
No-Code Test Cases
Run data quality tests at the table, column, and dimension level across all supported database connectors. Tests range from business validations — confirming data meets real-world expectations — to technical checks like ensuring required columns are never null and identifier columns hold only unique values. No YAML or JSON config files needed — set up everything from the UI by selecting a test level, filling in the details, and clicking Create.How to Create a Test
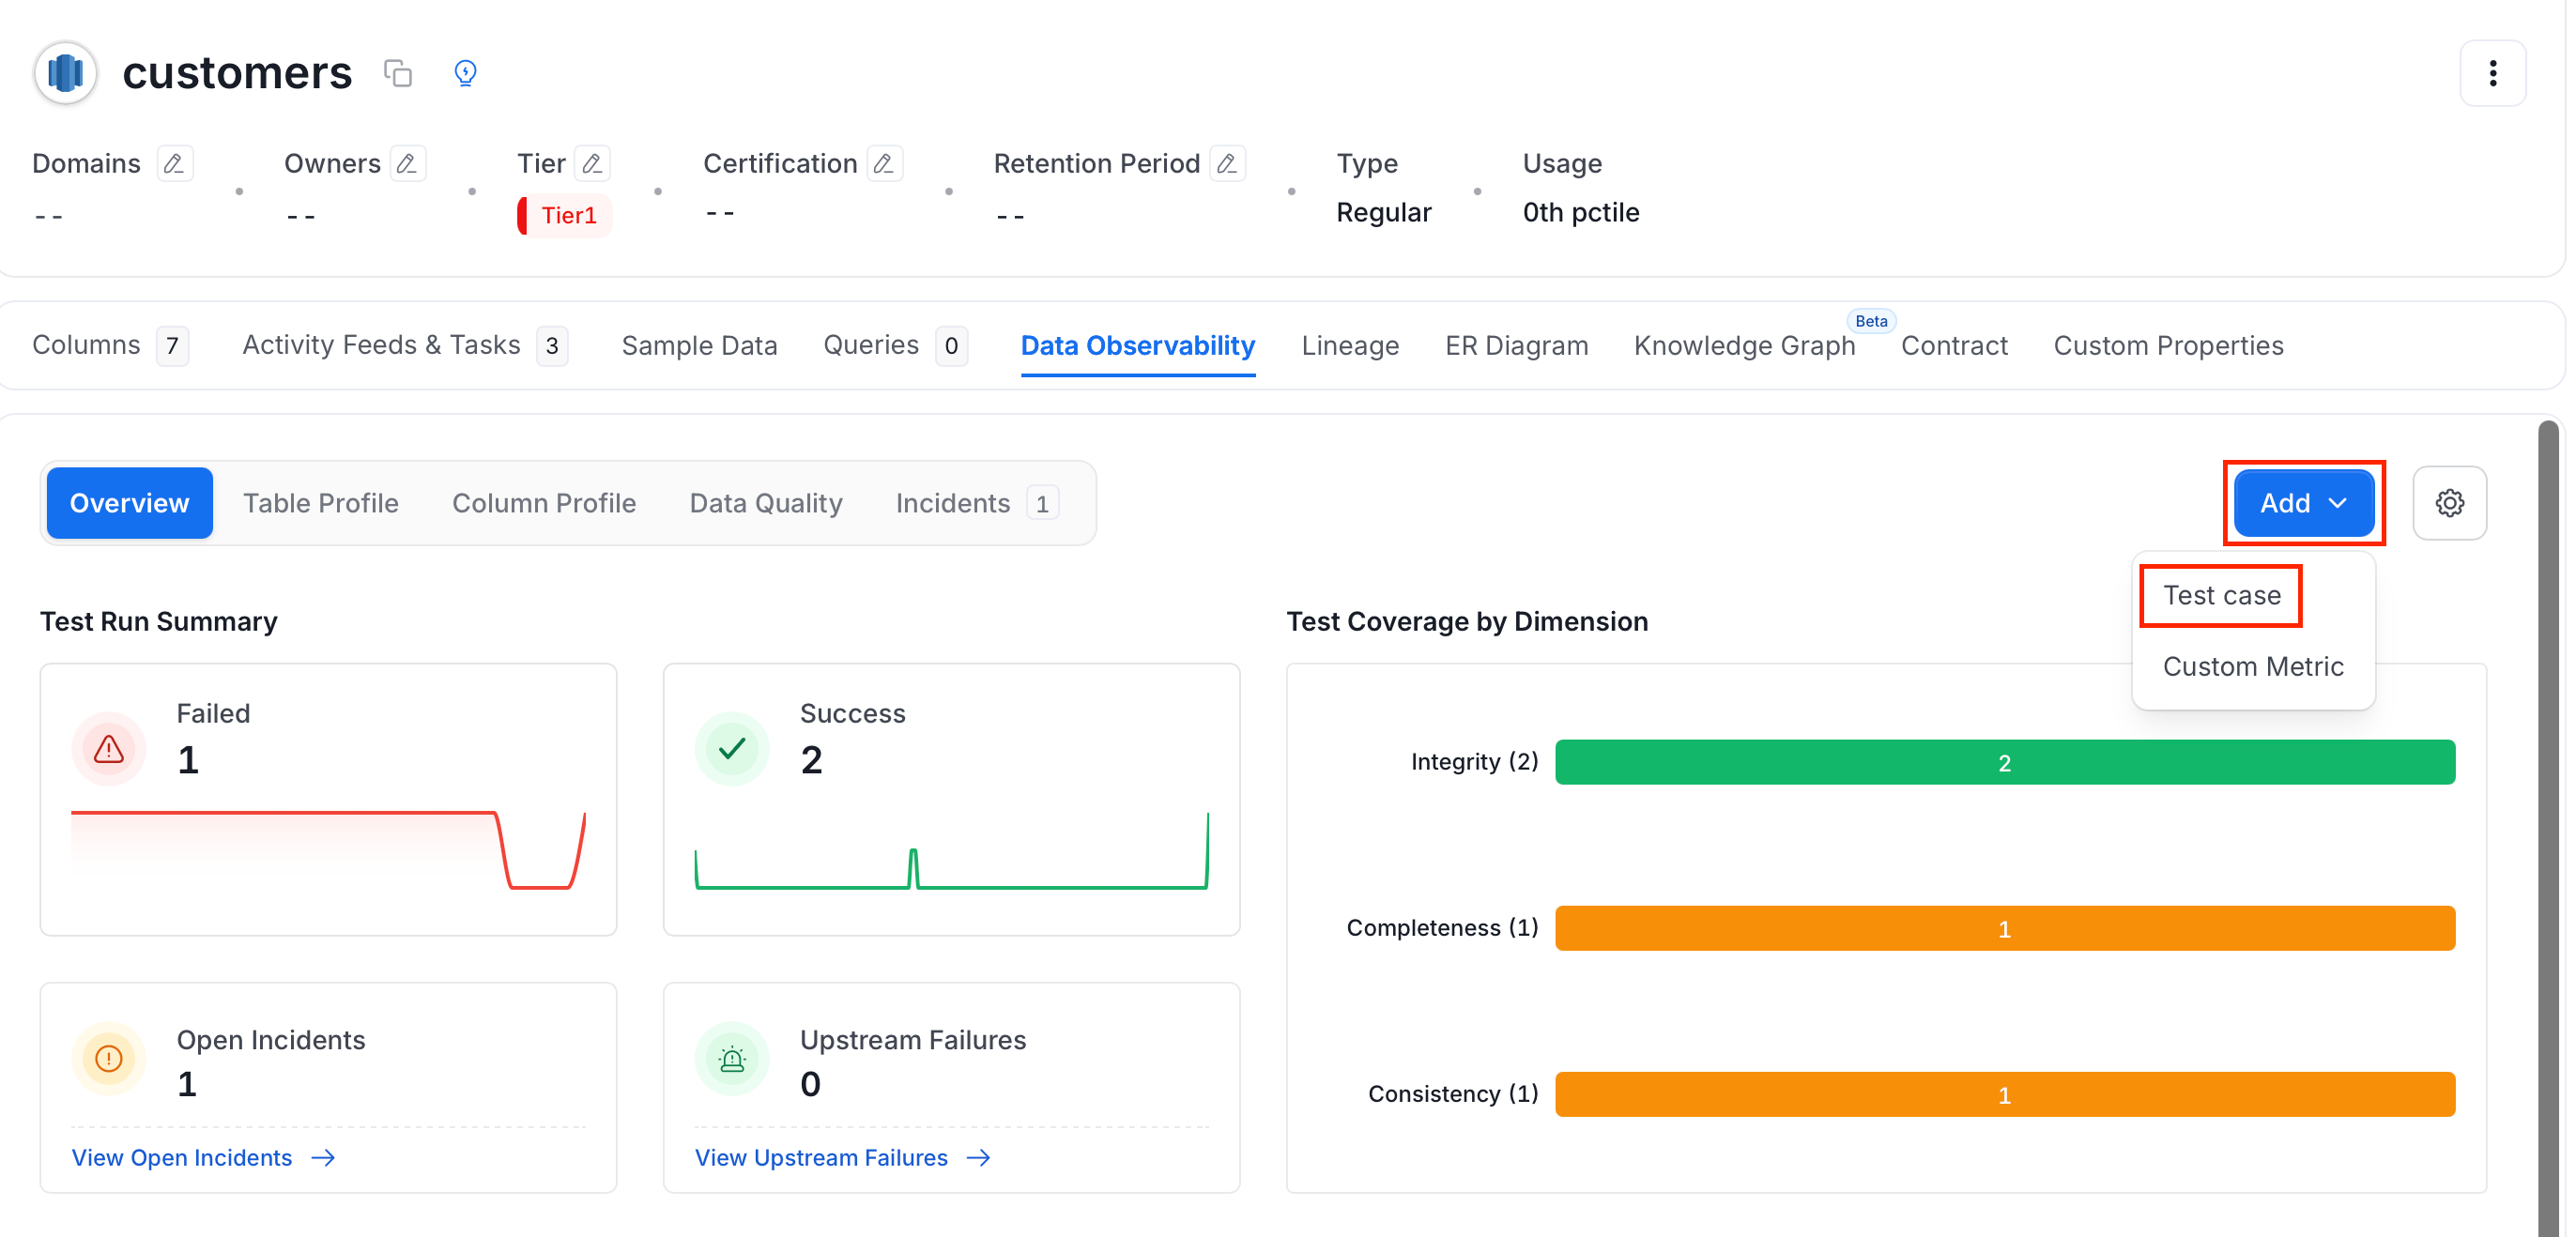
- Navigate to the desired table and click the Data Observability tab.
-
Click Add and select Test Case.
-
Select a test level and enter the test details. See the sections below for field details on each level:
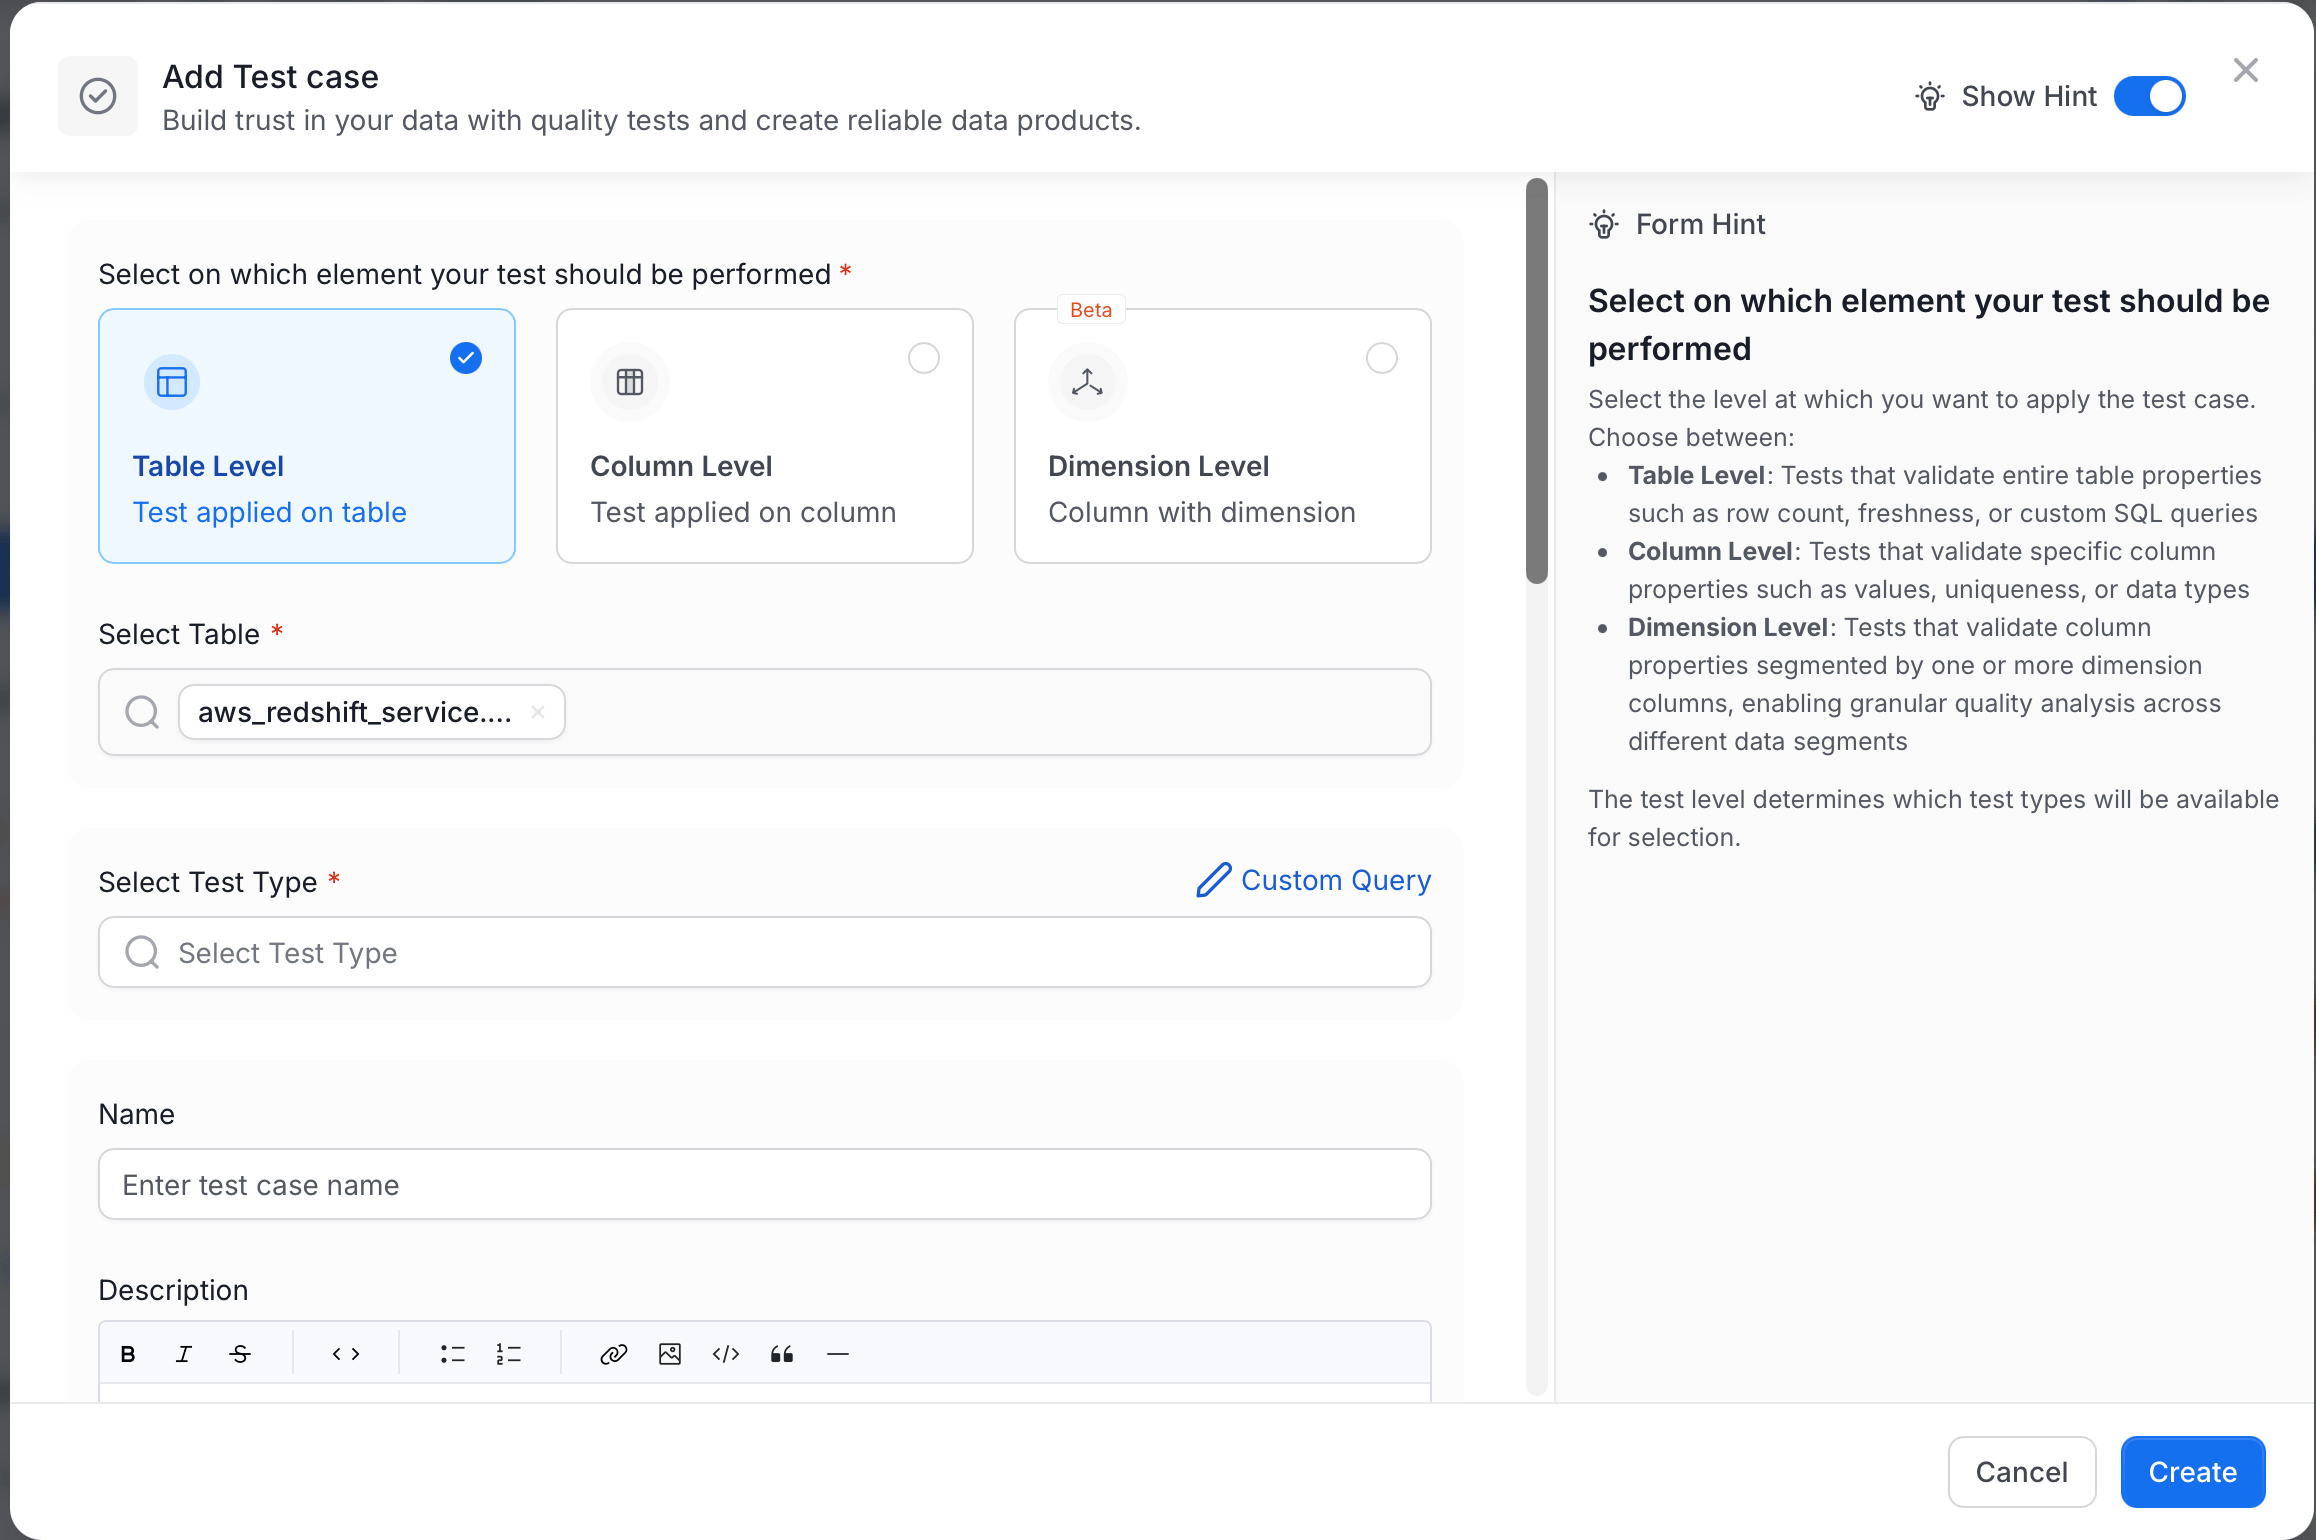
- Click Create to save and deploy the test.
Table Level Test
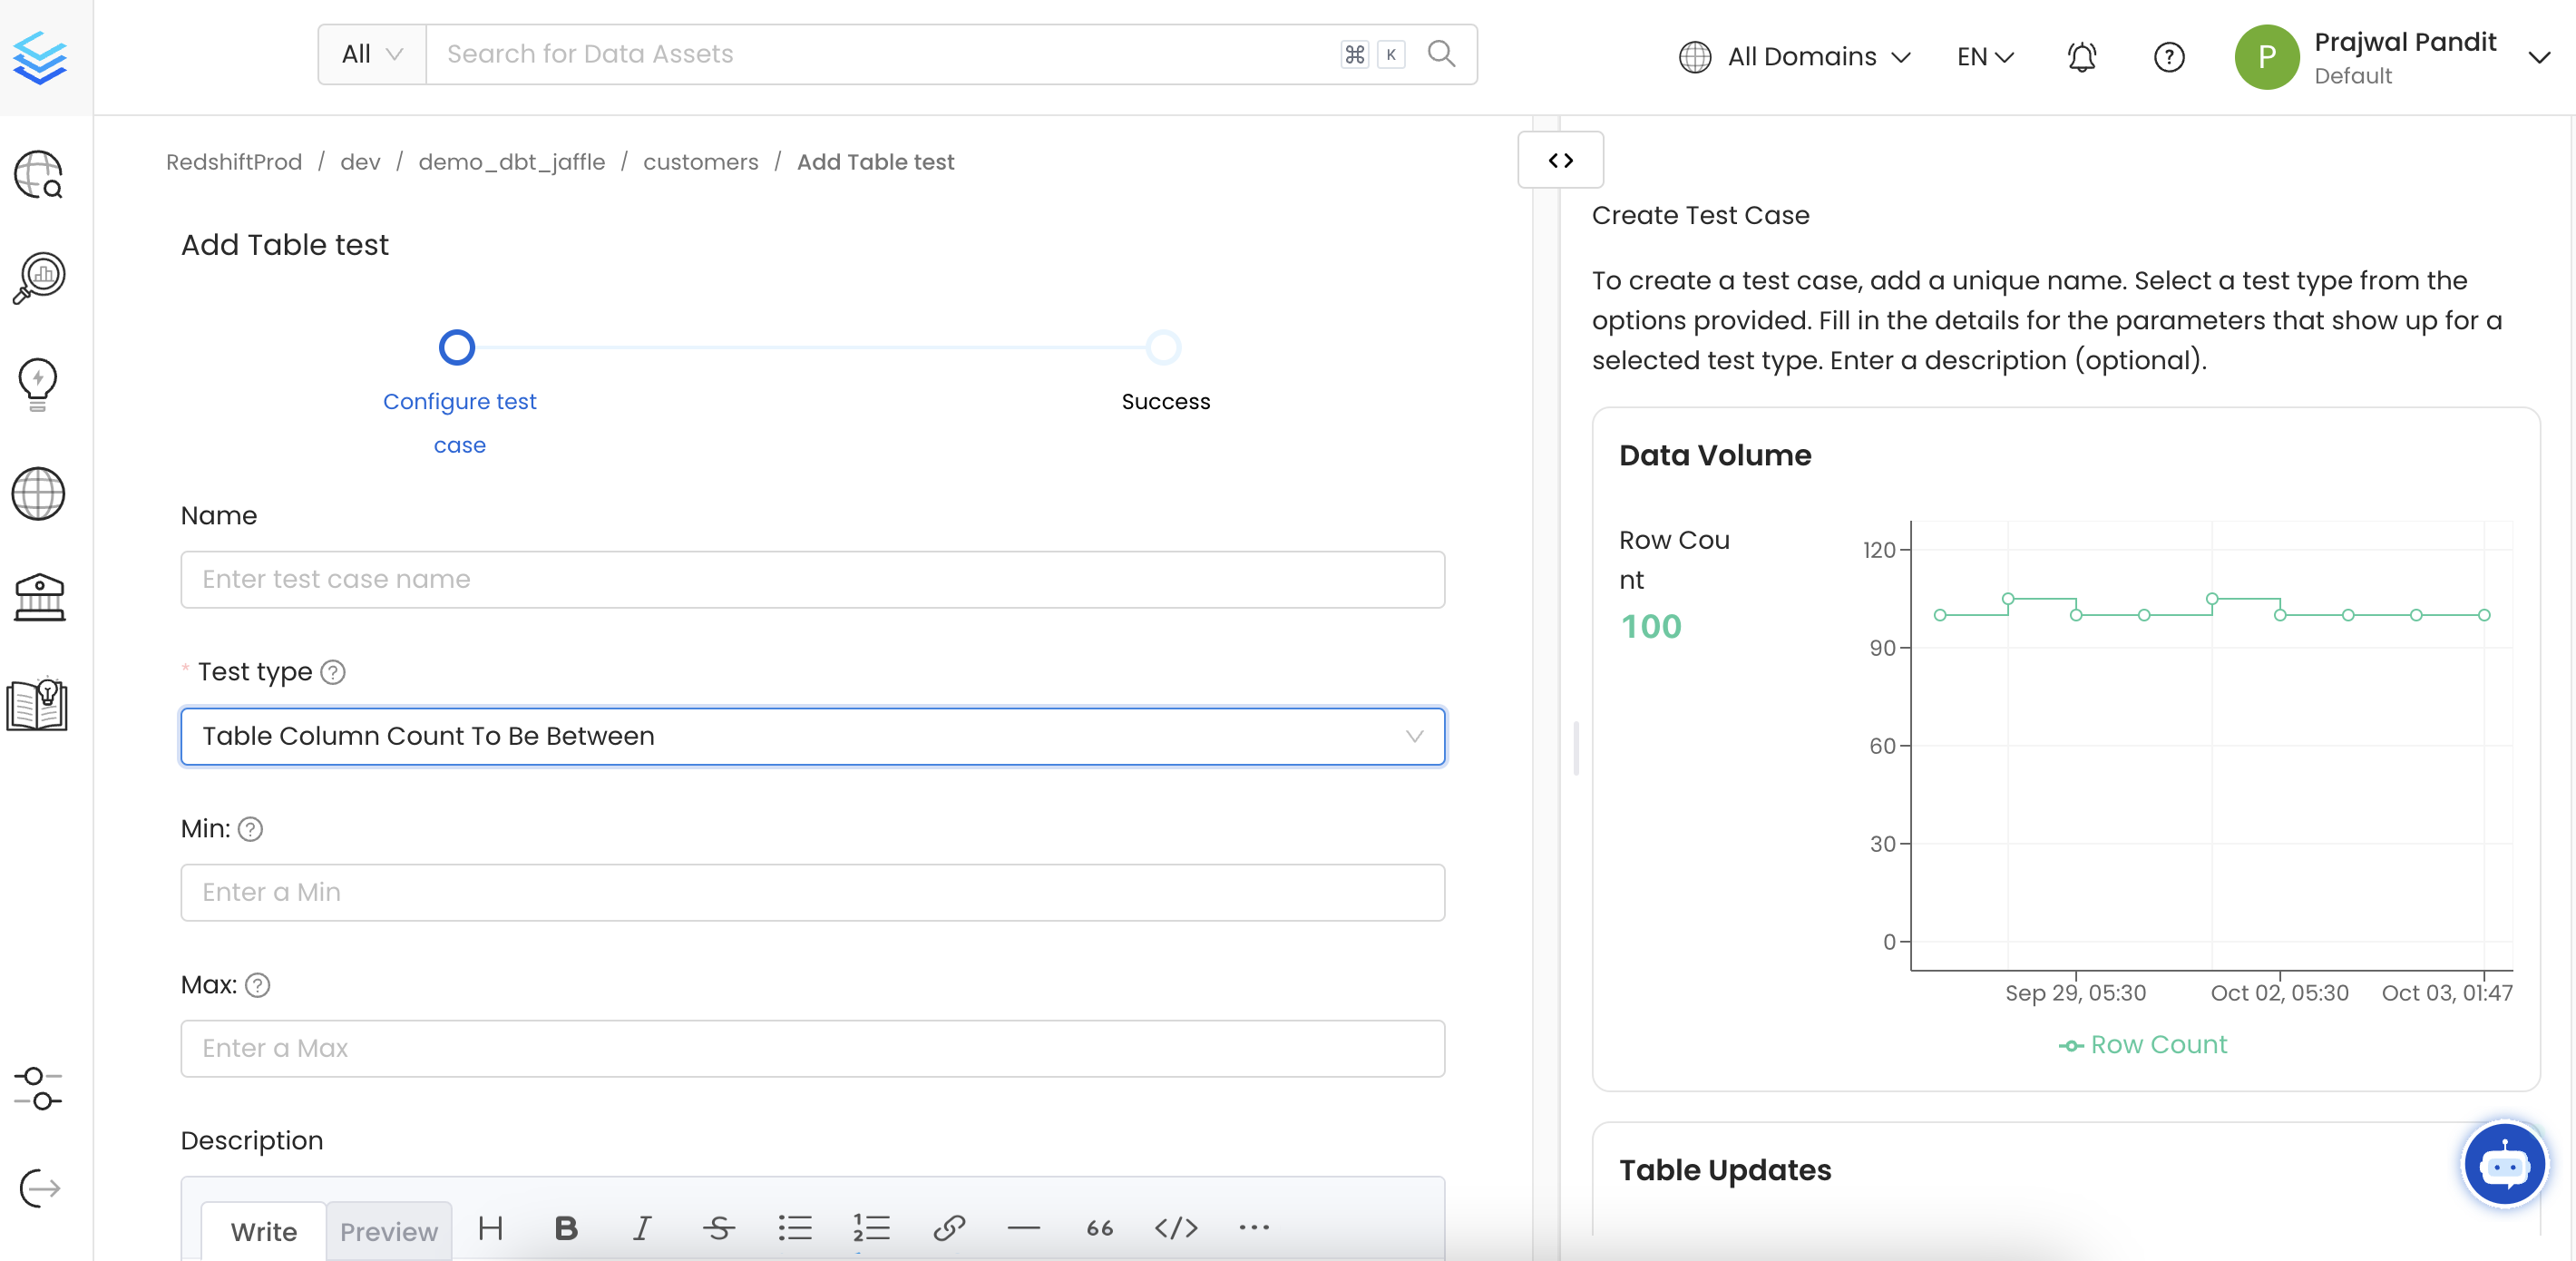
A Table Level Test validates properties of the entire table — row counts, column structure, freshness, or custom SQL logic. To create a Table Level Test, enter the following details:- Table: Select the table you want to test.
- Test Type: Choose the type of validation to run. Use the Custom Query shortcut on the right to write a SQL-based test directly.
- Name: Add a name that best defines your test case.
- Description: Describe what the test validates.
- Tags: Optionally tag the test for filtering and organization.
- Glossary Terms: Optionally link business glossary terms to add context.
- Table Column Count to be Between: Define the Min. and Max.
- Table Column Count to Equal: Define a number.
- Table Column Name to Exist: Define a column name.
- Table Column Names to Match Set: Add comma-separated column names to match. You can also verify if the column names are in order.
- Custom SQL Query: Define a SQL expression. Select a strategy for Rows or Count, and define a threshold to determine if the test passes or fails.
- Table Row Count to be Between: Define the Min. and Max.
- Table Row Count to Equal: Define a number.
- Table Row Inserted Count to be Between: Define the Min. and Max. row count. Works with Timestamp, Date, and DateTime columns. Specify a range type (Hour, Day, Month, or Year) and an interval.
- Compare 2 Tables for Differences: Compare two tables to check for data integrity.
- Table Data to Be Fresh: Validate the freshness of a table’s data.
Column Level Test
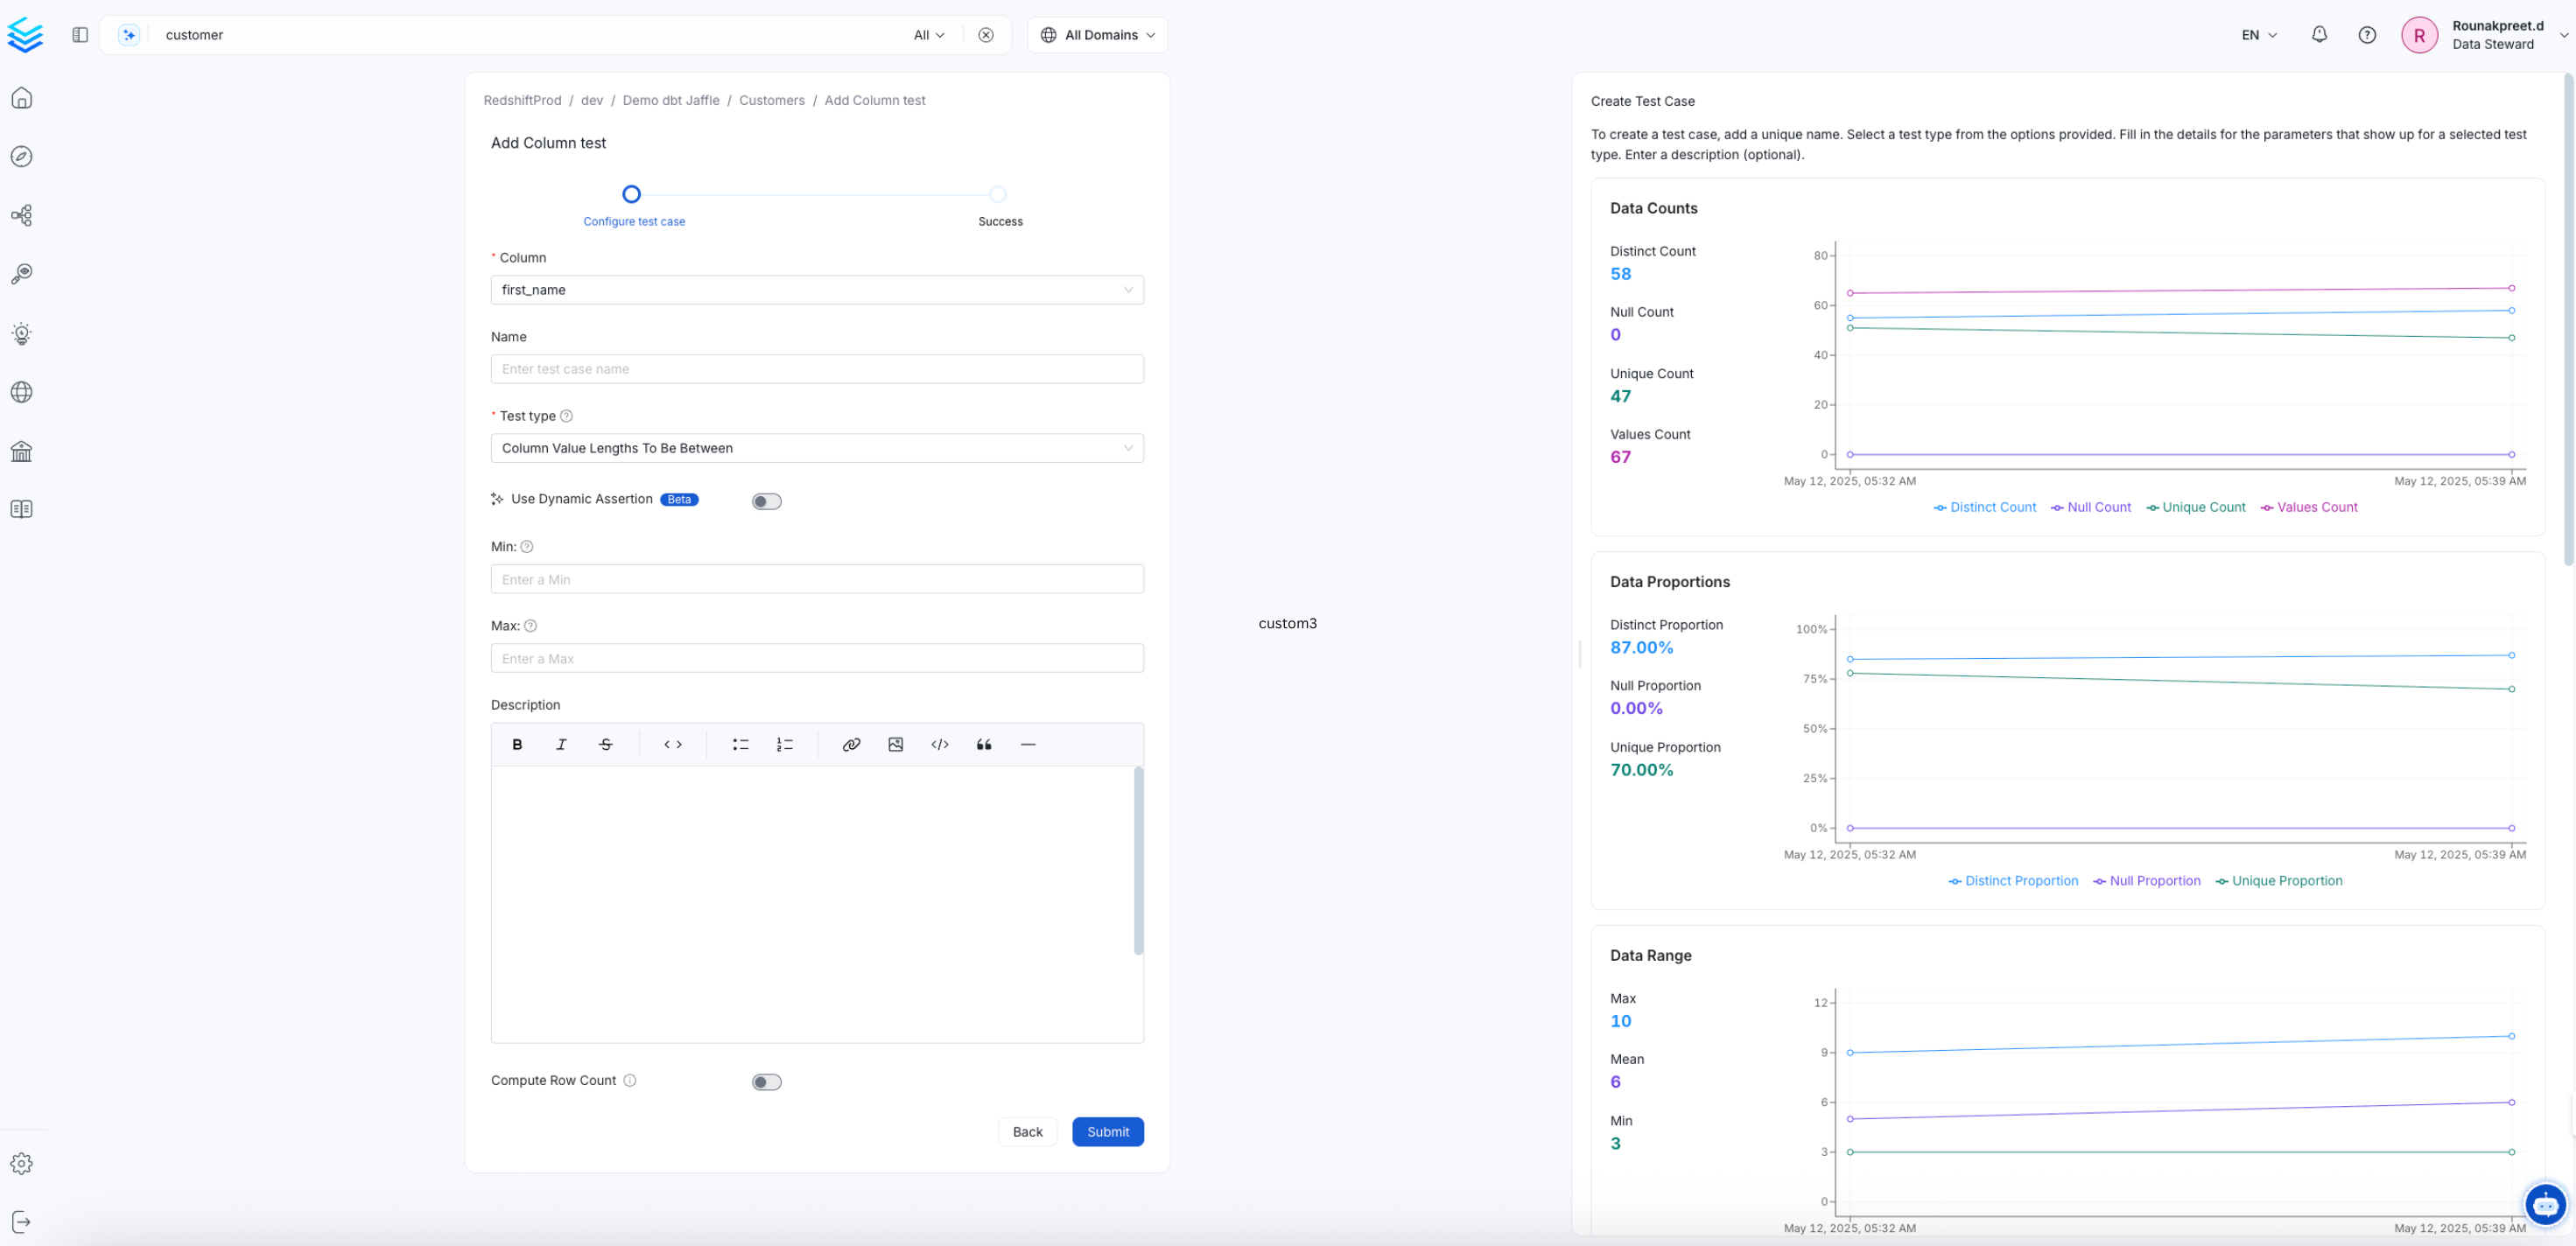
A Column Level Test validates specific column properties — null counts, value ranges, uniqueness, pattern matching, and more. To create a Column Level Test, enter the following details:- Table: Select the table that contains the column you want to test.
- Column: Select the column to test. A summary of the column’s context appears on the right.
- Test Type: Choose the type of validation to run.
- Name: Add a name that best defines your test case.
- Description: Describe what the test validates.
- Tags: Optionally tag the test for filtering and organization.
- Glossary Terms: Optionally link business glossary terms to add context.
- Column Value Lengths to be Between: Define the Min. and Max.
- Column Value Max. to be Between: Define the Min. and Max.
- Column Value Mean to be Between: Define the Min. and Max.
- Column Value Median to be Between: Define the Min. and Max.
- Column Value Min. to be Between: Define the Min. and Max.
- Column Values Missing Count: Define the number of missing values. Match all null and empty values as missing, and configure additional missing strings such as N/A.
- Column Values Sum to be Between: Define the Min. and Max.
- Column Value Std Dev to be Between: Define the Min. and Max.
- Column Values to be Between: Define the Min. and Max.
- Column Values to be in Set: Add an array of allowed values.
- Column Values to be Not in Set: Add an array of forbidden values.
- Column Values to be Not Null
- Column Values to be Unique
- Column Values to Match Regex Pattern: Define the regular expression that column entries should match.
- Column Values to Not Match Regex: Define the regular expression that column entries should not match.
Set a Failure Threshold (Optional)
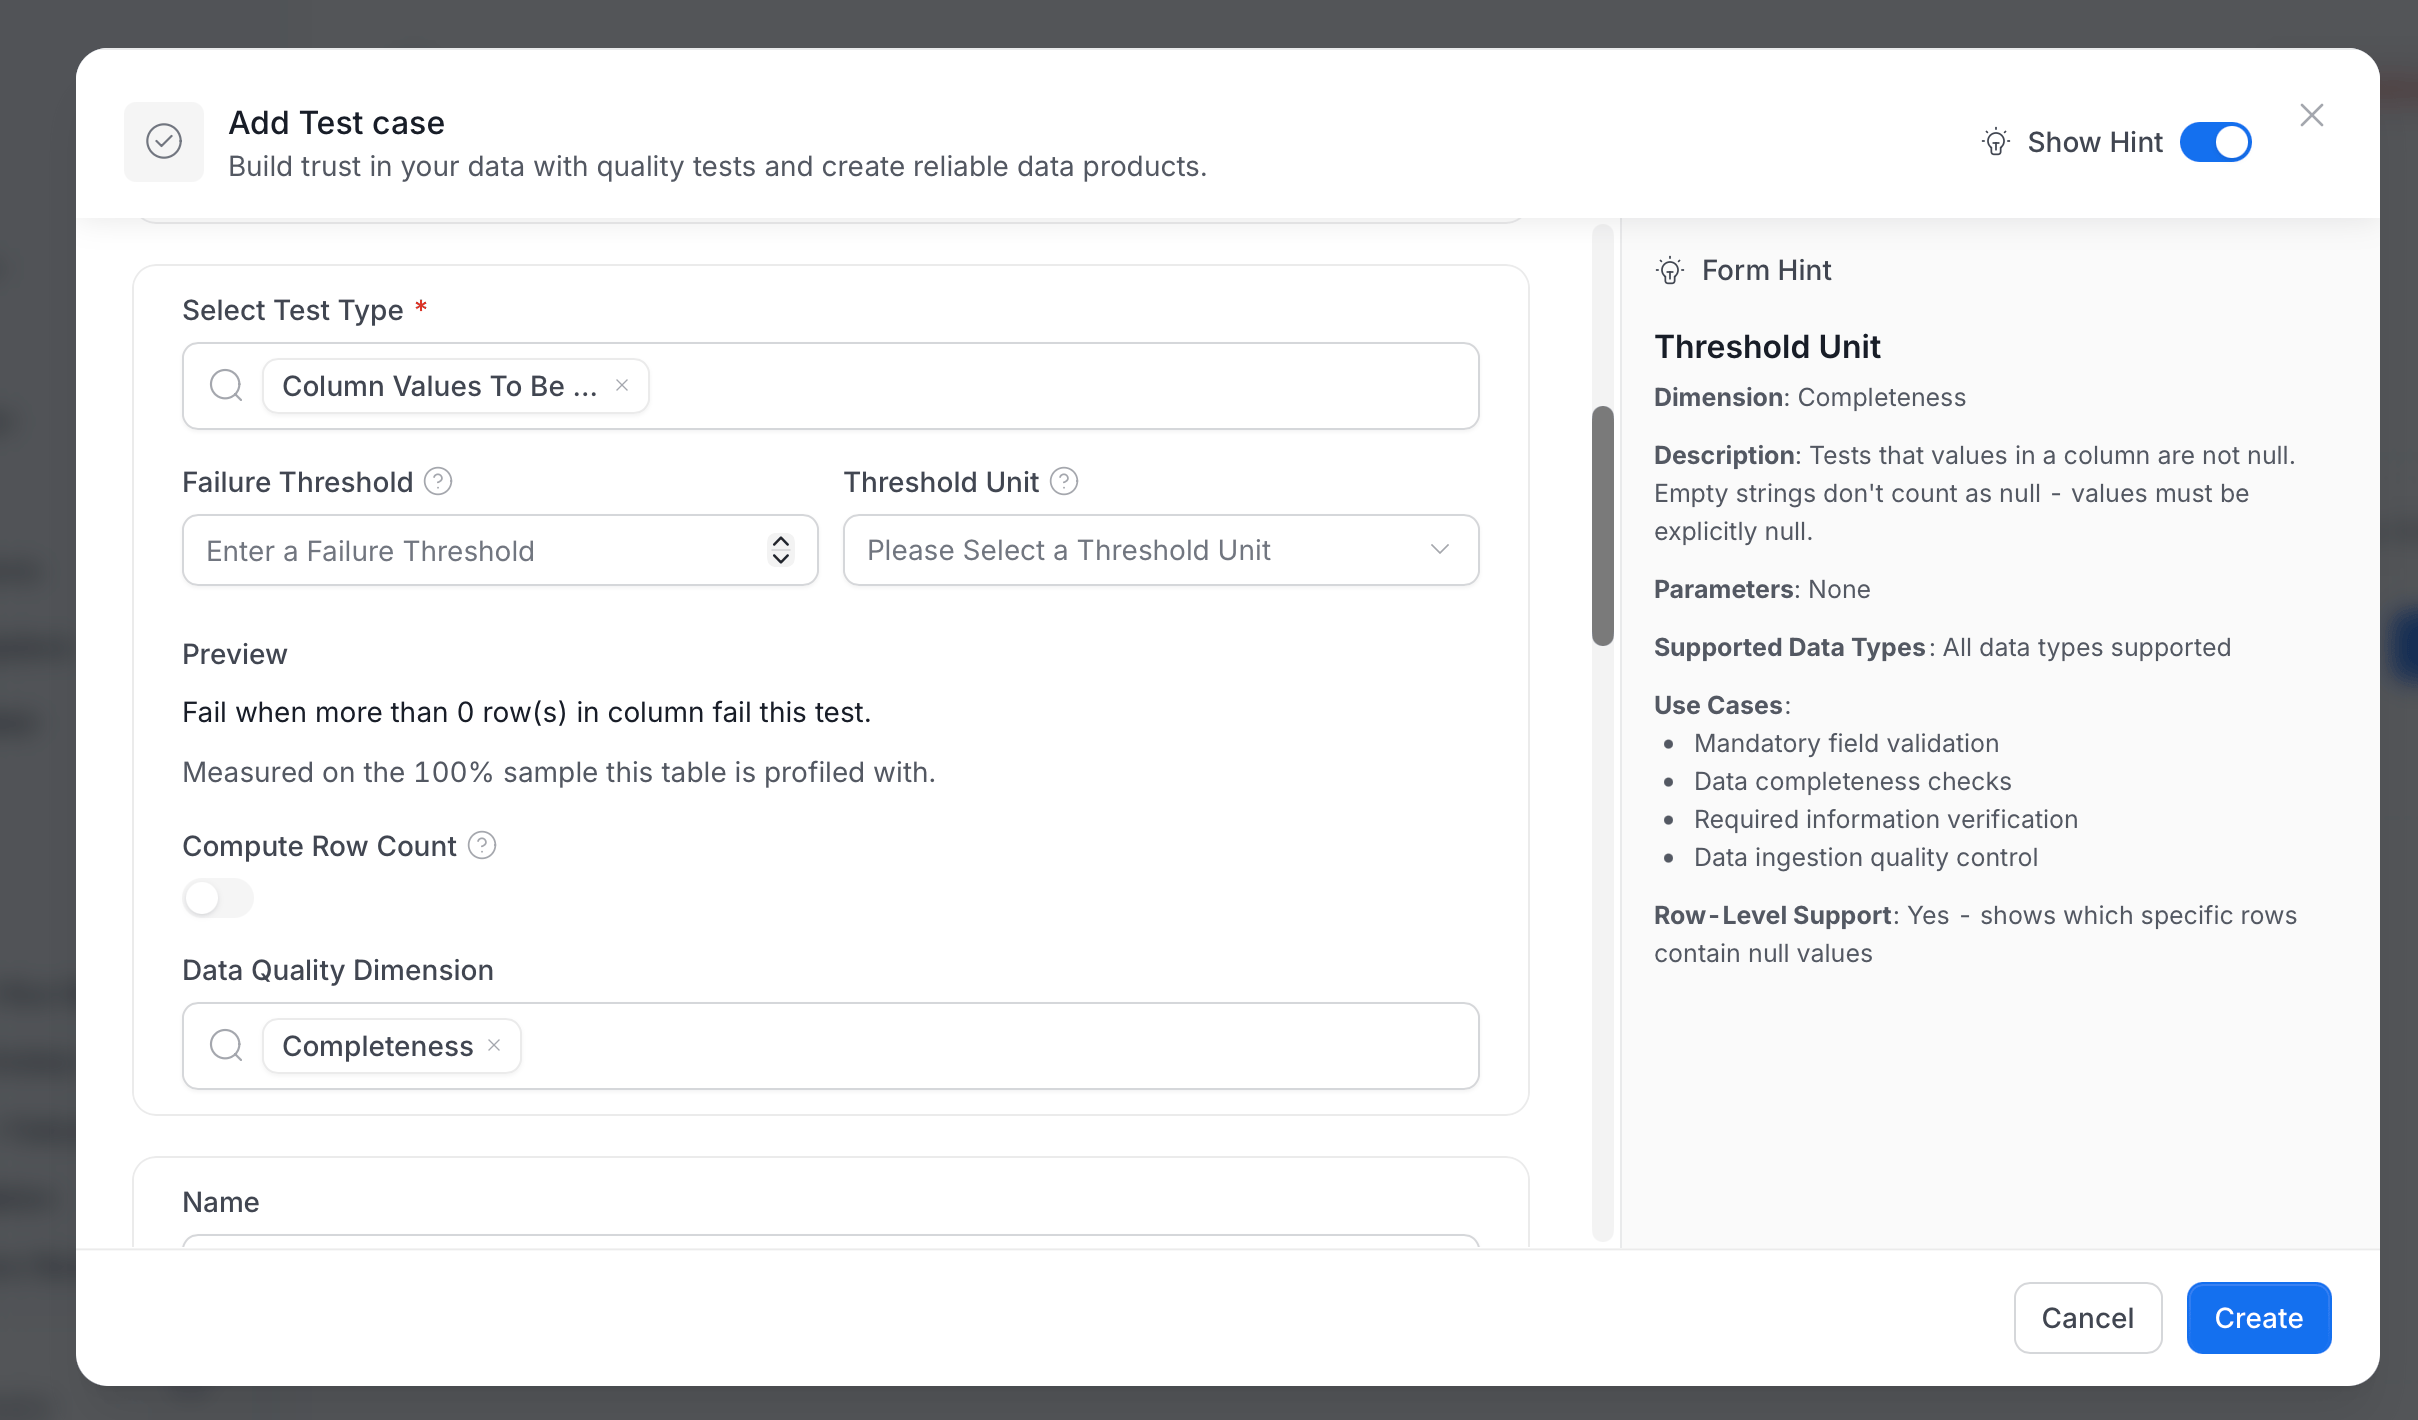
Many tests let you choose how many failures to tolerate before Collate marks the test as failed. By default Collate tolerates none, so a single failing row fails the test. The Add Test case form shows the Failure Threshold and Threshold Unit fields for the tests listed in Tests That Apply a Failure Threshold. To set a failure threshold:- In Select Test Type, select a test, for example Column Values To Be Not Null.
-
In Failure Threshold, enter the number of failures to tolerate. The value can’t be negative.
-
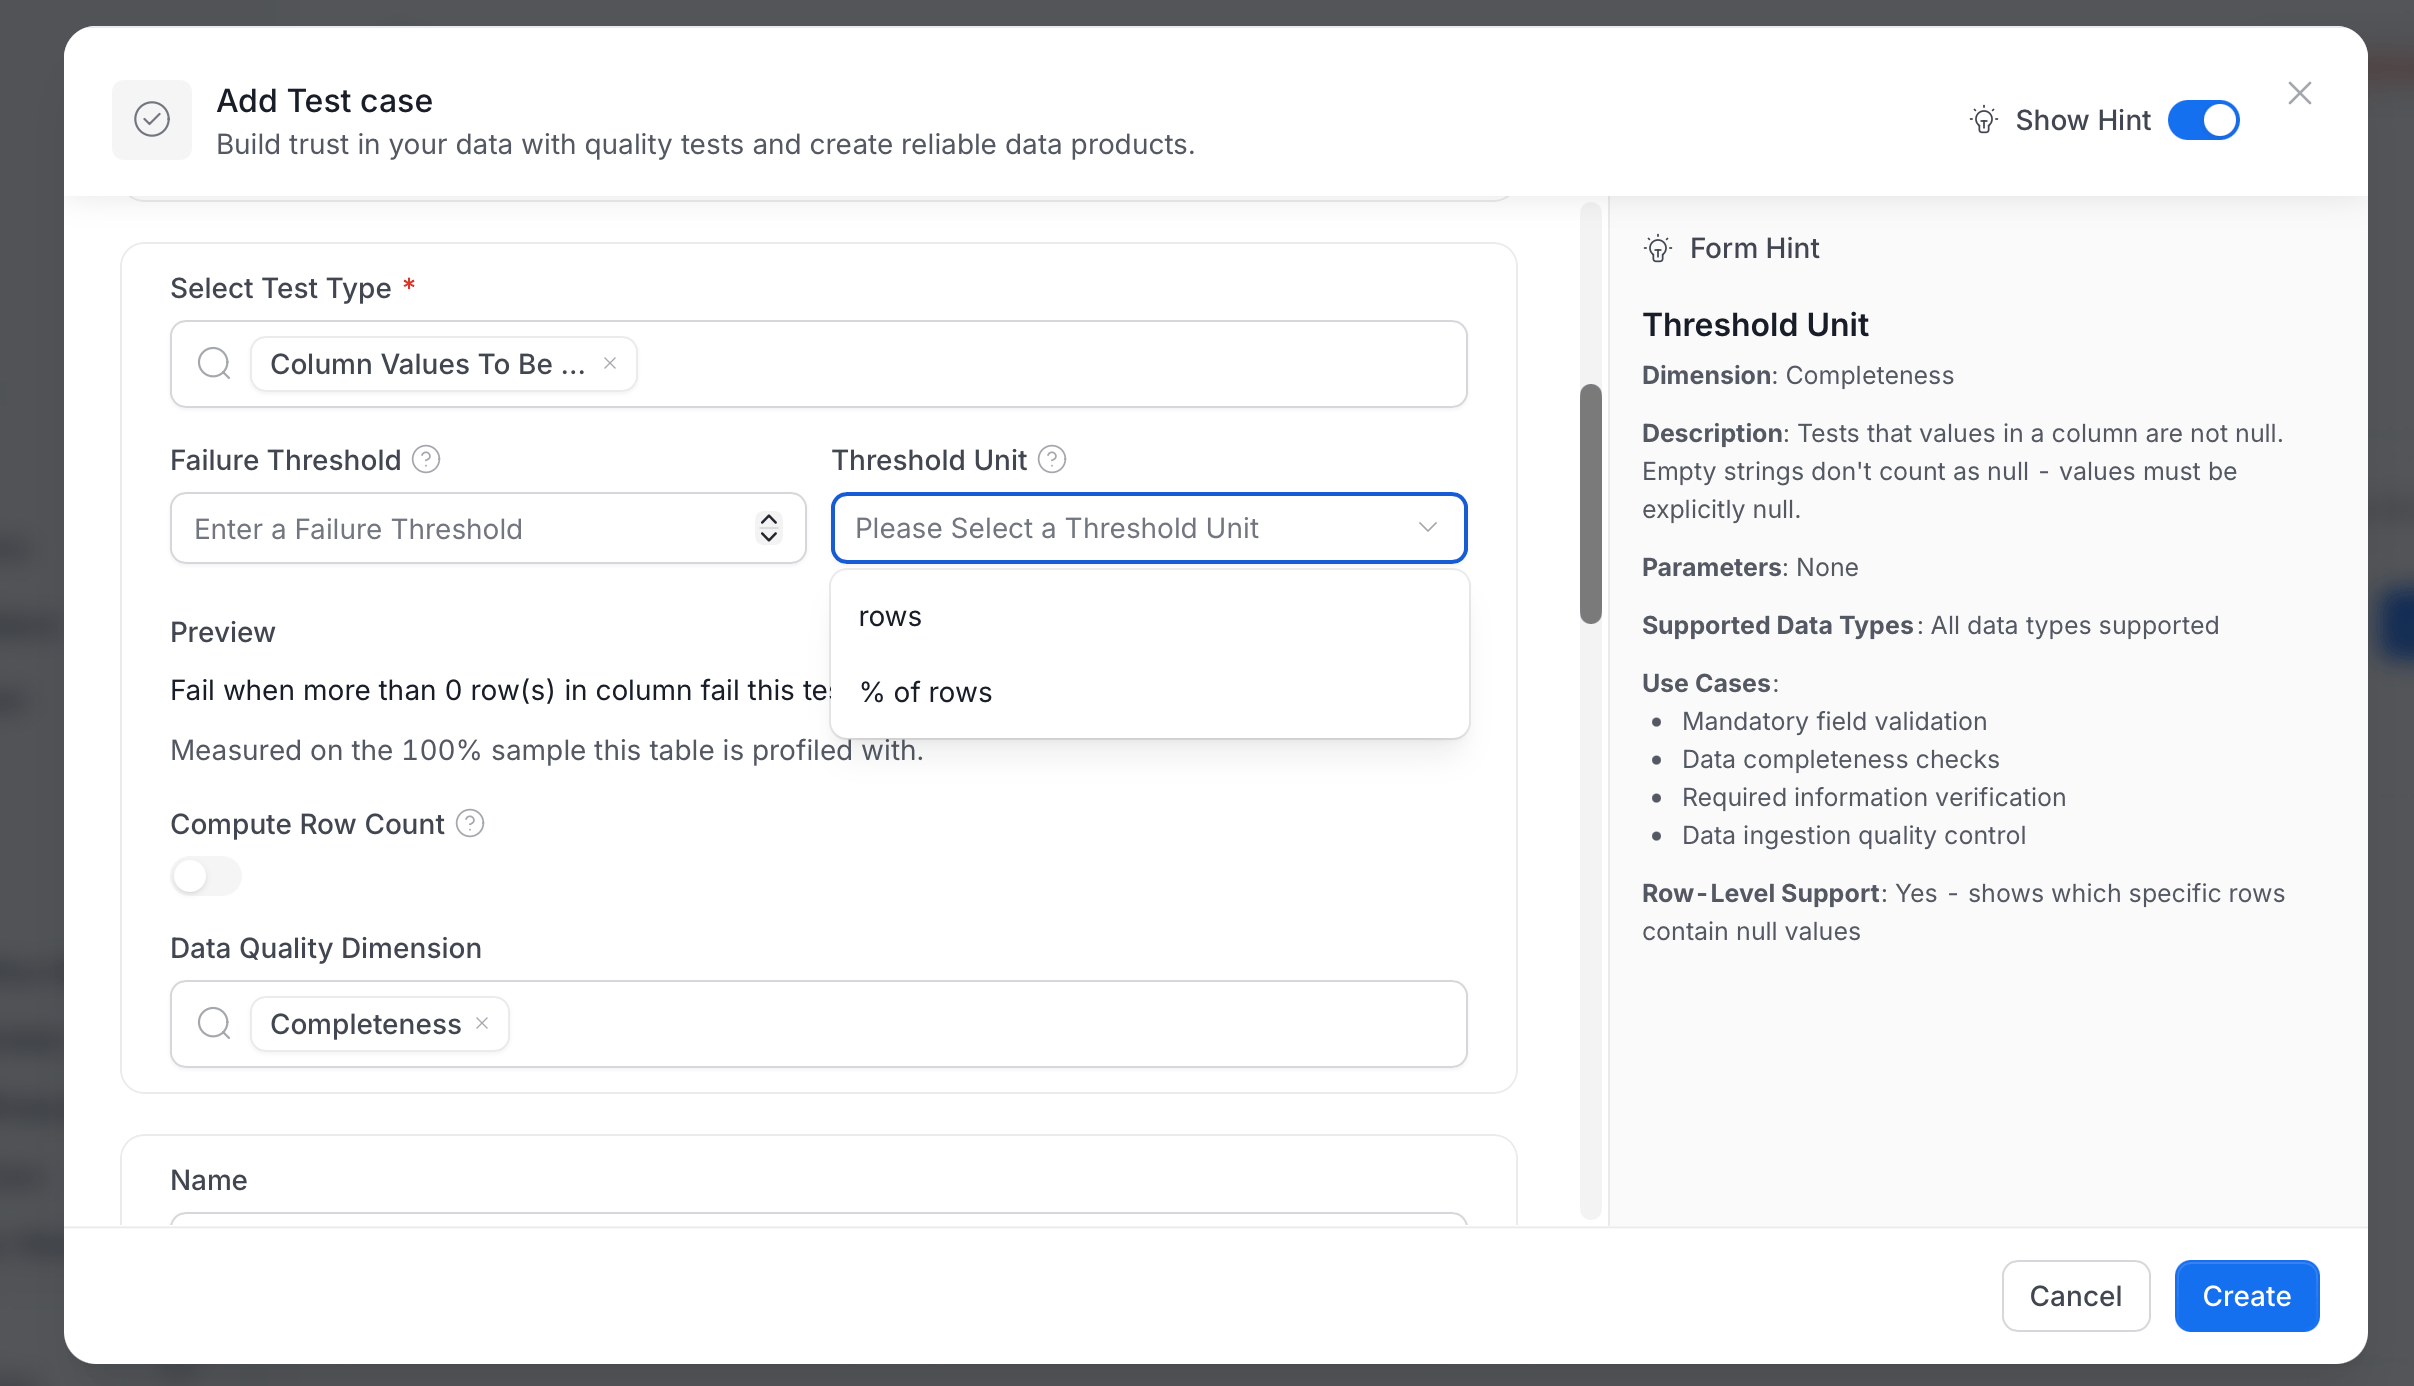
In Threshold Unit, select how Collate measures the threshold:
- rows: A count of failing rows. In the API, this is
ABSOLUTE. - % of rows: A share of the rows evaluated. For row-level tests, the value can’t be higher than 100. In the API, this is
PERCENTAGE.
- rows: A count of failing rows. In the API, this is
- Check the Preview. It restates your choice, for example “Fail when more than 0 row(s) in column fail this test.” A second line shows what Collate measures the test on, for example “Measured on the 100% sample this table is profiled with.”
- Complete the rest of the form and select Create.
Tests That Apply a Failure Threshold
How Collate applies the threshold depends on the test:- Row-level tests: Collate counts the rows that break the rule. The test fails when that count, or its share of the rows evaluated, is above the threshold. These tests are Column Values to be Not Null, Column Values to be Unique, Column Values to be in Set, Column Values to be Not in Set, Column Values to Match Regex Pattern, Column Values to Not Match Regex, Column Values to be Between, and Column Value Lengths to be Between. For example, with a threshold of
5and % of rows selected, a Column Values to be Not Null test on 1,000 evaluated rows tolerates up to 50 null rows. - Statistical and count tests: Collate compares one measured value with the range or the expected value you set. The threshold widens the accepted range, or the allowed difference from the expected value, so small deviations don’t fail the test. These tests are Column Value Max., Min., Mean, Median, and Std Dev to be Between, Column Values Sum to be Between, Column Values Missing Count, Table Row Count to be Between, Table Row Count to Equal, Table Column Count to be Between, Table Column Count to Equal, and Table Row Inserted Count to be Between. A percentage applies to the bound you set, not to rows, so it can be higher than 100, and the unit names adapt to the test. For example, a Table Row Count to be Between test with a Min. of
100, a Max. of200, and a threshold of10as a percentage accepts row counts from 90 to 220.
- Column Values to be in Set: Collate applies a threshold only when Match enum is on. With Match enum off, the test passes as soon as one allowed value occurs, so no rows fail and Collate rejects a threshold above
0. - Custom SQL Query: This test keeps its own Threshold and Operator. Its Threshold is the value that Collate compares the query result with, not a number of failures to tolerate.
- Table Column Name to Exist, Table Column Names to Match Set, and Compare 2 Tables for Differences: These tests don’t have the failure threshold fields.
Dimension Level Test
Beta A Dimension Level Test is a column test segmented by one or more dimension columns. Instead of a single pass/fail result for the whole column, you get separate results for each unique combination of dimension values — so you can pinpoint exactly which segment of your data is failing. To create a Dimension Level Test, enter the following details:- Table: Select the table that contains the column you want to test.
- Column: Select the column to test.
- Dimensions: Select one or more columns to segment results by. Use low-cardinality columns such as
region,status, orproduct_categoryfor the most useful breakdown. - Top Dimensions: Set how many top dimension combinations to display in the results (default: 5).
- Test Type: Choose from the same test types available for column-level tests.
- Name: Add a name that best defines your test case.
- Description: Describe the test case.
amount column with region and product_type as dimensions, Collate returns separate results for each combination — North America / Electronics, Europe / Clothing, and so on — so you can immediately see which segment is causing a failure.
For concepts, best practices, and real-world examples, see Dimensional Validation.
View Test Results
Once you create a test, it appears in the Data Quality tab. Edit the Display Name and Description for any test directly from there.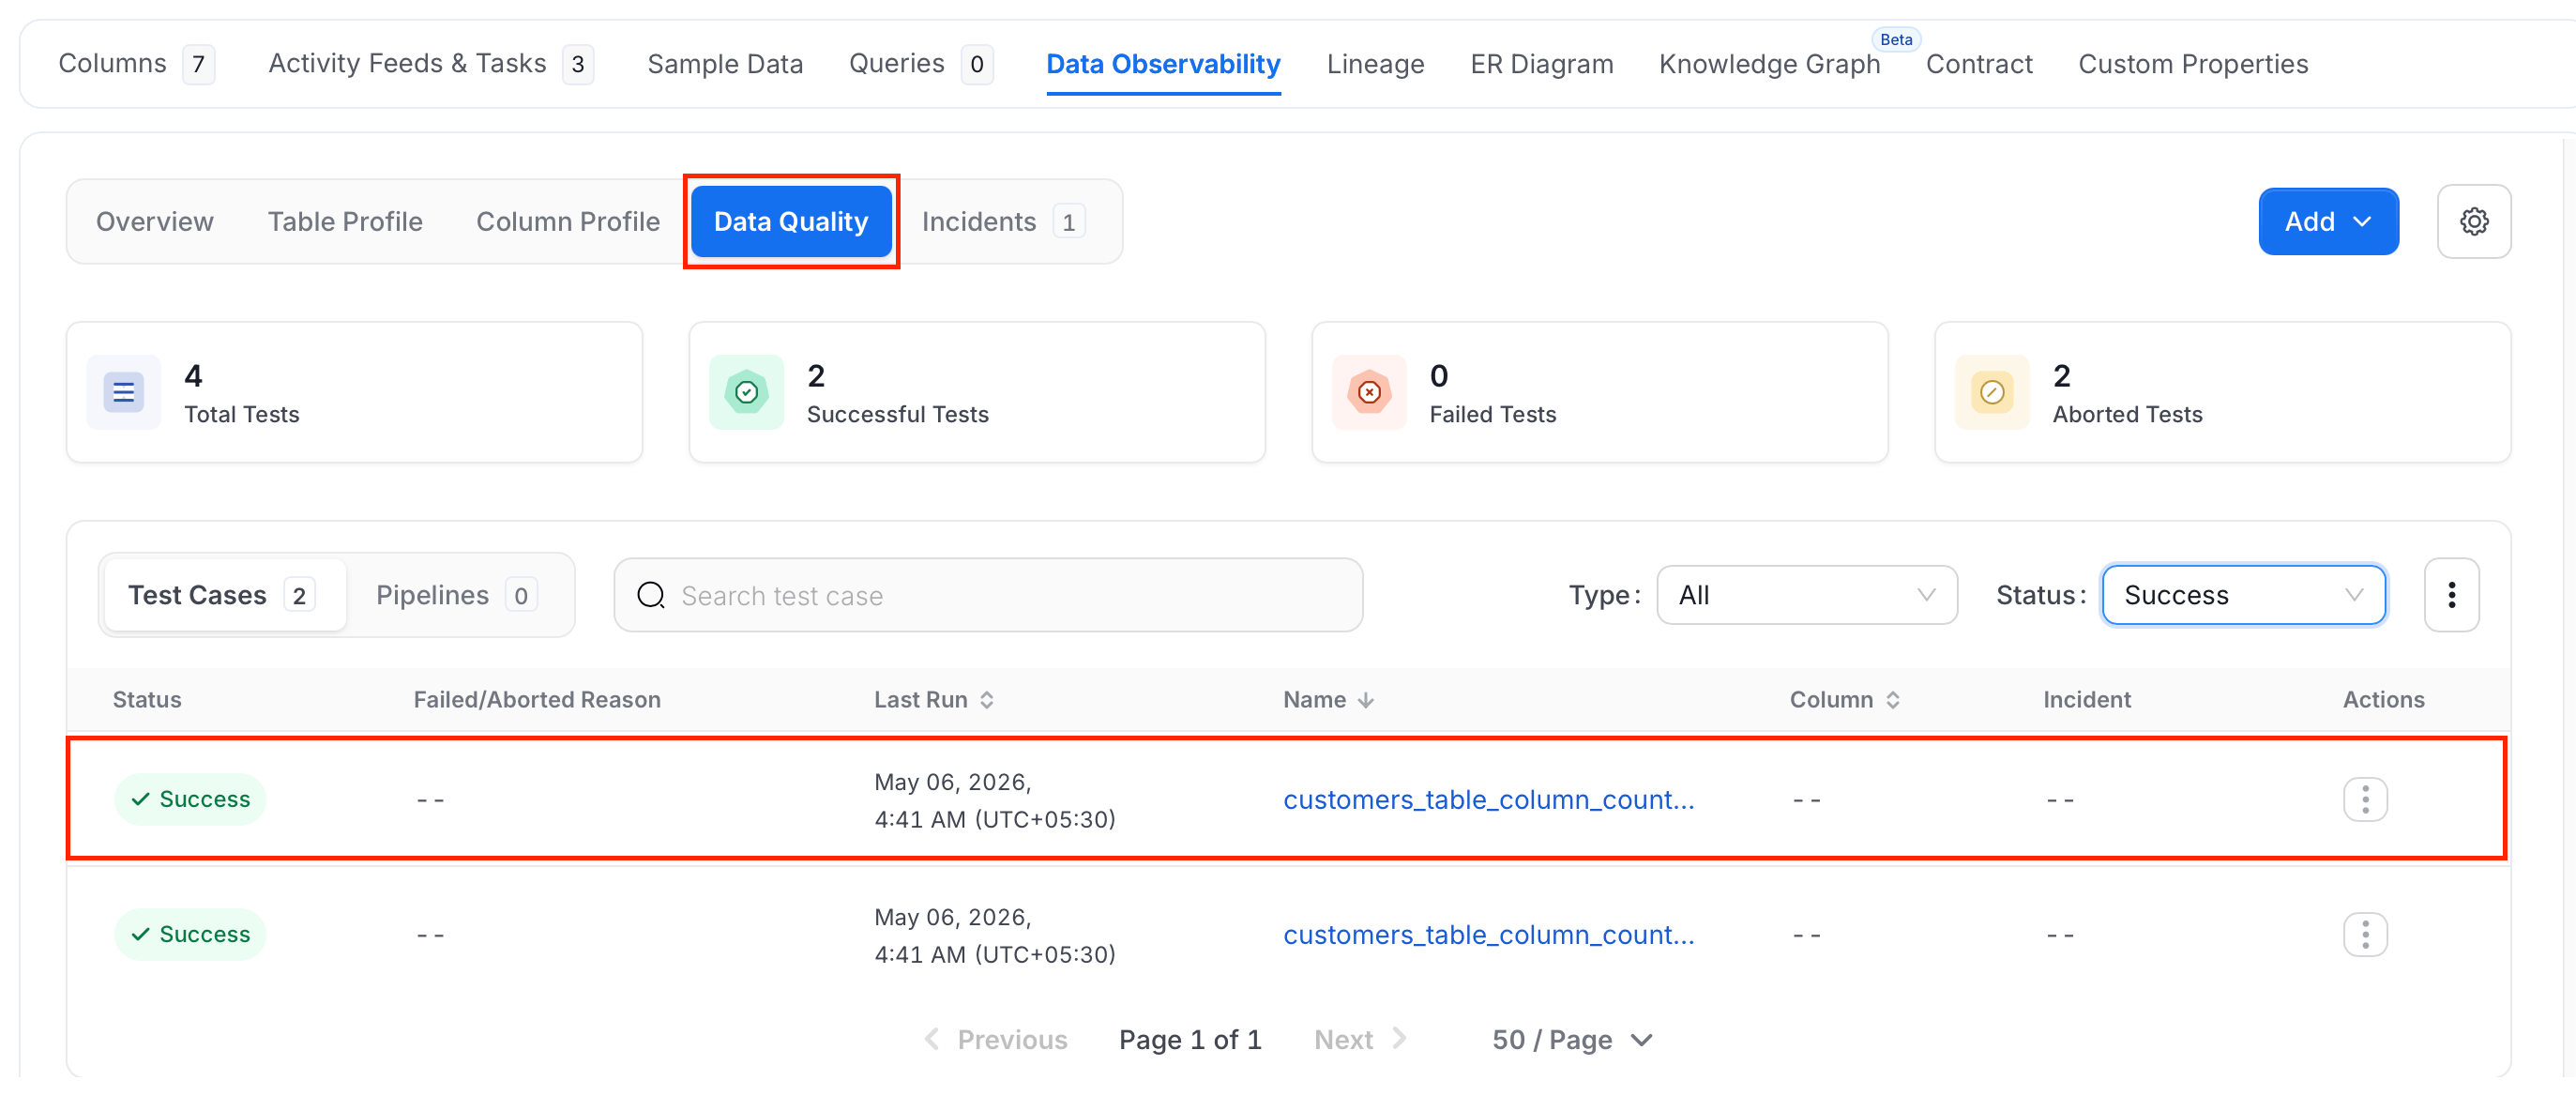
Set Up a Pipeline
Set up a pipeline to run tests at a regular interval. Follow the steps below:-
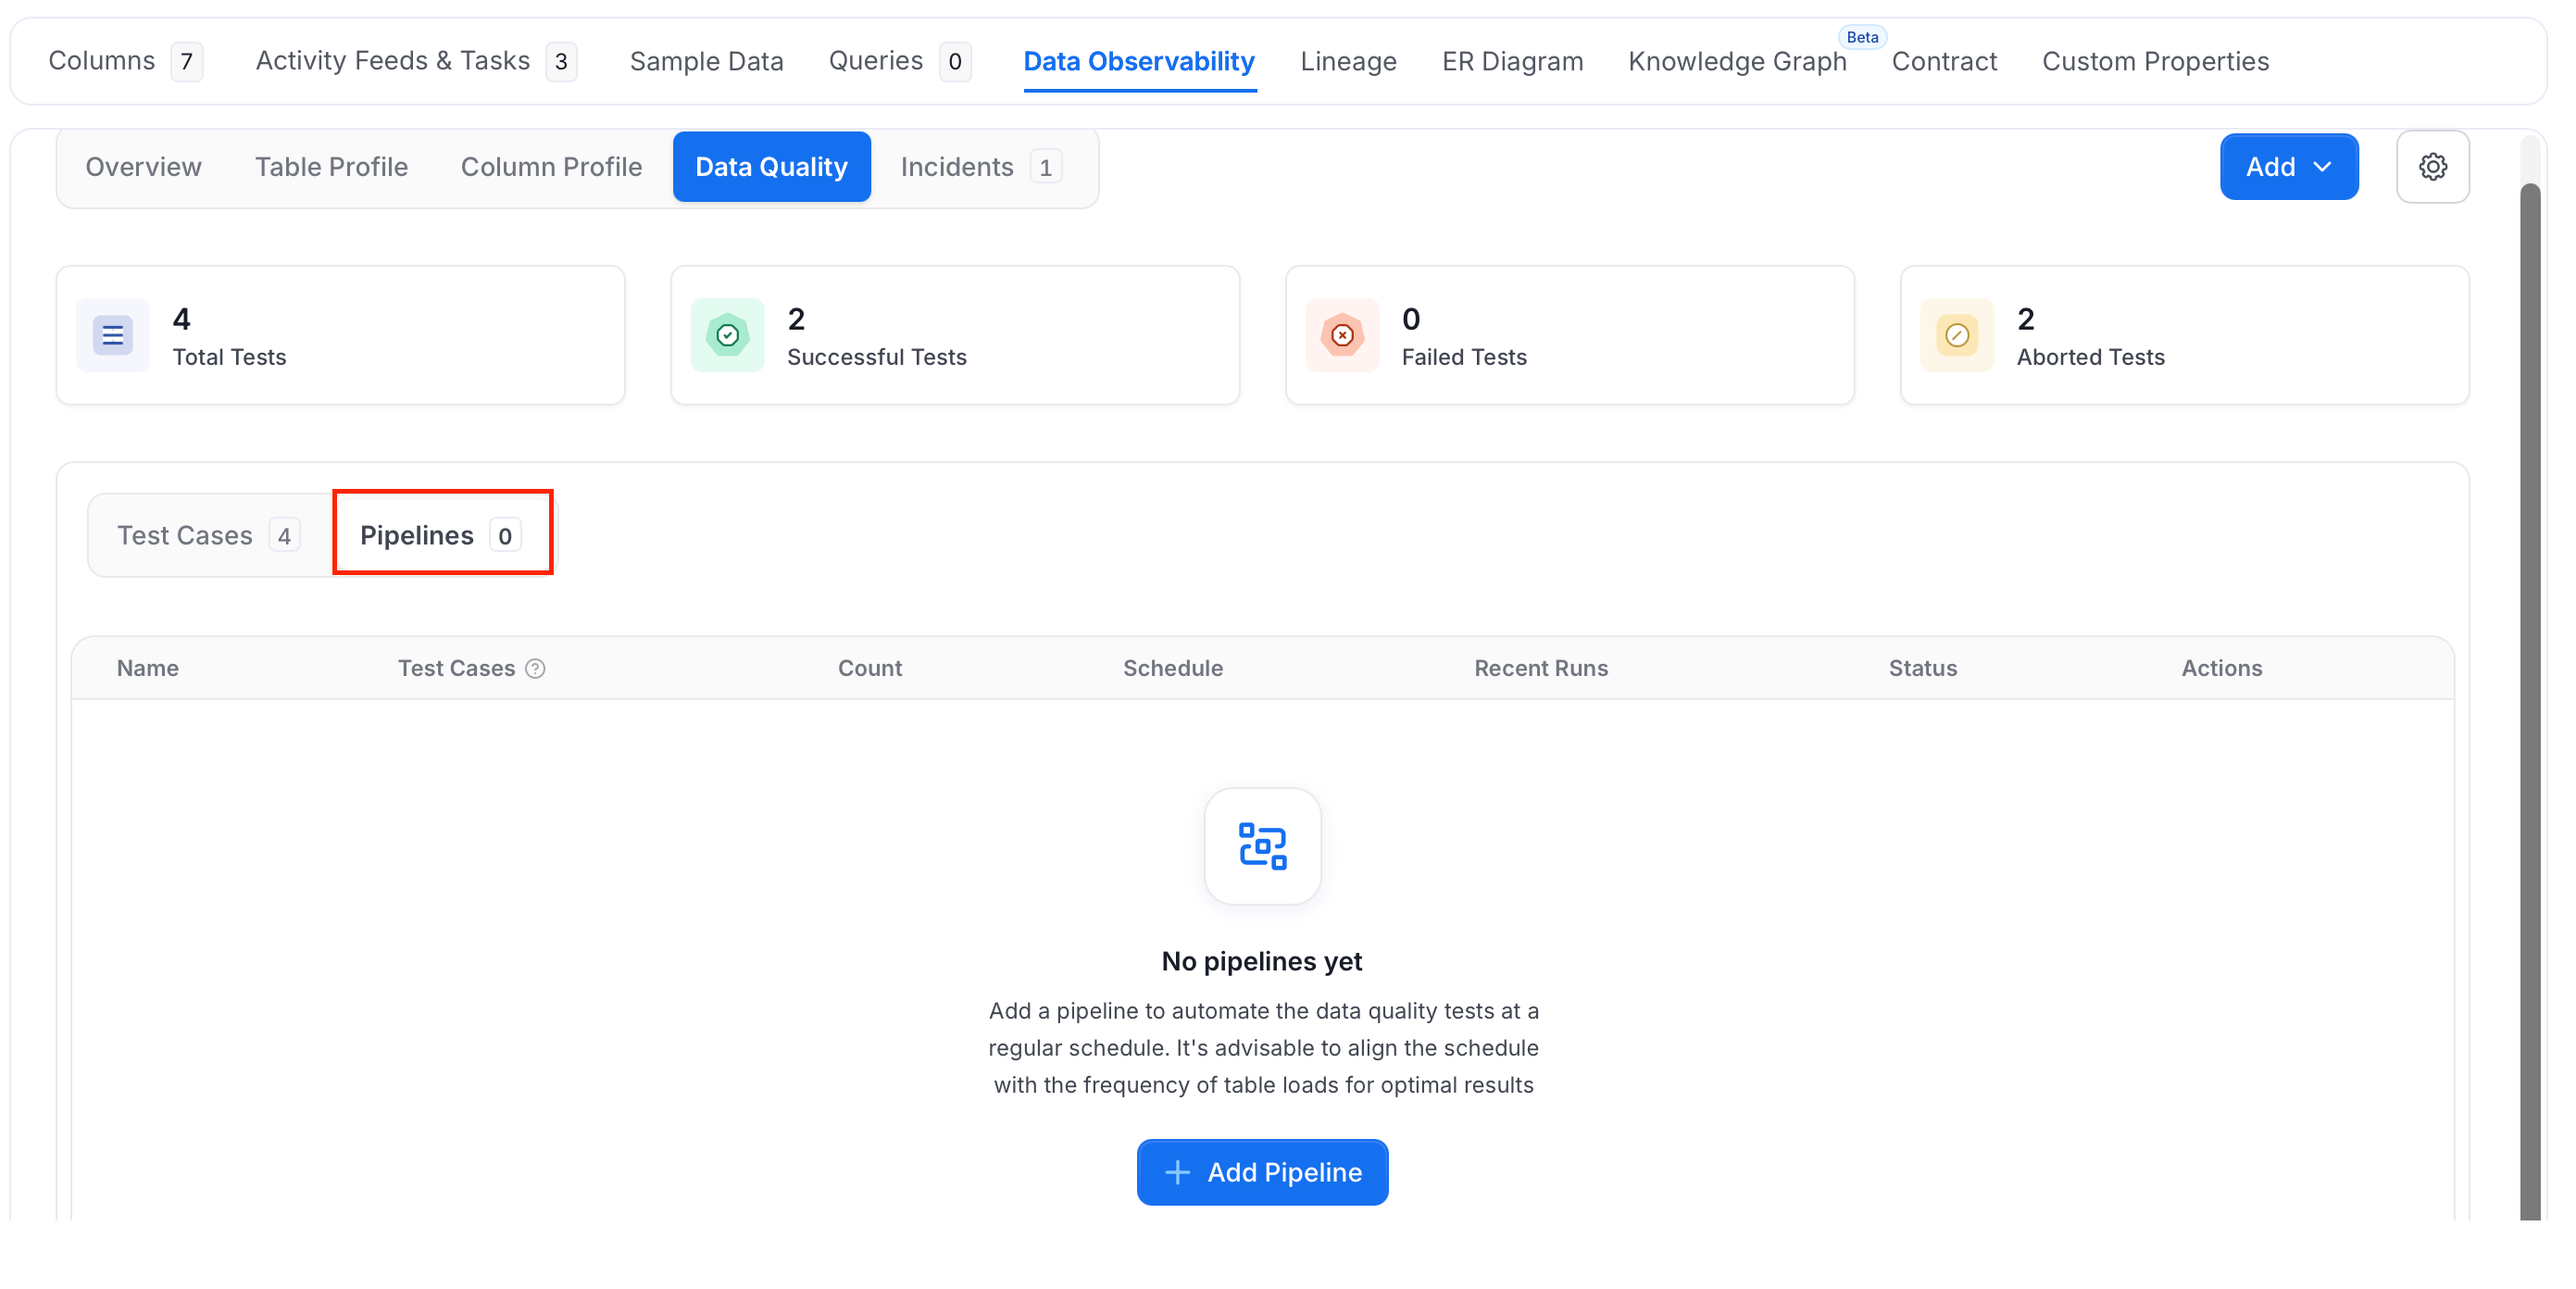
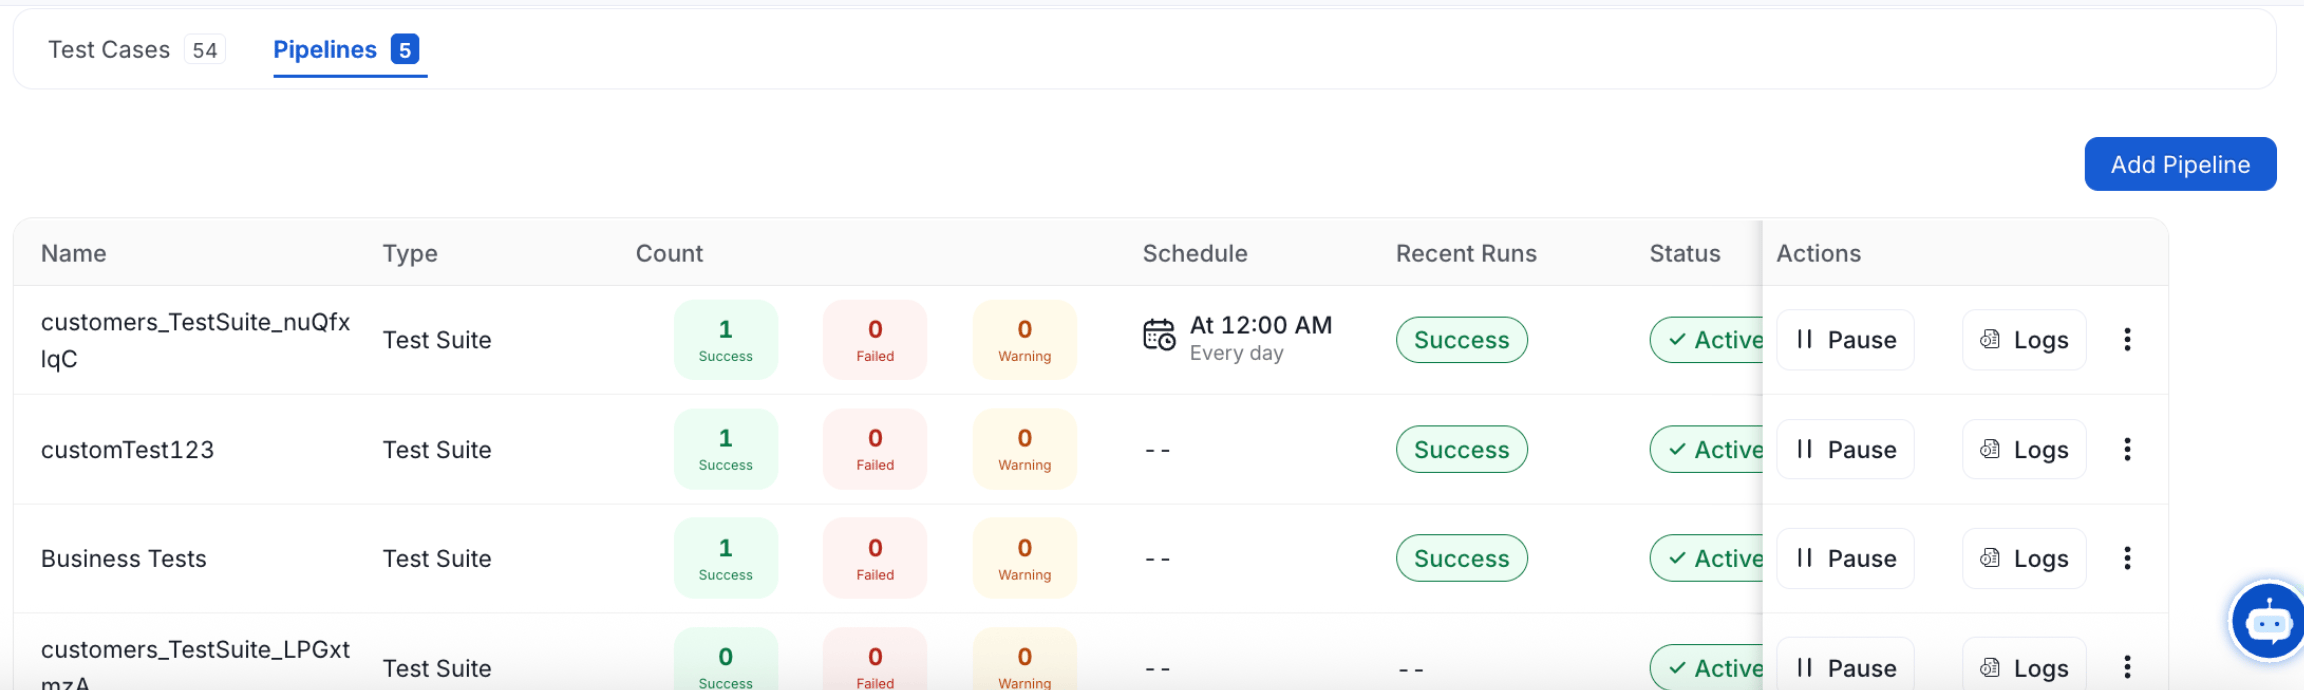
On the Data Quality page, select the test suite and click the Pipelines tab.
Alternatively, open the table, go to Data Observability > Data Quality, and click the Pipelines tab.
- Click Add Pipeline.
-
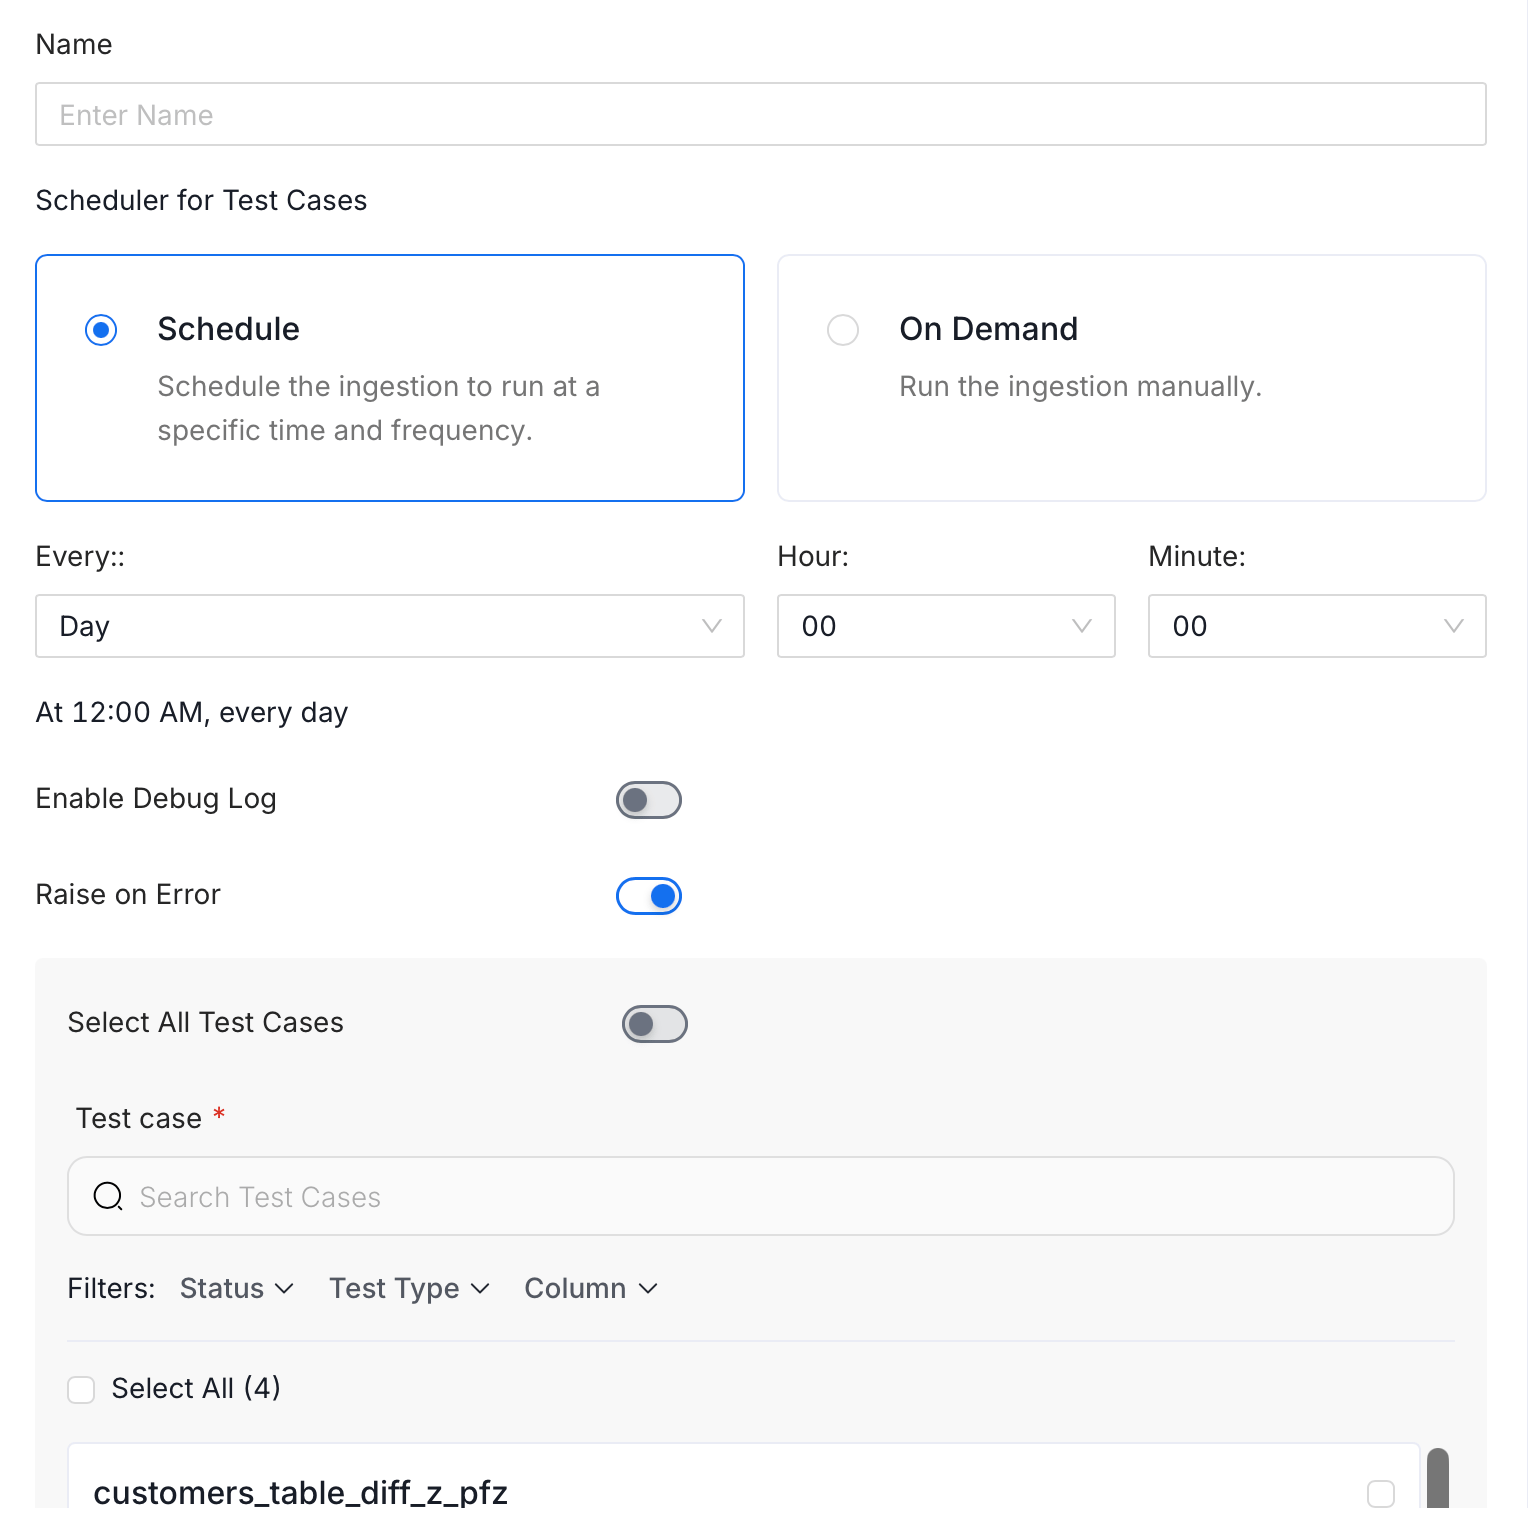
Enter the pipeline details:
- Name: Enter a name for the pipeline.
- Scheduler for Test Cases: Choose how it runs:
- Schedule: Runs automatically. Set the Every, Hour, and Minute fields to define the frequency — for example, every day at 12:00 AM.
- On Demand: Run the tests manually whenever needed.
- Enable Debug Log: Toggle on to capture detailed logs for troubleshooting.
- Raise on Error: Toggle on to stop the pipeline if a test throws an error.
- Select All Test Cases: Toggle on to include all tests, or search for specific ones in the Test Case field. Use the Status, Test Type, and Column filters to narrow the list.
- Click Submit to save and activate the pipeline.
Run a Test Case On Demand
You don’t have to wait for the schedule. To run your test cases right away, run the pipeline manually:- Open the table that has the test case and go to Data Observability > Data Quality.
- Select the Pipelines tab and find the pipeline that runs your test case.
-
Click the ⋮ menu next to the pipeline and select Run.
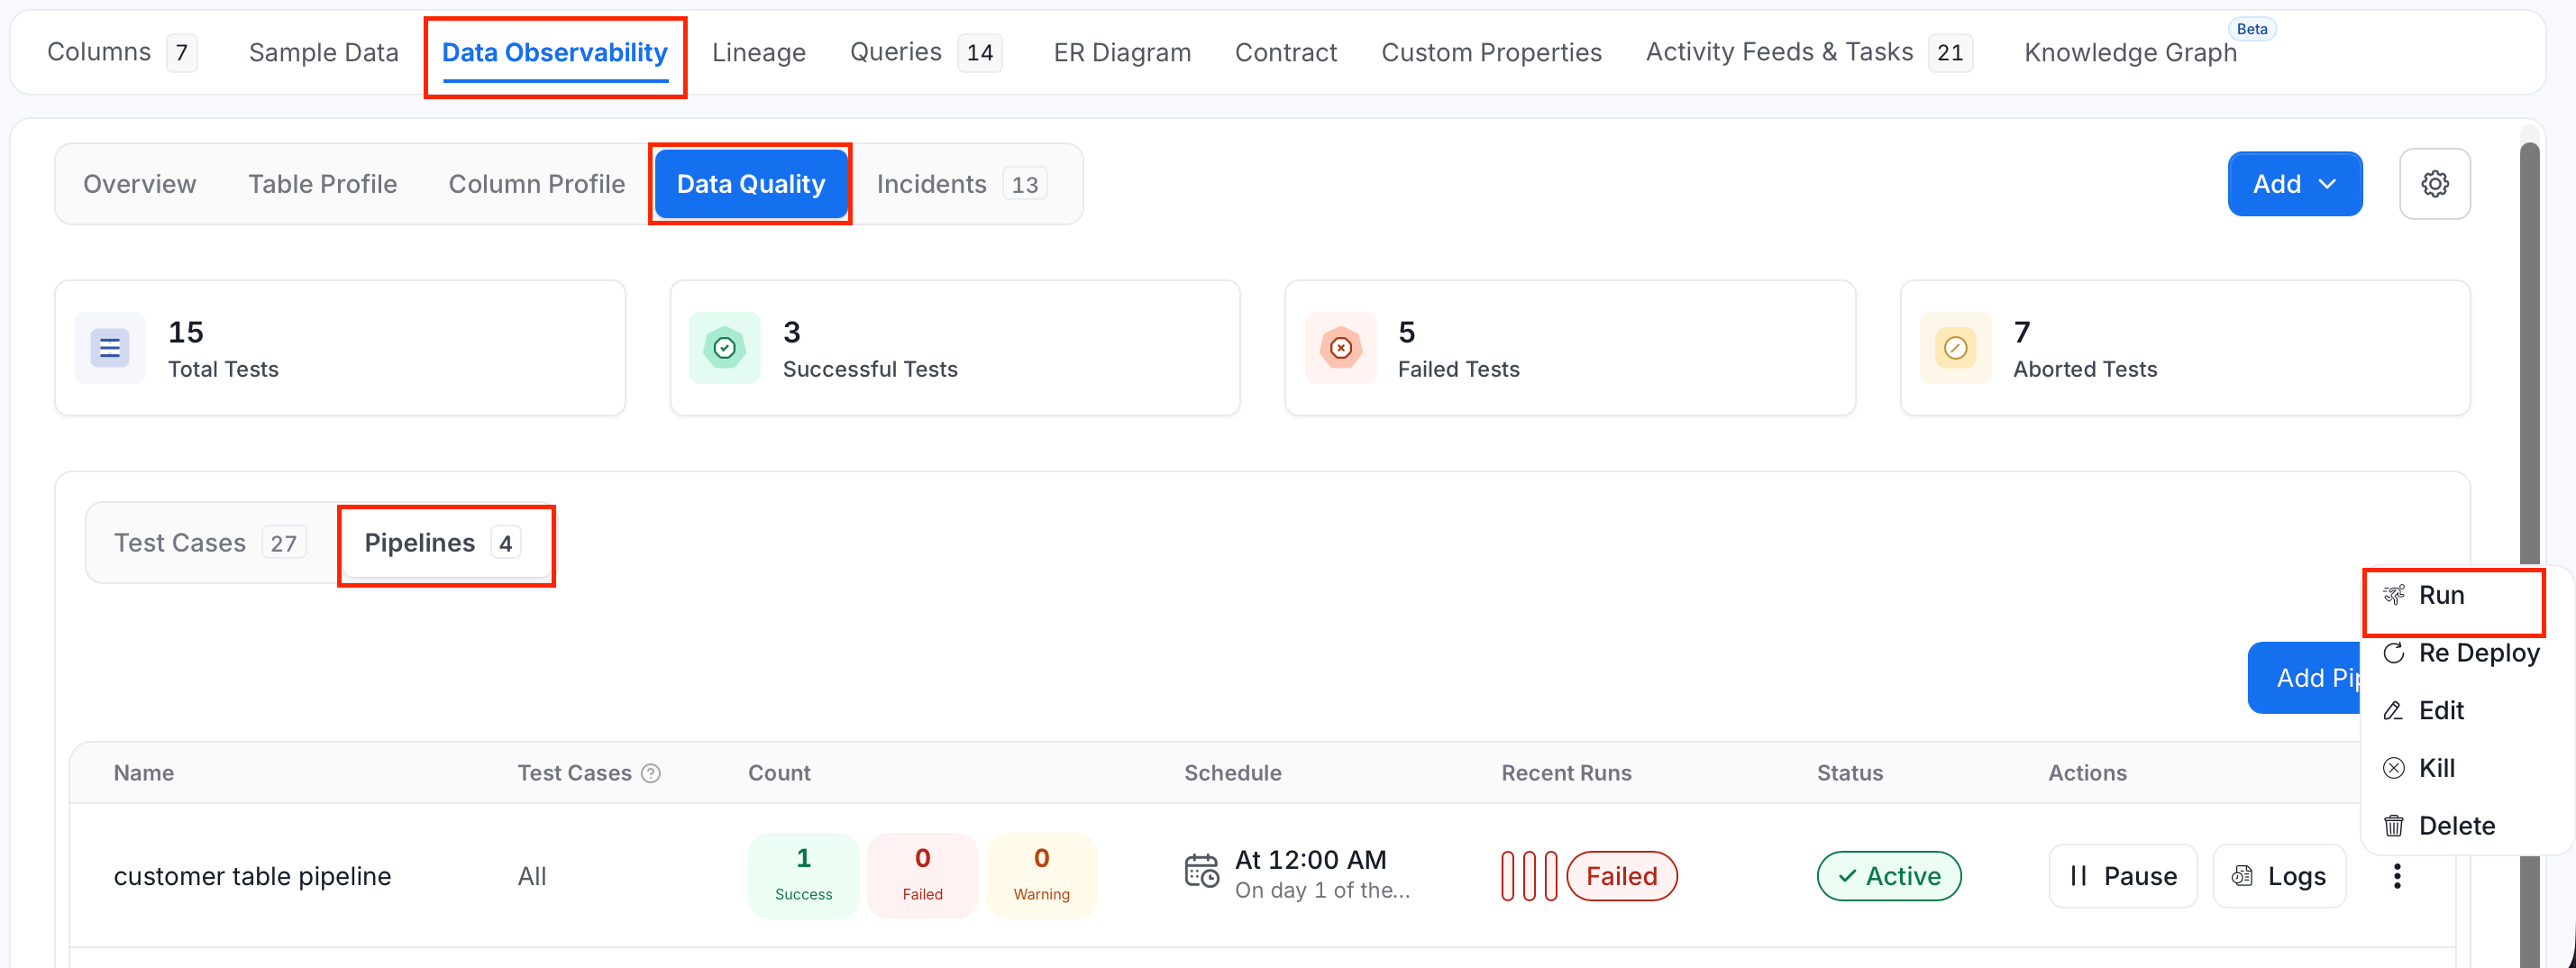
- Check the Recent Runs column for the pipeline to follow the result. The test case results update in the Data Quality tab.
Note: The Run option appears only if the pipeline is deployed and you have the
Trigger permission. For more information, see Rules, Policies, and Roles.Handle Test Failures
When a test fails, Collate creates an incident for it. If the test case has an owner, the incident is assigned to the owner automatically, so its status shows Assigned in the Incident column. If the test case has no owner, the status shows New.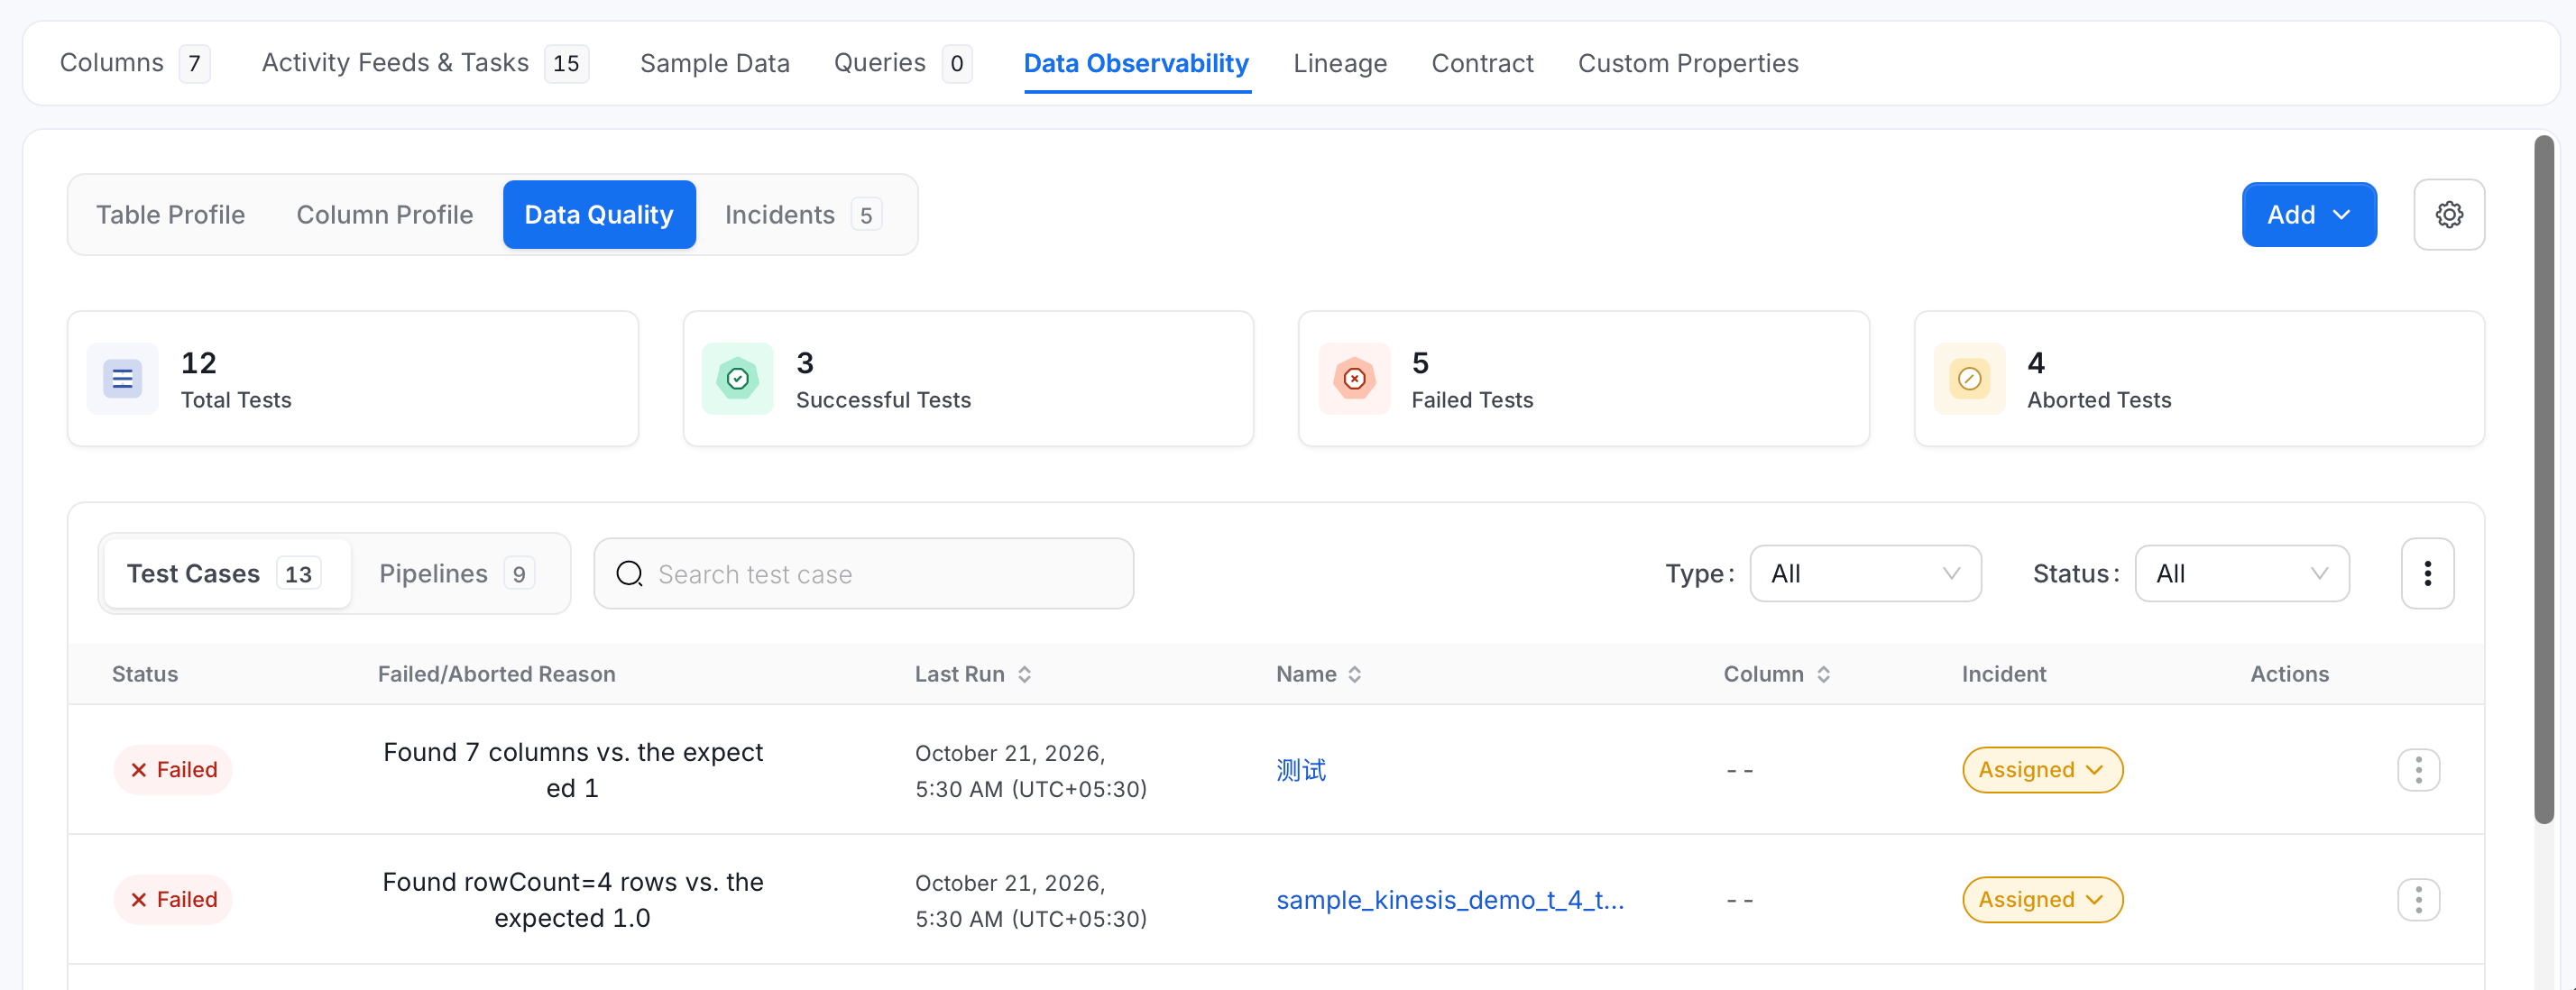
-
In the Incident column, click the status of the failed test, for example Assigned.
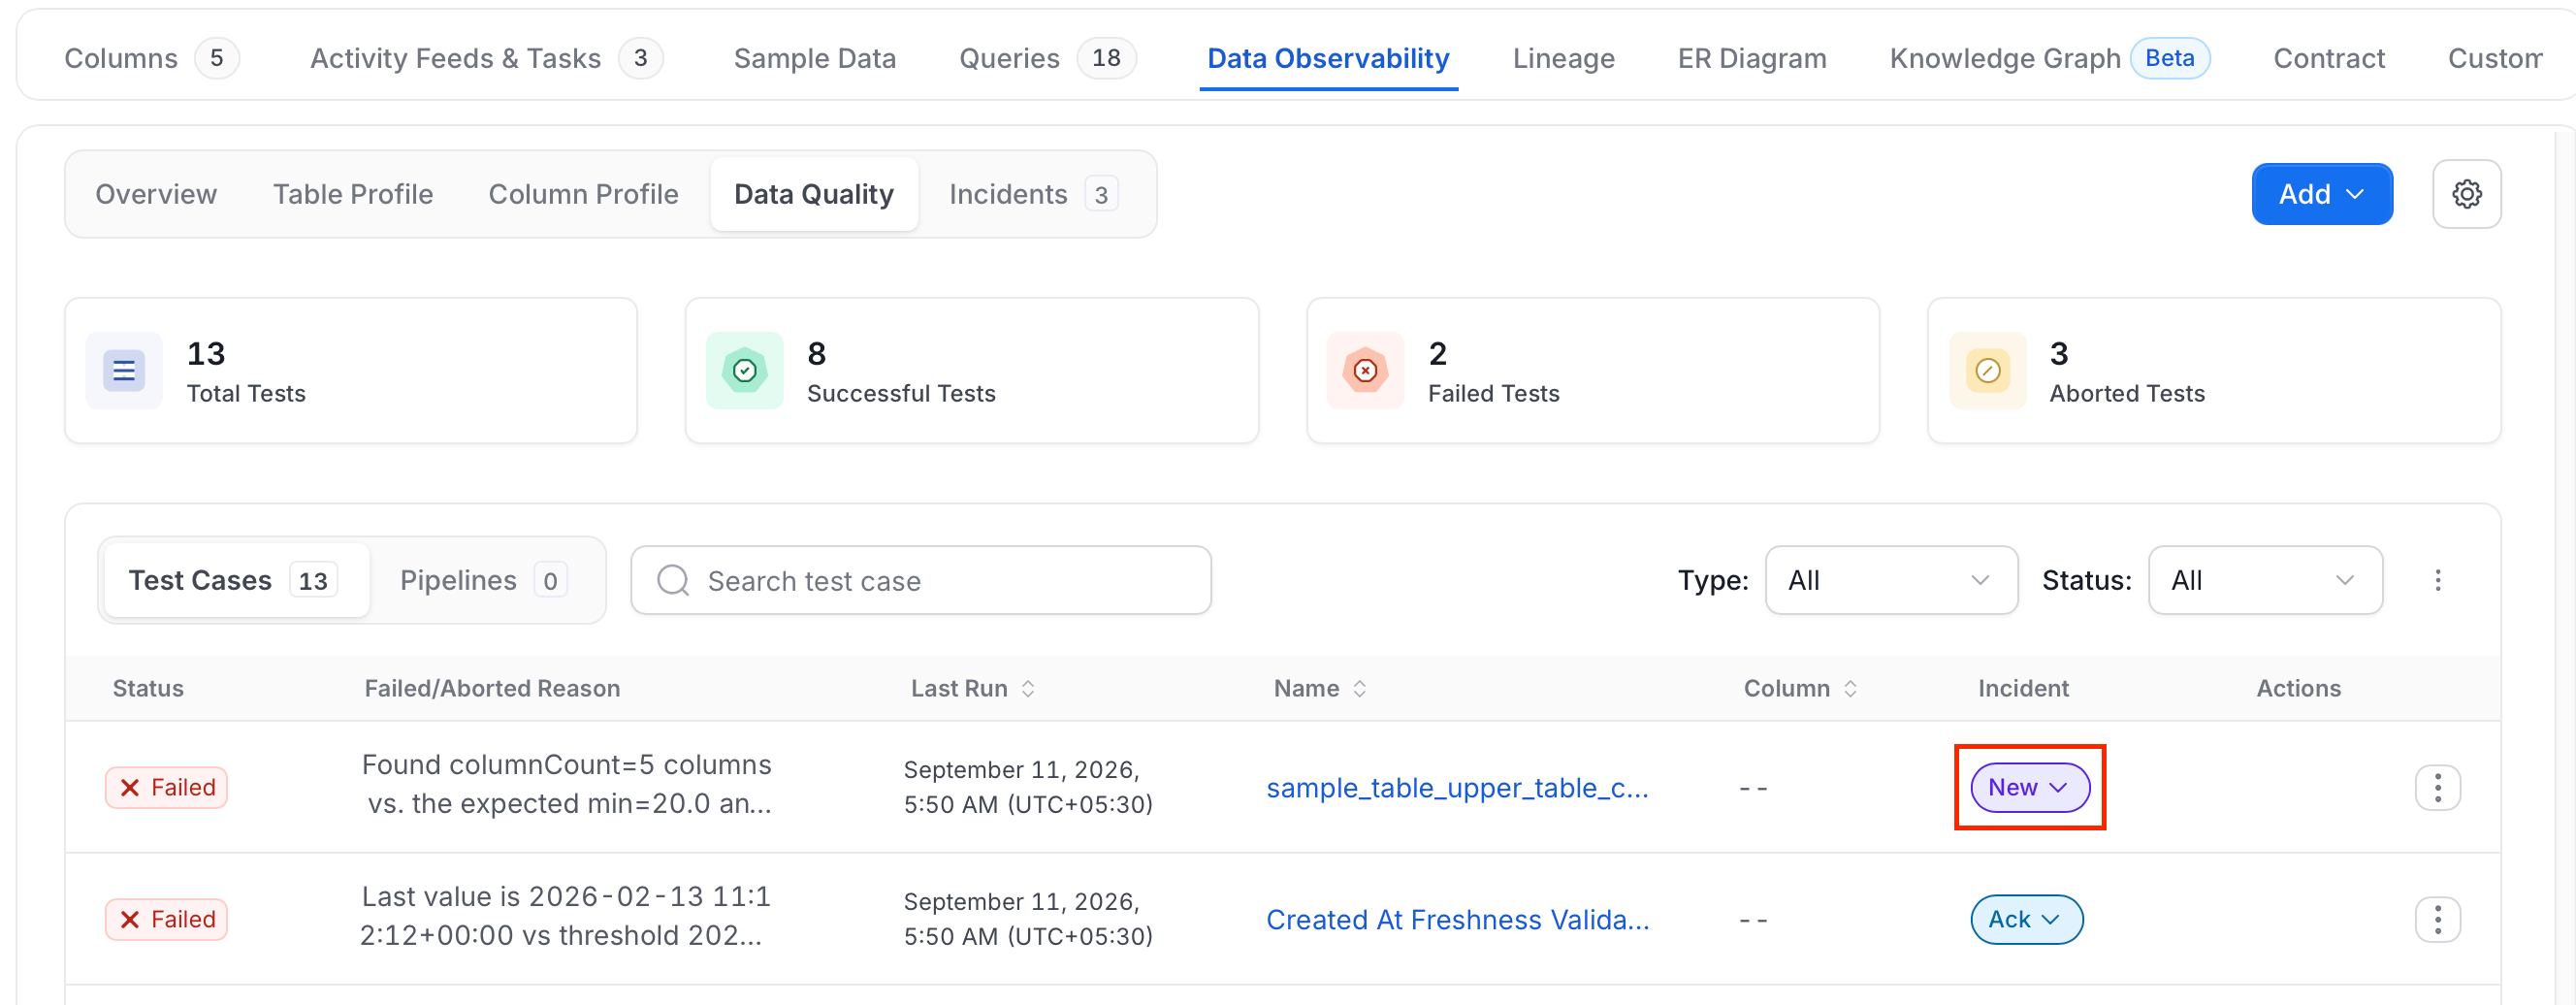
-
Select a status: Ack, Assigned, New, or Resolved.
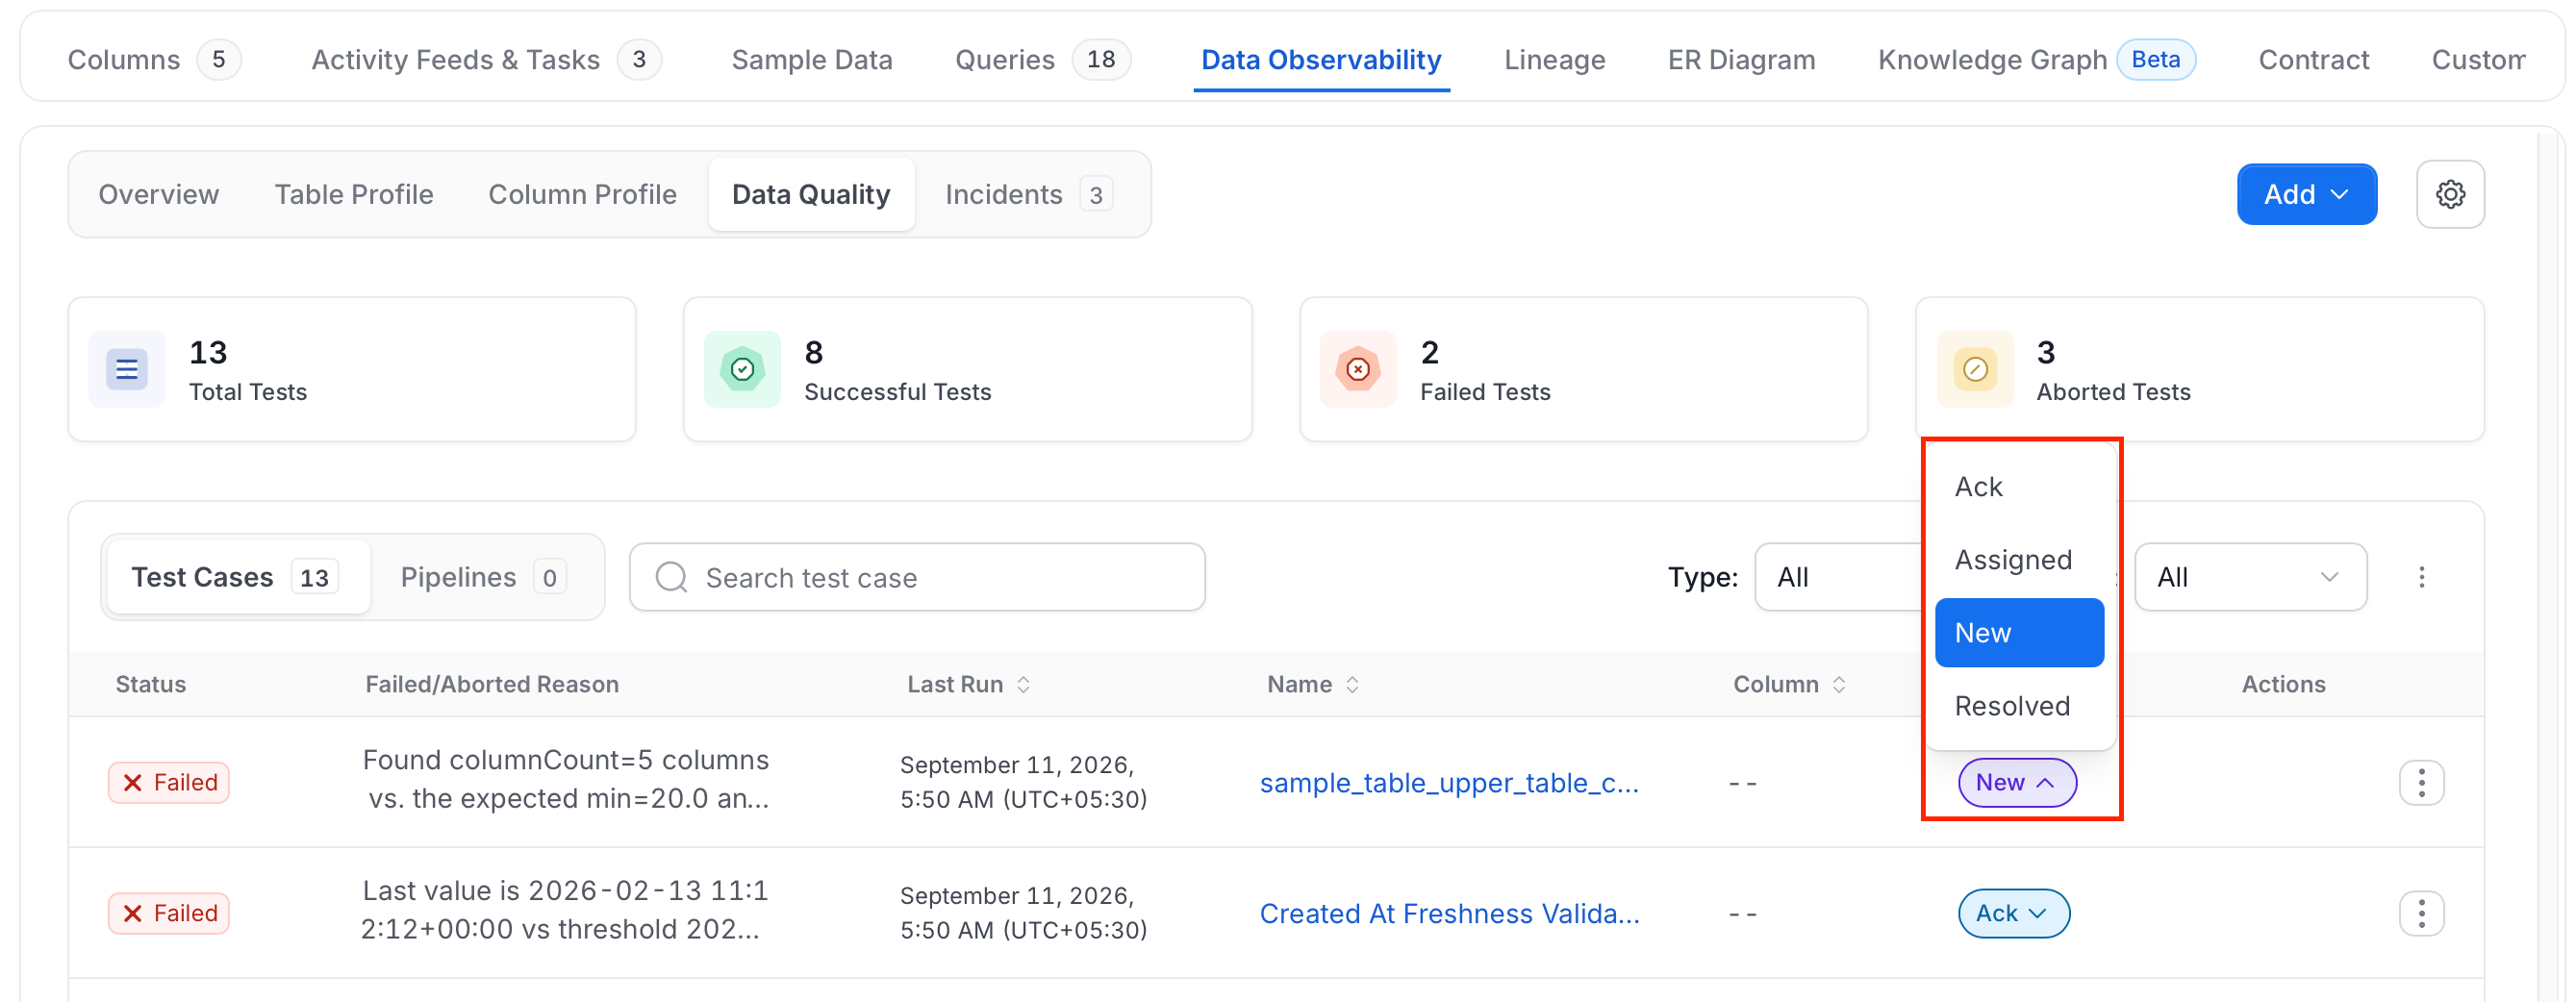
-
If you select Resolved, choose a Reason and enter a Comment. Both are required. The reasons are Duplicates, False Positive, Missing Data, Other, and Out Of Bounds.
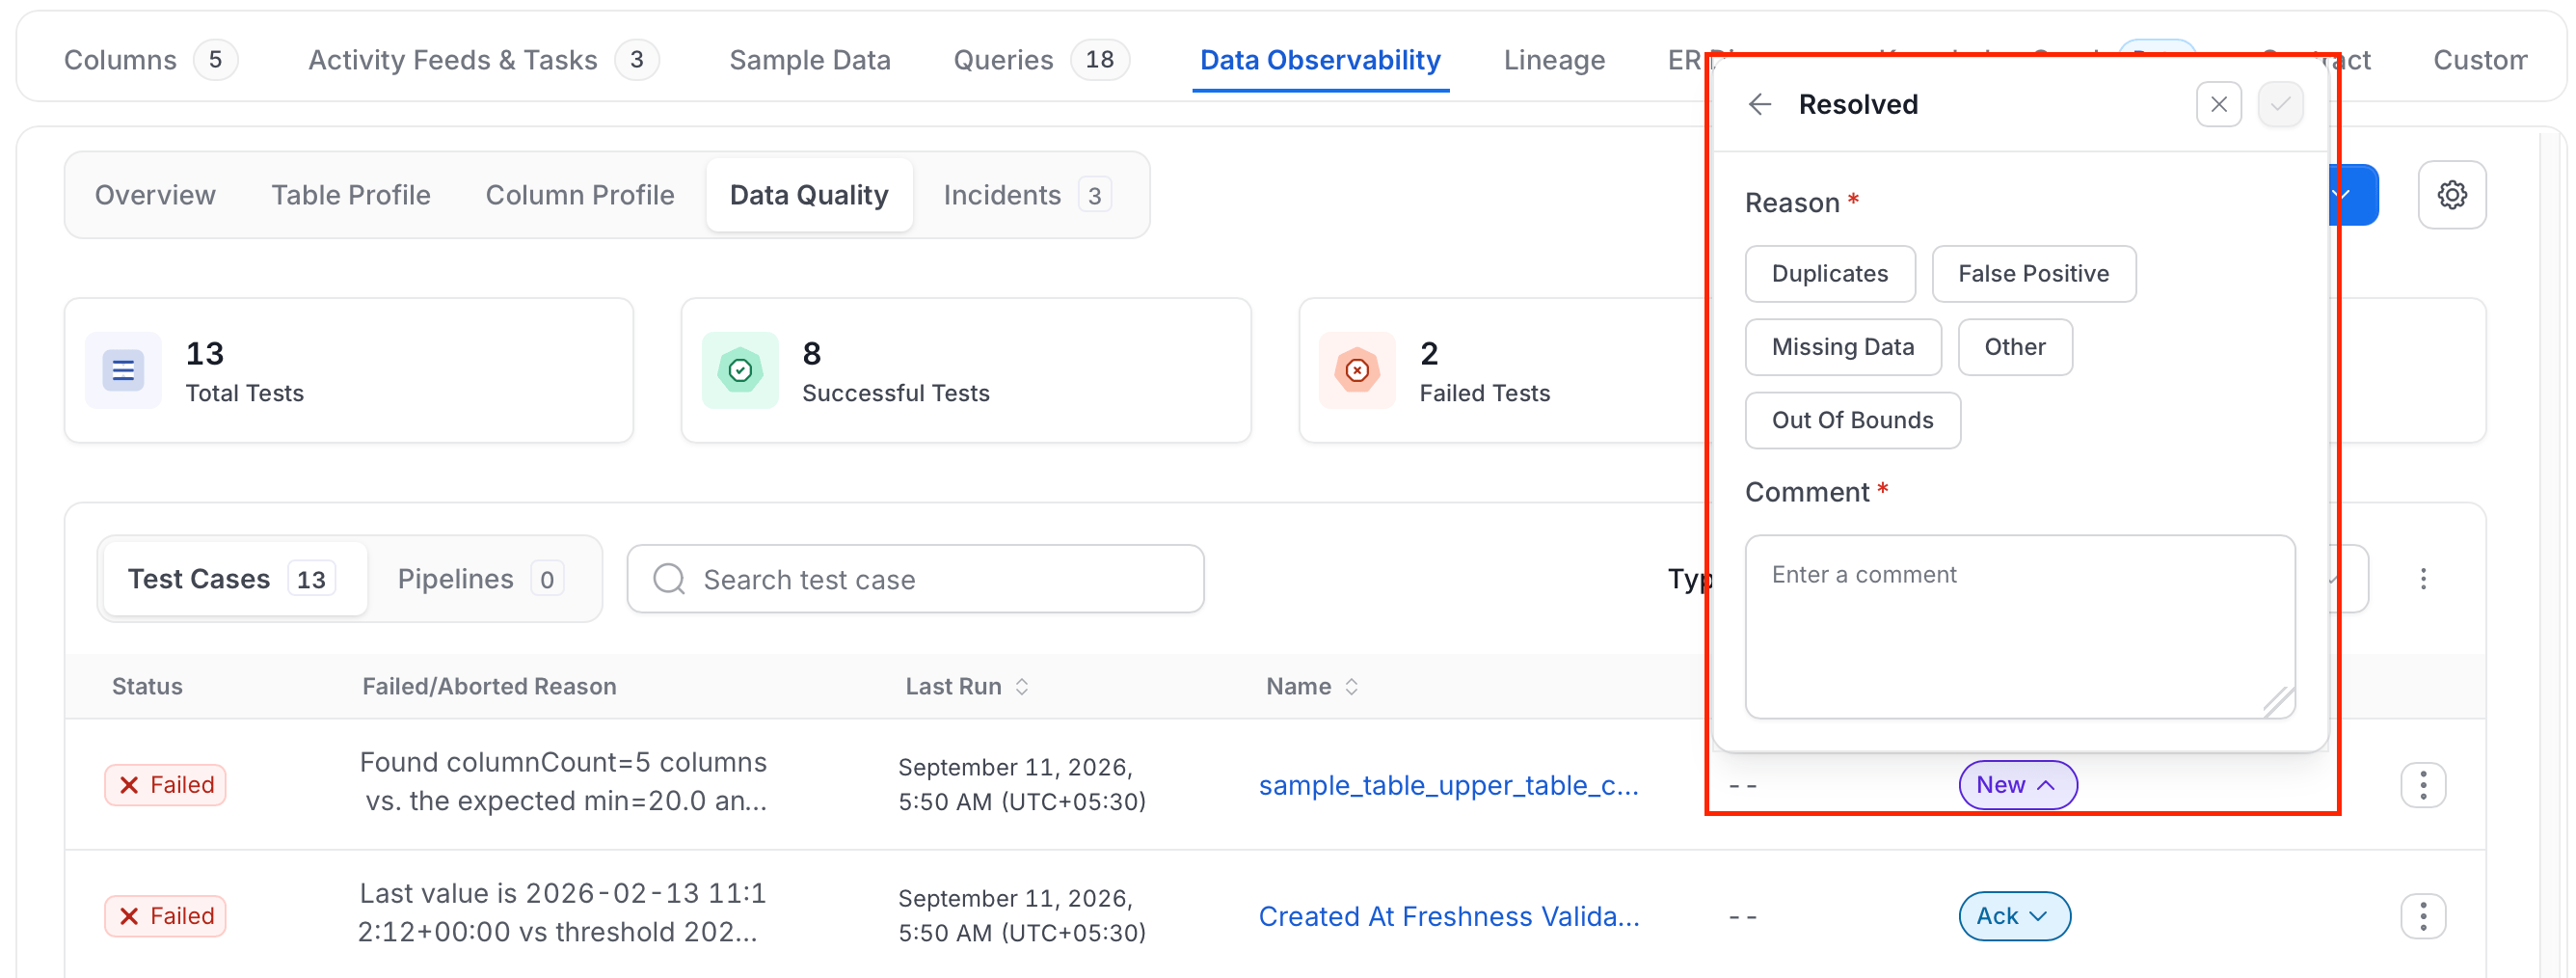
- Click the check mark to save.
How to Set Alerts for Test Case Fails
Get notified when a data quality test fails.