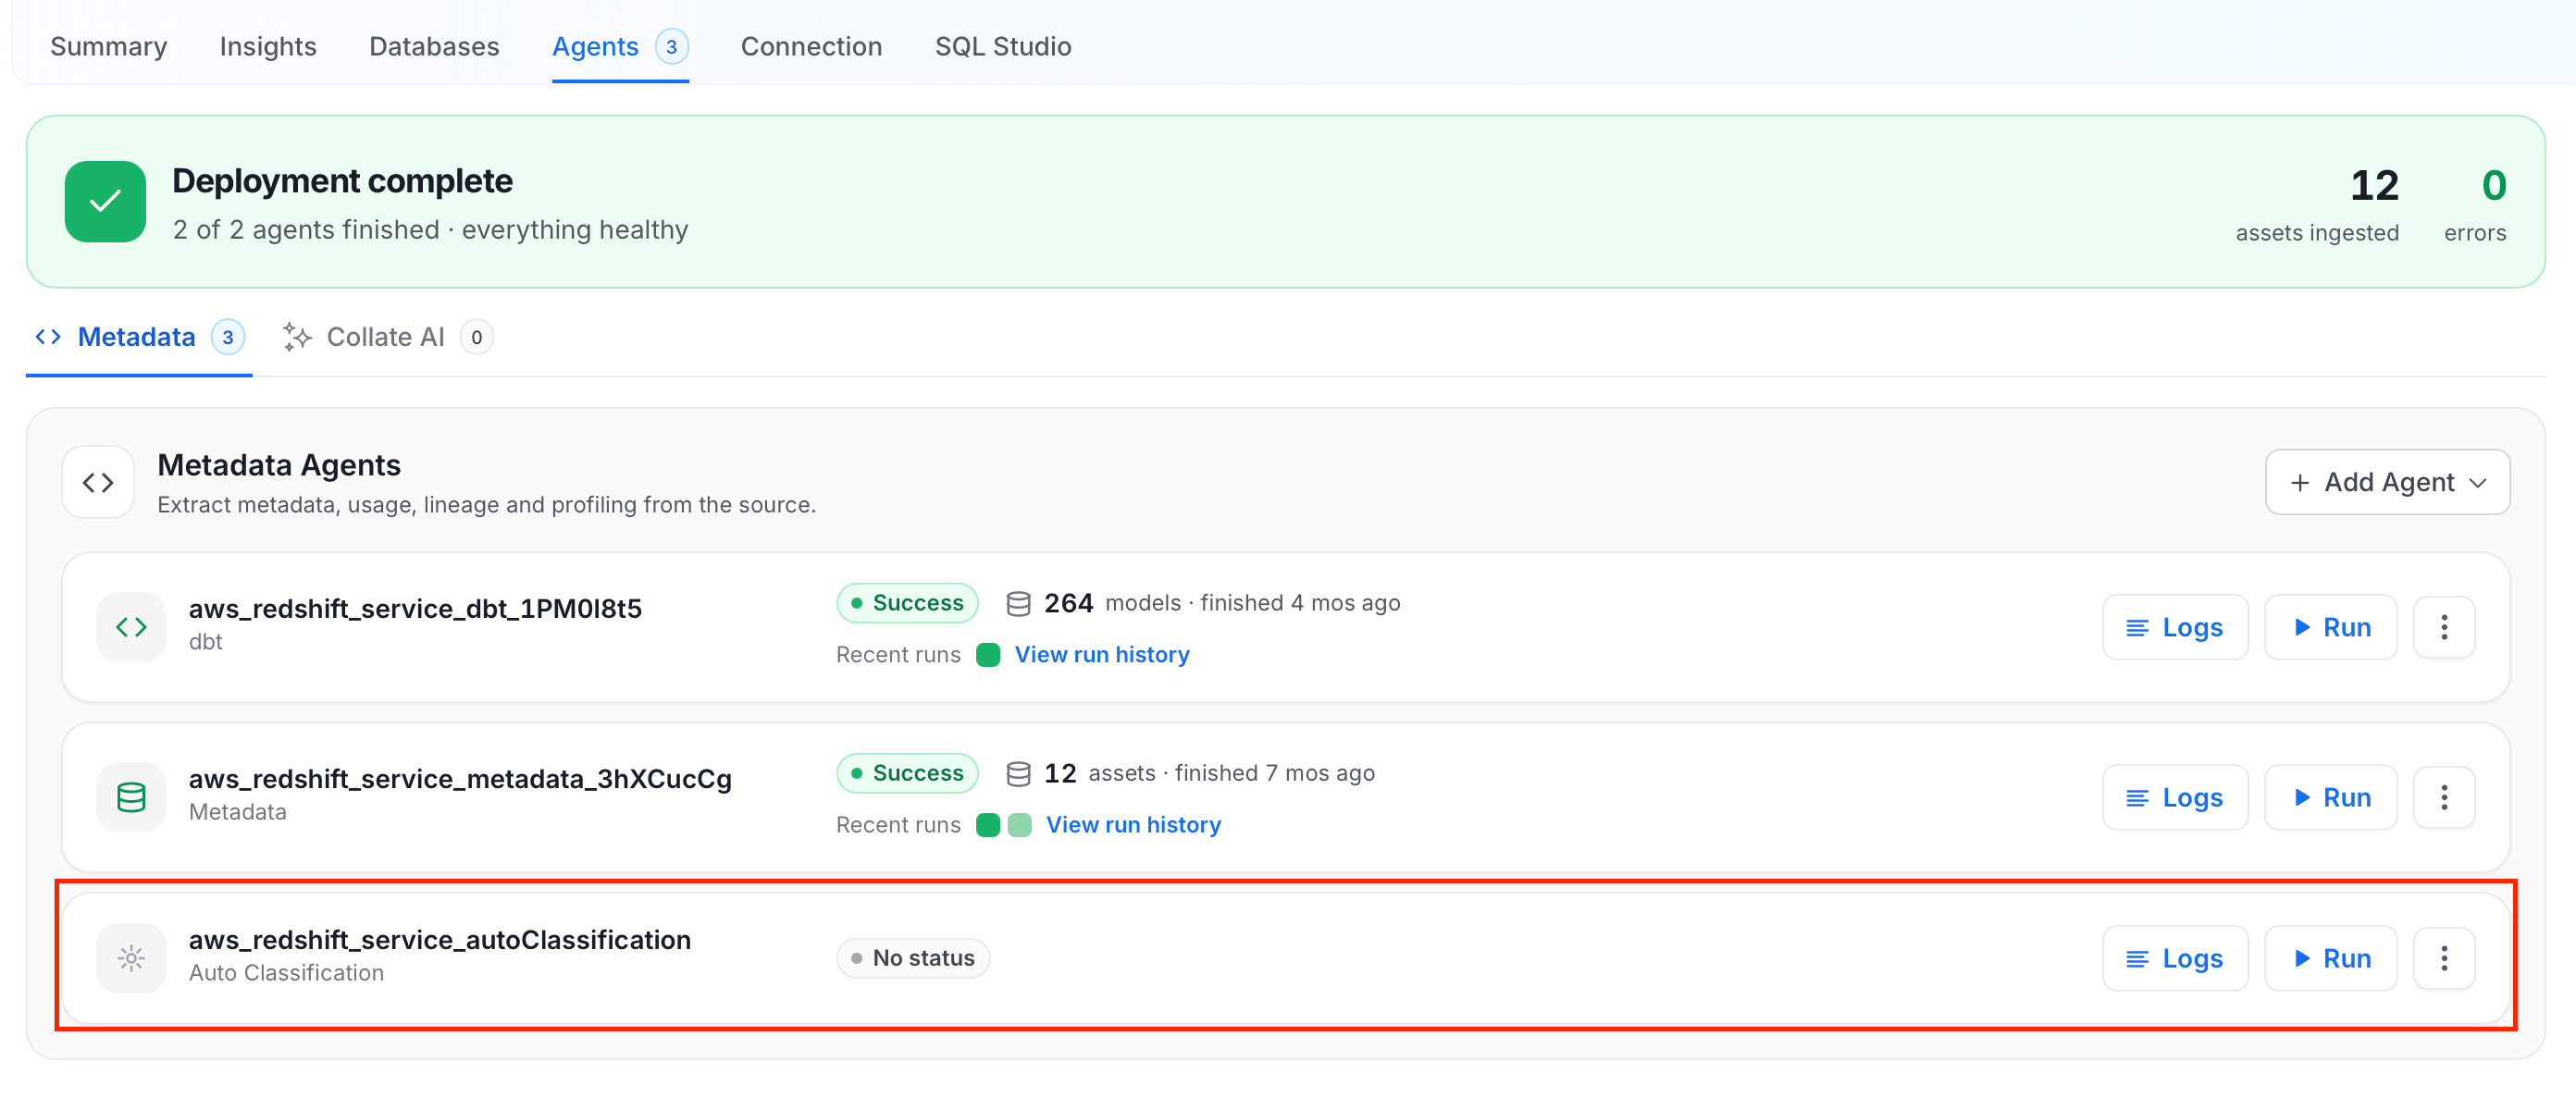
Adding Auto-Classification Workflow Using Collate UI
Follow these steps to configure Auto Classification Agent via the Collate UI:Step 1: Navigate to the Database Service
- In the left navigation bar, click the Profile icon and navigate to Settings > Services > Databases.
-
Select the database for which you want to configure Auto Classification Agent.
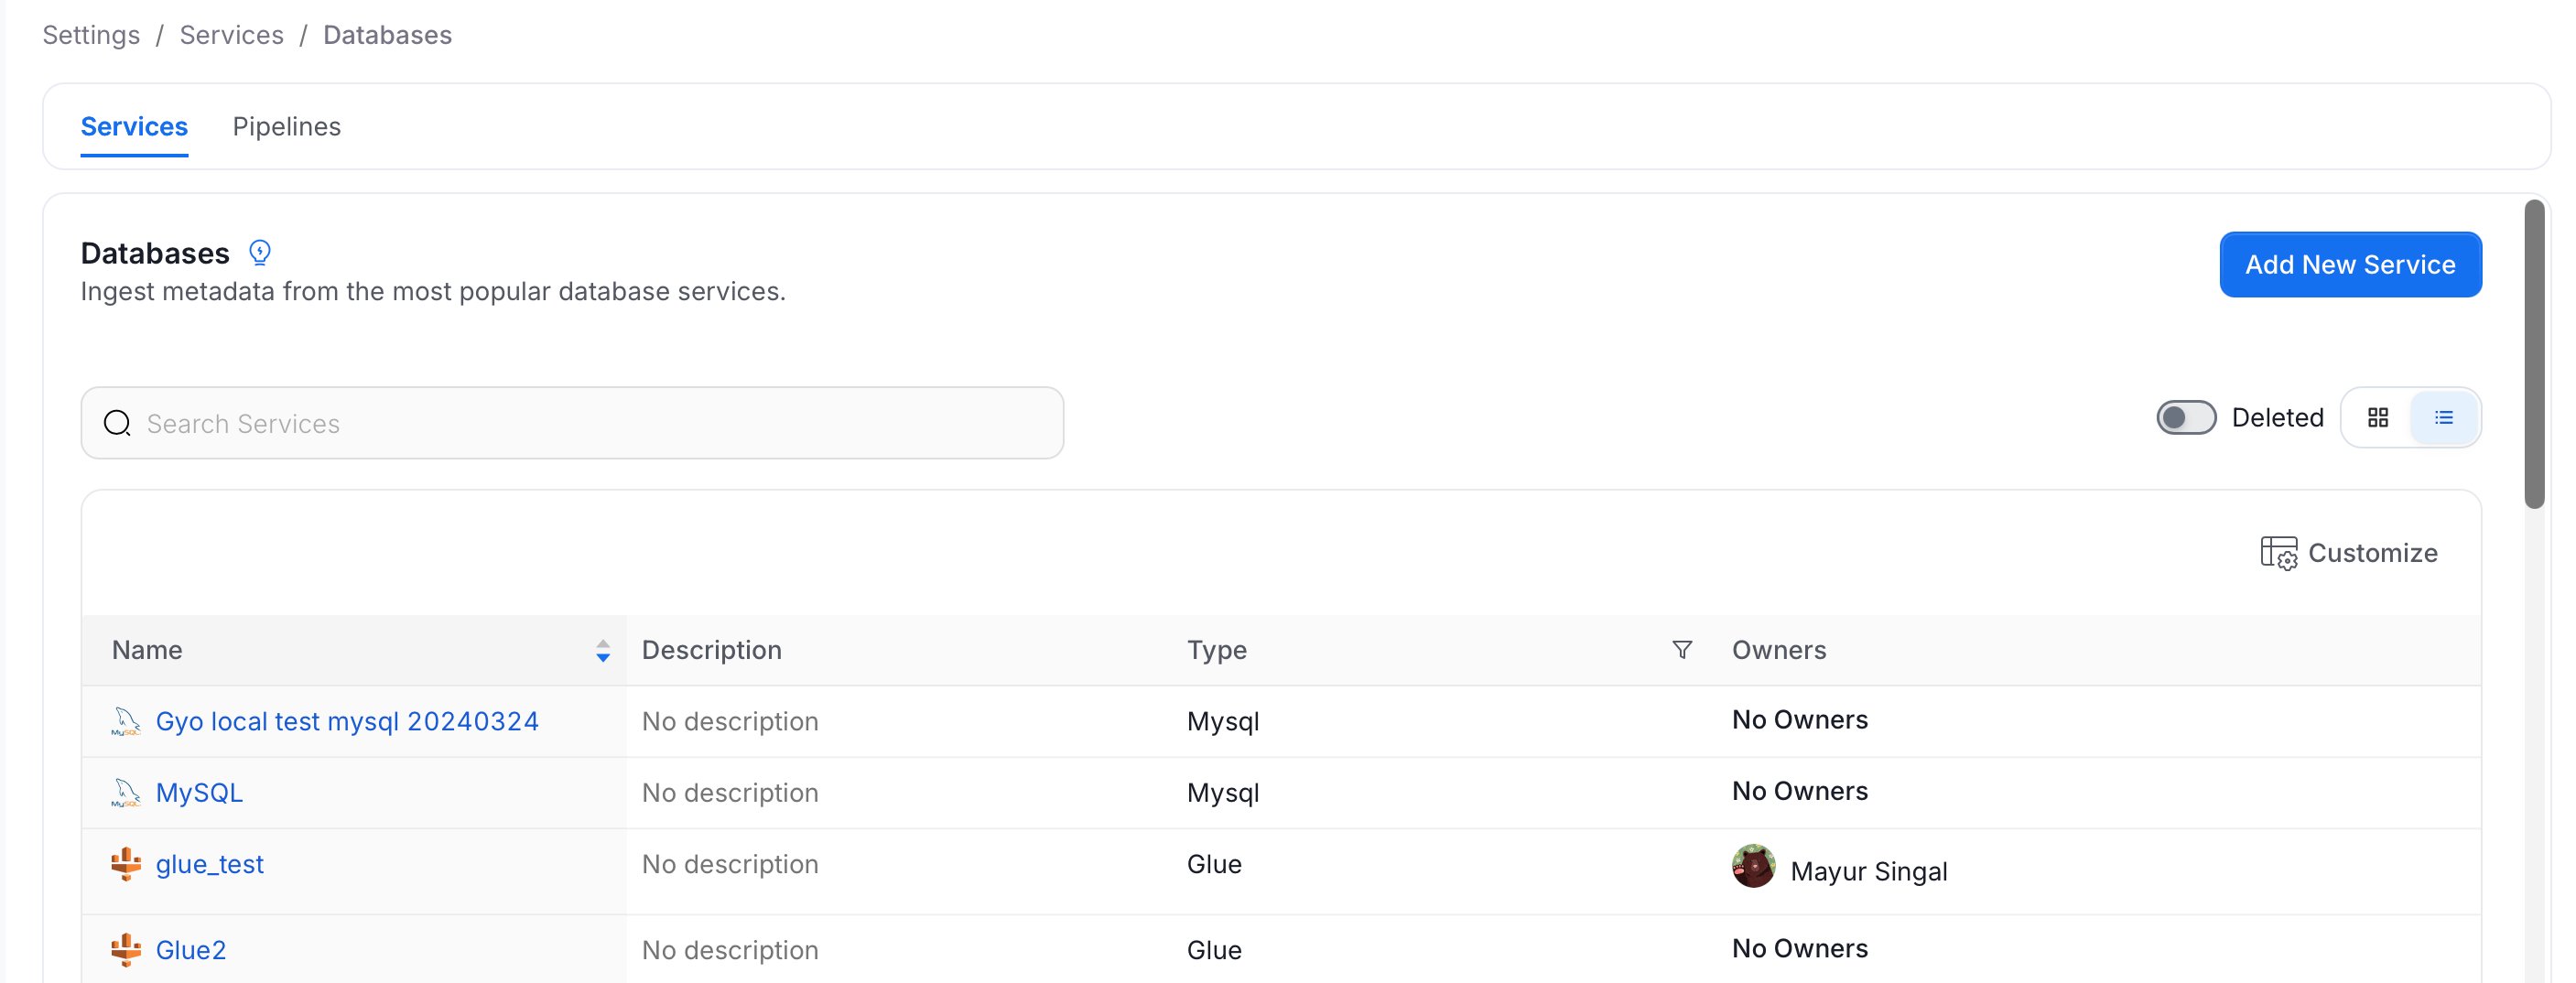
Step 2: Access the Agents Tab
- In the selected database, navigate to the Agents tab.
-
Click Add Agent and select Auto Classification.
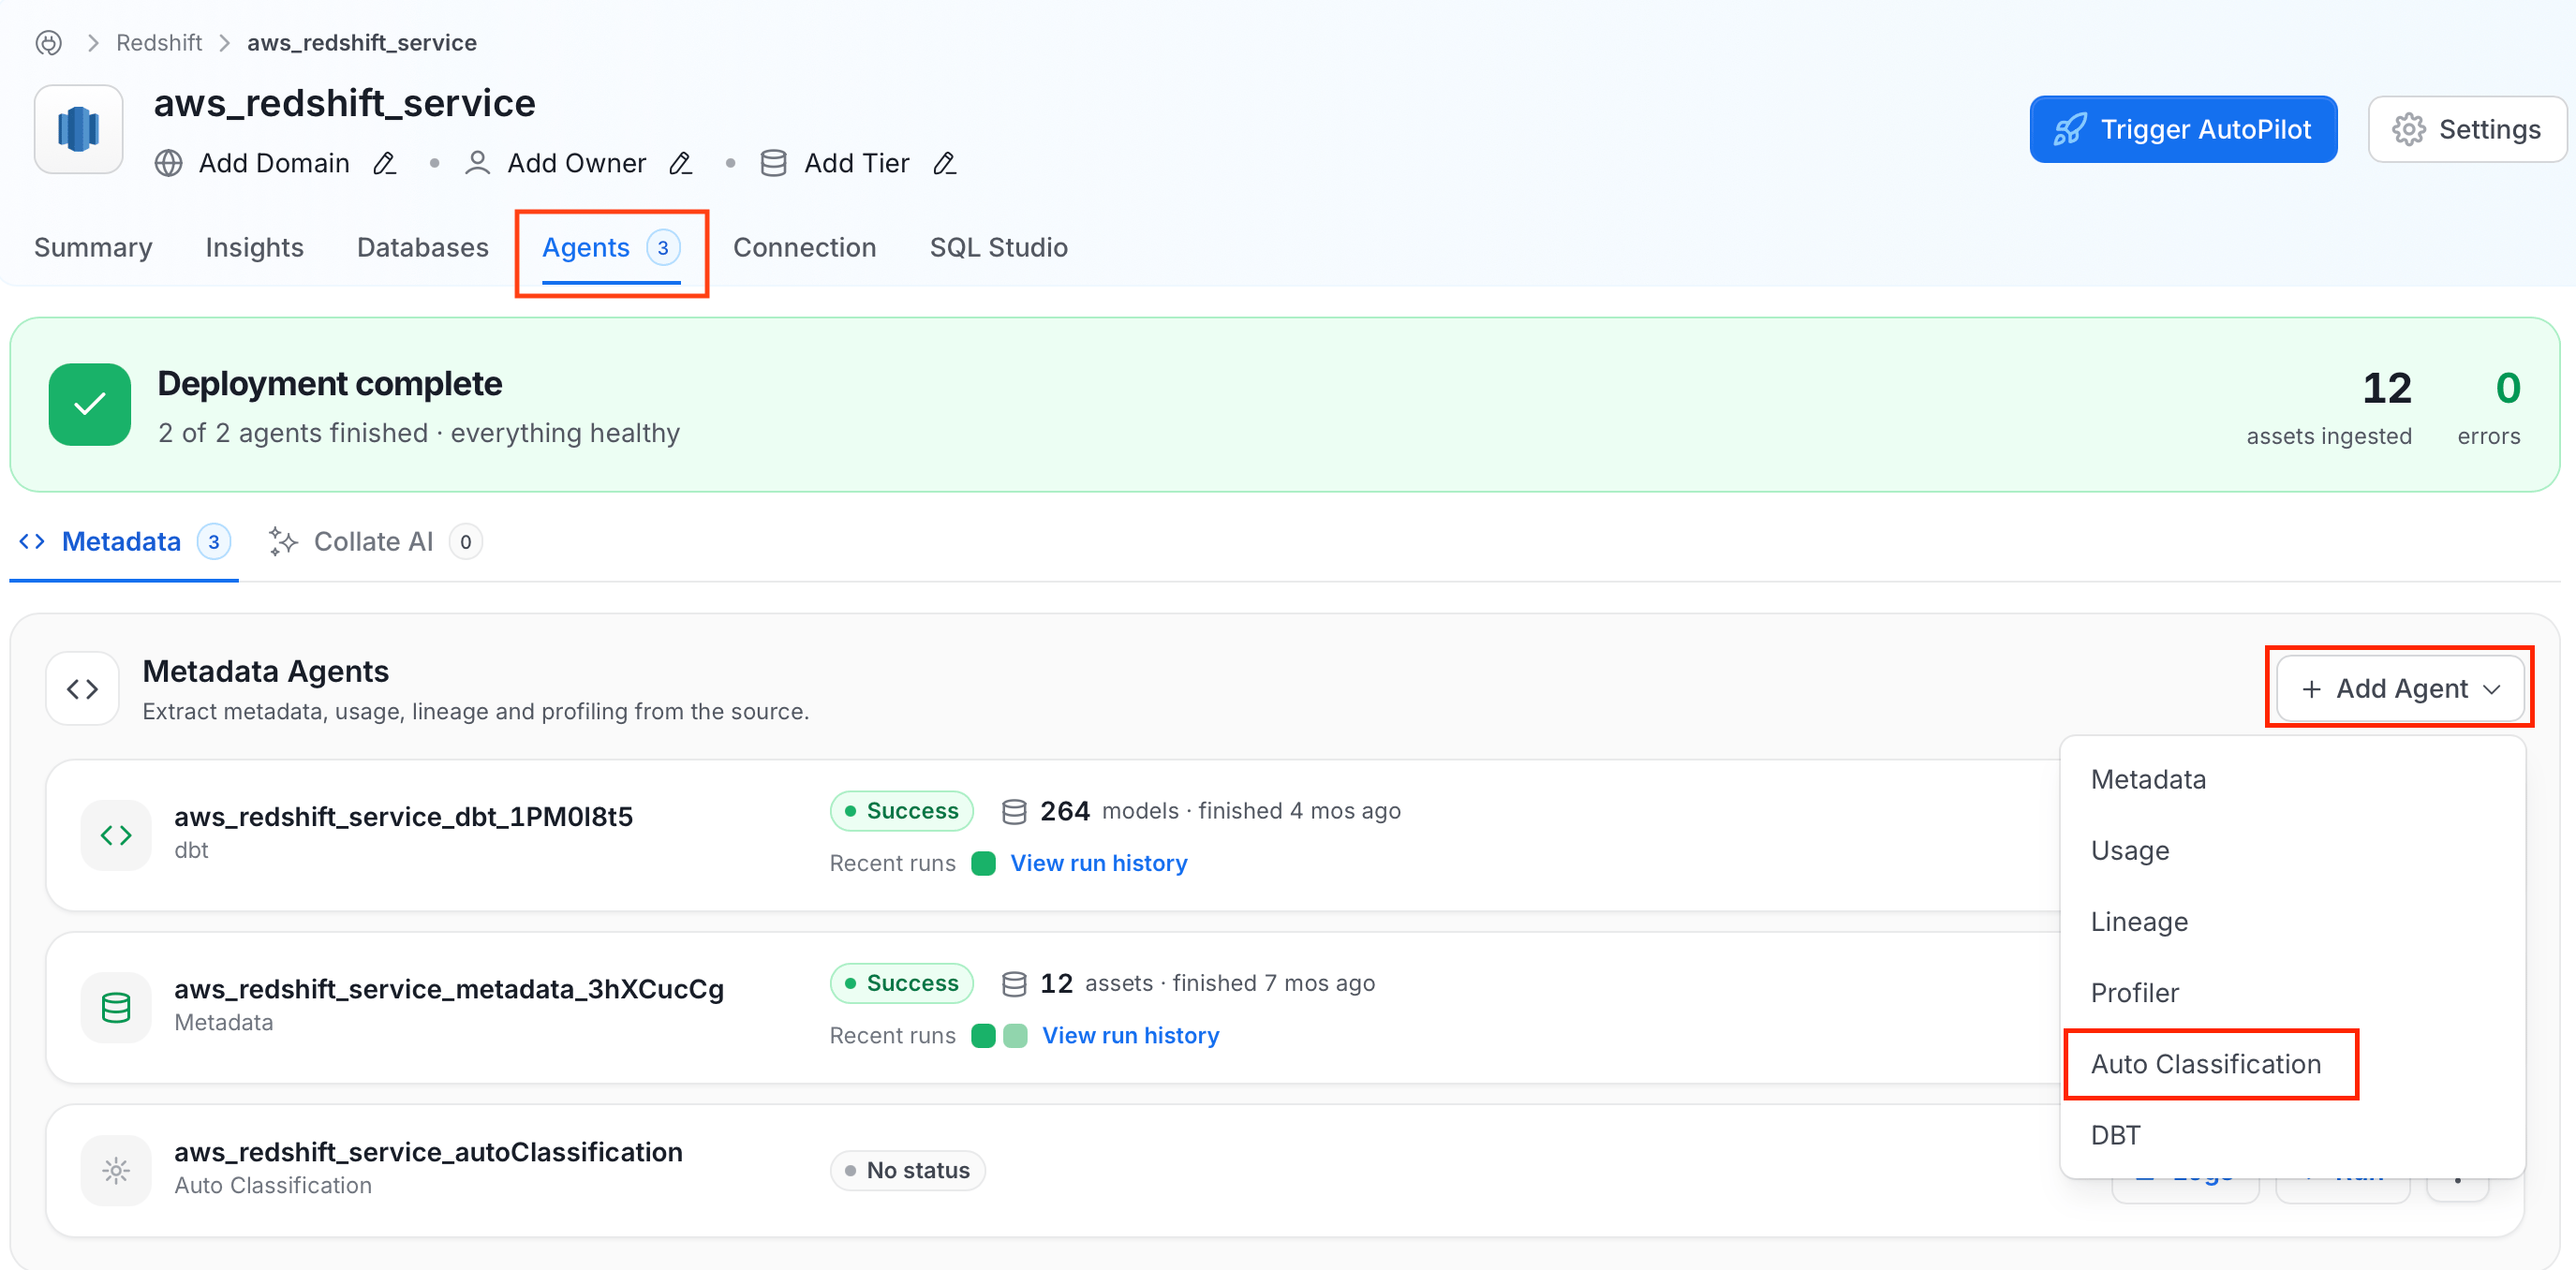
Step 3: Configure Auto Classification Details
Fill the details for your Auto Classification Agent workflow. Each field’s purpose is explained directly in the UI, allowing you to customize the configuration based on your requirements.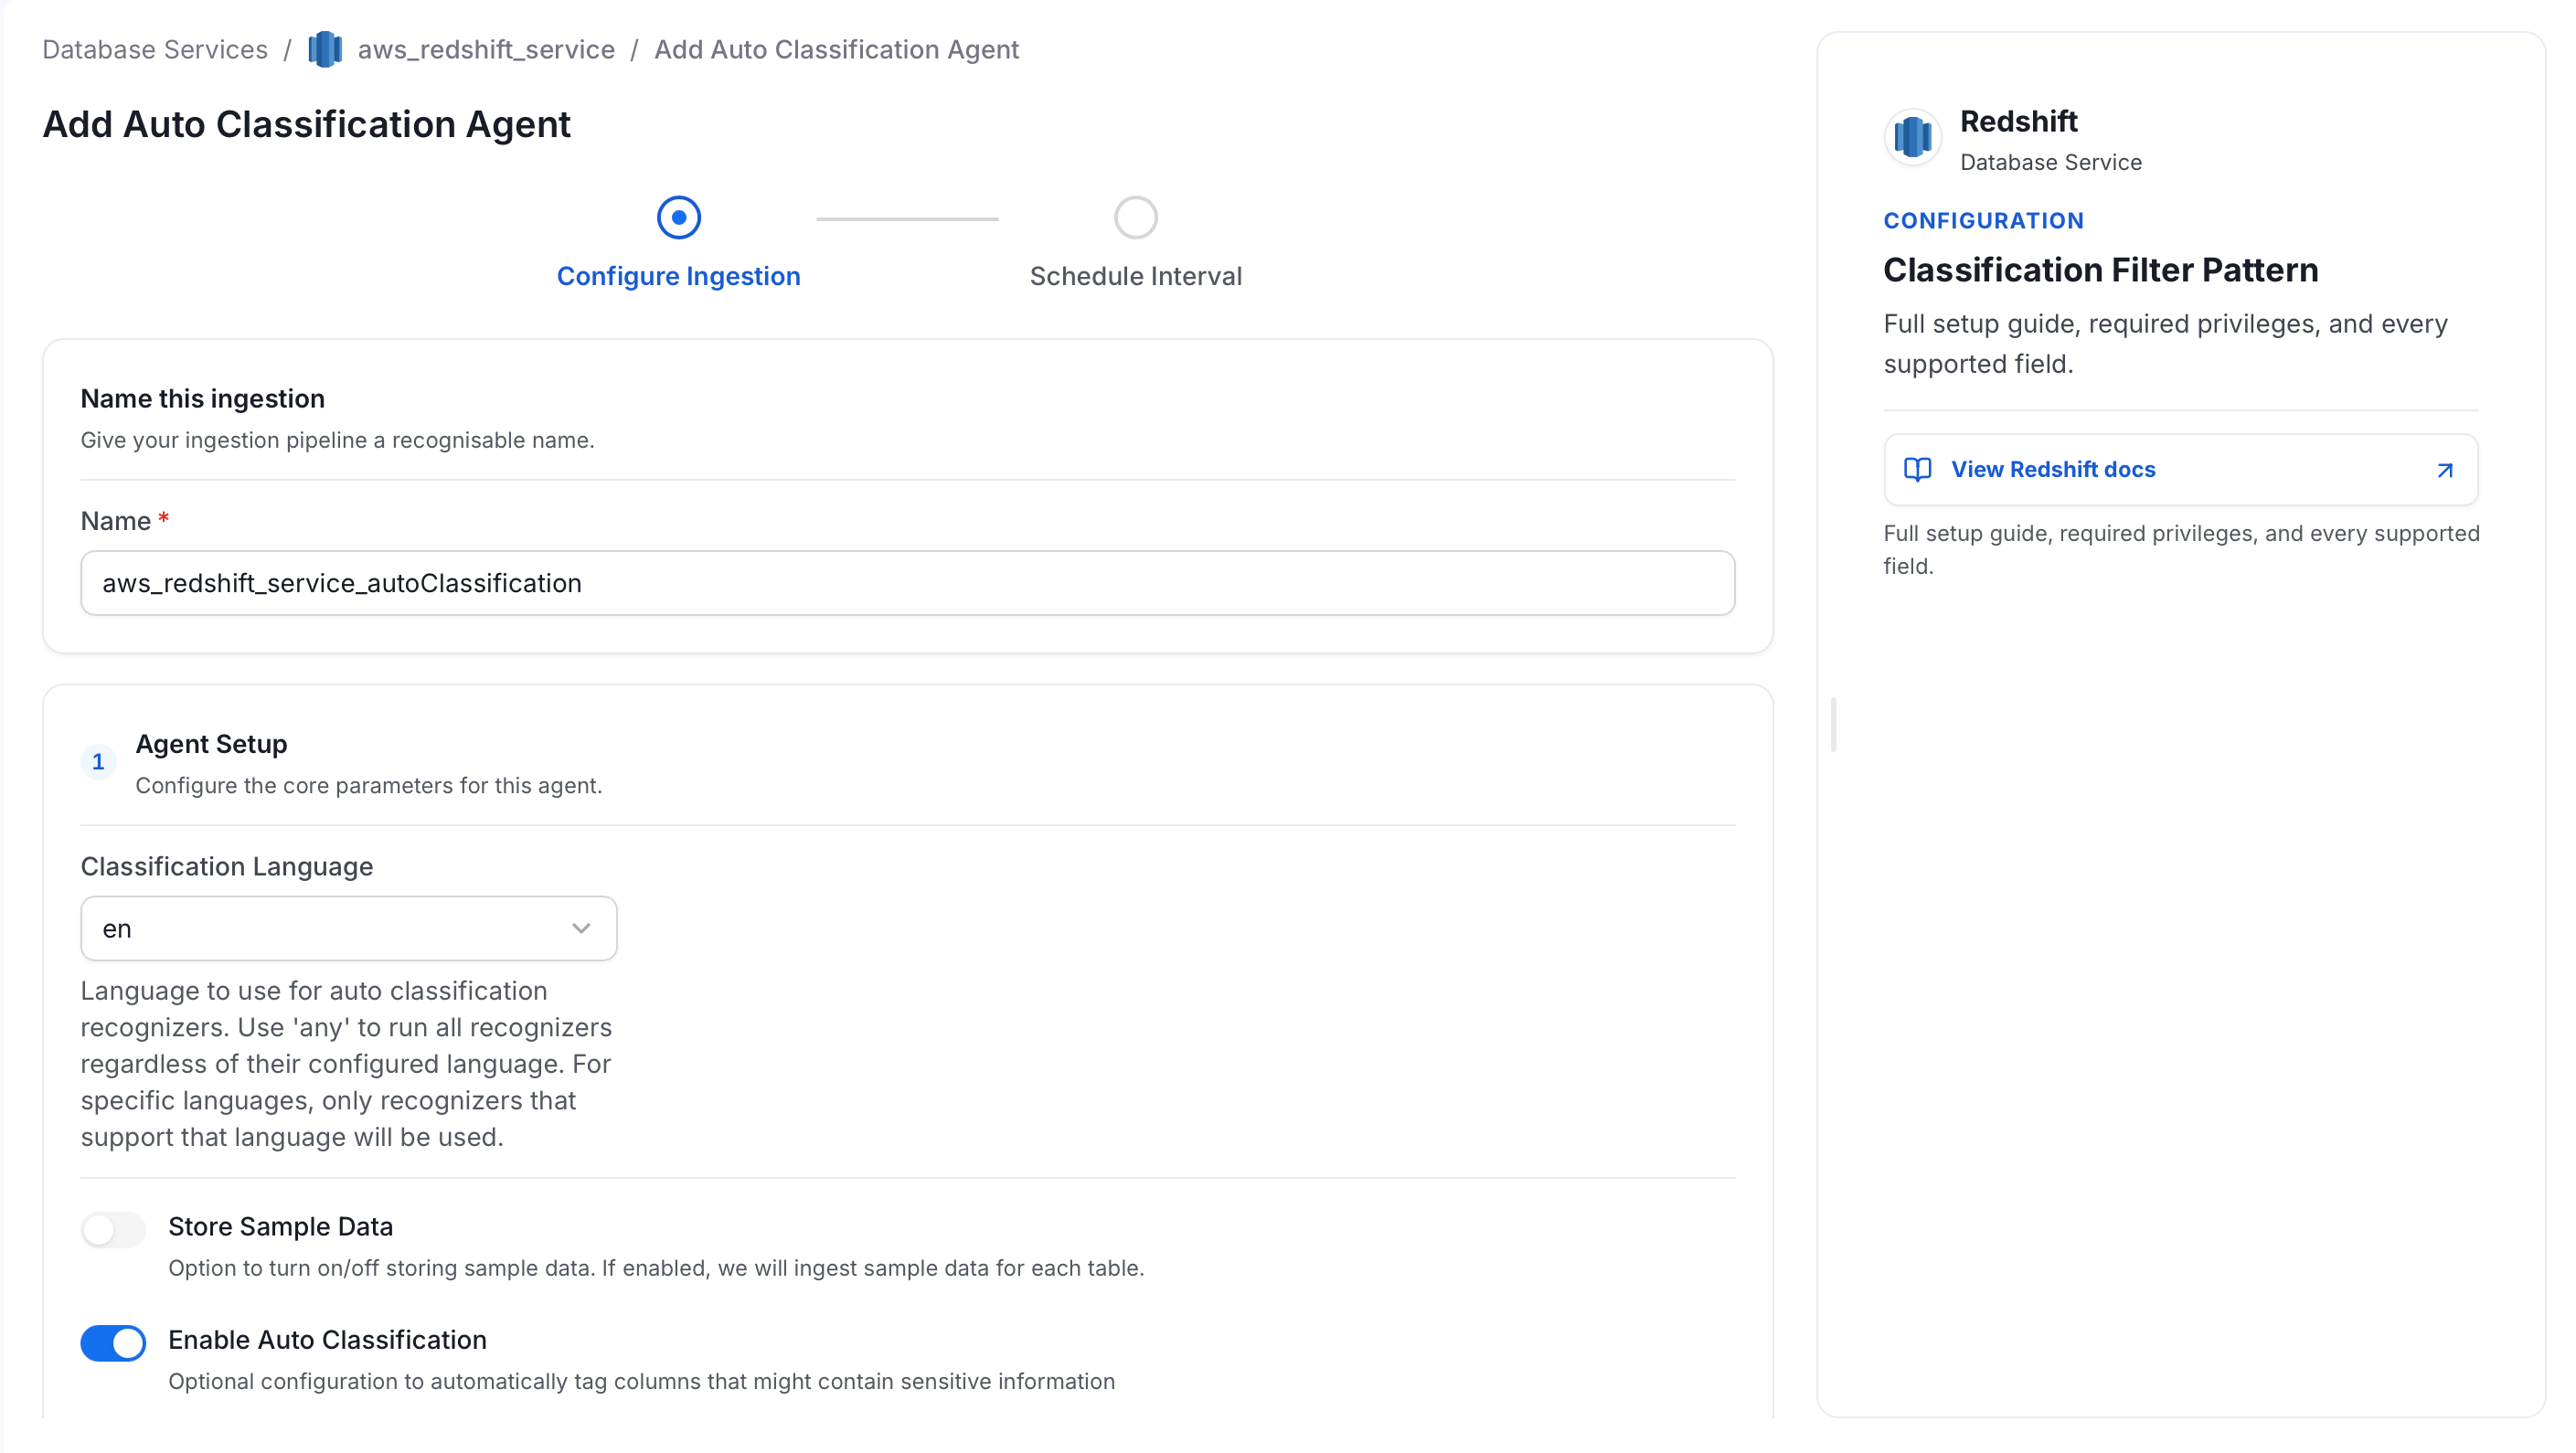
Step 4: Set the Schedule and Deploy
Specify the time interval at which the Auto Classification Agent runs and click Add & Deploy.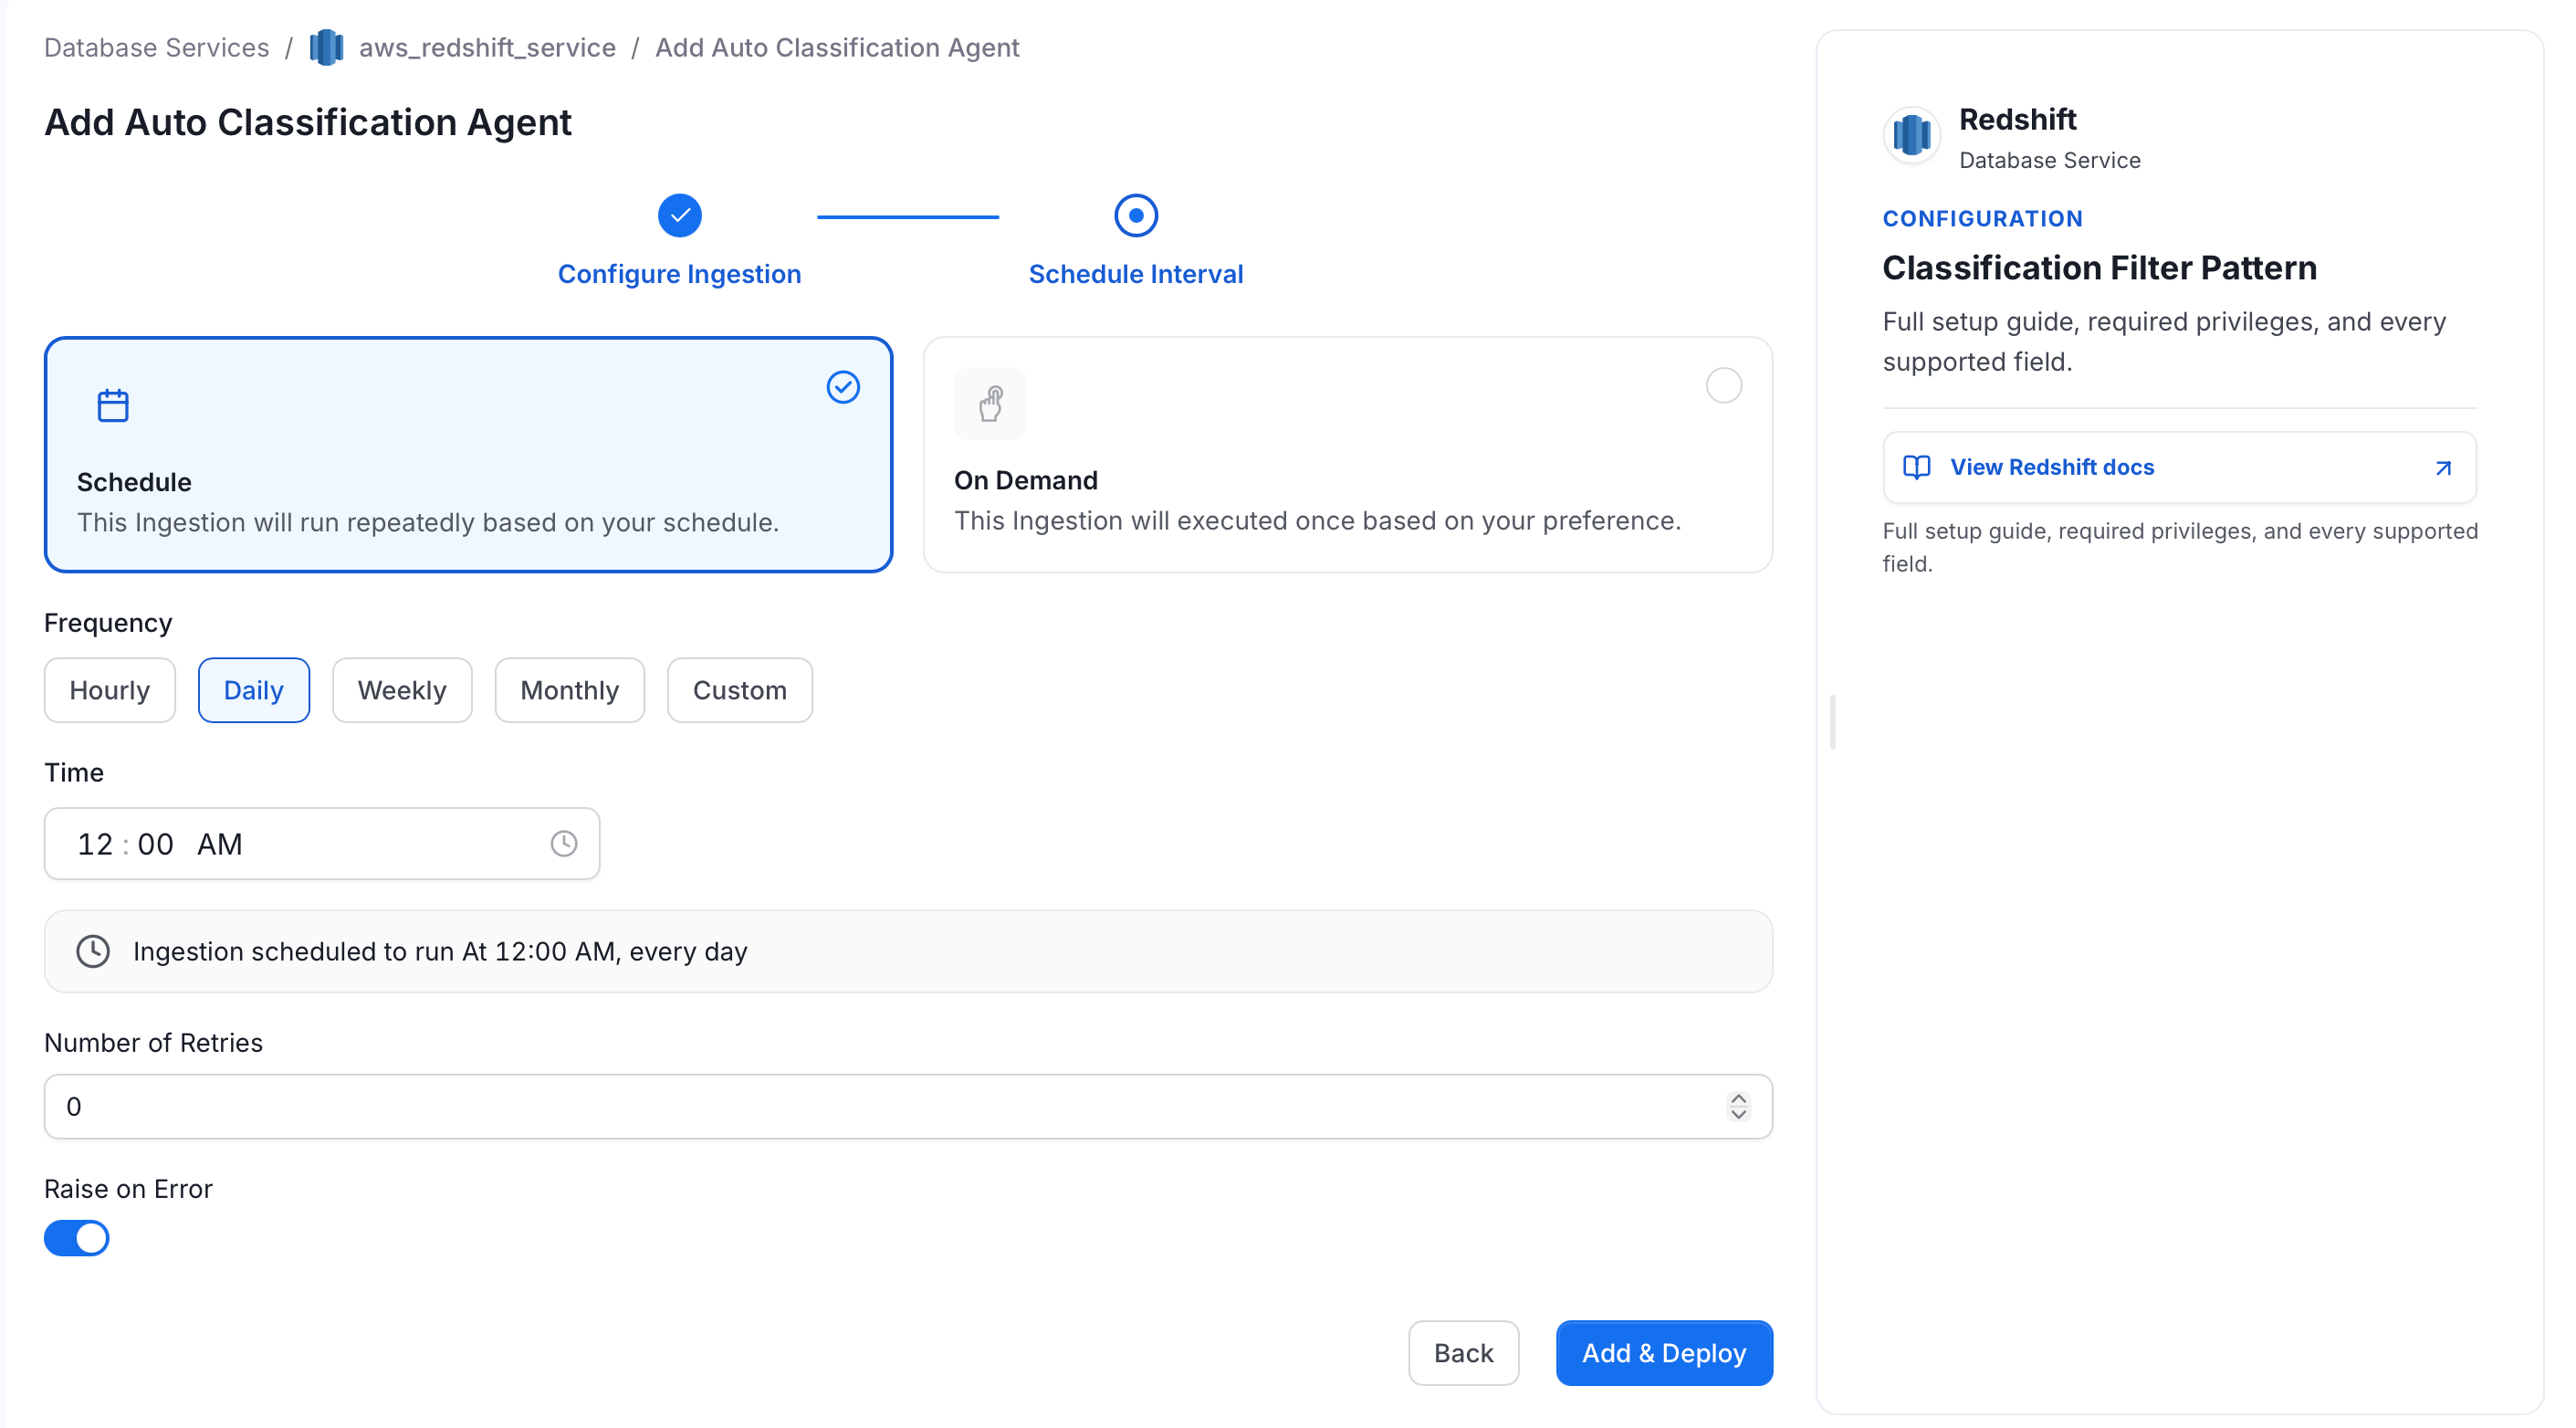
Step 5: View Auto Classification Agent
After deploying the auto classification agent, you can view it in the Agents tab.