How to Ingest Metadata
This guide covers how to integrate third-party sources with Collate and run ingestion workflows from the UI. Collate supports metadata ingestion from third-party sources through the CLI or the UI. Admin users can connect to multiple source types: Databases, Dashboards, Pipelines, ML Models, Messaging, Storage, and Metadata services. You can add a connector and schedule metadata fetches at your preferred frequency. The following steps let you fetch metadata from a Snowflake database service. The steps are the same for other supported database services.Step 1: Create a Service Connection
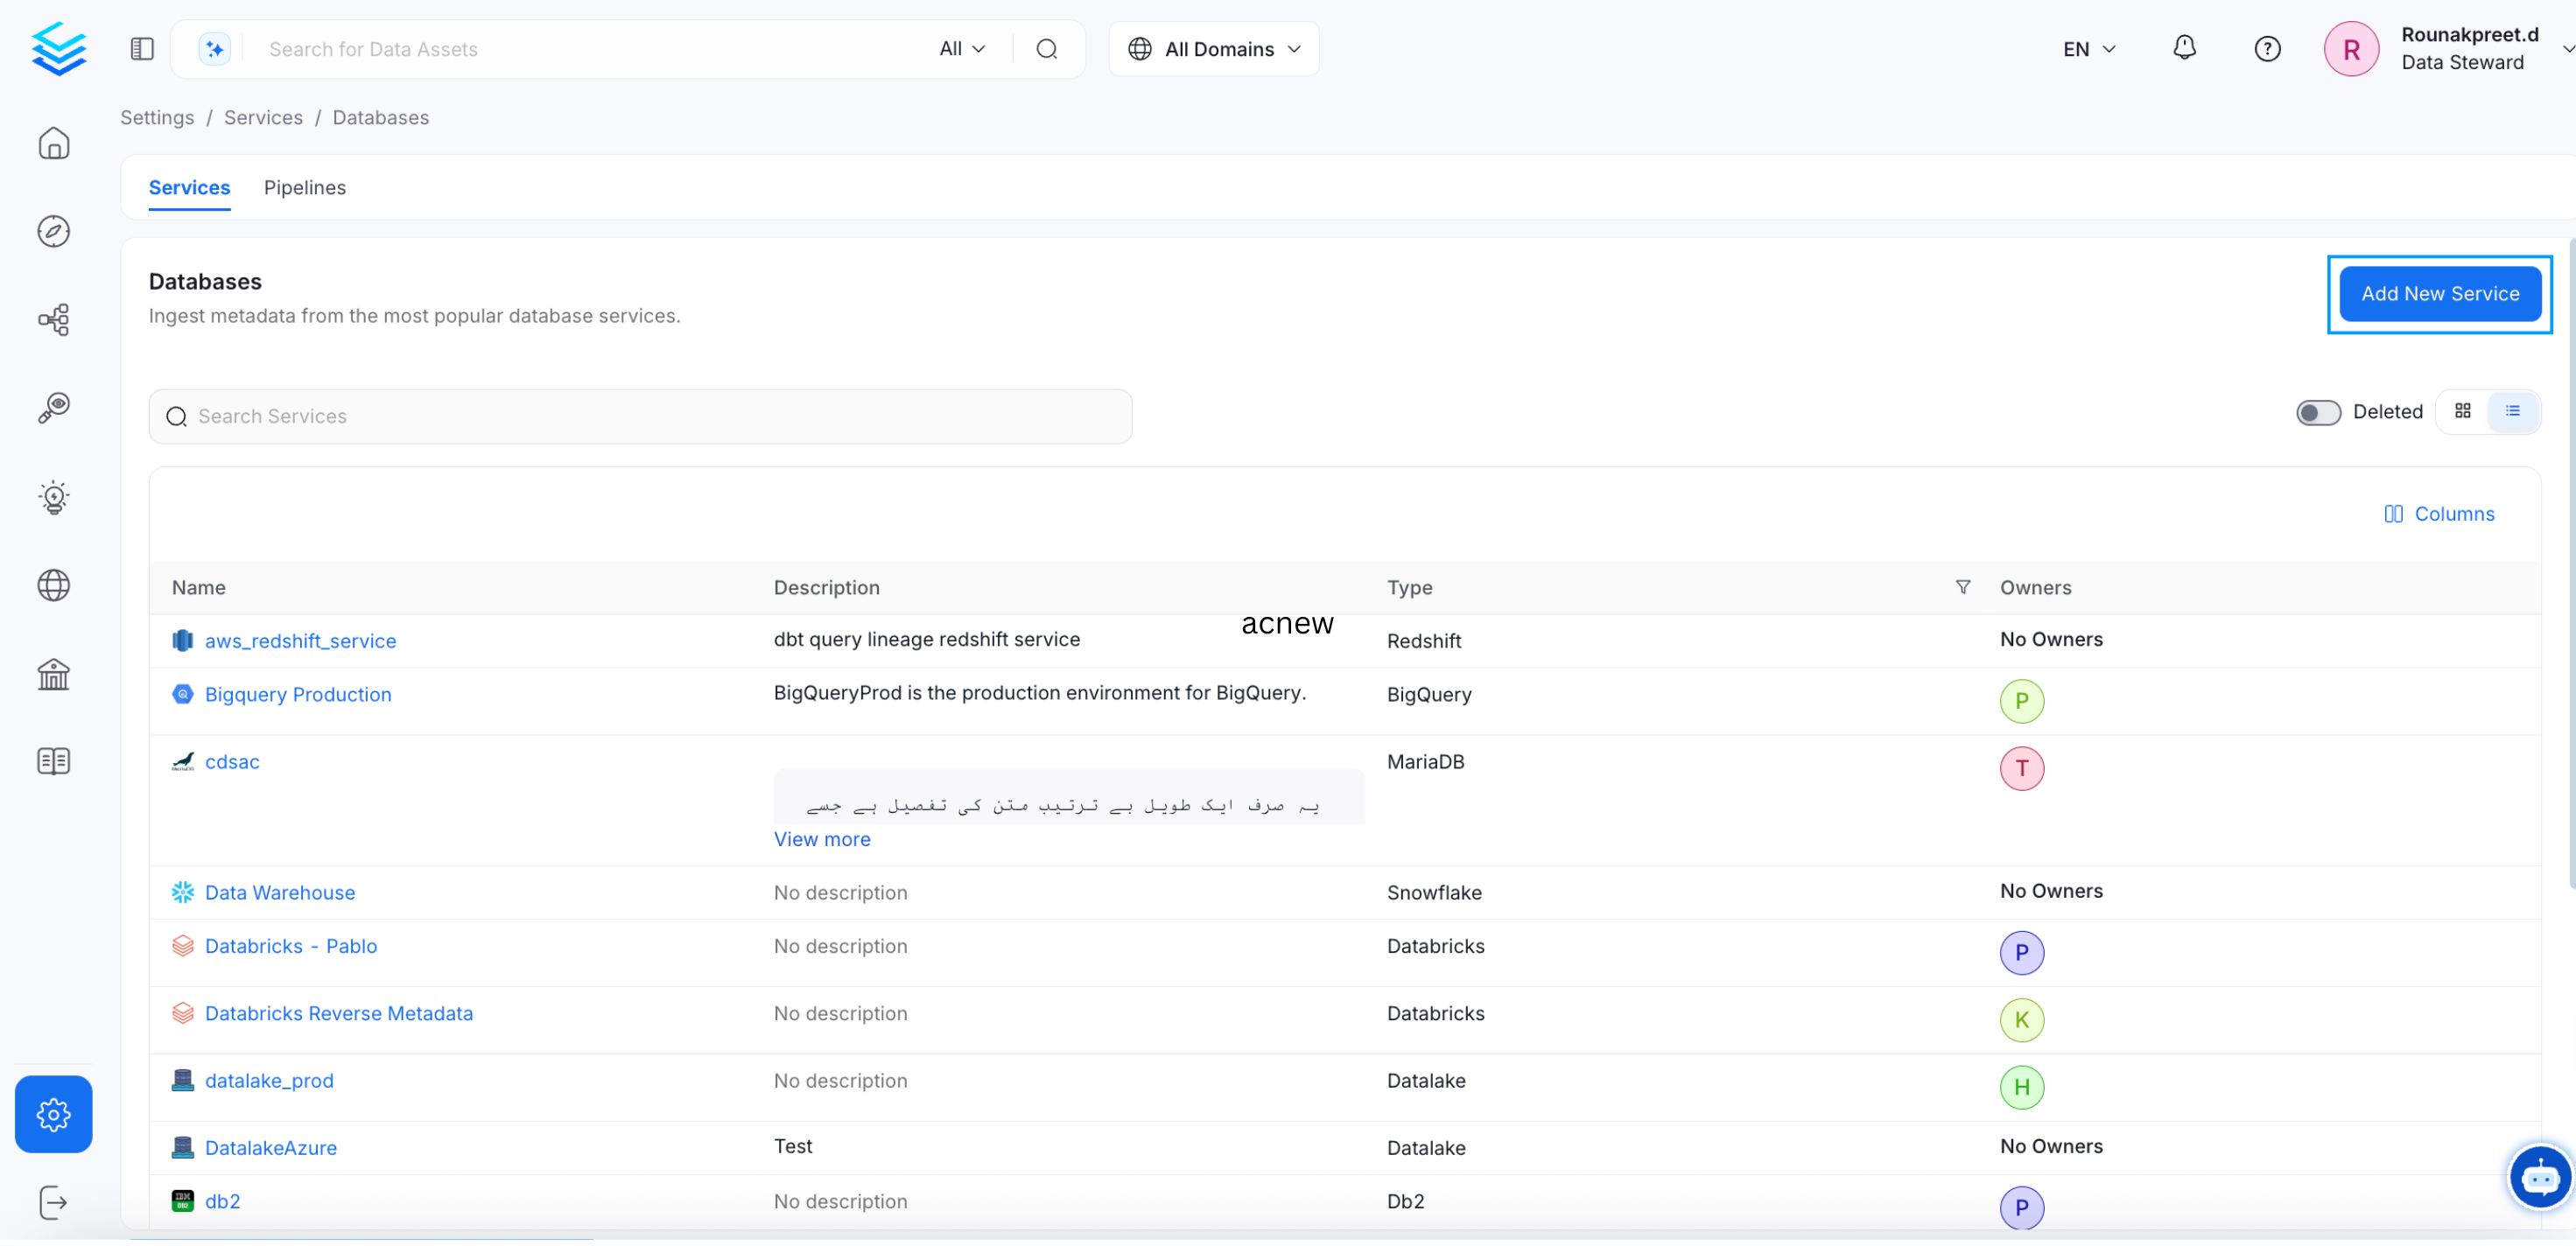
- Go to the Settings page and click Services.

- On the next page, select Databases and click Add New Service.

Step 2: Select a Database Connector
Select the Snowflake database service and click Next. You can select your desired database from the various database service options available.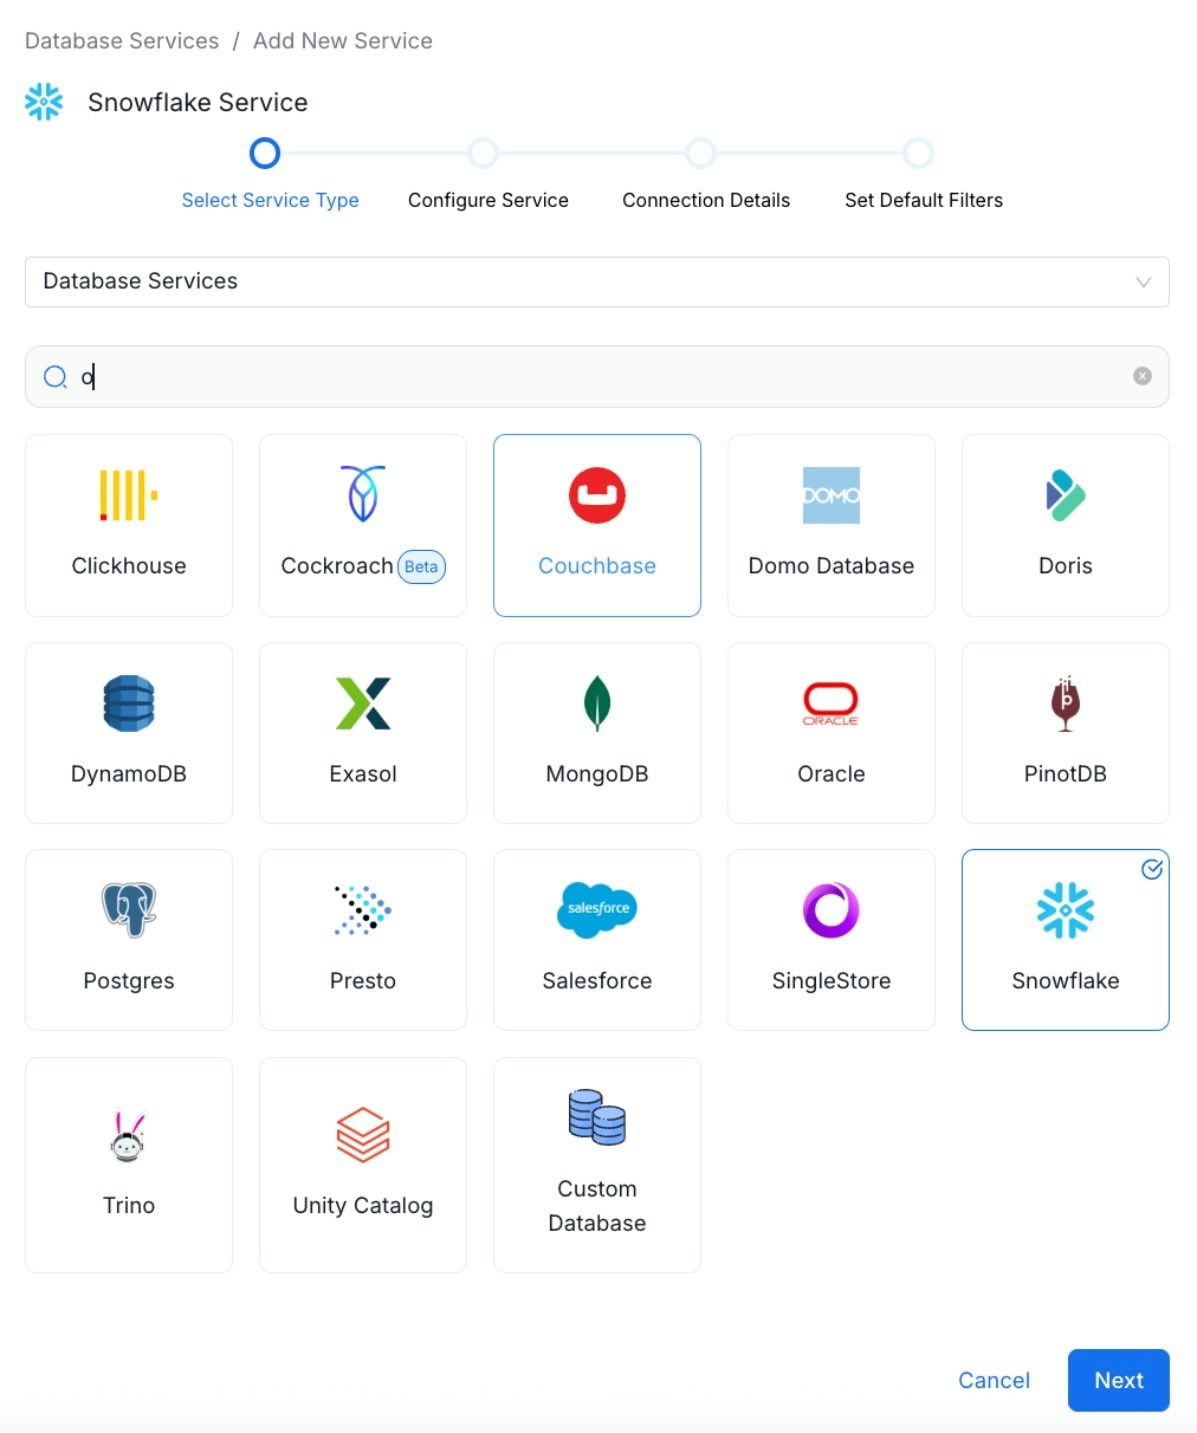
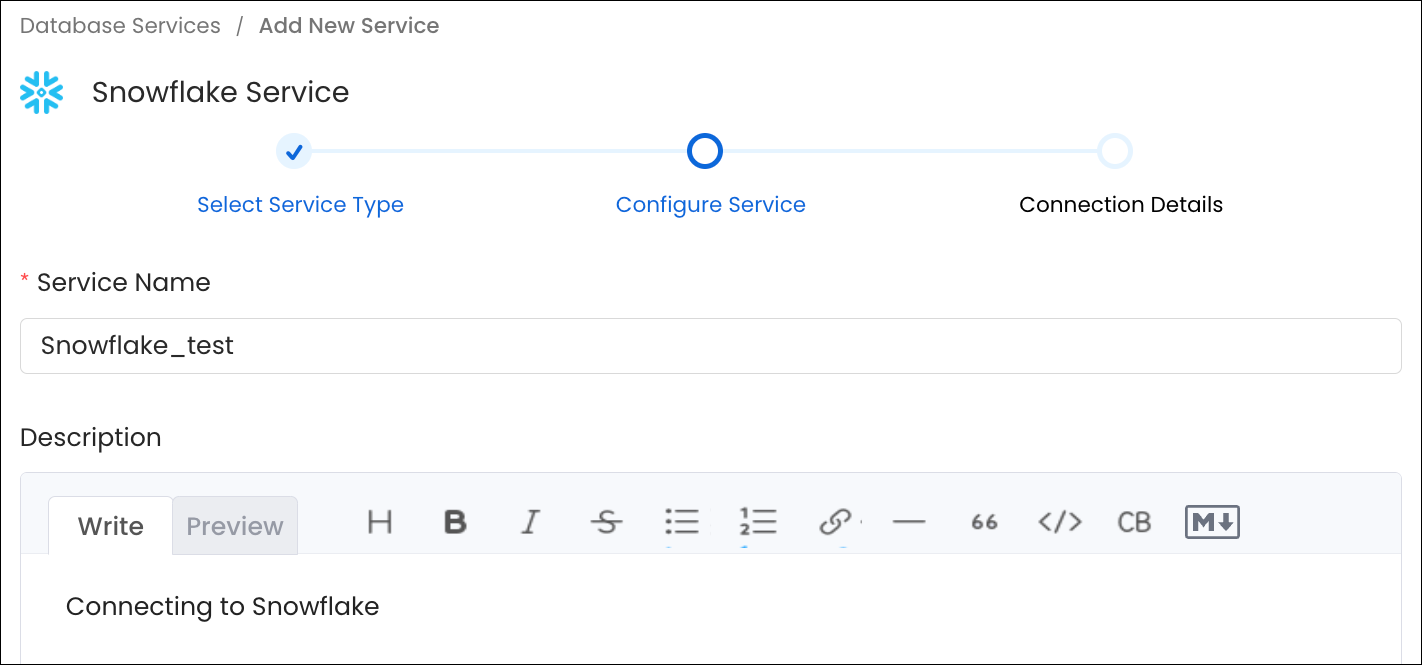
Step 3: Configure the Service
Enter a unique Service Name and Description, then click Next.- Service Name (required): No spaces allowed. Apart from letters and numbers, you can use _ - . & ( )
- Description (optional): Add a description to document the service and support data culture.
Step 4: Enter Connection Details
Enter the Connection Details for your service. The connector documentation is available in the right side panel within Collate. Required fields differ based on the service you selected. Enter your credentials to create the service and set up ingestion workflows.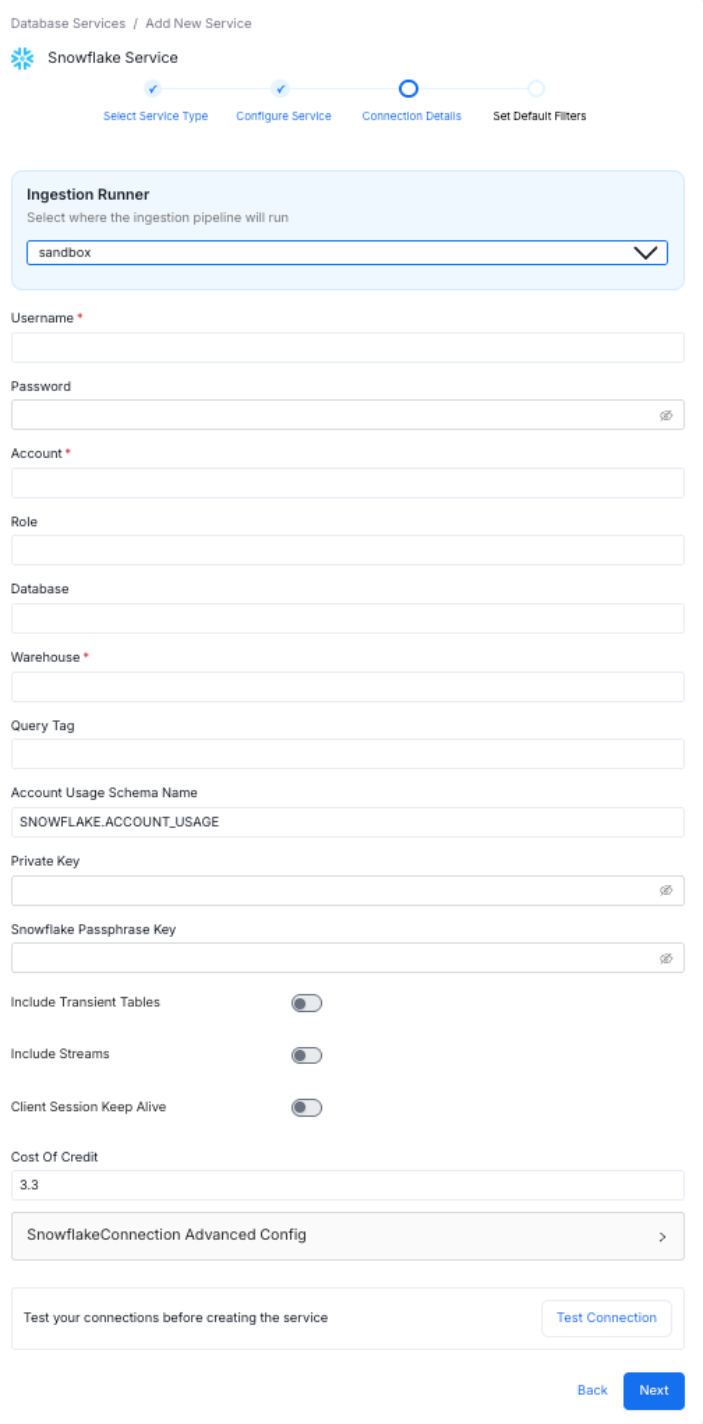
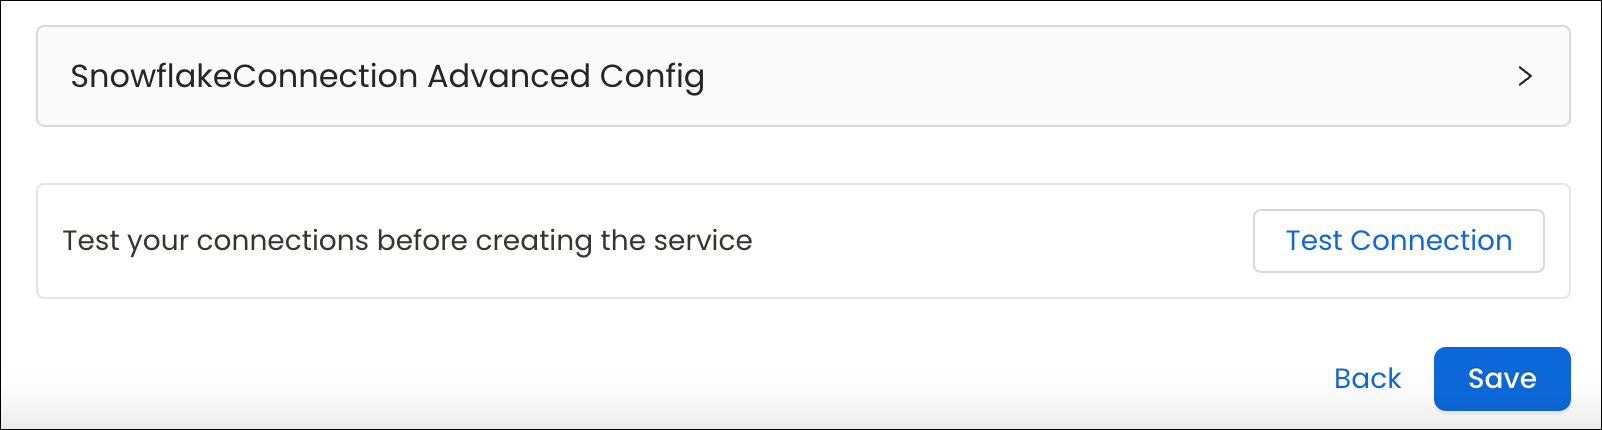
Step 5: Test the Connection
- Click Test Connection to verify access before saving.
- The test checks connectivity and confirms which data assets can be ingested using the provided credentials.
- The Connection Status panel shows access results for the service and its data assets.
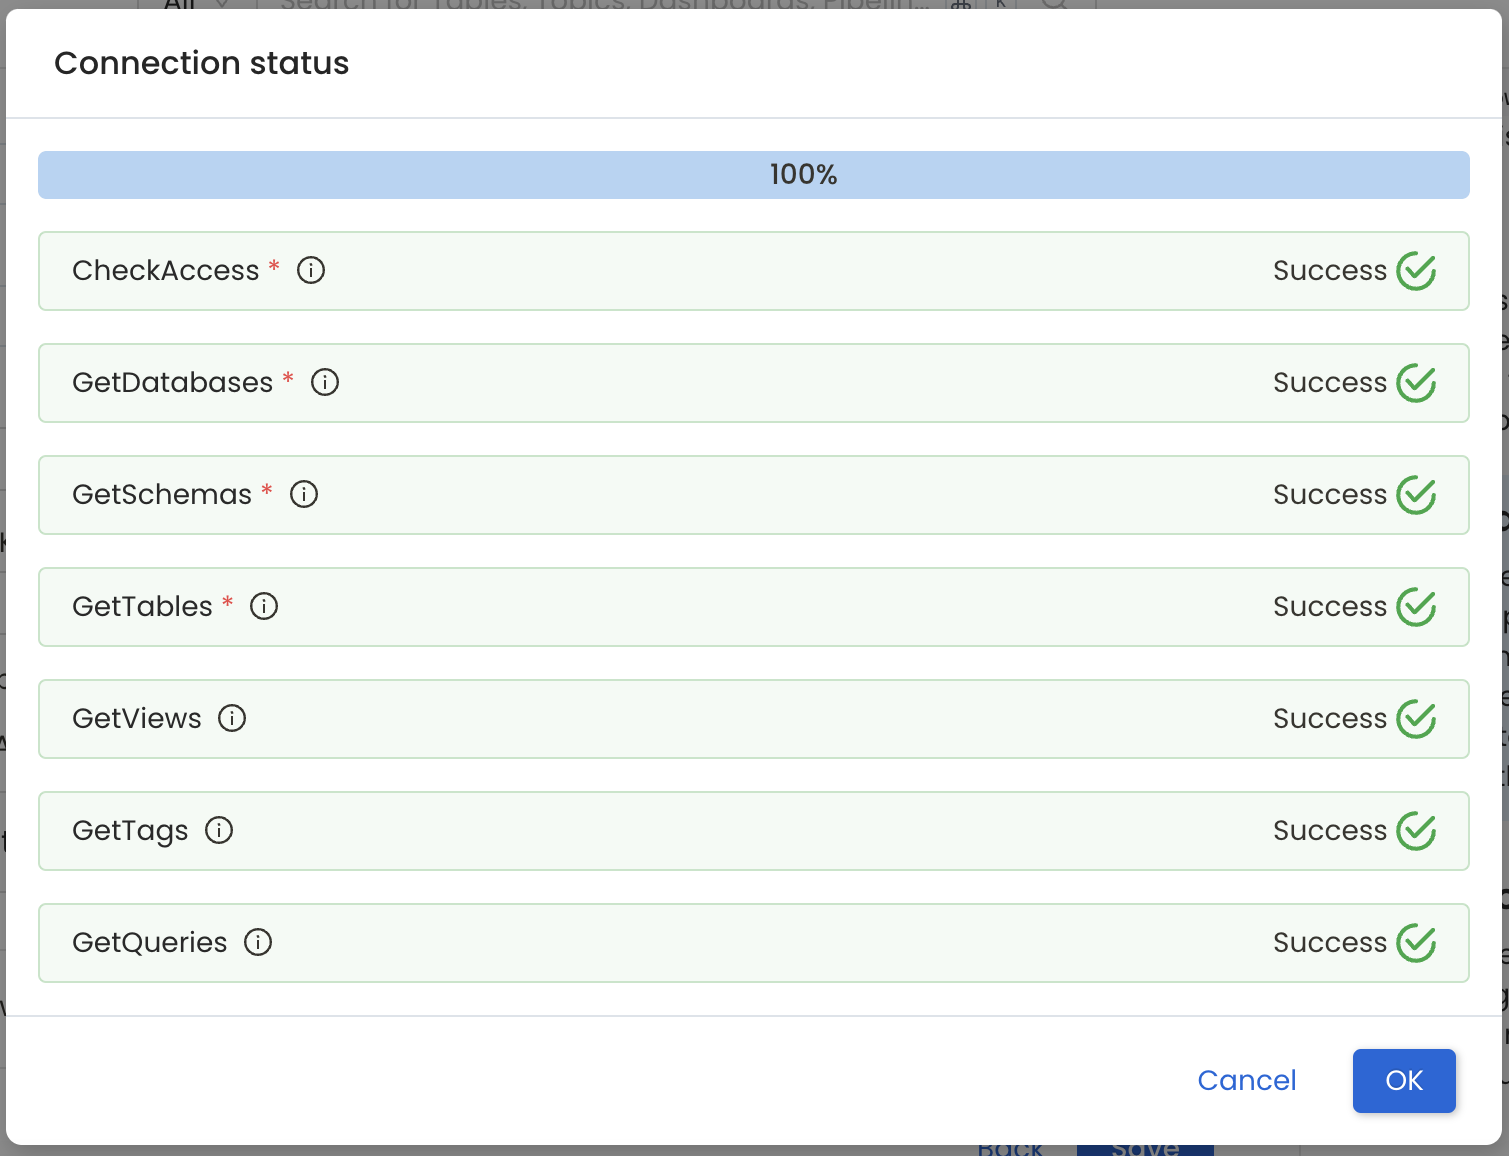
- The test checks connectivity and confirms which data assets can be ingested using the provided credentials.
- After the connection test passes, click Save.
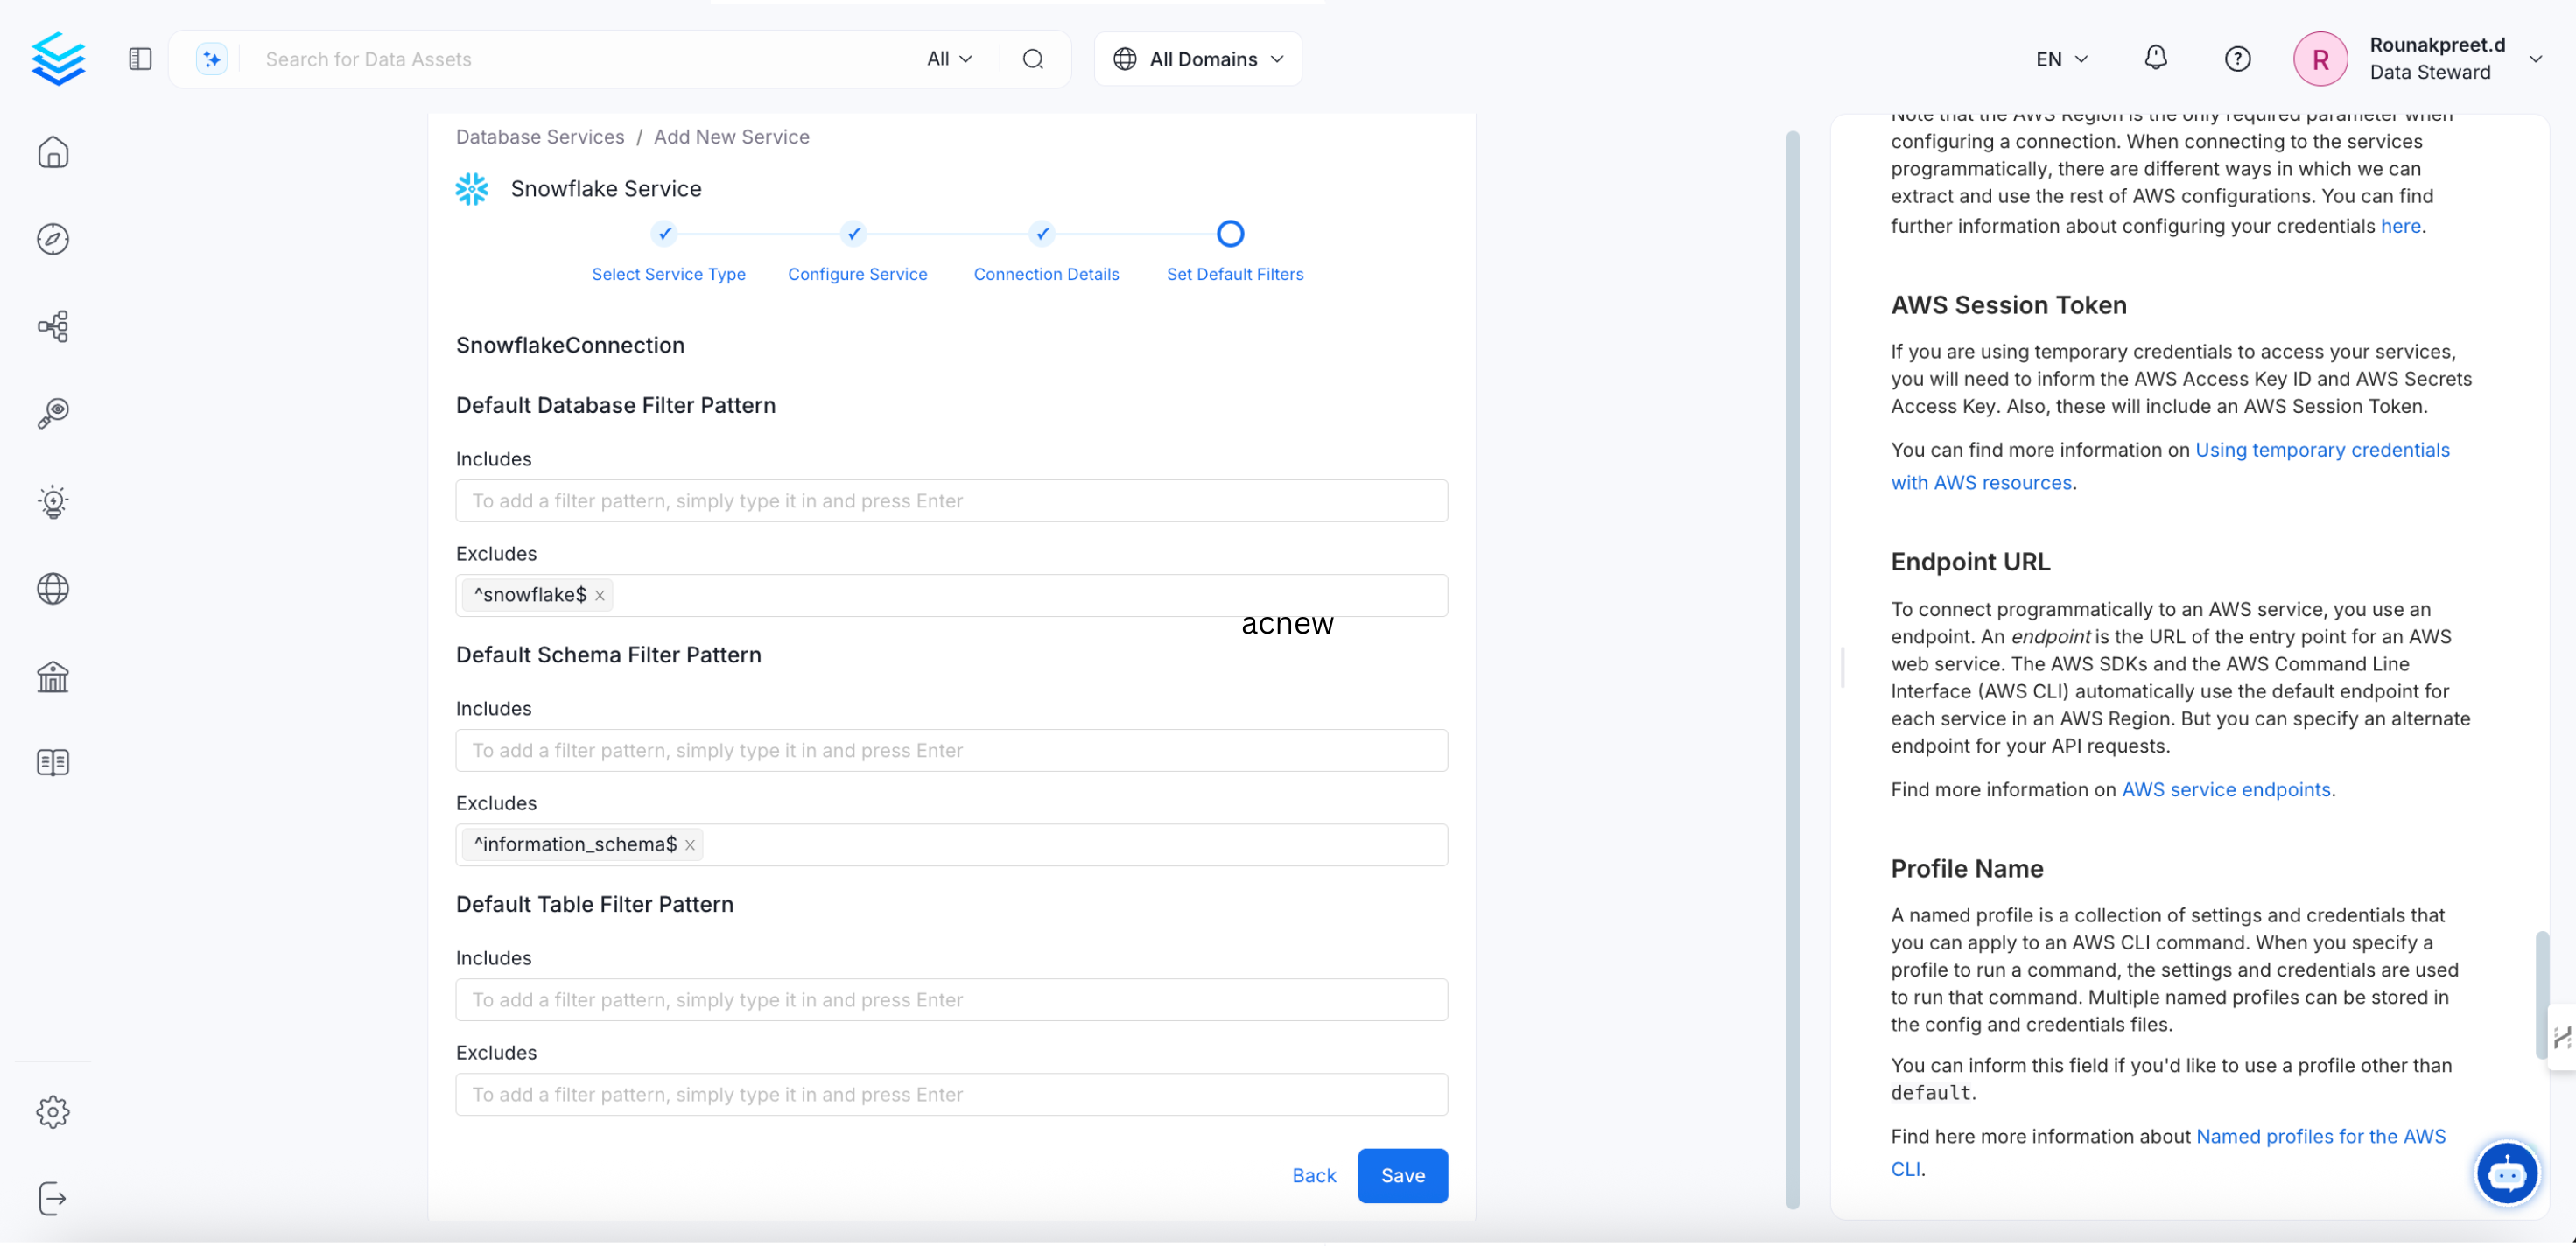
Step 6: Save the Service and Add an Agent
-
Add the default schema, database, and table filter patterns, and then click Save to create and configure the database service.
-
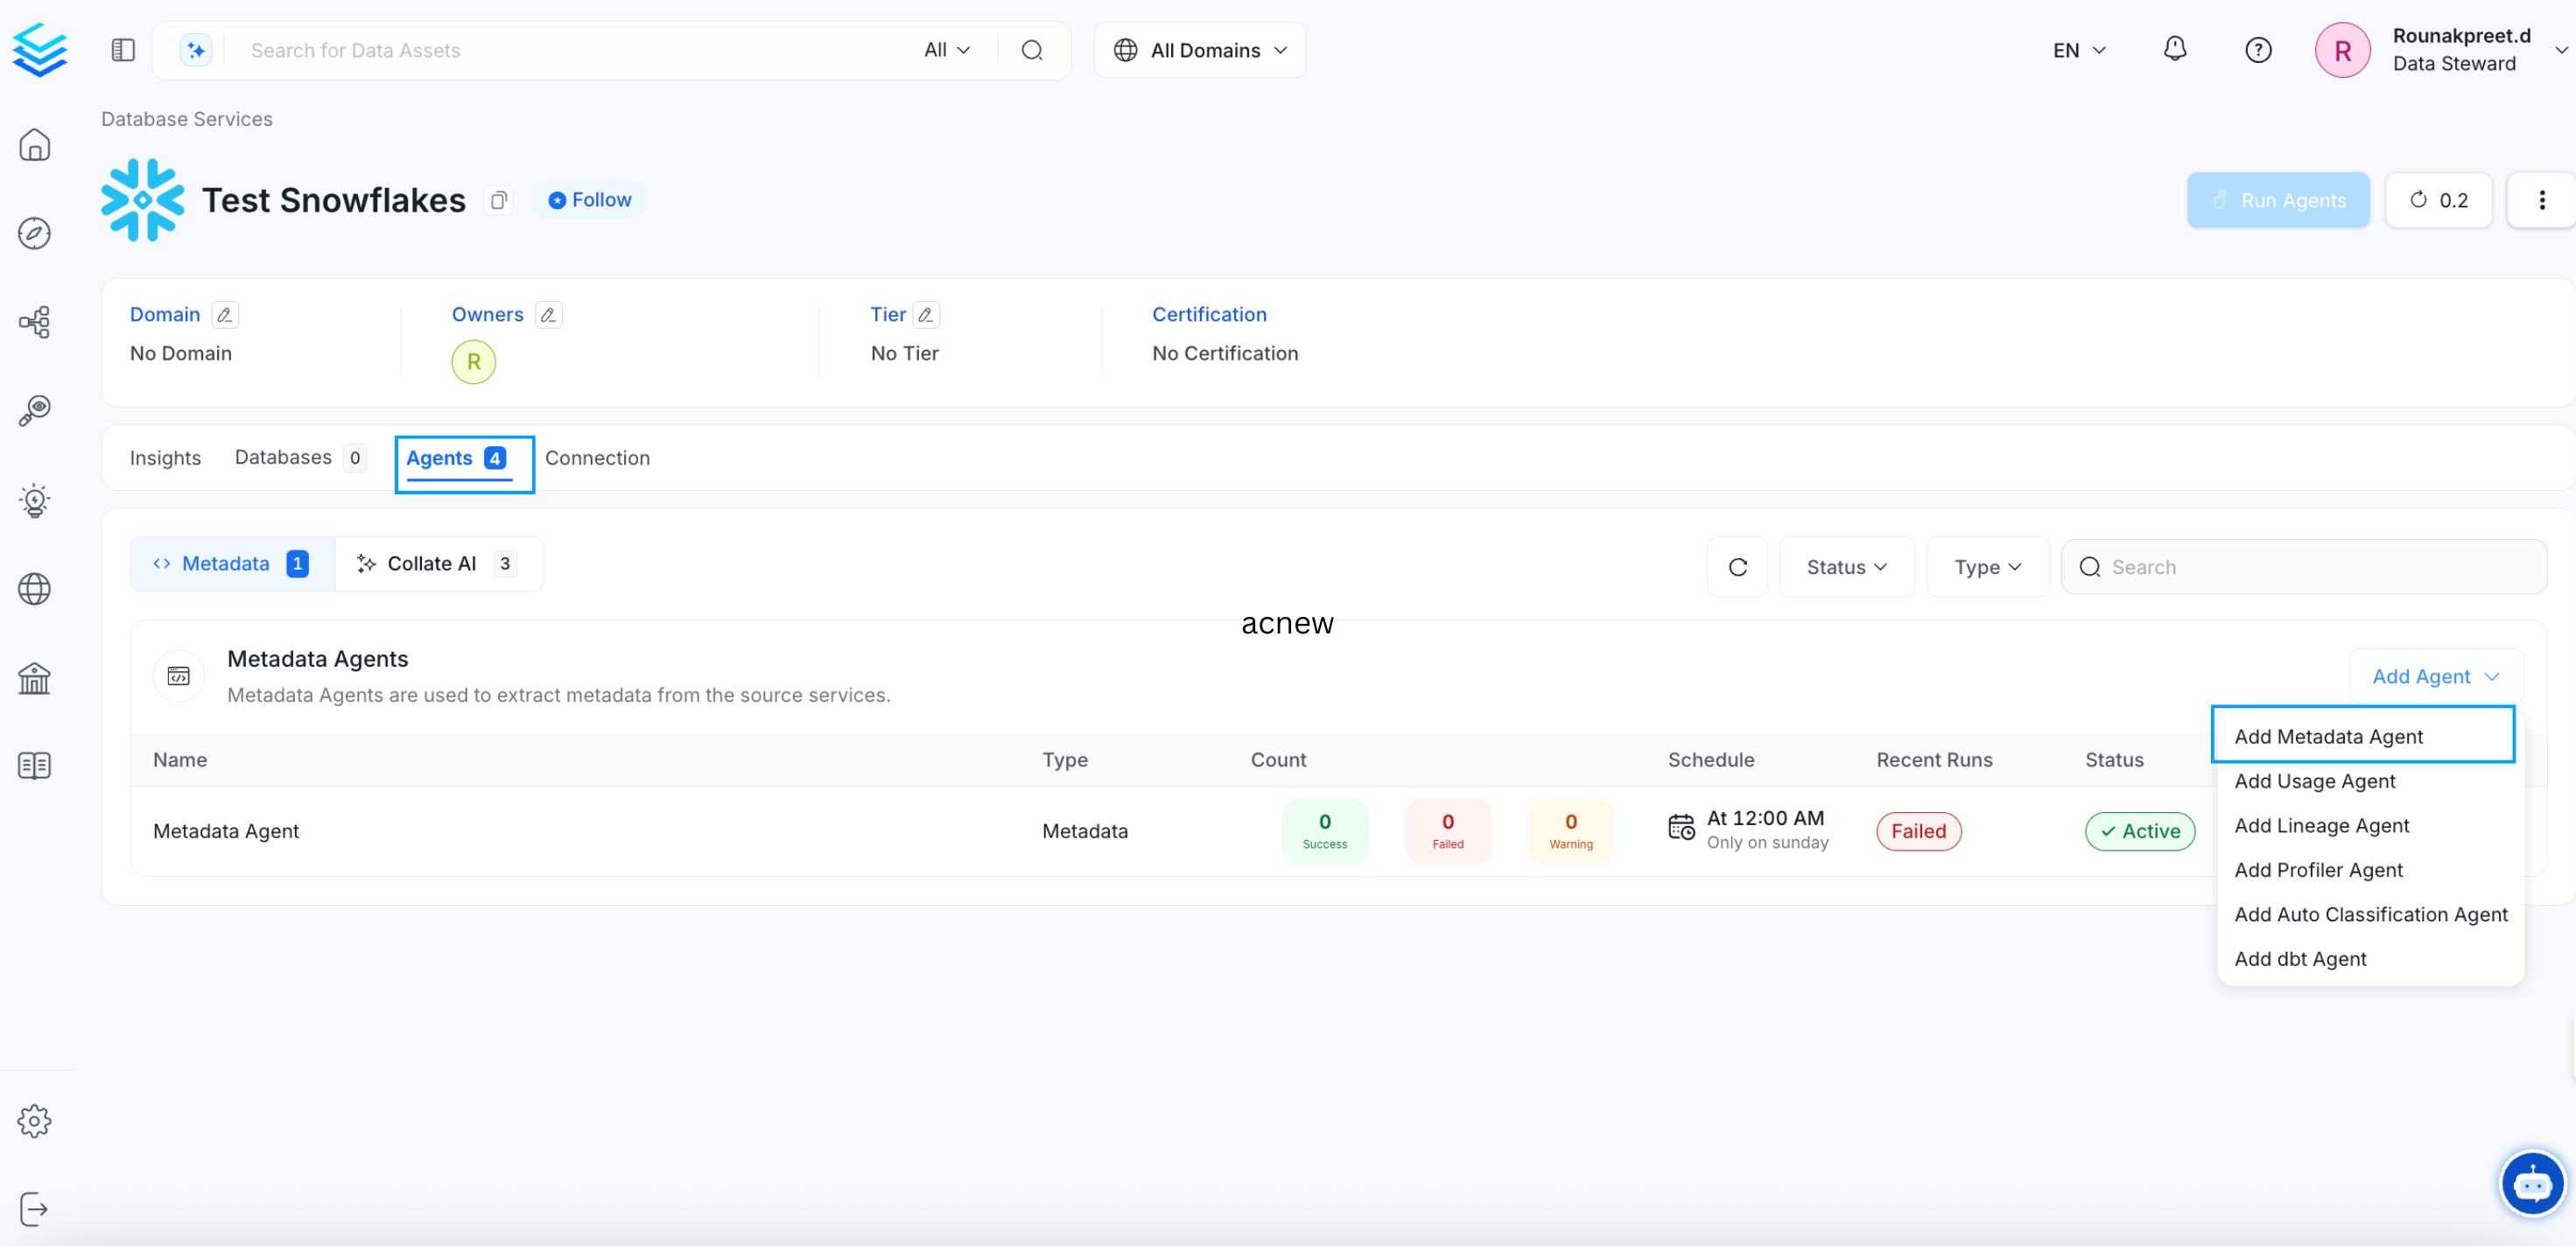
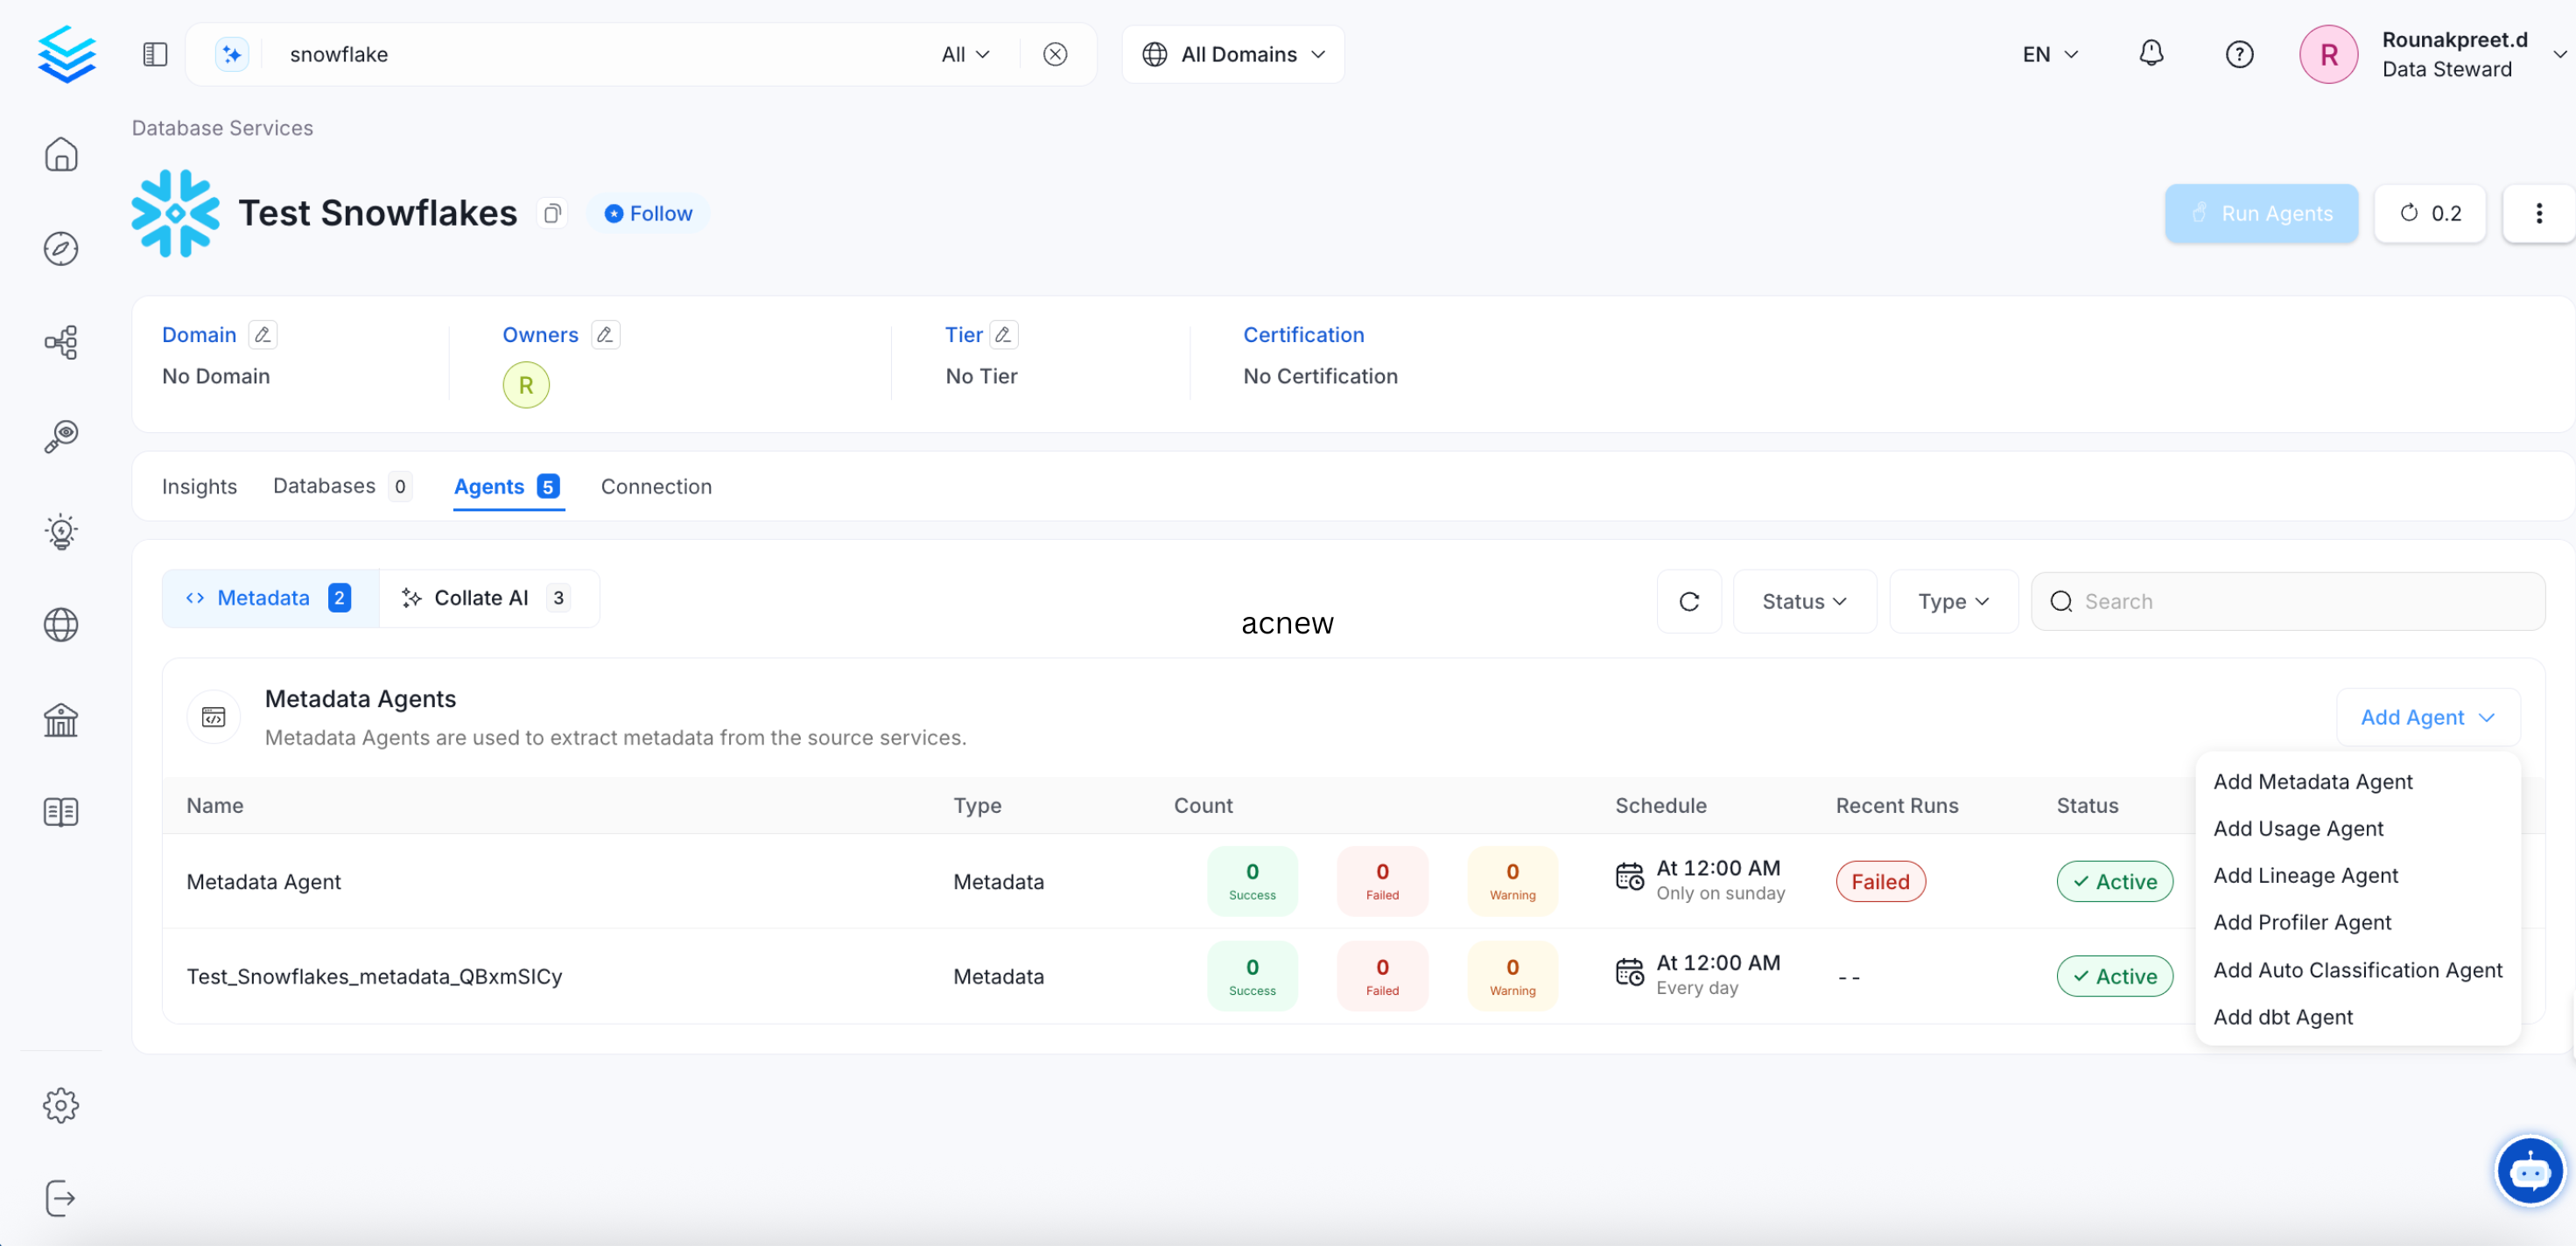
To start ingesting metadata, add a metadata agent using one of these two methods:
- Go to the Agents tab and click Add Metadata Agent.
- Click Add Agent directly from the service page.
Step 7: Configure the Metadata Agent
Click Add Agent and enter the following details:- Name: Pre-populated with the service name and a randomly generated suffix to ensure uniqueness.
- Database Filter Pattern: Include or exclude specific databases. A database service can contain multiple databases — use this filter to ingest only the ones you need.
- Schema Filter Pattern: Include or exclude specific schemas within a database.
- Table Filter Pattern: Include or exclude specific tables within a schema. Use the toggle options to configure the following:
- Use FQN For Filtering
- Include Views — generates lineage
- Include Tags
- Enable Debug Log — recommended for troubleshooting
- Mark Deleted Tables
- View Definition Parsing Timeout Limit: Defaults to
300.

Step 8: Schedule the Metadata Agent
Define when the metadata agent pipeline runs. Select a preset schedule or enter a Custom Cron expression.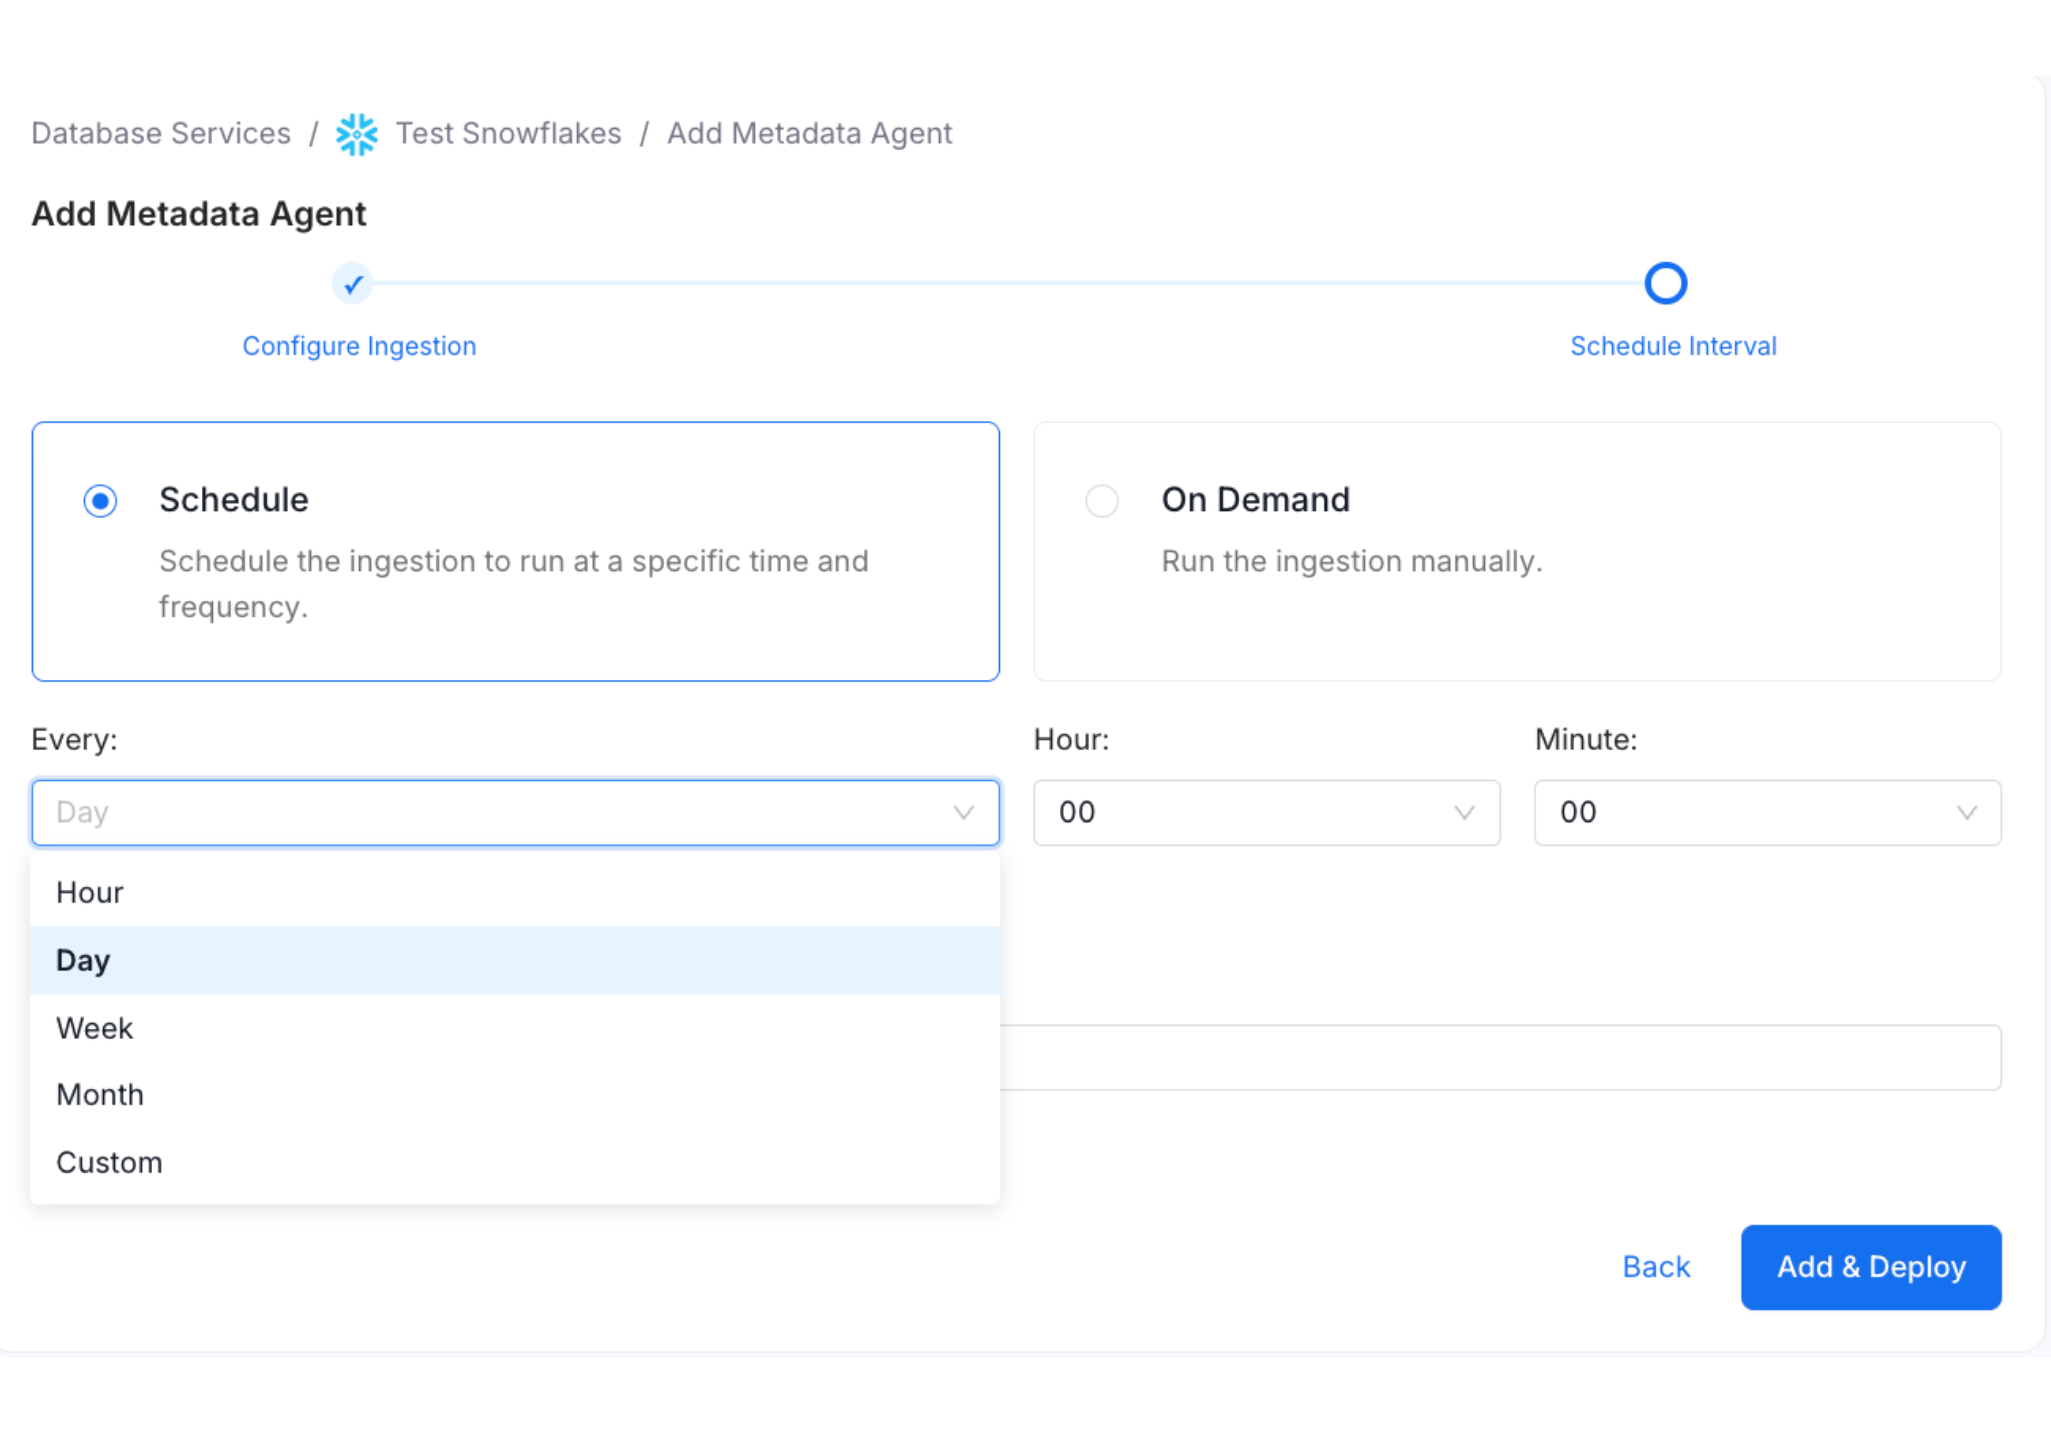
Viewing Agent Run Status
After the pipeline deploys successfully, click View Service. The Agents tab shows the status and run history for each agent — including whether a pipeline is queued, running, failed, or successful. Hover over an agent to see its scheduling frequency and the start and end times for recent runs. From the Agents tab, you can perform the following actions:- Run: Trigger the pipeline immediately.
- Kill: Stop all currently running instances of the pipeline.
- Redeploy: Re-fetch data using updated credentials. Use this if the source connection credentials change after the initial setup — redeploying applies the new access permissions and ingests any additionally accessible data.

Browsing Ingested Data
After ingestion, the Databases tab on the service page lists all ingested databases. From there, drill down to view Schemas and Tables.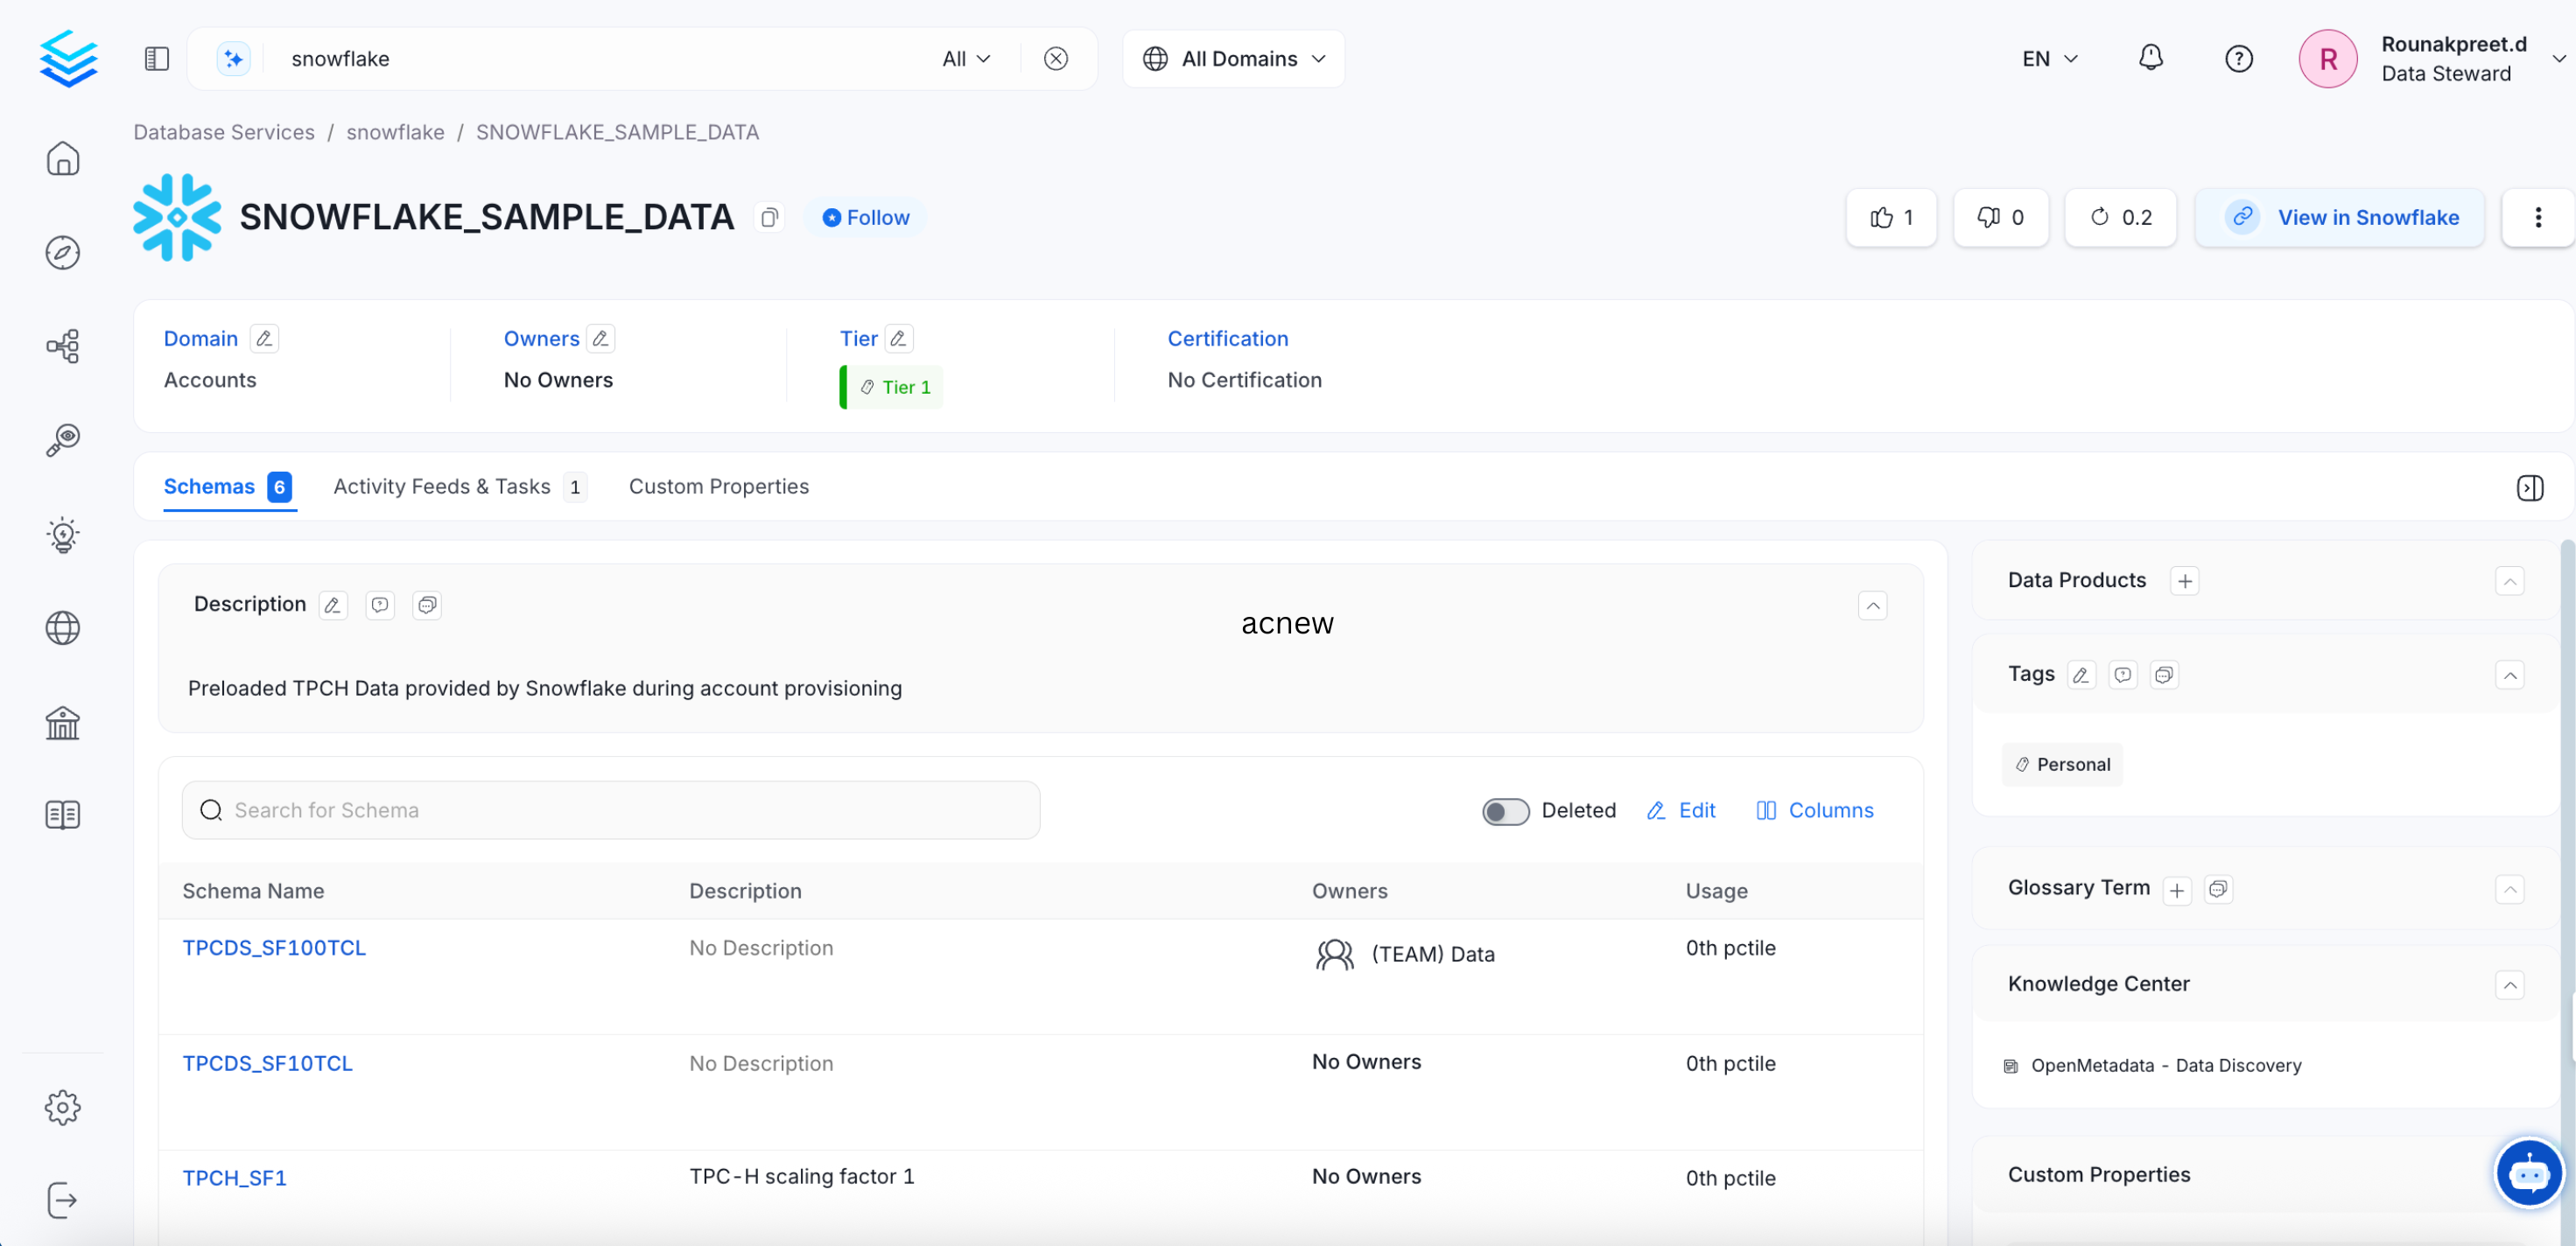
Managing Services
Admin users can create, edit, or delete services, and view connection details for existing services.Delete a Service Connection
Permanently delete a service connection.