Collate SaaS is the simplest way to connect a data source. Collate connects directly to your data source from its cloud — no local agent or additional infrastructure required.
When to use this: Use Collate SaaS when your data source is accessible from the internet or you’re able to allowlist an IP address in your data source’s firewall settings.
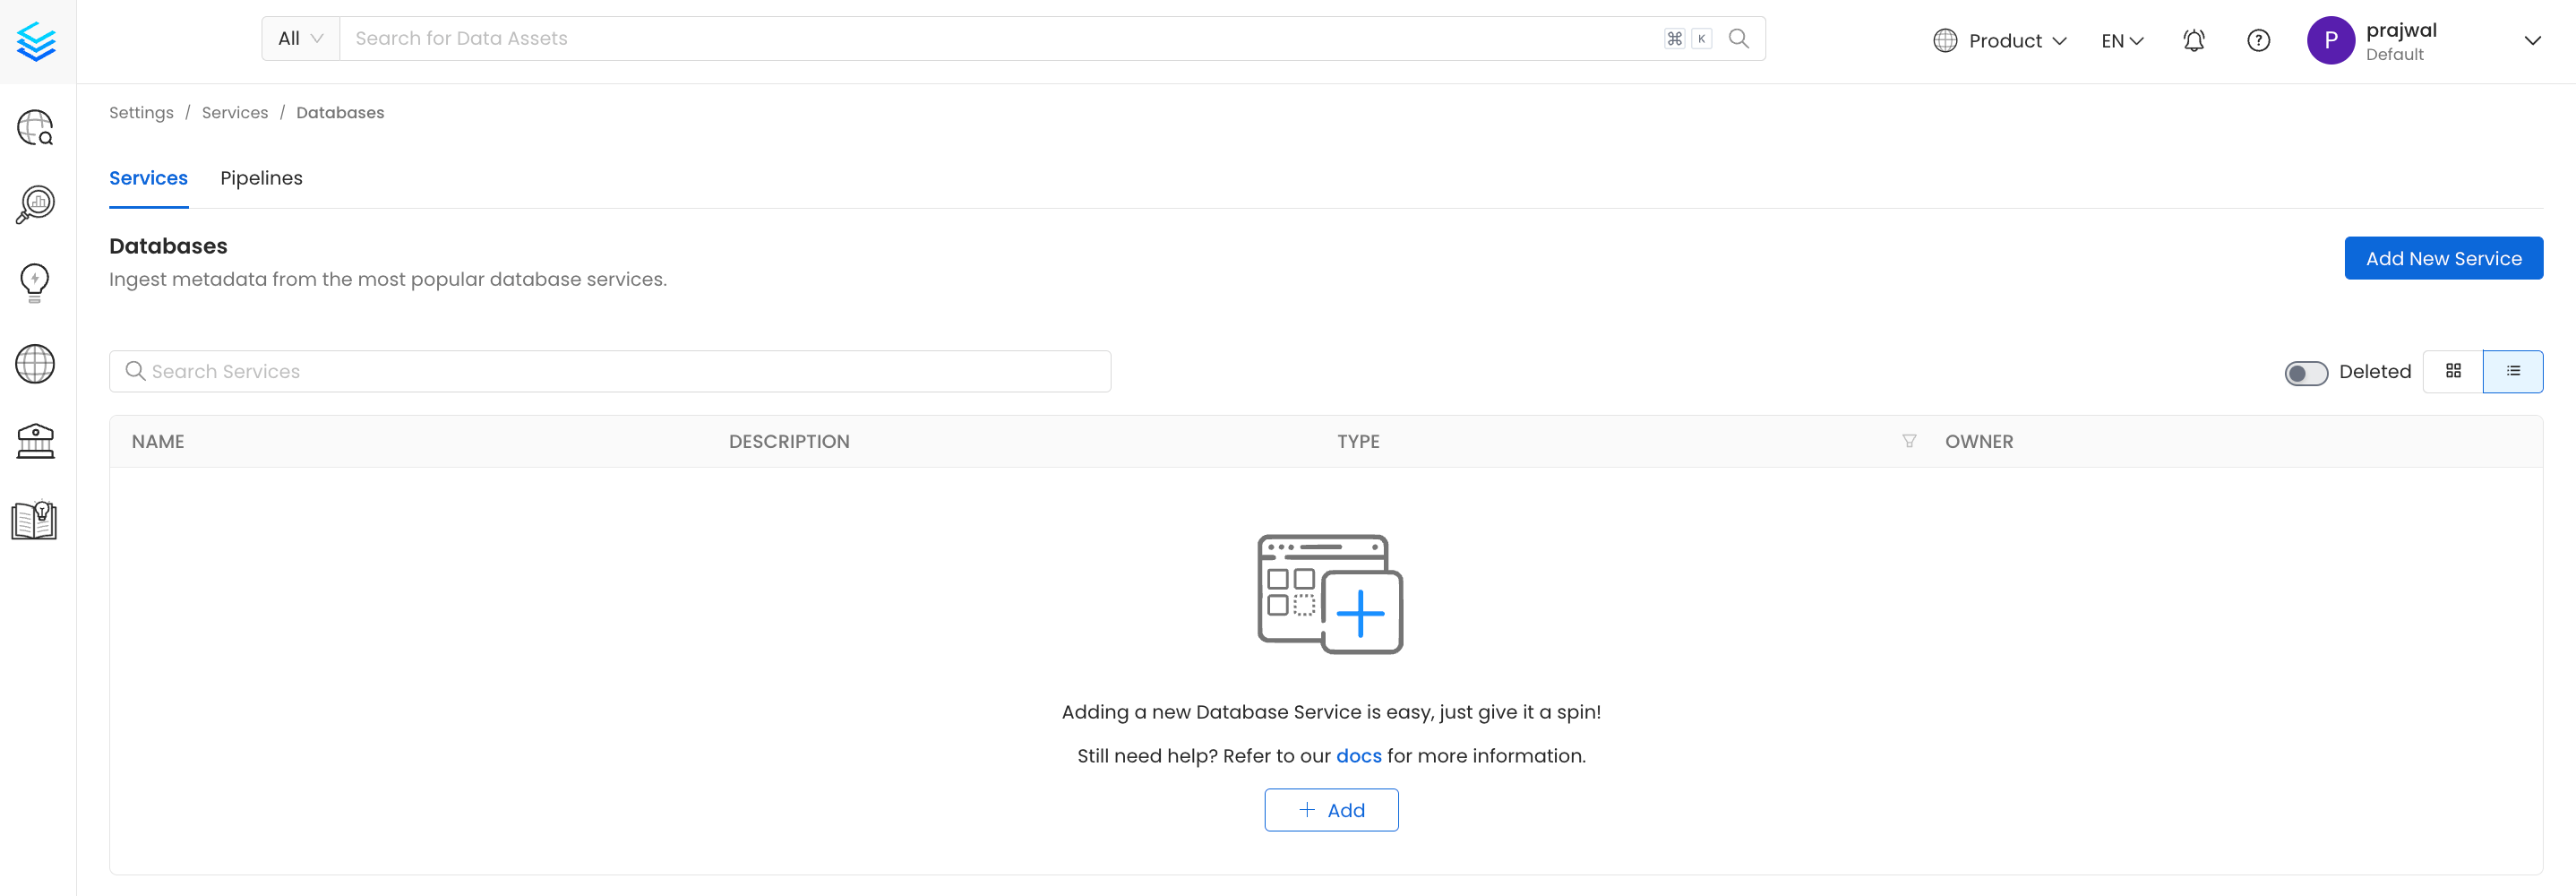
Sign in to your Collate instance, then navigate to Settings > Services and select the service type. For example, select Databases.
On the service page, click Add New Service.
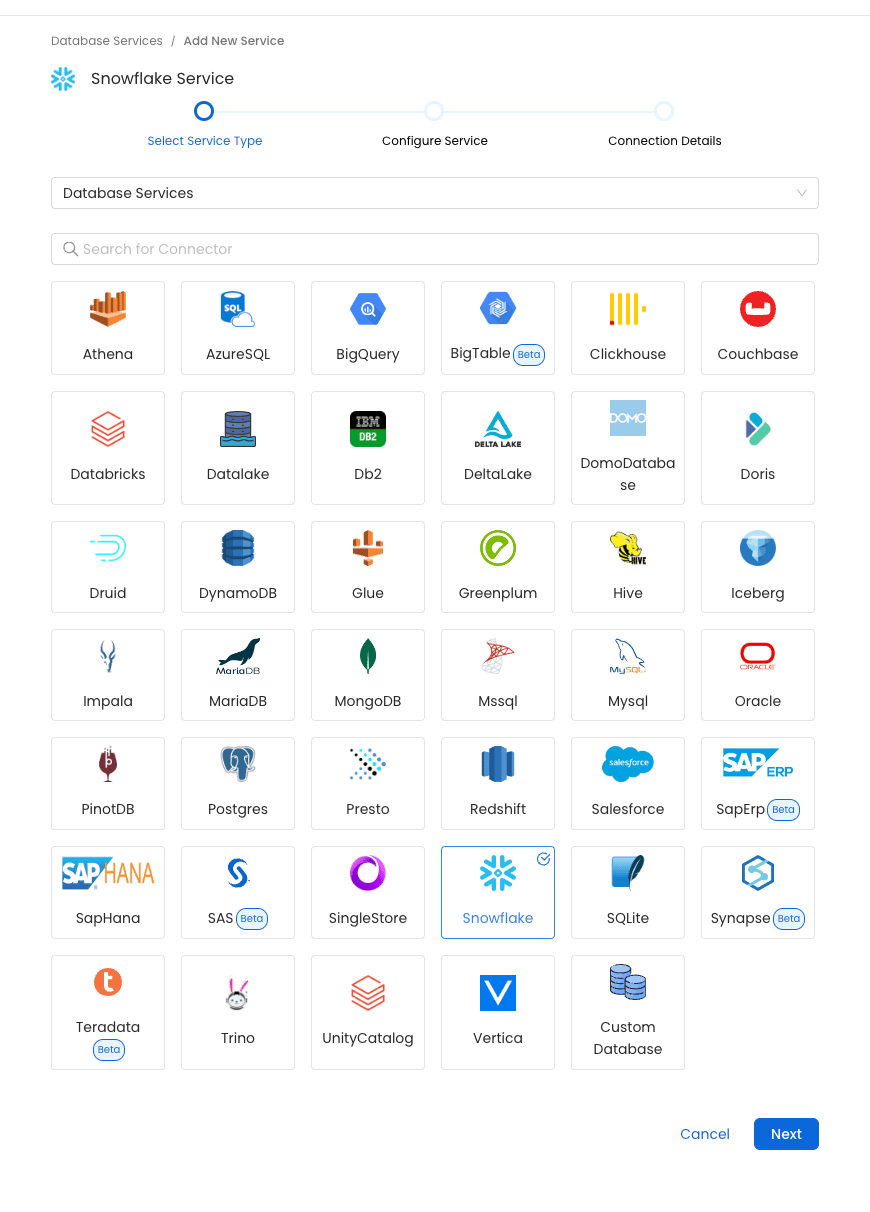
Select the service connector and click Next. For example, the below image displays the Snowflake connector is selected for Databases service.
Enter unique Service Name and Description (optional), then click Next.
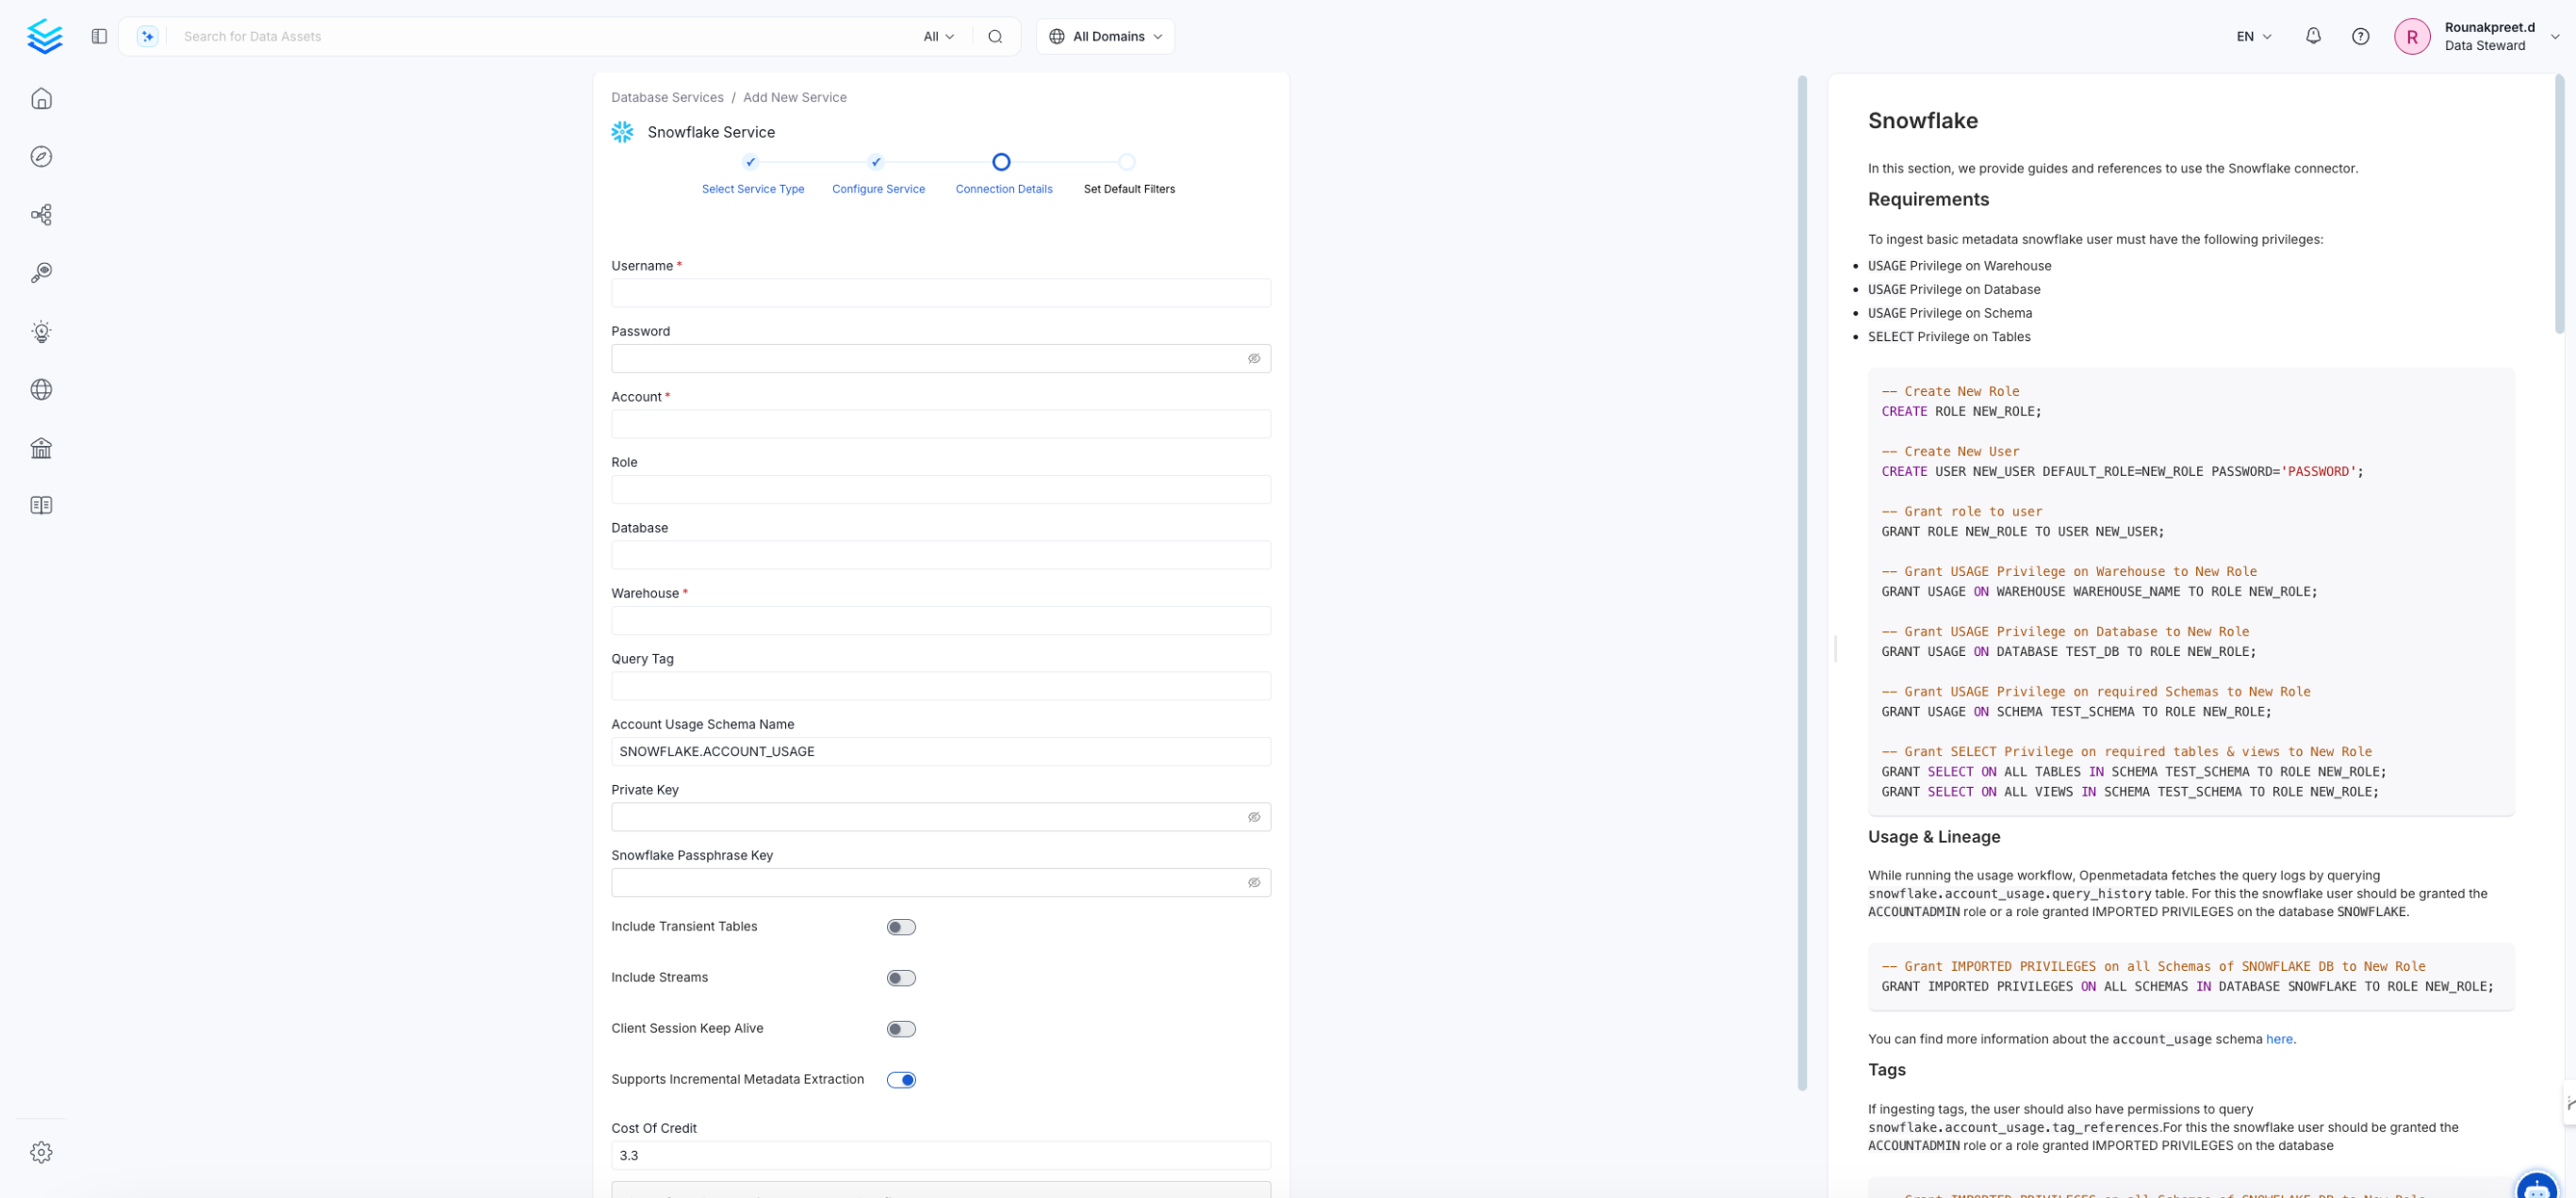
Enter the Connection Details. Refer to the side panel documentation for field-by-field guidance.For more information about configuring each connector, see Connector.
In the Connection Details, you will see the IP Address unique to your cluster. Add this IP to your data source’s allowlist so Collate can access your data source.
This step applies to Collate SaaS only. If you’re using the Hybrid Runner, no IP allowlist is needed — the runner connects from inside your own infrastructure.
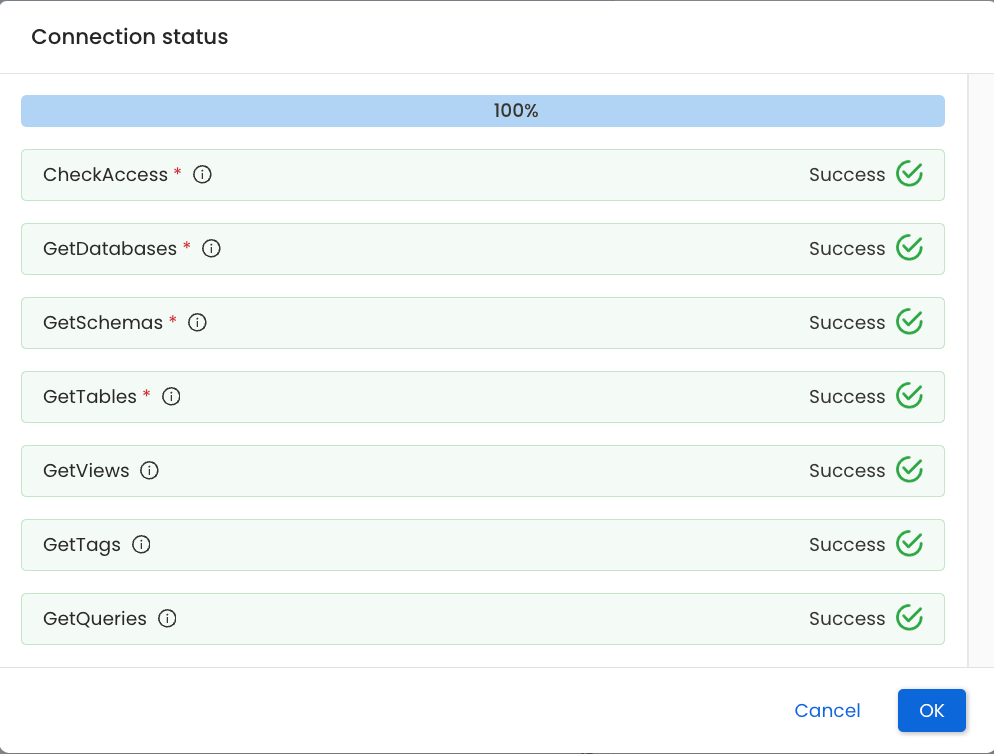
To verify that Collate can reach the data source, click Test Connection. The test confirms the service is reachable and the credentials are valid.