
Managing Incidents
Use this guide to manage incidents from the dashboard through to resolution.Incident Dashboard
The Incident Dashboard gives a real-time overview of incident health. It lists open incidents in groups to help you triage many failures at once, and it lists the individual incidents behind each group.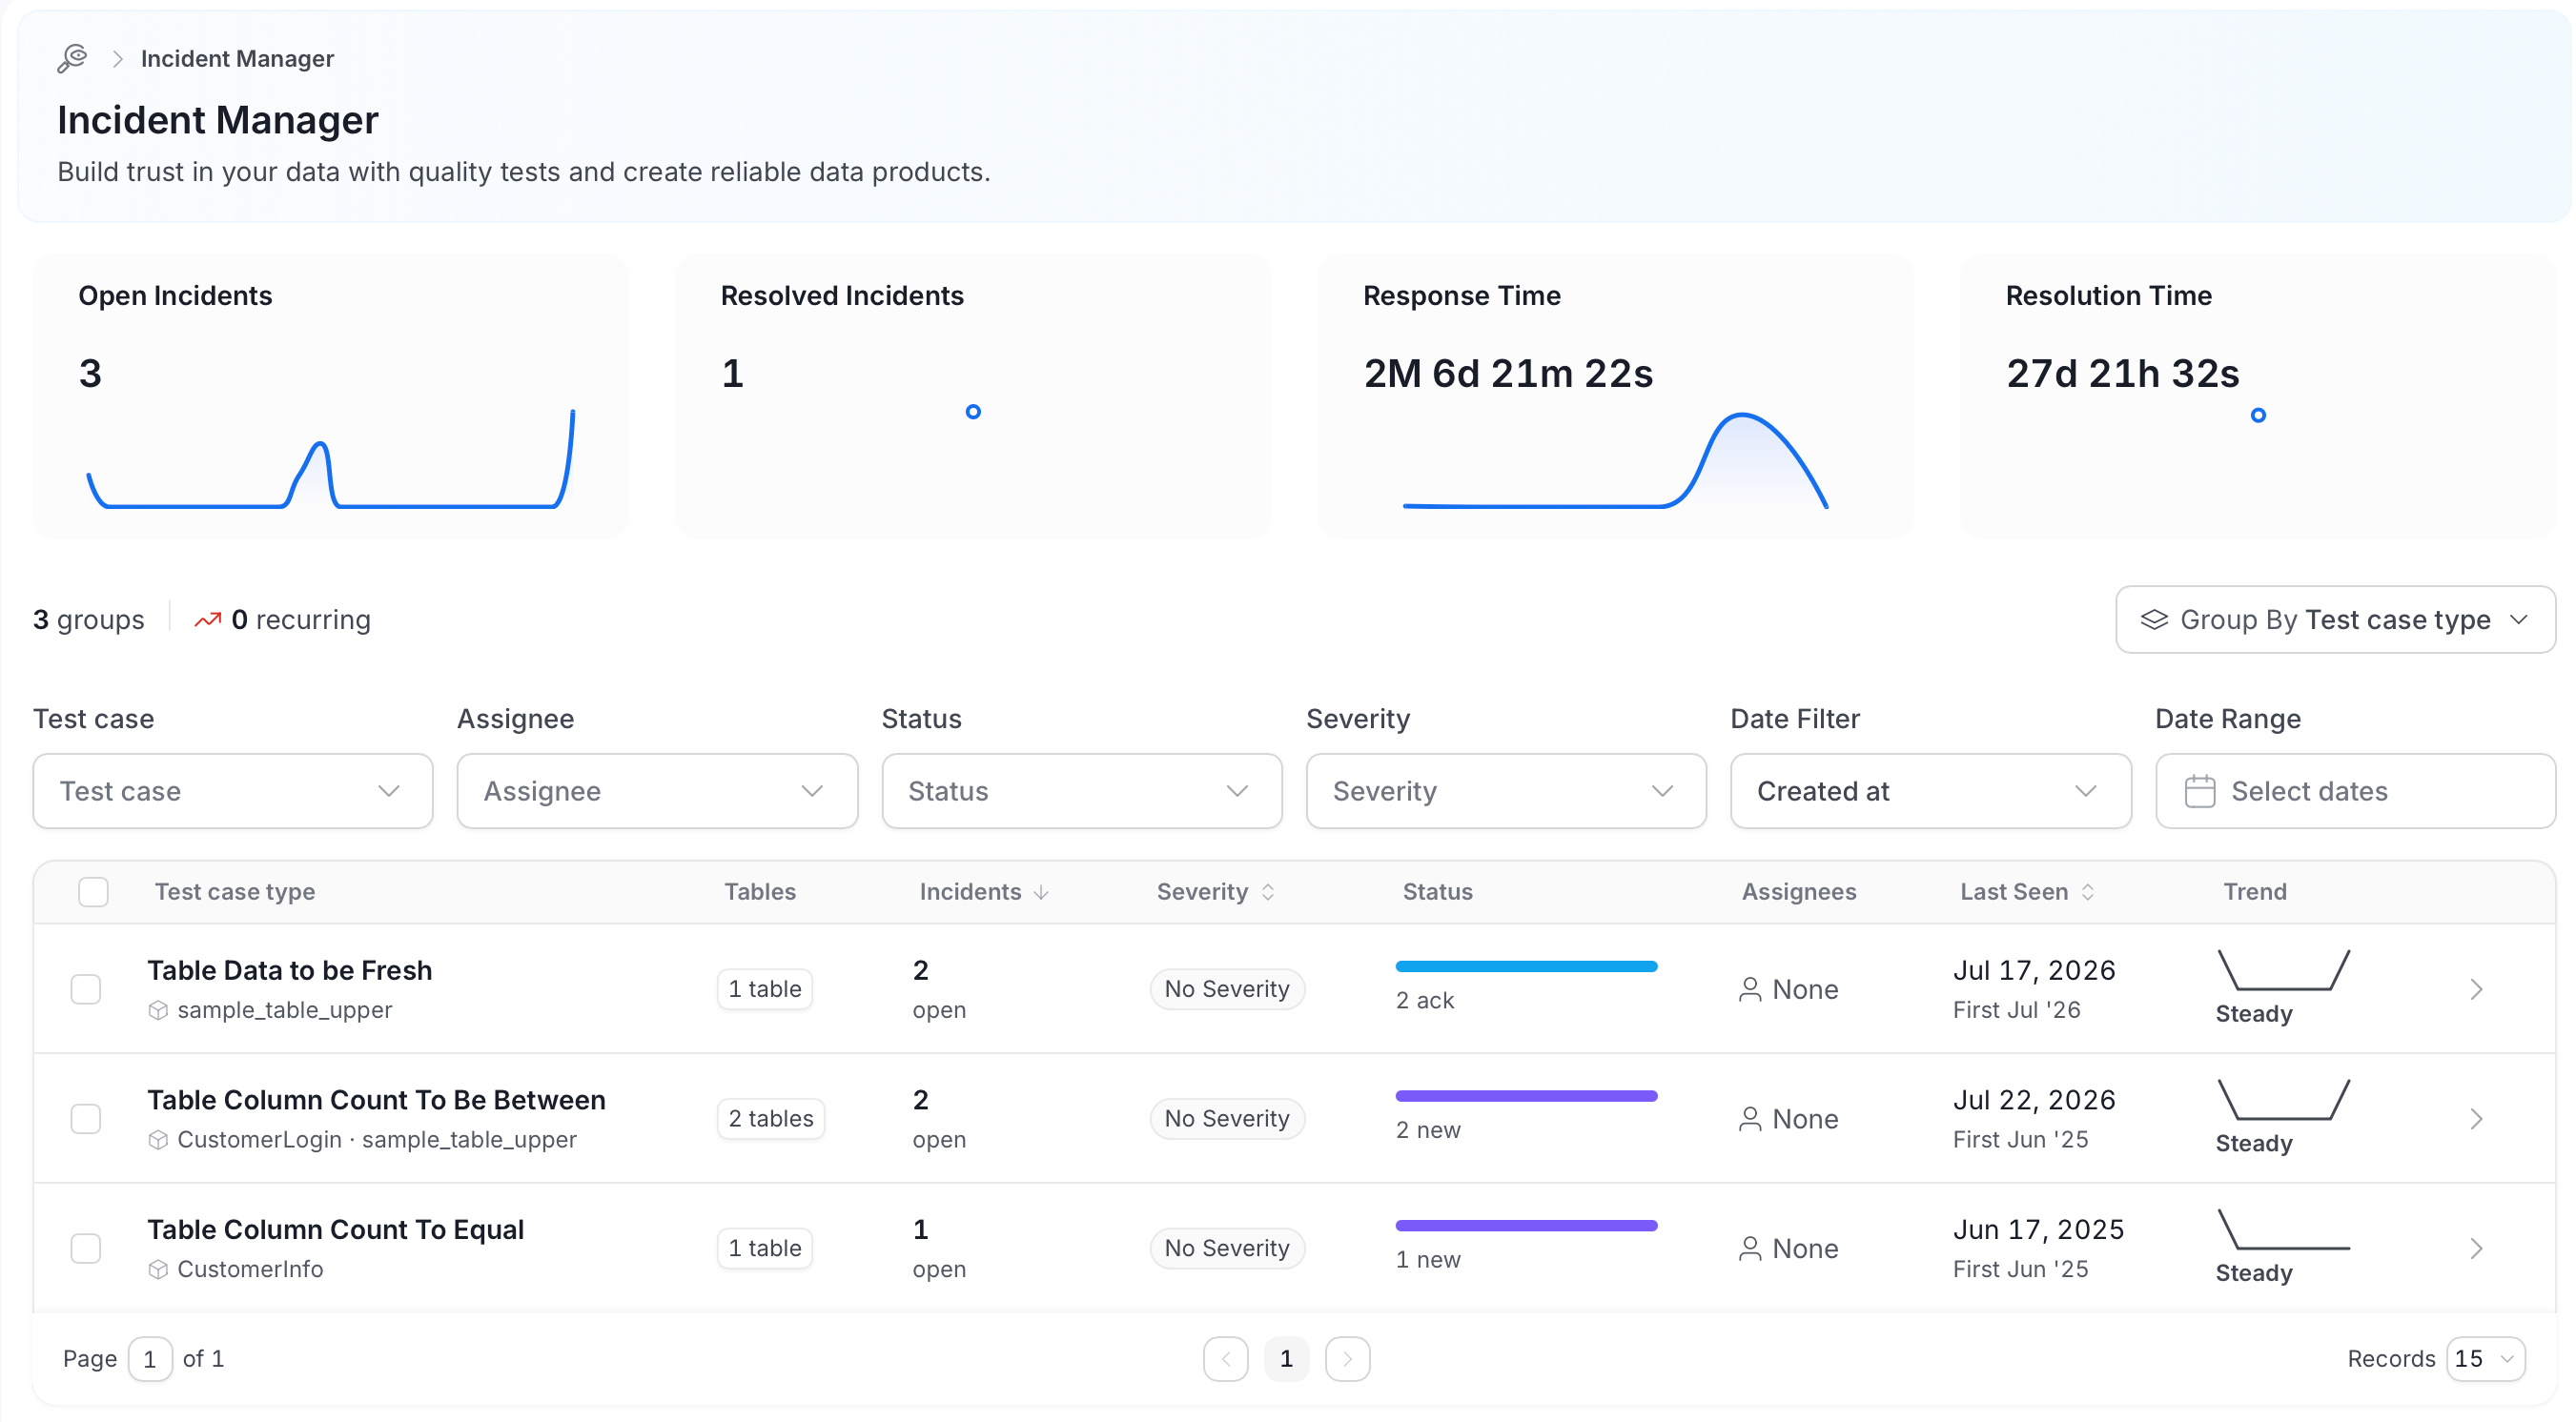
Summary Metrics
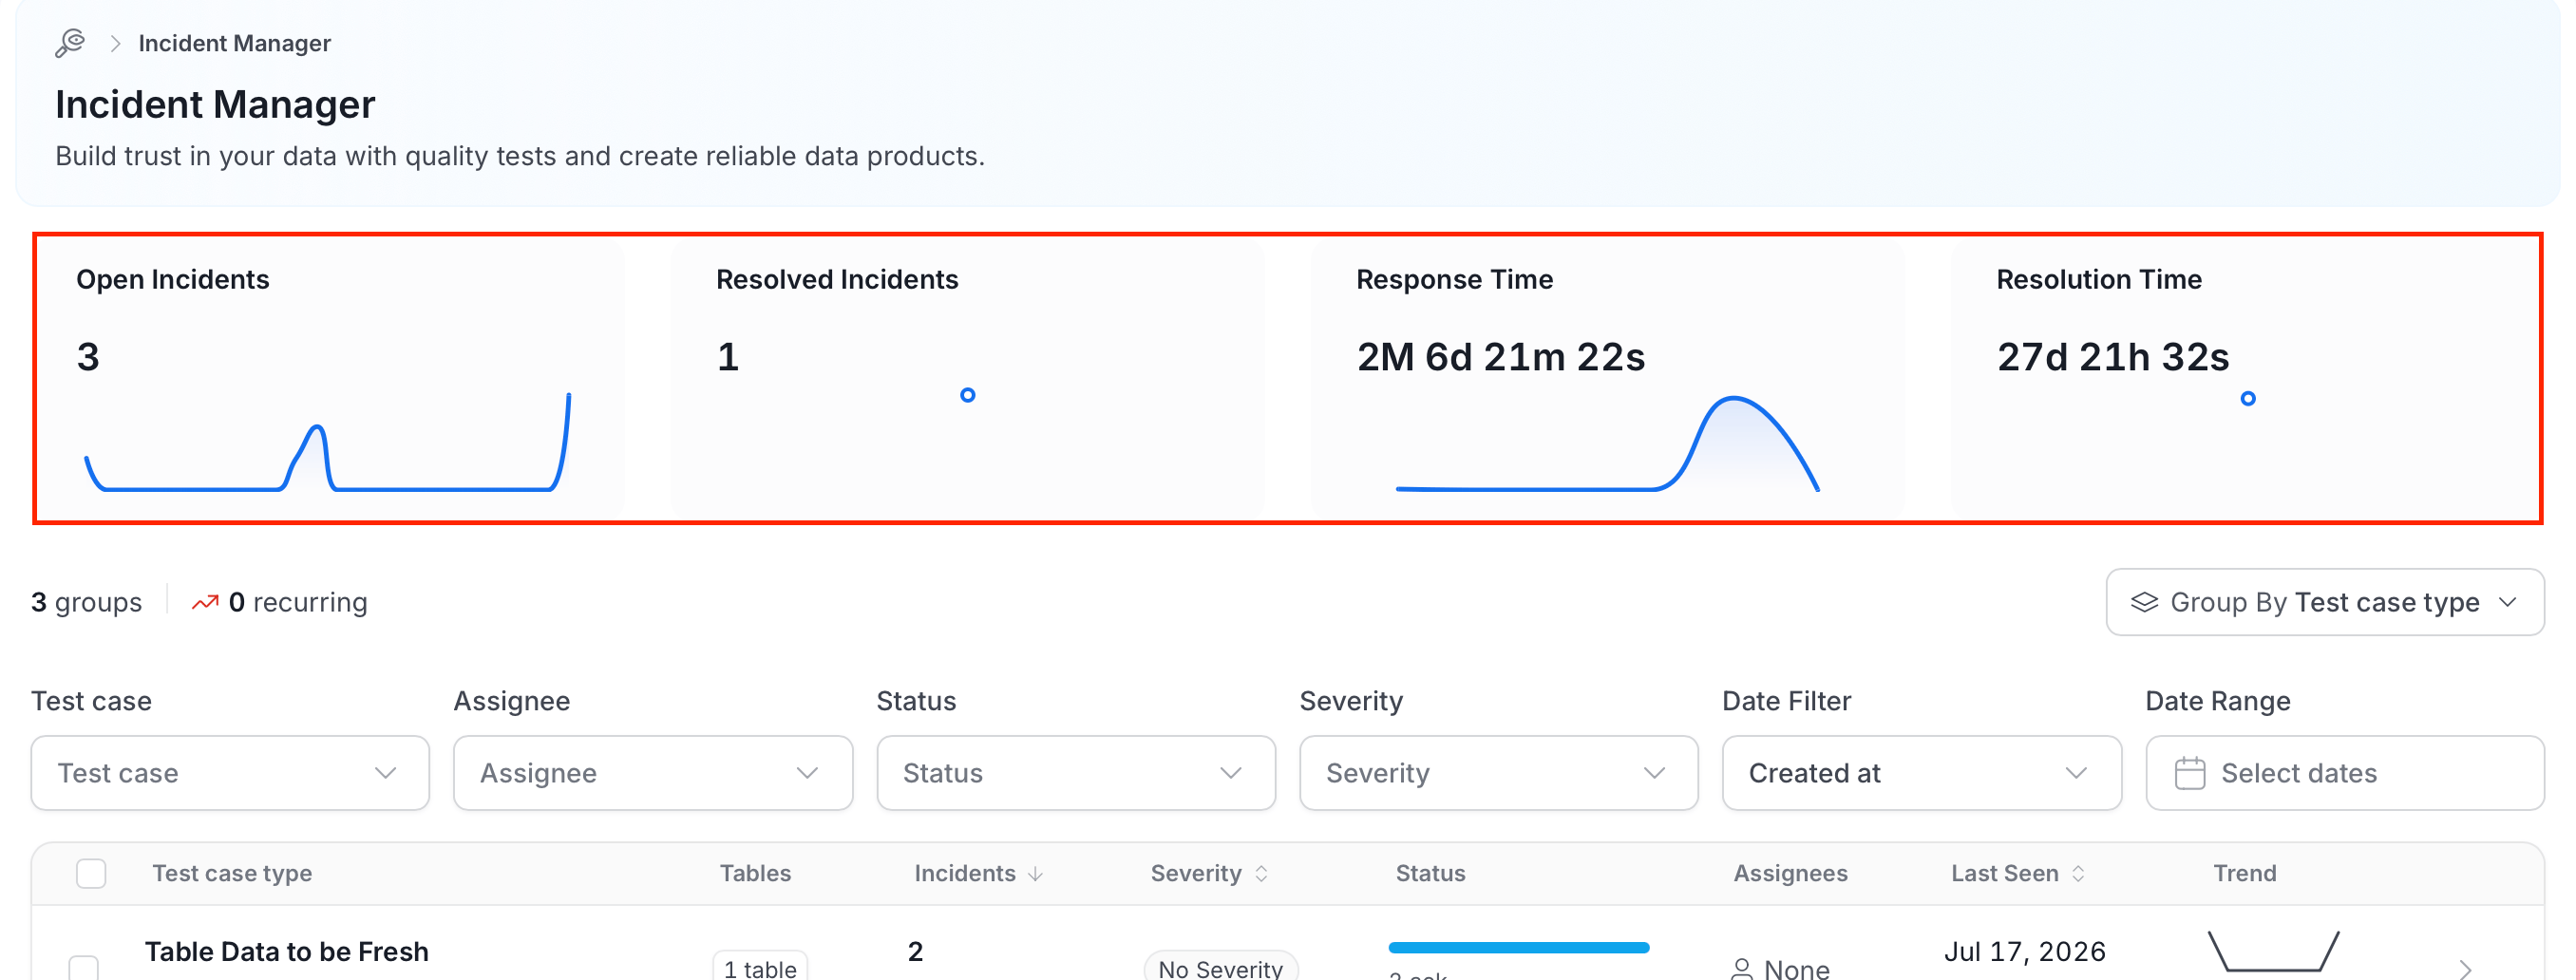
Four cards at the top of the dashboard show key incident statistics at a glance:- Open Incidents: Total number of currently active incidents.
- Resolved Incidents: Total number of closed incidents.
- Response Time: Average time from incident creation to first acknowledgement.
- Resolution Time: Average time from incident creation to resolution.
Incident Groups
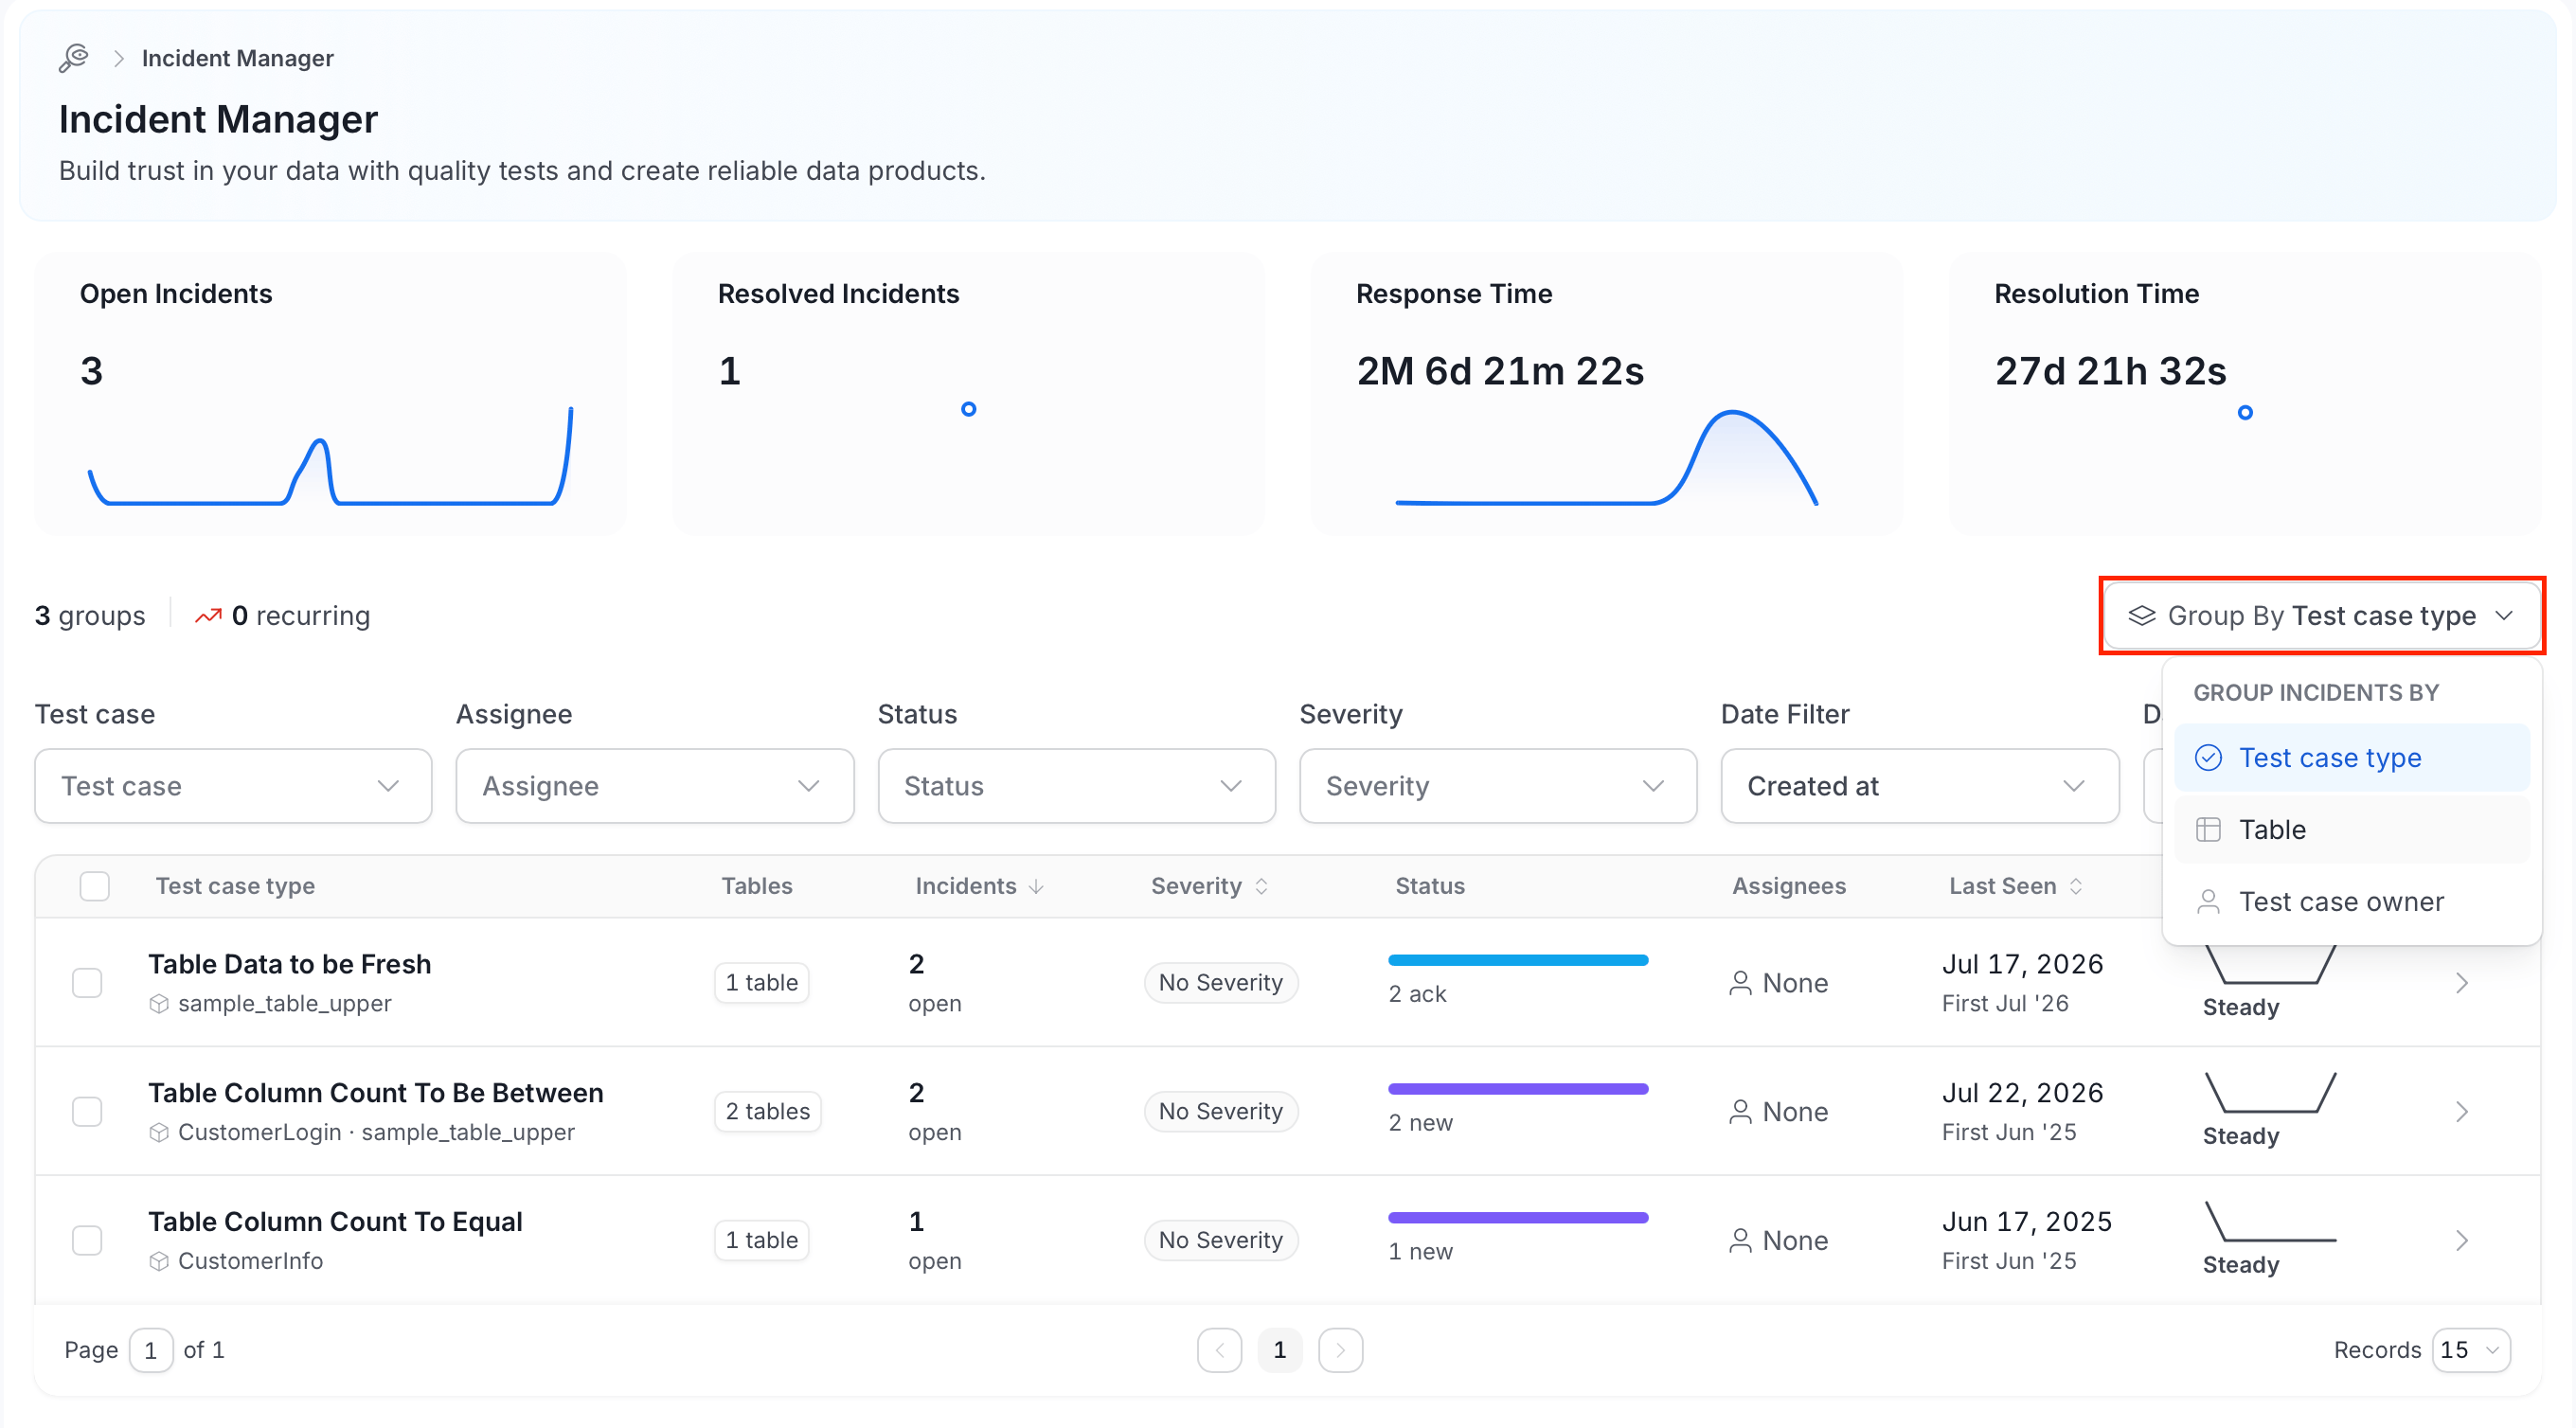
The dashboard groups open incidents. A resolved incident leaves its group. Use Group By to choose how Collate groups the incidents:- Test case type: One group for each test definition, such as Column Values To Be Not Null. This is the default.
- Table: One group for each table that has open incidents.
- Test case owner: One group for each owner of the failing test cases. Test cases that nobody owns appear in a No Owner group.
- The group name: The first column is named after the grouping, for example Test case type. A line under the name lists related tables, or check types when you group by Table.
- Tables: The number of tables that the group’s incidents cover, for example “2 tables”. When you group by Table or Test case owner, this column is Check type and counts check types instead.
- Incidents: The number of open incidents in the group.
- Severity: The most critical severity among the open incidents in the group, or No Severity when none of them has one.
- Status: The most actionable status in the group, ranked Assigned, then Ack, then New. A bar and counts, for example “2 ack”, show how many incidents are in each status.
- Assignees: The users and teams that the incidents are assigned to, or None.
- Last Seen: When the group’s incidents last changed, with the month and year of the first incident, for example “First Jul ‘26”.
- Trend: Whether new incidents in the group are Rising, Falling, or Steady.
Filters
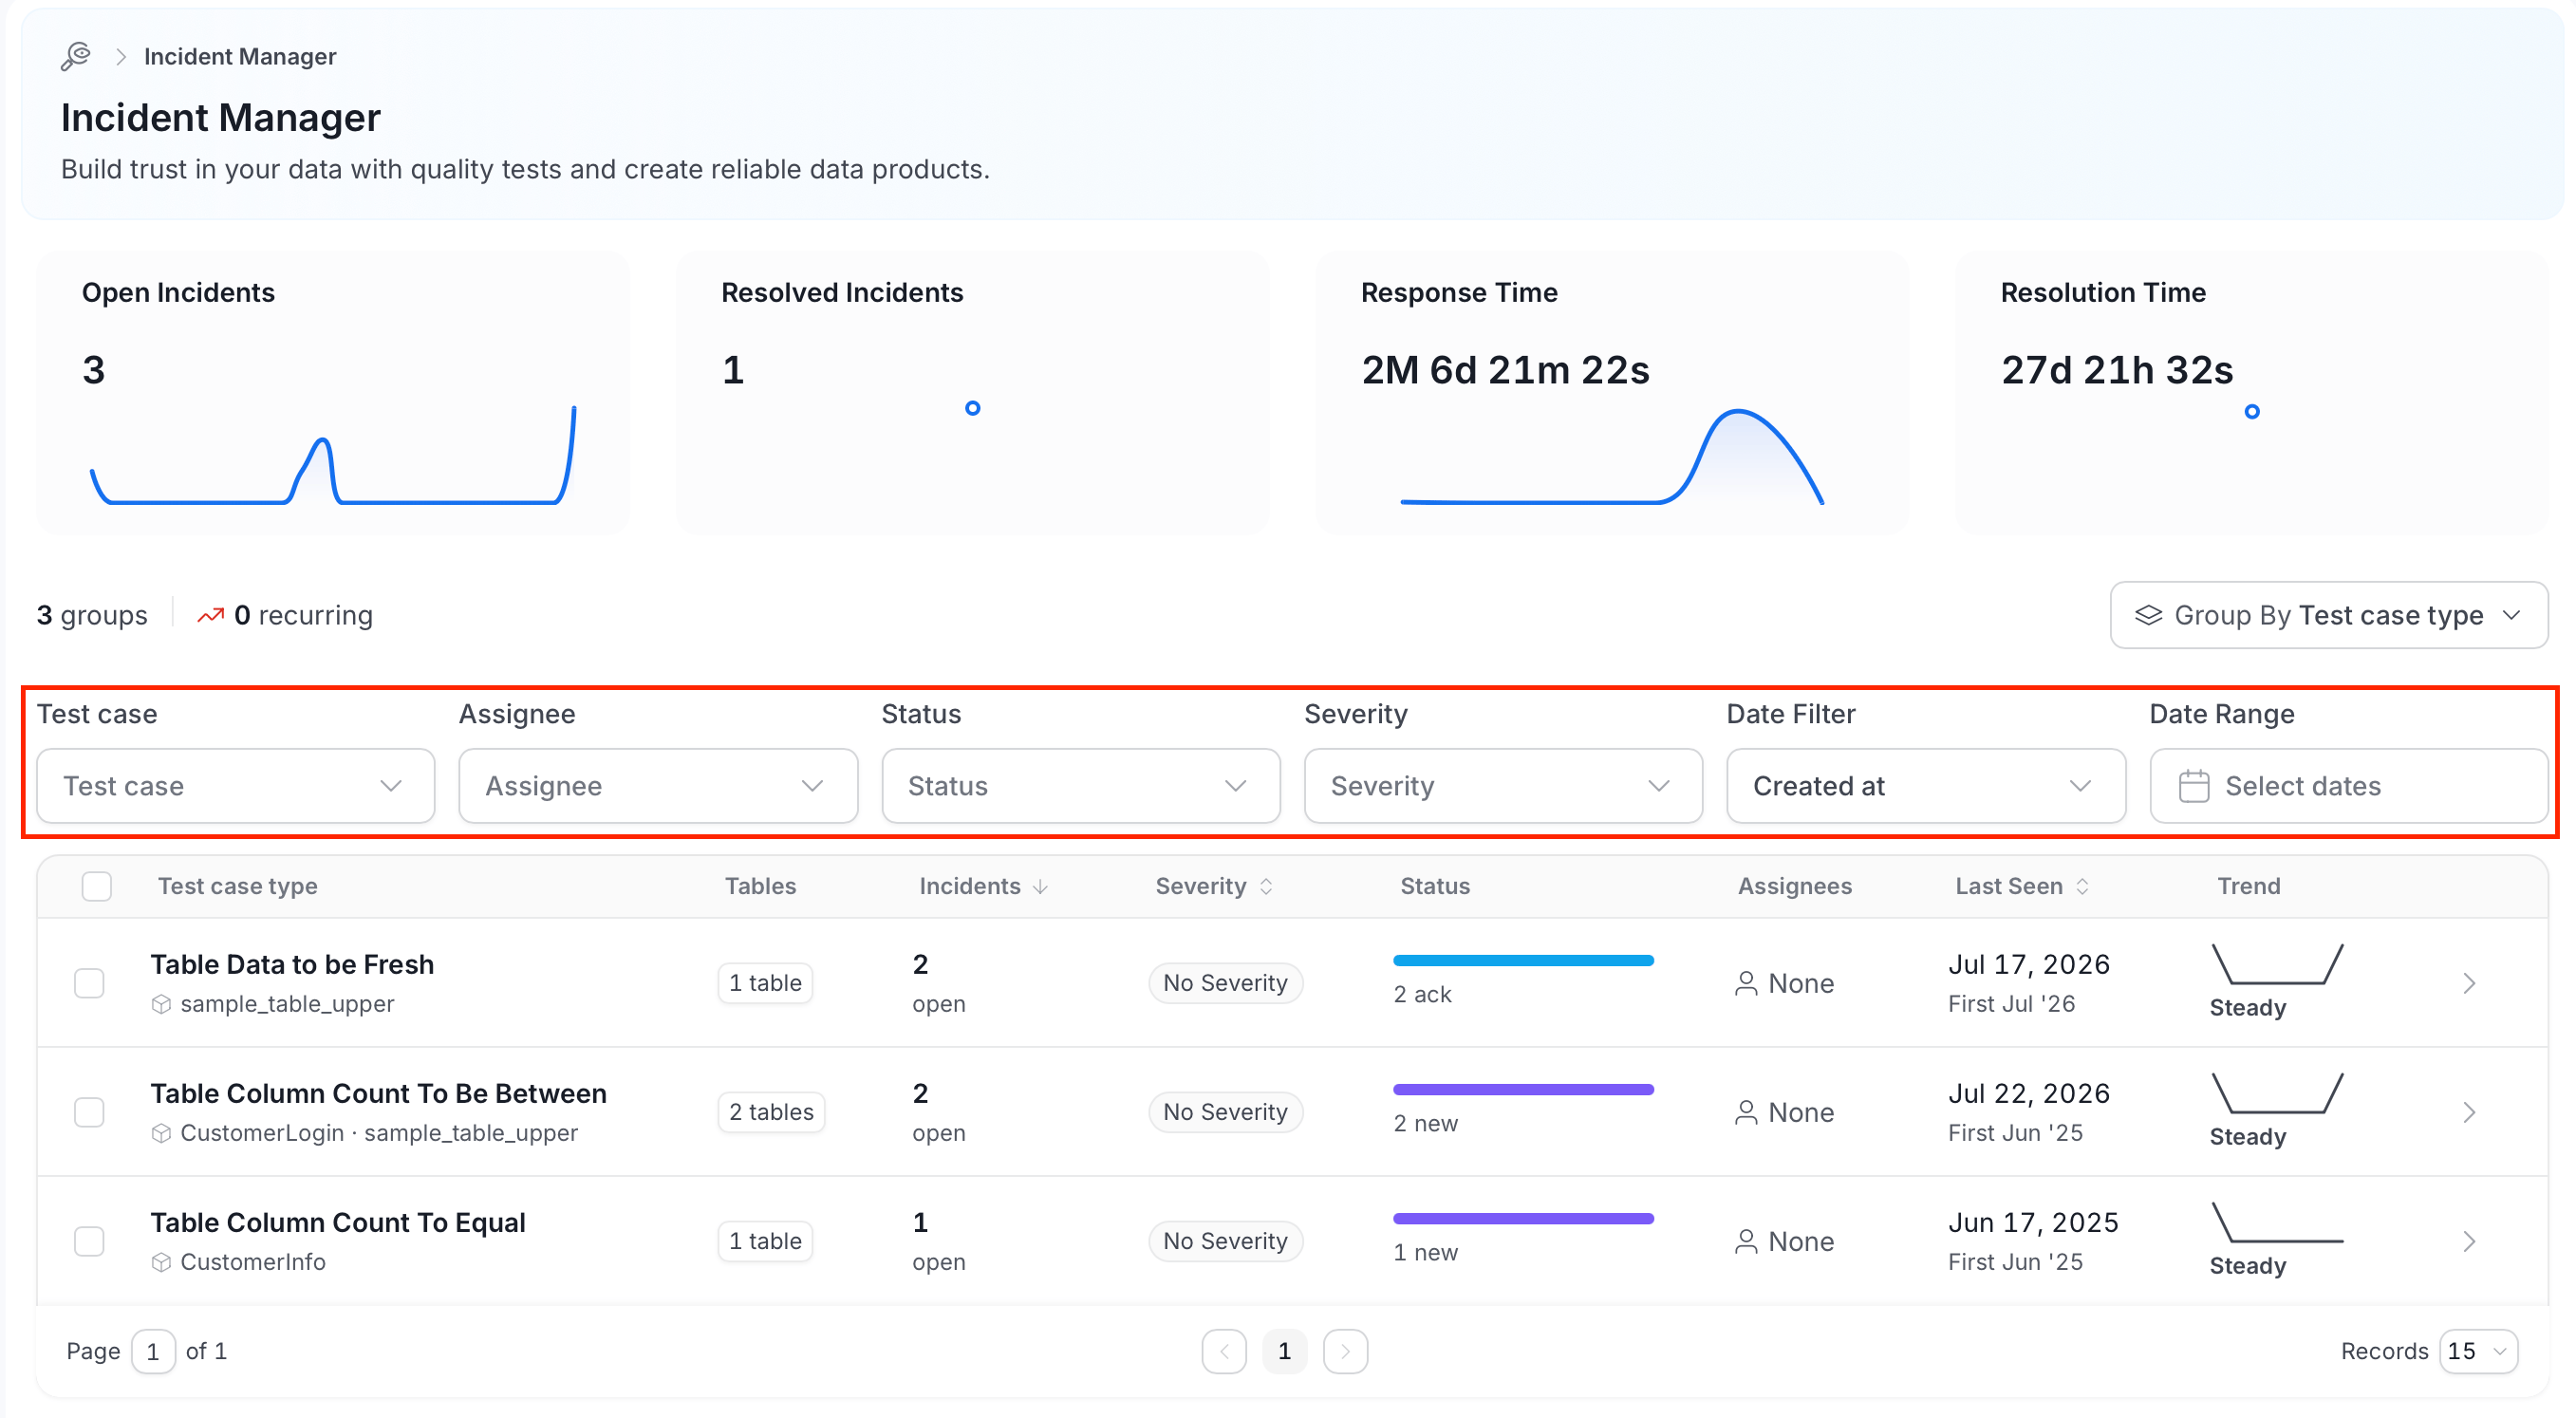
Use the filter bar to narrow the groups. The filters apply to the incidents inside each group:- Test case: Filter by a specific test case name.
- Assignee: Filter by the team member assigned to the incident.
- Status: Filter by current status: New, Ack, or Assigned. Resolved incidents aren’t part of a group.
- Severity: Filter by the severity of the incident.
- Date Filter: Choose the date field to filter by: Created at or Updated at.
- Date Range: Set a custom date range.
Open a Group
-
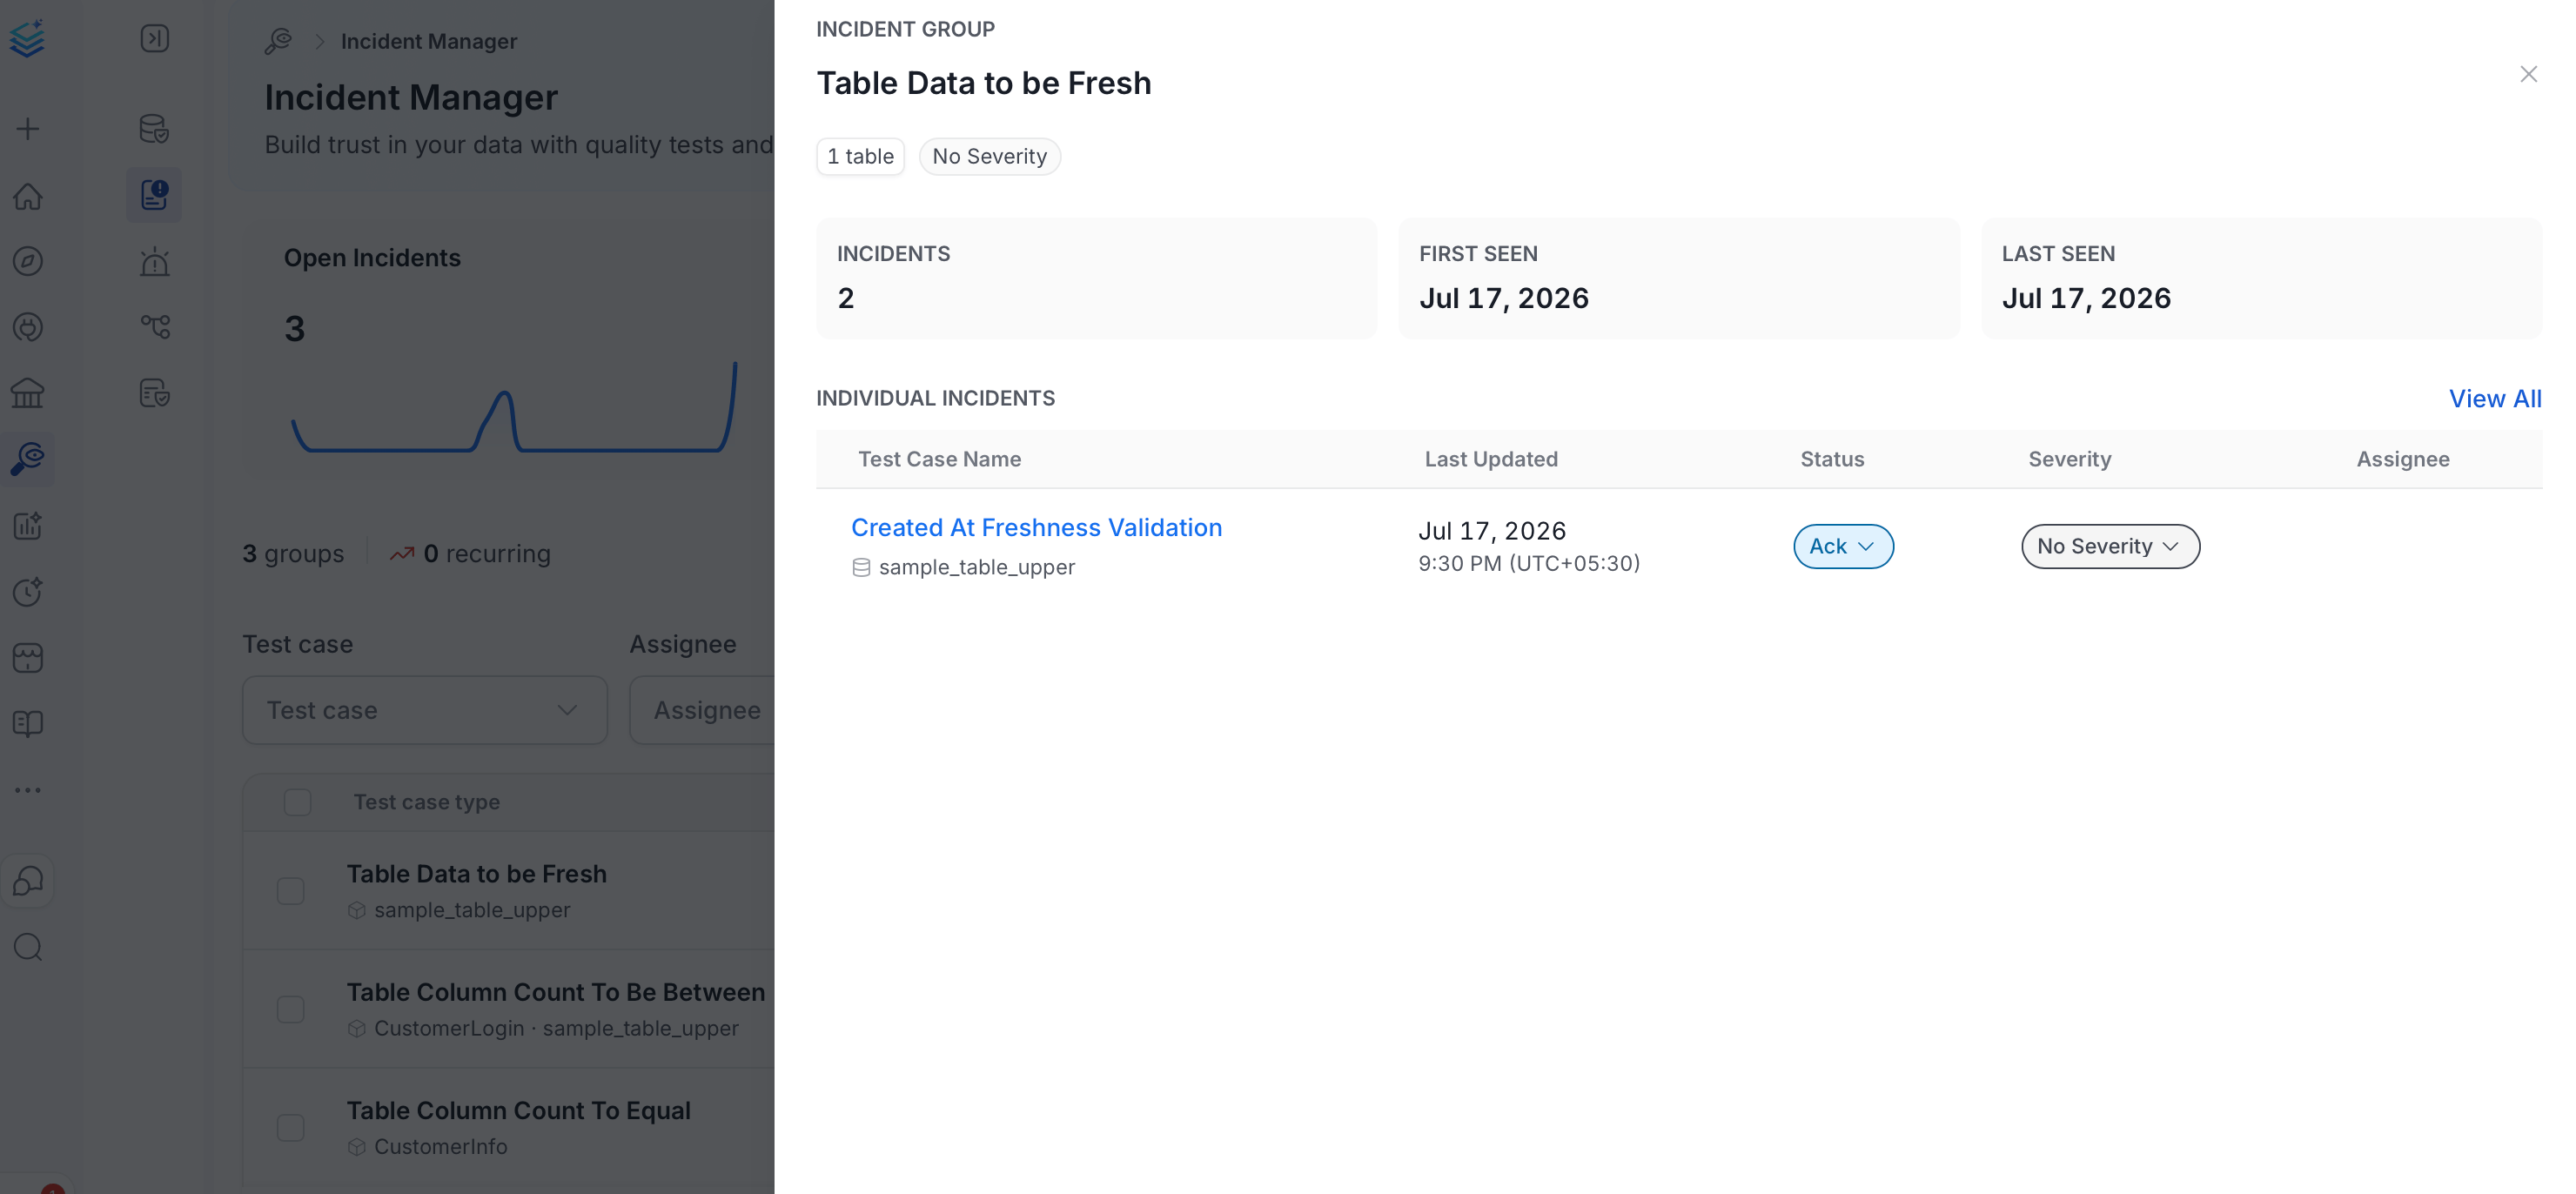
Select a group to open the Incident group panel. It shows when the group’s incidents were first and last seen, and it lists the Individual incidents in the group.
-
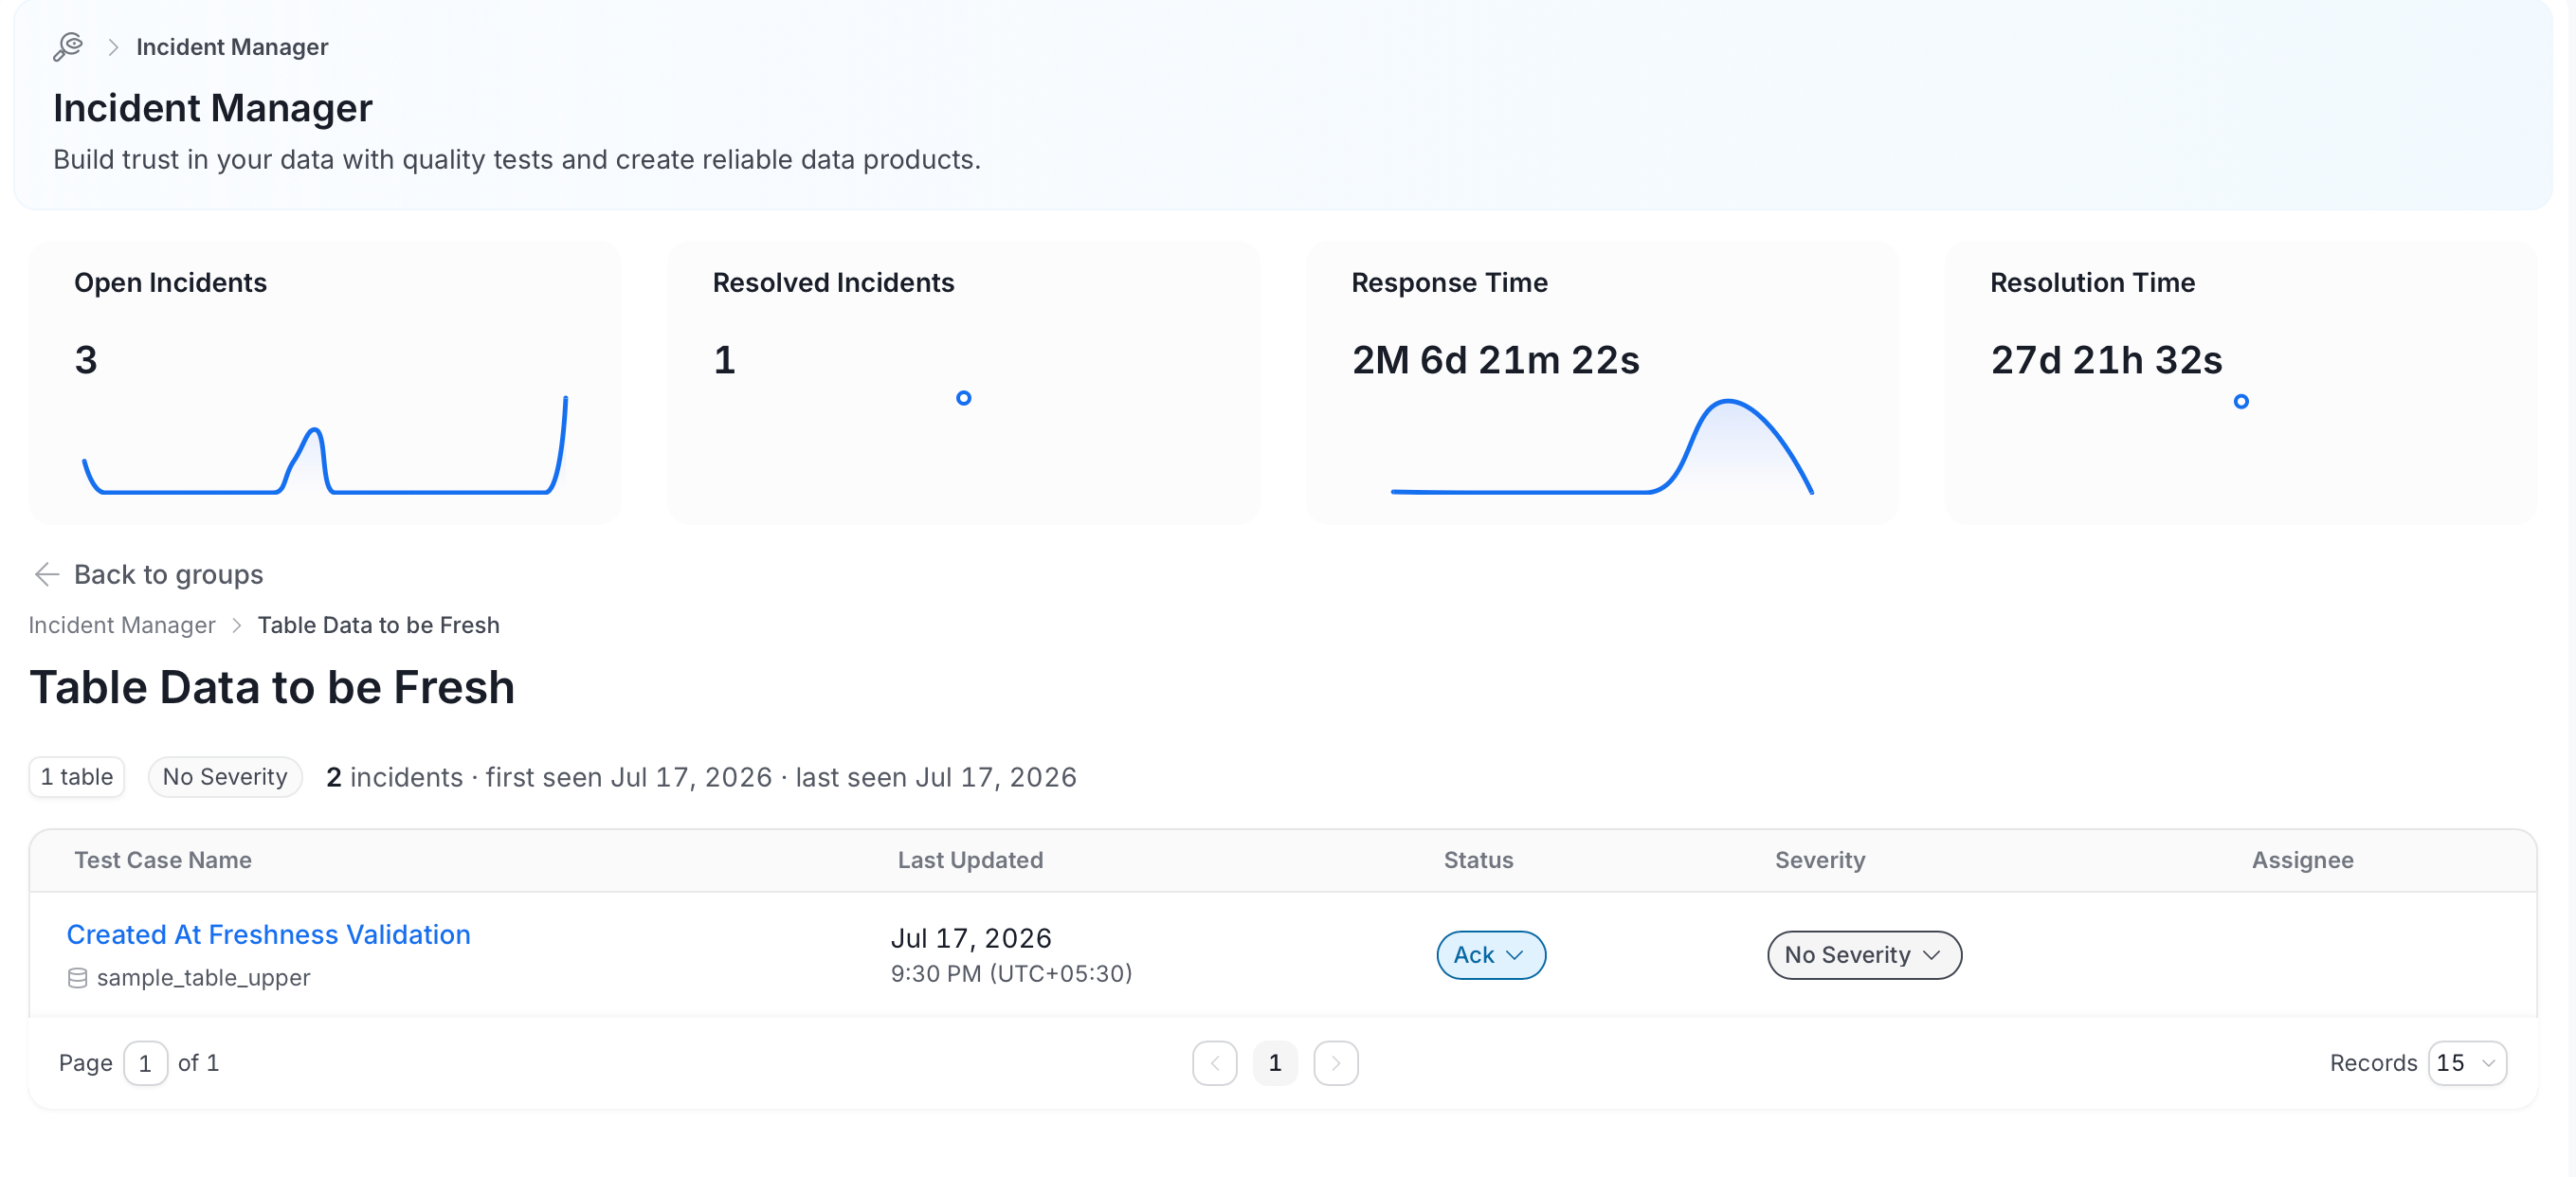
Select the right arrow next to the test case type to open the full list of the group’s incidents, and select Back to groups to return to the groups with your filters still applied.
-
Each row in the incident list represents one incident and shows:
- Test Case Name: The test case that triggered the incident, with the data asset that it belongs to underneath.
- Last Updated: Date and time of the most recent activity.
- Status: Current stage of the incident (New, Ack, Assigned, Resolved). Select the value to change it.
- Severity: Severity level assigned to the incident. Select the value to change it.
- Assignee: The team member responsible for resolution.
Incident Status Change
Update the incident status to reflect the current stage of the resolution process. The incident owner assigns it to a team member for resolution.For Single Incident or Test Case
To change the status of individual test cases, follow the steps below:- Open the group that contains the incident. See Open a Group.
- In the Status column, select the status of the incident whose status you want to change. A menu lists the statuses: New, Ack, Assigned, and Resolved.
-
Select a status:
- New or Ack: Collate applies the change right away.
- Assigned: A panel titled Assigned opens. Search for a user or a team, select one, and select the check mark icon to save.
-
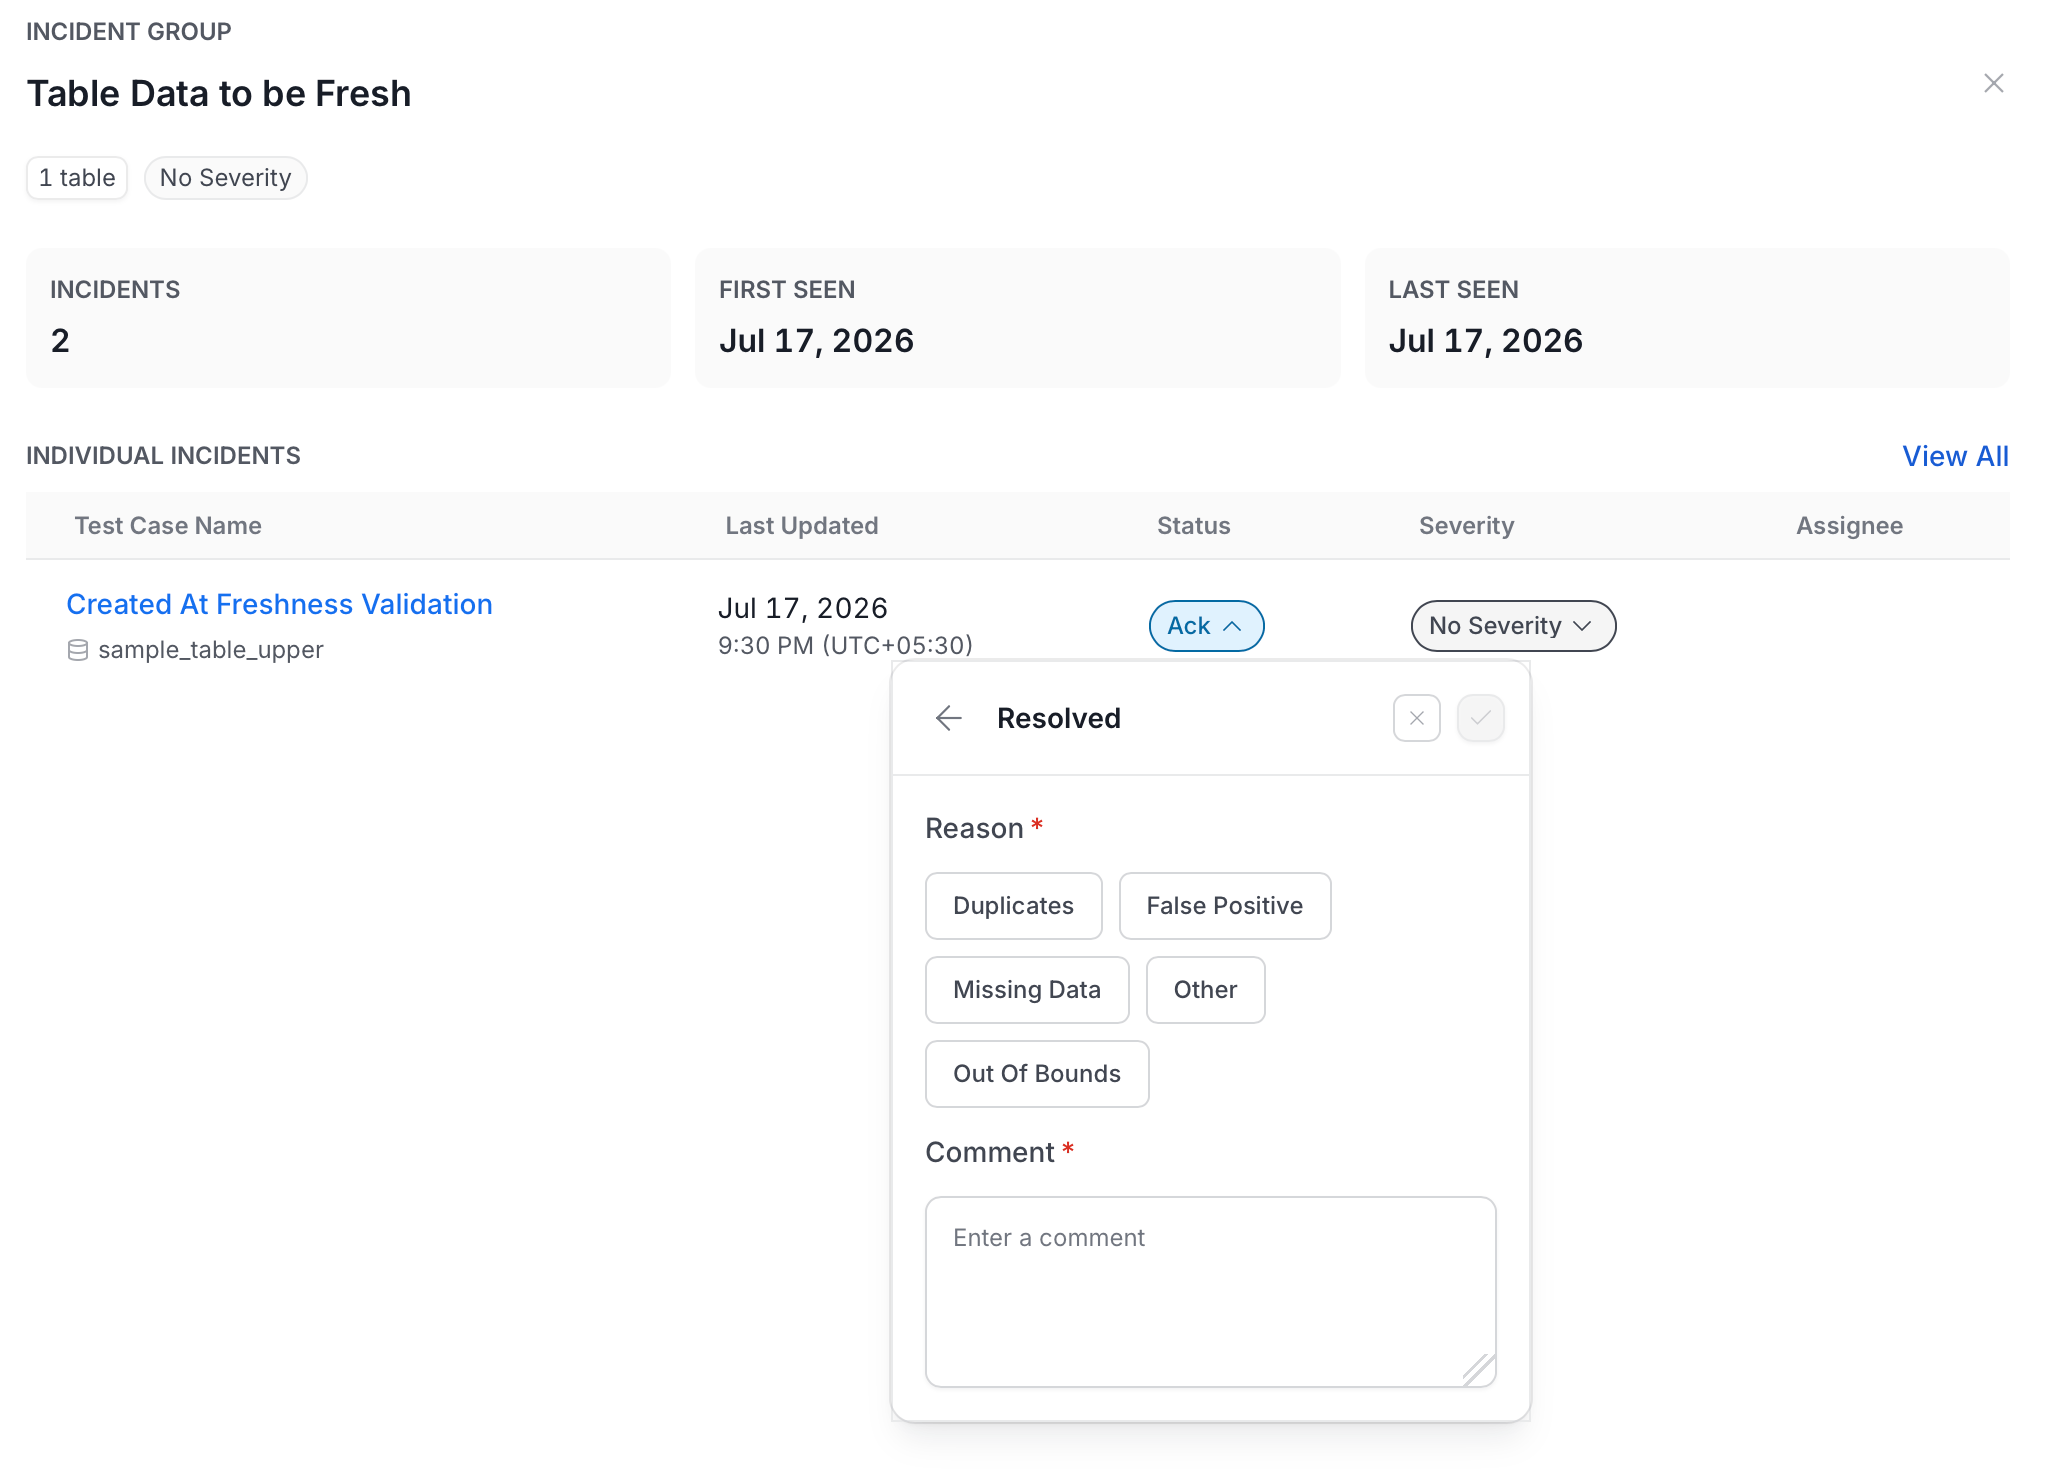
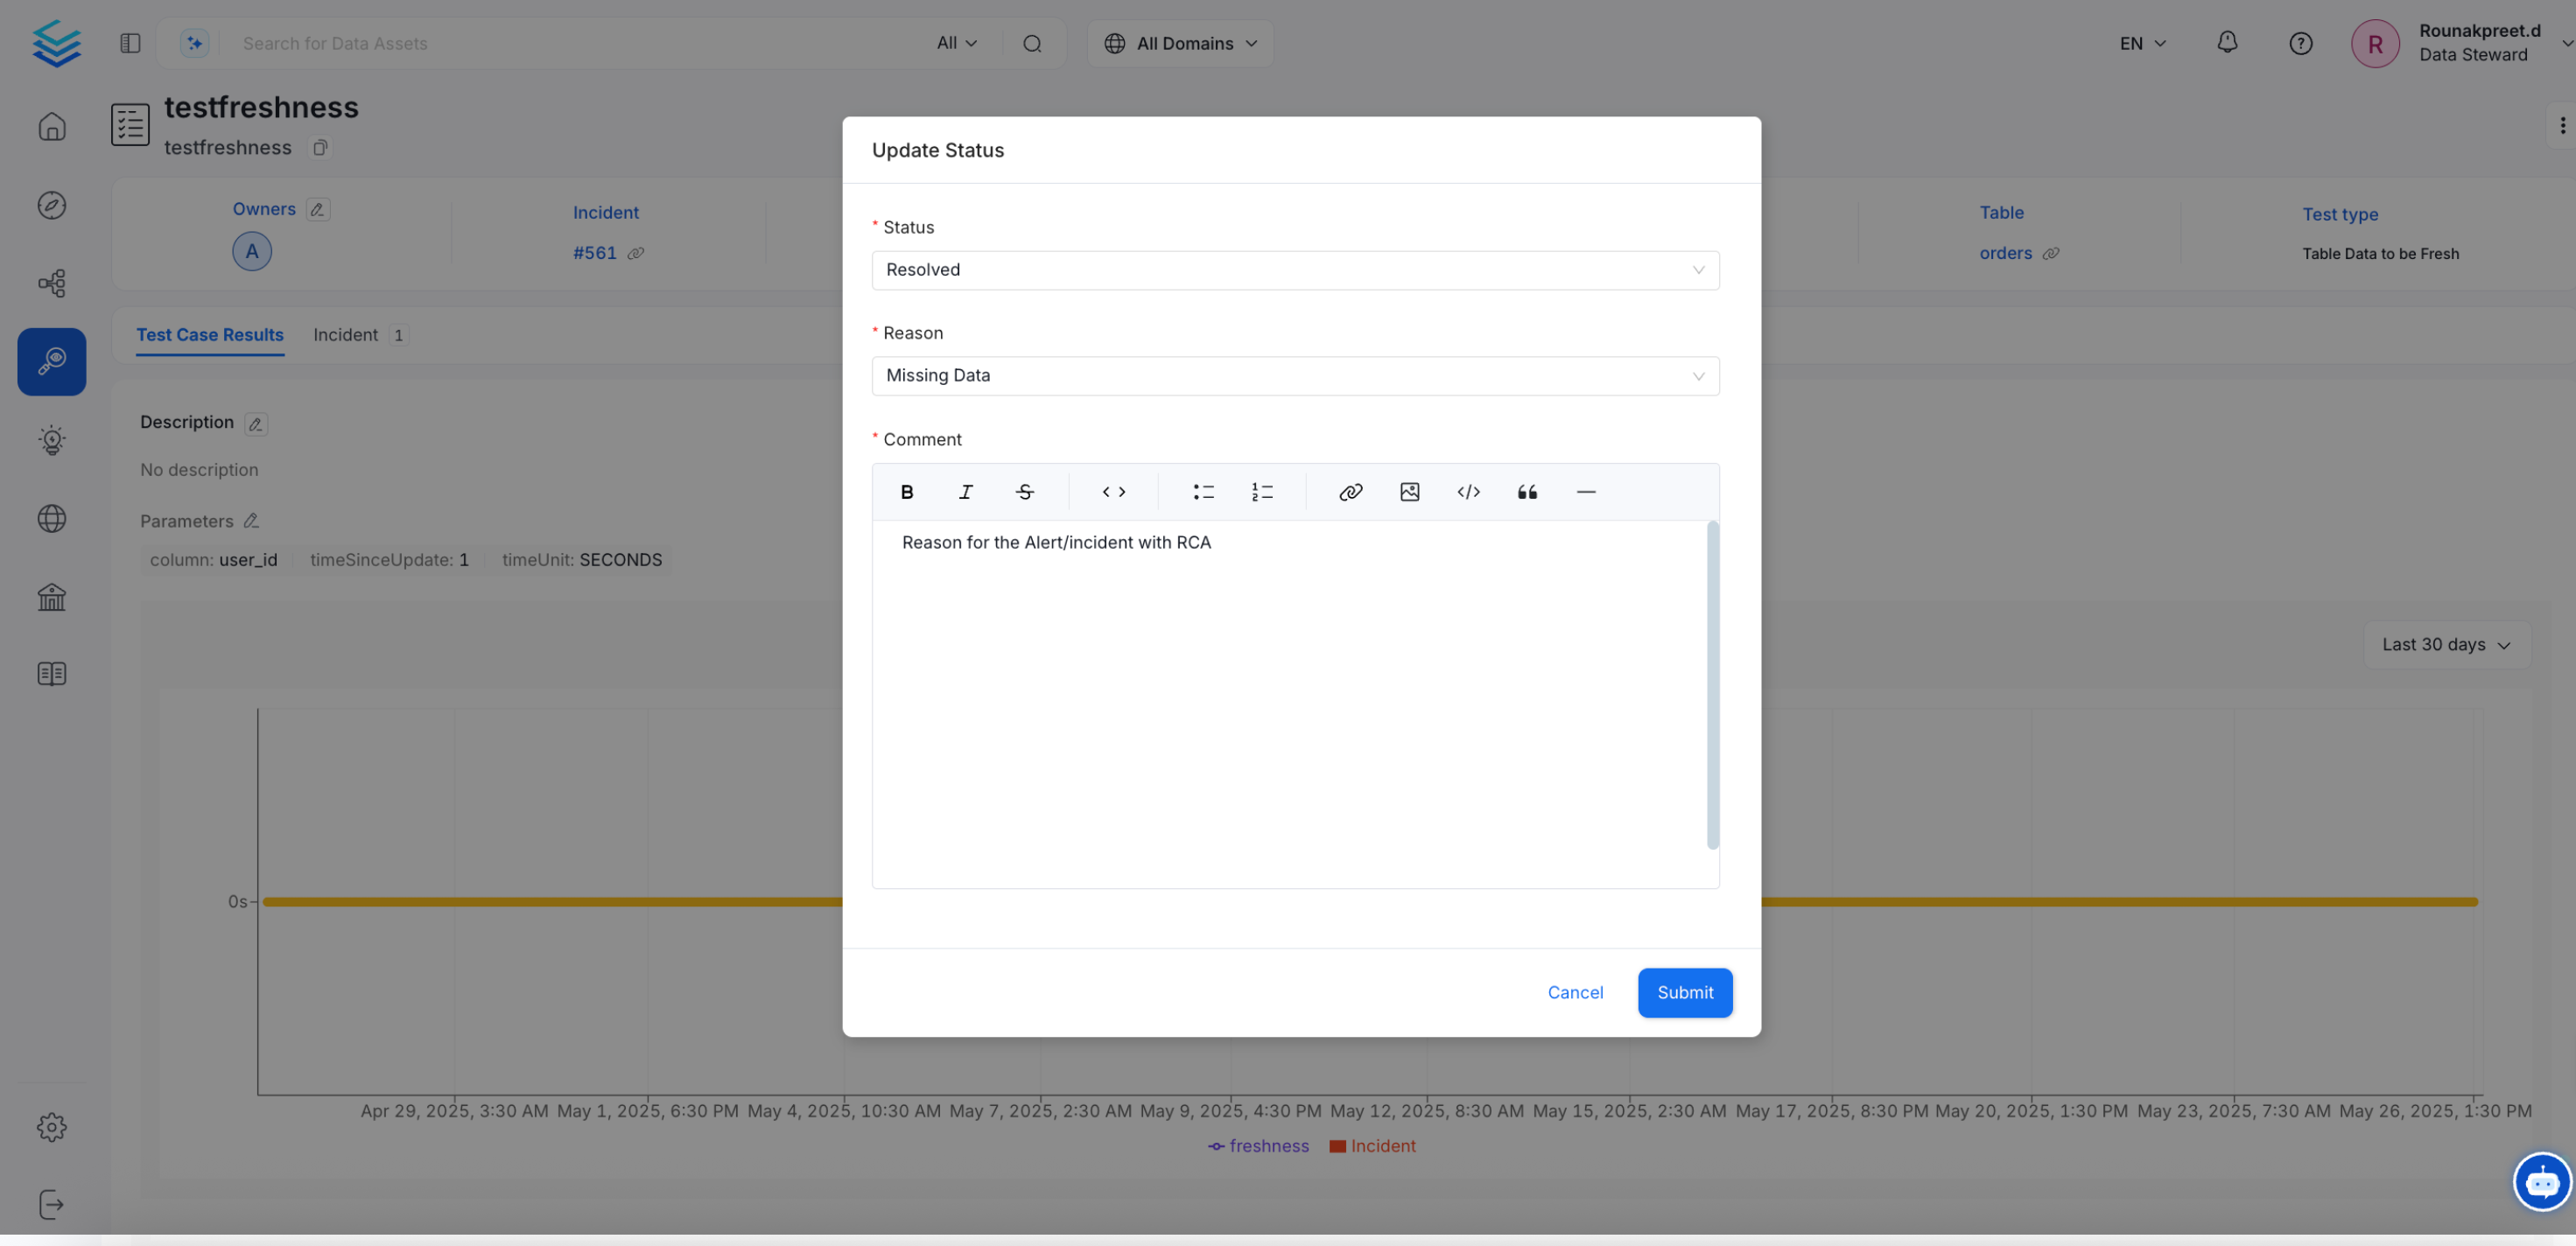
Resolved: A panel titled Resolved opens. Select a Reason: Duplicates, False Positive, Missing Data, Out Of Bounds, or Other. Enter a Comment. Both are required. Select the check mark icon to save.
From the Incident Details Page
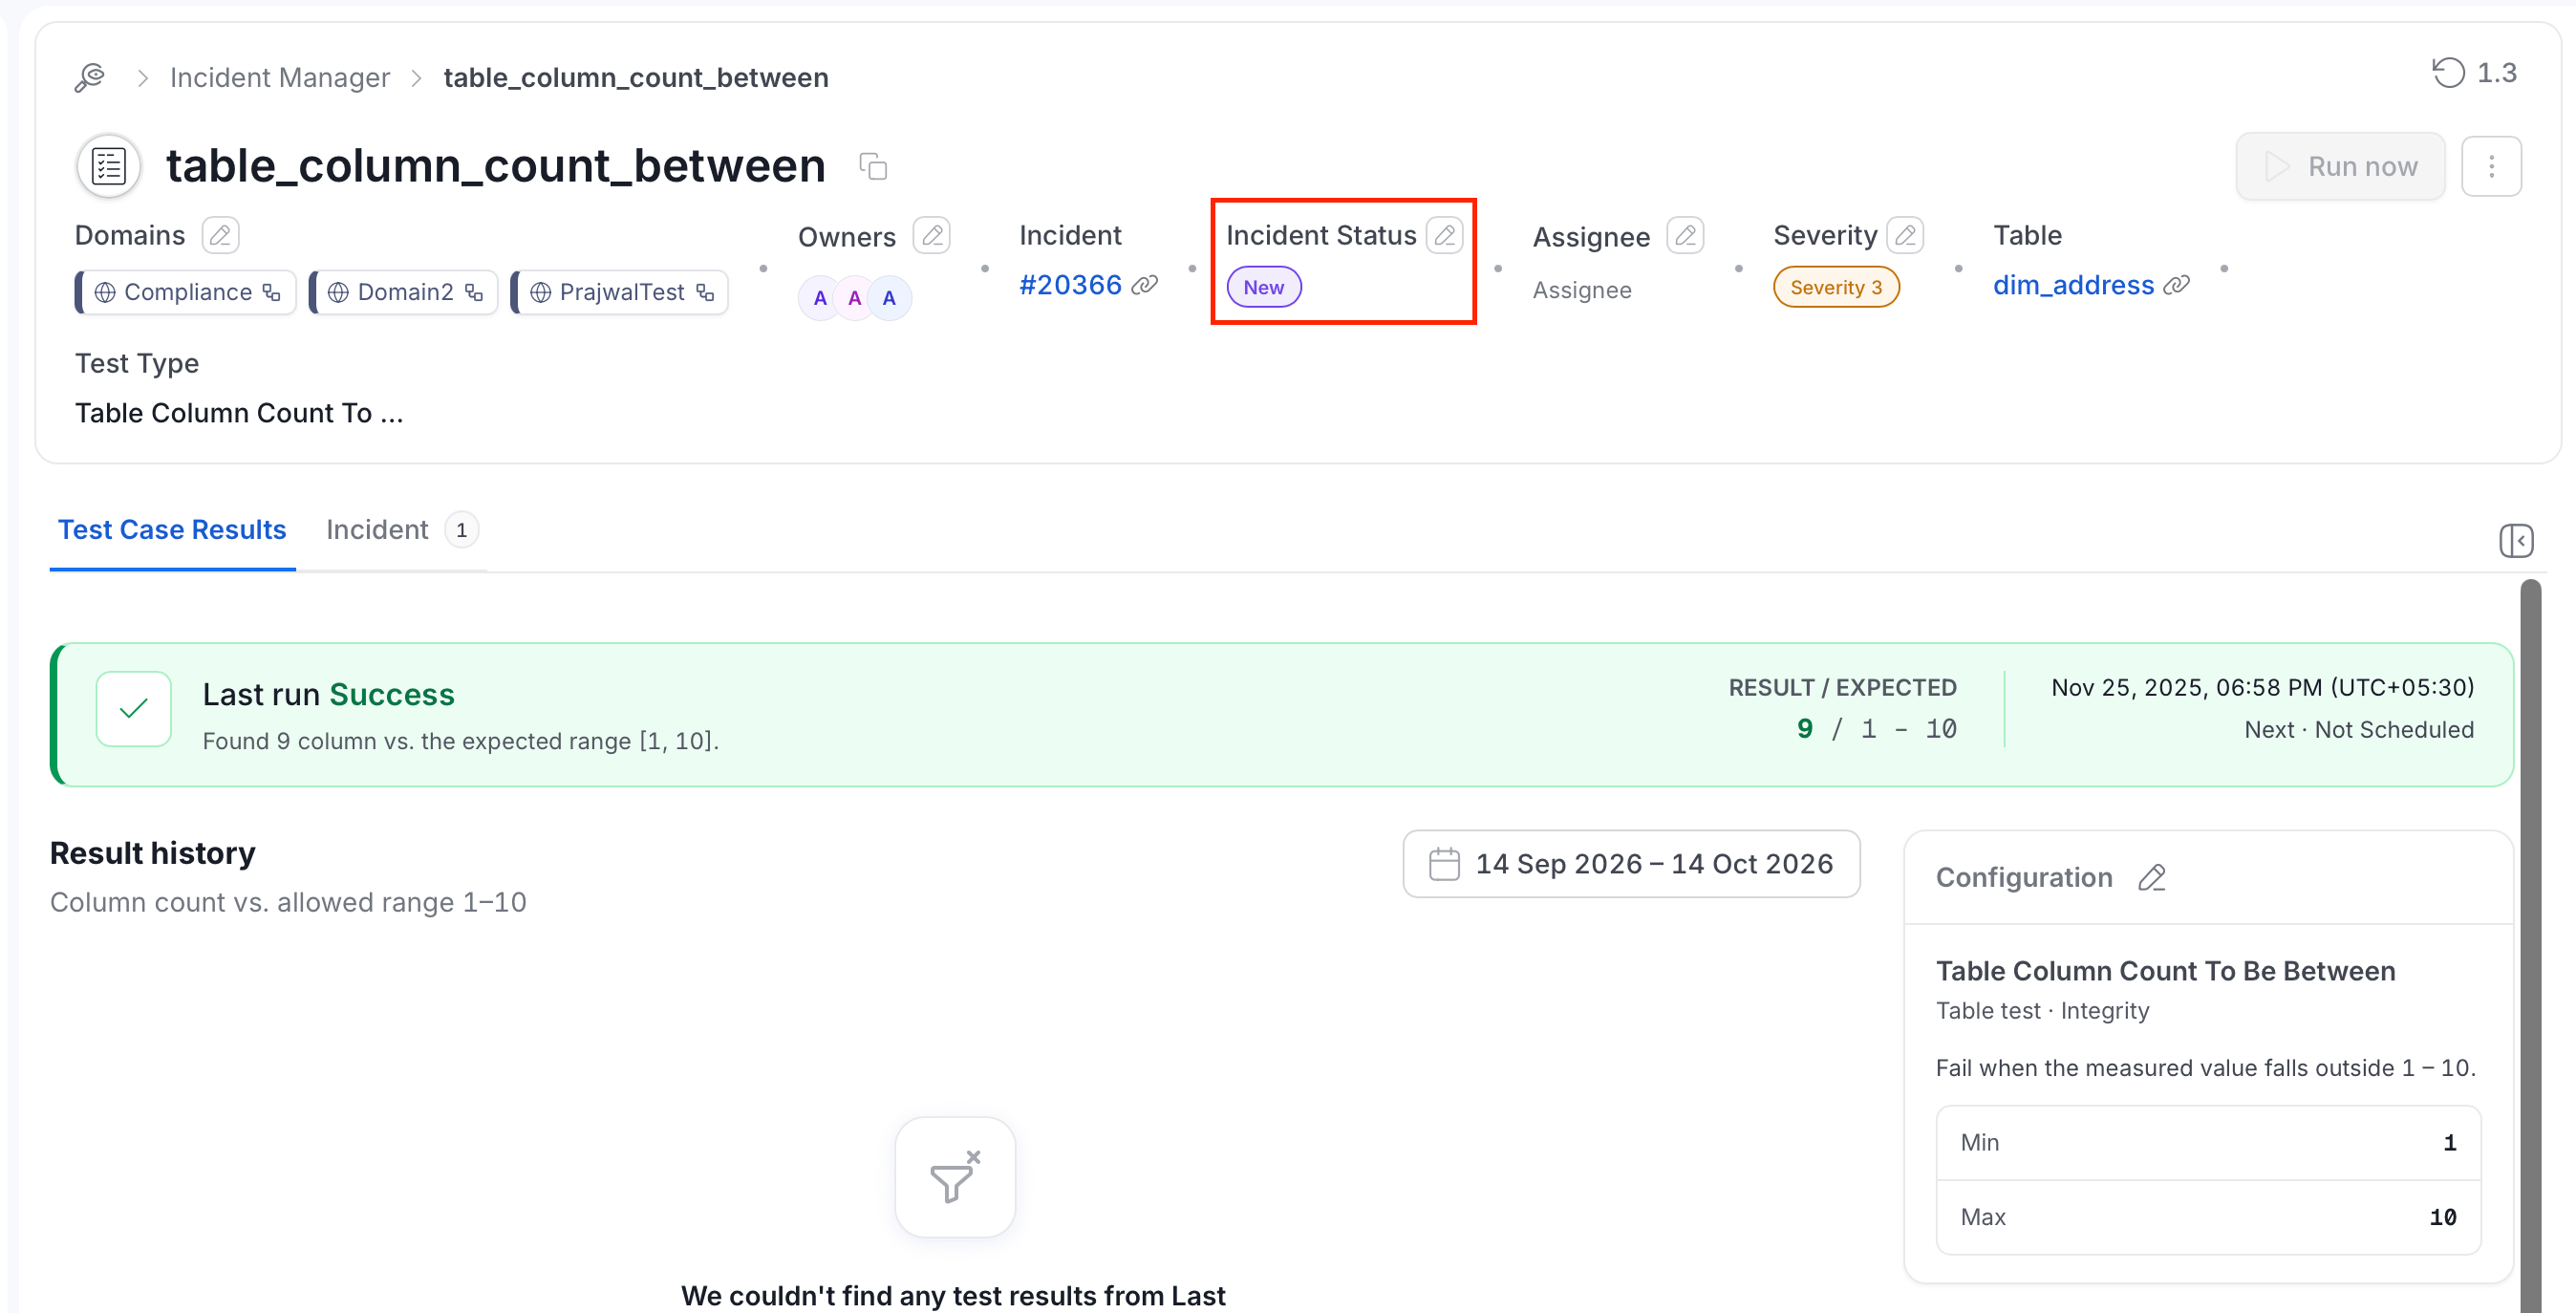
Alternatively, change the status from the incident details page:- Open the incident details page. In the incident list, select the test case name.
-
In the header, select the edit icon next to Incident Status.
-
In the Update Status dialog, select a Status: Ack, Assigned, New, or Resolved.
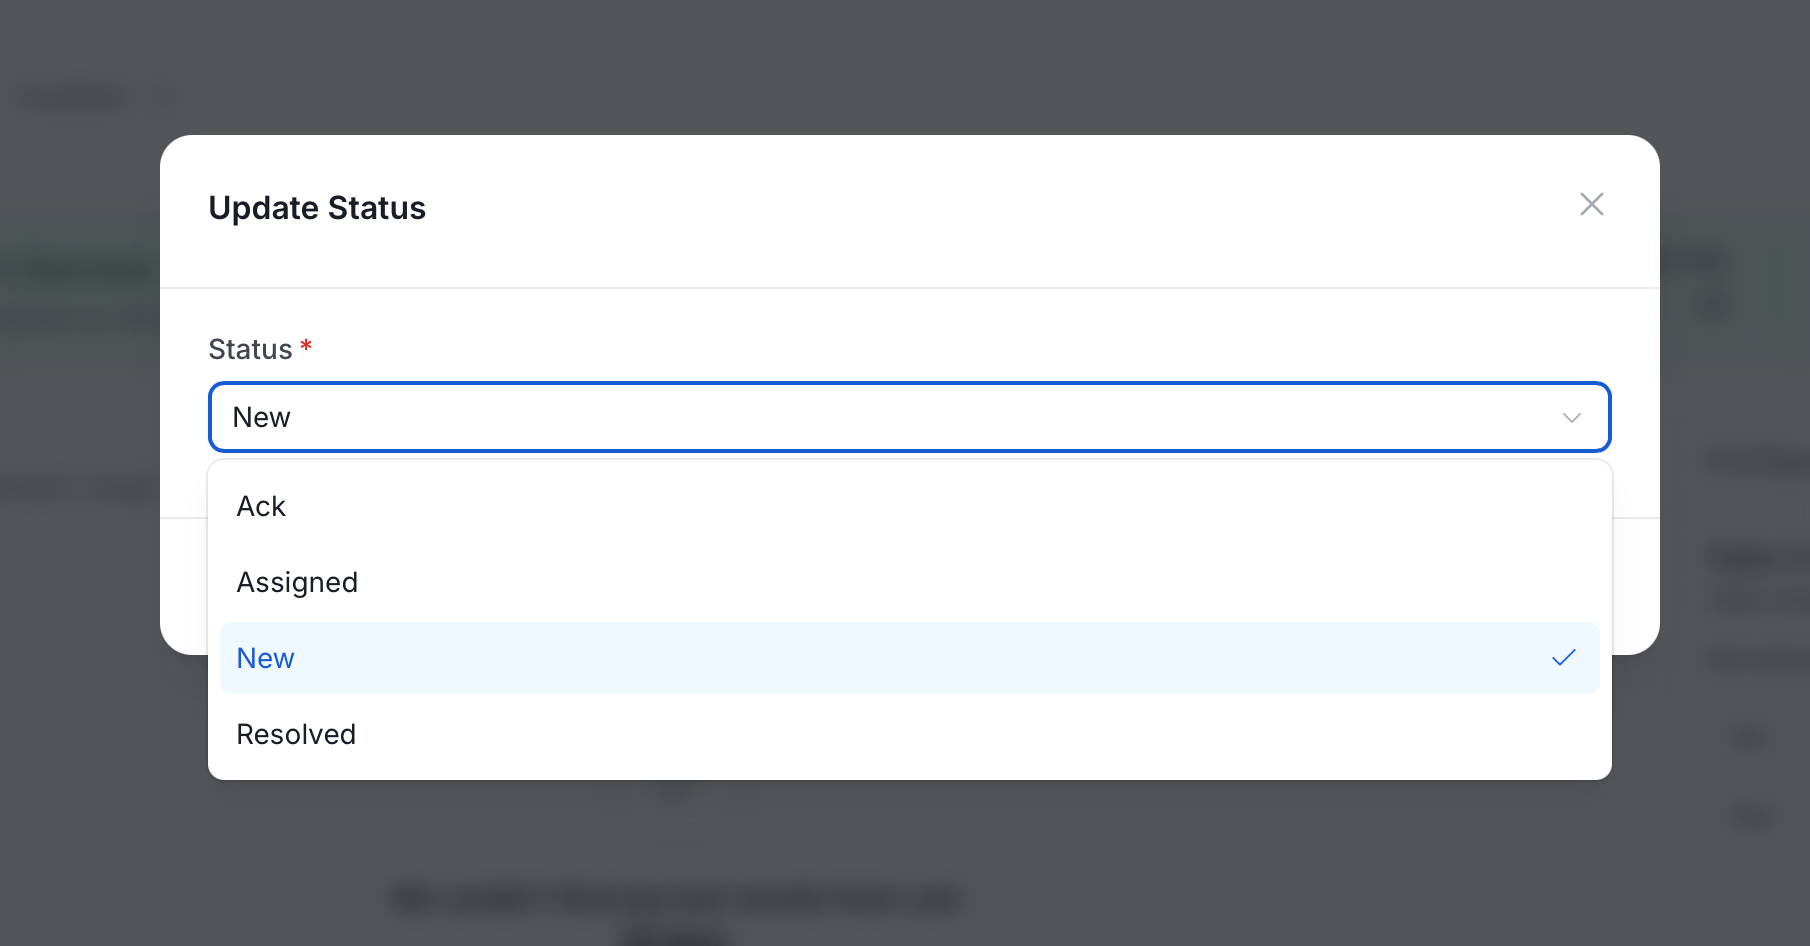
-
Complete the fields that the status needs:
- Ack or New: The dialog has no other fields.
-
Assigned: Search for and select an Assignee. This field is required.
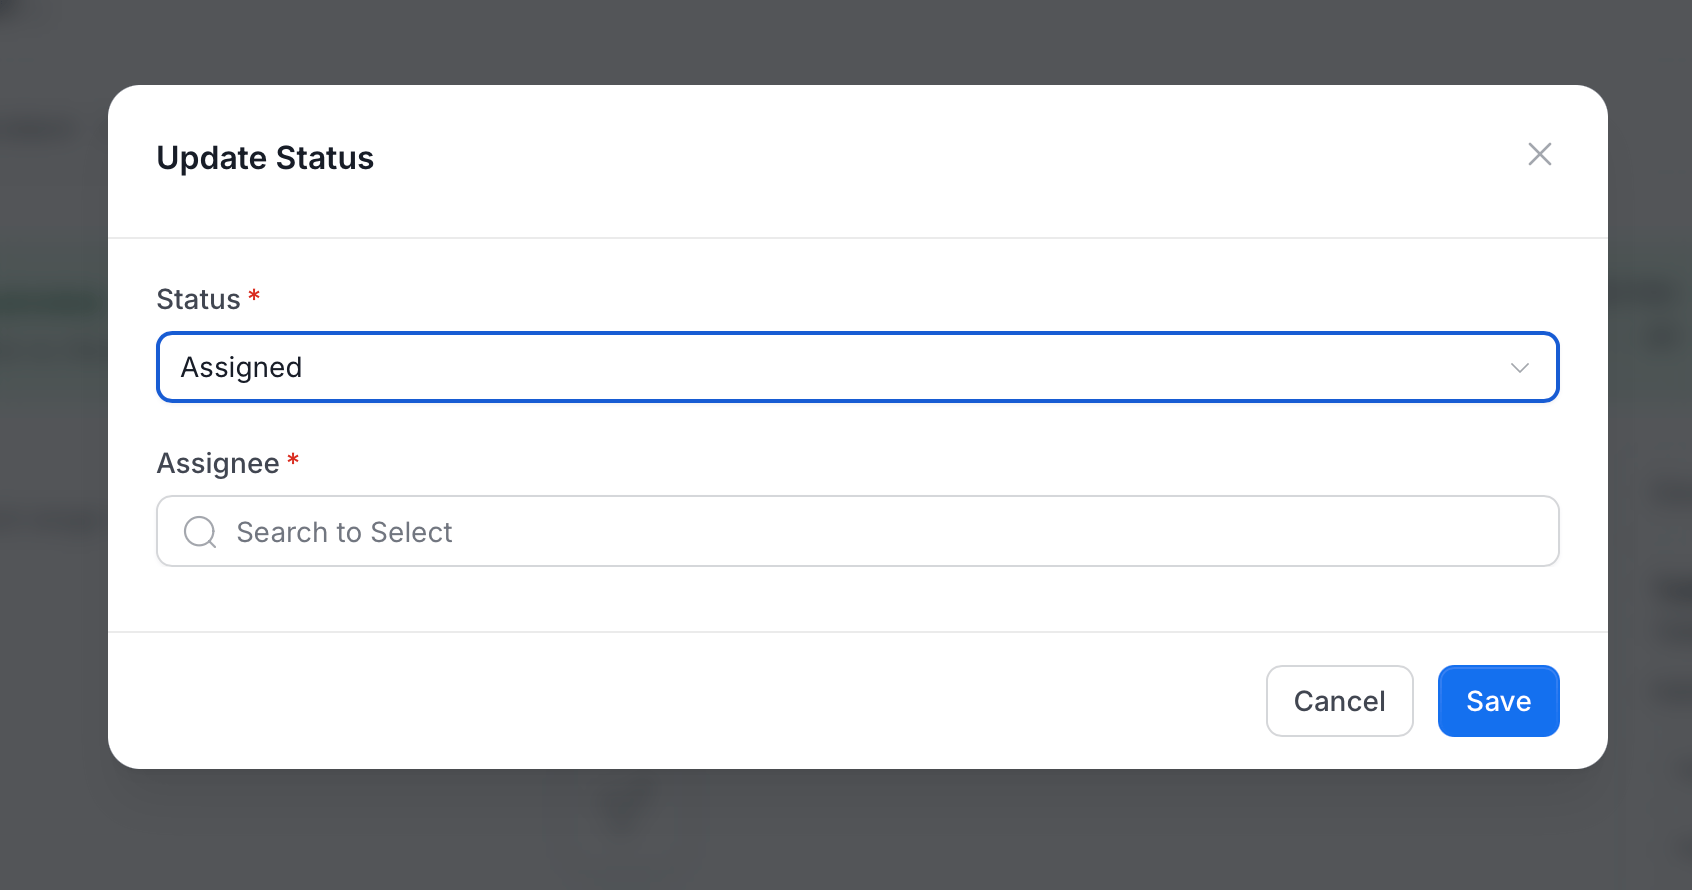
-
Resolved: Select a Reason and enter a Comment. Both fields are required.
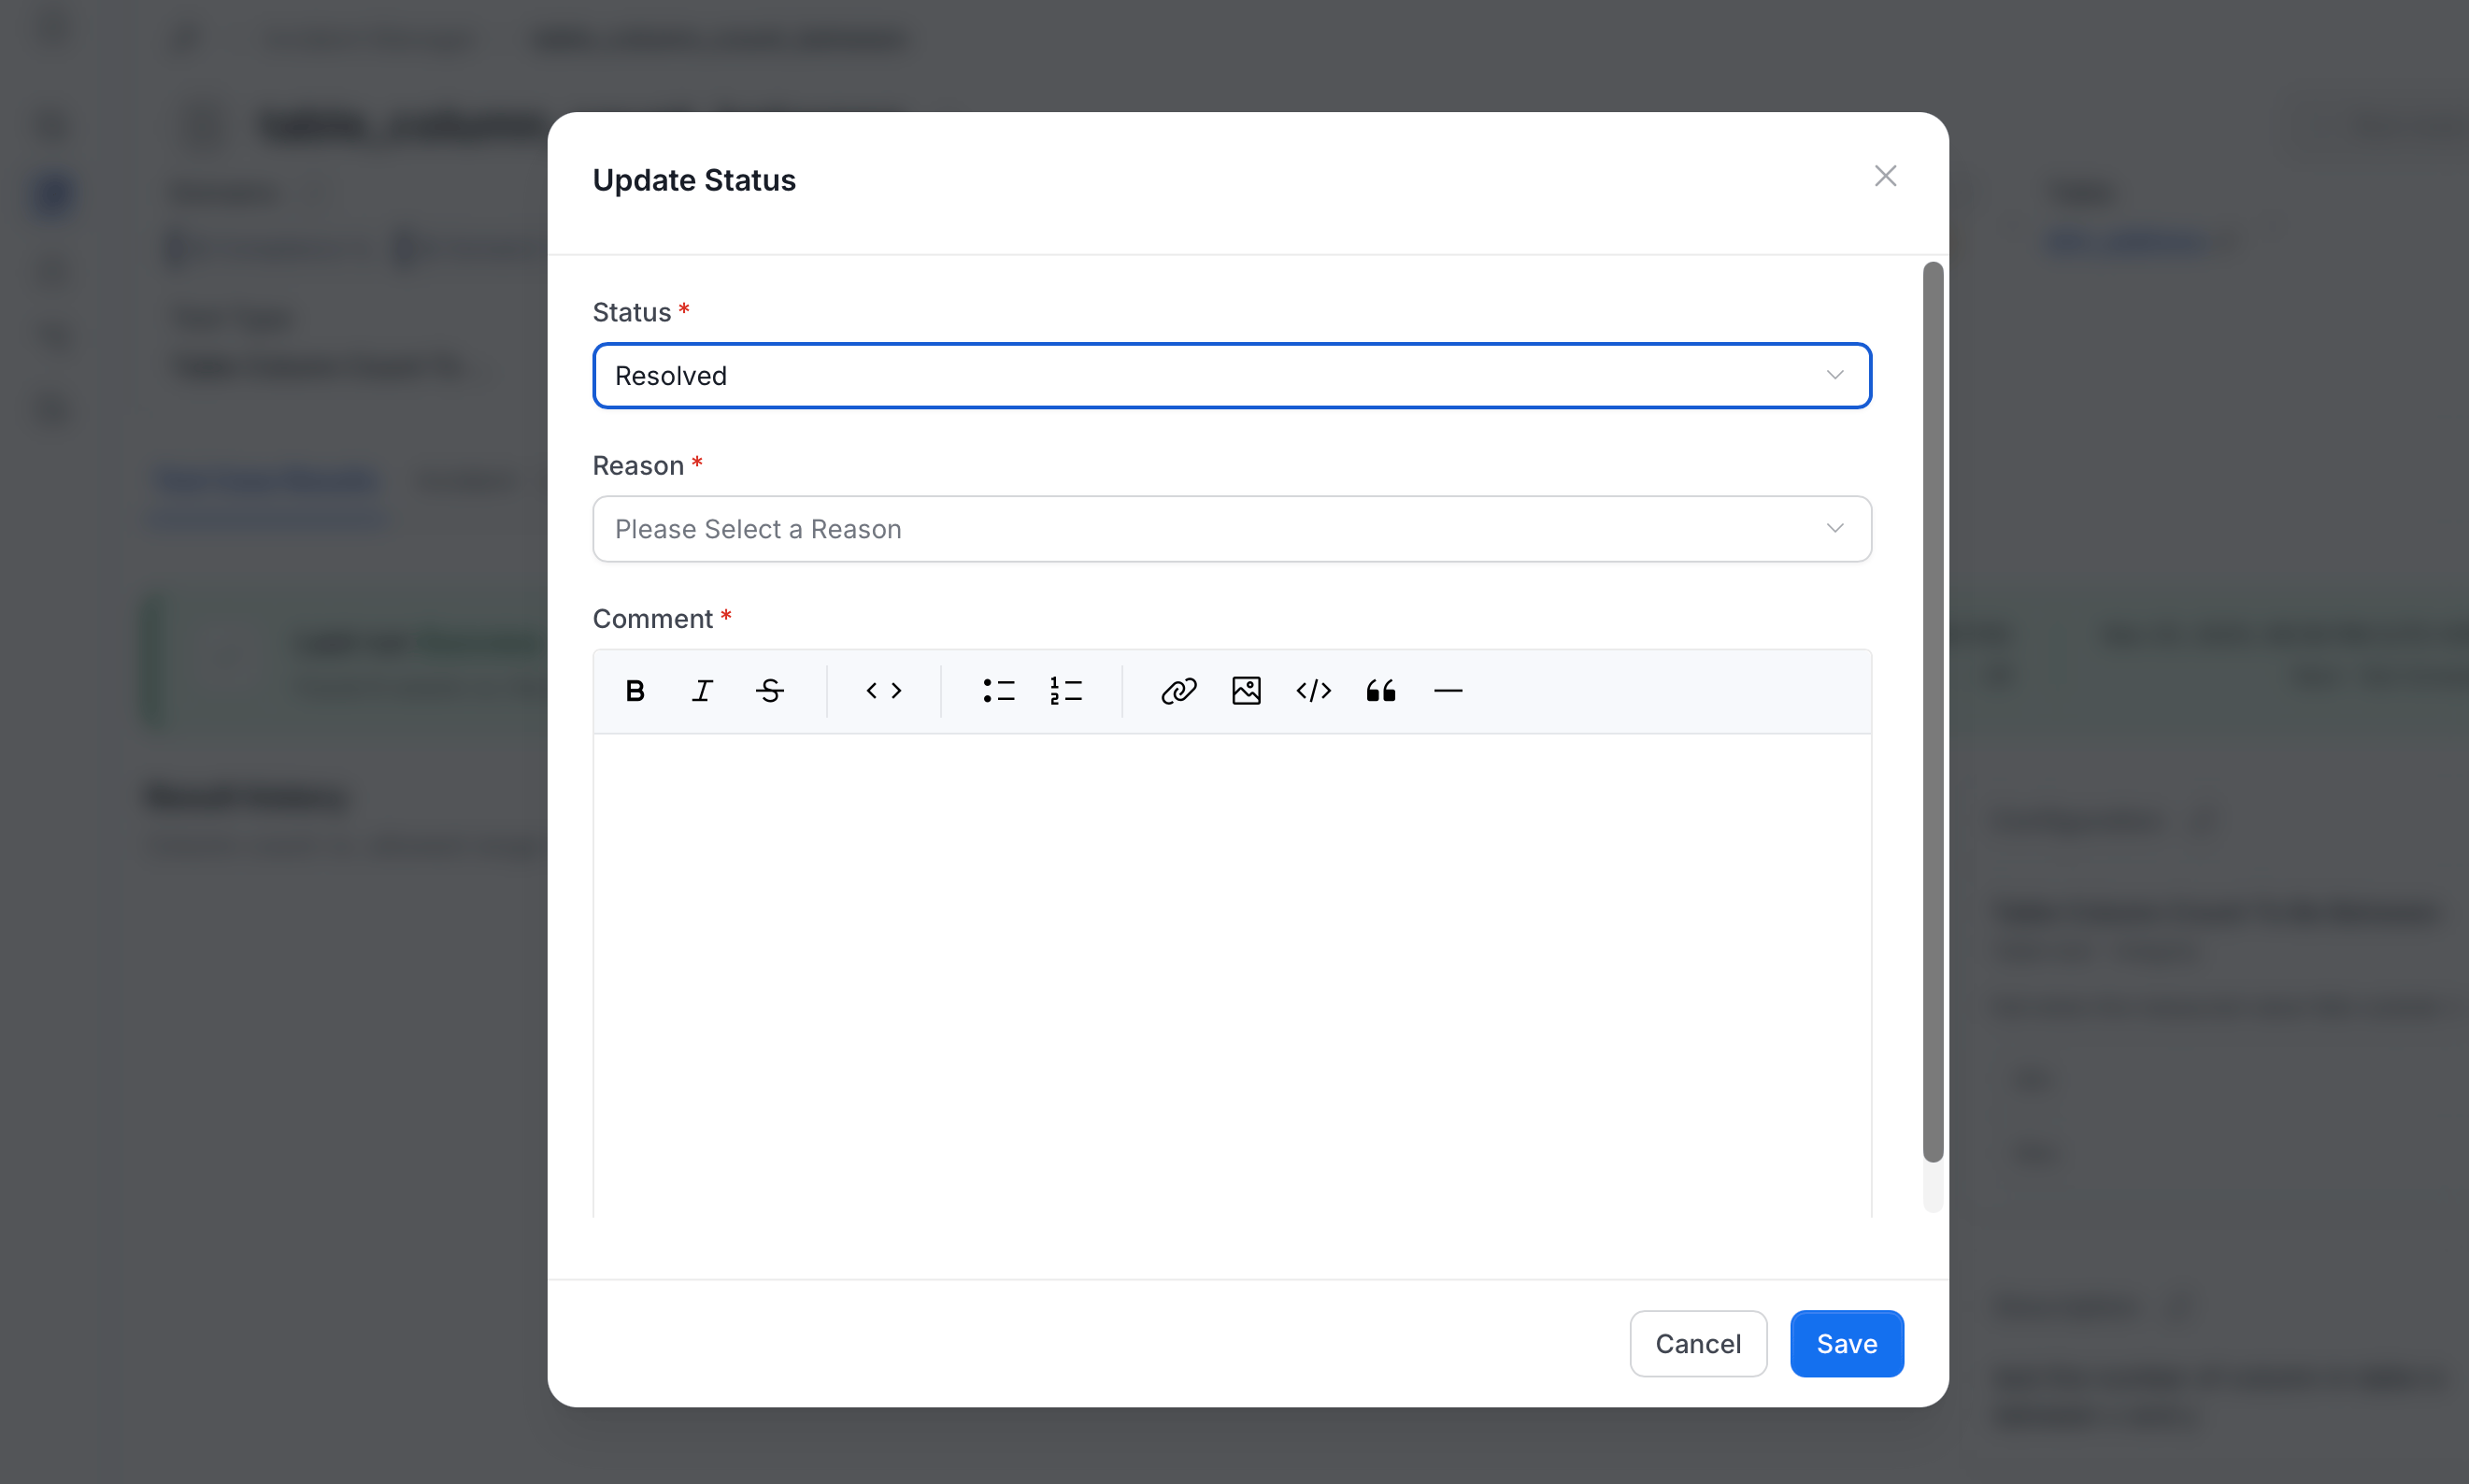
- Select Save.
For Multiple Incidents or Test Cases
To change the status or severity of all the open incidents in several groups at once:-
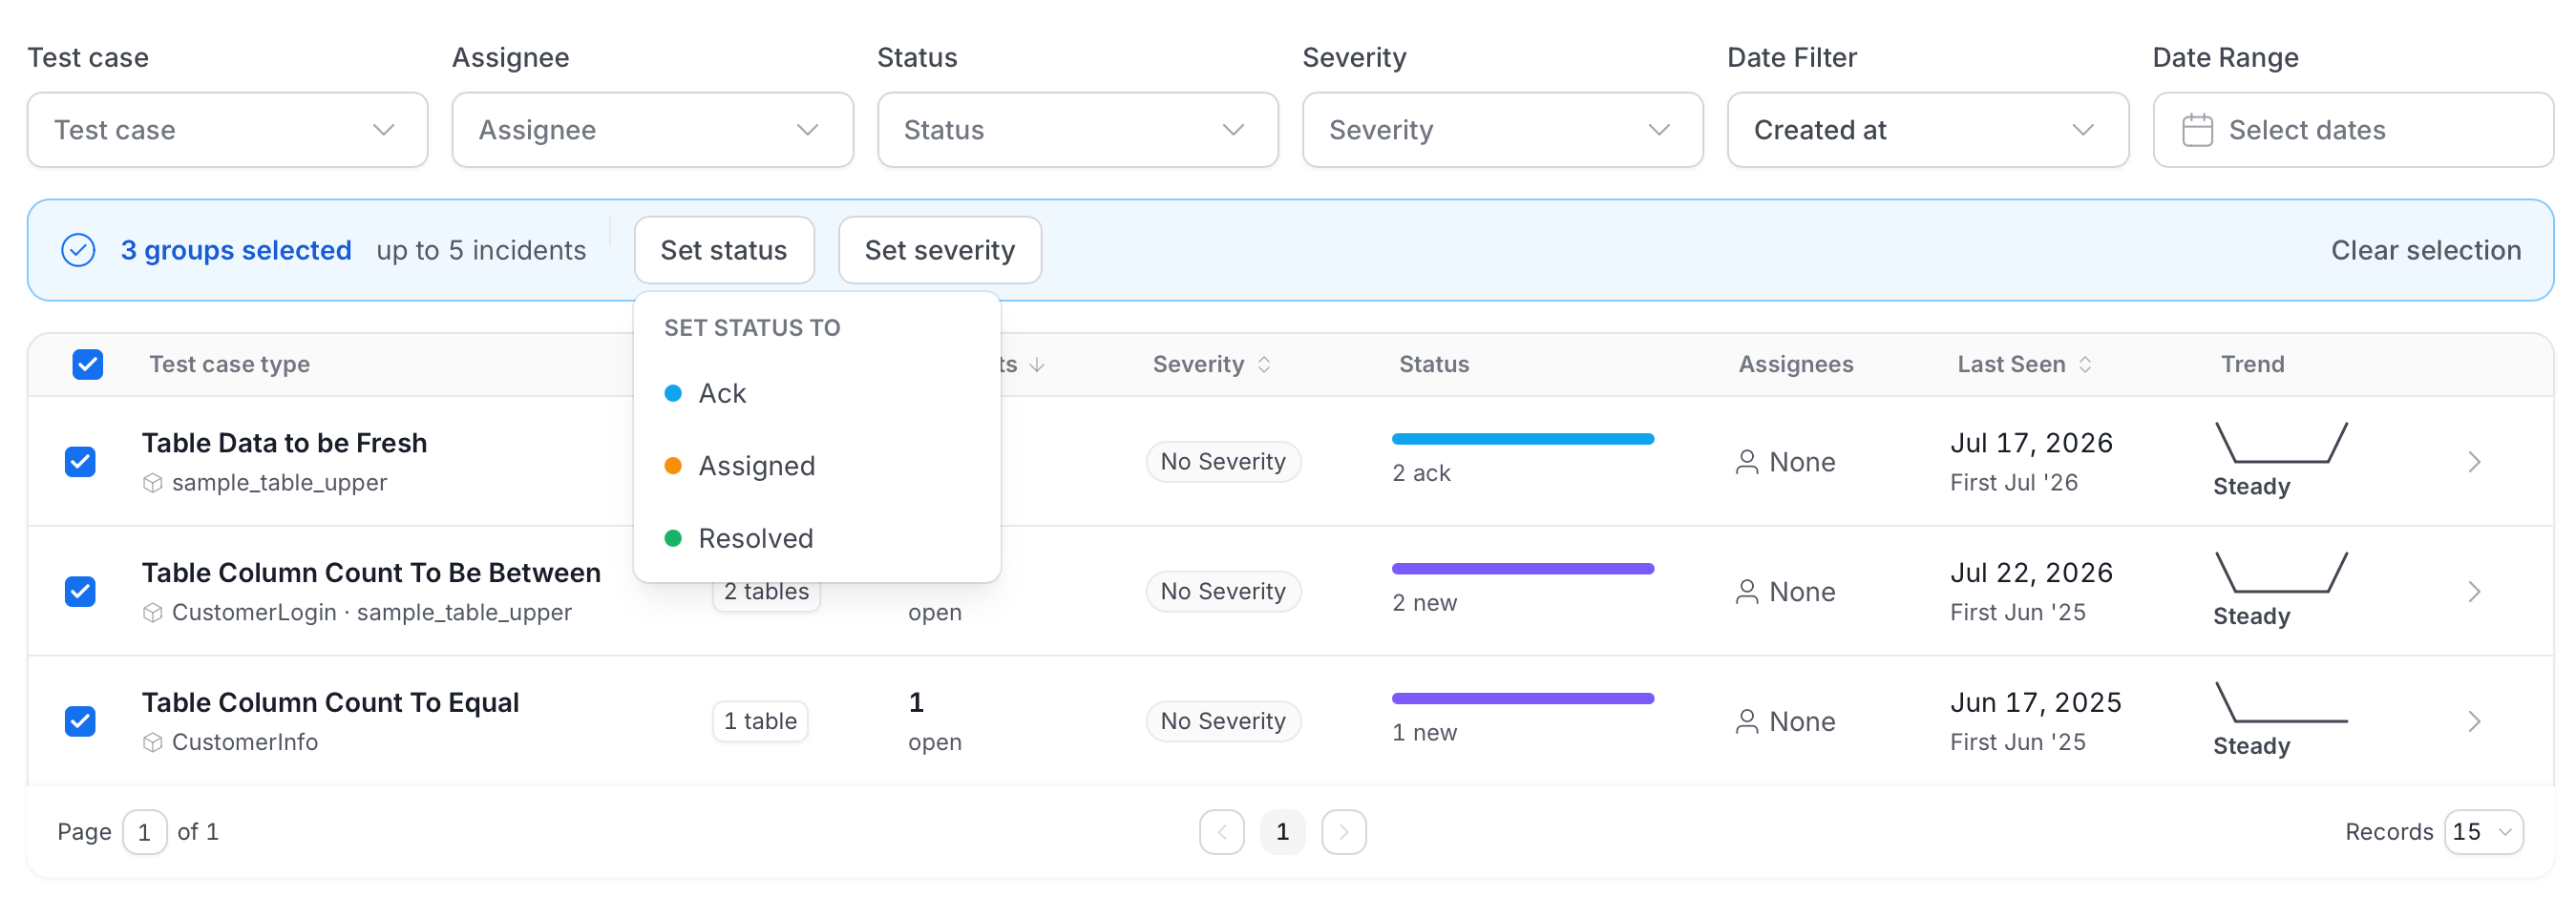
Select the checkbox next to each test case type, or select all. A bar shows how many groups you selected and how many incidents the change can affect.
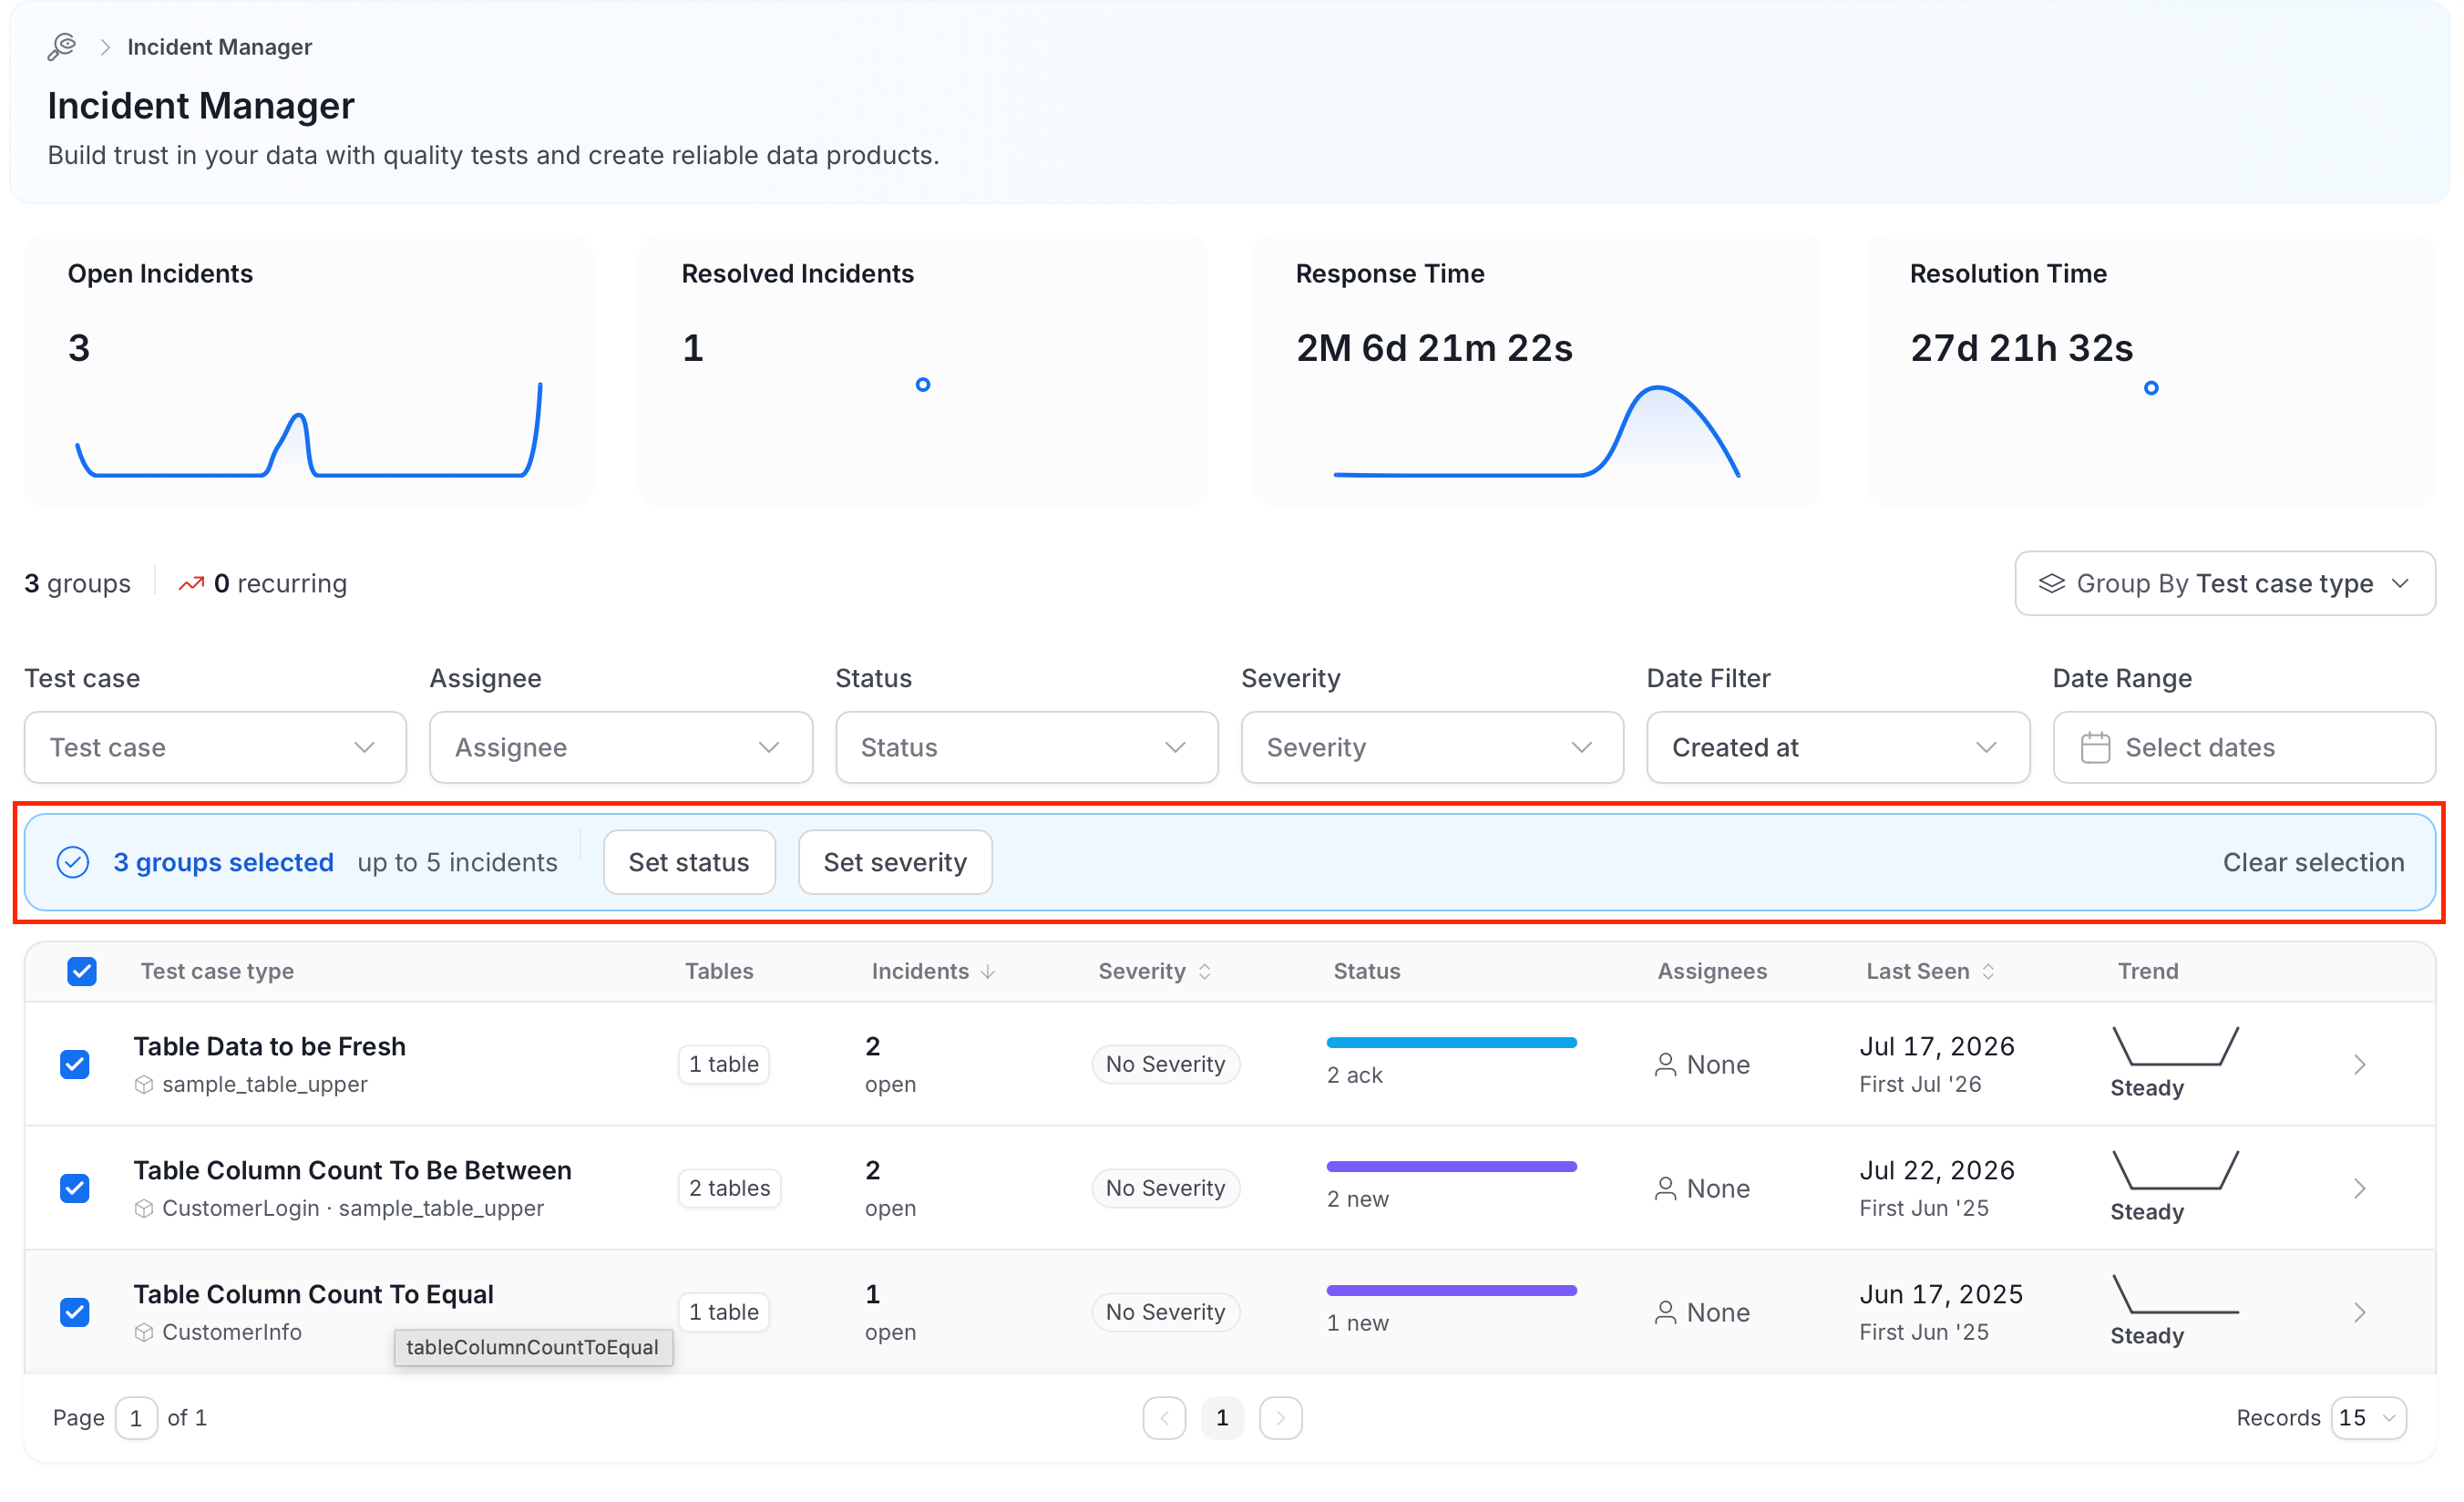
-
In the bar, select Set status and choose Ack, Assigned, or Resolved. Or select Set severity and choose Severity 1 to Severity 5.
-
Complete the action for the option that you selected:
- Ack: Select Apply.
-
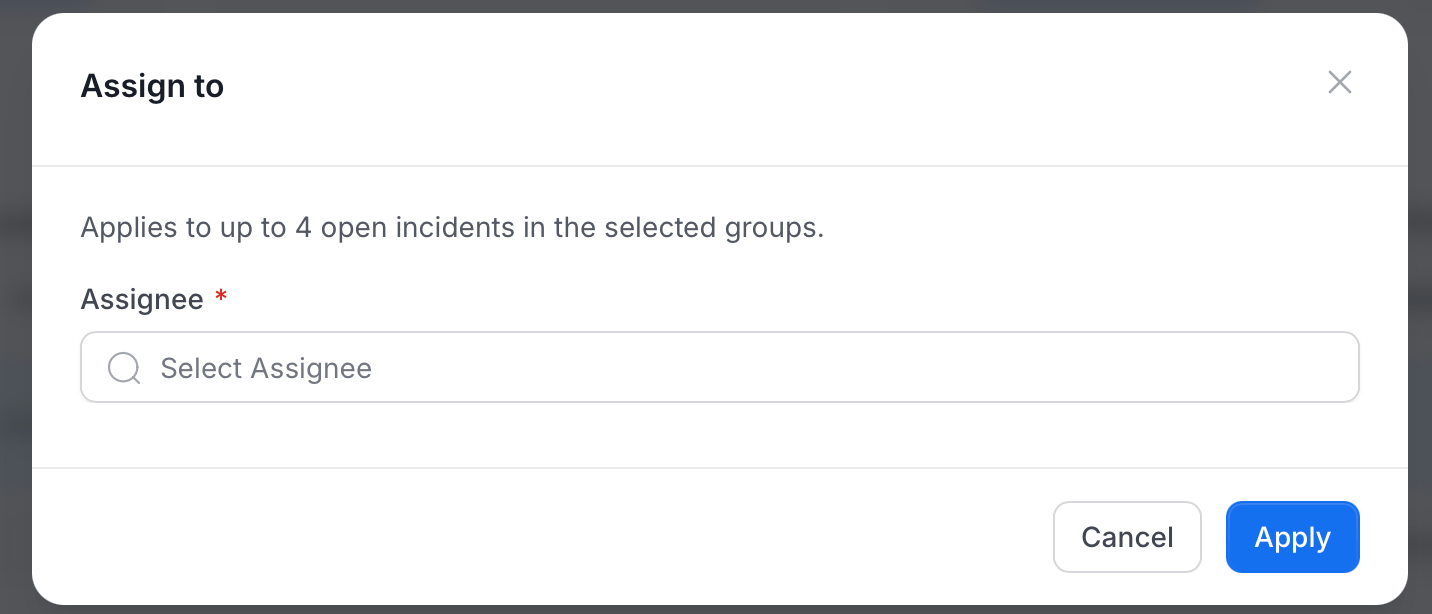
Assigned: Select an Assignee, which can be a user or a team, and select Apply.
-
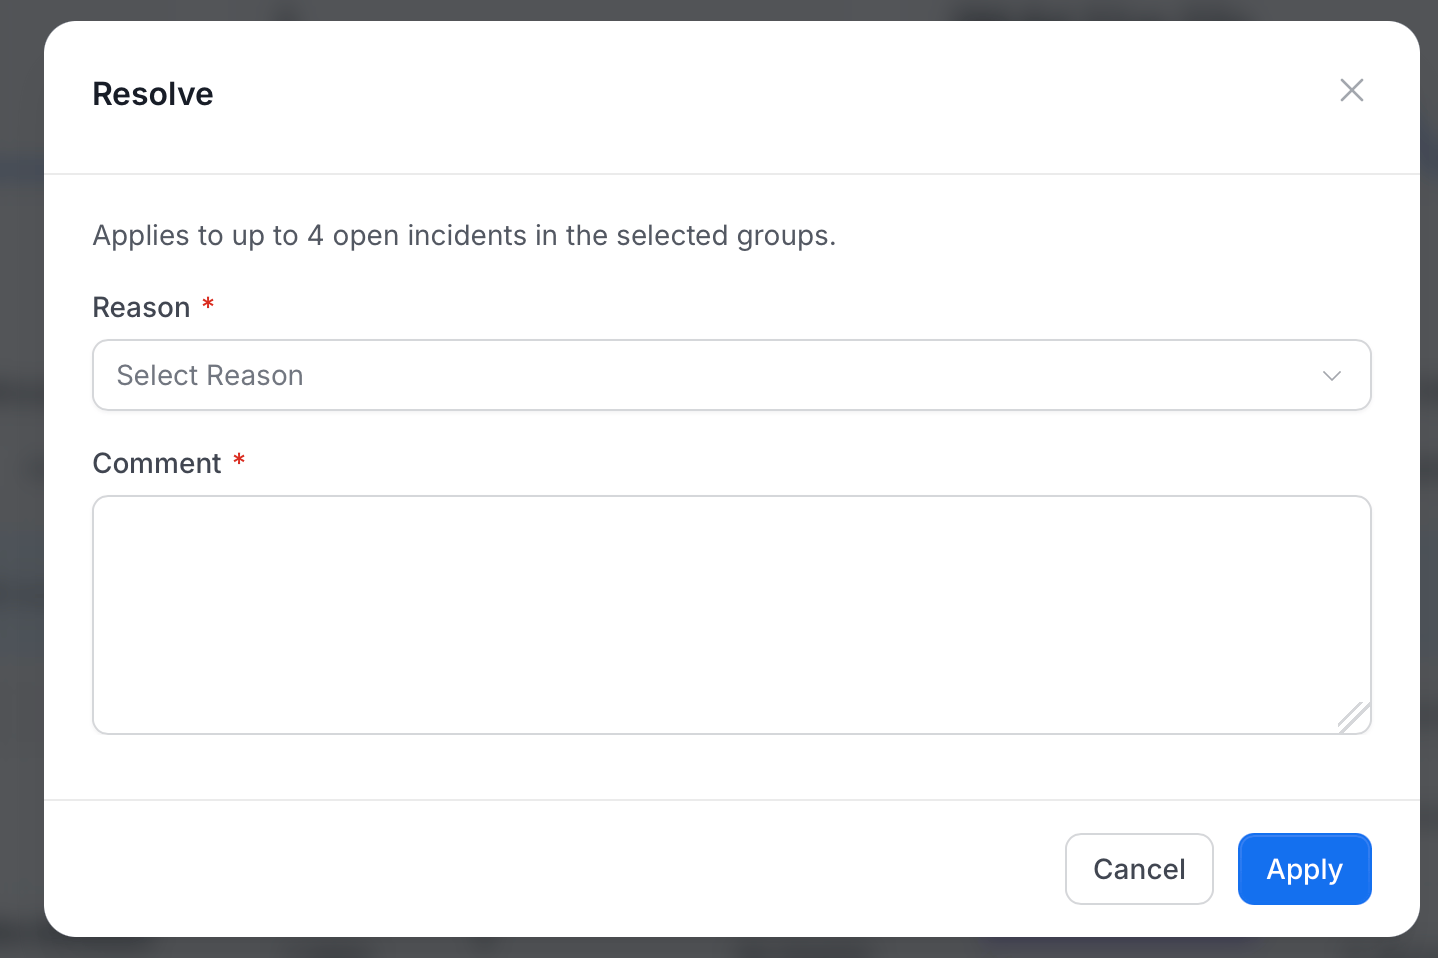
Resolved: The dialog is titled Resolve.
- Select a Reason: Duplicates, False positive, Missing data, Out of bounds, or Other.
- Enter a Comment.
- Select Apply.
- Severity: The dialog is titled Set severity and shows the severity that you chose. It has no fields. Select Apply.
Incident Severity Change
Update the incident severity to reflect how critical the failure is. Collate sets a severity automatically when it has enough context. Change it at any time.For Single Incident or Test Case
To change the severity of an individual incident, follow the steps below:- Open the group that contains the incident. See Open a Group.
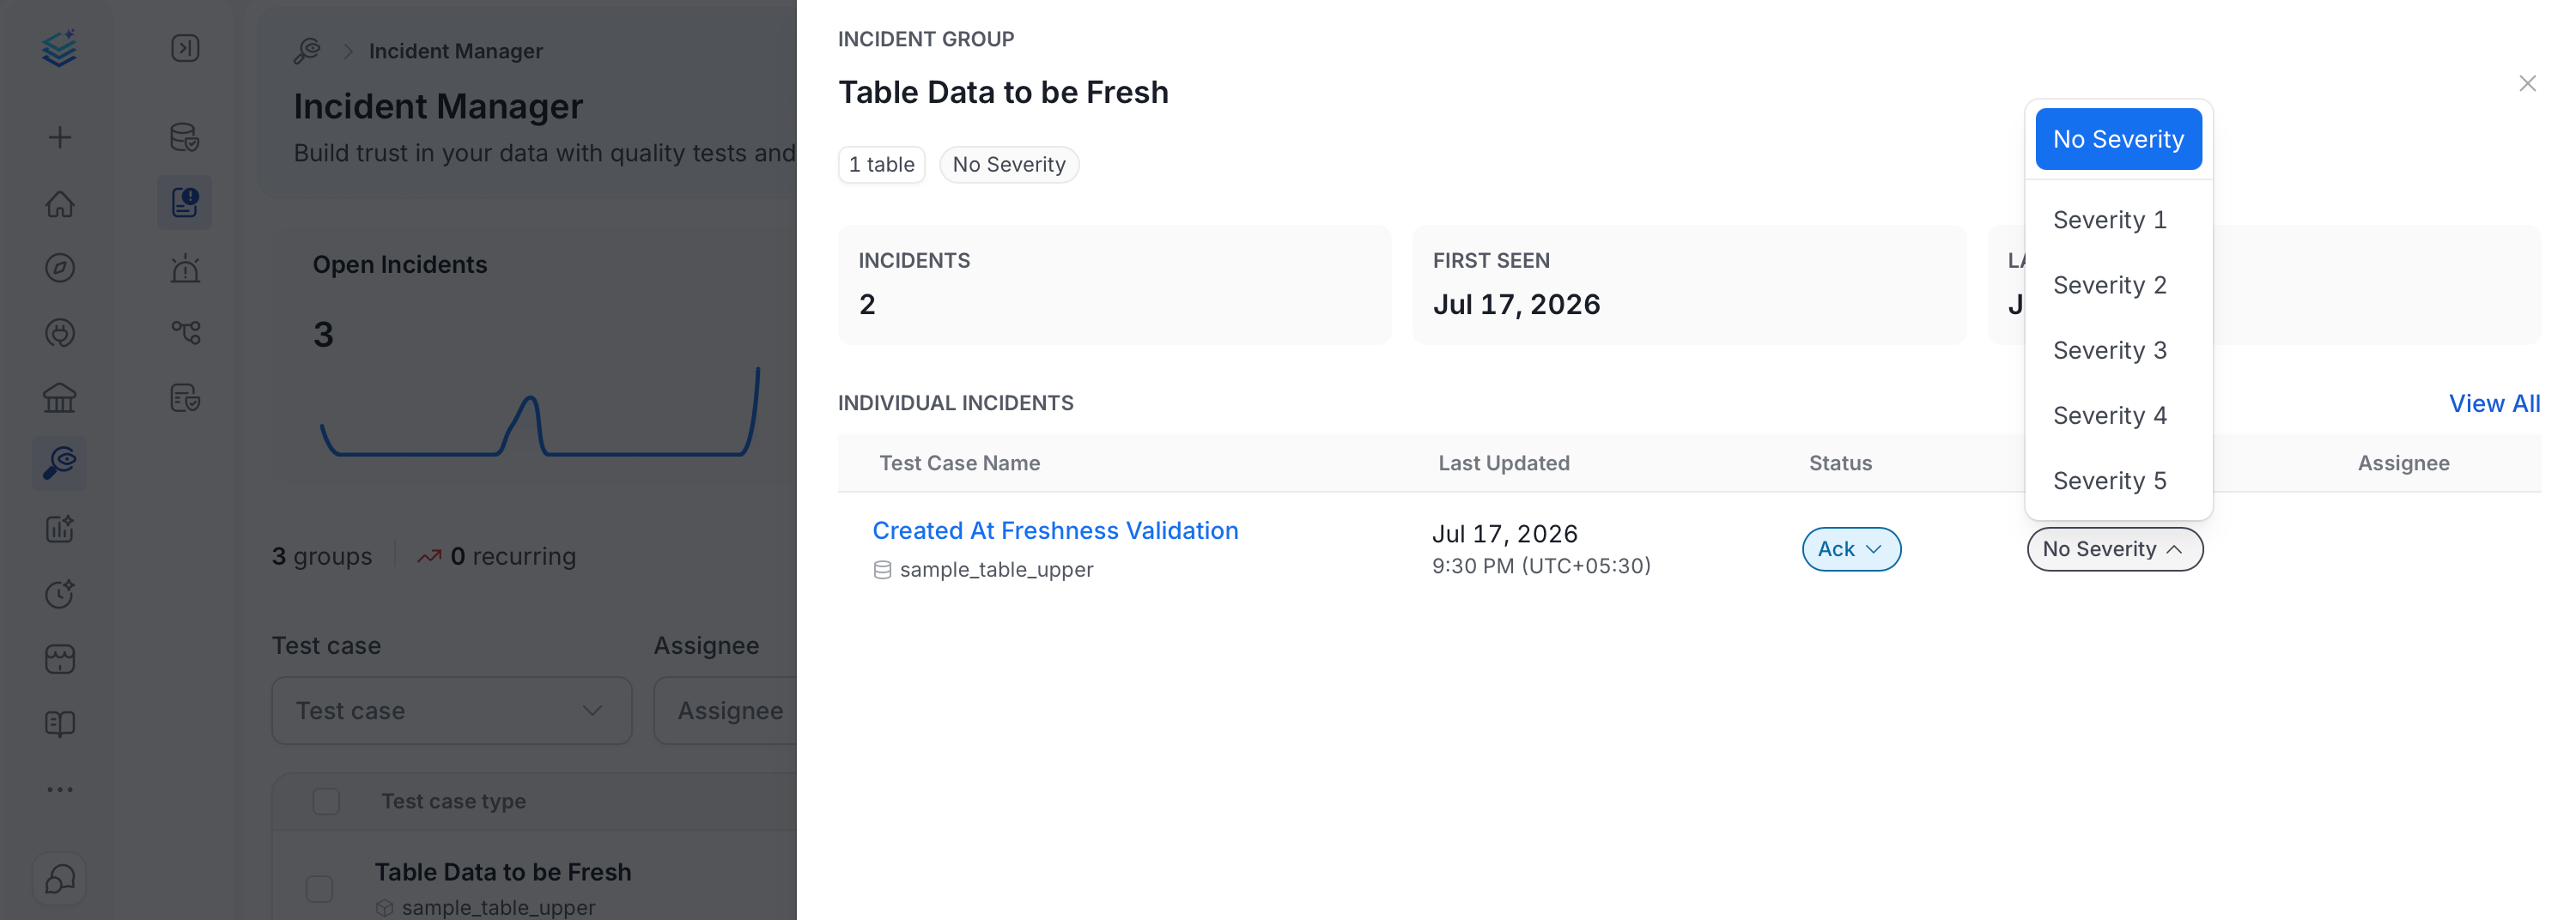
- In the Severity column, select the severity of the incident whose severity you want to change. A menu lists No Severity and Severity 1 to Severity 5. Severity 1 is the most critical.
-
Select a severity. Collate applies the change right away.
For Multiple Incidents or Test Cases
To change the severity of all the open incidents in several groups at once:- Select the checkbox next to each group, or select the checkbox in the header row to select every group on the page. A bar shows how many groups you selected and how many incidents the change can affect.
-
In the bar, select Set severity and choose Severity 1 to Severity 5.
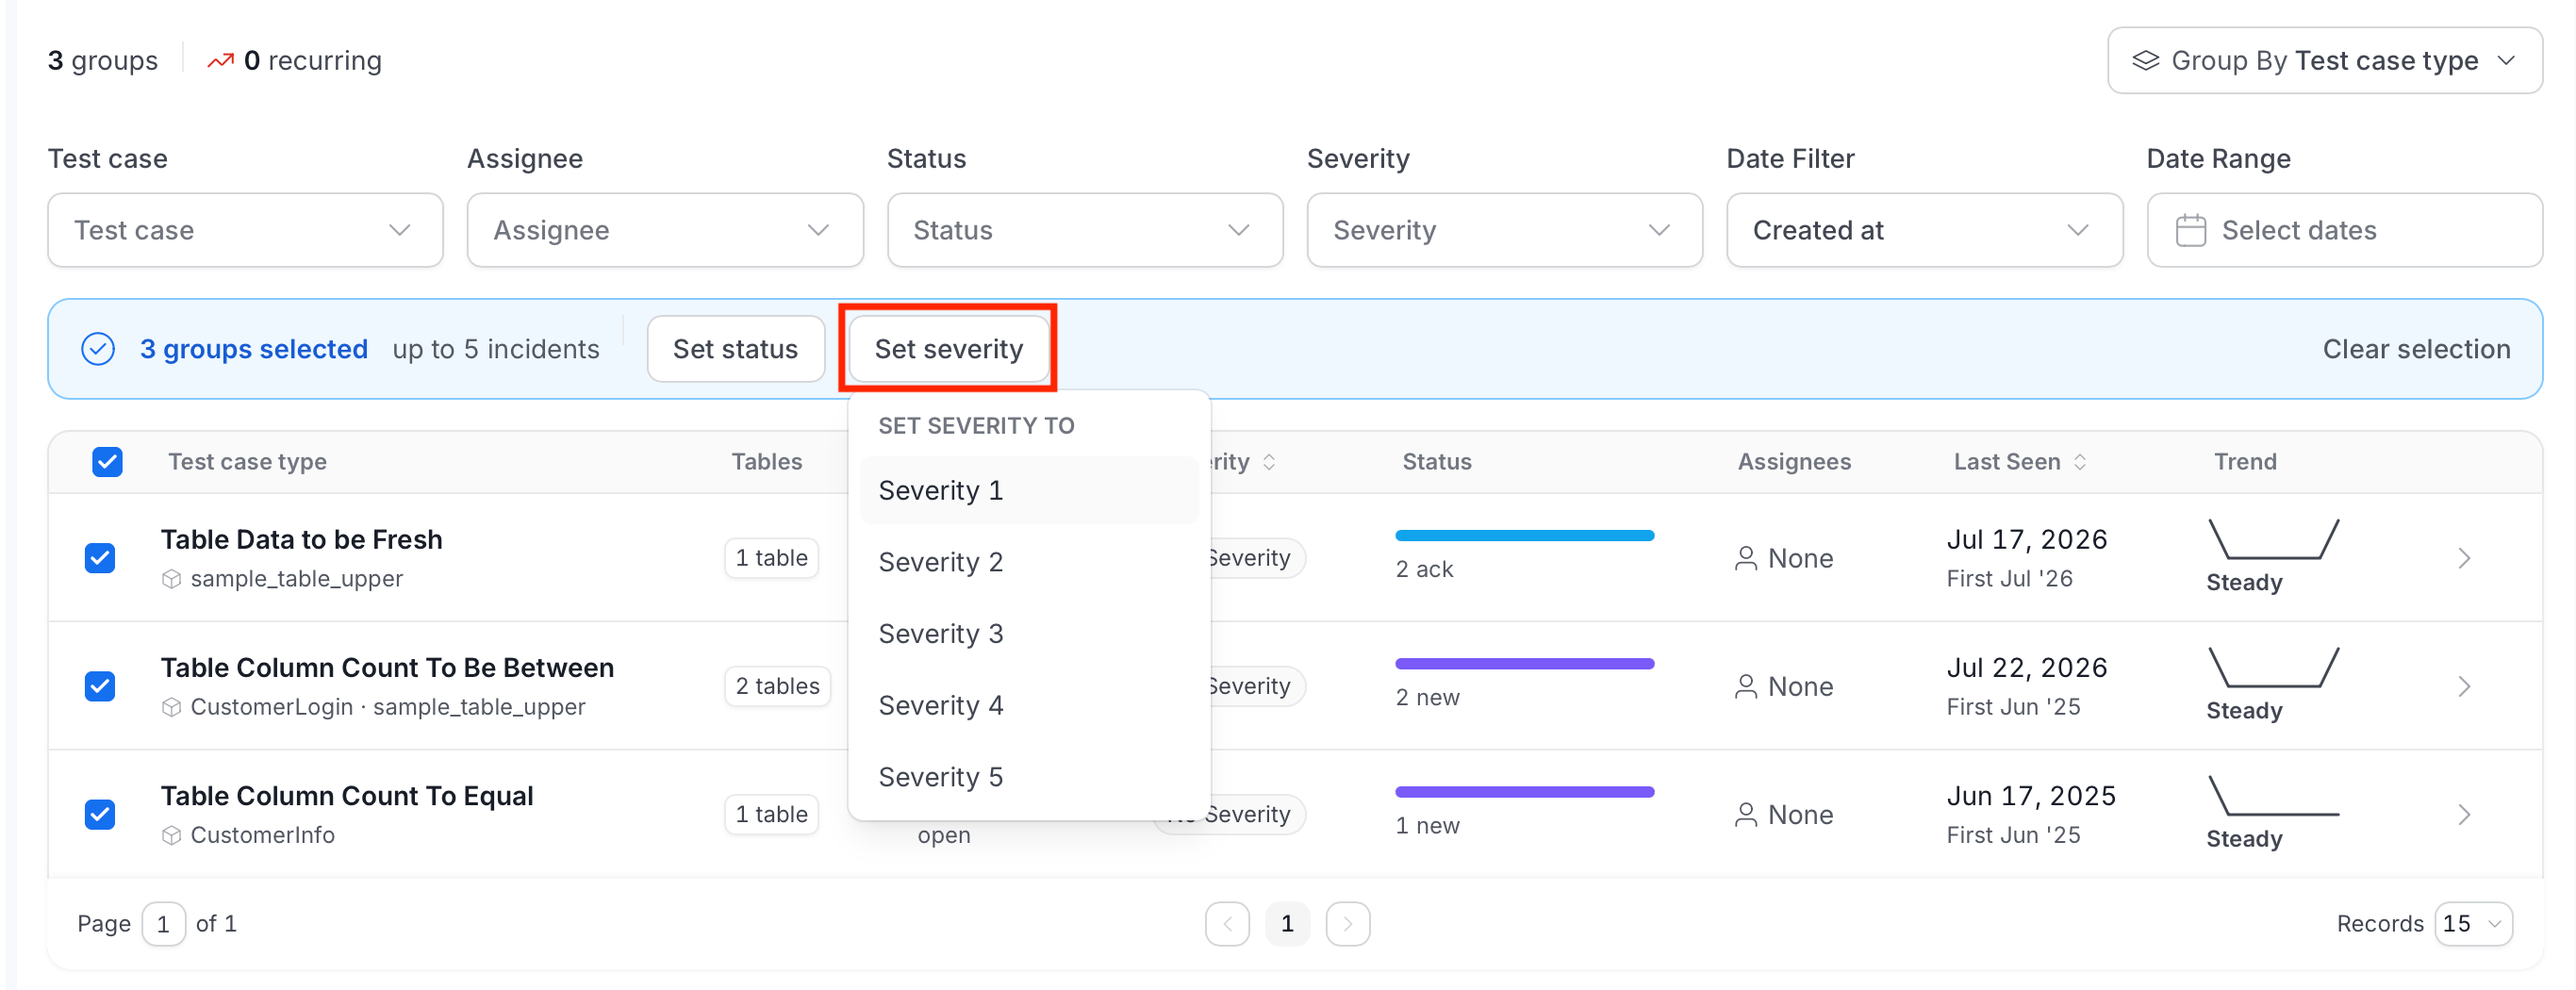
- Select Apply.
Incident Resolution
Once you resolve an incident, close it officially. Add a Root Cause Analysis (RCA) to the resolution comments to provide context for what went wrong and how it was fixed.Steps to Resolve and Close an Incident
- Verify that all necessary steps to resolve the incident have been completed.
- In the Status column, select the status of the incident and choose Resolved.
- In the Resolved panel, select a Reason and describe the RCA in the Comment. Both are required.
- Select the check mark icon to close the incident. It leaves its group and appears in the Resolved Incidents count.
Incident Activities
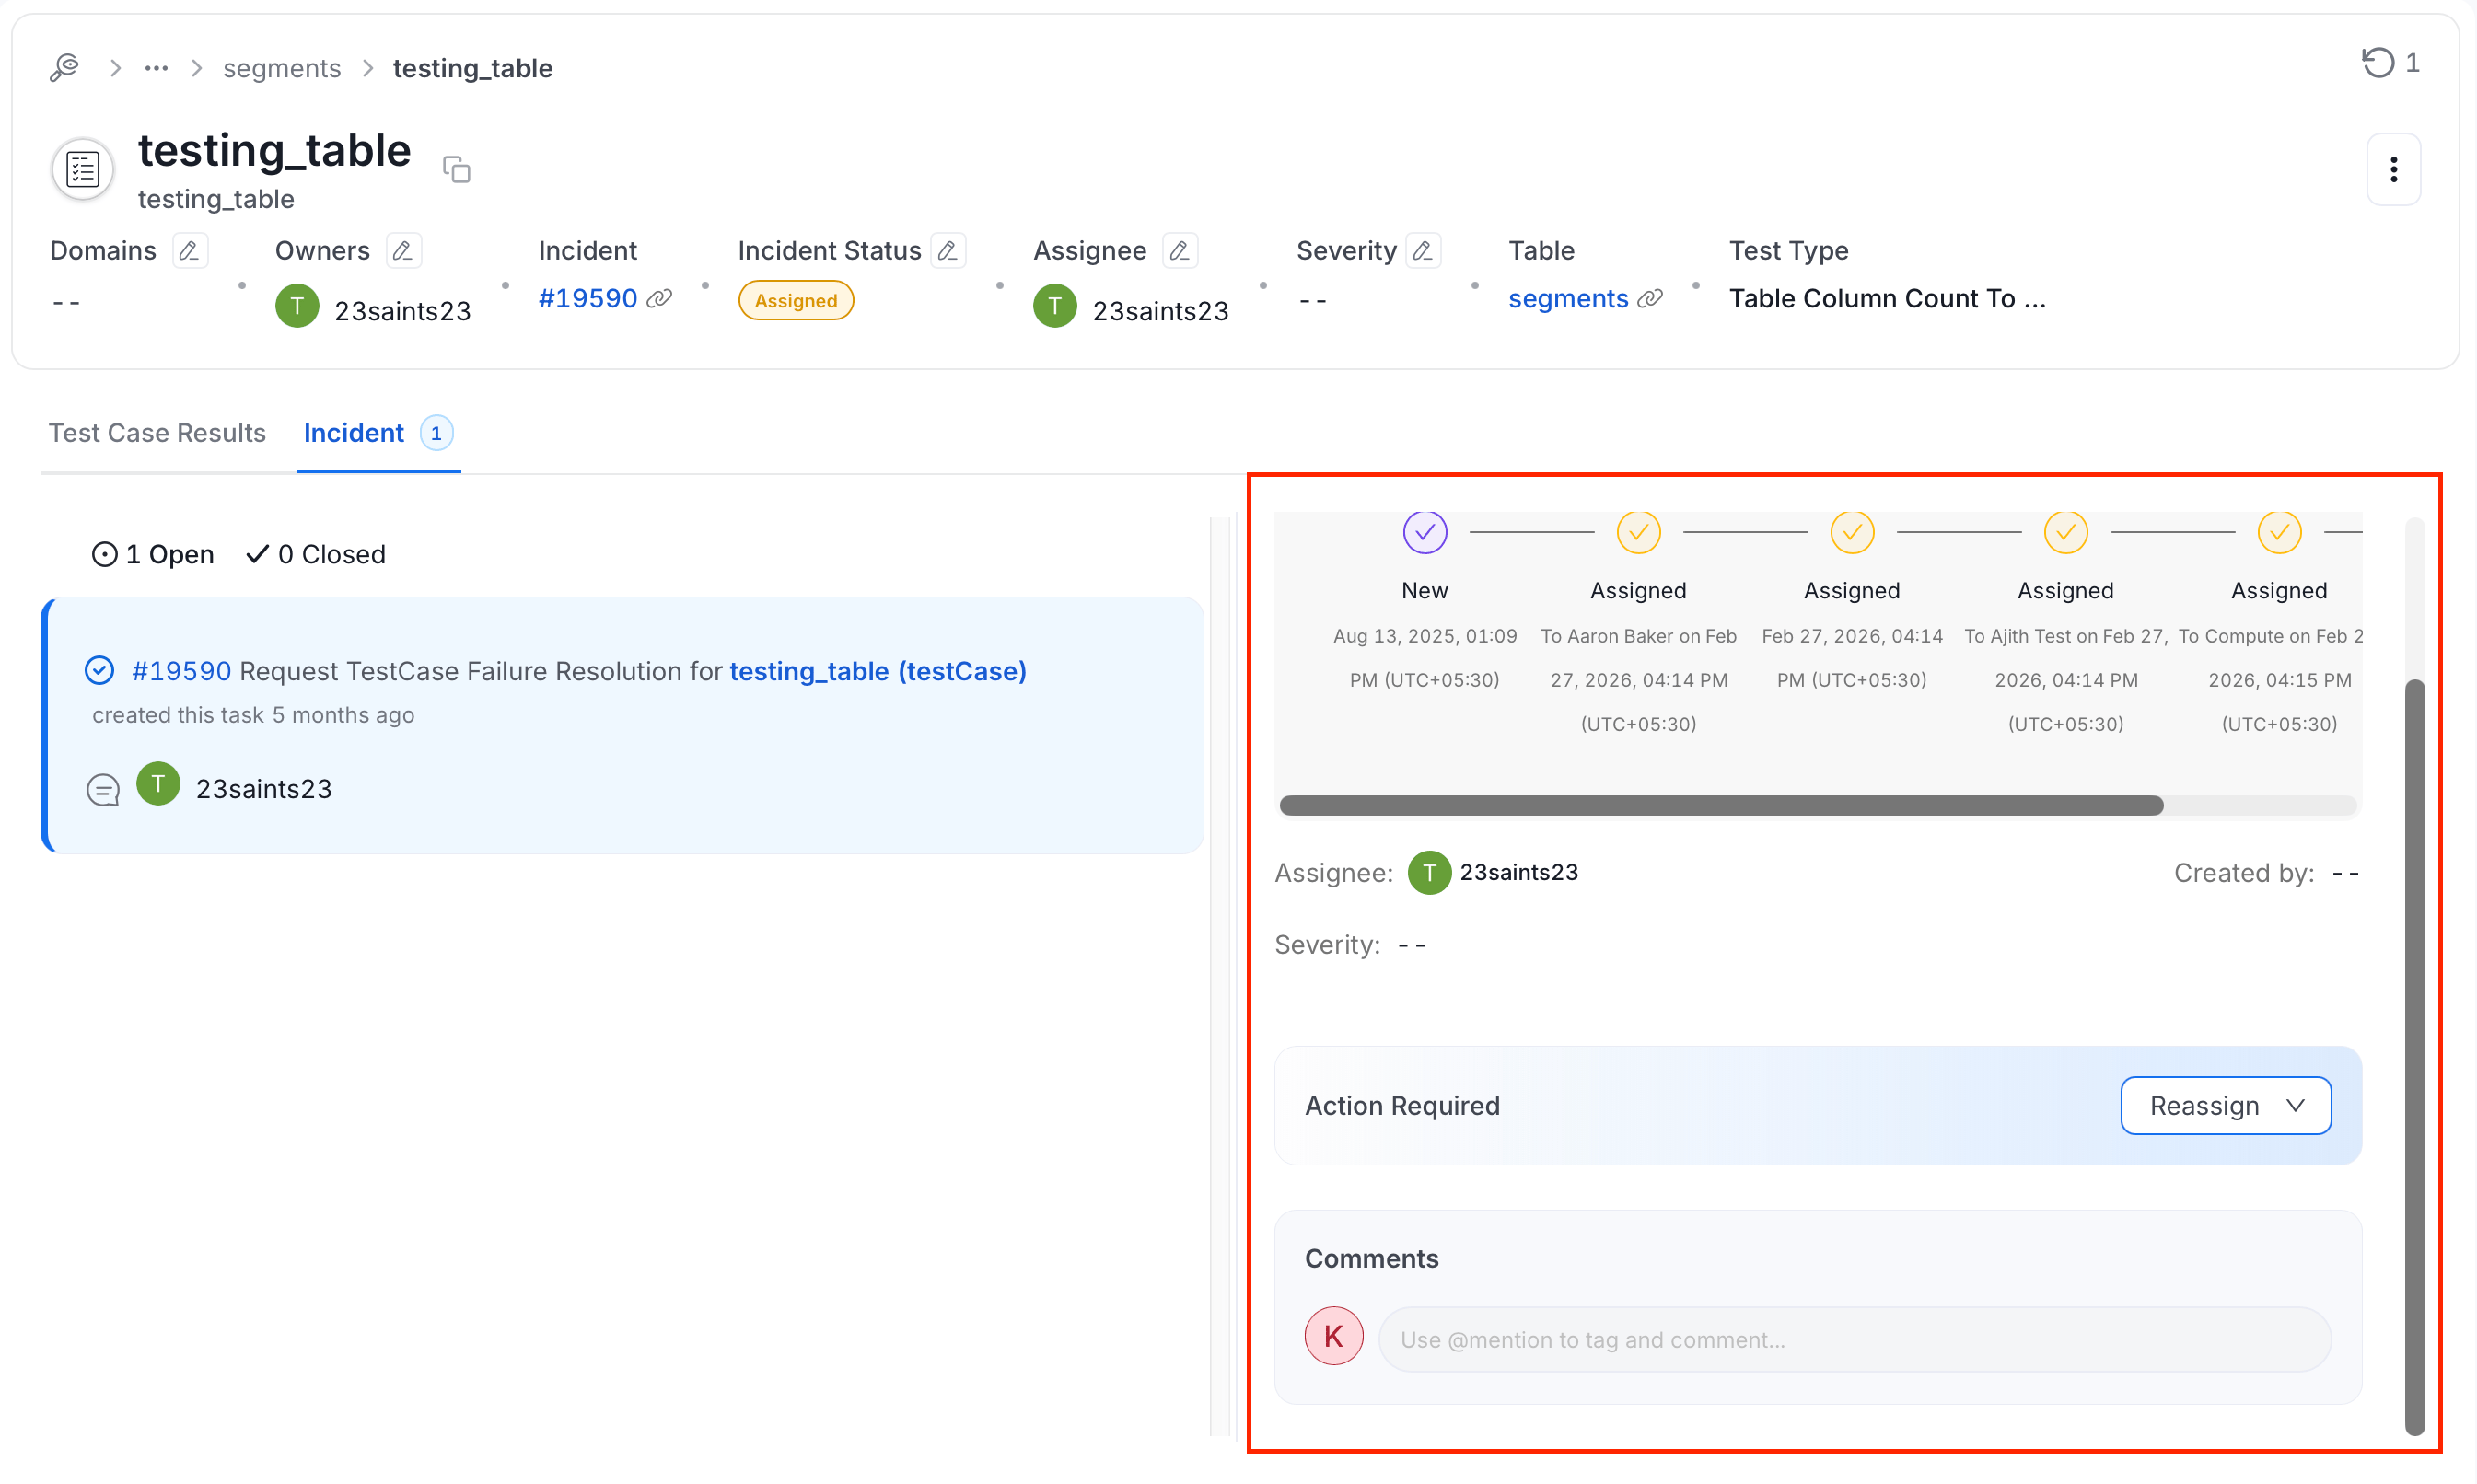
Each incident includes a detailed timeline where all activity is recorded. This timeline provides a comprehensive view of the incident’s lifecycle, including key events, RCA documentation, and closure updates.How to View Incident Activities
- On the Incident Manager page, select the test case type and open the incident.
- Navigate to the Incident tab.
- Review the chronological events, RCA, and closure updates associated with the incident.
Set Up Alerts for Incident Activity
To receive notifications when an incident is created, updated, commented on, or assigned, configure an alert with Source = Task. Incidents in Collate are Task threads with task typeRequestTestCaseFailureResolution. Alert sources are matched by thread type, not task type — so if you configure an alert with Source = Conversation, it will never fire for incidents.
Create an Incident Alert
-
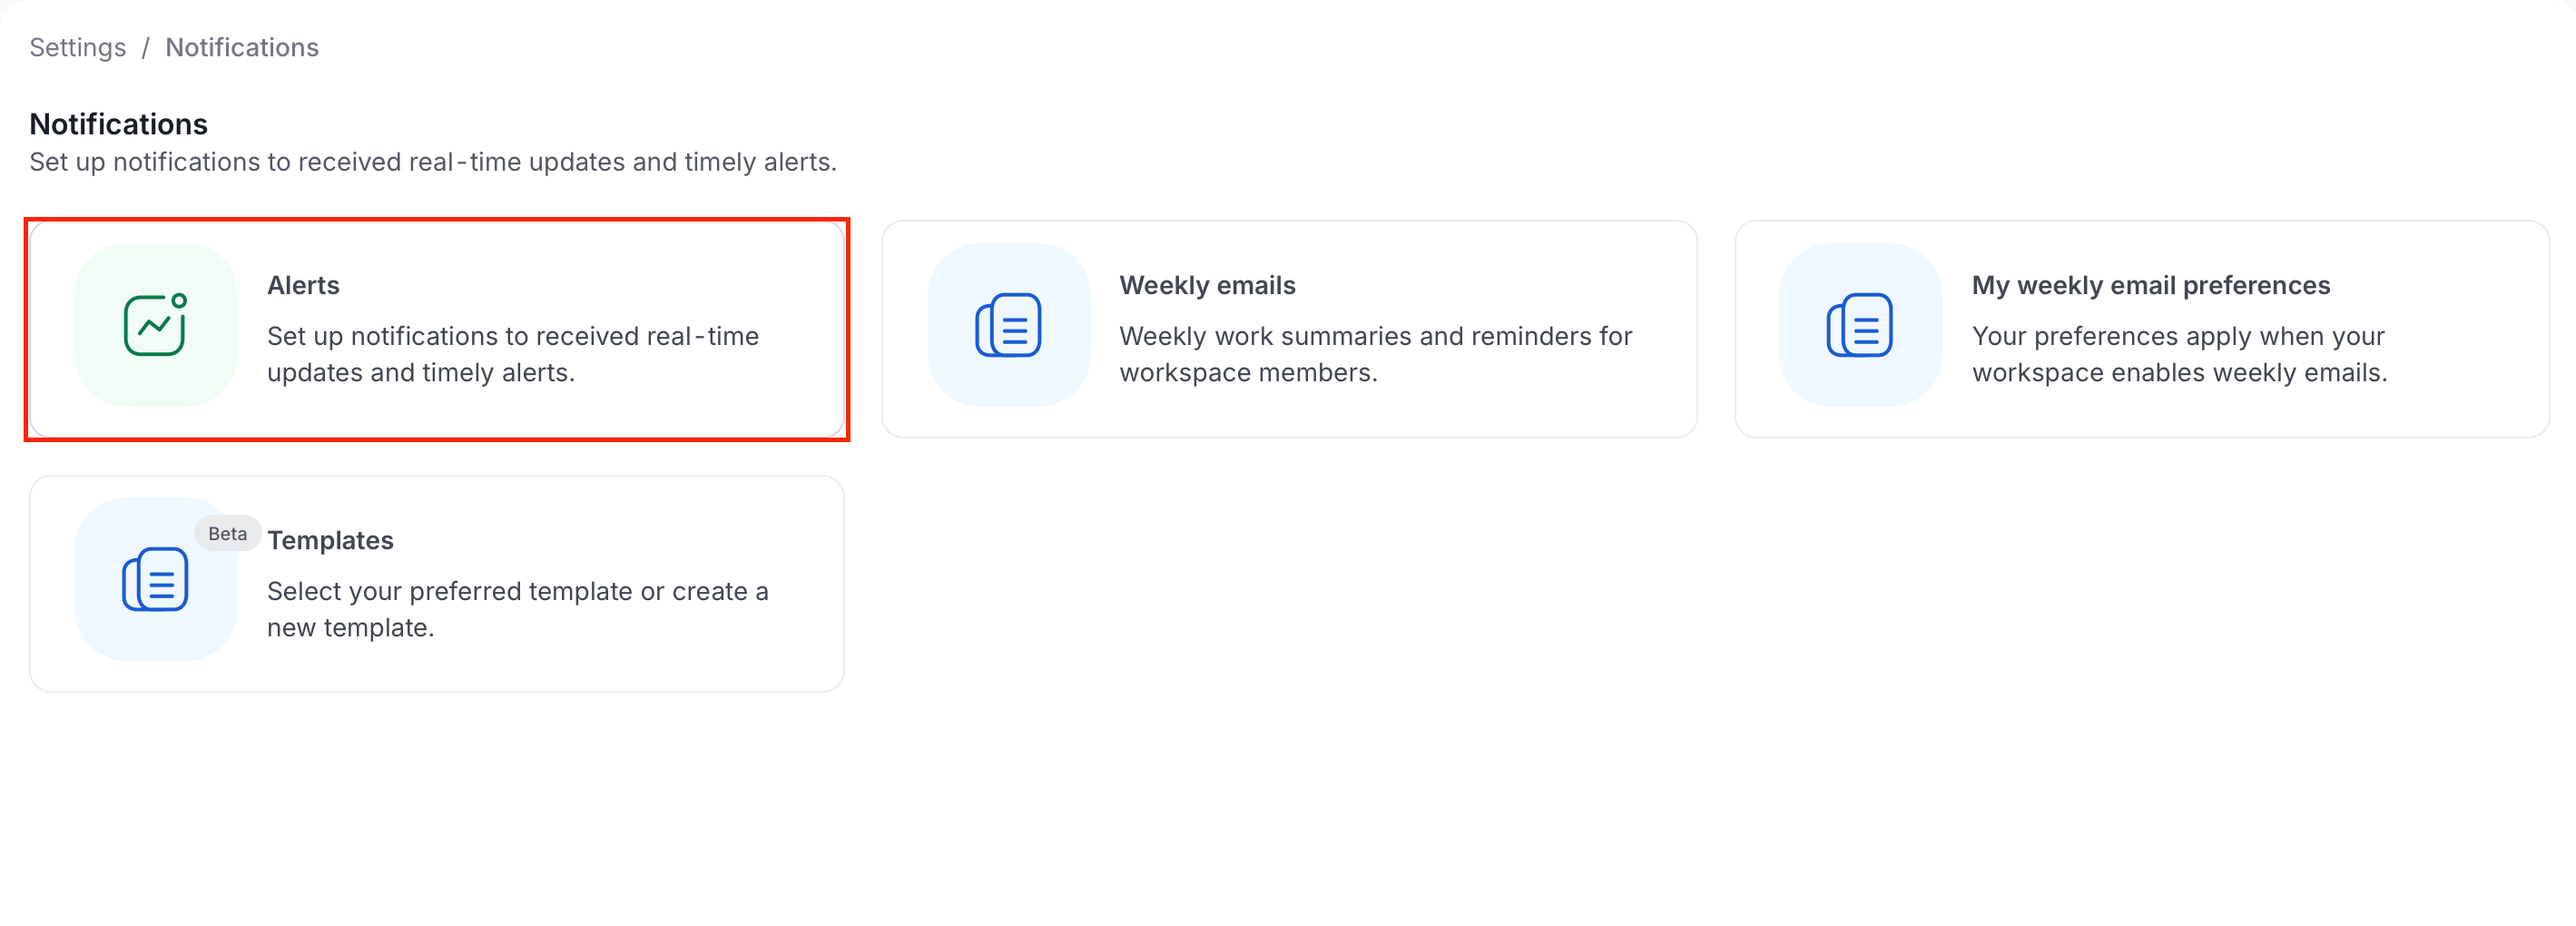
Select the Profile icon and navigate to Settings > Notifications > Alerts.
-
Select Add Alert.
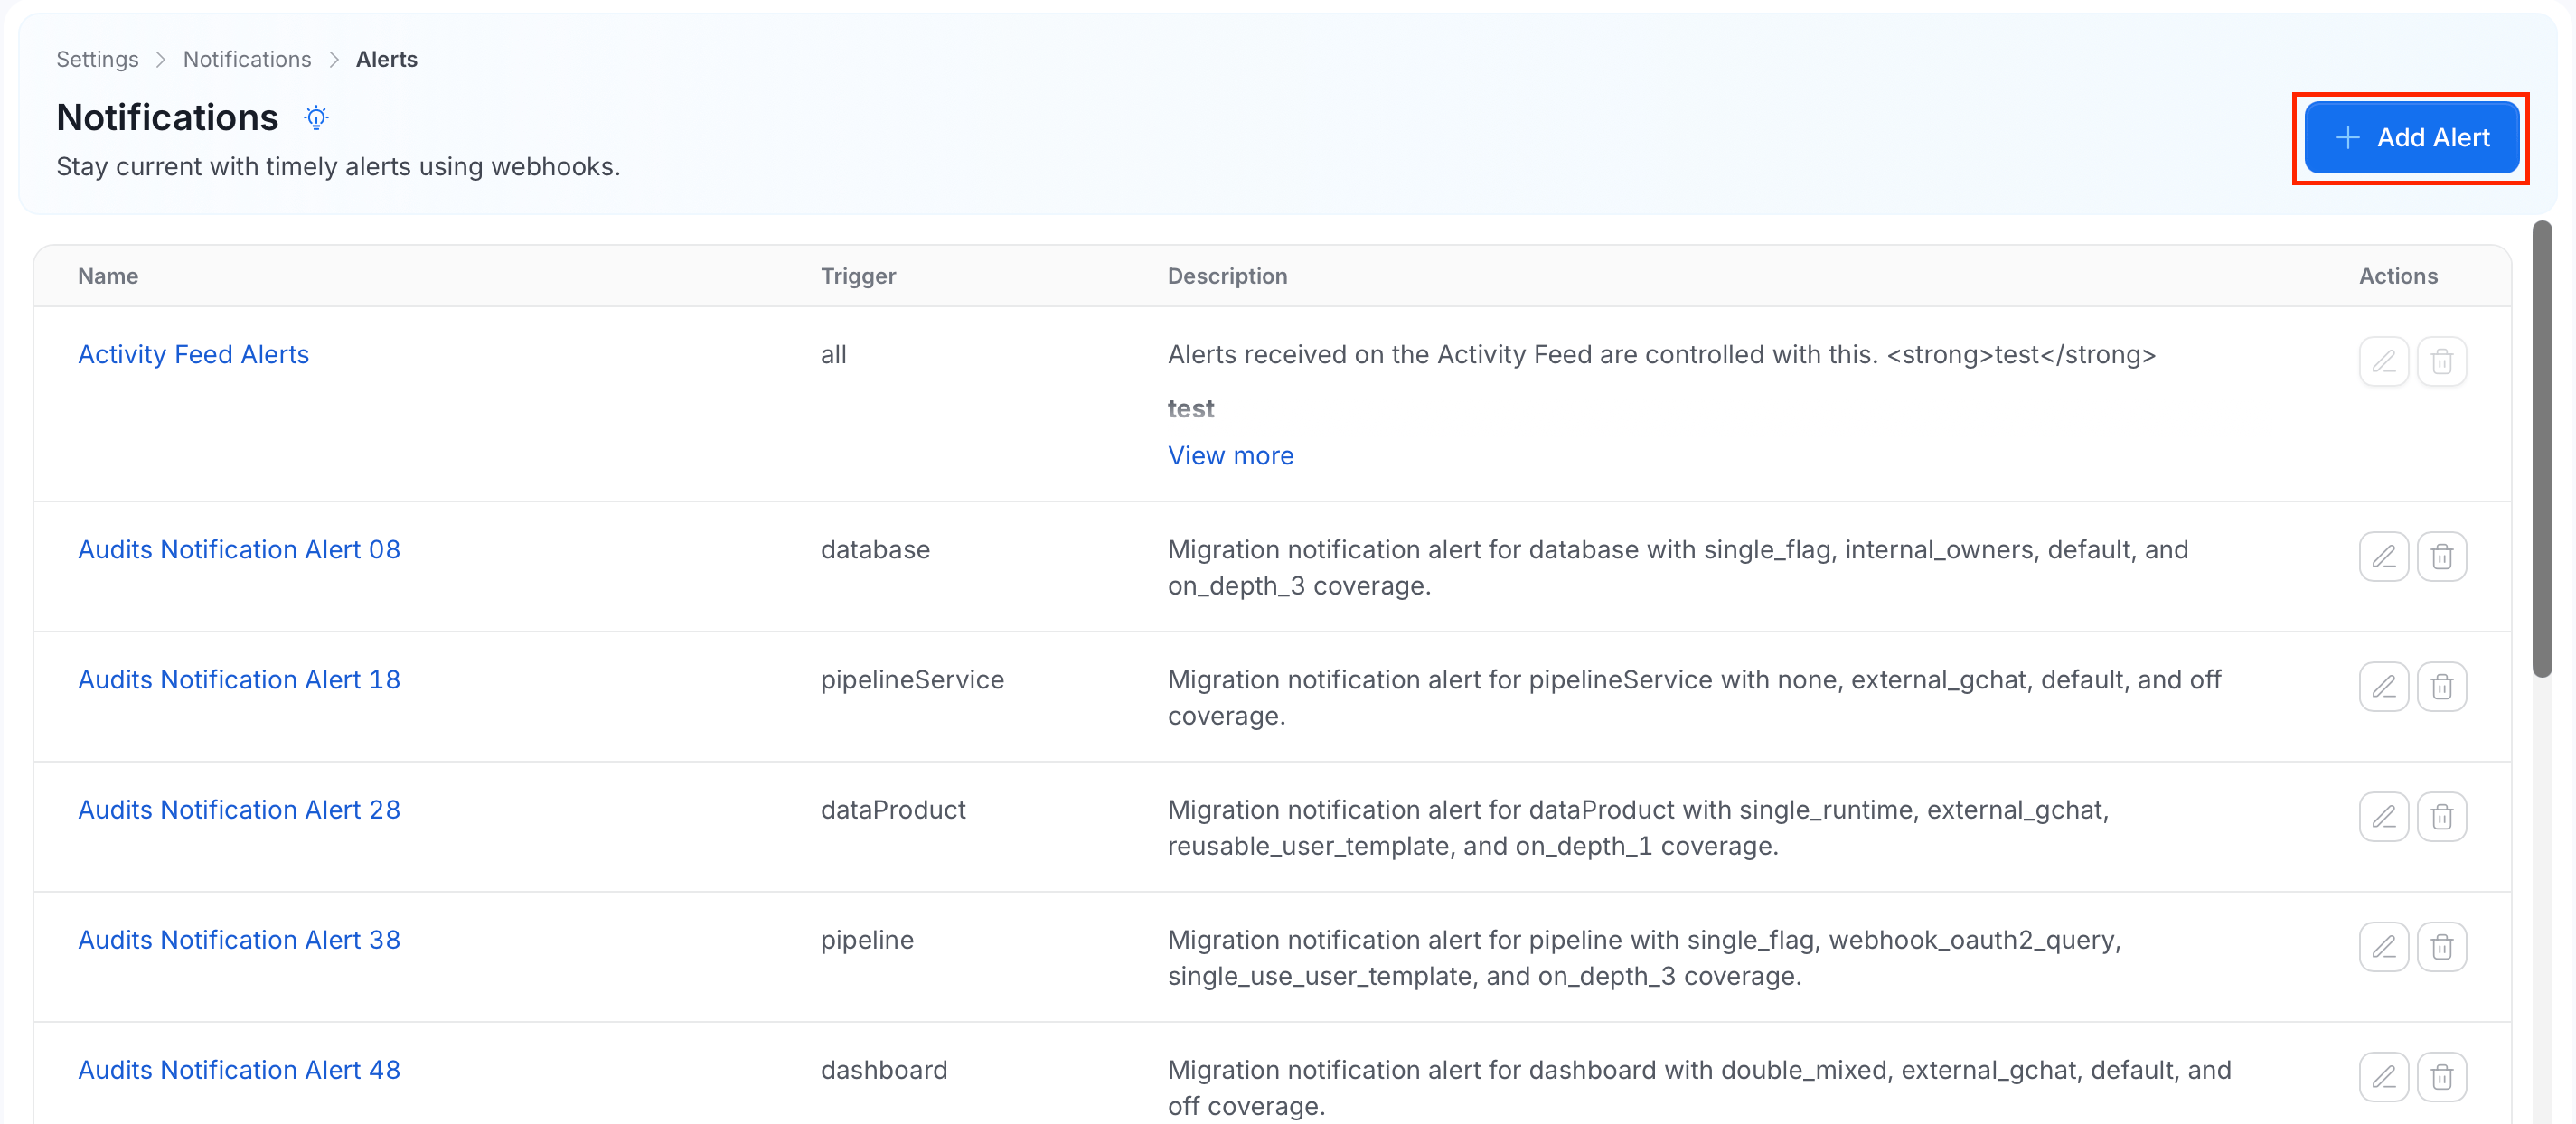
-
On the Add Alert page, do the following:
- Add a unique Name and Description (optional).
- Set Source to Task.
- (Optional) Add a Mentioned User or Team filter to limit alerts to incidents where a specific person or team is @-mentioned.
- Set Destination to Slack, MS Teams, email, or internal Collate users.
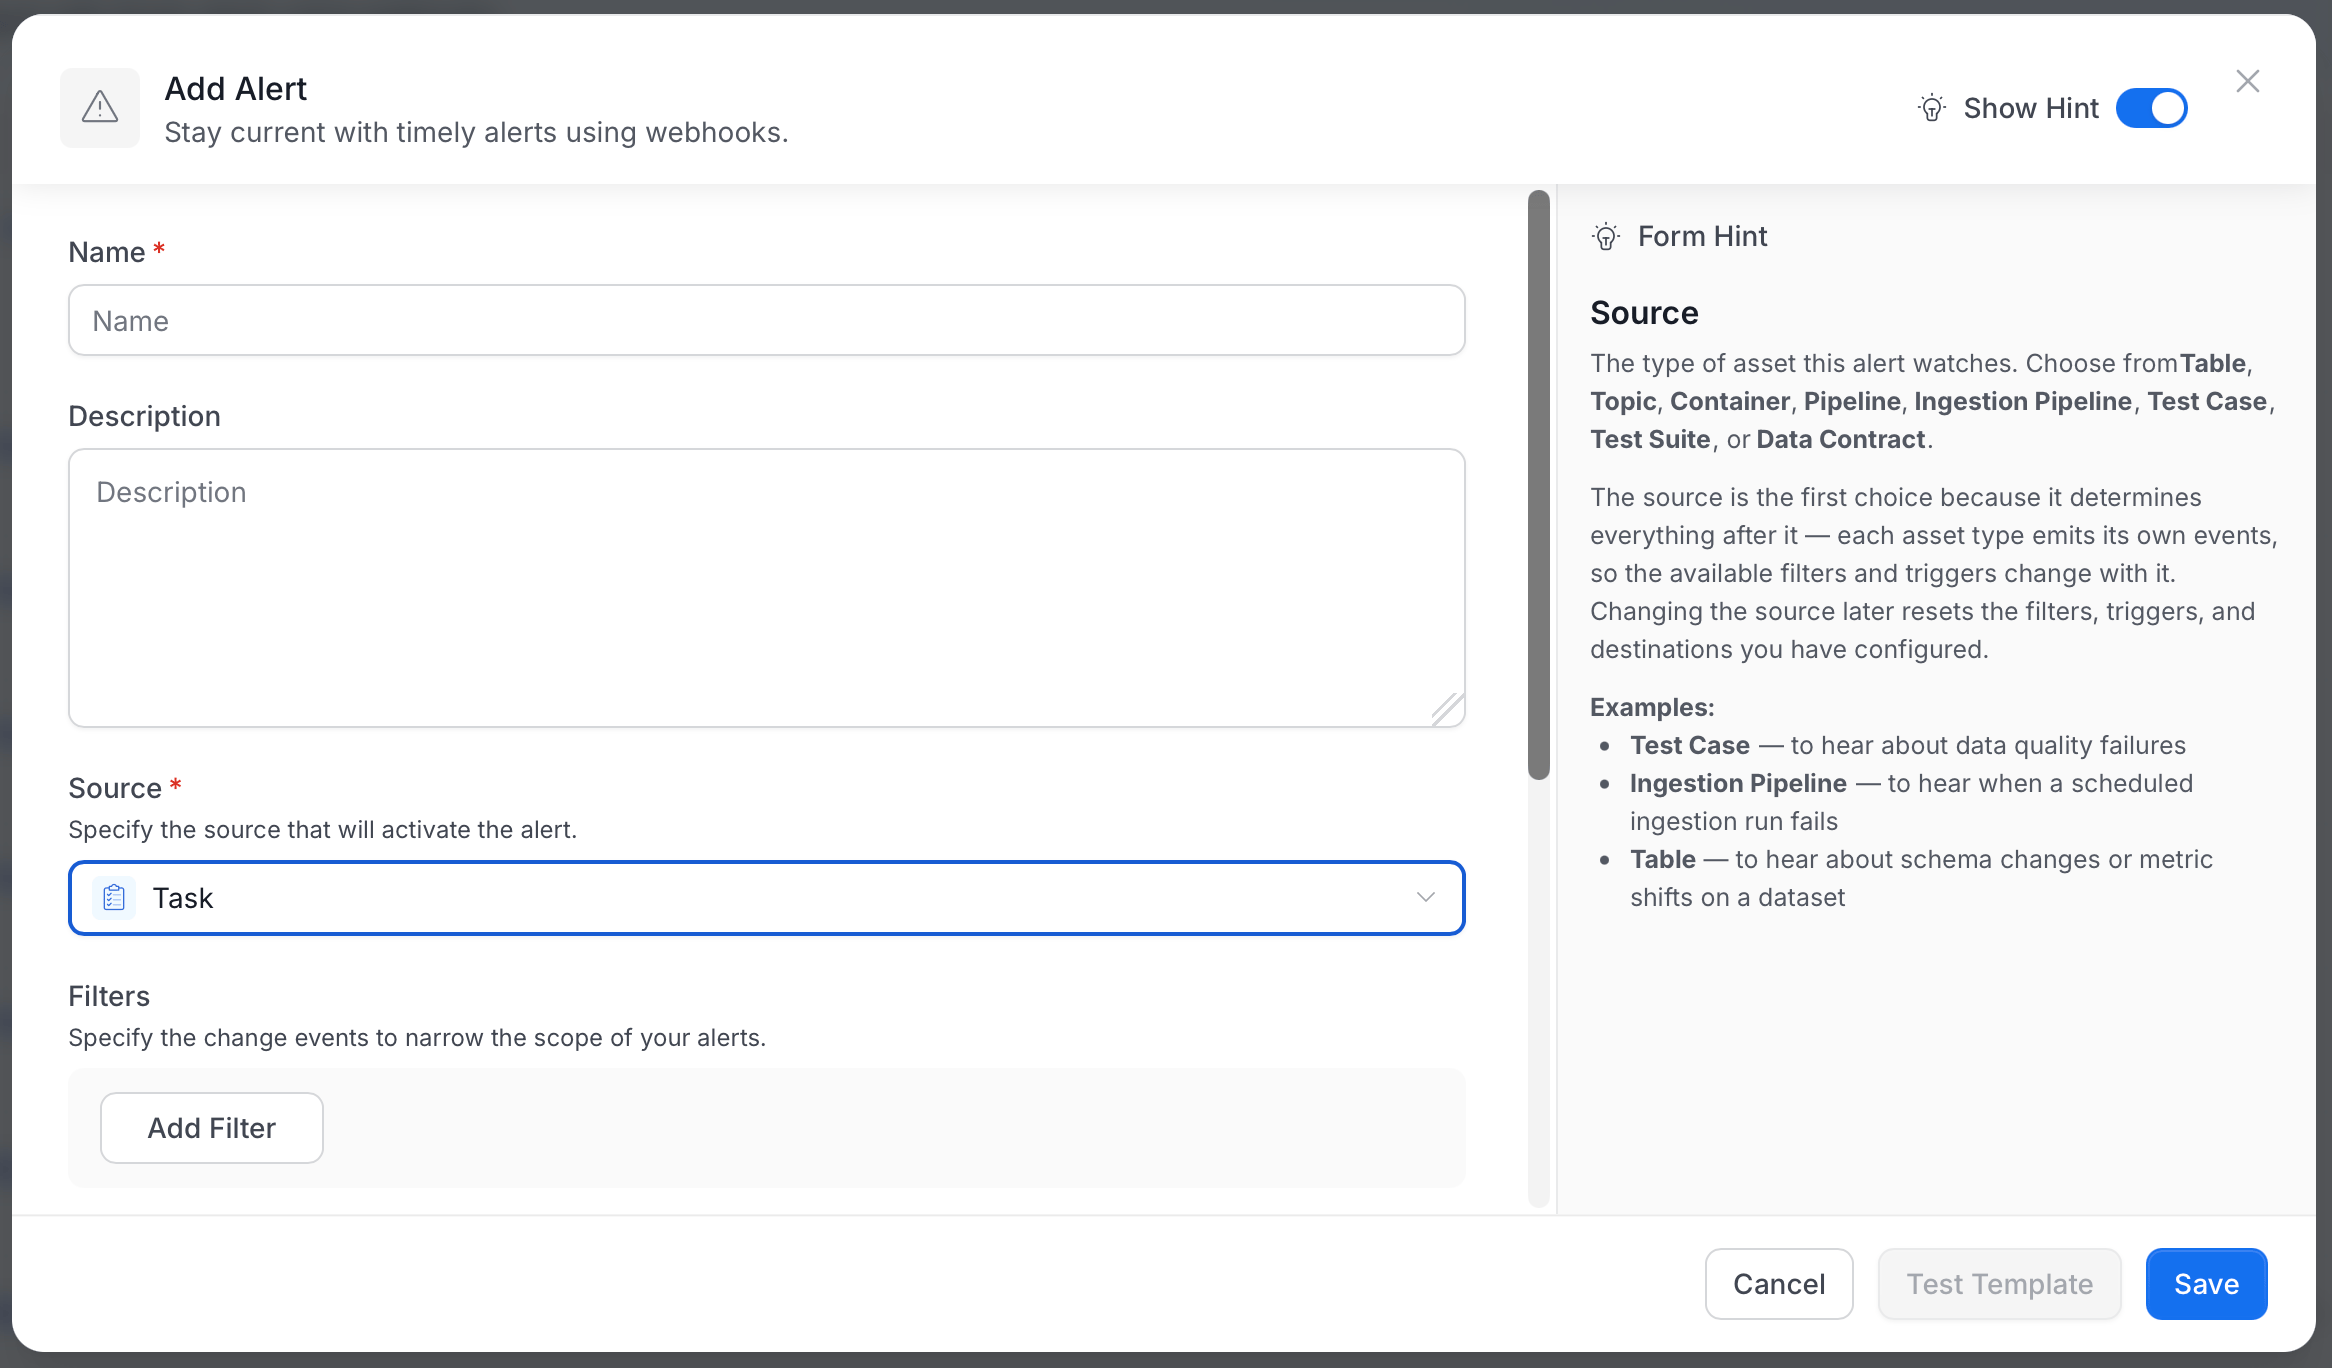
- Select Save to create an alert.
Note: The Task source covers all structured workflow tasks — incidents, description requests, tag requests, and approval workflows. There is currently no filter to restrict to incidents only. If you only want incident notifications, configure a dedicated alert and instruct your team to use that alert’s destination channel for incident discussions.