
Creating the “Set Tags to ML Model Workflow”
The following steps walk you through building the SetTagsToMLModelWorkflow from start to finish. Each screenshot corresponds to a specific action you take while creating the workflow.Step 1: Create a New Workflow
-
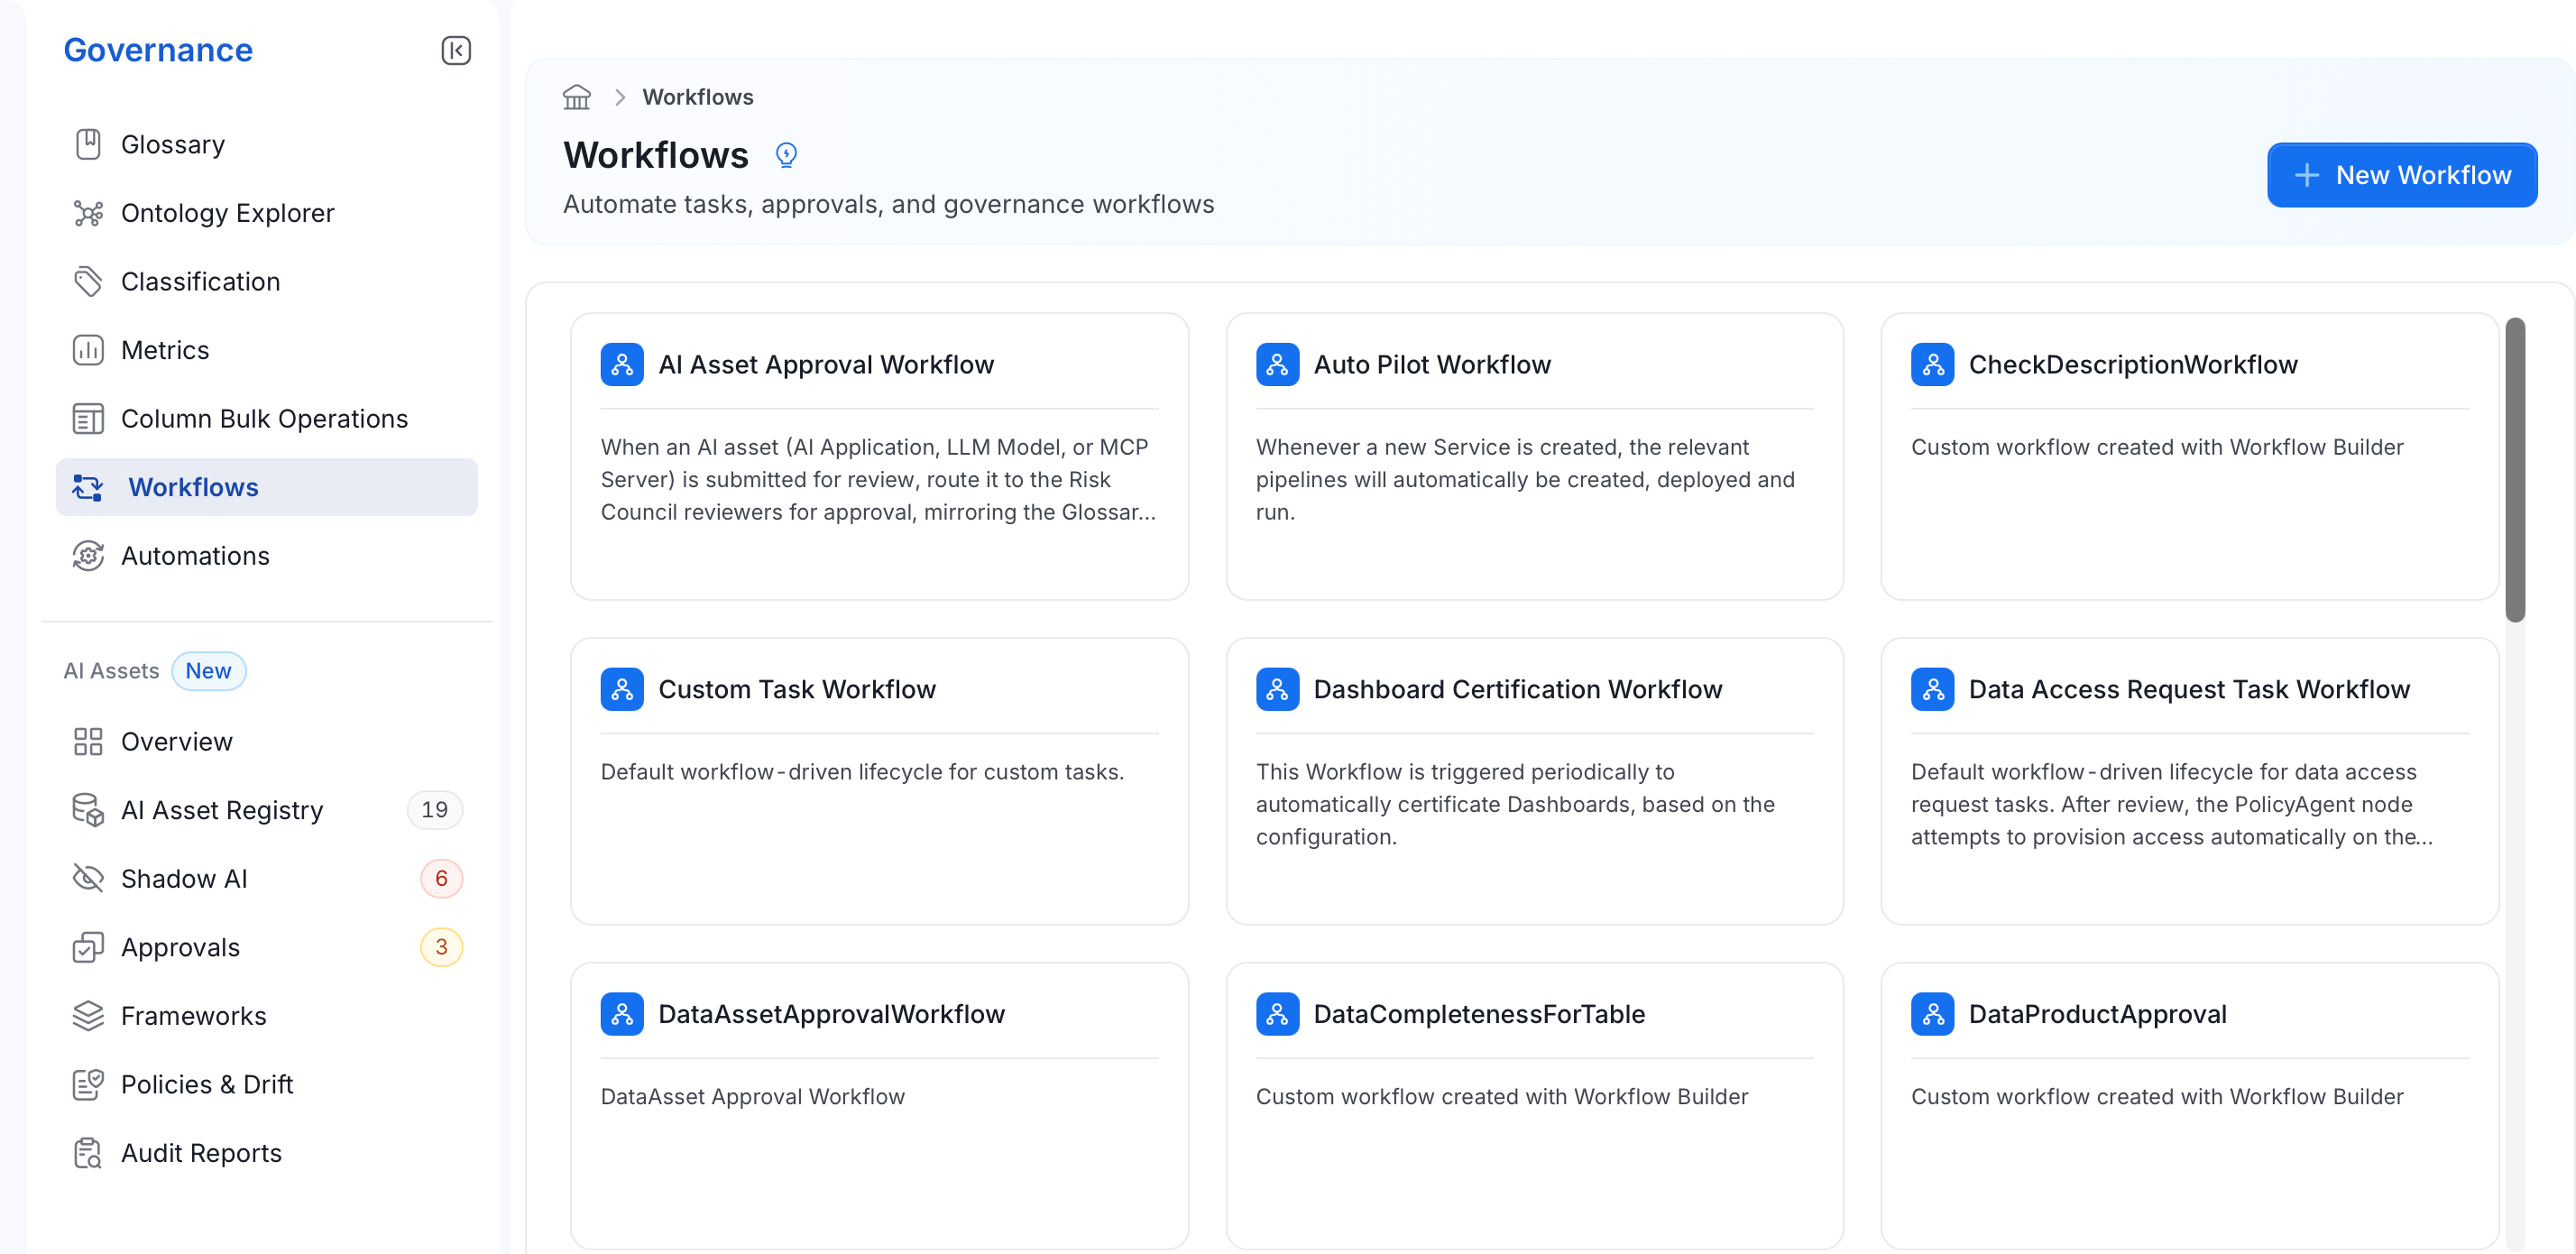
From the left navigation bar, navigate to Governance > Workflows.
-
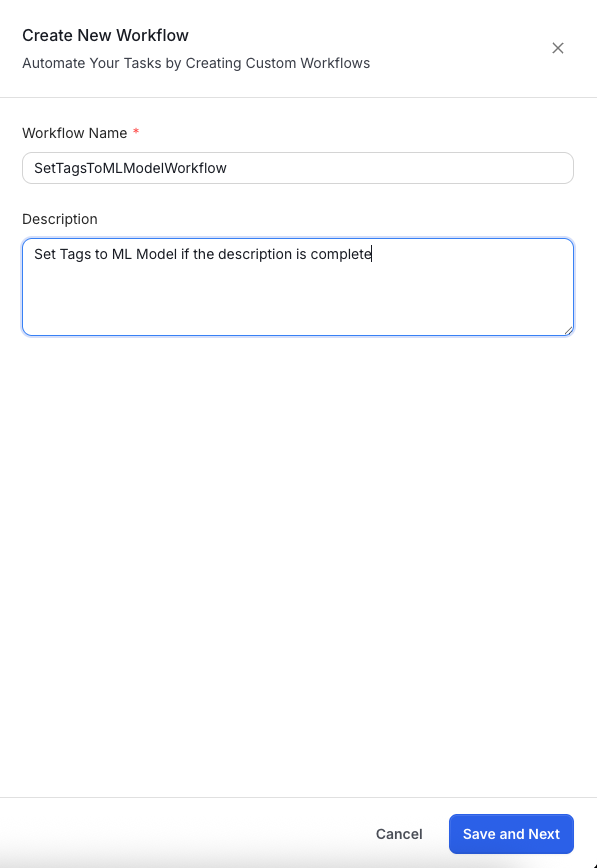
Click New Workflow and enter the following details:
-
Workflow Name: A unique identifier without spaces. For example,
SetTagsToMLModelWorkflow. -
Description: A short summary of the workflow purpose. For example, “Set Tags to ML Model if the description is complete.”
-
Workflow Name: A unique identifier without spaces. For example,
- Click Save and Next to continue.
Step 2: Configure the Start Node
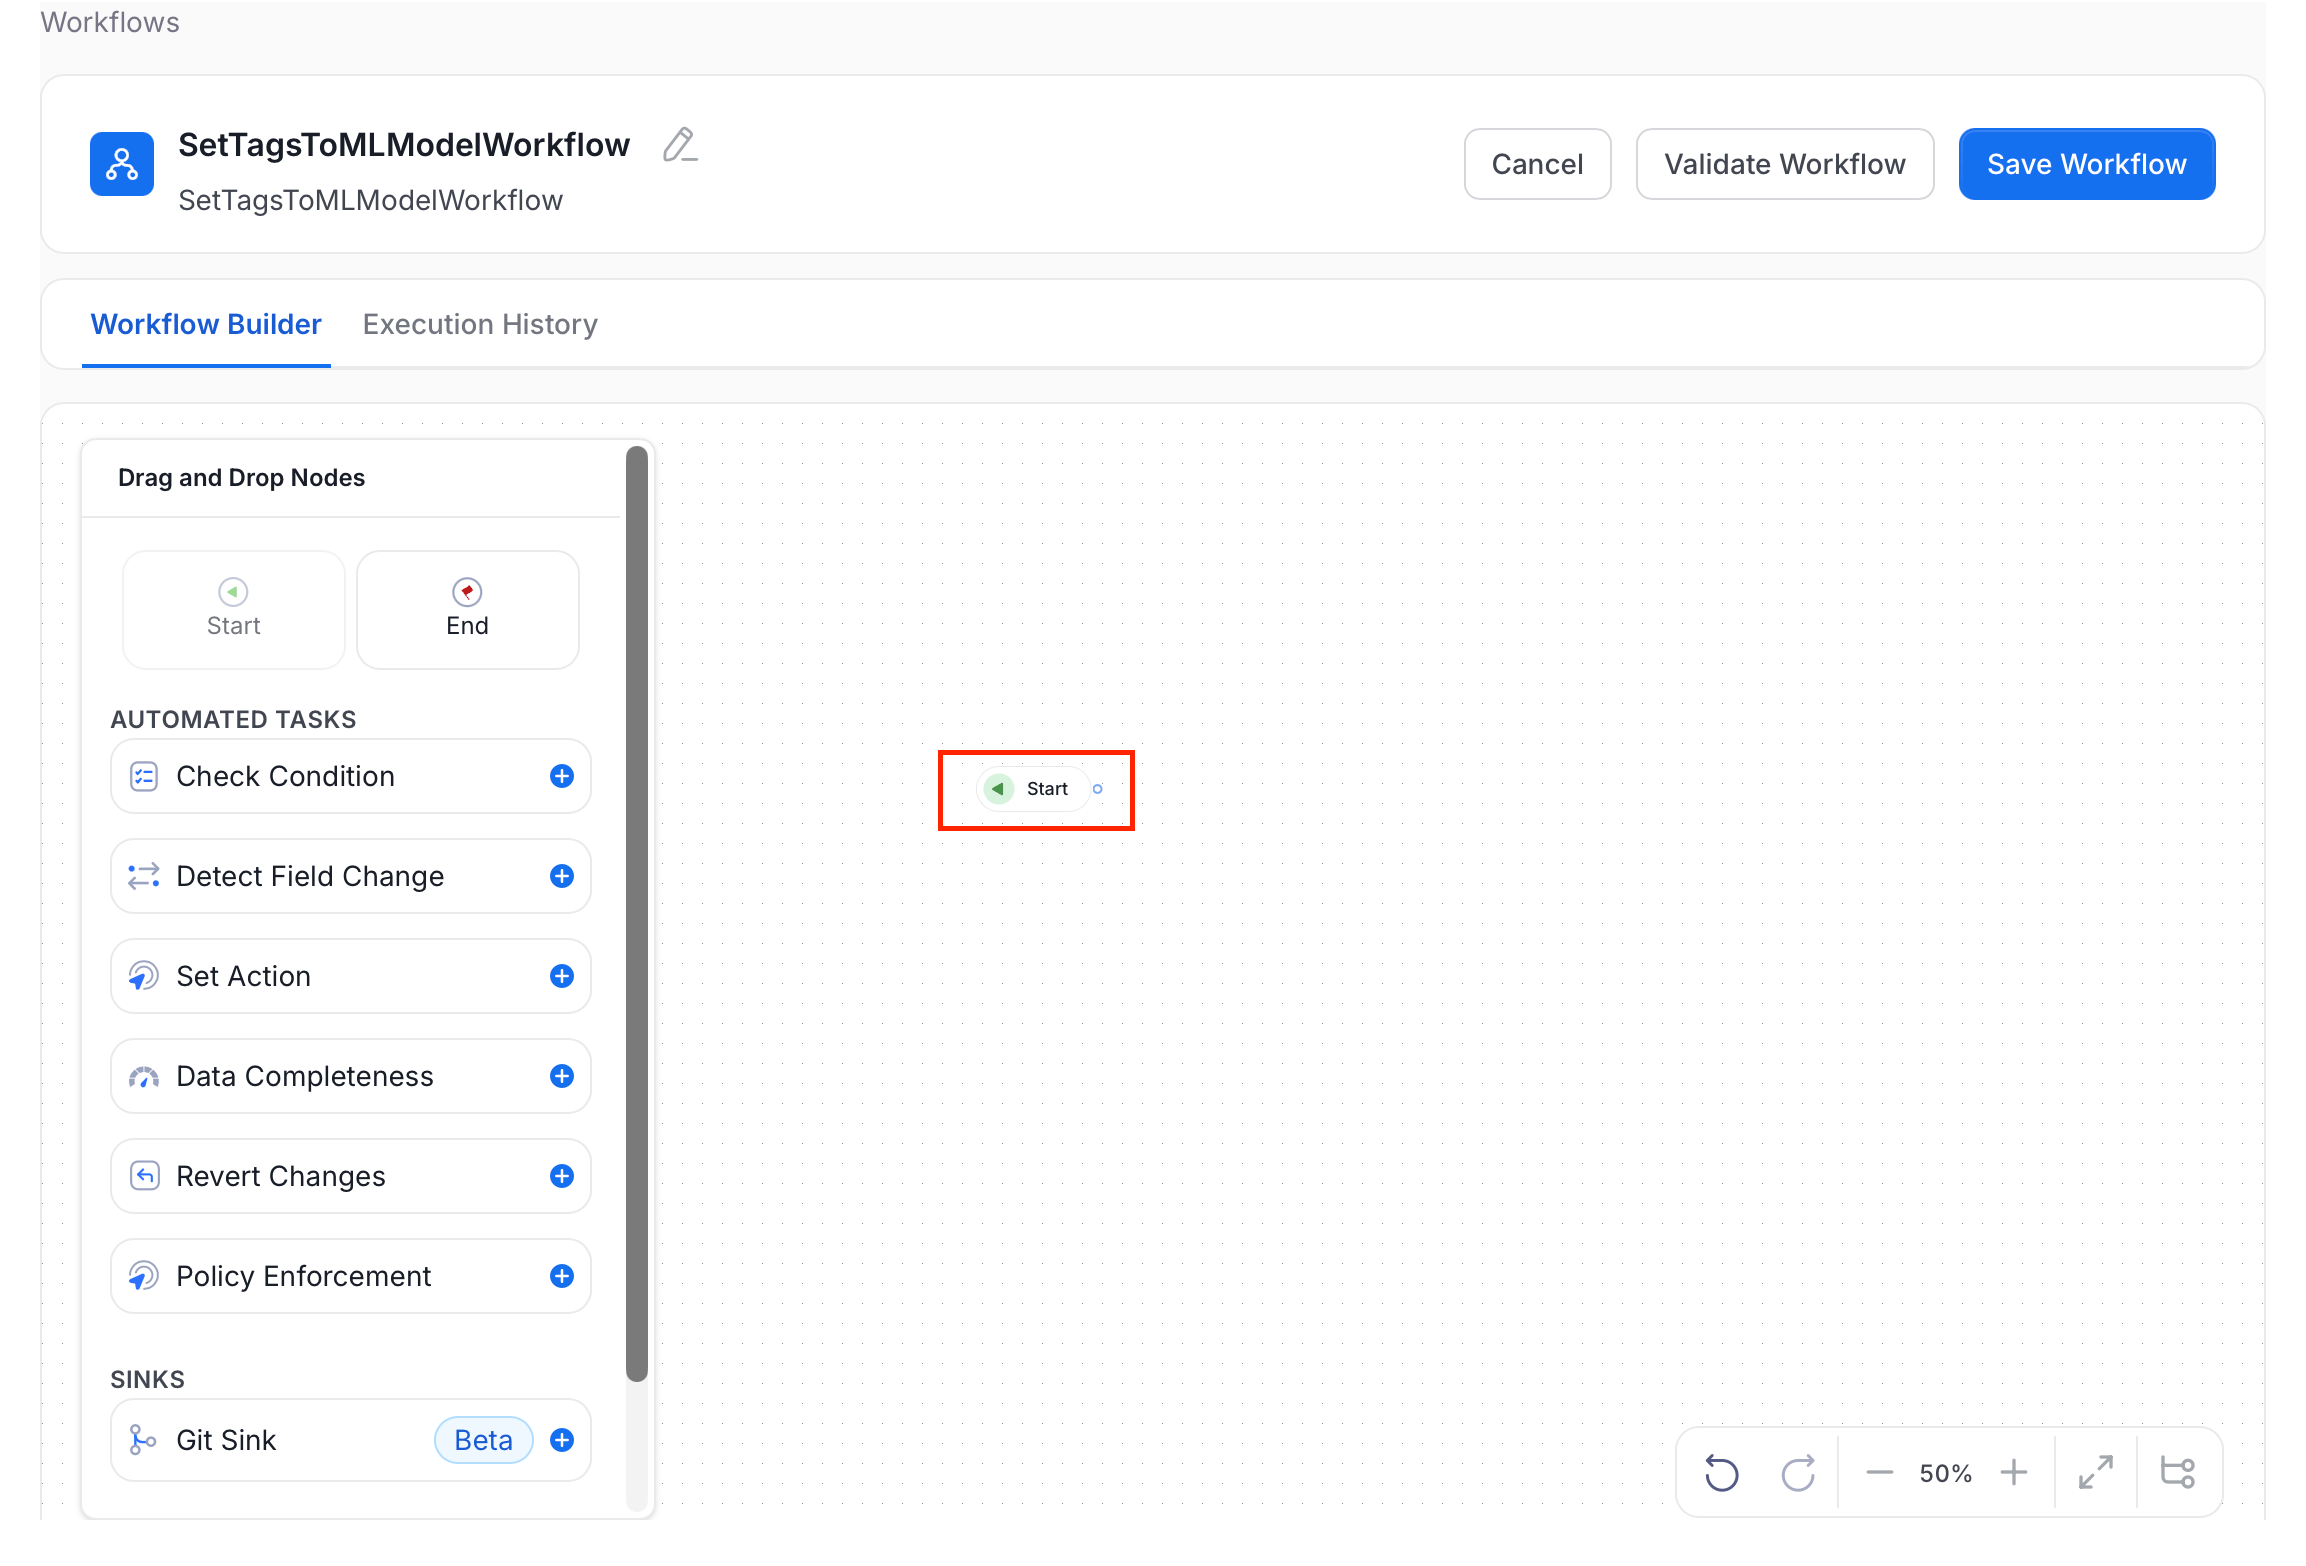
After creating the workflow, configure the Start node to define which assets it applies to and when it runs.-
Drag the Start node onto the canvas.
-
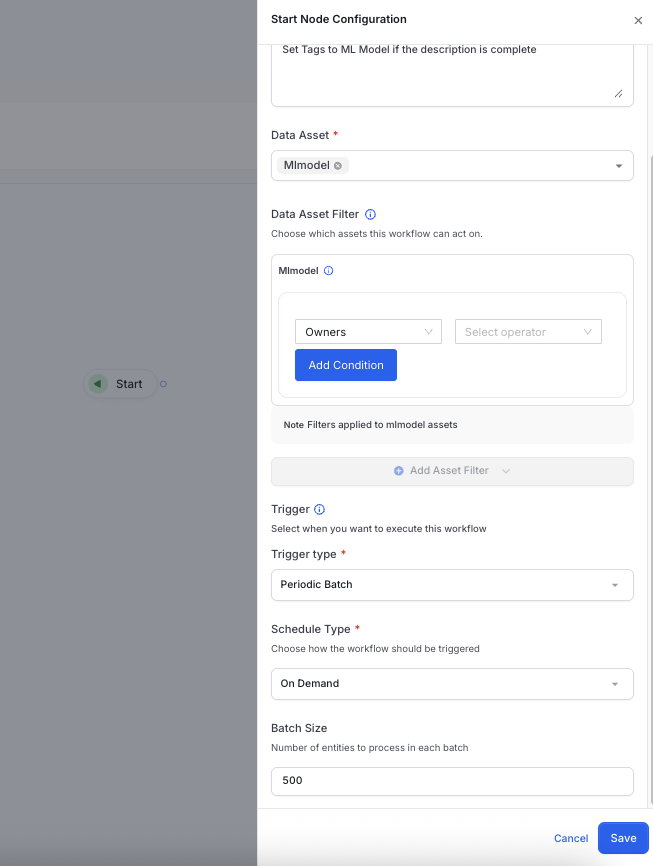
Fill in the following fields:
- Data Asset (required): Select one or more entity types the workflow applies to (for example,
MlModel). - Data Asset Filter (Optional): Add search filters to narrow which assets the workflow acts on.
- Trigger Type (required): Choose how to trigger the workflow:
- Event Based: Triggers when an entity is created or updated.
- Periodic Batch: Triggers on a schedule and processes entities in batches.
- Data Asset (required): Select one or more entity types the workflow applies to (for example,
-
If you selected Event Based, configure:
- Event Type (required): Select the events that trigger the workflow — Created, Updated, or both.
- Exclude Fields (Optional): Select fields whose changes alone should not trigger the workflow.
- Include Fields (Optional): Select fields that must be present in the change to trigger the workflow. Takes priority over Exclude Fields.
-
If you selected Periodic Batch, configure:
- Schedule Type (required): Choose On Demand to trigger manually, or Scheduled to set a cron-based schedule.
- Schedule (shown when Scheduled is selected): Define the cron expression for when the workflow runs.
- Batch Size: Number of entities to process per batch (default: 100).
- Click Save.
Step 3: Add a Condition Check
-
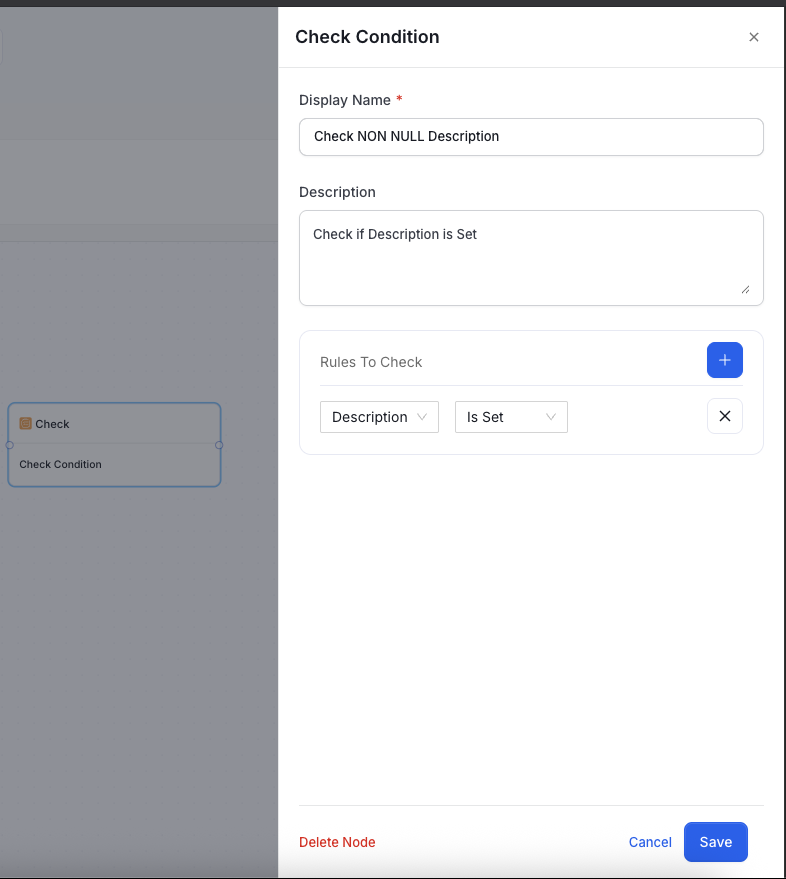
Drag the Check Condition node onto the canvas.
-
Fill in the following fields:
- Display Name: Enter a name for this condition (for example, Check NON NULL Description).
- Description: Briefly describe what this condition checks (for example, Check if Description is Set).
- Rules to Check: Build a condition using the query builder. For example:
- Field:
Description - Operator:
Is Set
- Field:
- Click Save.
Step 4: Configure the TRUE Condition Path
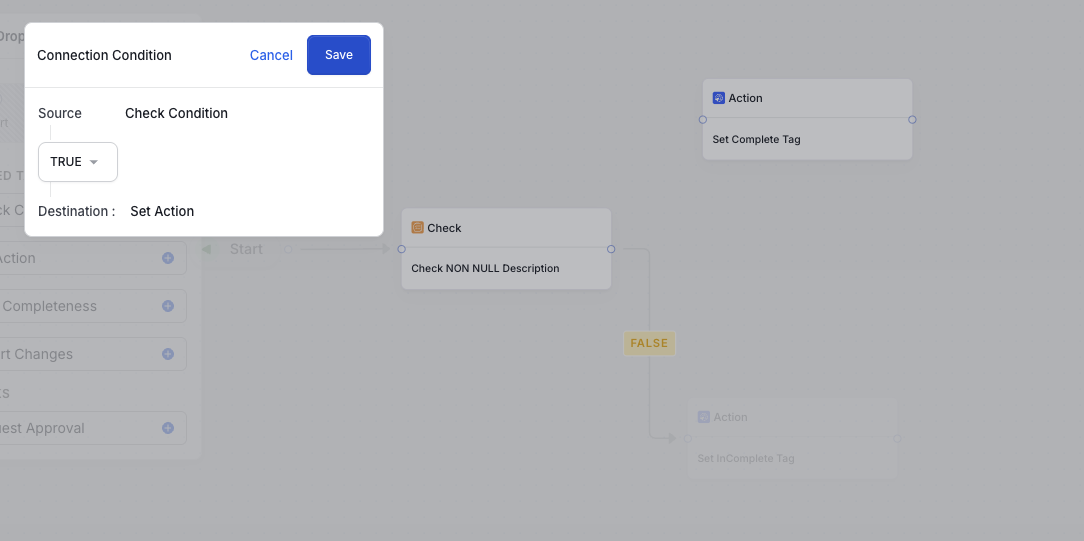
- Draw a connection from the Check Condition node to a new Set Action node. A Connection Condition modal appears.
-
In the modal, set the condition to TRUE and confirm the source and destination nodes.
- Click Save.
- Open the Set Action node.
-
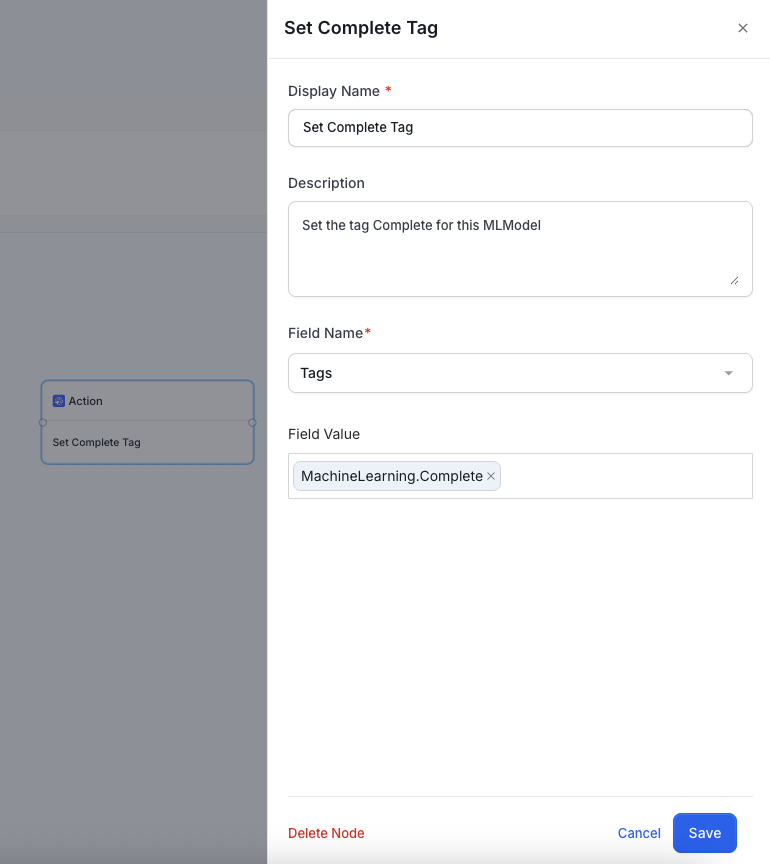
Fill in the following fields:
- Display Name: Enter a name for this action (for example, Set Complete Tag).
- Description: Briefly describe the action.
- Field Name: Select
tags. - Field Value: Select or enter
MachineLearning.Complete.
- Click Save.
Step 5: Configure the FALSE Condition Path
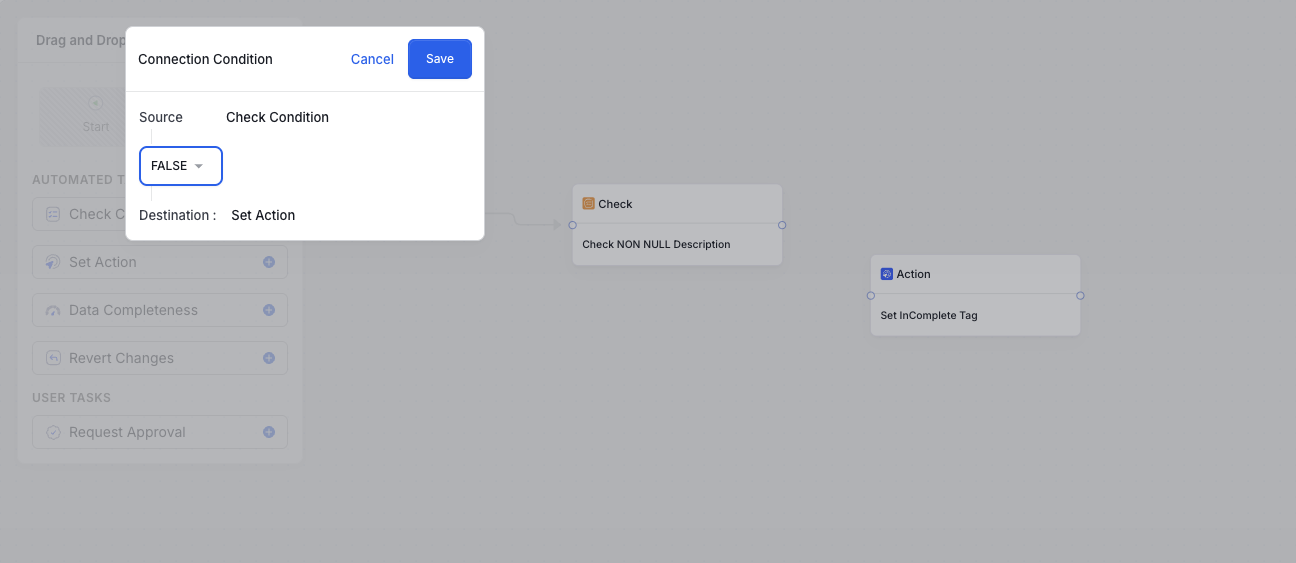
- Draw a connection from the Check Condition node to another Set Action node. A Connection Condition modal appears.
-
In the modal, set the condition to FALSE and confirm the source and destination nodes.
- Click Save.
- Open the Set Action node.
-
Fill in the following fields:
- Display Name: Enter a name for this action (for example, Set InComplete Tag).
- Description: Briefly describe the action.
- Field Name: Select
tags. - Field Value: Select or enter
MachineLearning.InComplete.
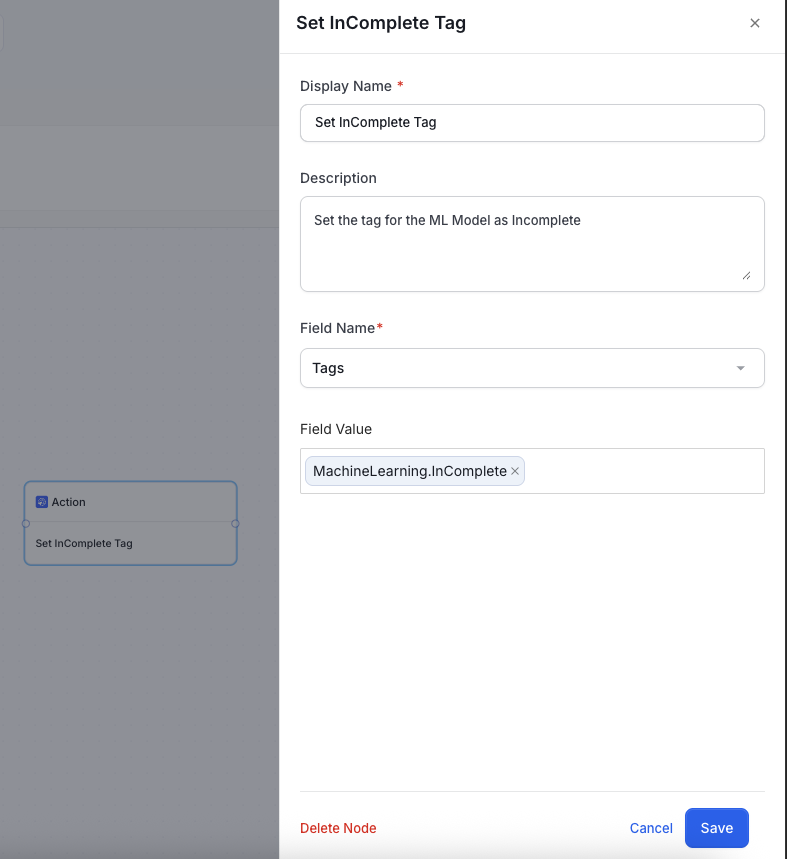
- Click Save.
Step 6: End the Workflow
Connect both the TRUE and FALSE action nodes to an End node to mark workflow completion.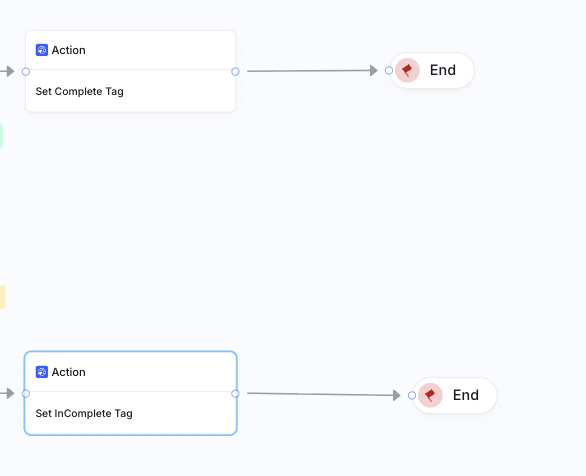
Final Workflow Overview
Once all nodes and connections are in place, your workflow should look like this: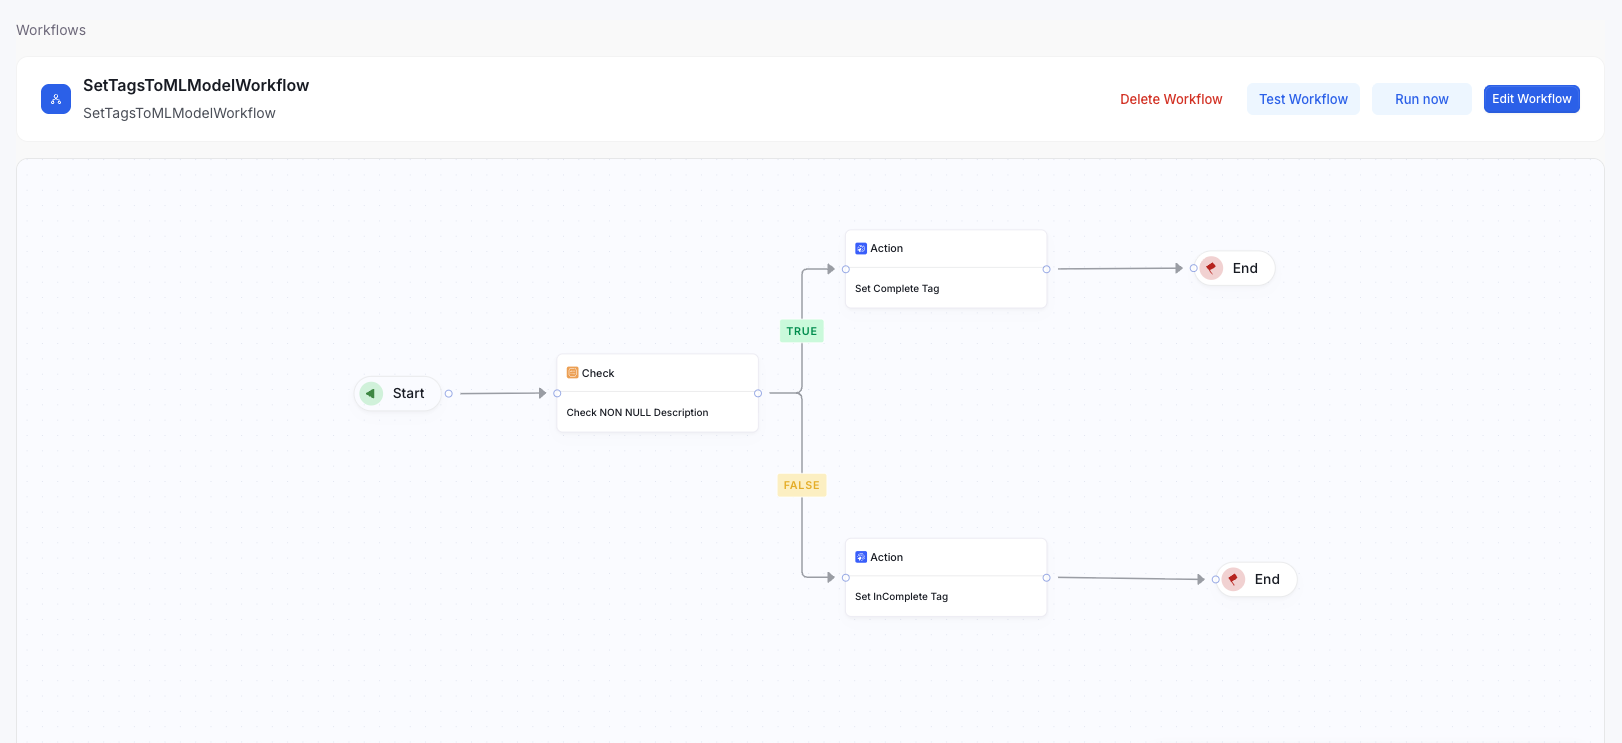
- TRUE → Apply Complete Tag
- FALSE → Apply Incomplete Tag
Running a Periodic Batch Workflow
To execute an on-demand workflow, click Run Now This immediately triggers the workflow based on its configuration.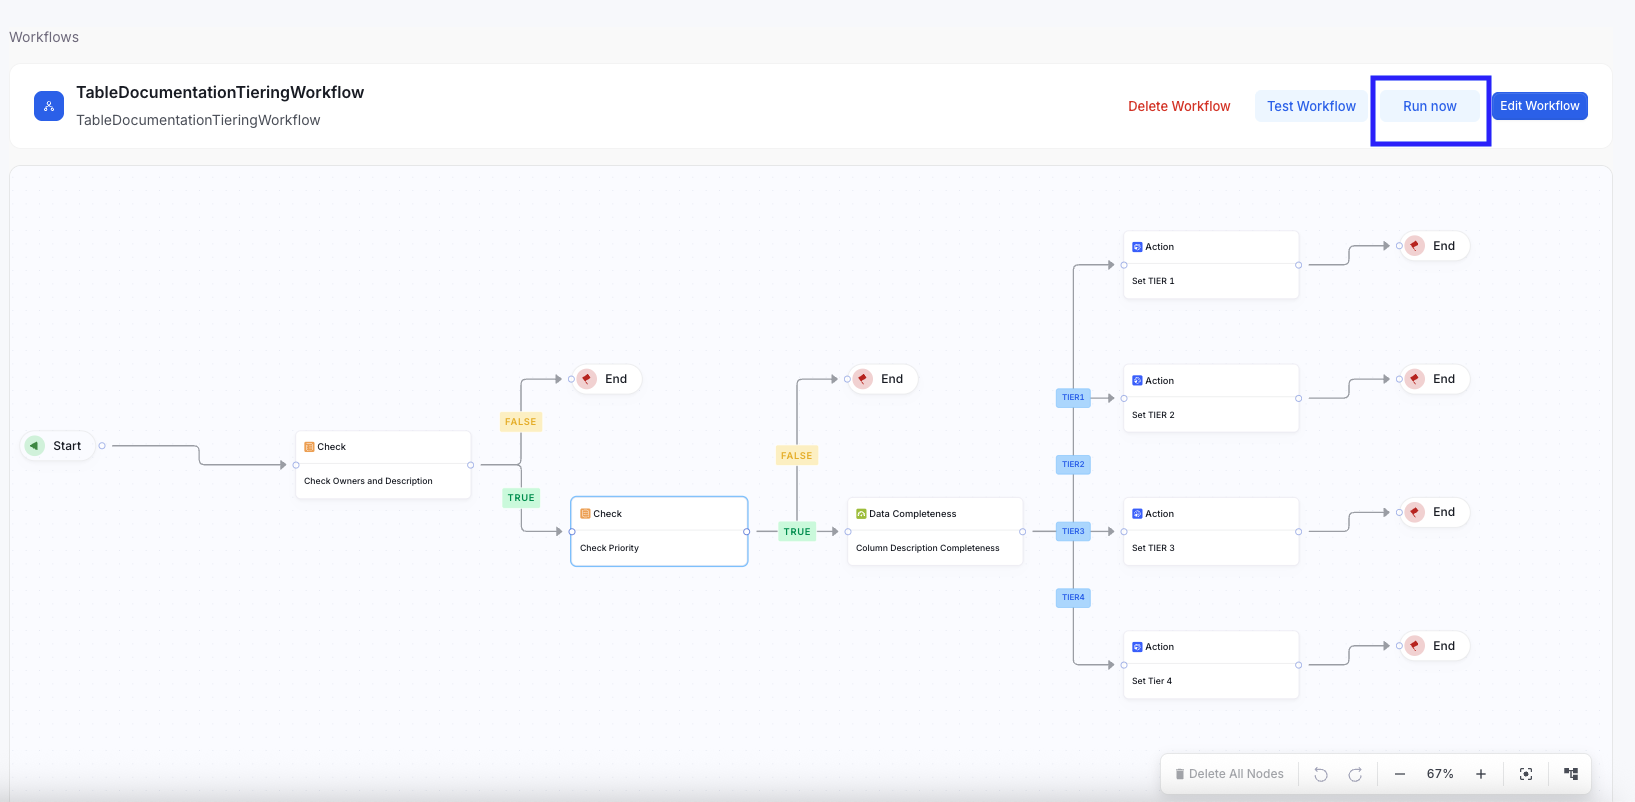
Best Practices
-
Use the Right Type of Trigger
- Event-Based Entity Triggers are ideal when Collate needs to automatically update specific fields in response to a change. Example: When any attribute of a Glossary Term changes, its status automatically updates to IN REVIEW.
- Periodic Batch Triggers are best suited for bulk updates across many entities, especially for classification or enrichment workflows. Example: Tables or Dashboards can be classified as Tier 1, Tier 2, or Tier 3 based on the completeness of their column descriptions.
-
Use a Single Event-Based Workflow per Data Asset
- Configure only one event-based entity workflow for each data asset. Having multiple workflows attempting to update the same field (such as the status of a Glossary Term) can result in unpredictable behavior, as one workflow’s changes may override another’s.
-
Optimize Batch Size for Periodic Workflows
- Tune the batch size based on the number of data assets to ensure optimal performance.
- Avoid running periodic workflows across all entities without filtering. Instead, apply an inclusion filter to limit the result set and prevent performance degradation.
-
Use User Approval Tasks Only in Event-Based Workflows
- Use User Approval Tasks exclusively in event-driven workflows. Using them in periodic workflows would generate multiple approval tasks simultaneously, overloading system resources.
- If a periodic batch workflow requires an approval step, limit the workflow scope to a small, controlled set of entities.
Limitations
-
User Approval Tasks Are Limited to Assets with Reviewer Support
- User Approval Tasks can only be used for data assets that support assigning reviewers. Reviewer support for additional asset types will be introduced in future releases.
-
Fallback Behavior for Entities Without Reviewers
- For entities that do not have any reviewers configured, User Approval Tasks automatically follow the TRUE path as a graceful fallback. Example: A Metric without a reviewer will automatically pass the approval step.