Getting Started with Goose Desktop
Configure Collate’s MCP Server to interact with the Goose AI agent.Prerequisites
For this guide, you’ll need:- nvm and npx/node version 22.
- Collate v1.8.0 or later. Upgrade your version of Collate with this guide.
- Goose Desktop.
- The Collate MCP Application installed and a Personal Access Token generated.
Adding your Collate MCP Server to Goose Desktop
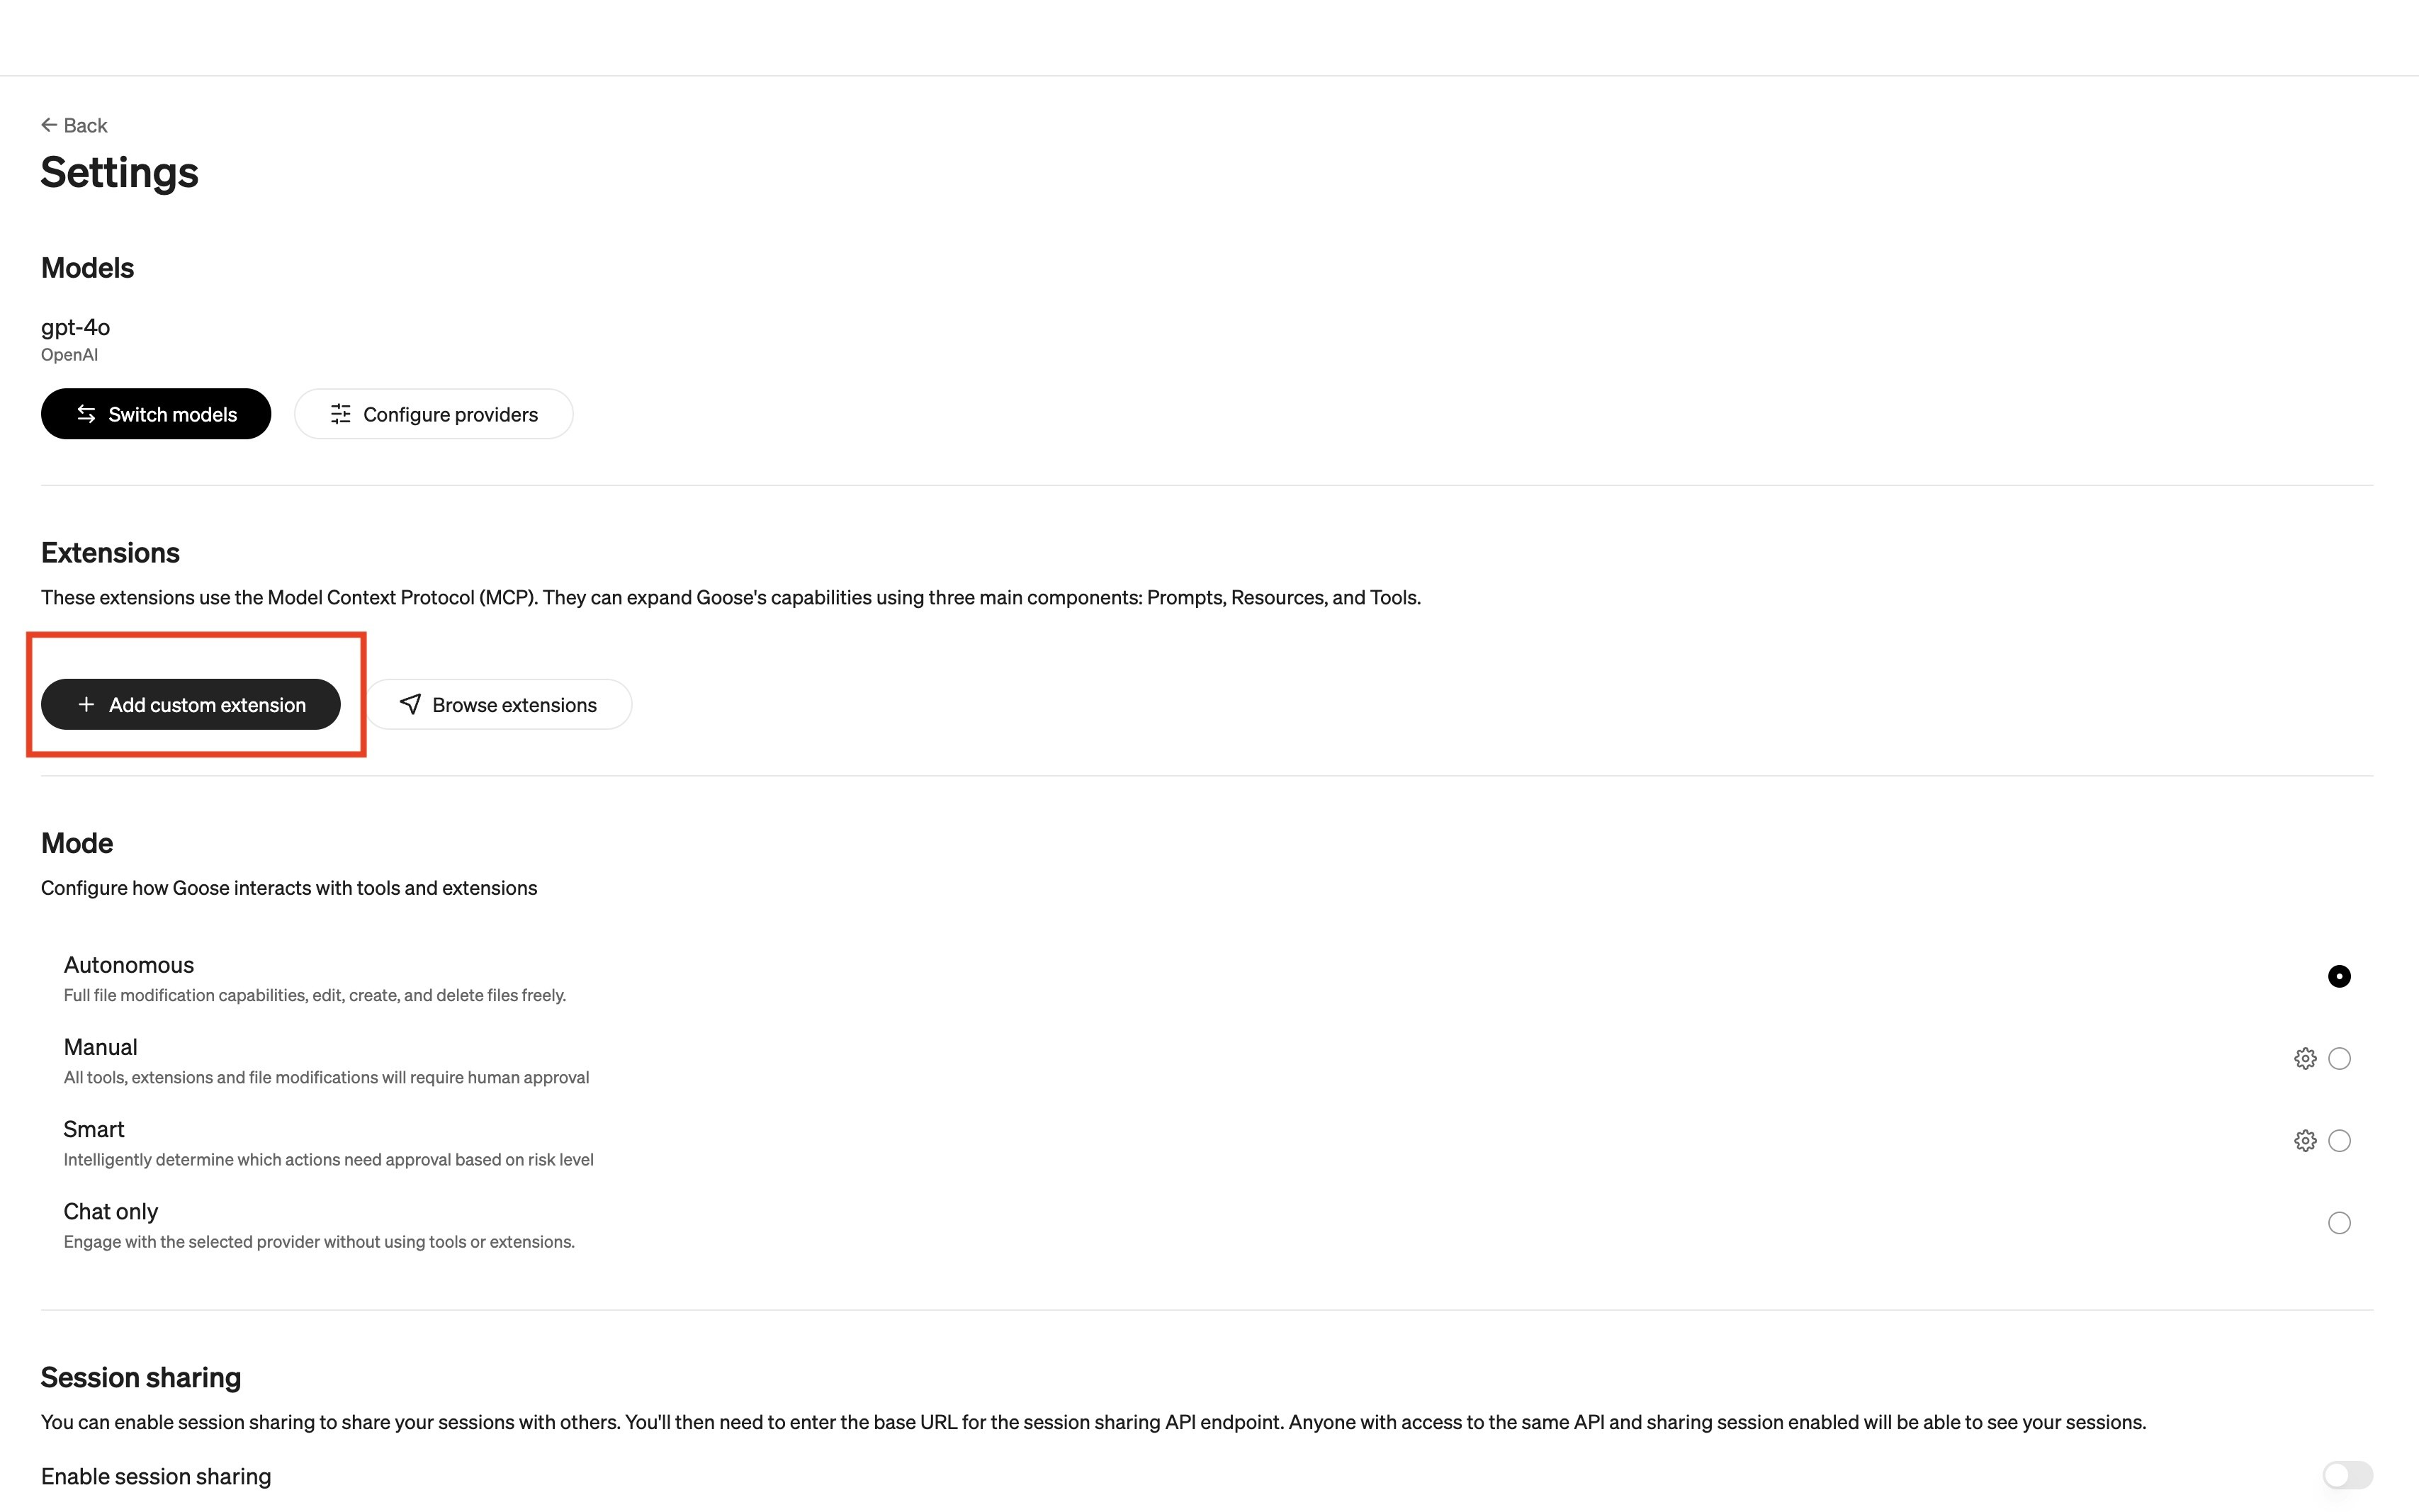
This how-to guide uses Goose Desktop for macOS. Make sure you already have an LLM Provider configured before prompting.- Navigate to Goose Desktop’s Settings, then under Extensions, select +Add custom extension.
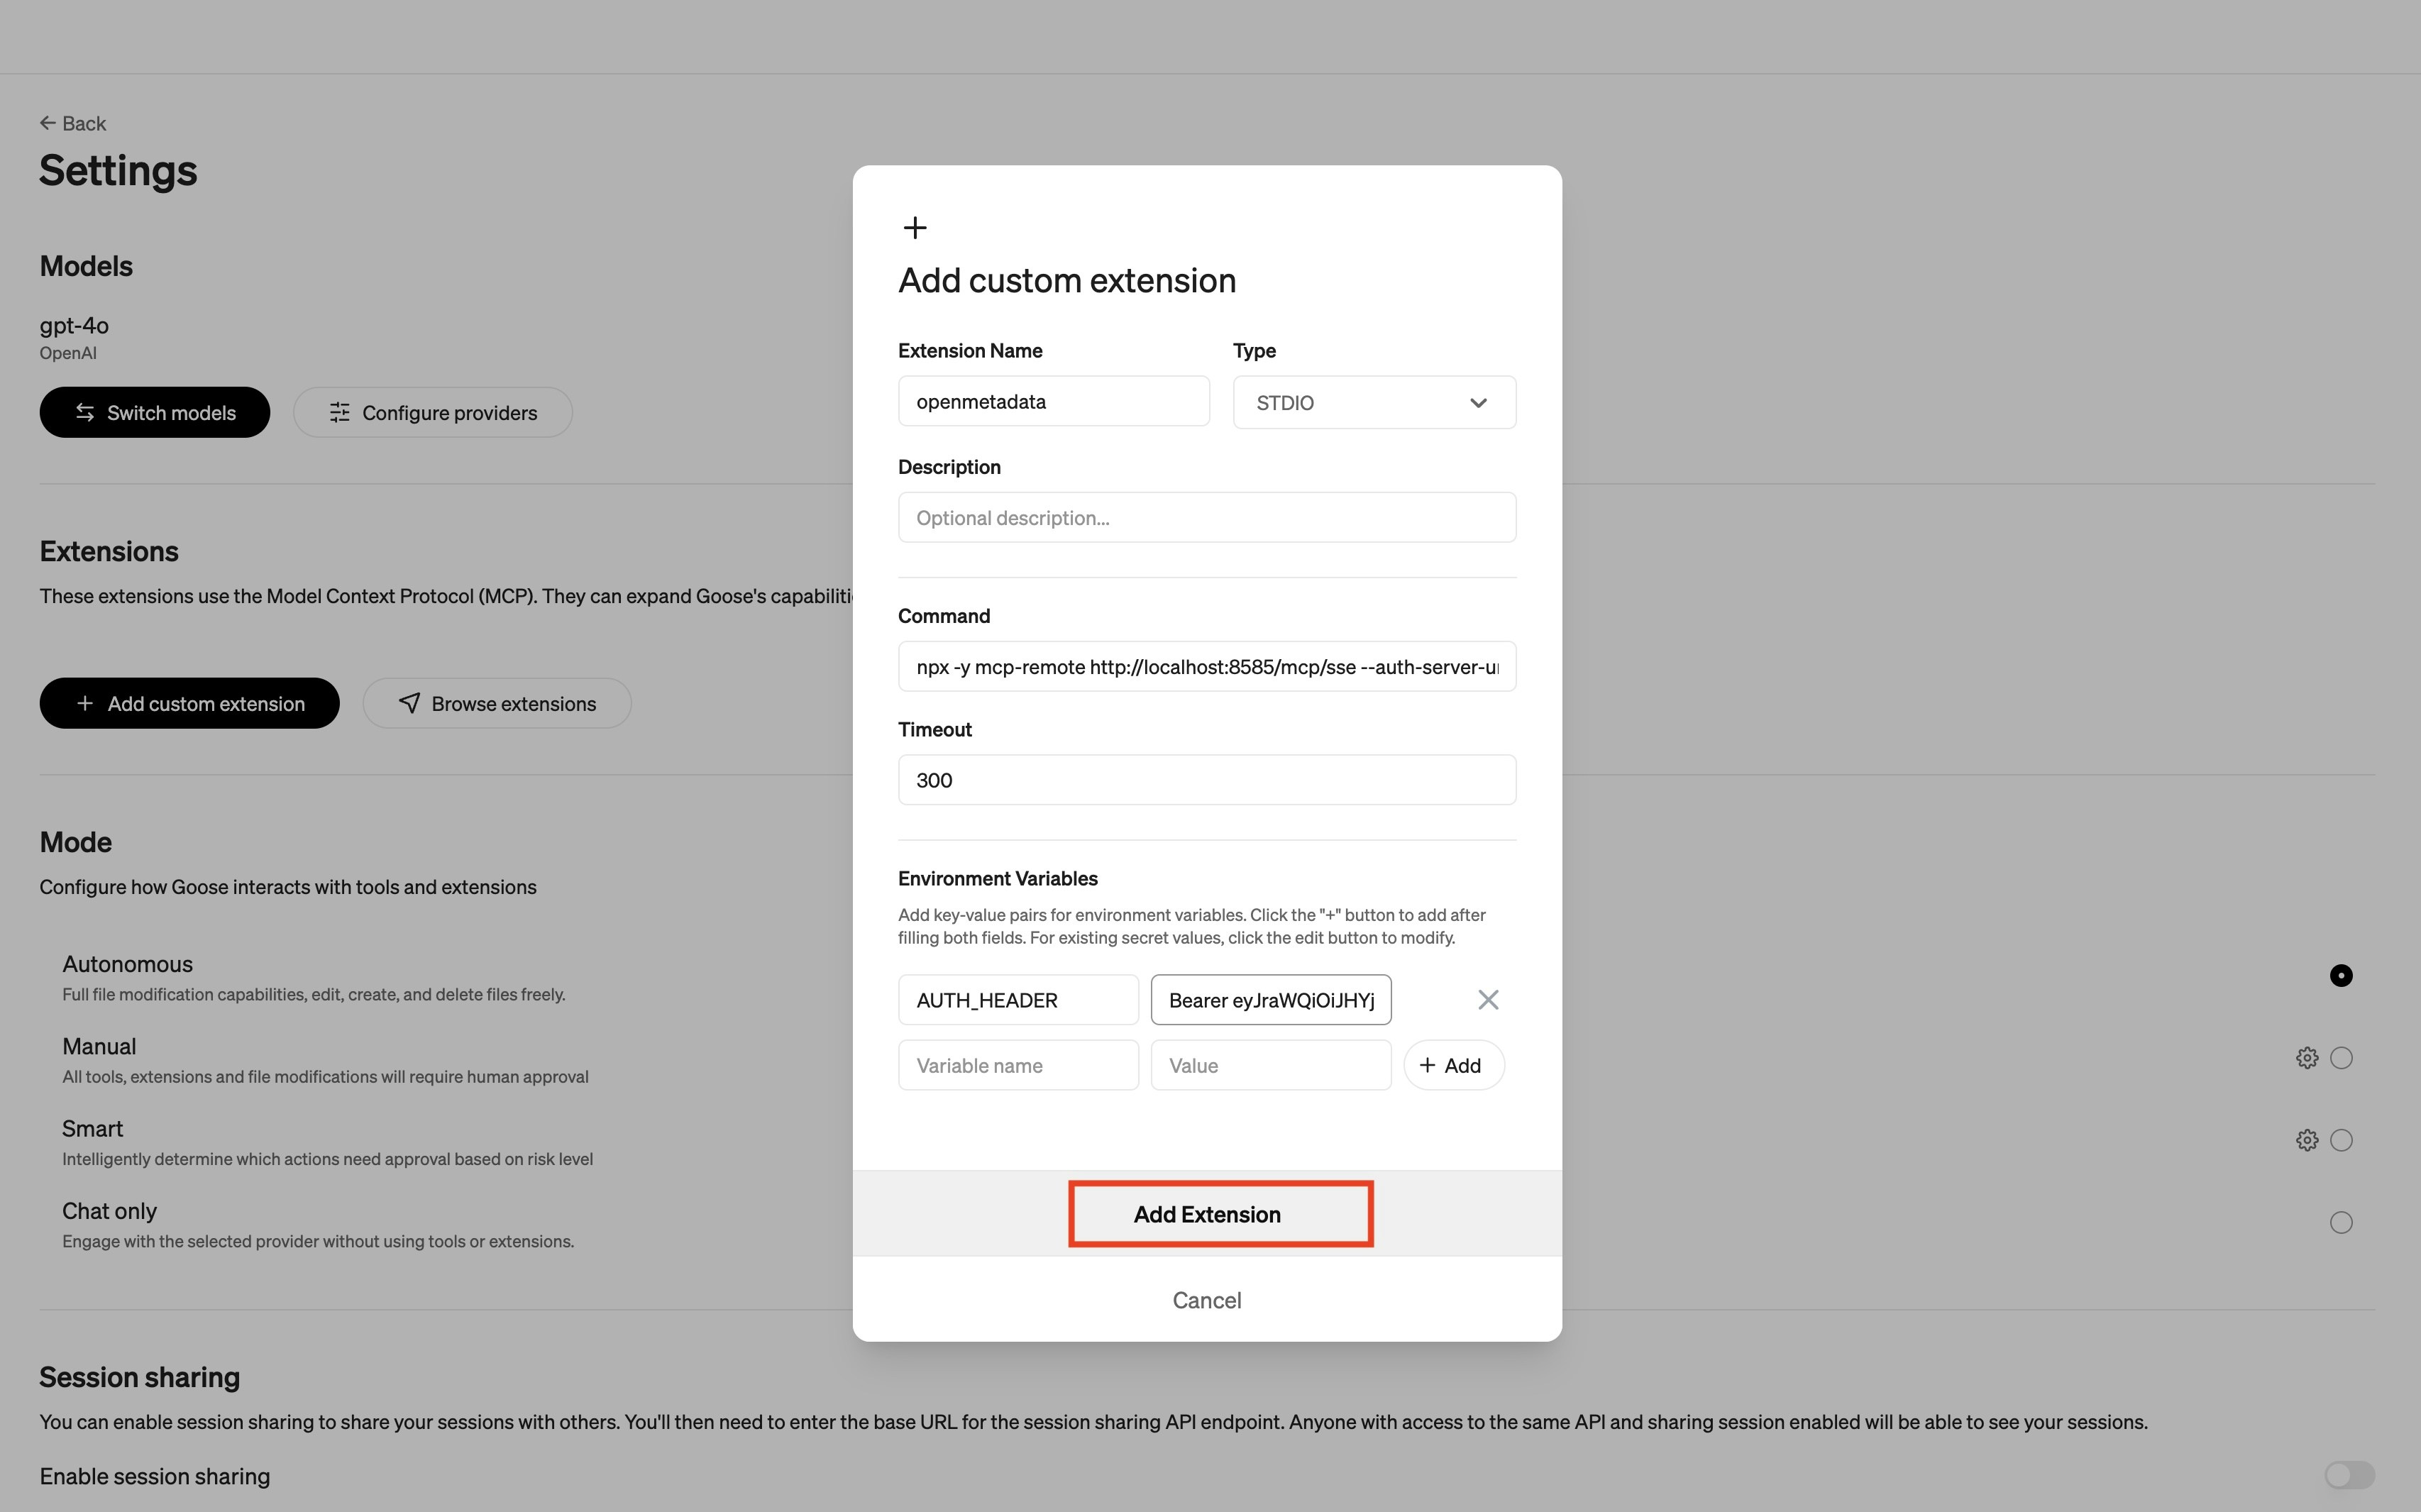
- The custom extension should have the following information:
- Extension Name:
Collate. - Command: paste the following command:
- If you’re running it locally, your command will look like this:
- If you’re running it locally, your command will look like this:
- Add one Environment Variable:
- Variable name is
AUTH_HEADER. - Value is
Bearer <YOUR-Collate-PAT>.
- Variable name is
- Extension Name:
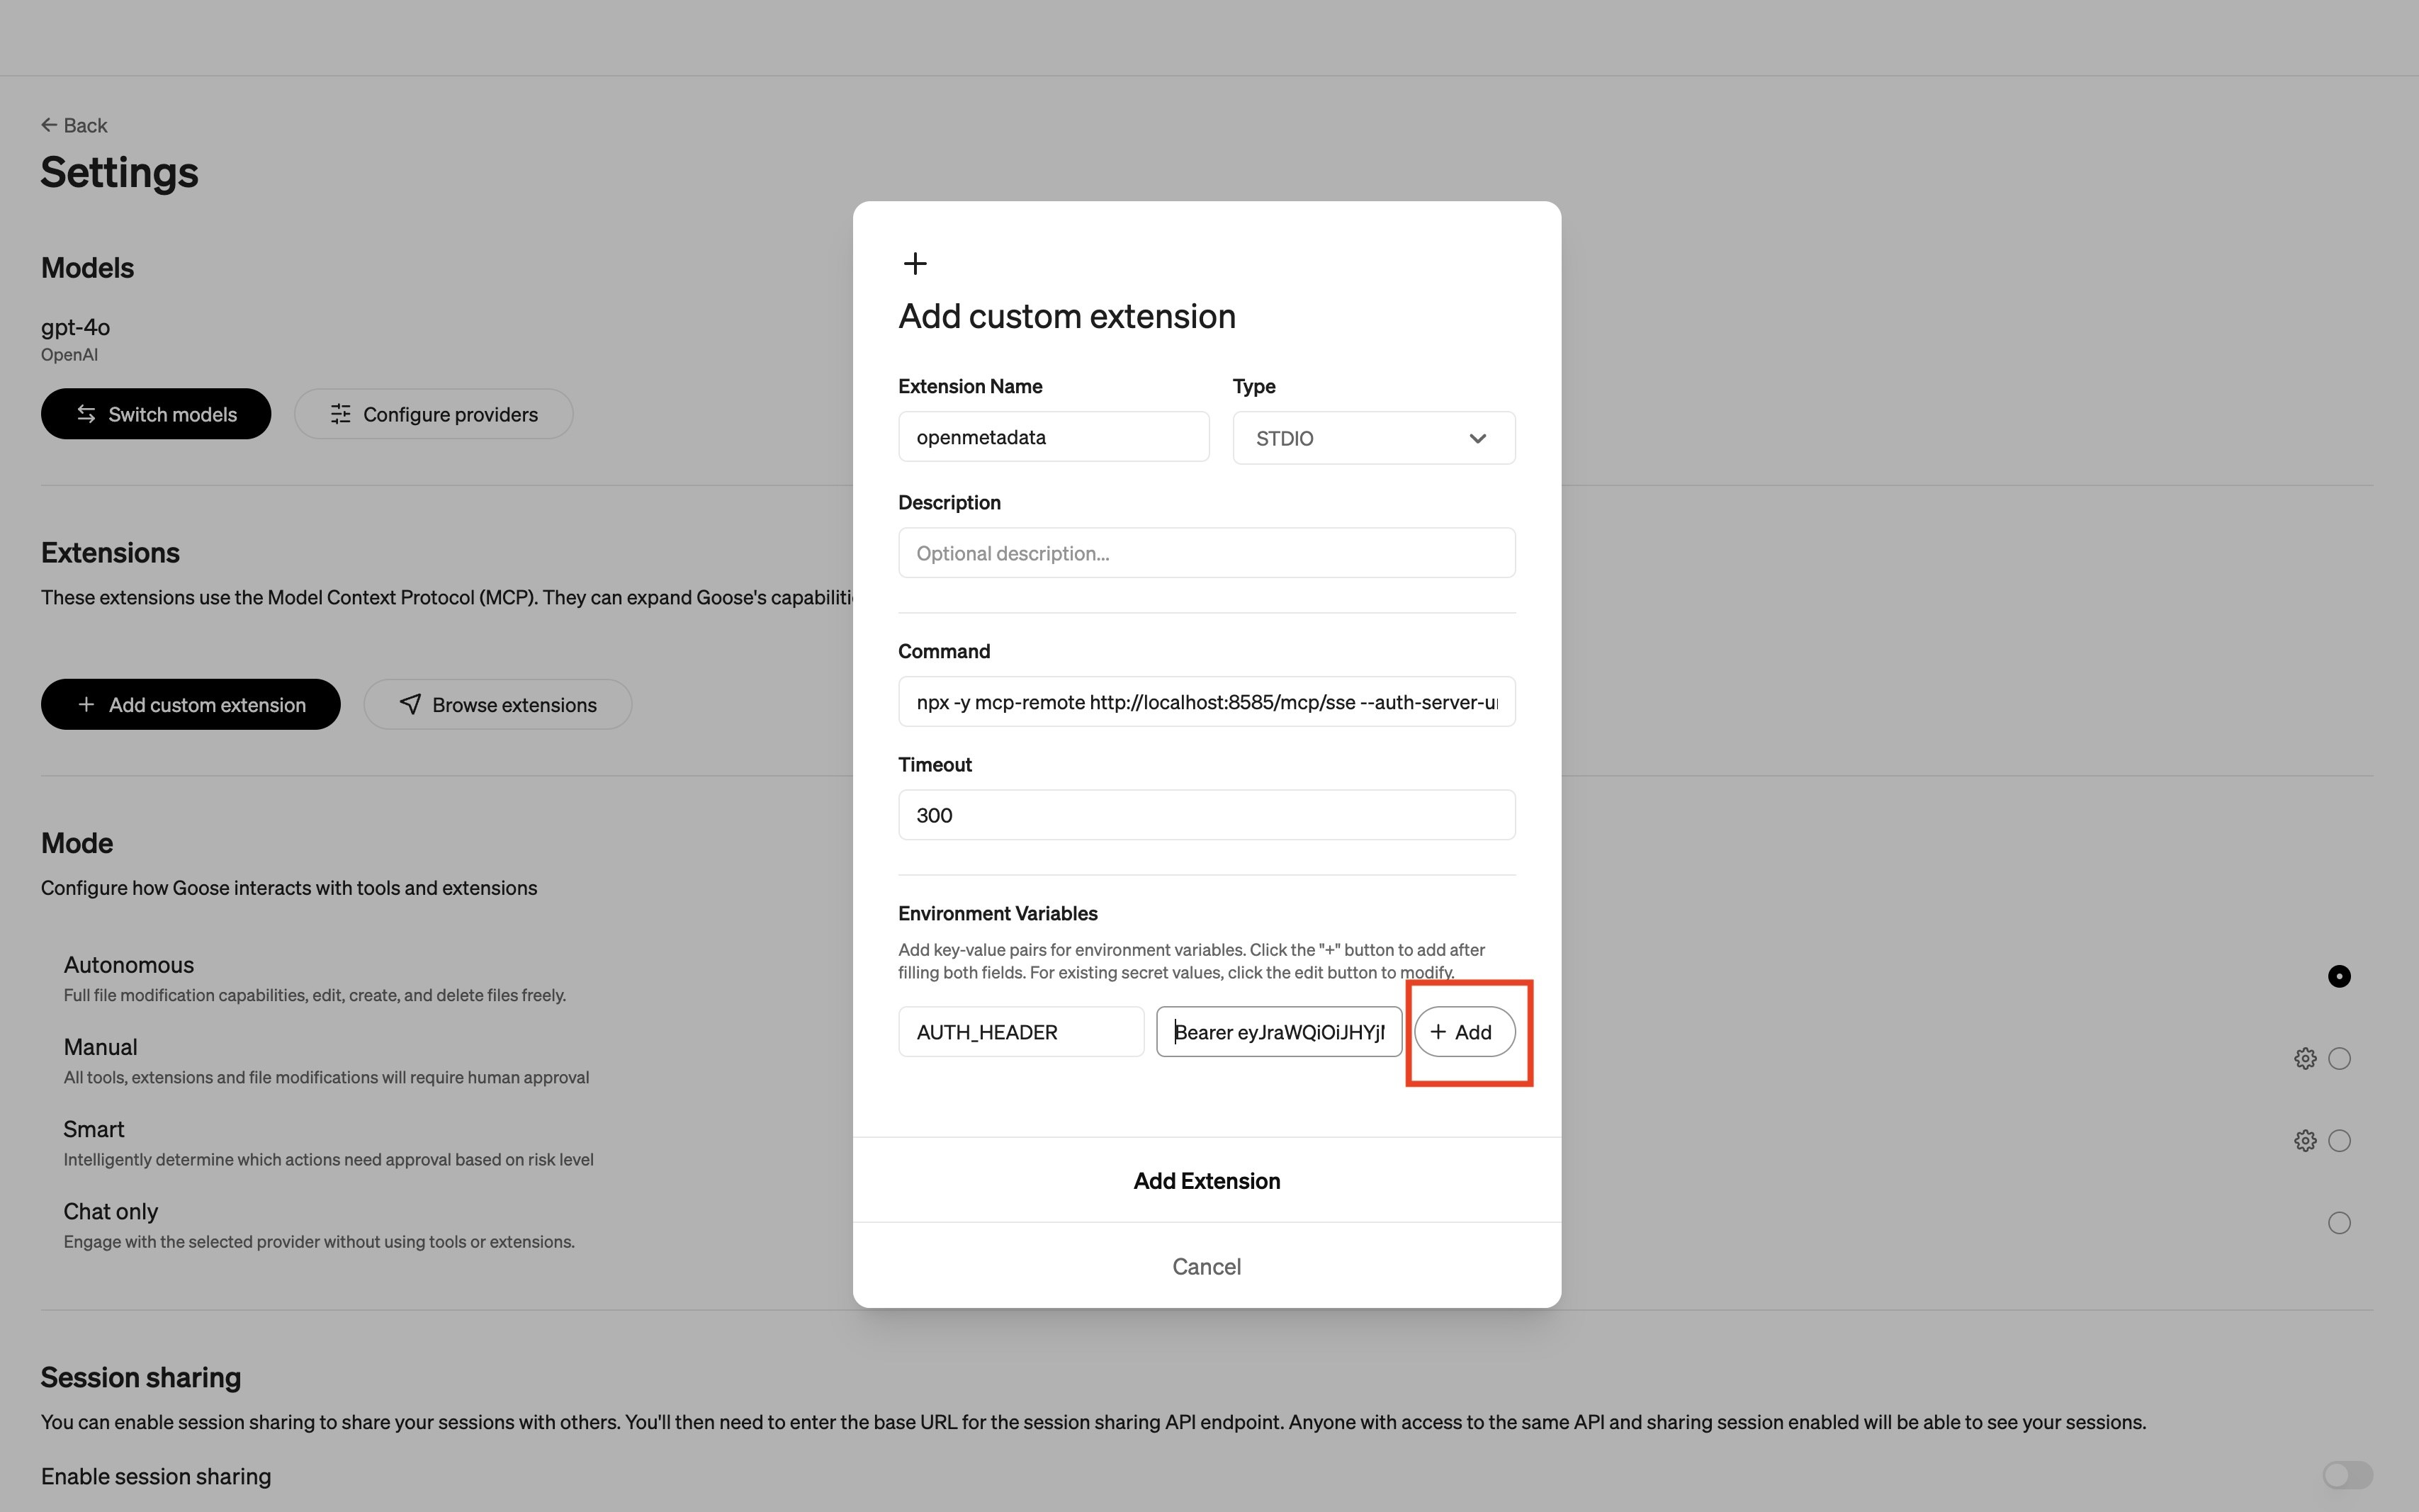
- Select +Add to store this environment variable.
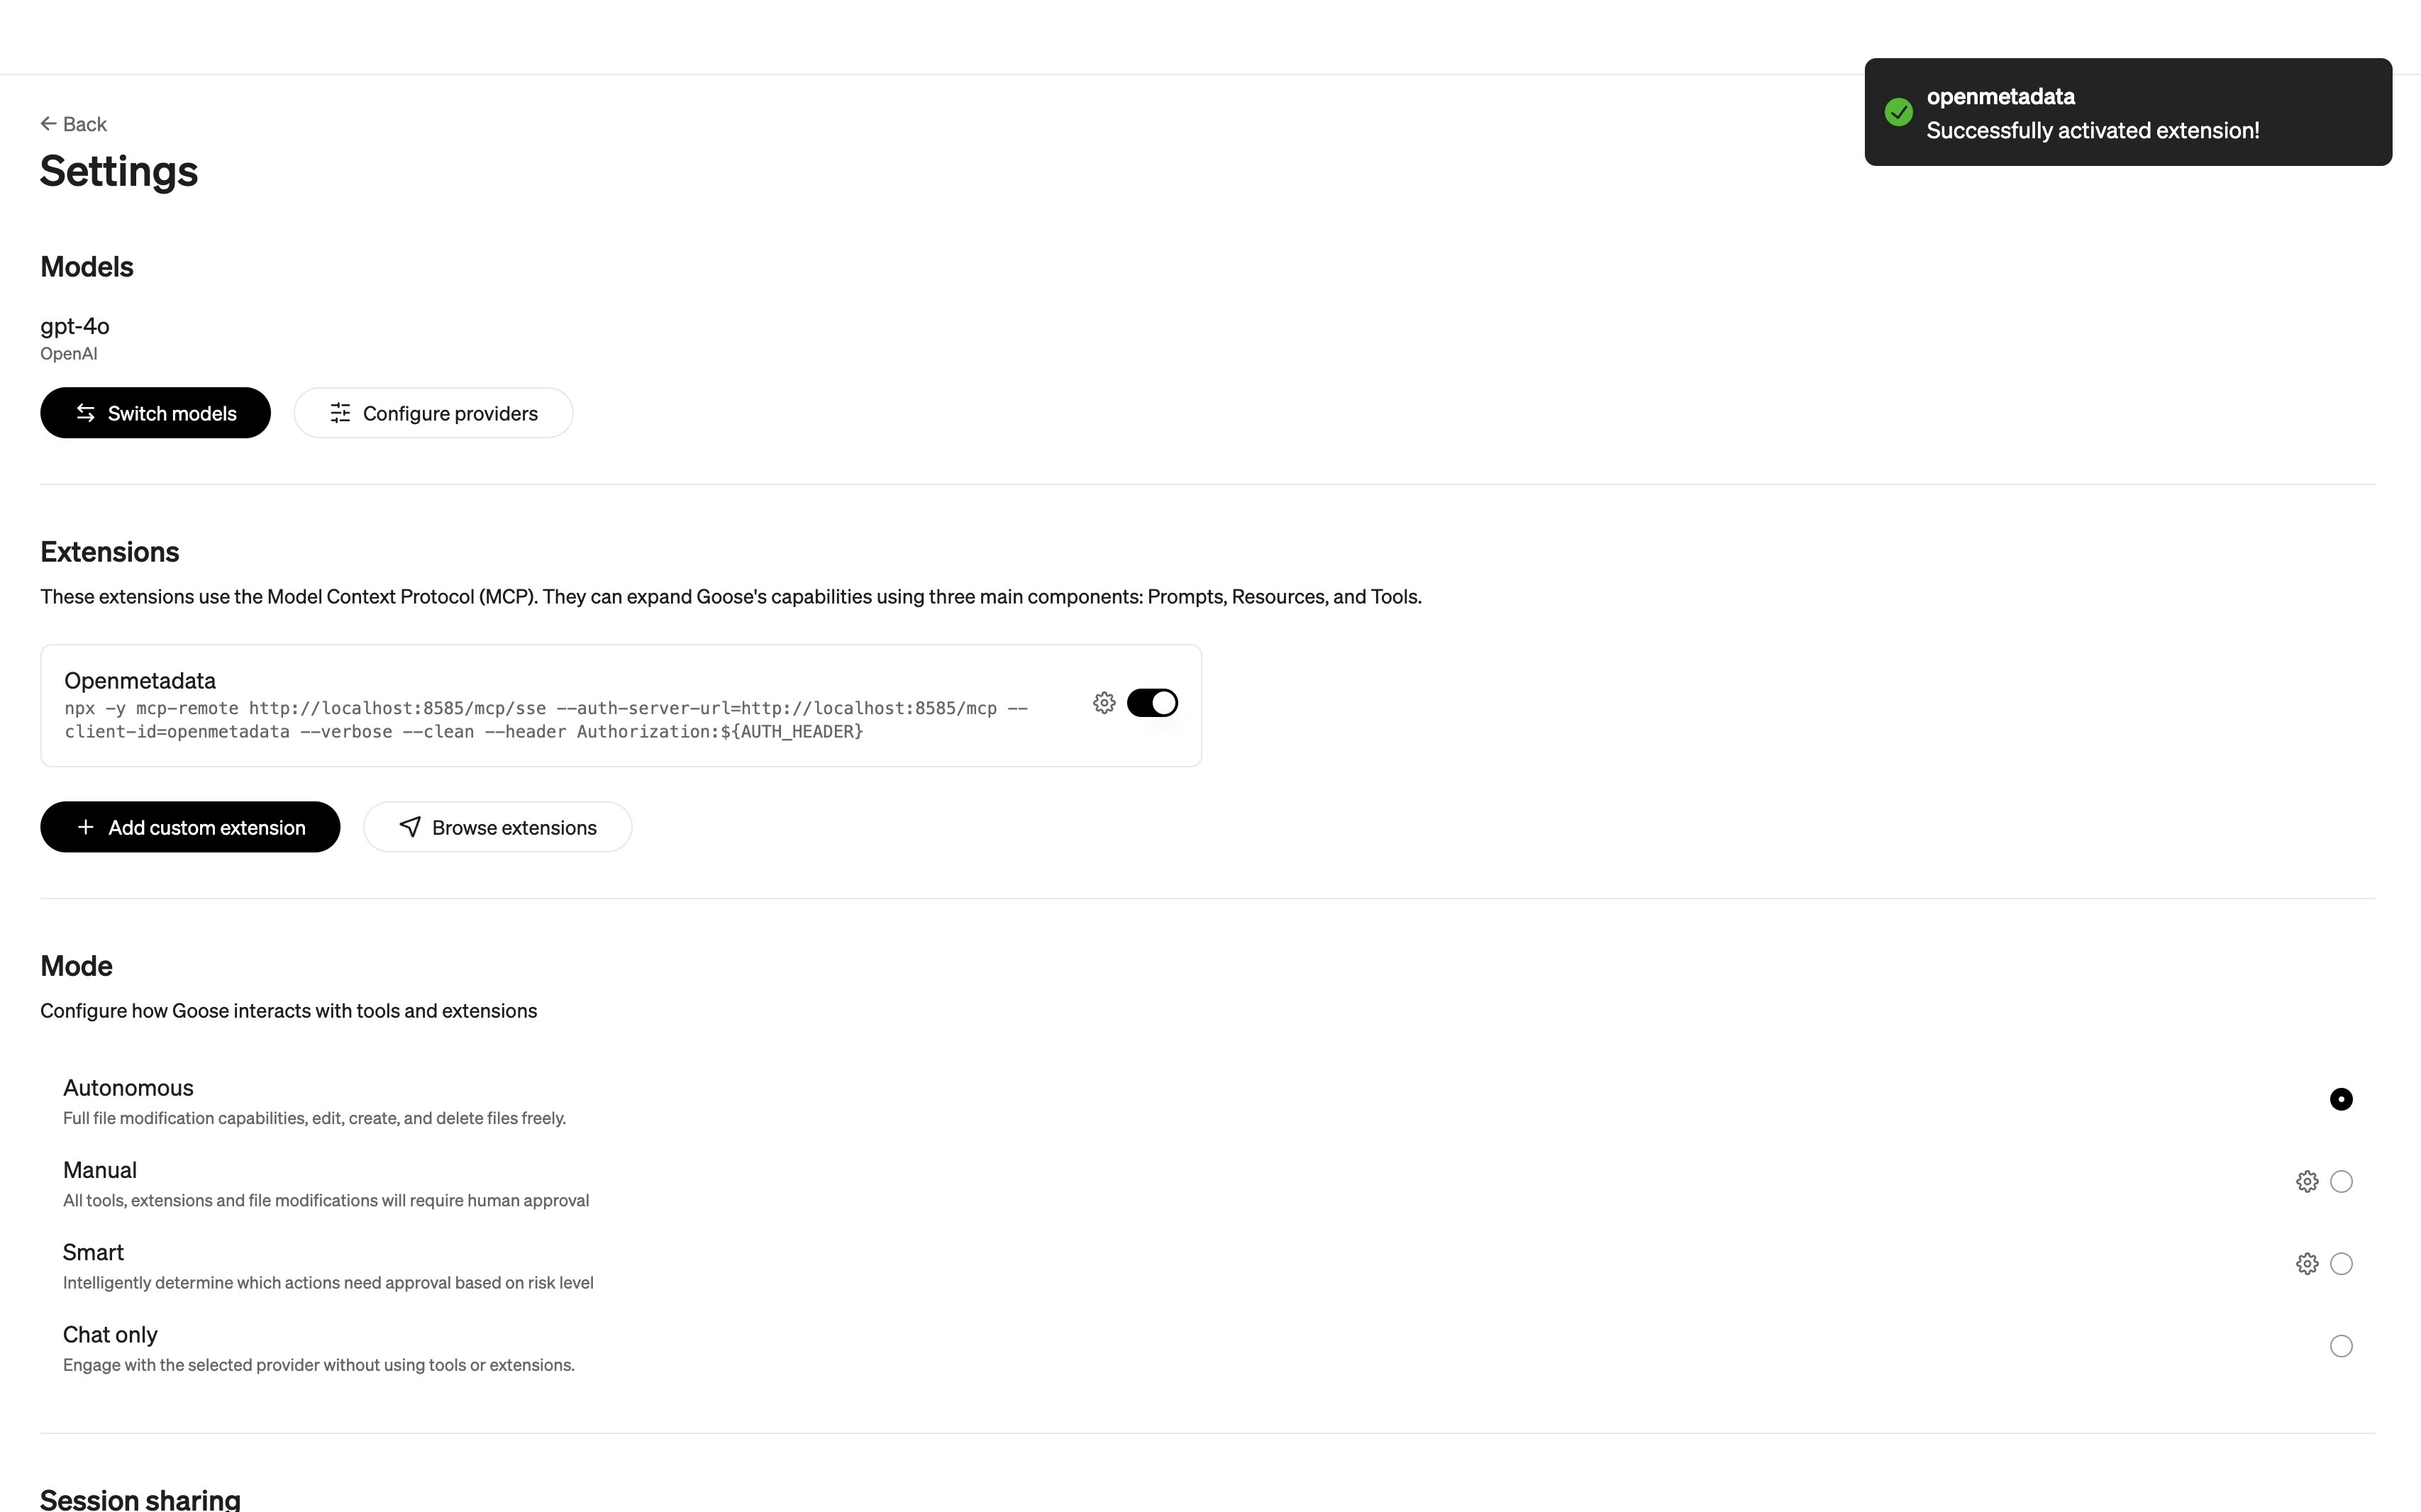
- Select Add Extension.