
Create a Data Contract
Data contracts define expectations for a data asset across schema, quality, security, and service levels. They’re available for most data assets: tables, topics, API endpoints, dashboards, pipelines, and data products among them. This guide creates a contract for a table. The form shows only the tabs an asset supports:
API, API Service, and Metric contracts are available through the API only, so the UI steps below don’t apply to them. For the full asset list, see Supported Assets.
Creating a contract requires the Create permission on data contracts. Editing or running one requires Edit All on the contract.
Steps to Create a Data Contract
To create a data contract, follow the steps outlined below:Step 1: Open the Contract Tab
- On the Explore Assets page, open an asset.
- Navigate to the Contract tab.
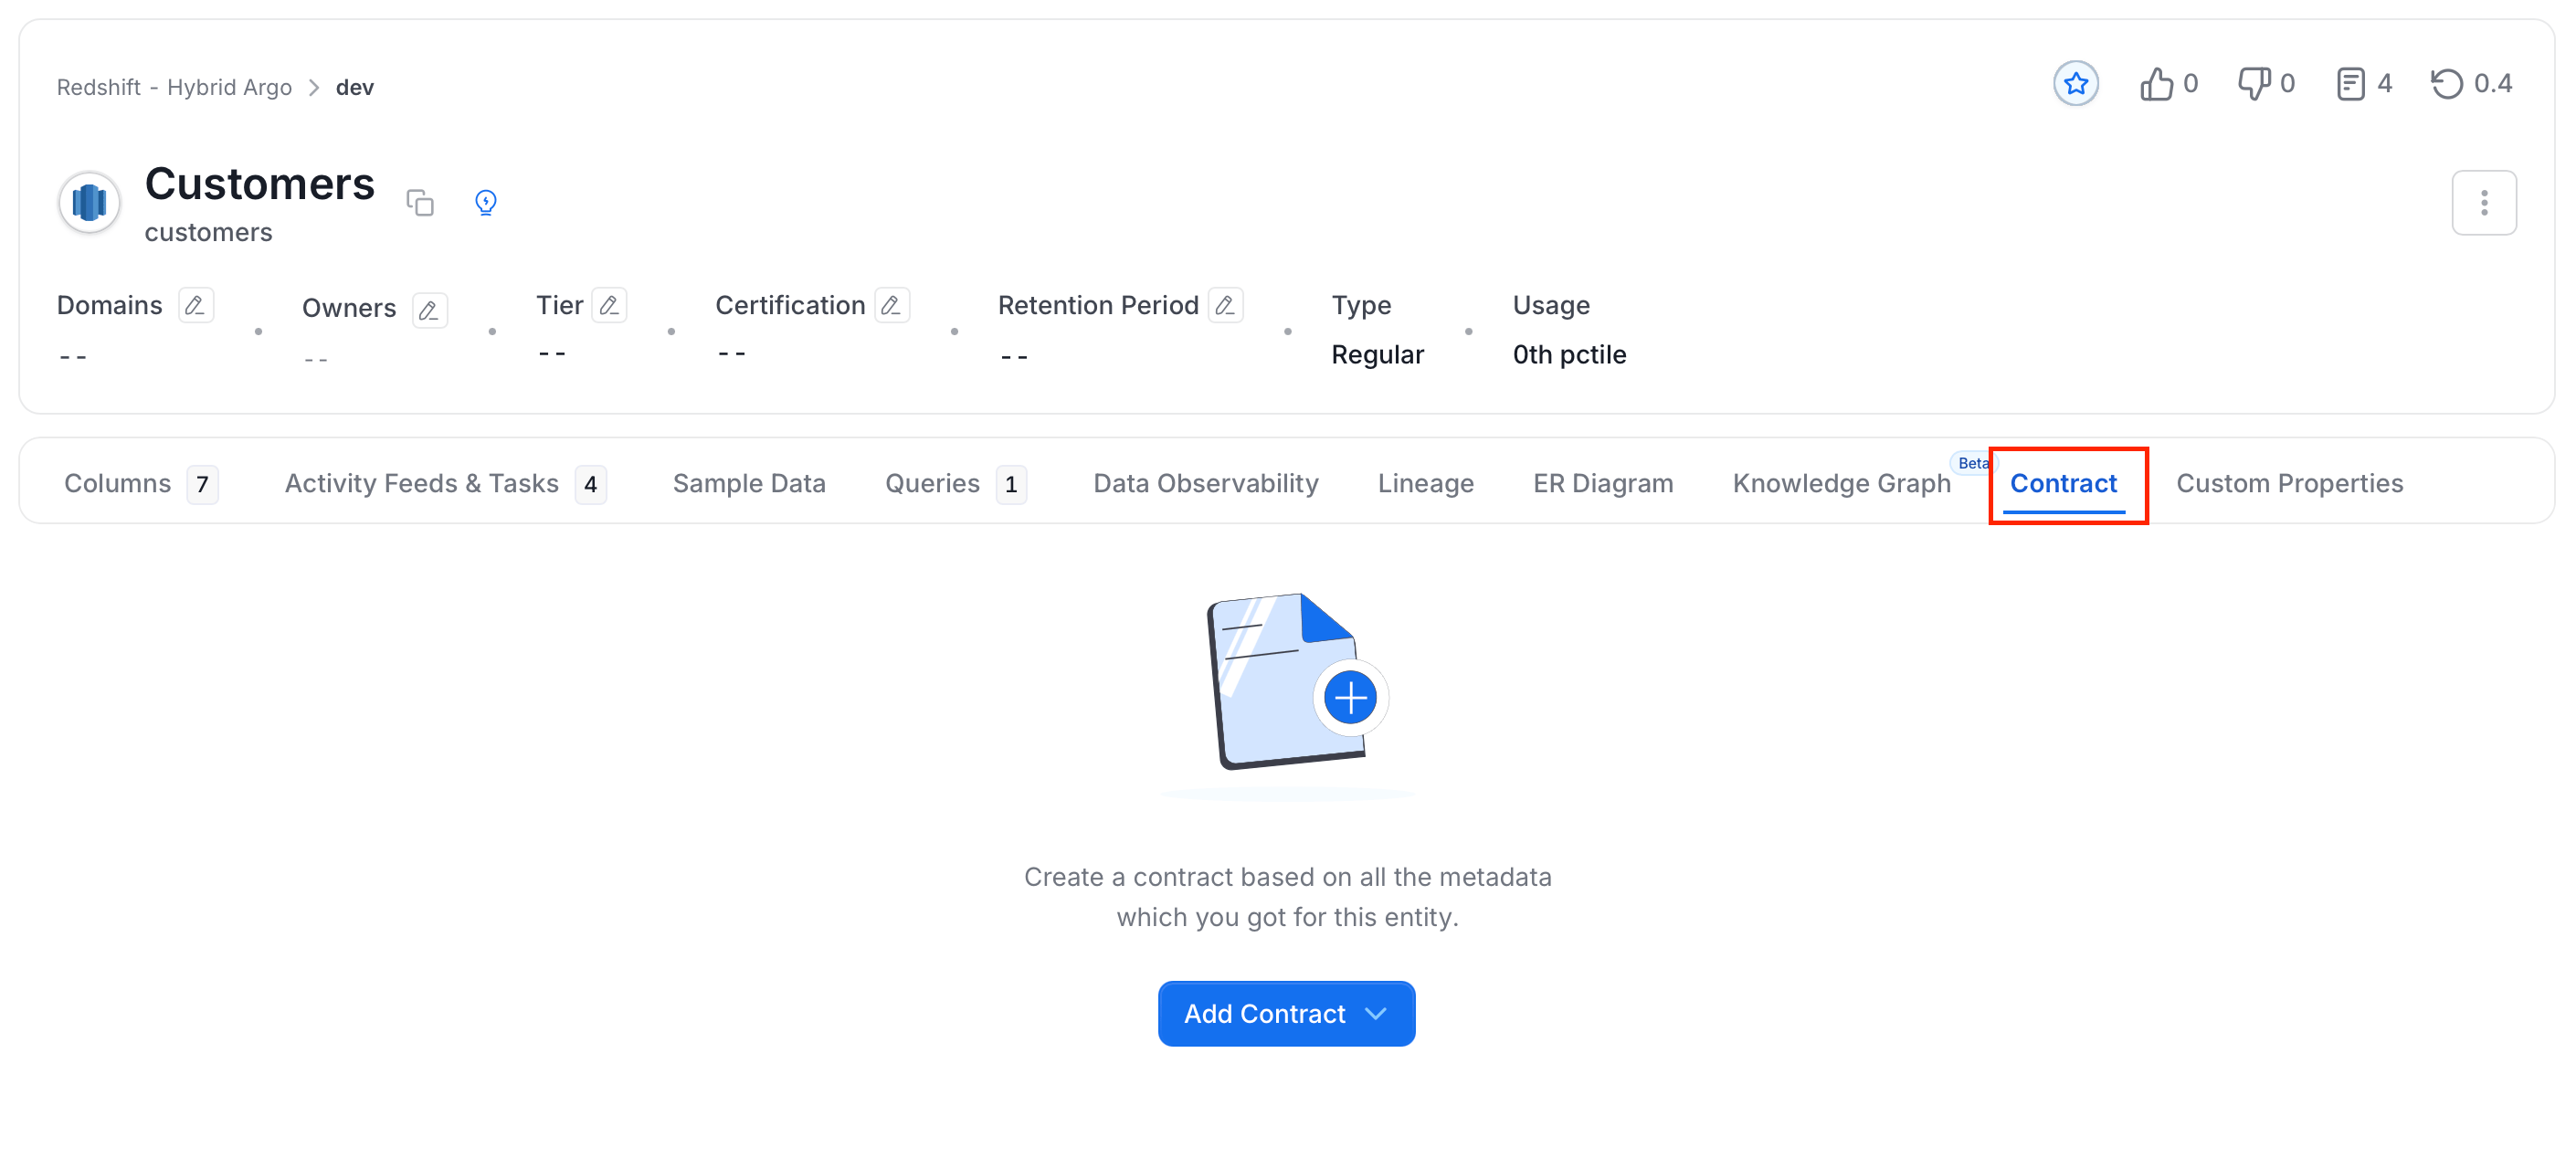
- Click Add Contract > Create Contract with UI.
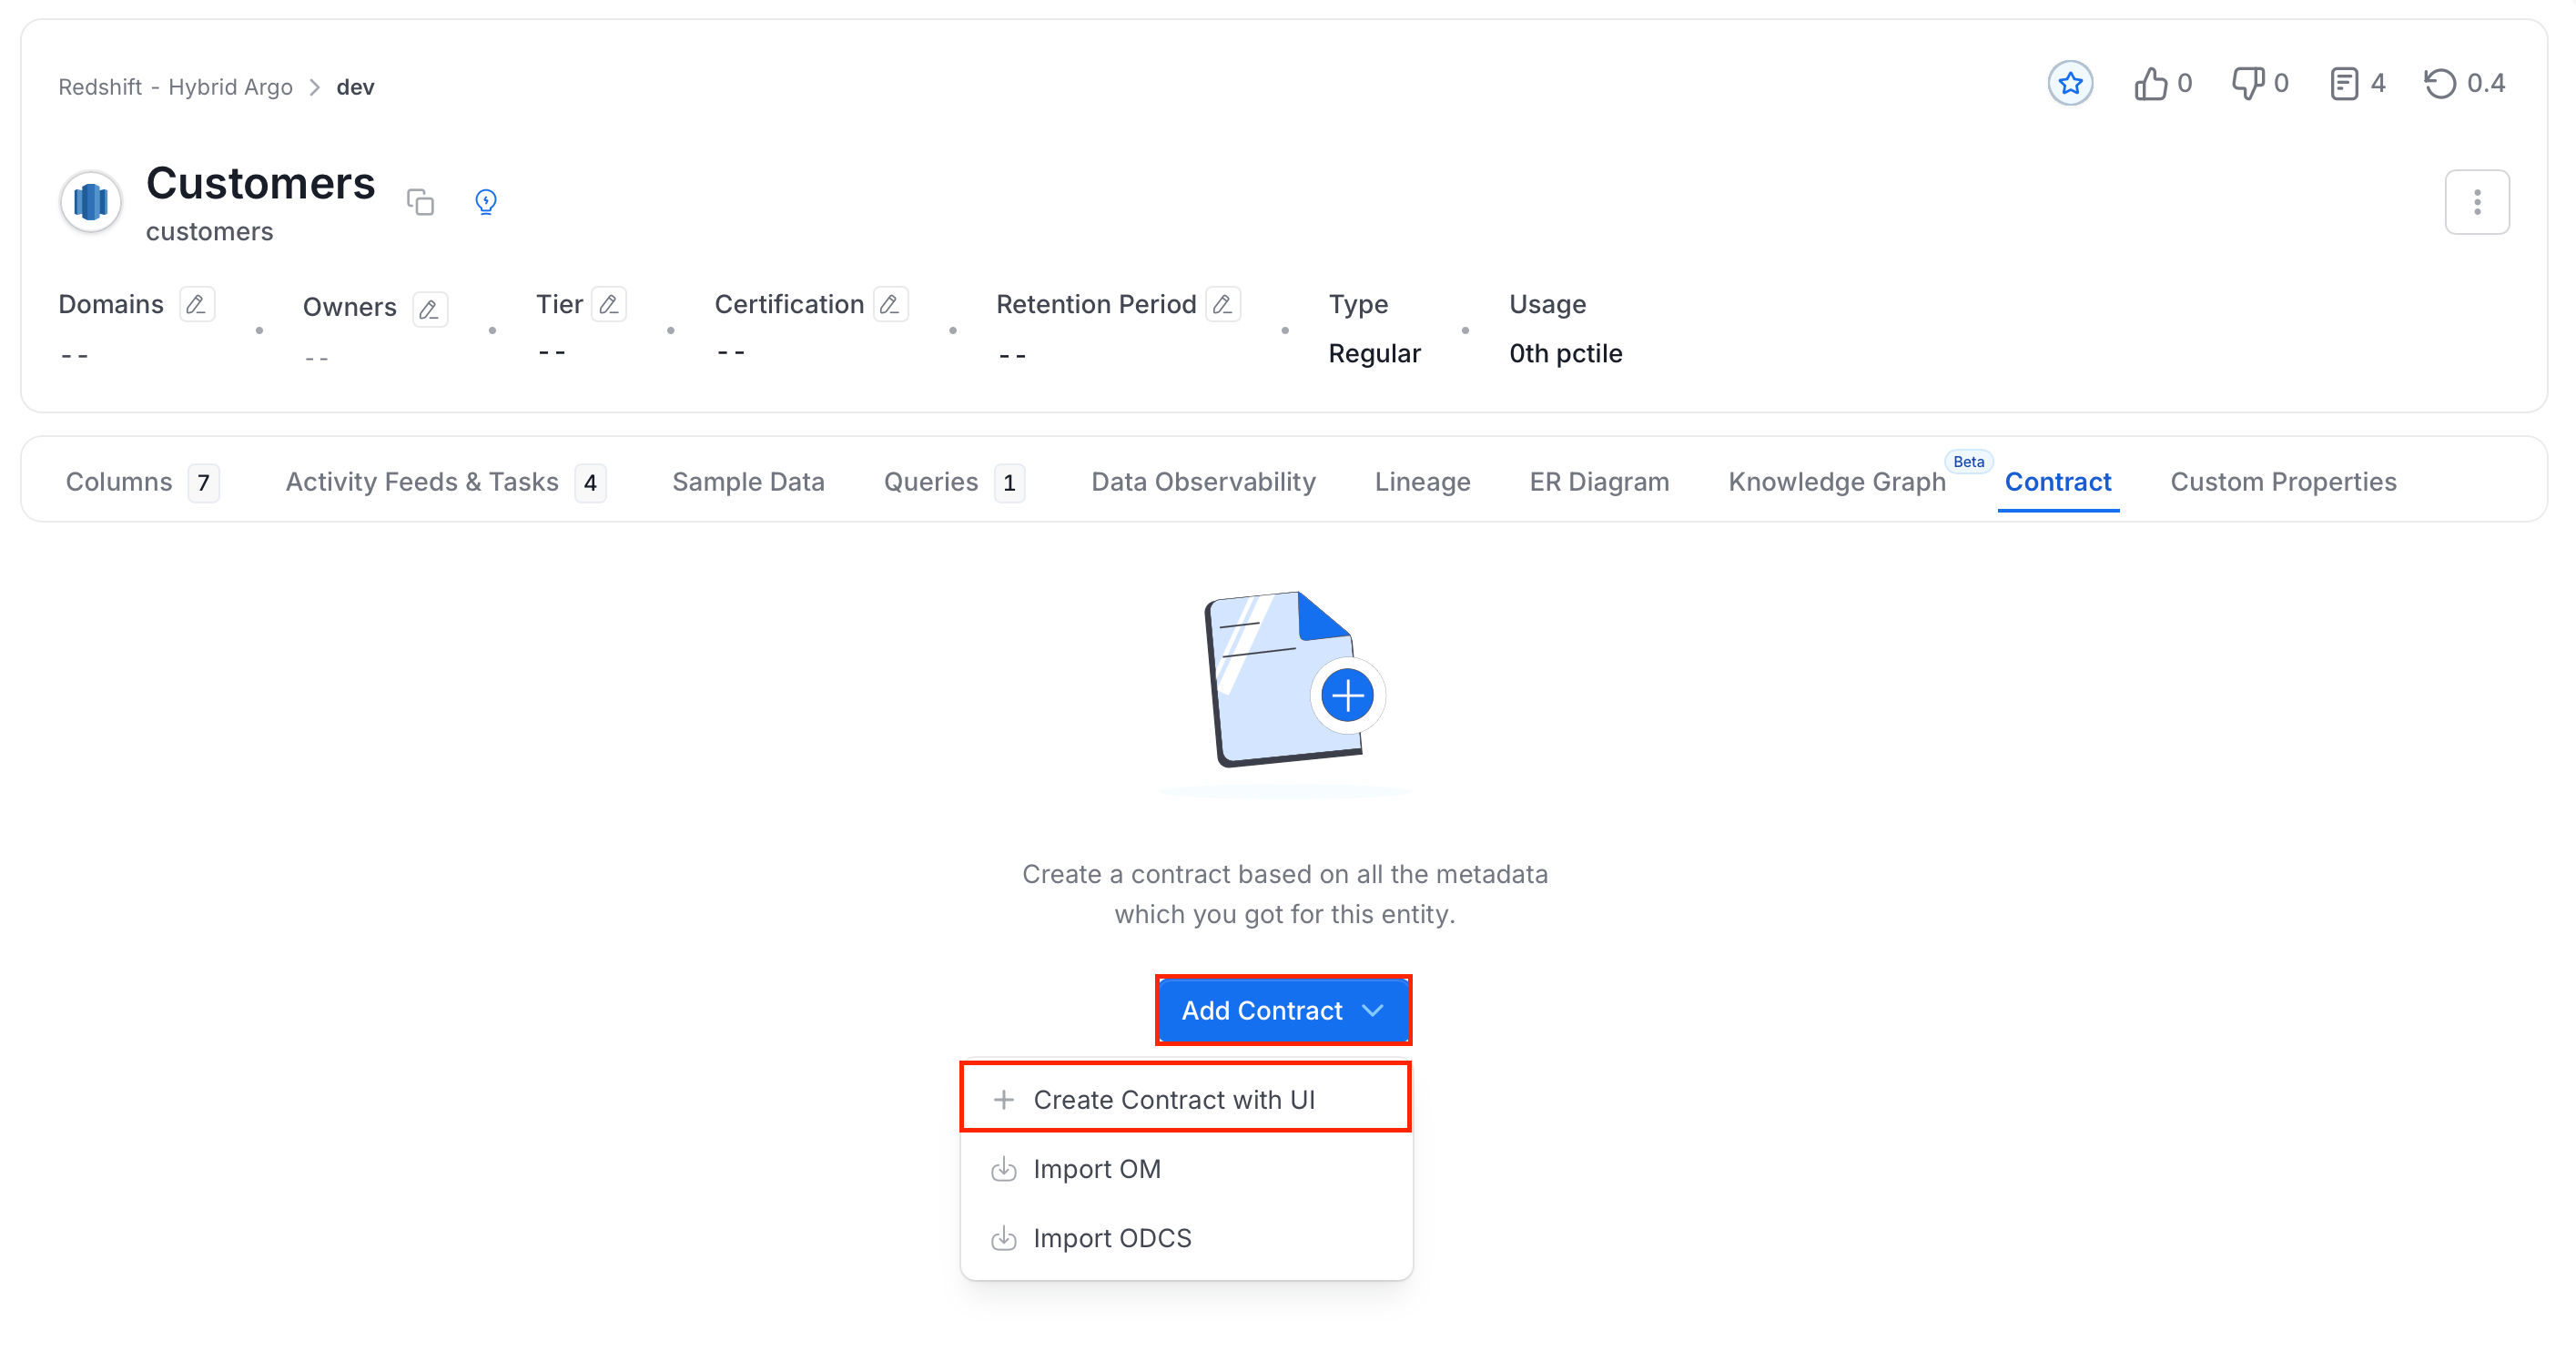
Step 2: Contract Details
-
On the Contract Details tab, fill in the following details:
- Contract Title (required): Enter a name for the contract.
- Owners: Select one or more owners from the directory.
- Description: Add a description using the rich text editor.
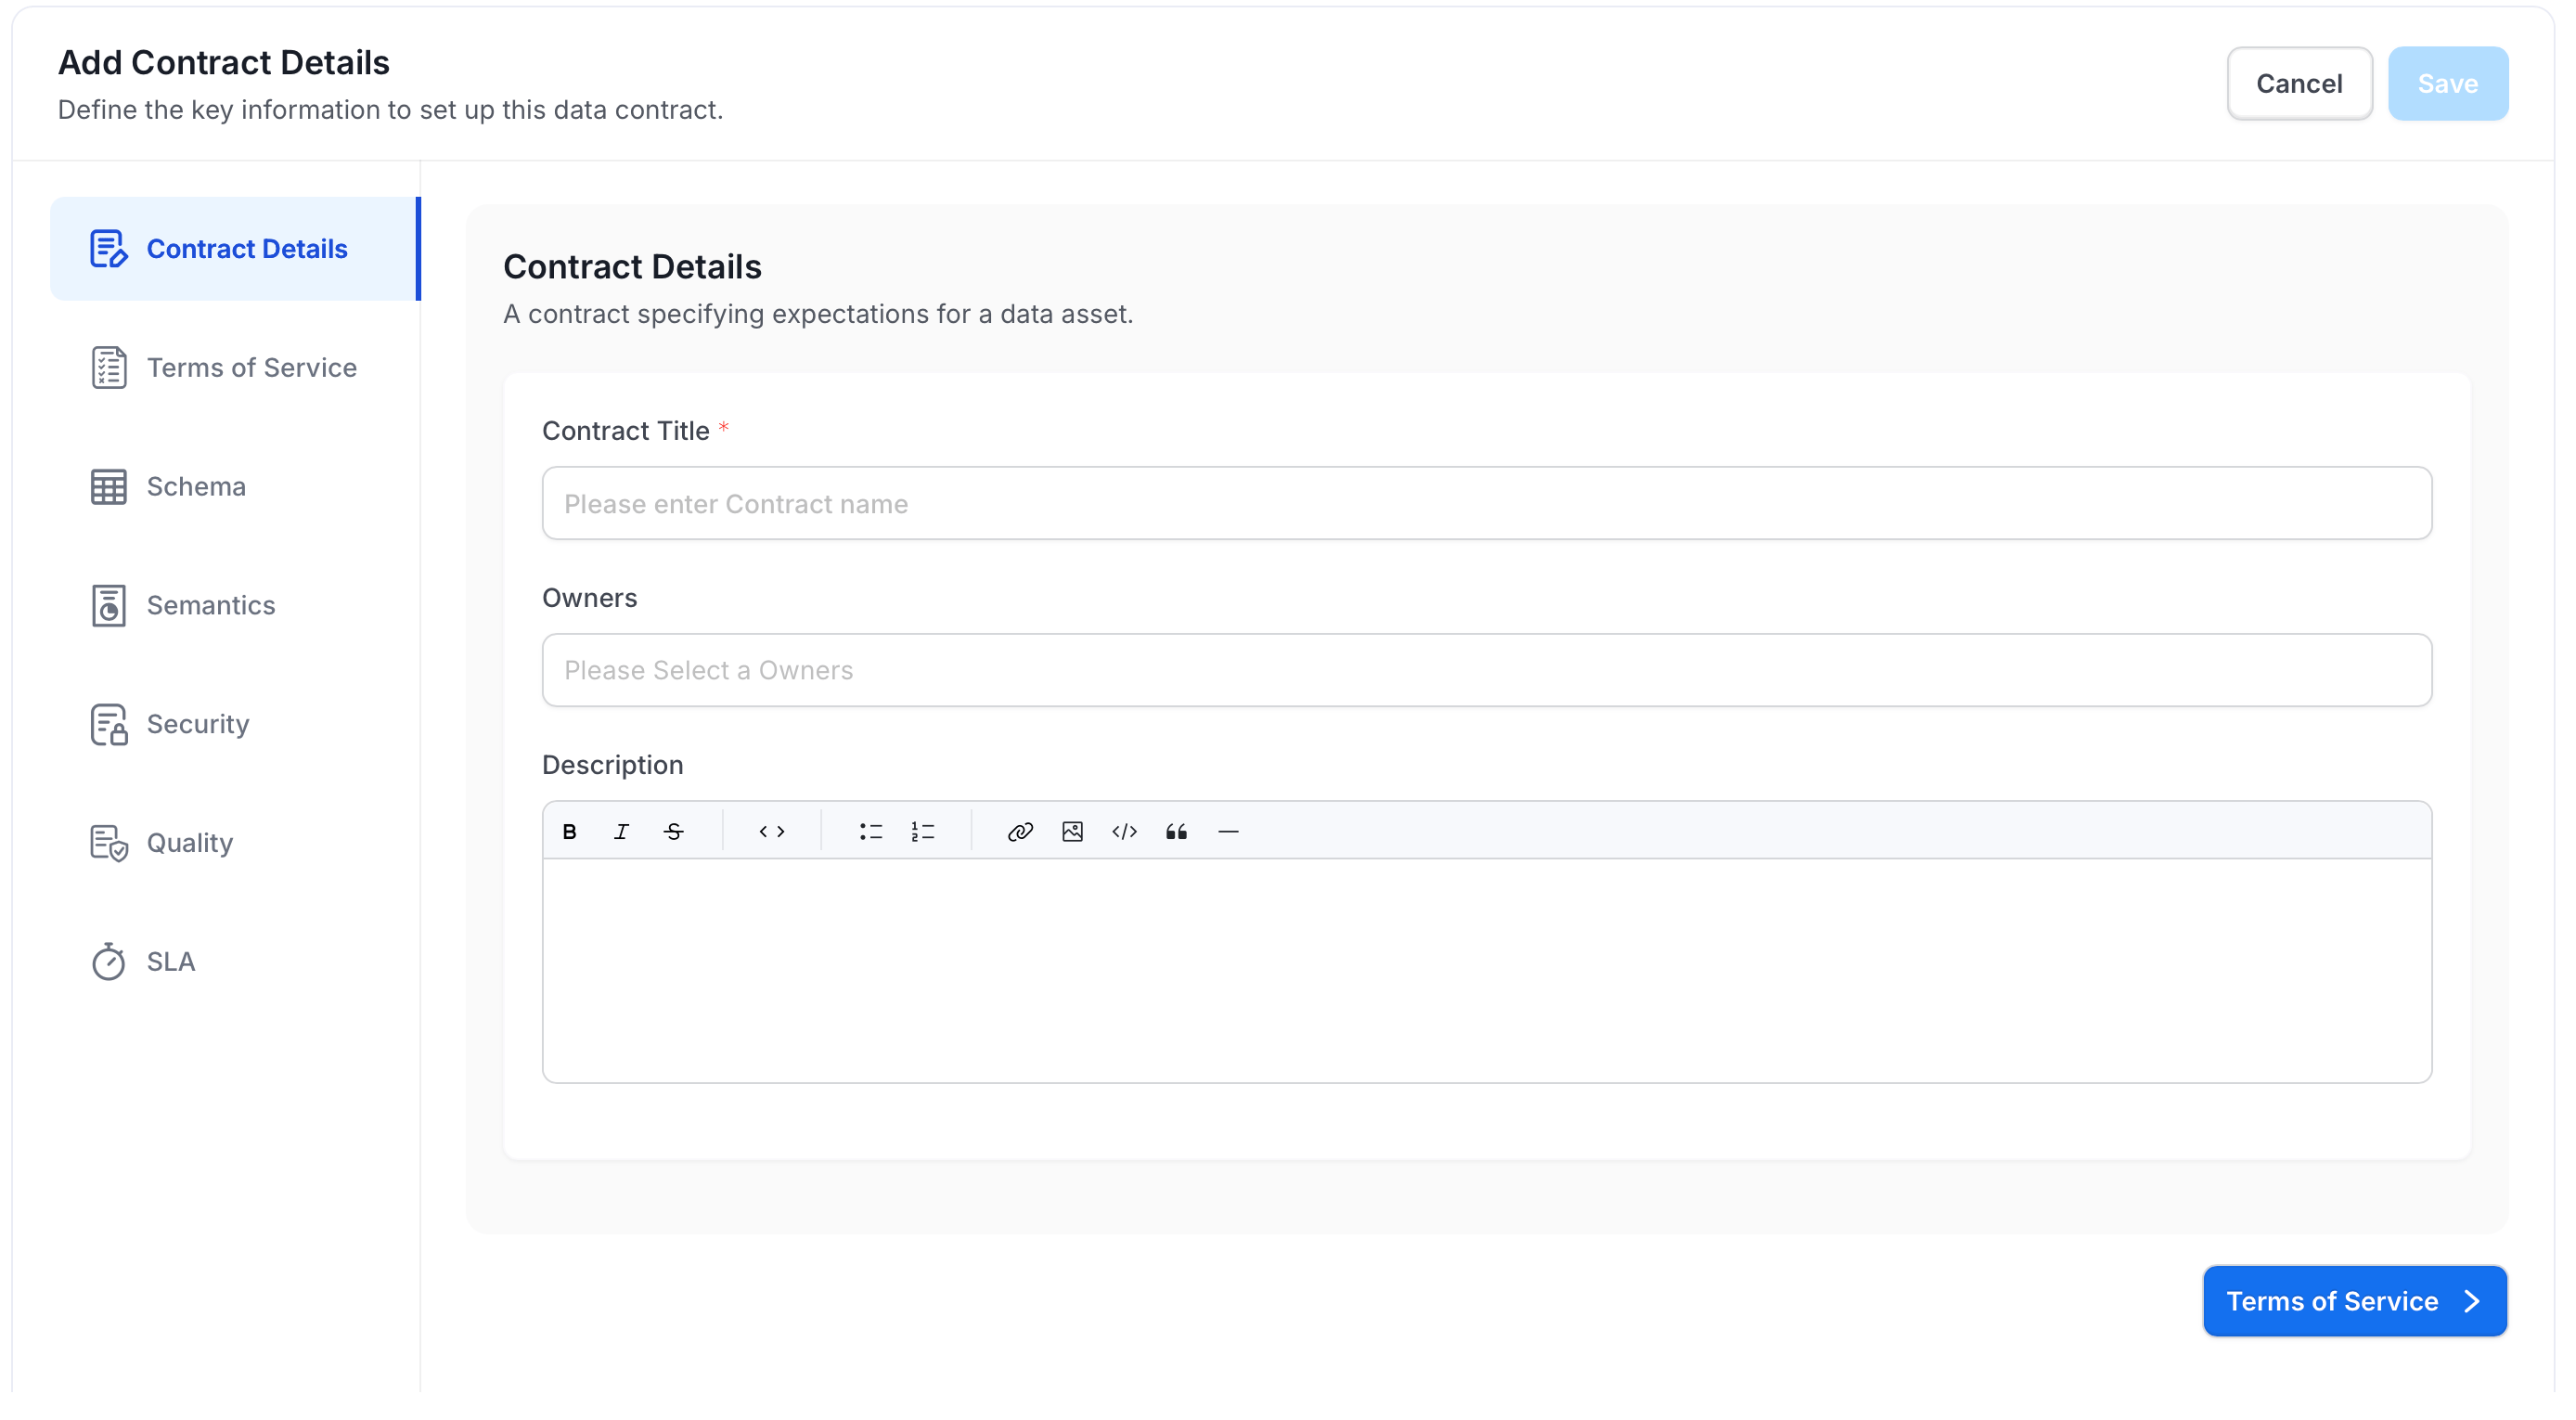
- Click Terms of Service to continue.
Step 3: Terms of Service
-
Optional: Enter the rules and conditions that consumers of this data asset agree to. Use the rich text editor: type
/to access formatting commands.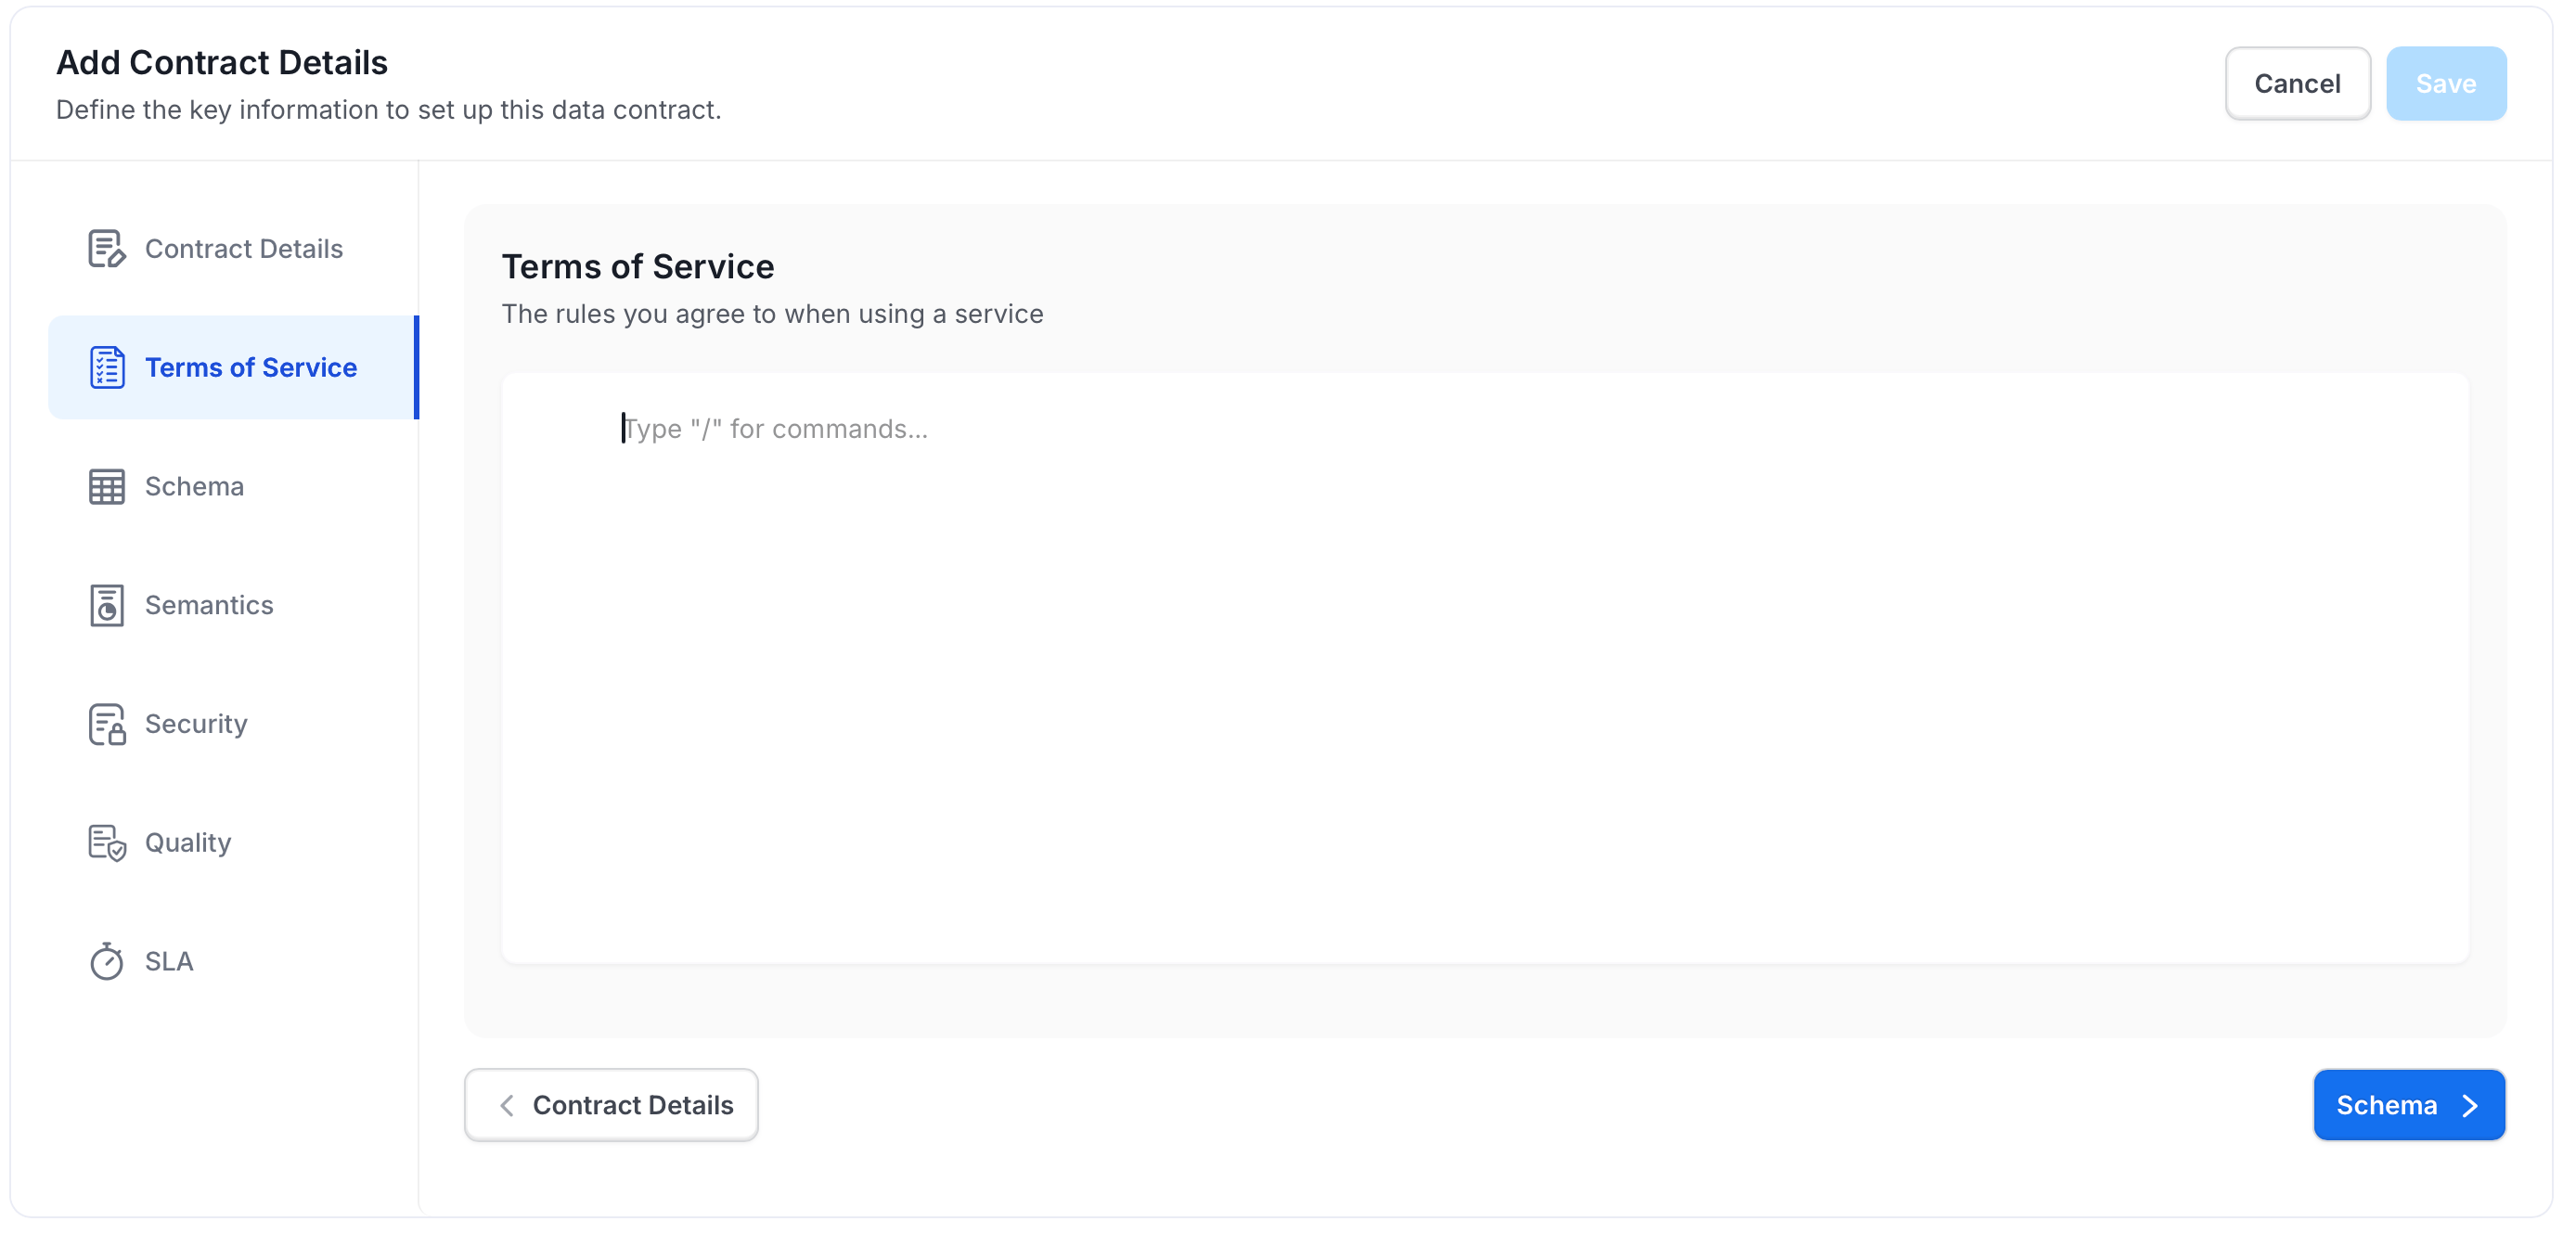
- Click Schema to continue.
Step 4: Schema
The Schema section lists all columns from the asset, pre-populated with their type, tags, glossary terms, and constraints.-
Select the columns to include in this contract, or check the top box to select all.
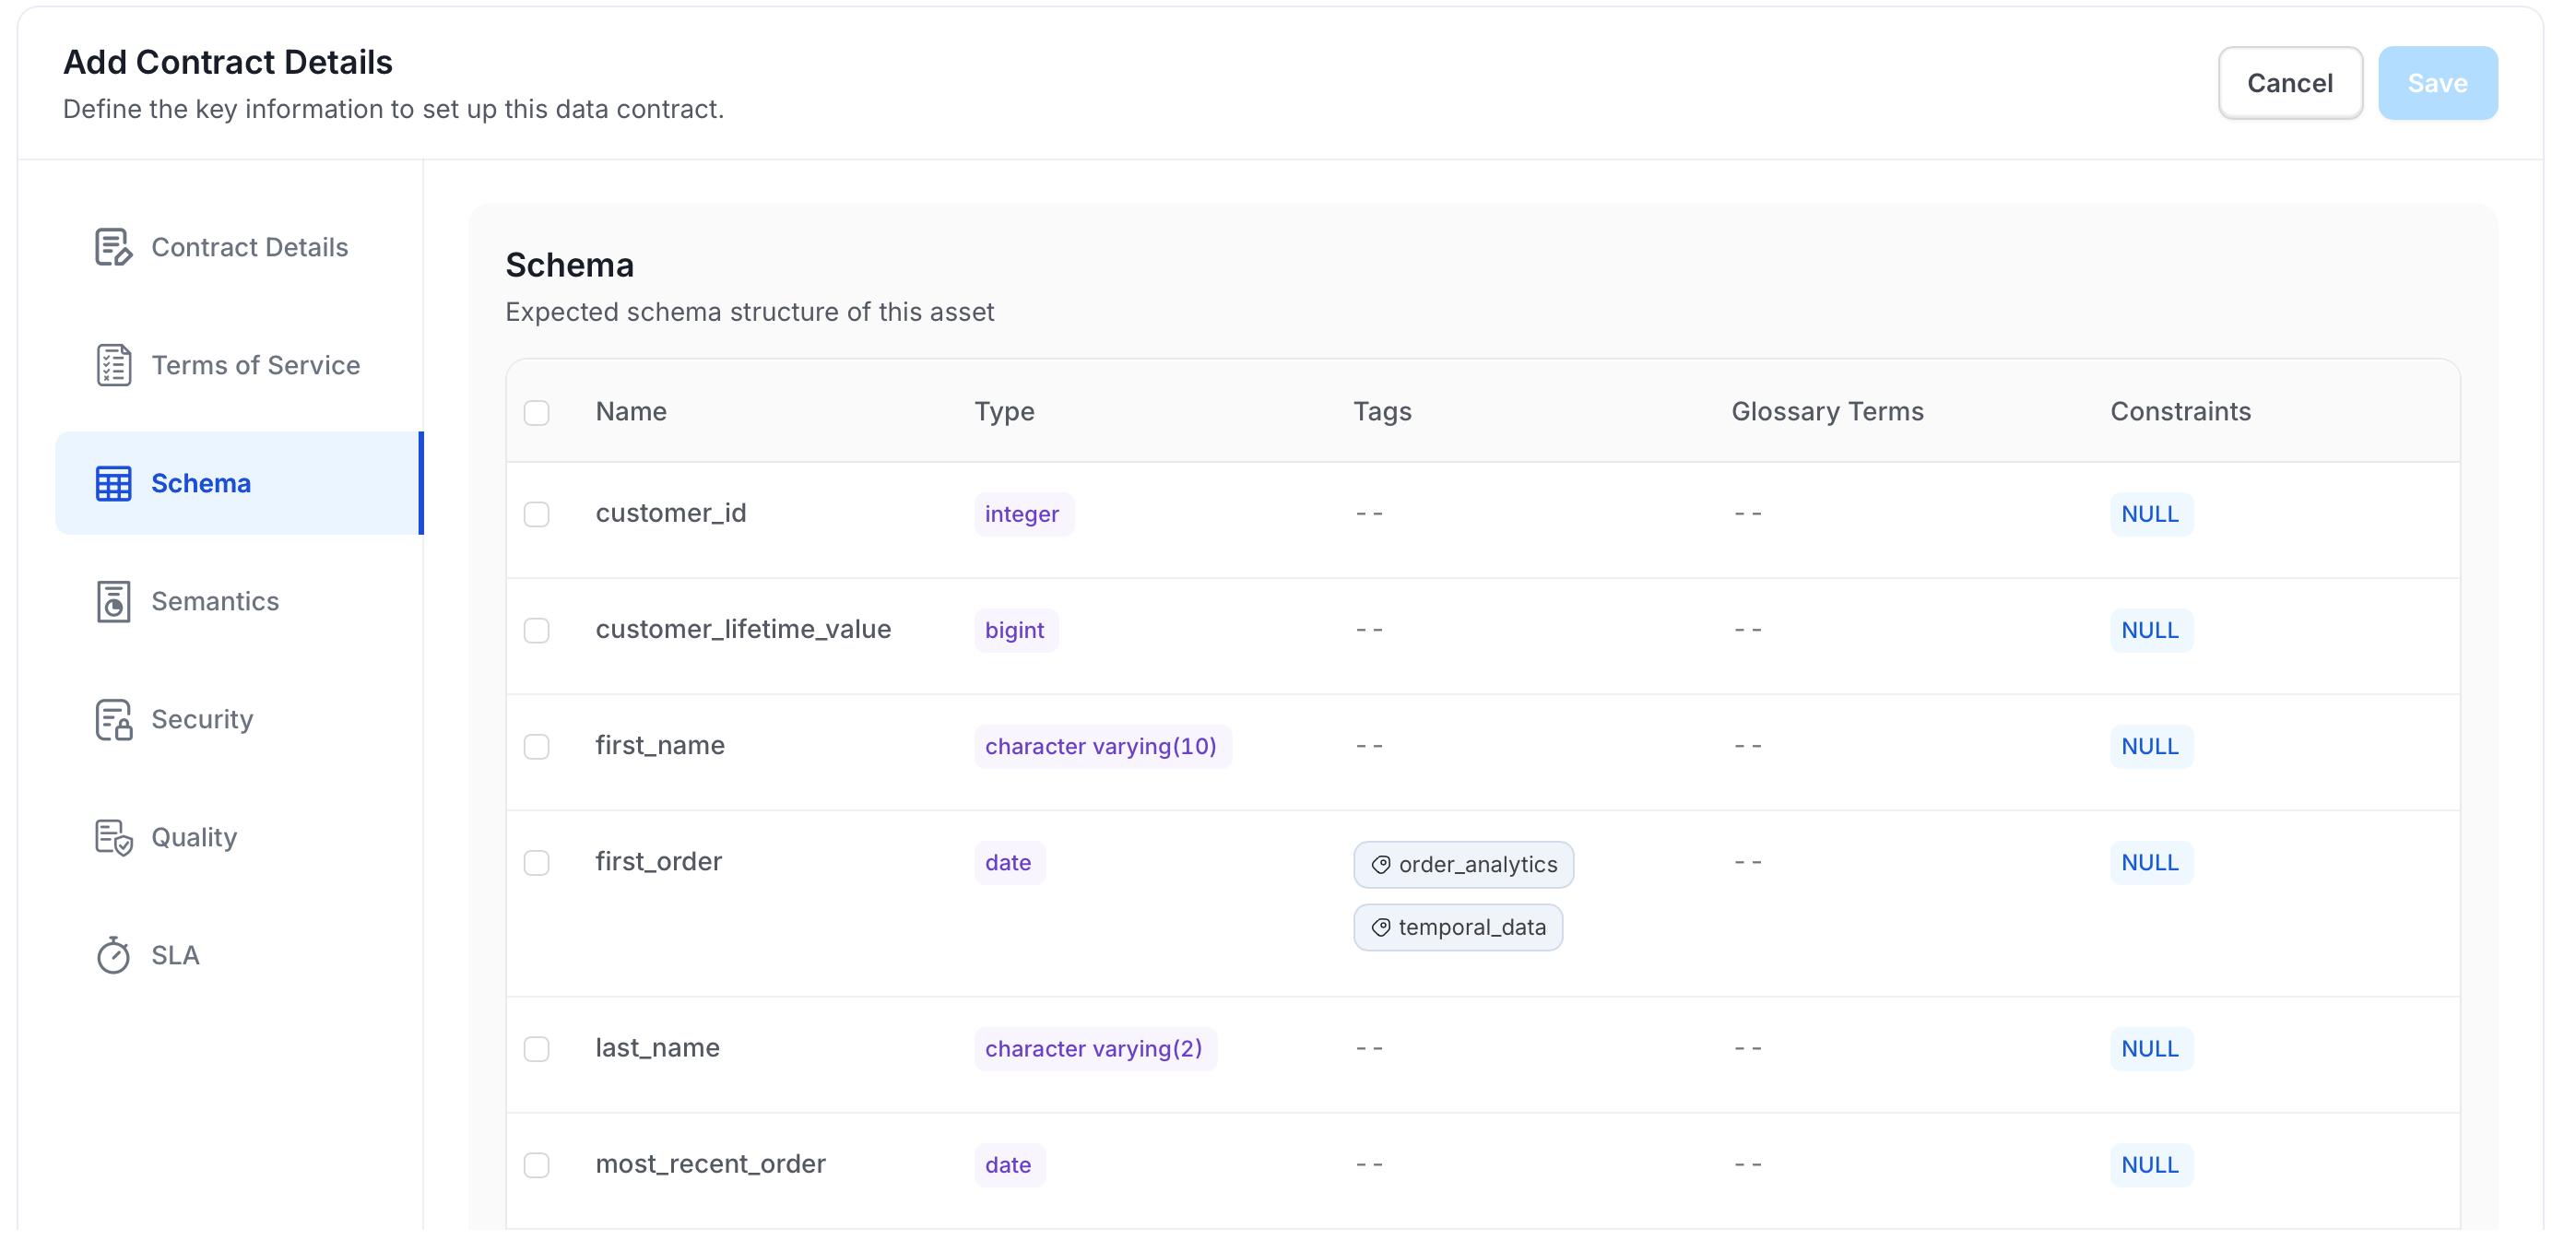
- Click Semantics to continue.
Step 5: Semantics
Semantics define business documentation rules the asset must meet. See Understanding Semantic Rules for a full list of supported fields and how to combine conditions.- Click Add Semantics to create a rule.
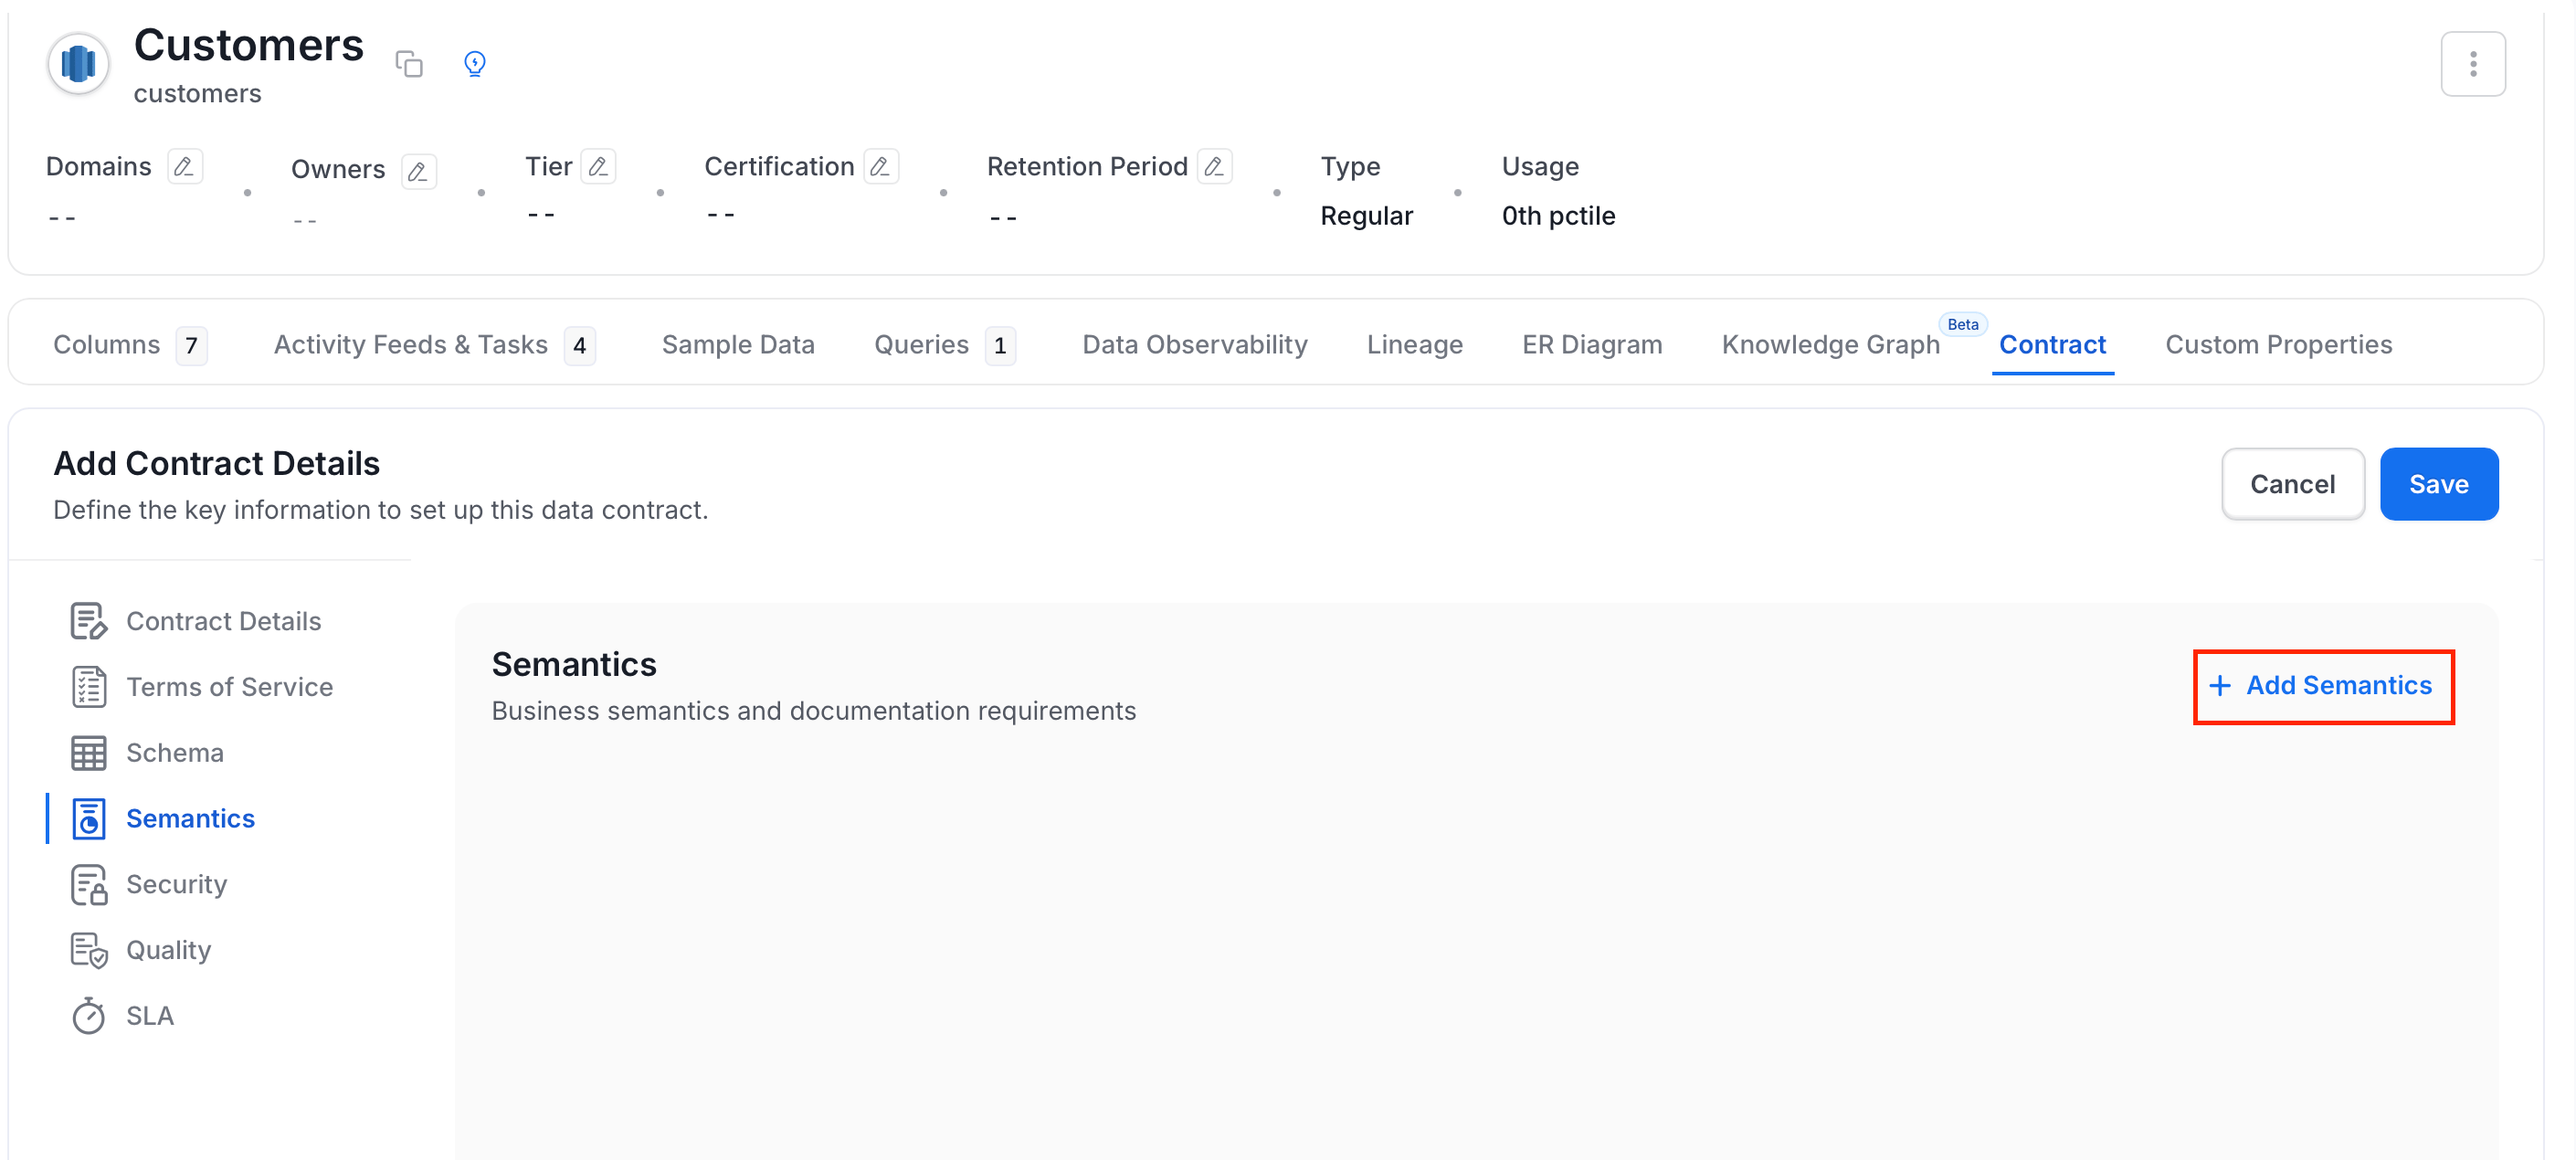
- Fill in the following details:
- Name (required): Enter a name for the rule.
- Description (required): Enter a description for the rule.
- Rule: Configure using the query builder by selecting a field, operator, and value.
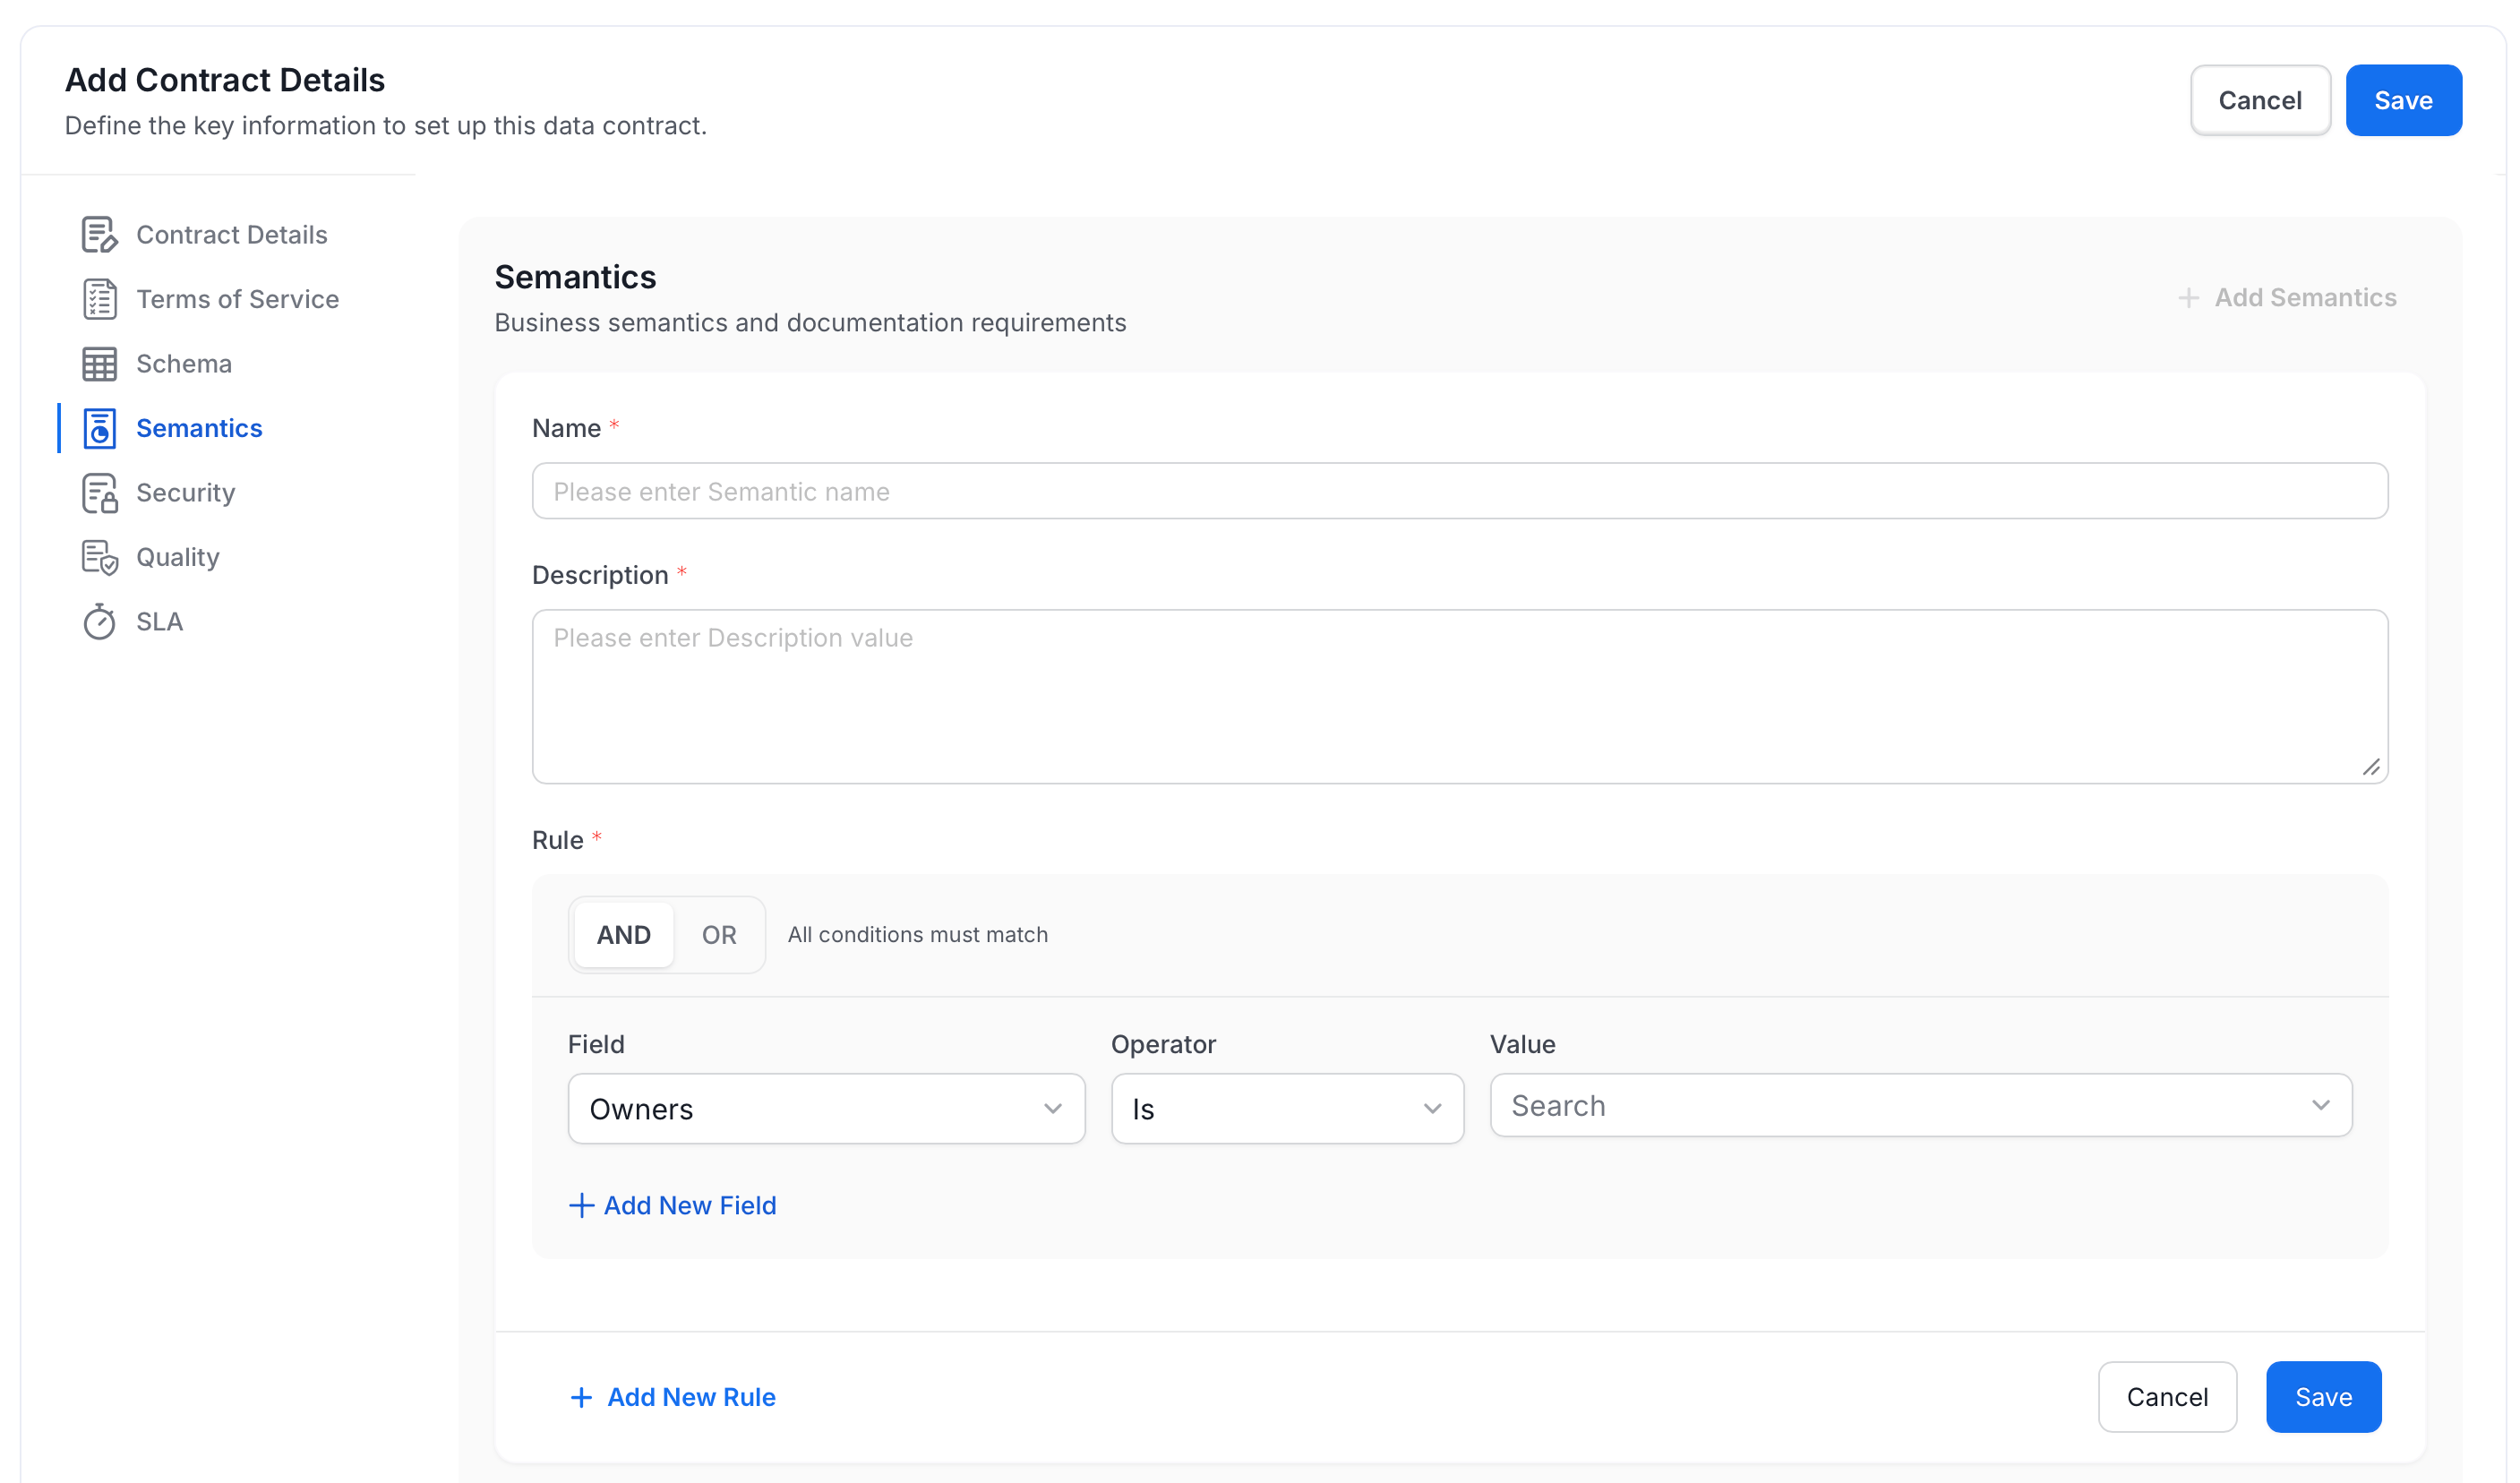
- Click Add New Rule within the query builder to add more conditions to the same rule.
- Click Save.
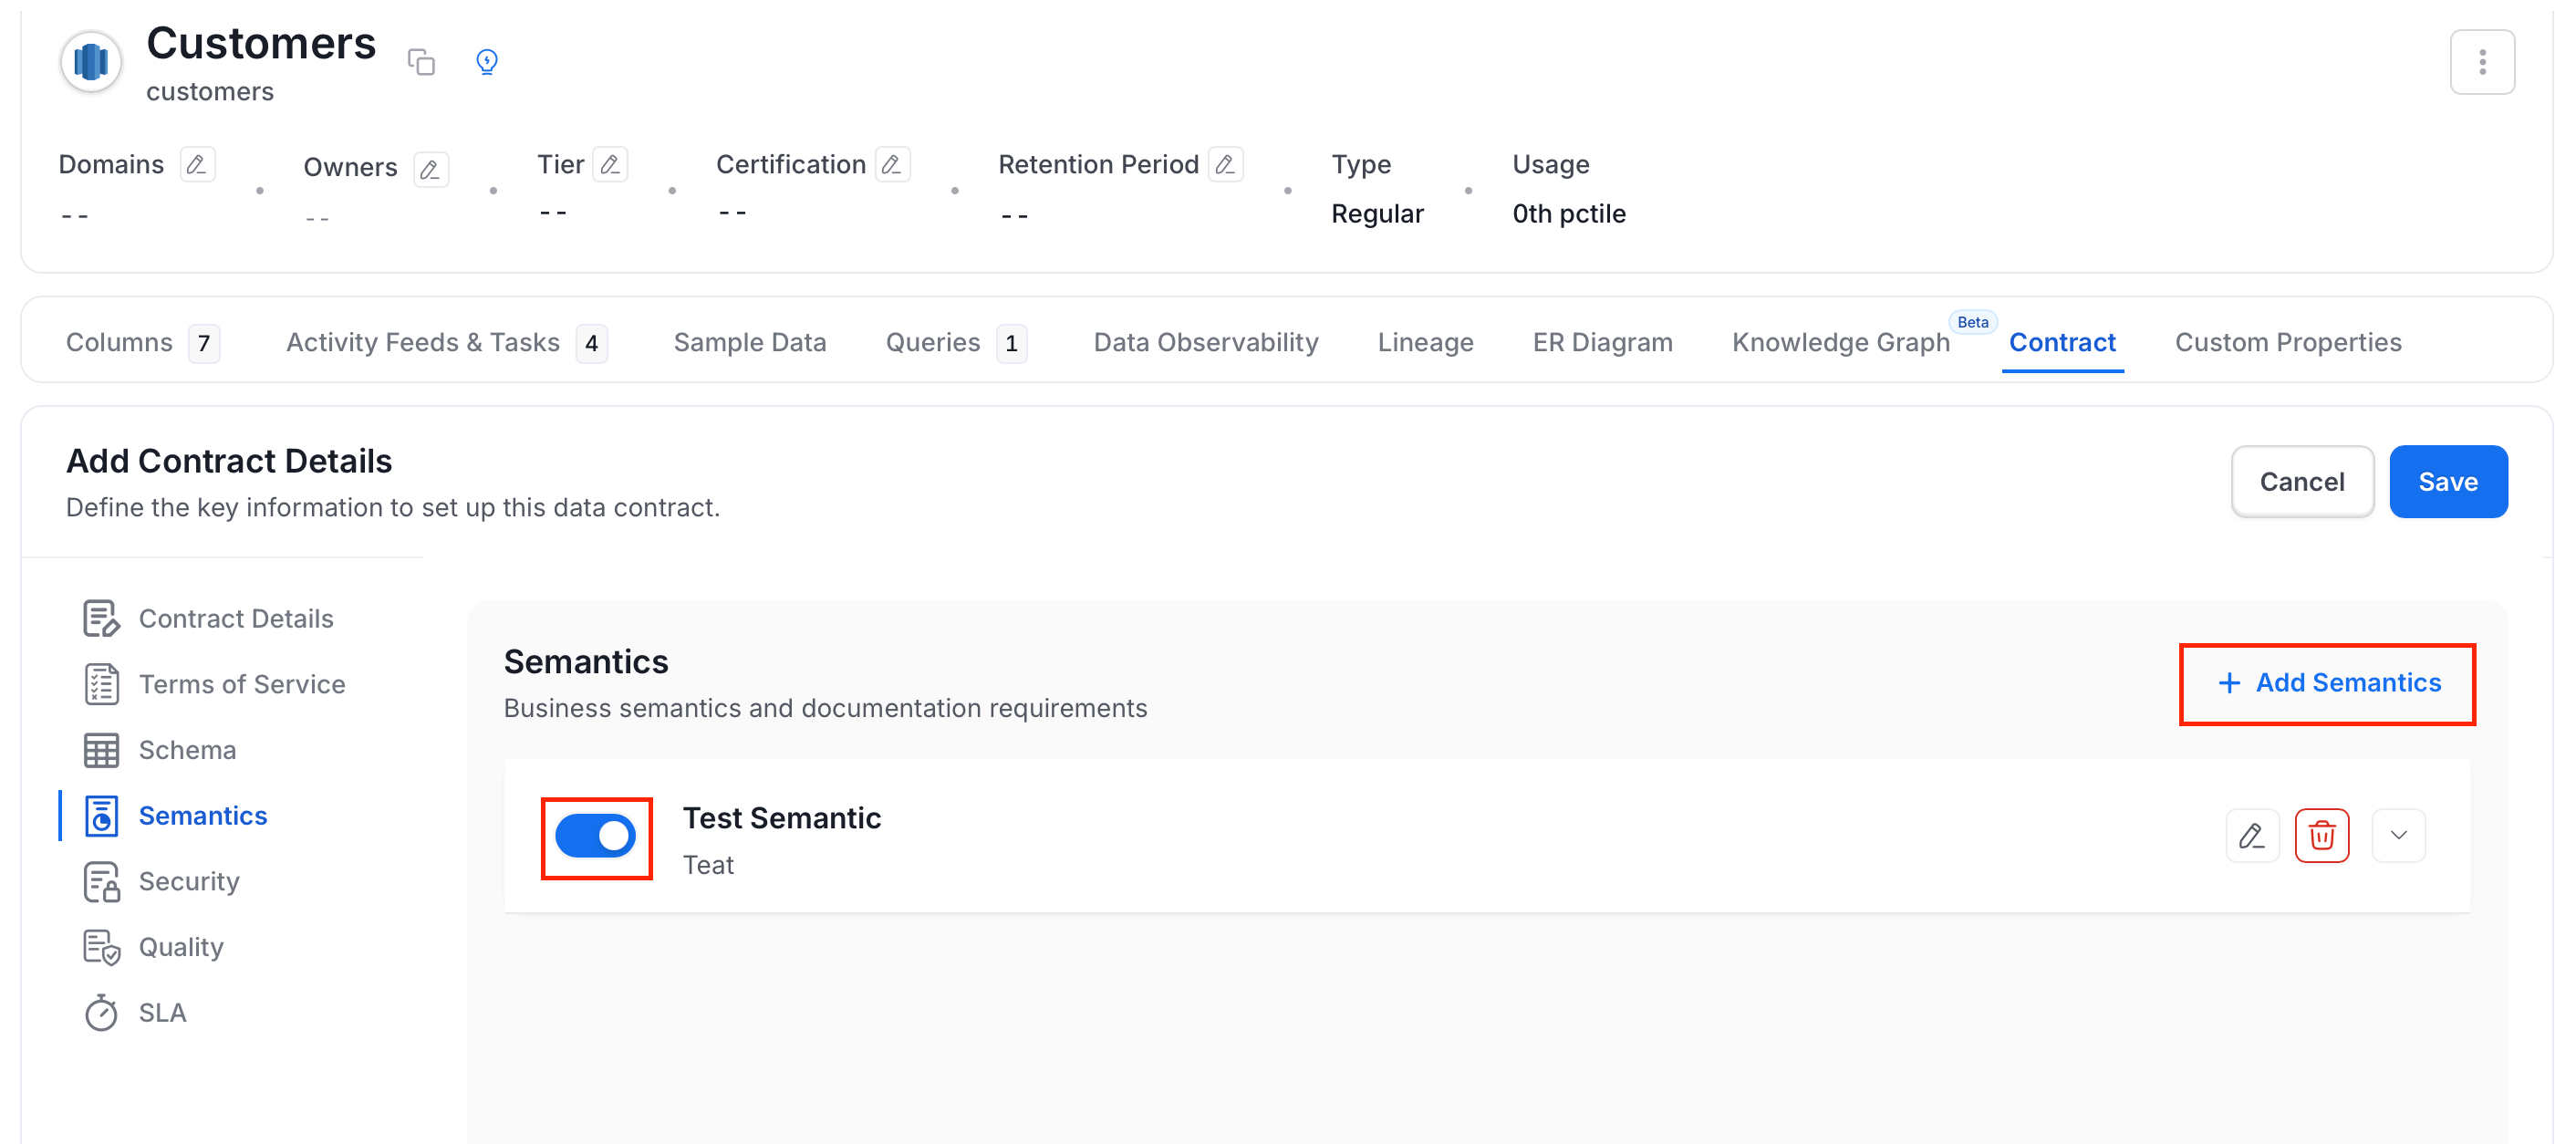
- Optional: Click Add Semantics to add another semantic rule.
- Optional: Use the toggle switch to turn semantics on or off.
- Click Security to continue.
Step 6: Security
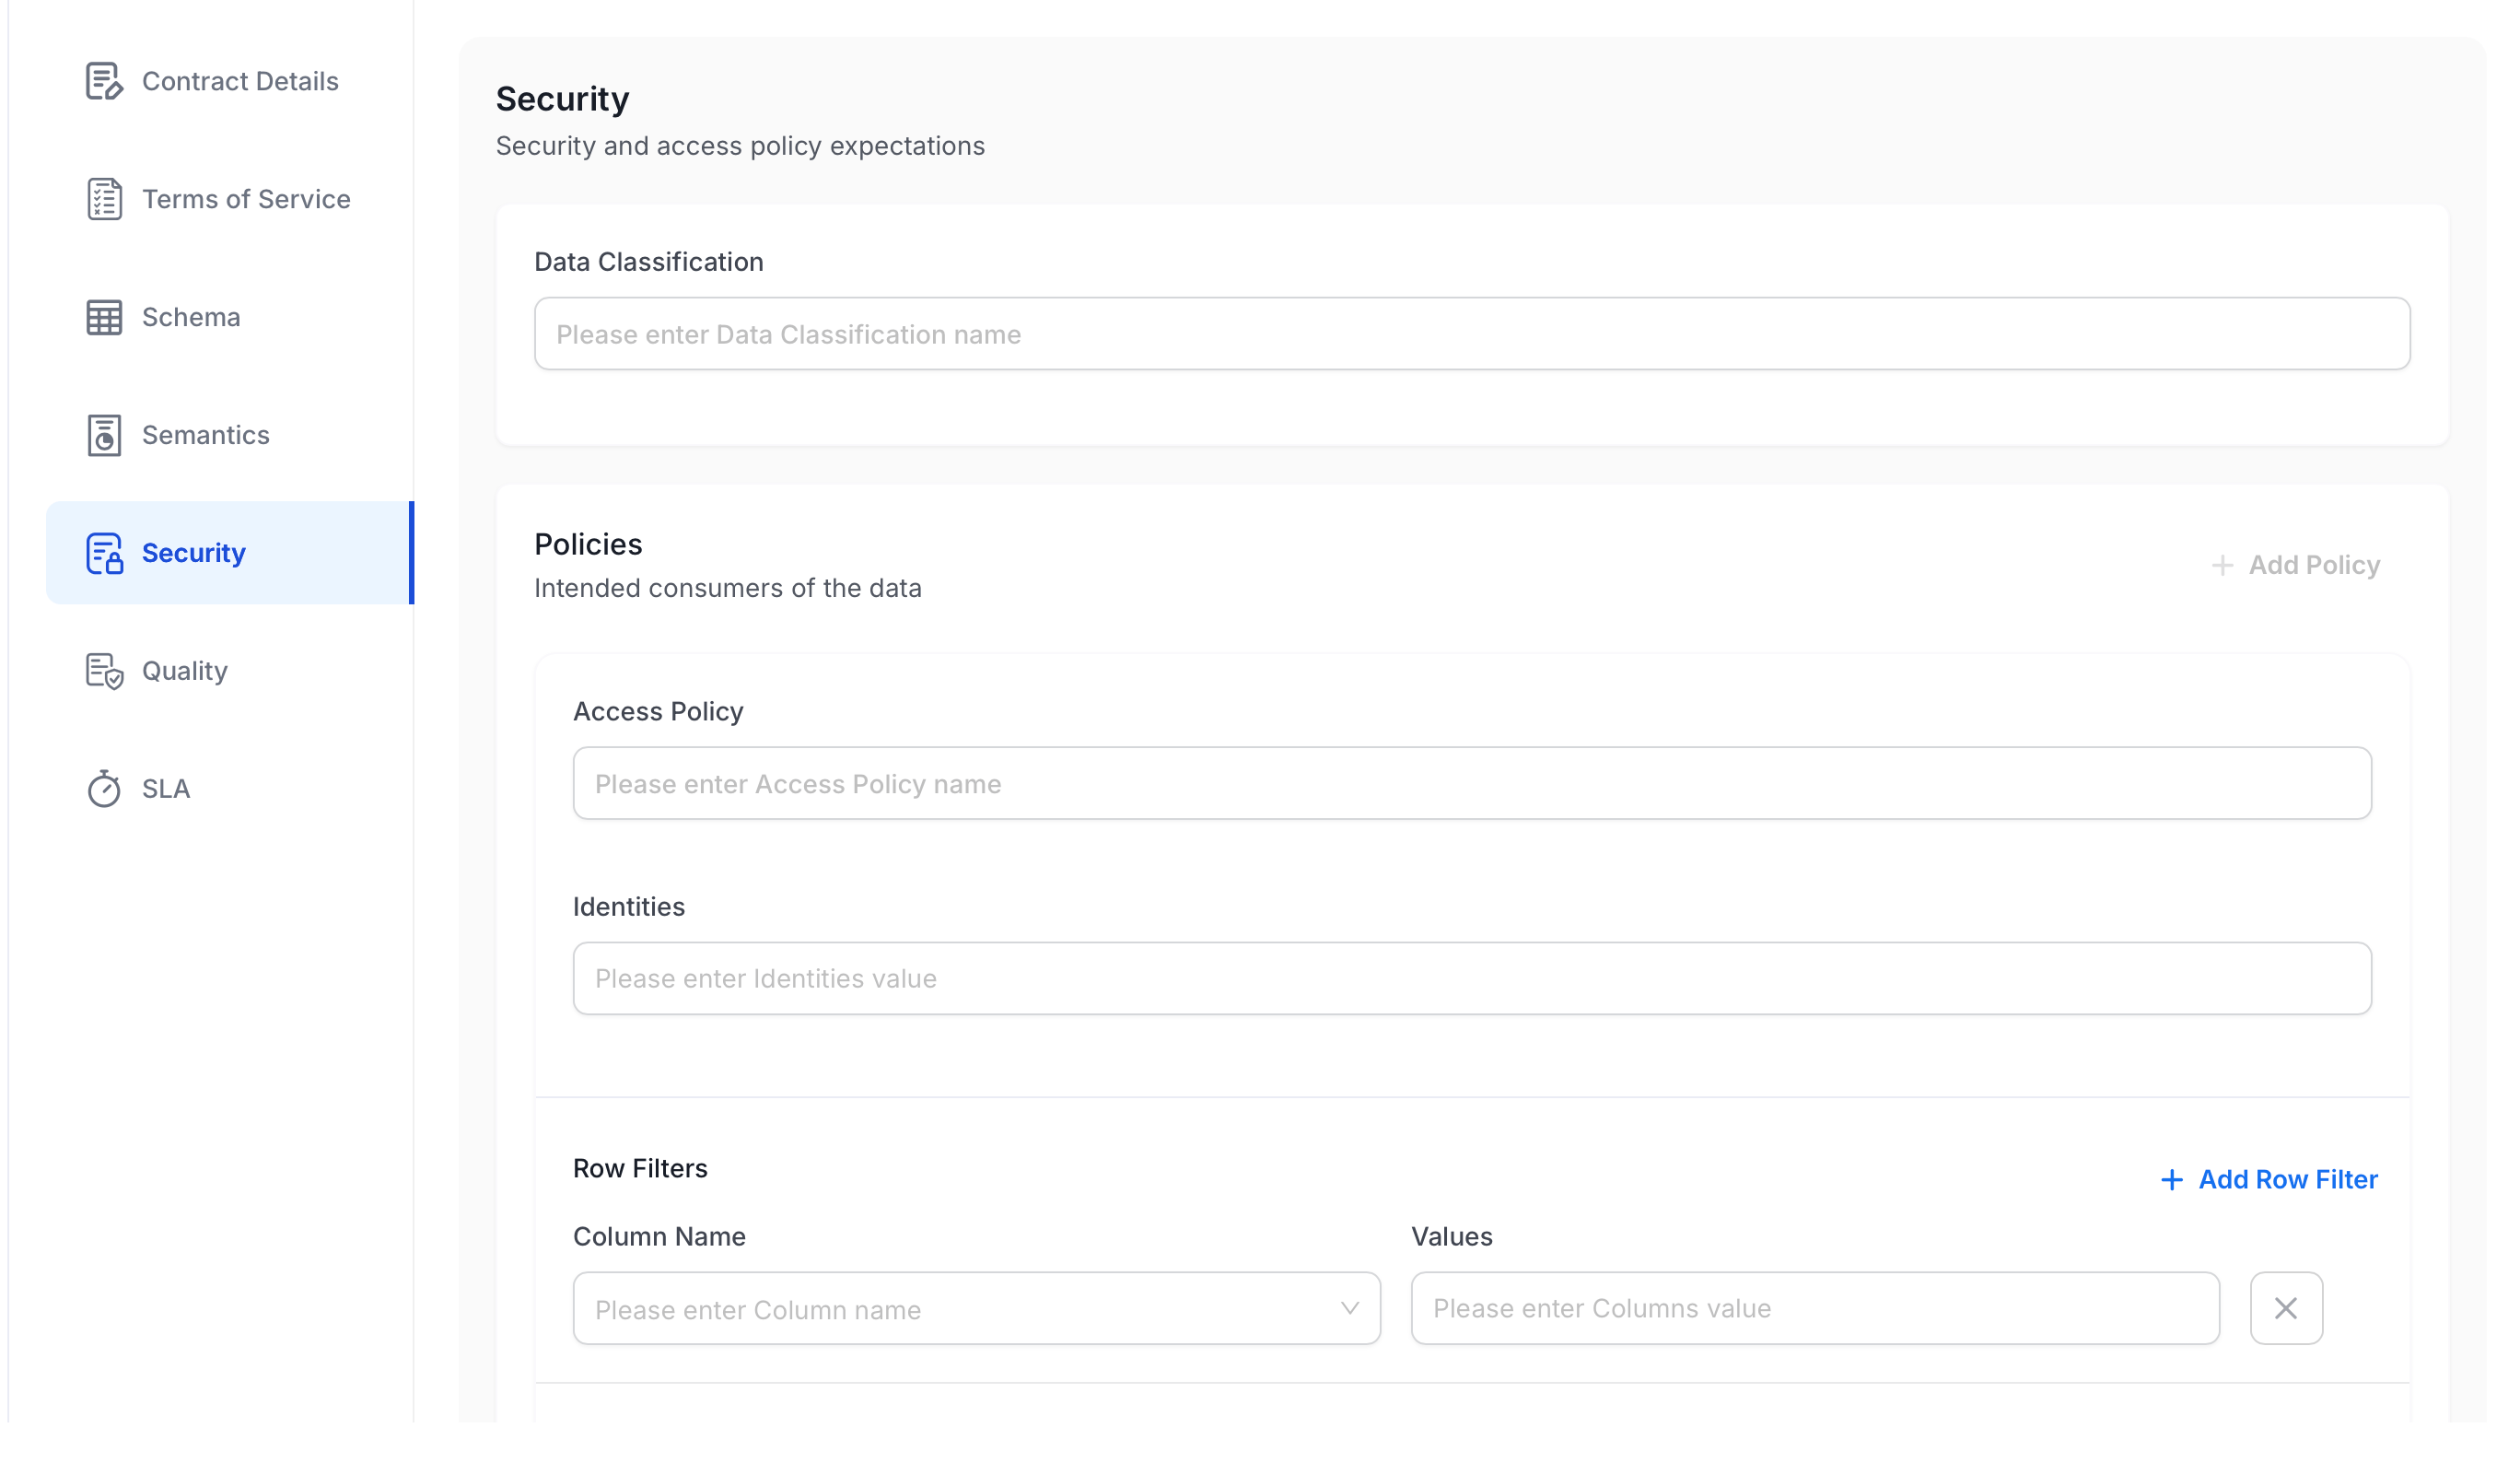
Security expectations cover classification, access policies, and row-level filters. See Security Settings Explained for guidance on when and how to use each field.-
Optional: Fill in the following details:
- Data Classification: Enter the classification label for this asset (for example,
PII,Confidential). - Policies: Click + Add Policy to define an access policy:
- Access Policy: Name of the access policy.
- Identities: Users or groups the policy applies to.
- Row Filters: Click + Add Row Filter to document which rows consumers should see by column value:
- Column Name: Select the column to filter on.
- Values: Enter the allowed values for that column.
- Data Classification: Enter the classification label for this asset (for example,
- Click Quality to continue.
Step 7: Quality
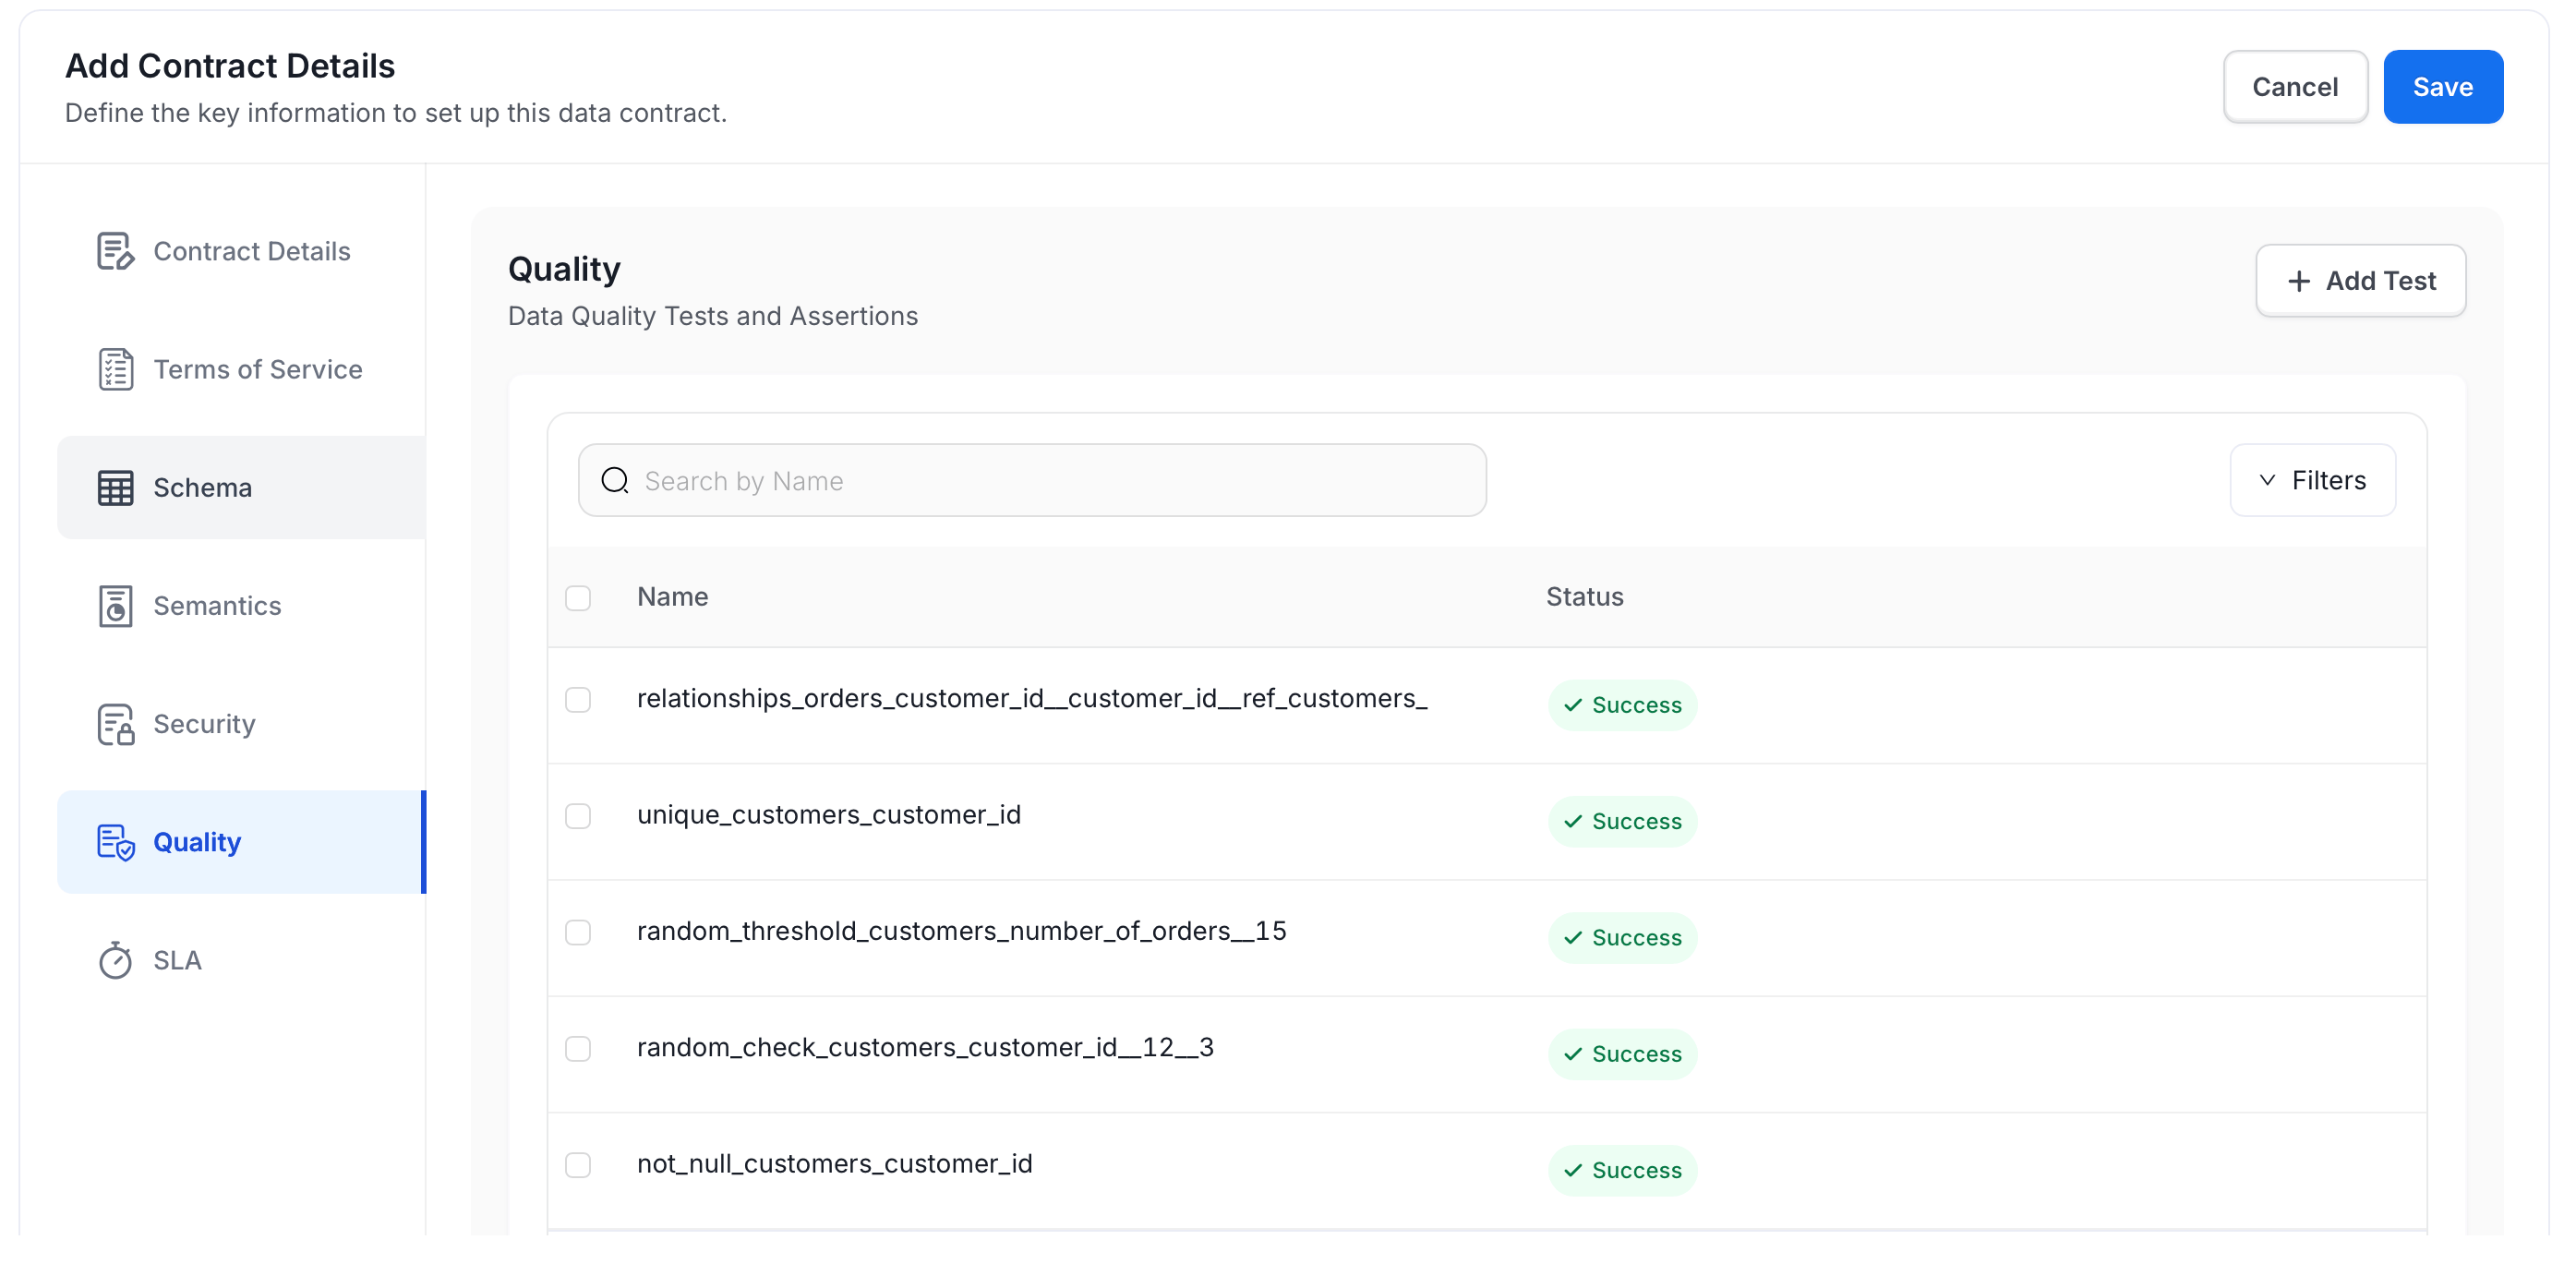
The Quality section lists existing data quality tests for the asset and their current status.-
Select tests to include in the contract, or click Add Test to create a new test case. See Create Quality Test Case.
- Click SLA to continue.
Step 8: SLA
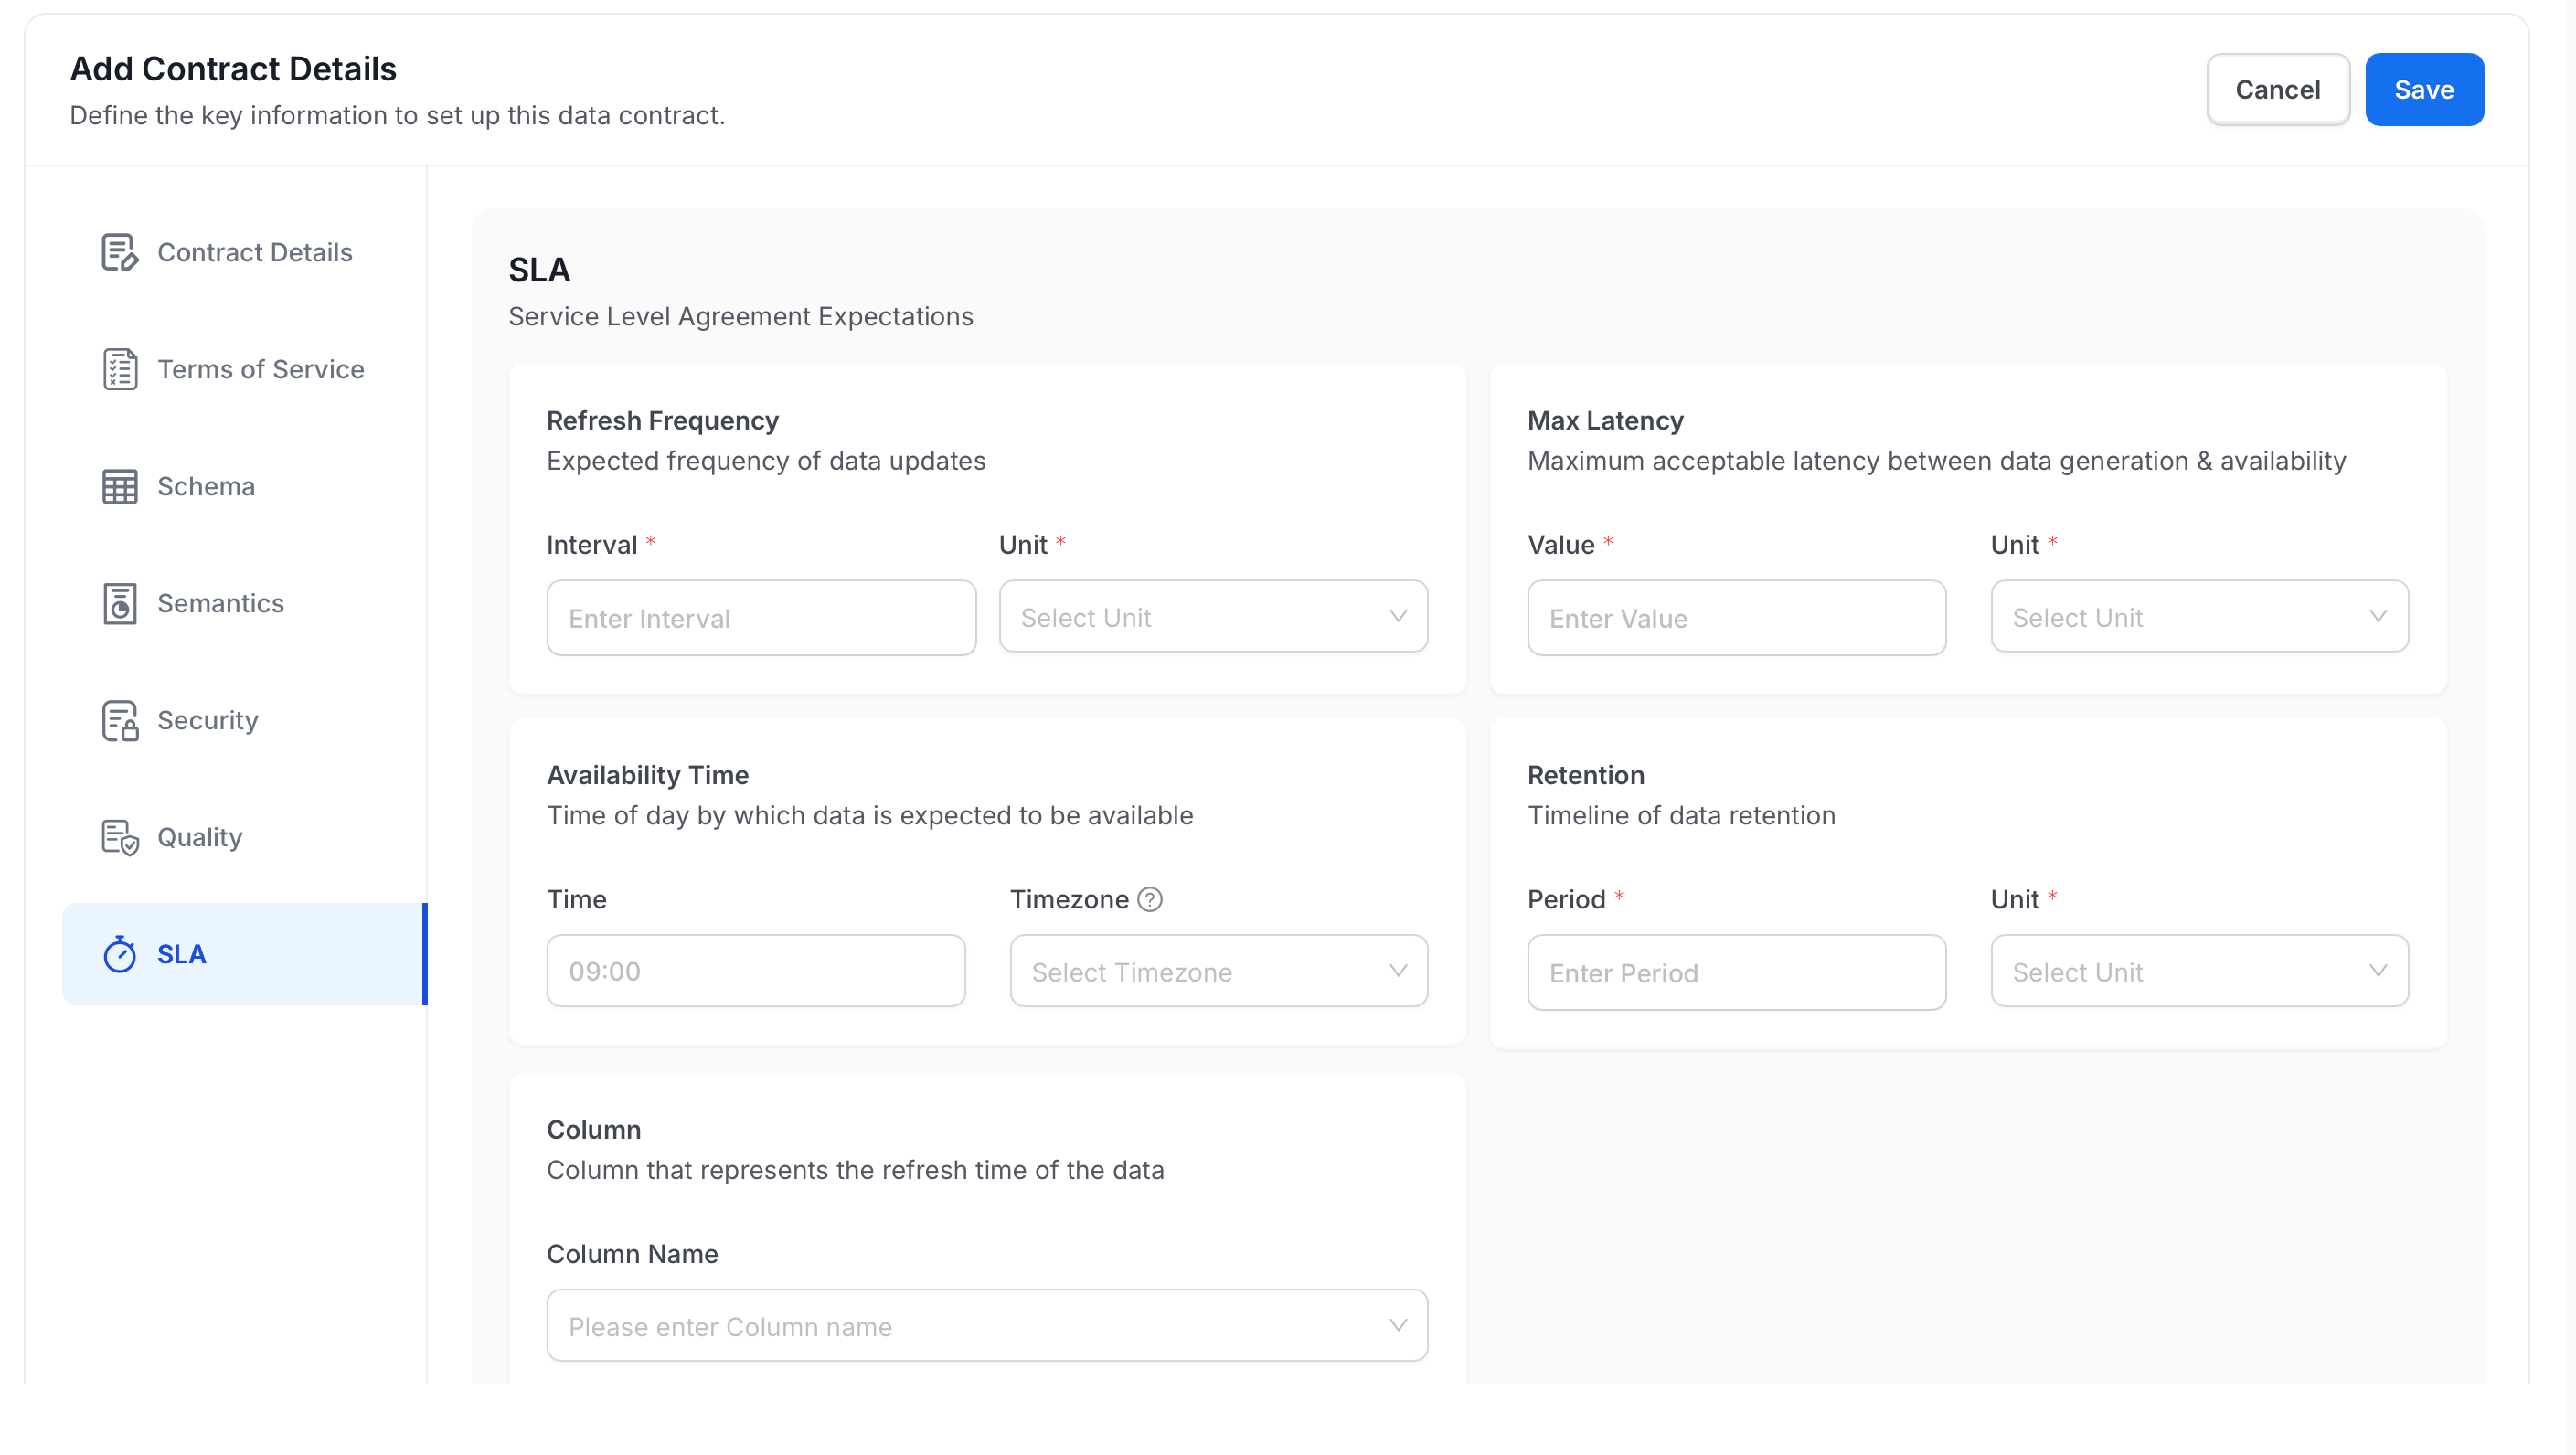
SLA defines the service level expectations for this asset. See SLA Fields Explained to understand the difference between each time-related field.-
Fill in the following fields:
- Refresh Frequency: Set the expected update interval and unit (hour, day, week, month, or year).
- Max Latency: Set the maximum acceptable delay between data generation and availability, in minutes, hours, or days.
- Availability Time: Set the time of day by which data must be available, and select a timezone.
- Retention: Set the data retention period and unit (day, week, month, or year).
- Column > Column Name: Select the column that represents the refresh timestamp of the data.
- Click Save to create a contract.
Run a Contract
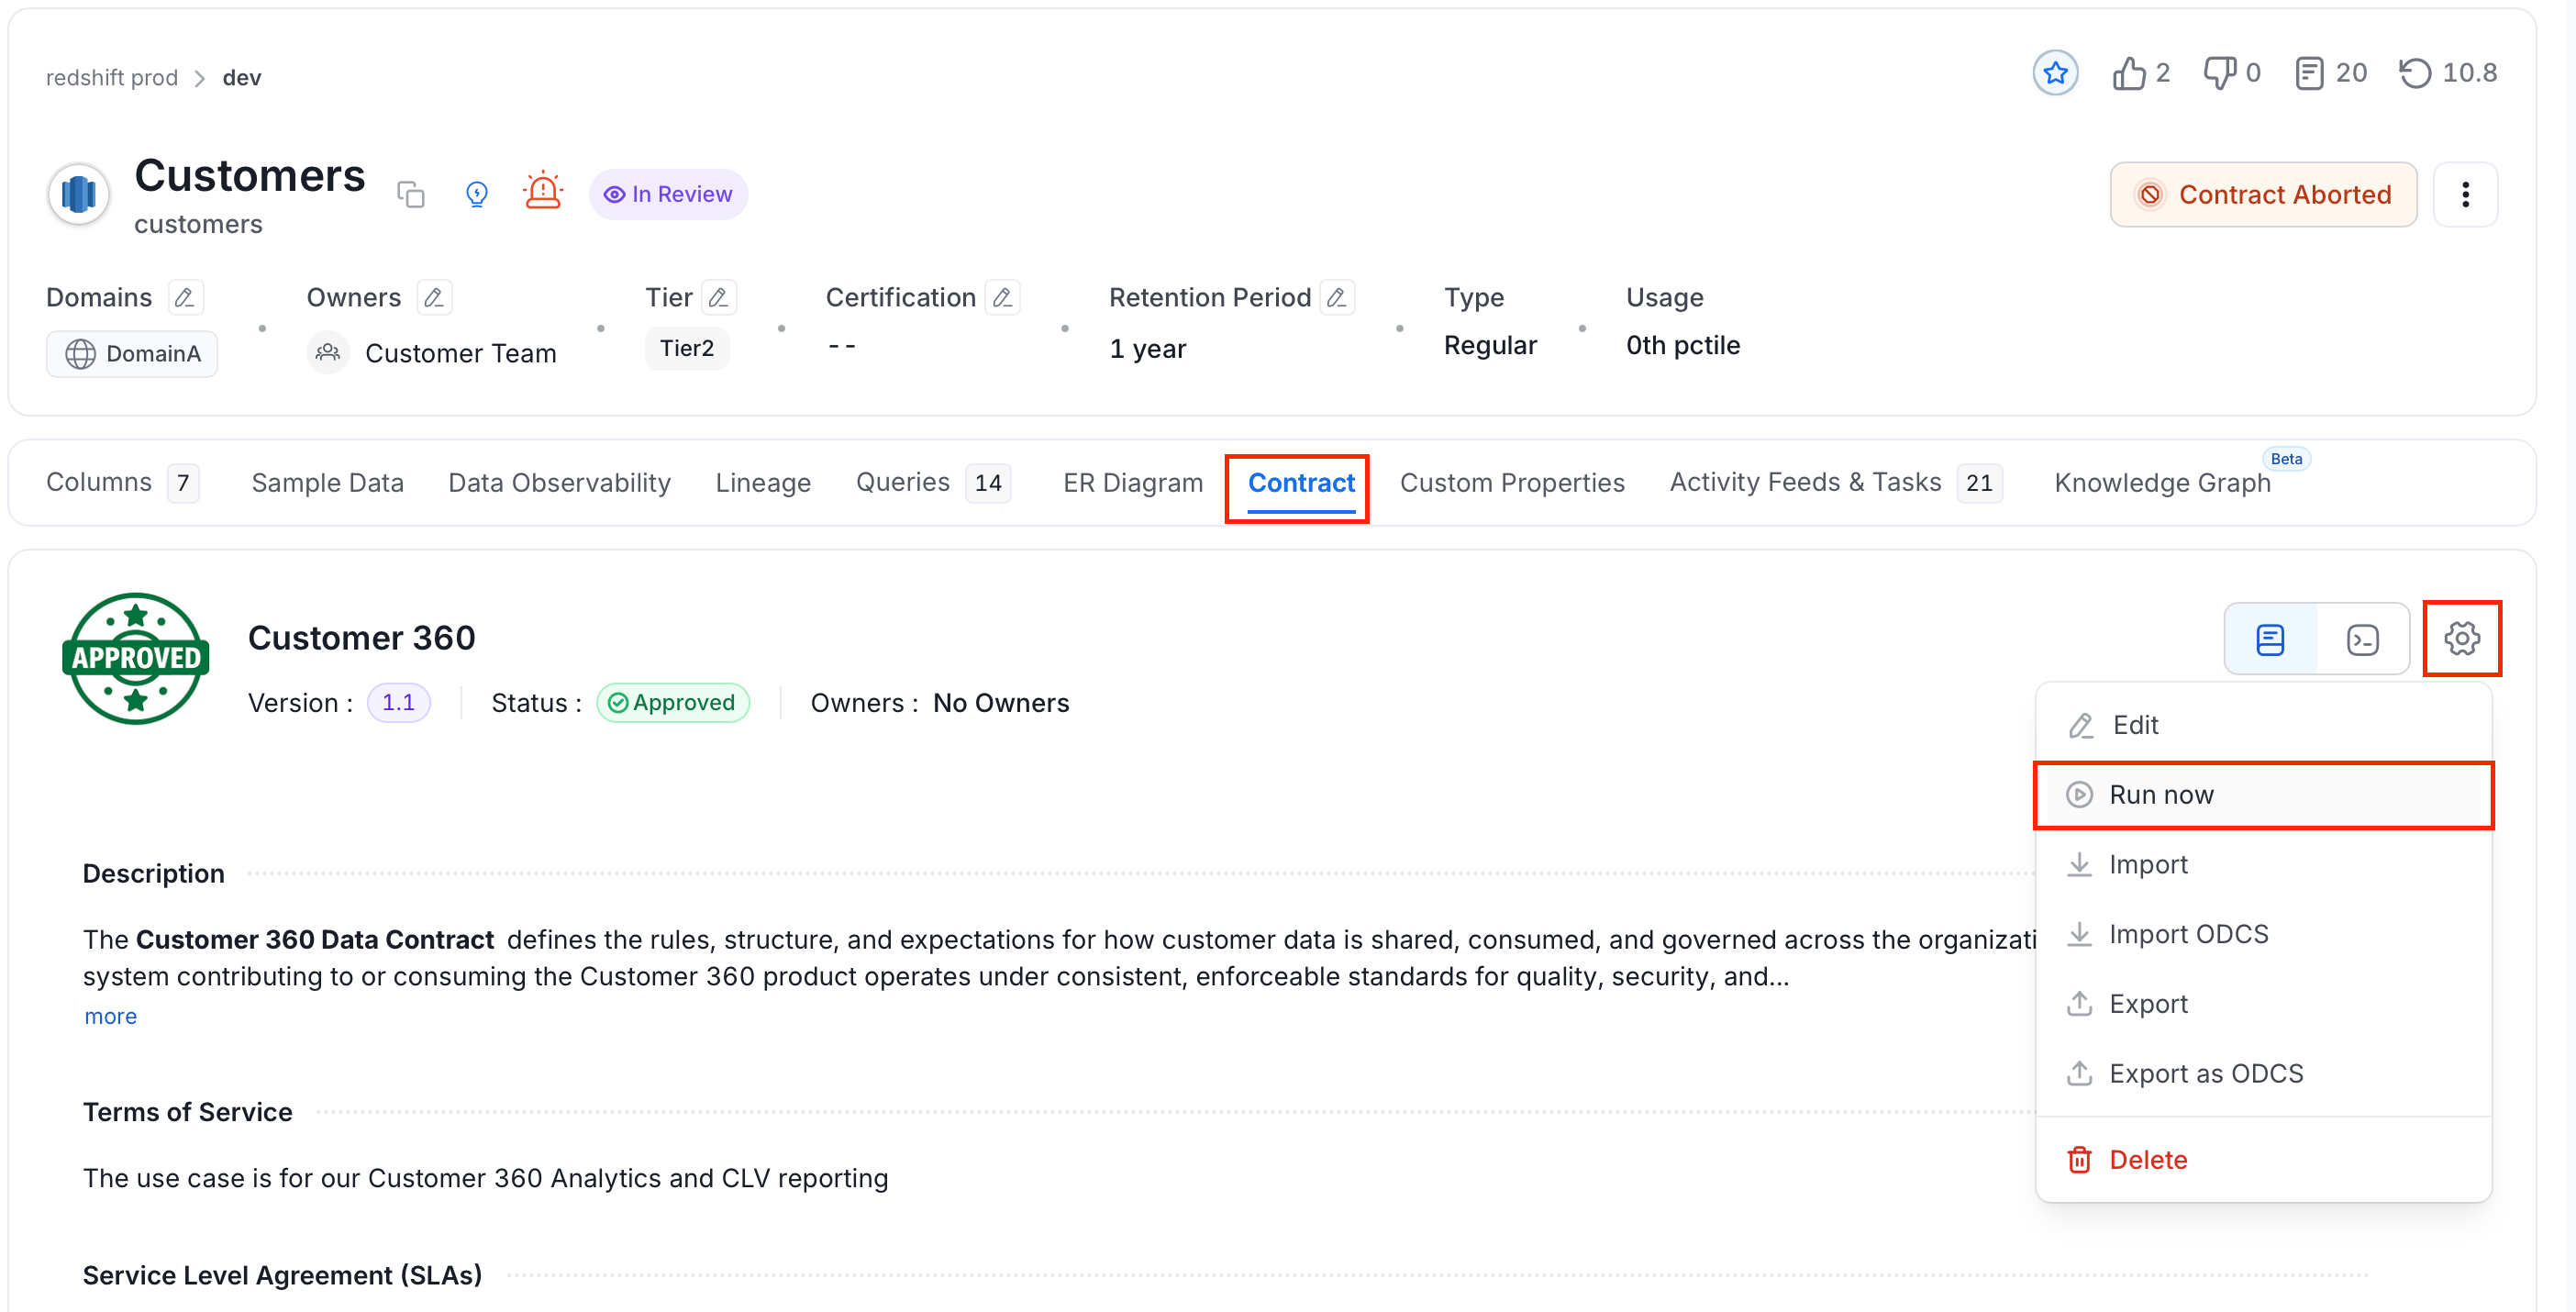
To run the contract, follow these steps:- On the asset’s details page, select the Contract tab.
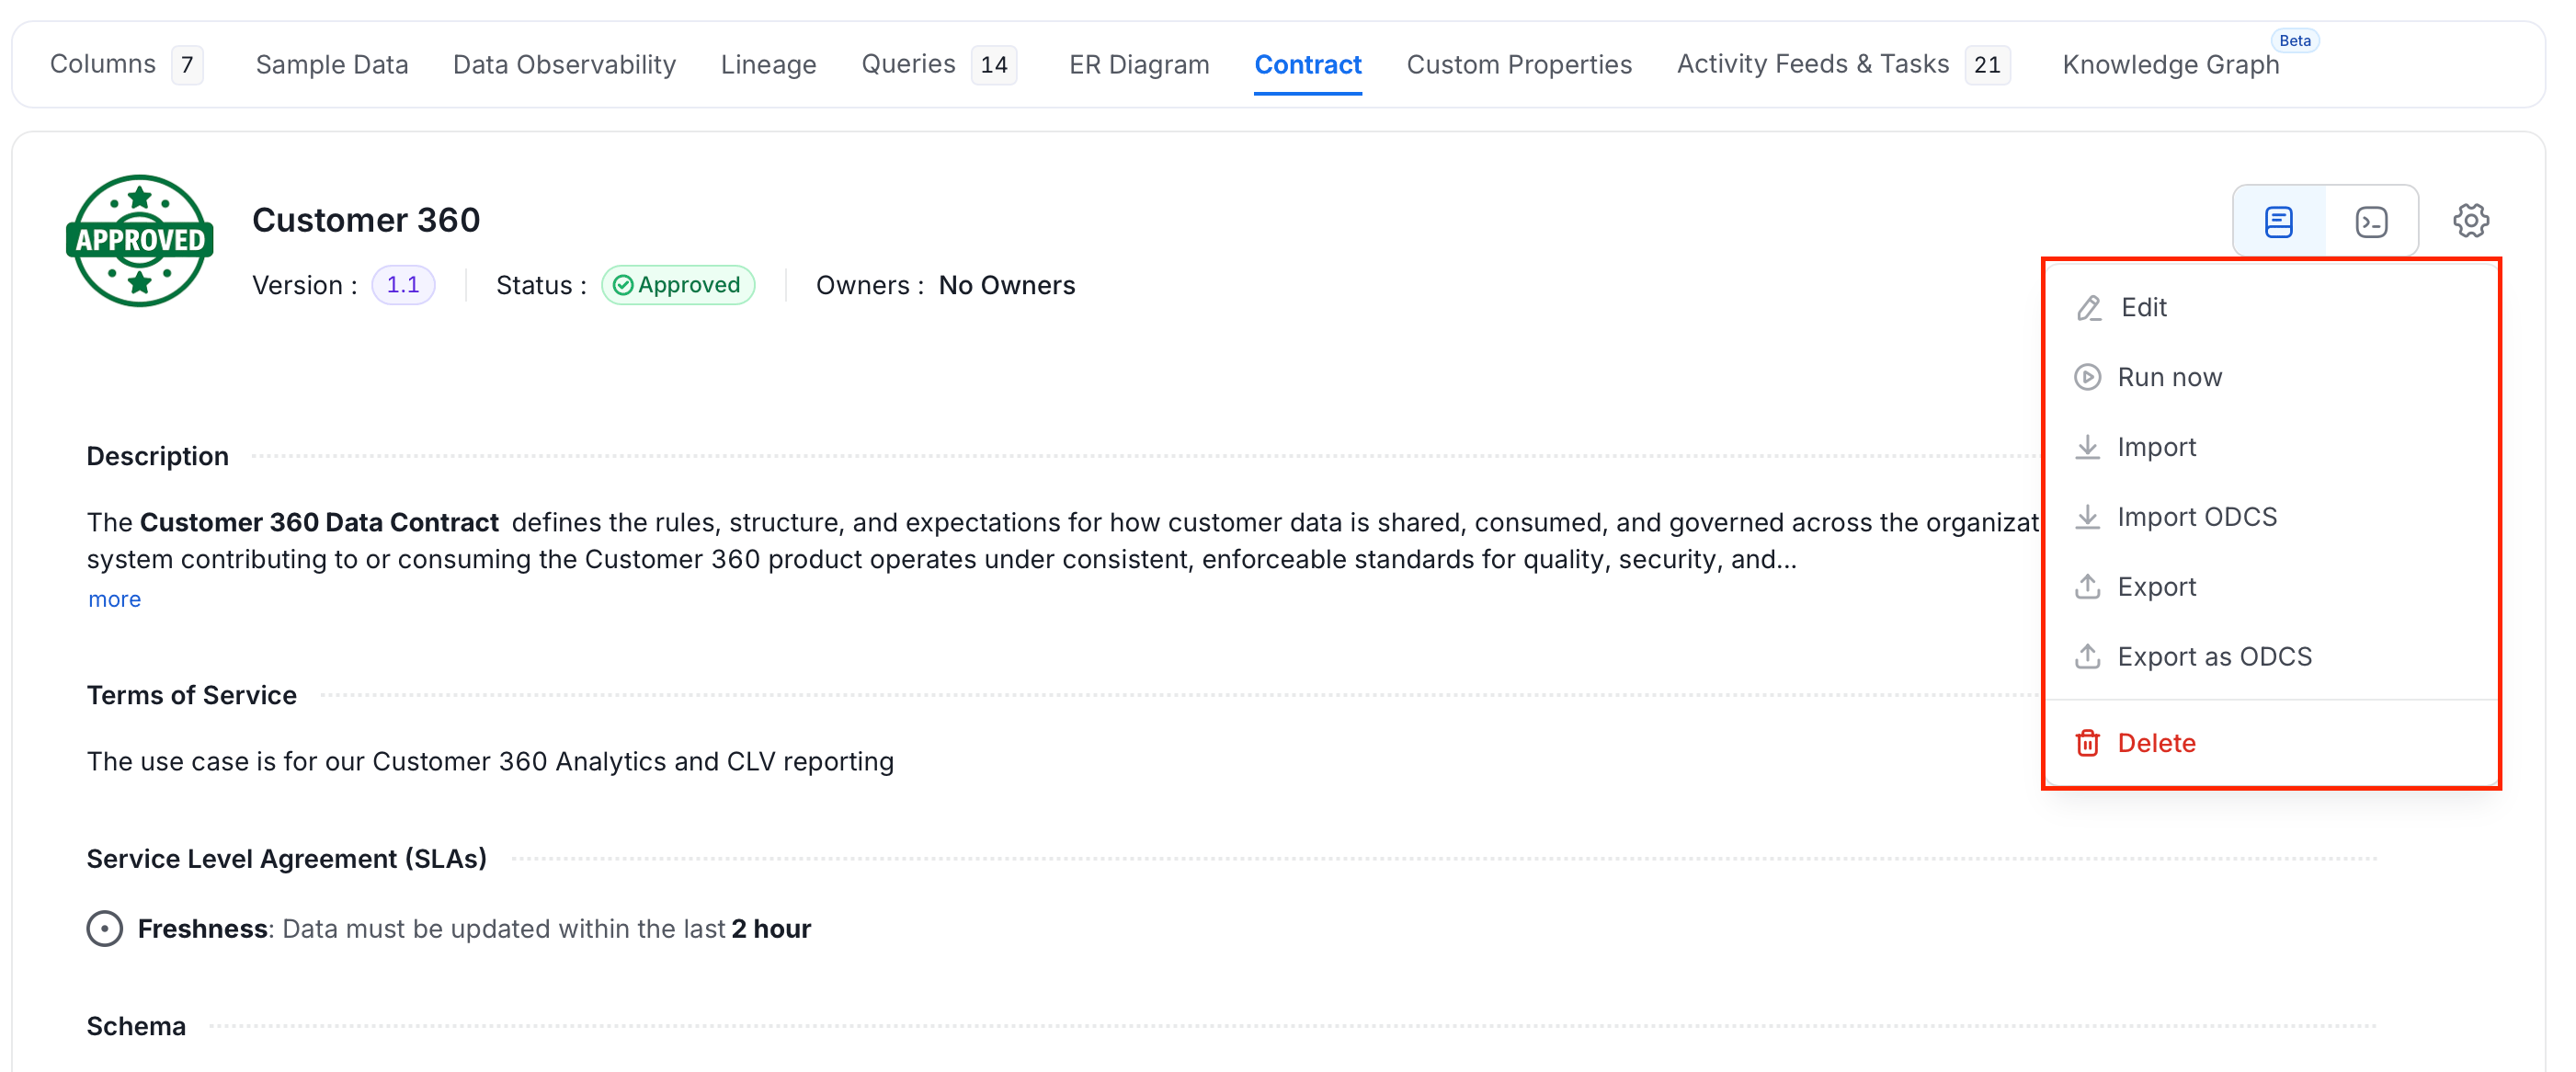
- Click the Settings icon and select Run now.
Understanding Semantic Rules
The rule builder uses a three-part structure: field | operator | value. Each combination creates one condition that the asset must satisfy.Supported Fields
The following fields are available in the rule builder:Combining Conditions
- Click + Add New Rule within a semantic card to add another condition to the same rule.
- Click + Add Semantics to create a separate, independent rule.
Example
To enforce that every asset in a contract has an owner assigned and is tagged:- Click + Add Semantics. Enter Name
Ownership Required, then set the Rule toOwners | Is | <owner-or-team>. Click Save. - Click + Add Semantics again. Enter Name
Tag Required, then set the Rule toTags | Is | <tag-name>. Click Save.
Security Settings Explained
The Security section has three components, each serving a different purpose.Data Classification
Data Classification is a free-text label that identifies the sensitivity level of the asset. Common values includePII, Confidential, Internal, and Public. This label is informational. It does not automatically enforce access controls, but makes the classification visible to contract consumers.
Policies
A policy defines who the intended consumers of this data are. Each policy has two fields:- Access Policy: A name identifying the policy (for example,
analytics-read-only). - Identities: The users, teams, or groups the policy applies to.
Row Filters
Row Filters record which rows a consumer should see when querying this asset. They are contract expectations, not query access controls. Enforce row access in your database or query engine. Each filter targets one column:-
Column Name: The column to filter on (for example,
country). -
Values: The allowed values for that column (for example,
US). -
Example: A contract on a global orders table with a row filter
country = USrecords the expectation that consumers see only US orders. Configure the same restriction in your query engine to enforce it.
Note: Row Filters can be configured for tables and dashboard data models.
SLA Fields Explained
The SLA section captures four distinct time-related expectations. Understanding the difference between them helps you set accurate commitments.Refresh Frequency vs Max Latency
These two fields are often confused:- Refresh Frequency is about cadence: the asset is expected to update once a day, once a week, and so on.
- Max Latency is about delay tolerance: after the upstream source produces data, how long before it must appear in this asset.
1 day and a Max Latency of 2 hours.
Column
Select the column that holds the timestamp of each row’s last refresh. This records the freshness expectation; contract runs don’t check the column or the SLA. To verify freshness, add a quality test that compares the latest timestamp with the current time.Manage a Contract
-
Click the Settings icon and the menu shows the following options:
-
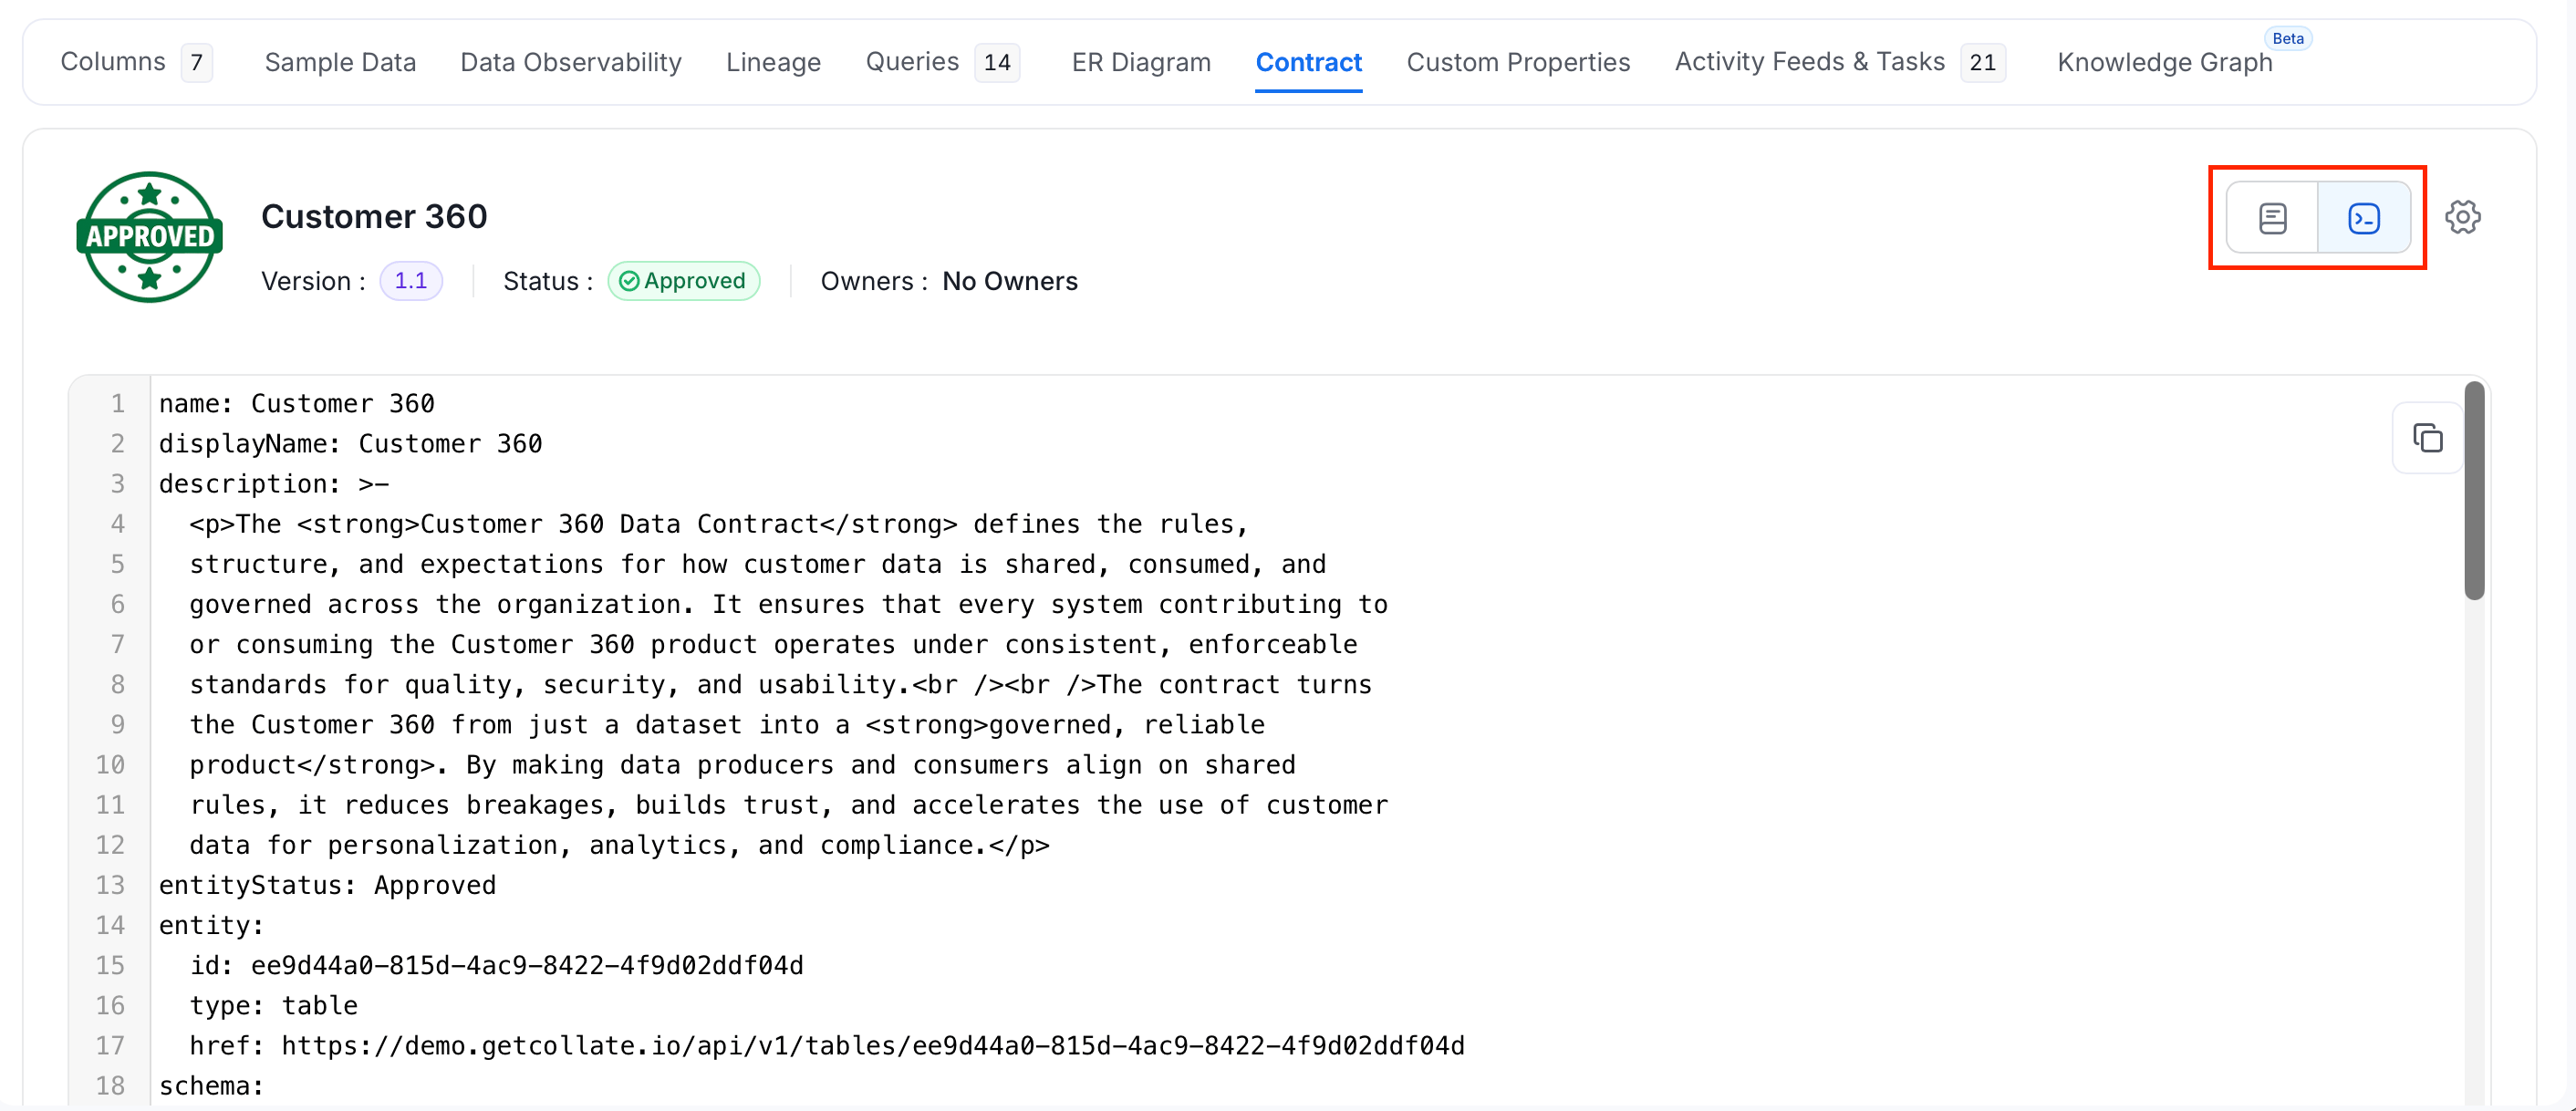
Use the view switch next to the Settings icon to see the contract as YAML.
Import a Contract
To create a contract from a file instead of the form, select Add Contract > Import OM for a YAML file in Collate’s contract format. For an ODCS file, select Add Contract > Import ODCS.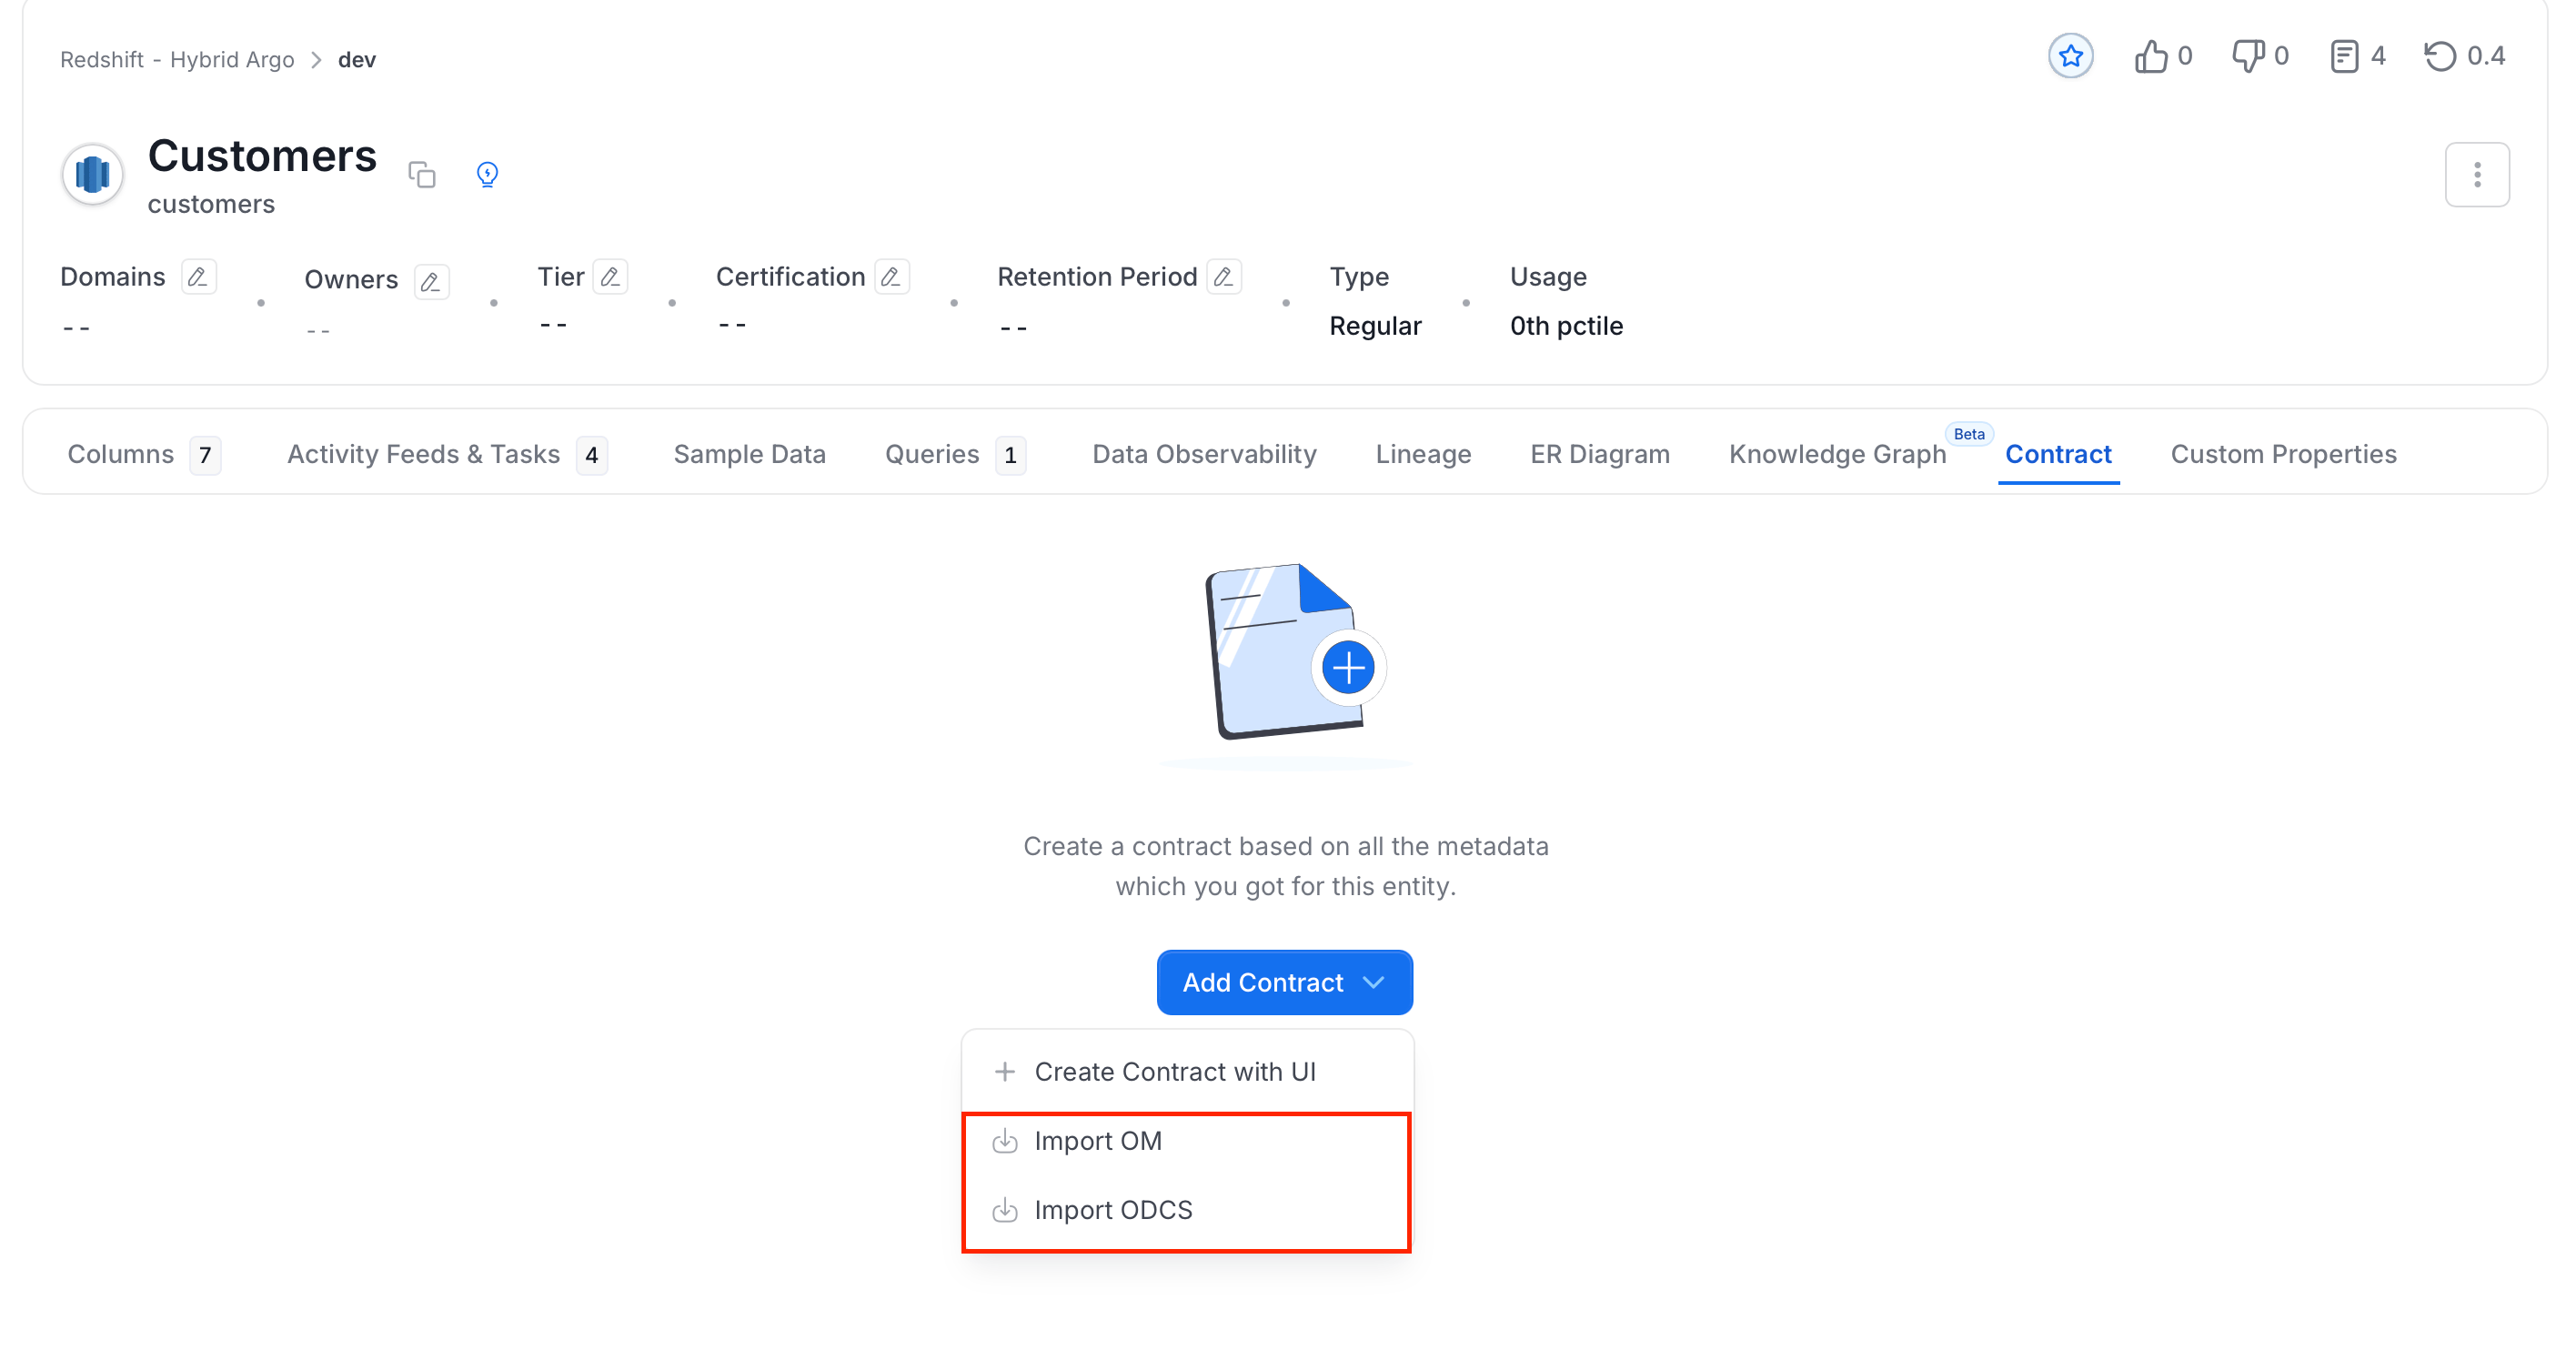
- Merge with Existing: Updates the fields the file sets and keeps the rest.
- Replace Entire Contract: Replaces the contract with the file.
Data Contract Specification
Every section of a data contract and what Collate checks.