
Requirements
Follow the official documentation to generate an API Access Token.Data Mapping and Assumptions
The following entities are supported and map to the Collate entities as shown in the table.- Because Alation does not have a concept of a Service entity, the Data Sources (OCF and Native) will be mapped to Database Service and Database in Collate. Hence, for each Data Source in Alation, there will be one Database Service and one Database in Collate.
- Custom fields will have a 1:1 mapping for all the entities except for Columns, because Collate does not support custom properties for columns.
- Alation has two fields for descriptions:
descriptionsandcomments. These fields will be combined under one fielddescriptionin Collate for all the entities. - Use the databaseFilterPattern (datasource in Alation), schemaFilterPattern, and tableFilterPattern to apply filters to Alation entities. Provide the
idsof the datasource, schemas, and tables for the Alation entities in the respective fields.
Metadata Ingestion
To ingest metadata from Alation, you need to create a service connection. The service connects Alation with Collate. Once you create a service, Collate automatically starts ingesting metadata.Step 1: Add New Service
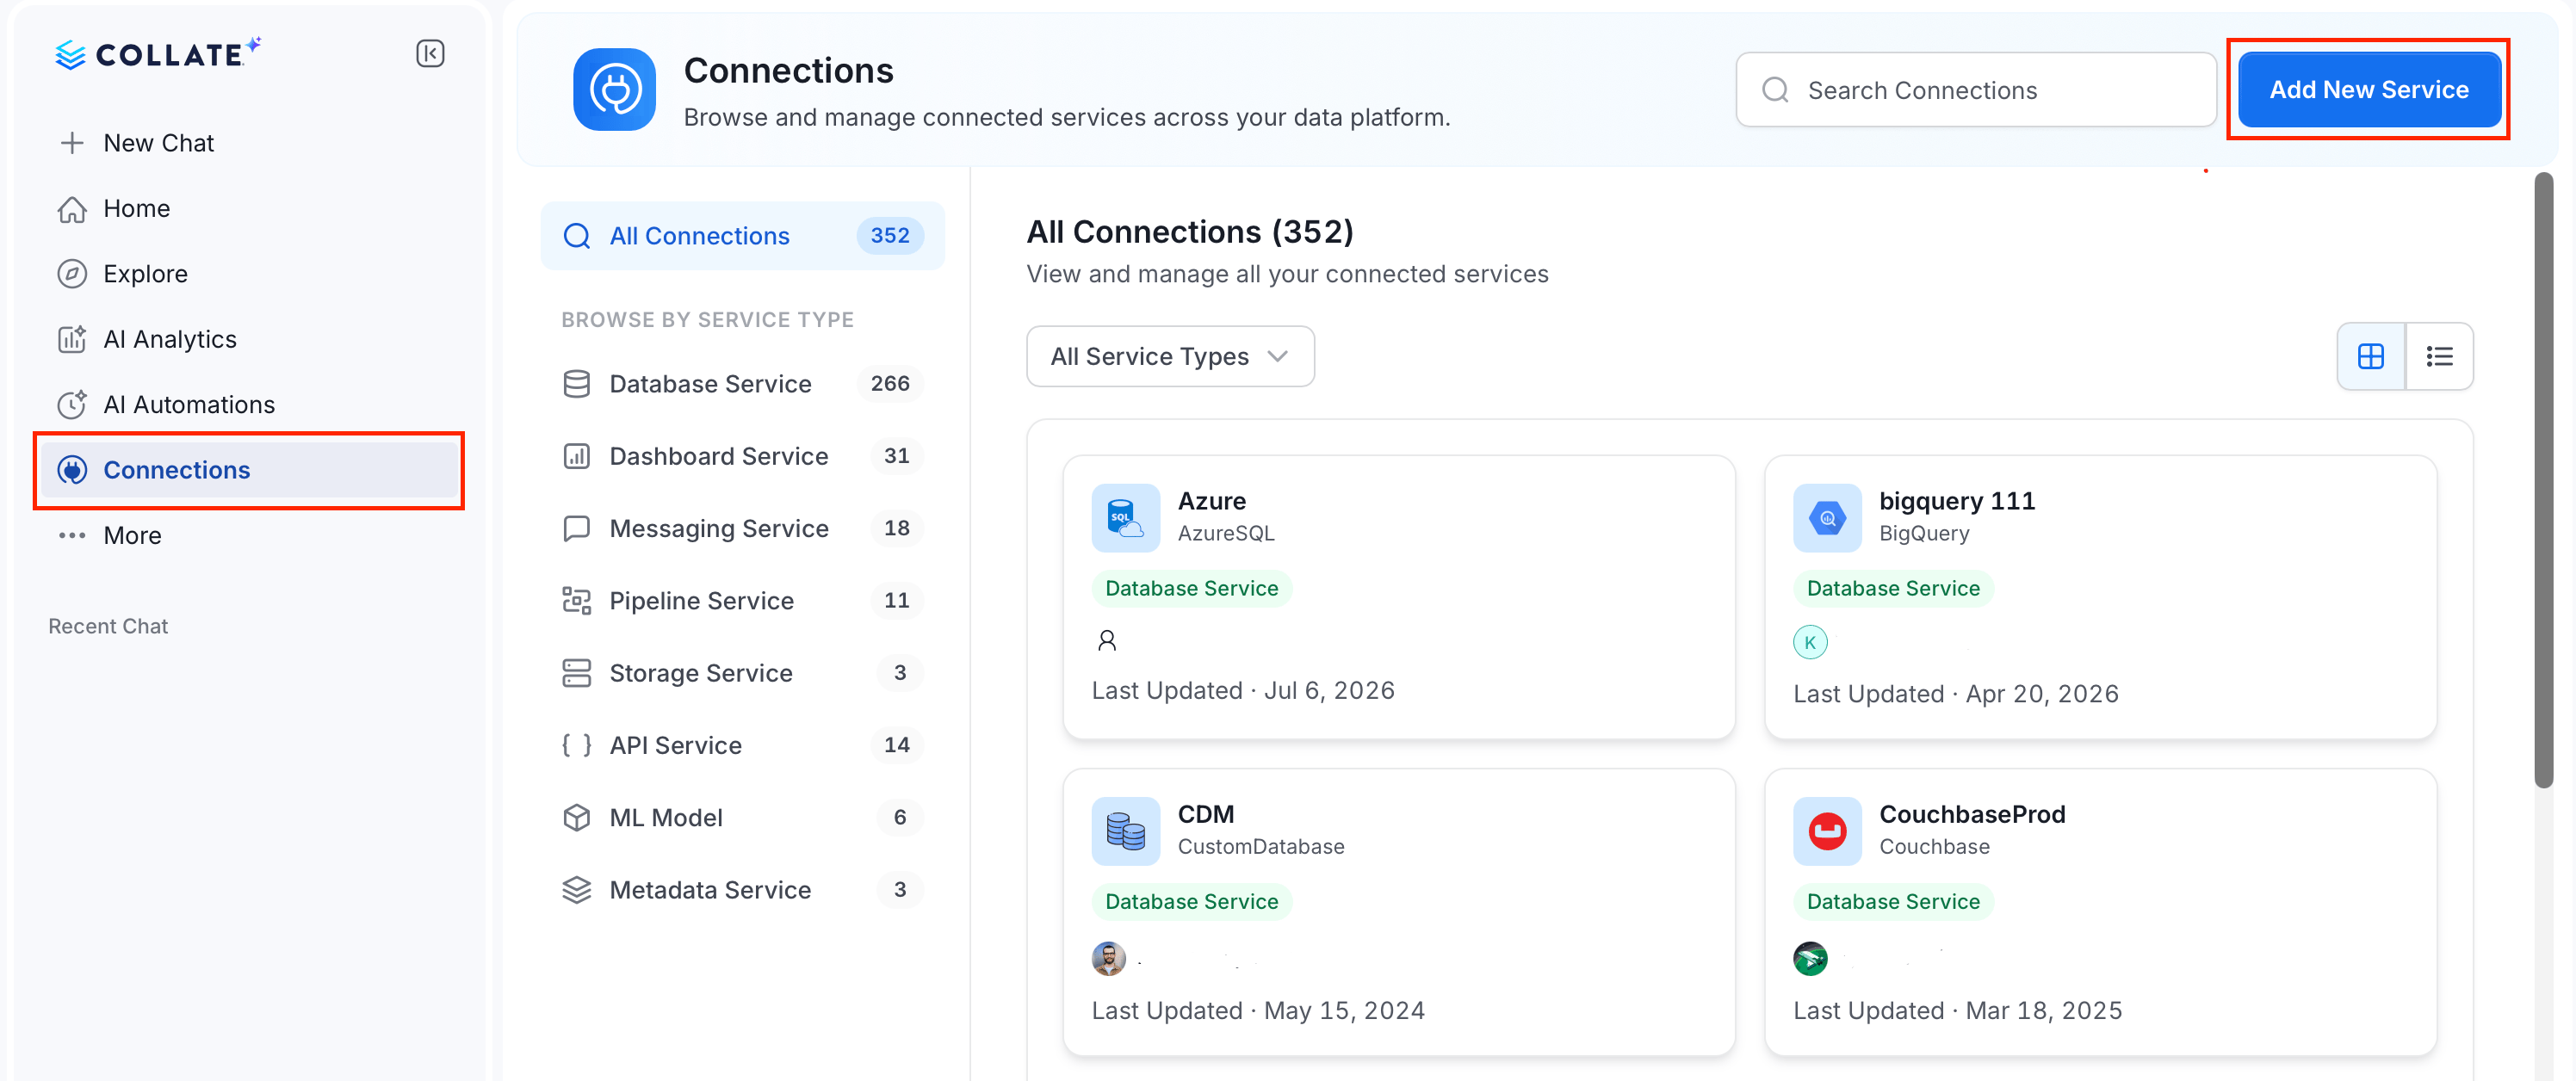
Create the service as follows:- In the left navigation, click Connections.
- On the Connections page, click Add New Service.
Step 2: Select a Service and Connector
From the service type dropdown, select Metadata Services, then click the Alation connector tile.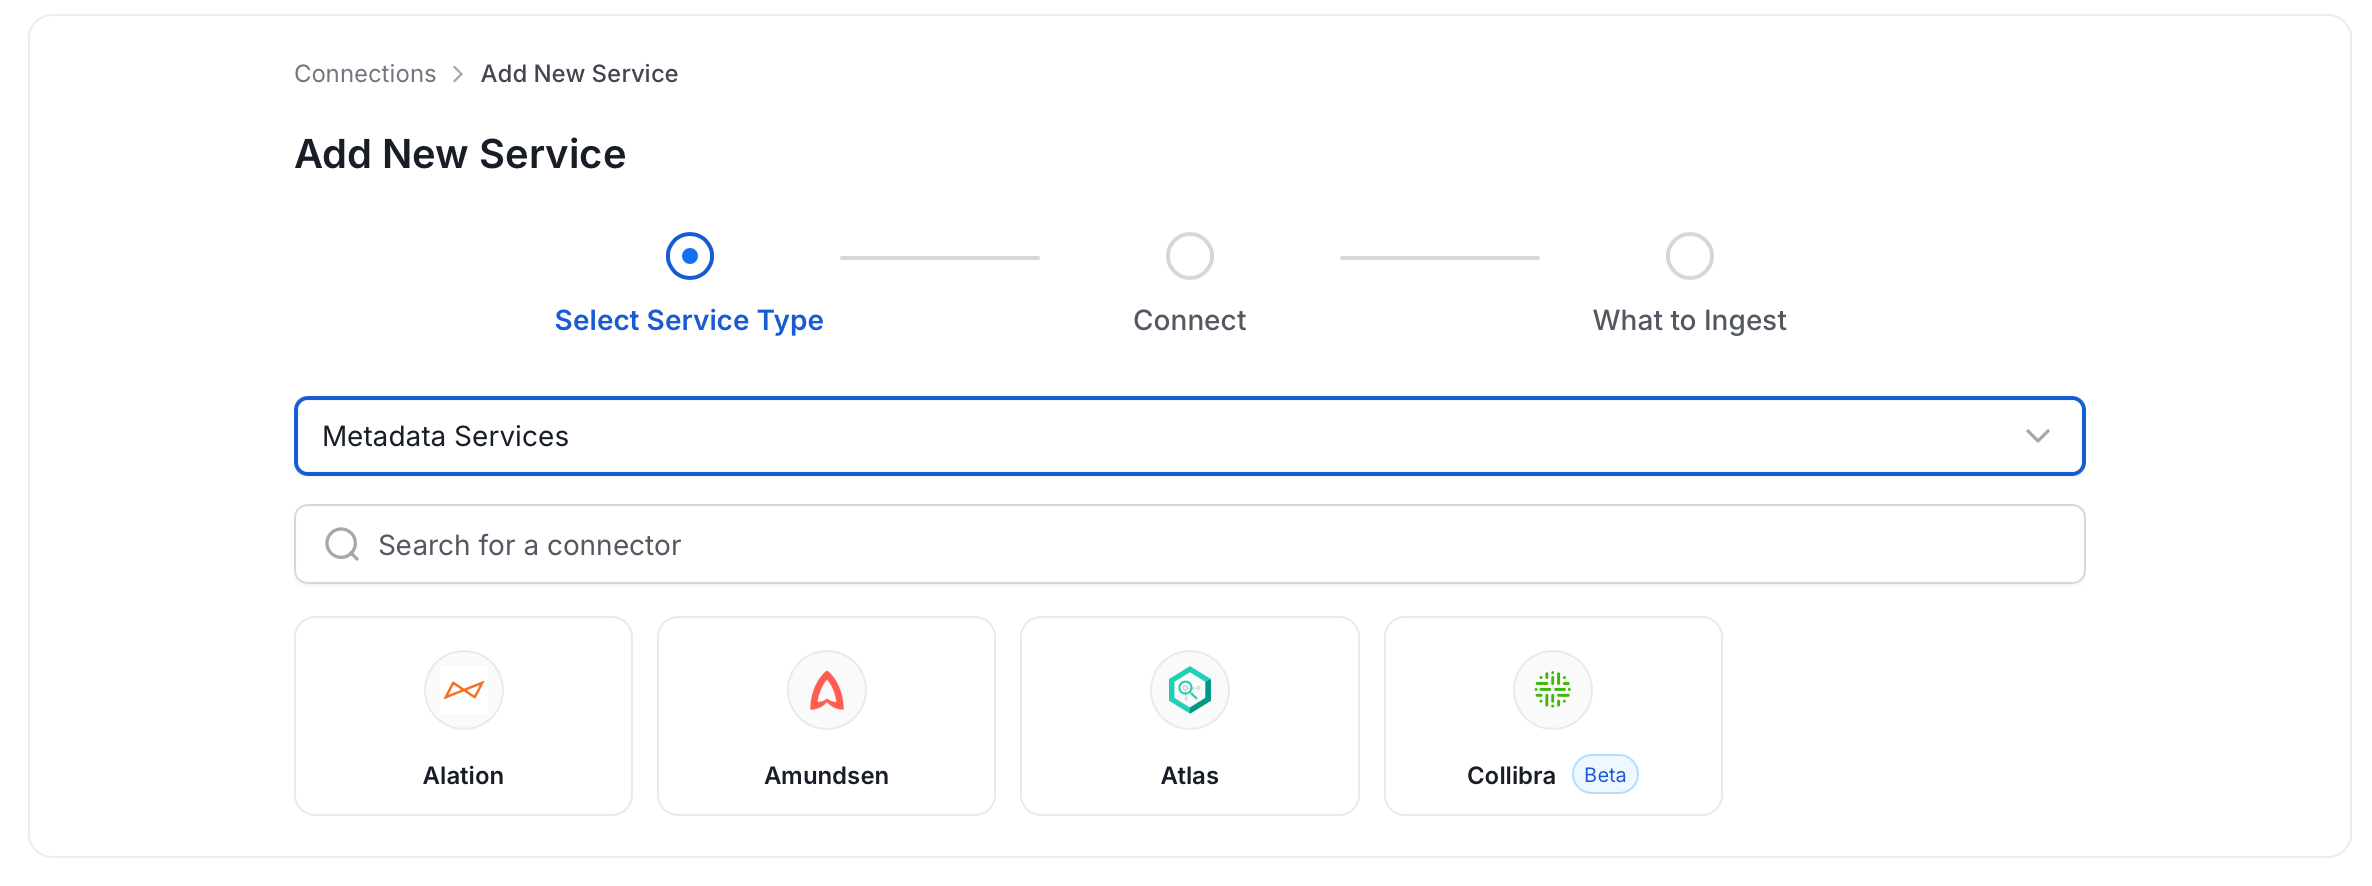
Step 3: Add Service Name and Description
- Enter a unique, descriptive Service Name. Collate identifies services by their service name. Enter a name that distinguishes this deployment from other Alation services you are ingesting metadata from.
- Optional: Enter a Description for the service.
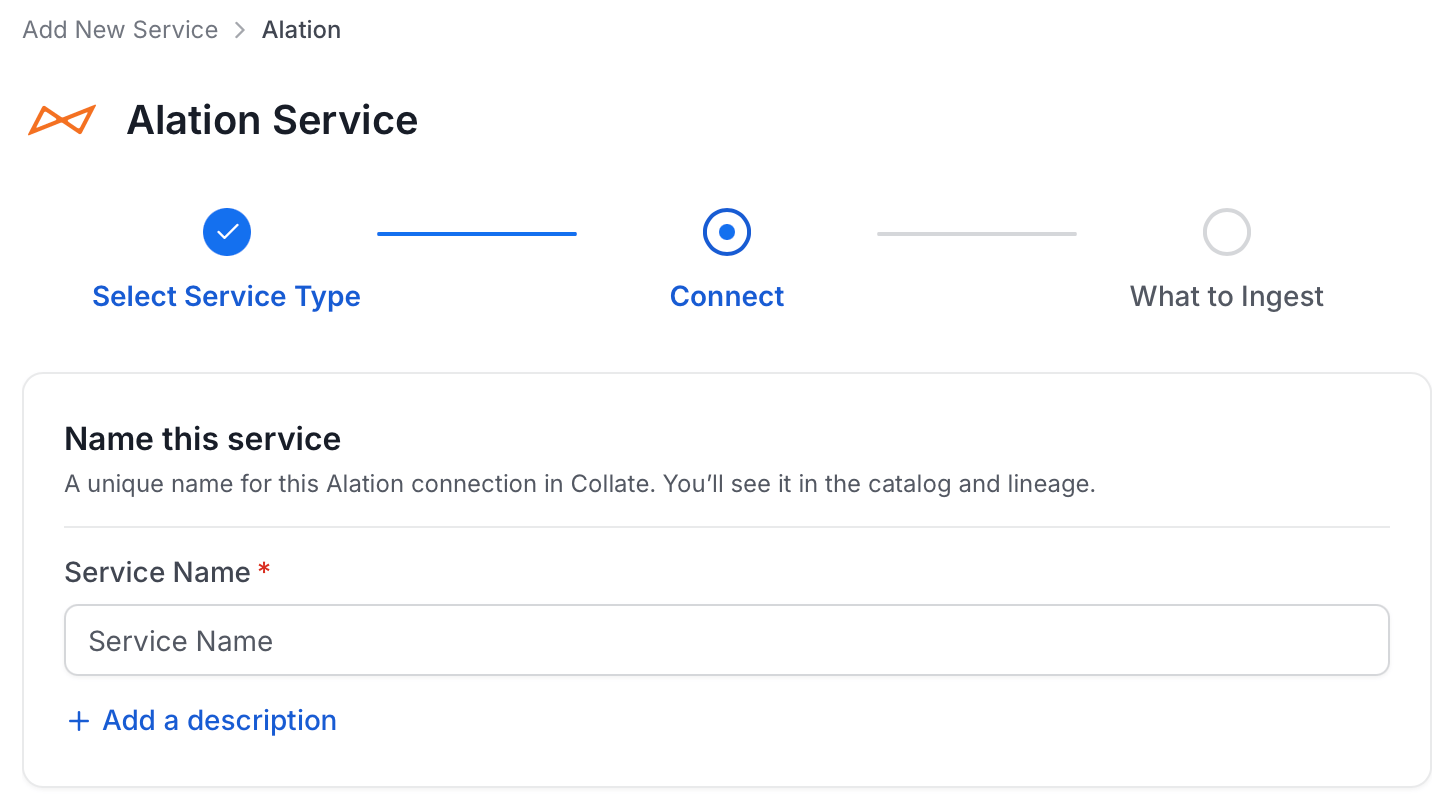
Note: The service name can’t be changed after you set it.
Step 4: Configure Connection Options
Specify where ingestion runs, provide your source credentials, and verify the connection.Select Ingestion Runner
Select an Ingestion Runner: the runner where the ingestion pipeline will execute.
Enter Connection Details
Enter the connection details for Alation. The right-hand panel in the UI displays inline help for each field.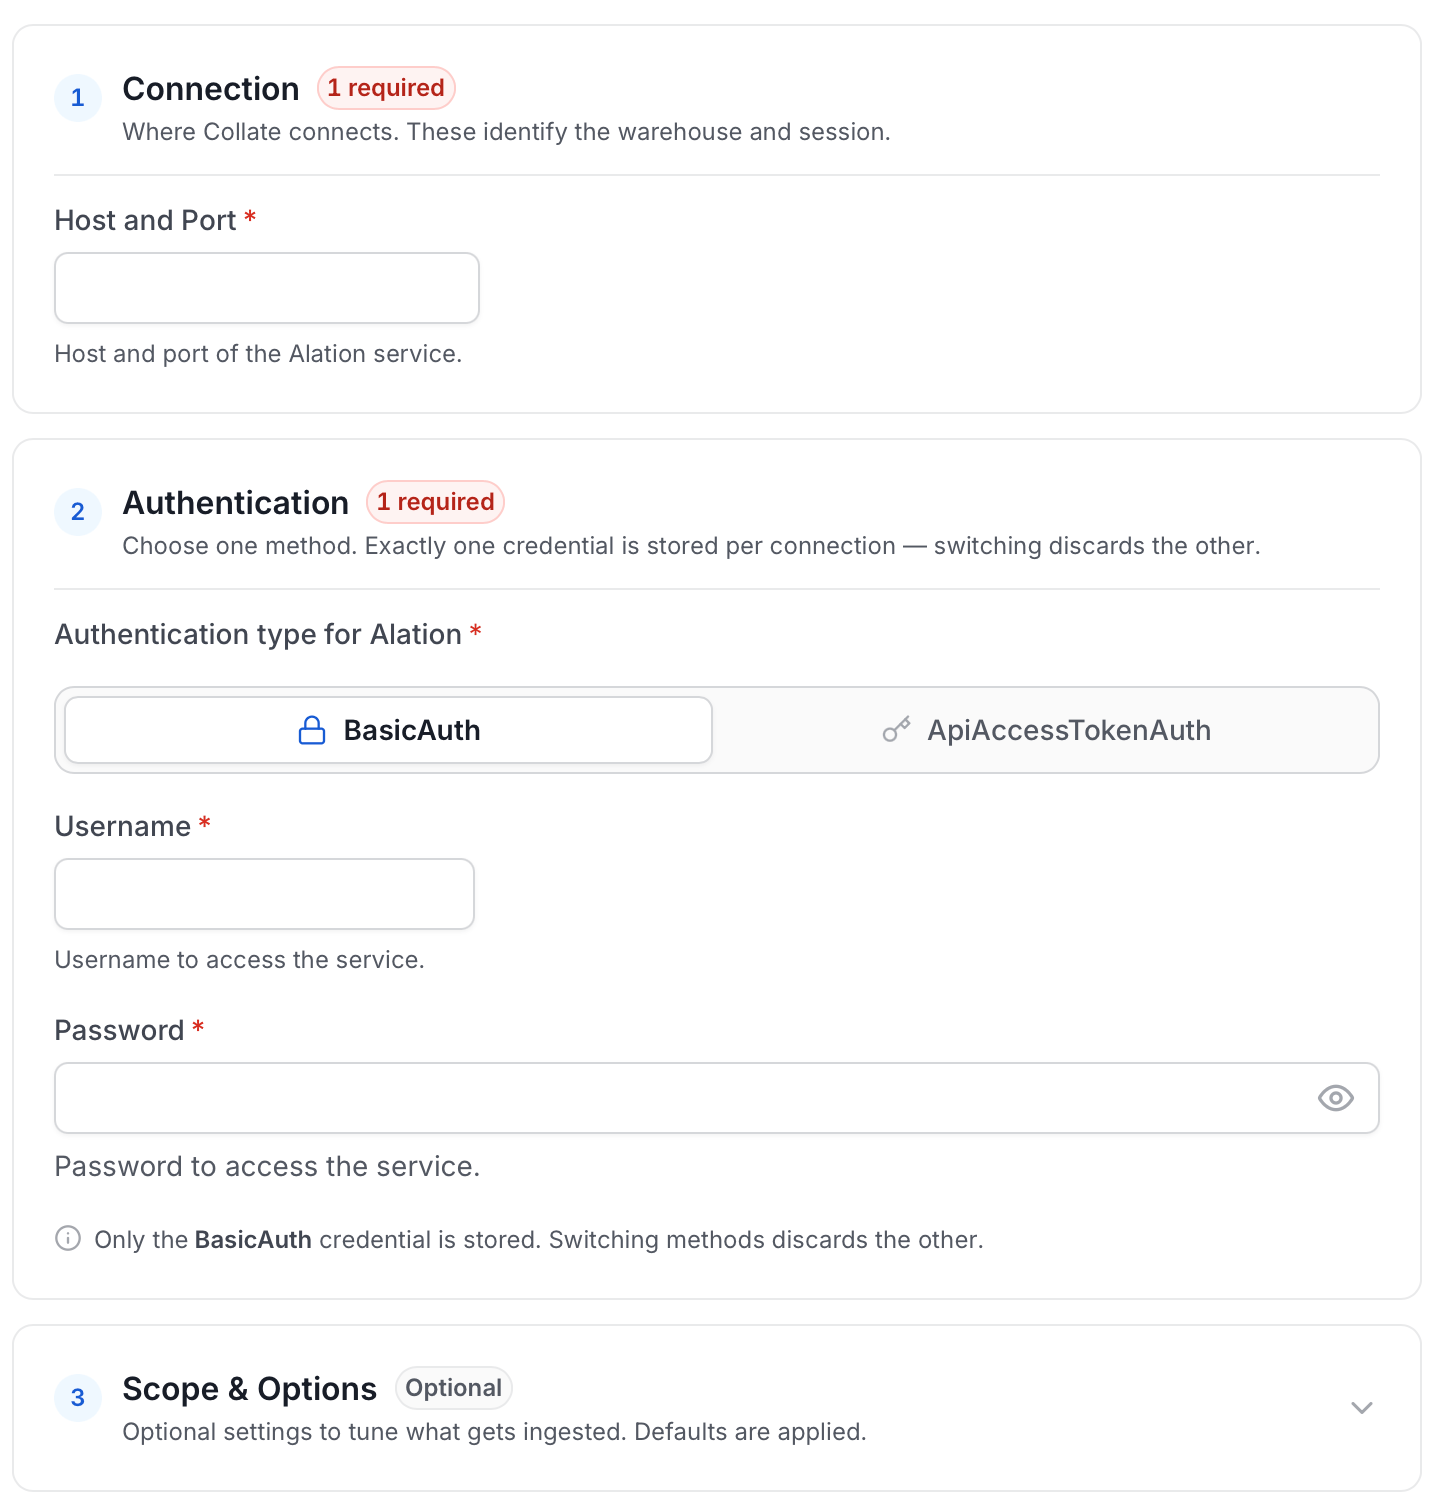
- hostPort: Host and port of the Alation instance.
- authType: The following authentication types are supported:
- Basic Authentication: Collate uses the user credentials to generate the access token required to authenticate Alation APIs.
- username: Username of the user.
- password: Password of the user.
- Access Token Authentication: The access token created using the steps to create an API access token can directly be entered. Collate uses that token directly to authenticate the Alation APIs
- accessToken: Generated access token
For Alation Backend Database Connection
Alation APIs do not provide some of the metadata. Collate extracts this metadata directly from Alation’s backend database by querying the tables. Note that this is an optional configuration, and if it is not provided, primary metadata will still be ingested. Below is the metadata fetched from the Alation database:1. User and Group Relationships
Choose either postgres or mysql connection depending on the db:
- Postgres Connection
- username: Specify the user to connect to Postgres. Make sure the user has select privileges on the tables of the Alation schema.
- password: Password to connect to Postgres.
- hostPort: Enter the fully qualified hostname and port number for your Postgres deployment in the Host and Port field.
- database: Initial Postgres database to connect to. Specify the name of the database associated with the Alation instance.
- MySQL Connection
- username: Specify the user to connect to MySQL. Make sure the user has select privileges on the tables of the Alation schema.
- password: Password to connect to MySQL.
- hostPort: Enter the fully qualified hostname and port number for your MySQL deployment in the Host and Port field.
- databaseSchema: Initial MySQL database to connect to. Specify the name of the database schema associated with the Alation instance.
- projectName: Project name can be anything, for example
ProdorDemo. It will be used while creating the tokens. - paginationLimit: Pagination limit used for Alation APIs pagination. By default, it is set to 10.
- includeUndeployedDatasources: Specifies if undeployed datasources should be included while ingesting. By default, it is set to
false. - includeHiddenDatasources: Specifies if hidden datasources should be included while ingesting. By default, it is set to
false. - ingestUsersAndGroups: Specifies if users and groups should be included while ingesting. By default, it is set to
true. - ingestKnowledgeArticles: Specifies if knowledge articles should be included while ingesting. By default, it is set to
true. - ingestDatasources: Specifies if databases, schemas and tables should be included while ingesting. By default, it is set to
true. - ingestDomains: Specifies if domains and subdomains should be included while ingesting. By default, it is set to
true. - ingestDashboards: Specifies if BI sources and dashboards should be included while ingesting. By default, it is set to
true. - alationTagClassificationName: Specify the classification name under which the tags from Alation will be created in Collate. By default, it is set to
alationTags. - connectionArguments: These are additional parameters for Alation. If not specified the ingestion will use the predefined pagination logic. The following arguments are intended to be used in conjunction and are specifically for Alation DataSource APIs:
- skip: This parameter determines the count of records to bypass at the start of the dataset. When set to 0, as in this case, it means that no records will be bypassed. If set to 10, it will bypass the first 10 records.
- limit: This argument specifies the maximum number of records to return. Here, it’s set to 10, meaning only the first 10 records will be returned. To perform incremental ingestion, these arguments should be used together. For instance, if there are a total of 30 datasources in Alation, the ingestion can be configured to execute three times, with each execution ingesting 10 datasources.
- 1st execution:
{"skip": 0, "limit": 10} - 2nd execution:
{"skip": 10, "limit": 10} - 3rd execution:
{"skip": 20, "limit": 10}
Advanced Configuration
Database Services include an Advanced Configuration section for passing extra arguments to the connector and, if needed, changing the connection scheme. You need this only for advanced connectivity scenarios or customizations.- Connection Options (Optional): Enter the details for any additional connection options that can be sent to the database during the connection. These details must be added as key-value pairs.
- Connection Arguments (Optional): Enter the details for any additional connection arguments such as security or protocol configs that can be sent during the connection. These details must be added as key-value pairs.
Test Connection
- Click Test Connection to verify the credentials.
- After the test succeeds, click Save.

Step 5: Configure Ingestion Options
In the What to Ingest step, configure the metadata ingestion pipeline settings, then click Create & Deploy. Collate creates the service connection and automatically triggers the first metadata ingestion run. To schedule recurring runs, see the next section. After deployment, you can monitor the ingestion status by navigating to Connections, selecting your service, and viewing the ingestion pipeline.Configure Metadata Agent and Schedule Ingestion
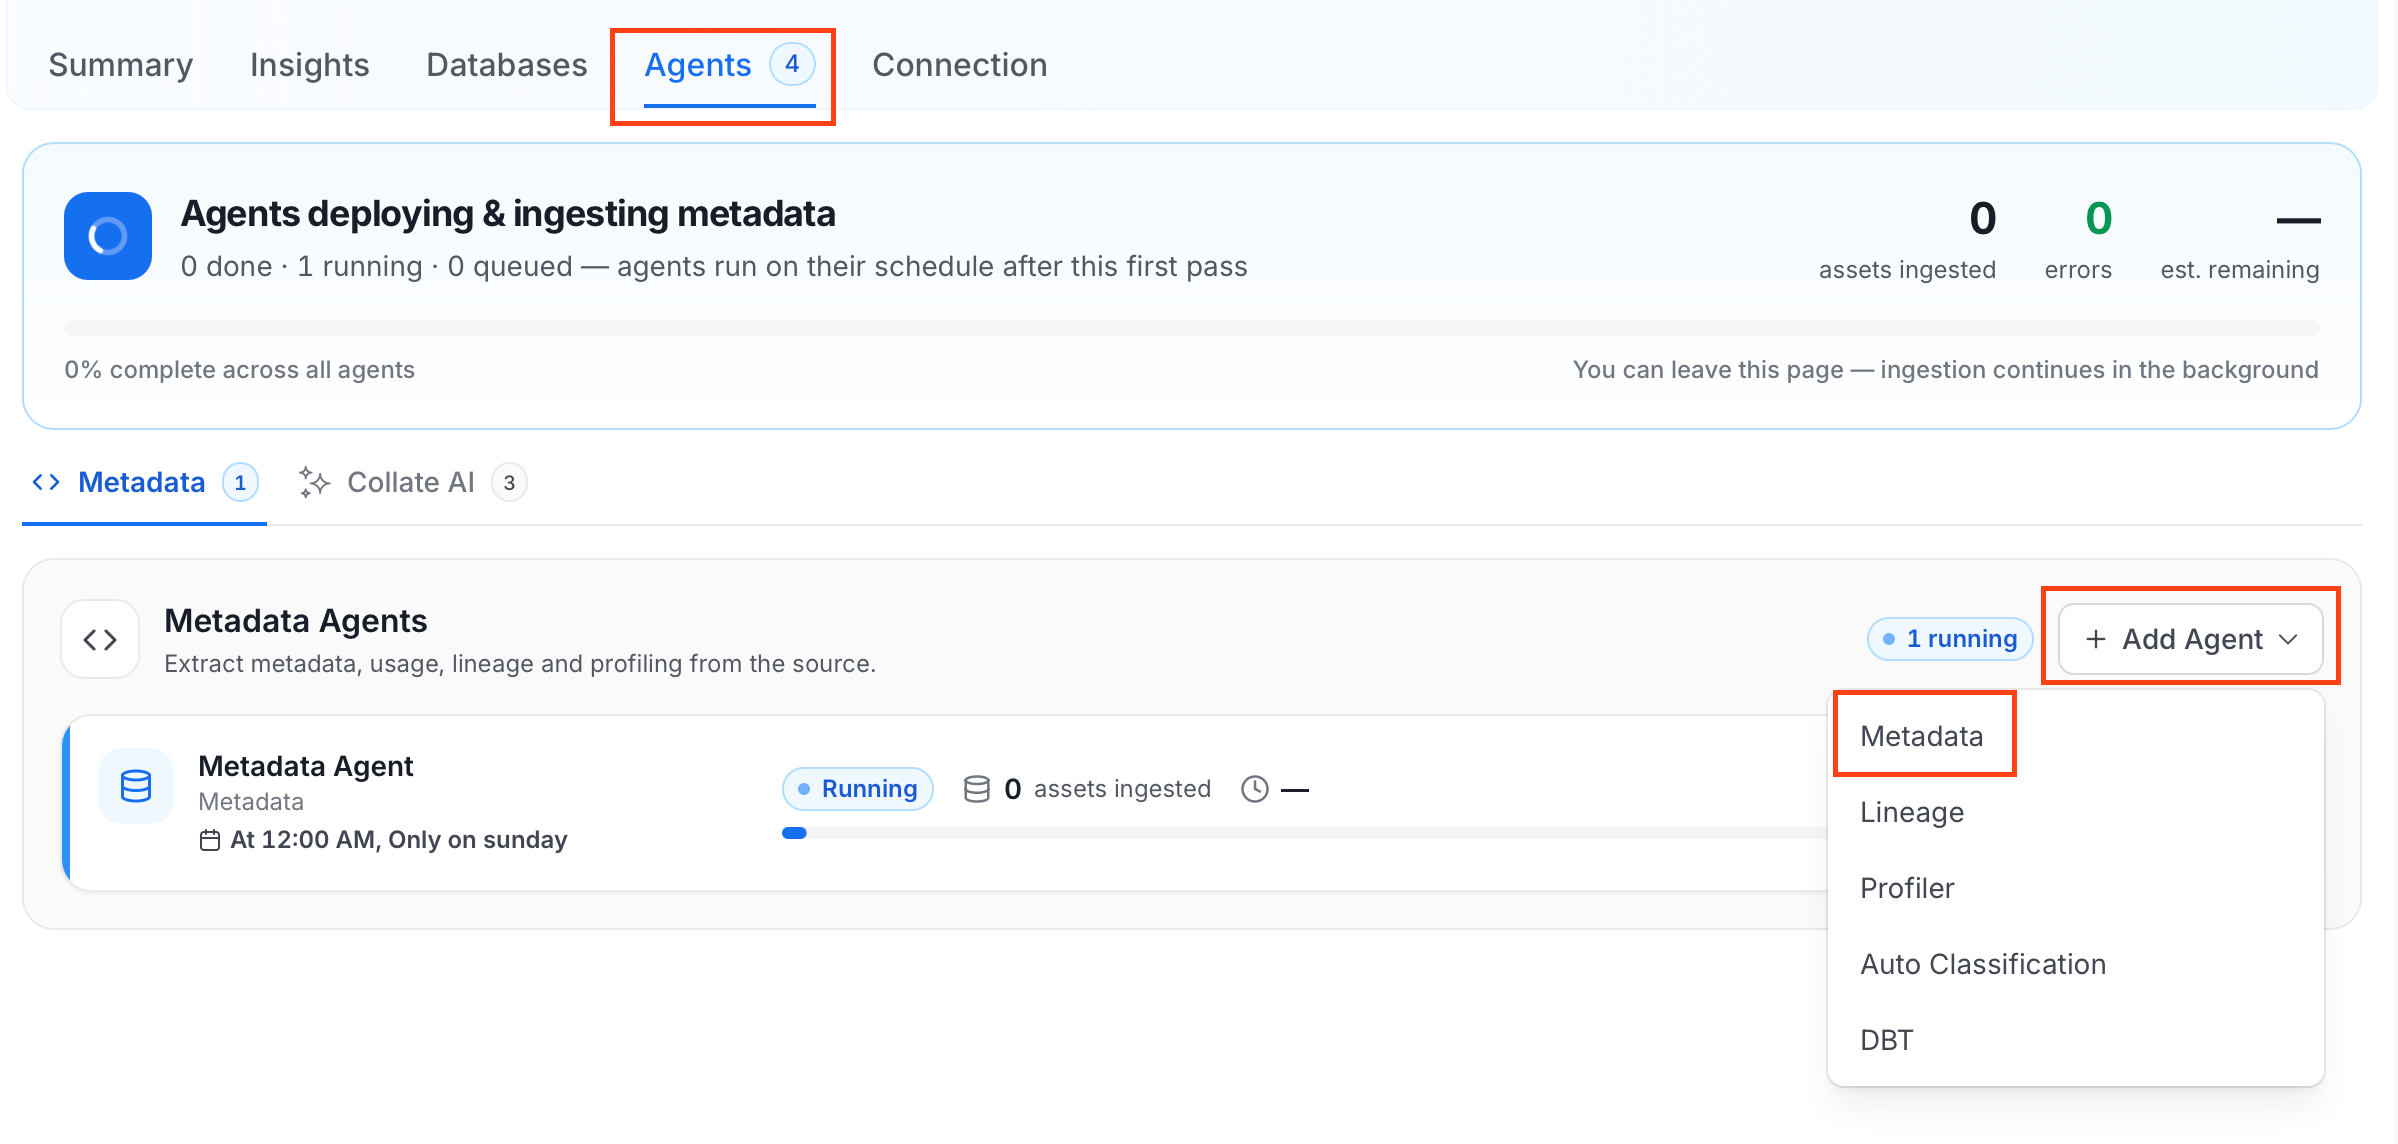
The Metadata Agent extracts databases, schemas, tables, stored procedures, and other structural metadata from your connected data source and keeps your Collate catalog in sync. It powers discovery, lineage, and governance across your data assets. When you click Create & Deploy, Collate automatically deploys a Metadata Agent for this service and triggers the first ingestion run. View its status and run history from the Agents tab on the service detail page. To configure the additional Metadata Agent and schedule ingestion, follow these steps:- In the left navigation, click Connections and select your service.
- Click the Agents tab.
-
Click Add Agent and select Metadata from the dropdown.
-
On the Configure Ingestion page, do the following and click Next.
-
Name this Ingestion: Enter a unique, recognizable name for this ingestion pipeline.

-
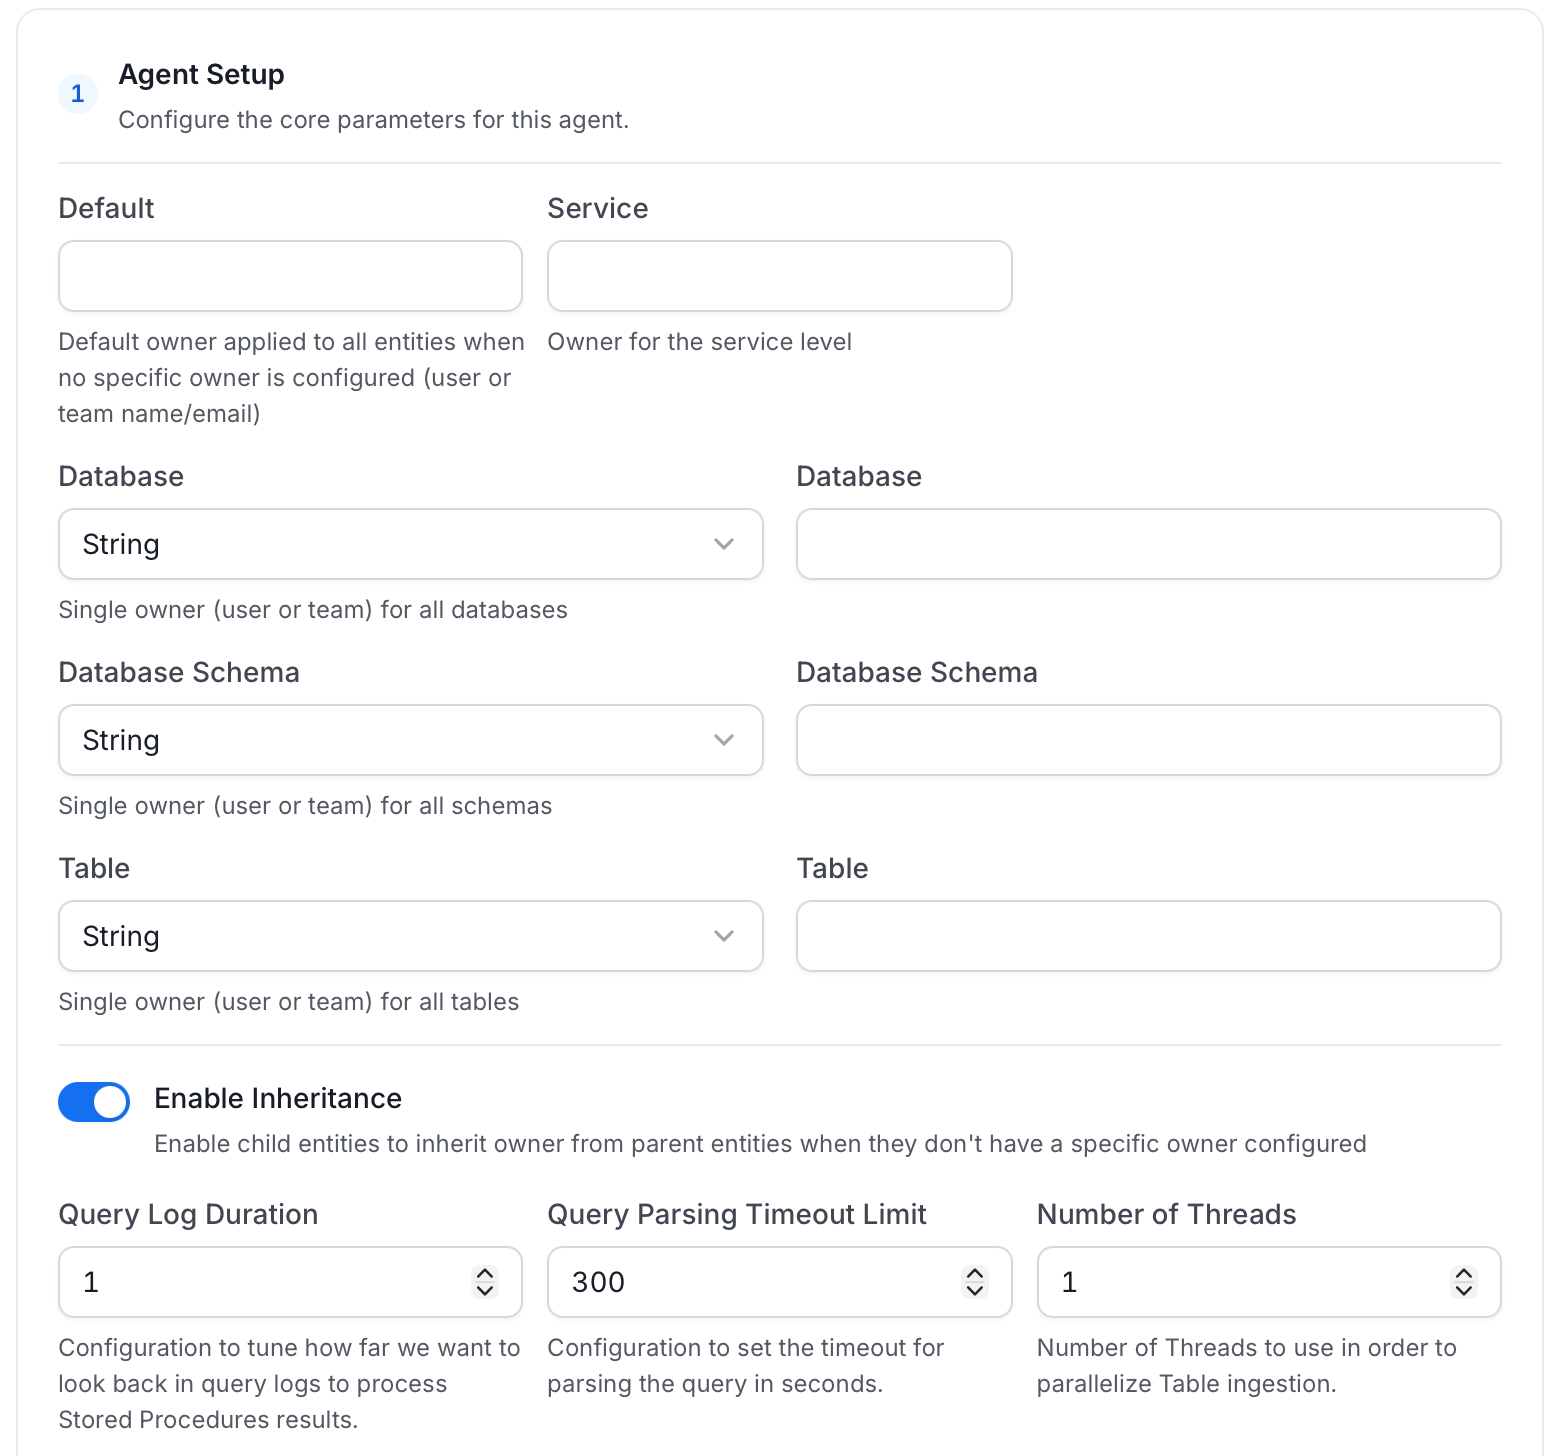
Agent Setup: Configure the core parameters for this agent. The following fields are available:
-
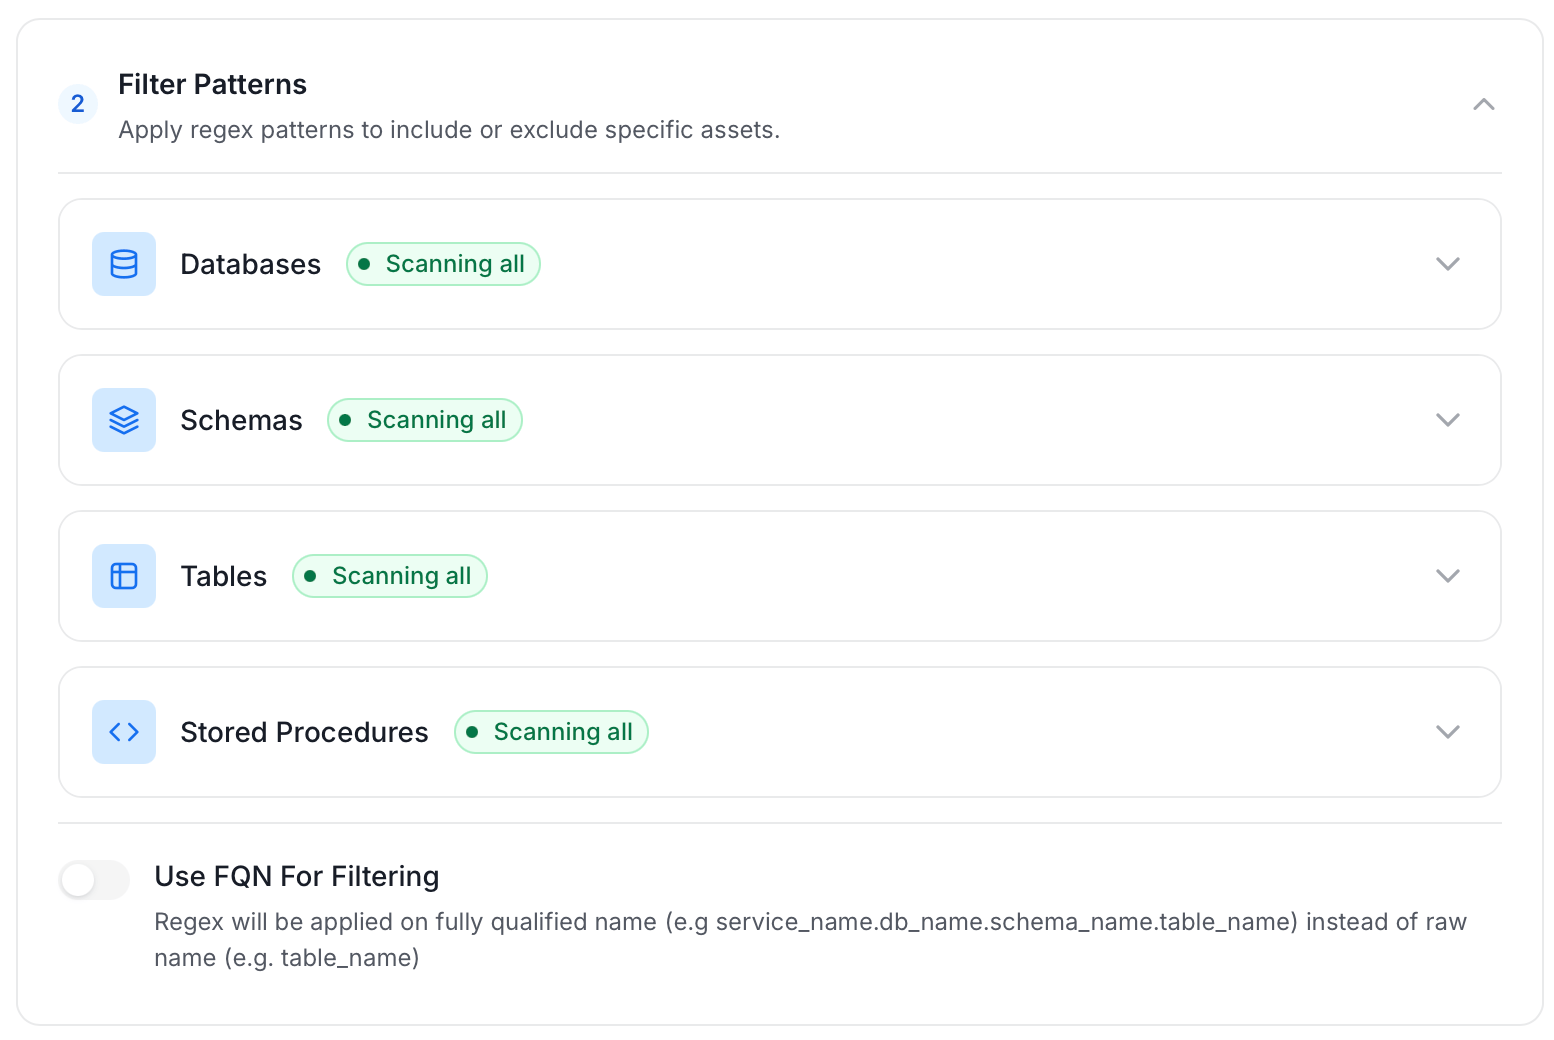
Filter Patterns: Apply include or exclude rules to scope which databases, schemas, tables, and stored procedures this agent ingests. These follow the same filter options described in Step 5.
-
Scope & Behaviour: Control what metadata to include and how to handle deletions. Toggle each option on or off based on your needs:

-
Name this Ingestion: Enter a unique, recognizable name for this ingestion pipeline.
-
On the Schedule Interval page, set when the agent runs:
- Schedule: Choose a preset interval (Hourly, Daily, Weekly, Monthly) or enter a custom cron expression.
- On-Demand: No automatic schedule; trigger the agent manually when needed.
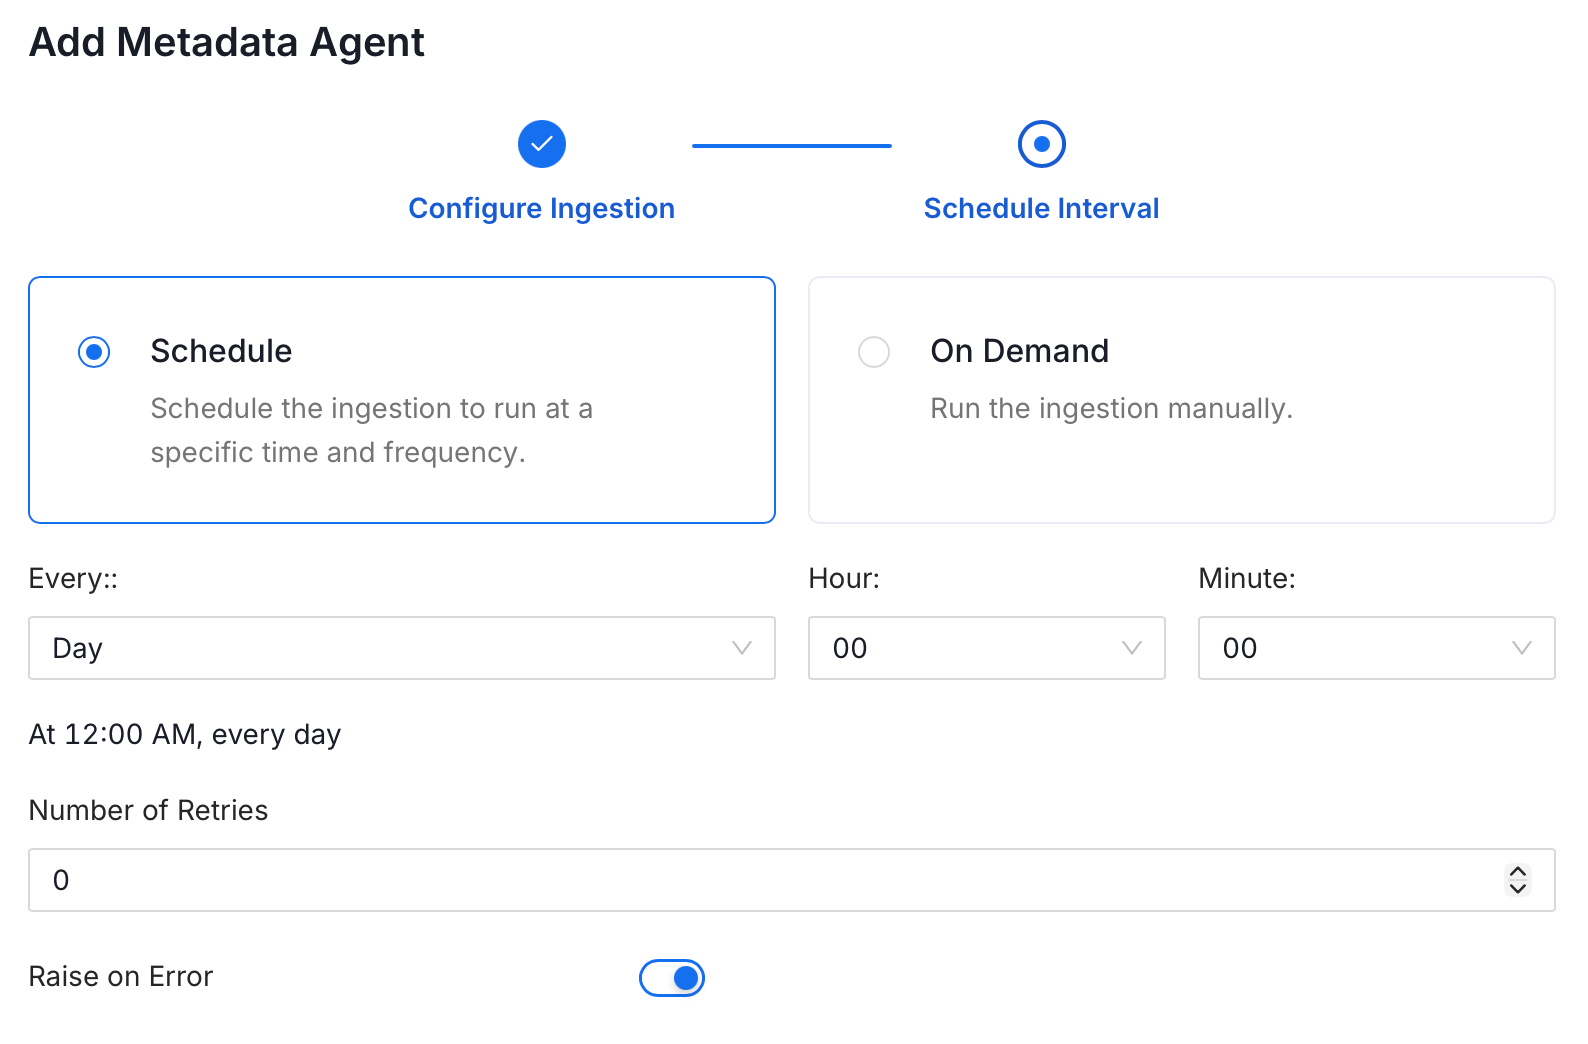
- Click Add to deploy the agent.
Troubleshooting
Alation Troubleshooting
Learn more about how to troubleshoot common Alation connector issues and resolve configuration or ingestion errors.