Slack Application in Collate
Integrate Collate with Slack to enhance data collaboration and streamline team workflows. This integration enables real-time notifications, in-Slack search and sharing of metadata assets, and message interactions—all within your existing Slack workspace.
Overview
The Slack application connects your Slack workspace with Collate, enabling seamless communication and metadata access:
- Real-Time Notifications: Receive instant alerts, mentions, and updates directly in Slack.
- Metadata Search: Quickly search for glossaries, terms, tags, and tables within Slack.
- Asset Sharing: Share Collate assets effortlessly with your team from Slack.
- Enhanced Productivity: Stay informed and connected without leaving your workspace.
Key Capabilities
- Search Entities: Use Slack to search glossaries, terms, tags, and tables.
- Share Assets: Share metadata assets from Collate to your team directly in Slack.
- Notifications: Get notified when someone mentions
@collate2, or when updates occur in your data workspace.
Authorizations
When connected, Collate will have the following permissions in Slack:
- View and respond to messages that mention
@collate2. - Access content in public channels where Collate is added.
- Join public channels and view their basic information.
- Add and respond to shortcuts and slash commands.
- Access content in direct messages and group direct messages.
- View user profiles in the workspace.
- Send messages as
@collate2, including to channels it's not a member of. - Post messages to designated Slack channels.
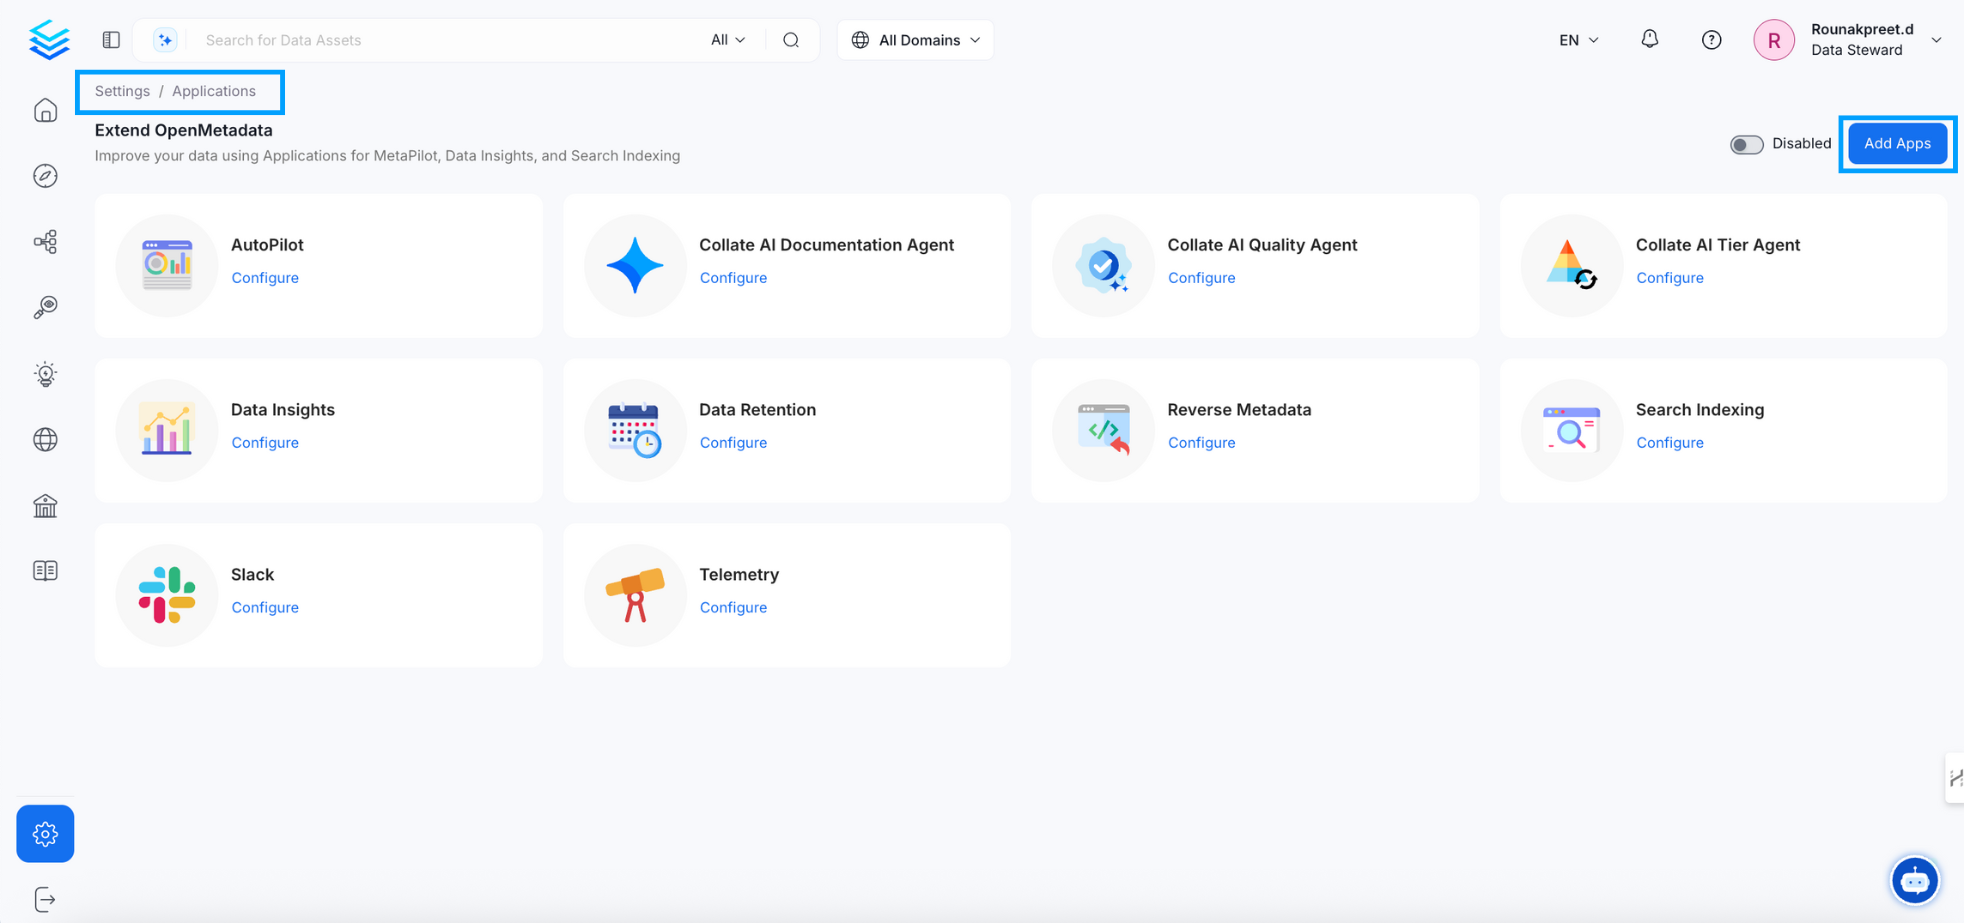
Slack App Configuration
To enable Slack integration in Collate:
- Navigate to Settings → Applications → Add Apps.
Configuration
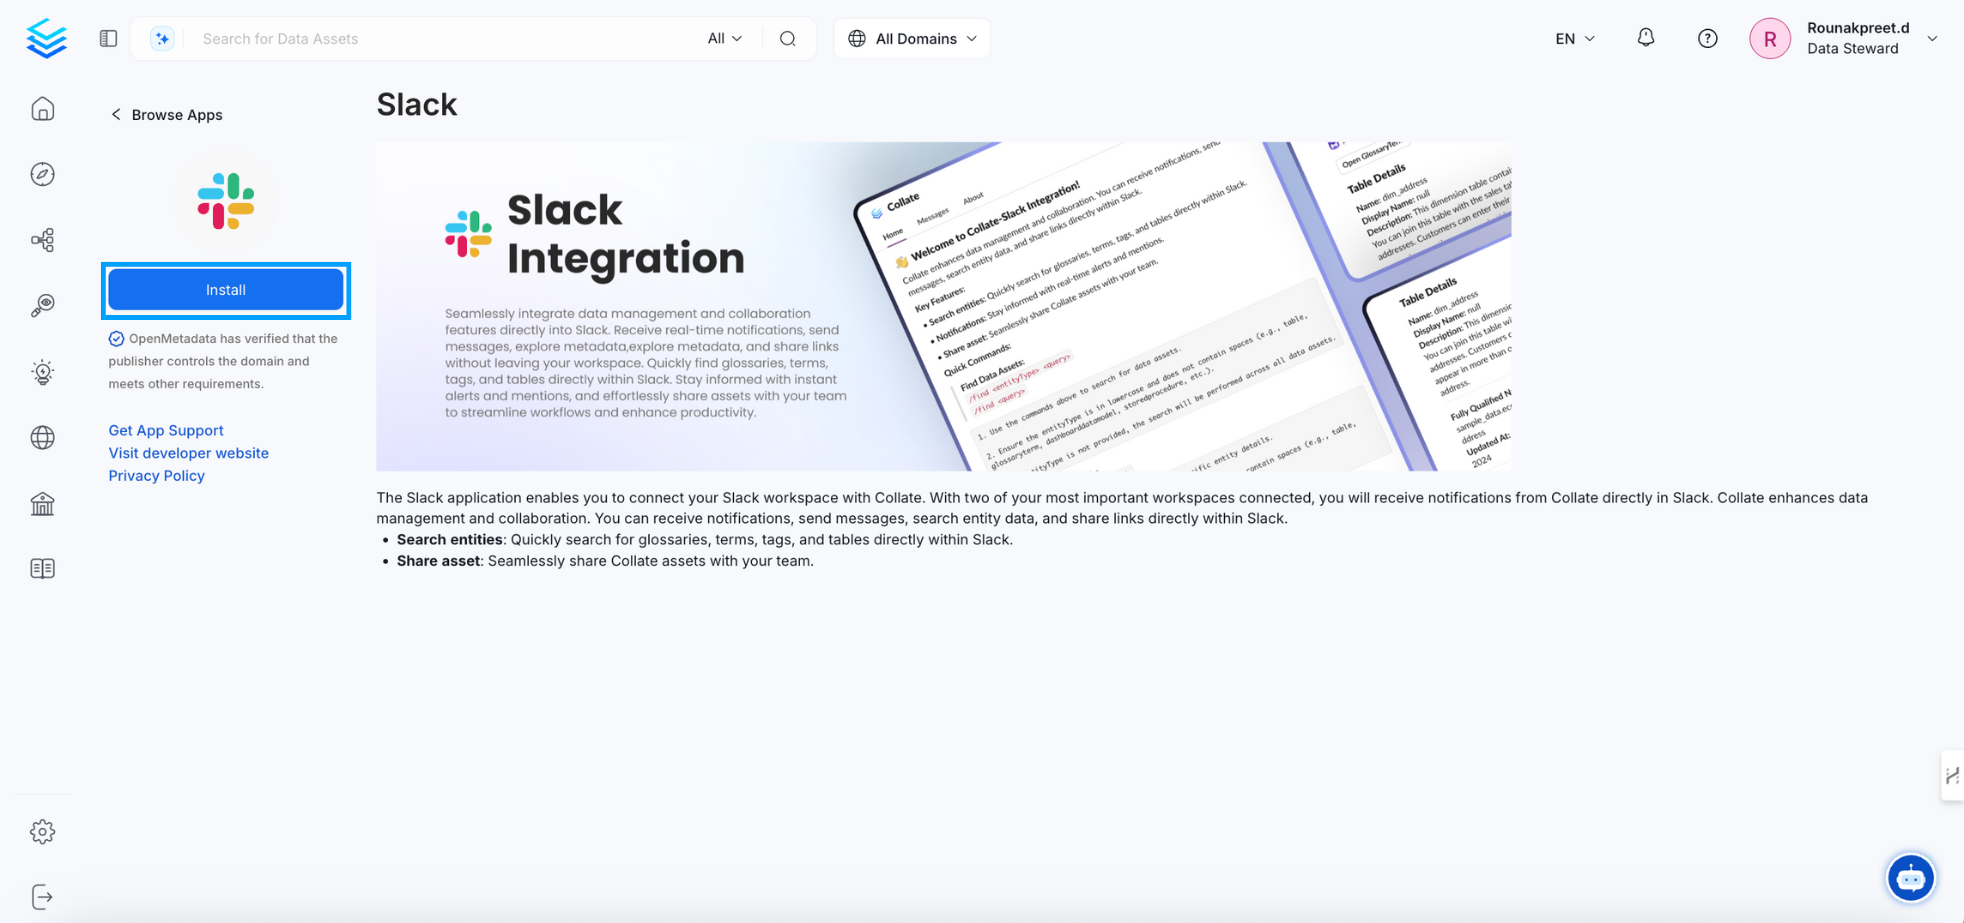
- Search for Slack and install the application.
Configuration
Configuration Fields
- User Token: Token used to authenticate Slack API requests on behalf of a user.
- Bot Token: Token used to authenticate Slack API requests on behalf of the bot.
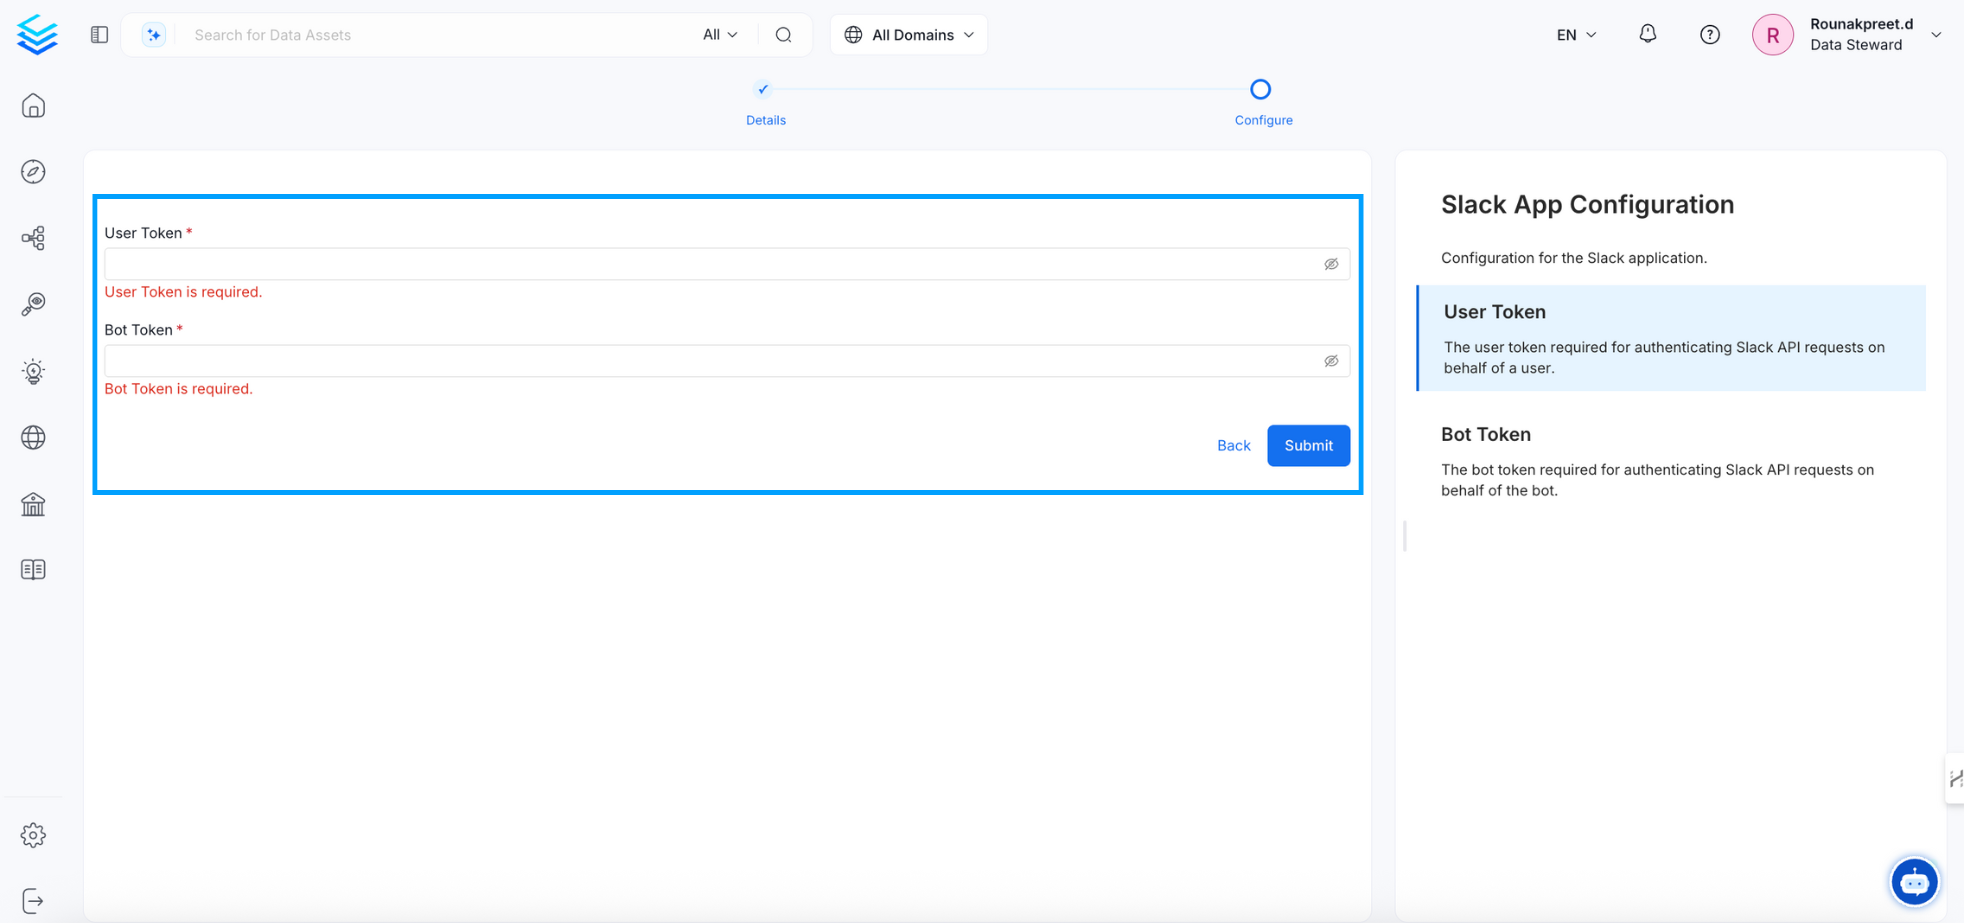
Configuration
Ensure that both tokens are securely stored and have the required scopes for interaction with your Slack workspace.
How to Obtain Slack Bot Token and User Token
To integrate Slack with Collate, you need to generate both a Bot Token and a User Token from your Slack workspace. These tokens allow Collate to interact with Slack APIs on behalf of your application and users.
Step-by-Step Instructions
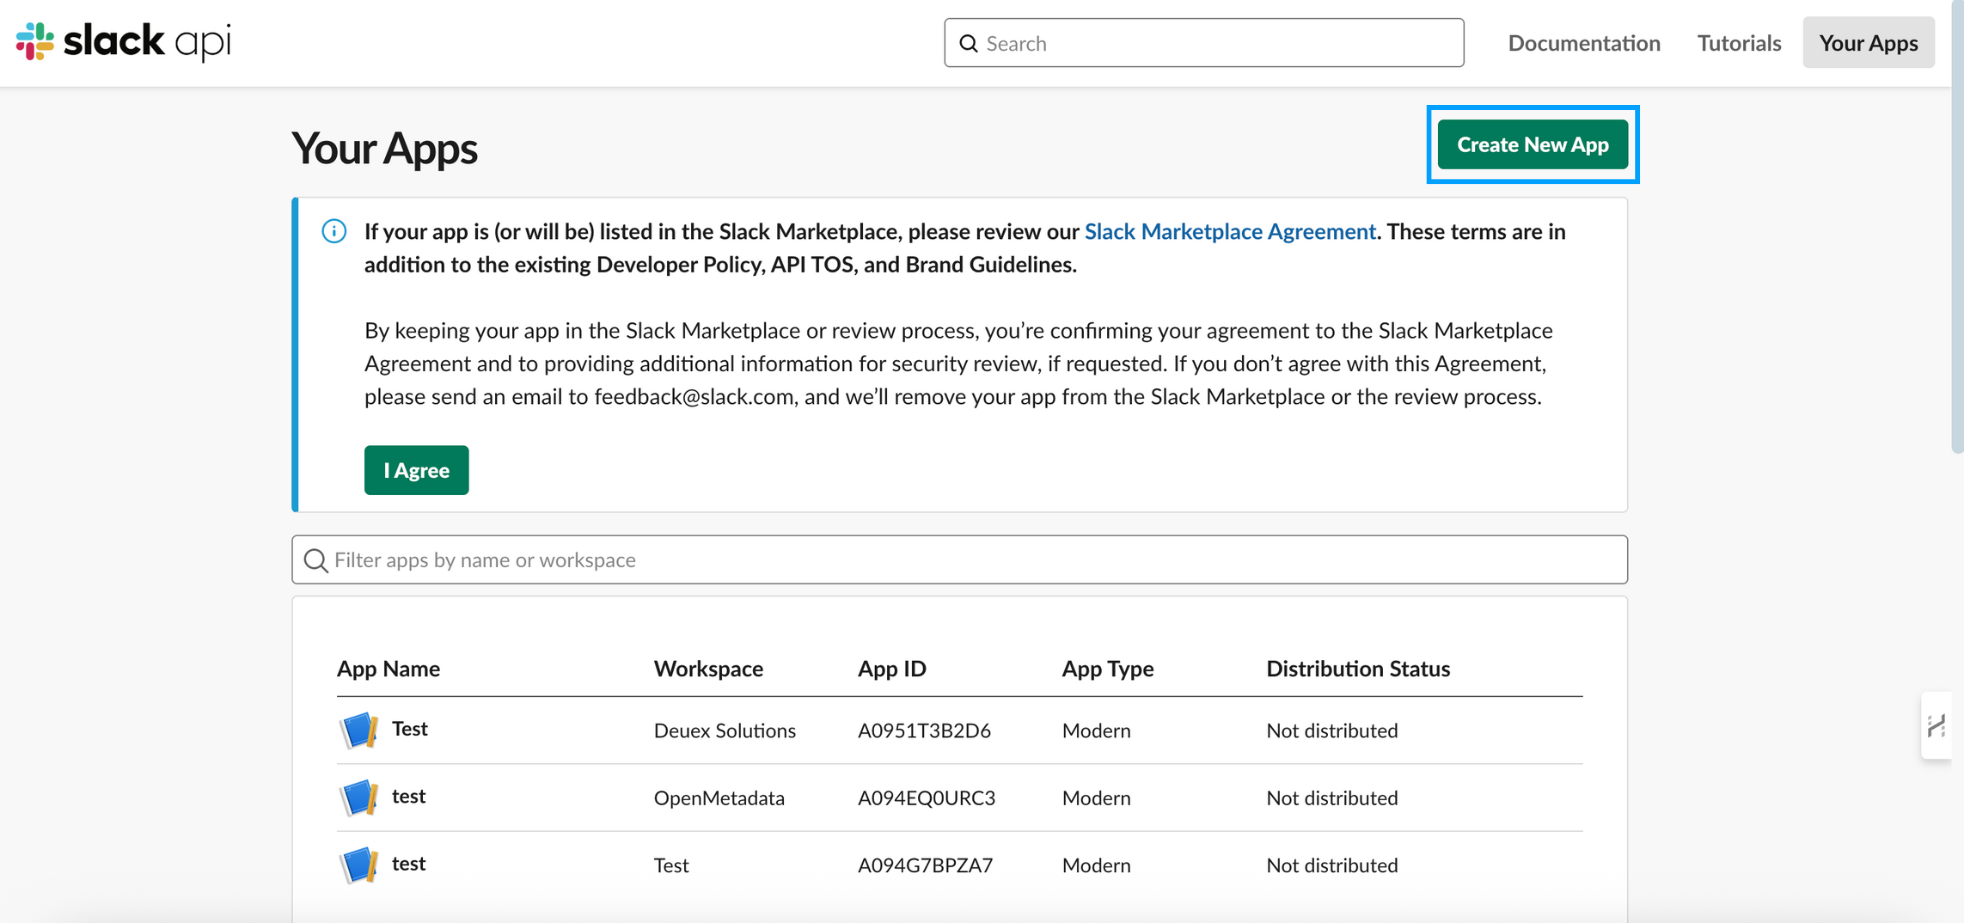
Create a Slack App
- Go to the Slack API: Your Apps page.
- Click Create New App.
Configuration
- Select From scratch.
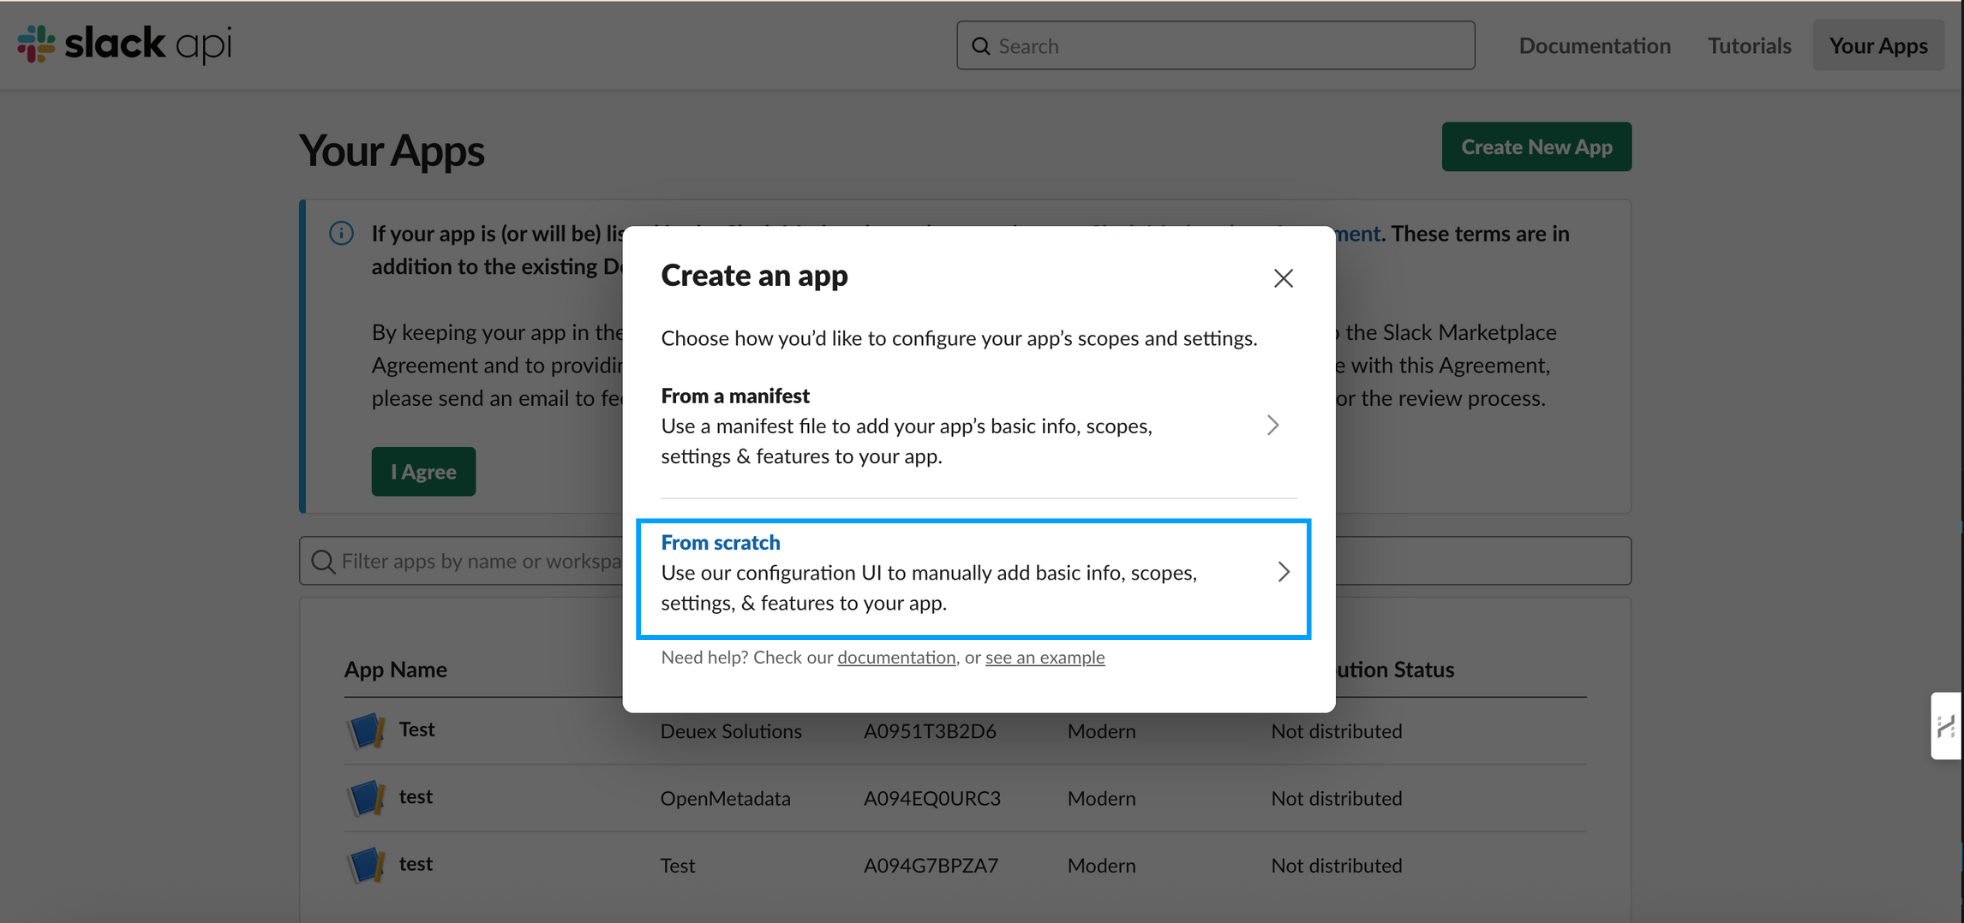
Configuration
- Enter the App Name (e.g.,
Collate Integration) and choose your Slack workspace. - Click Create App.
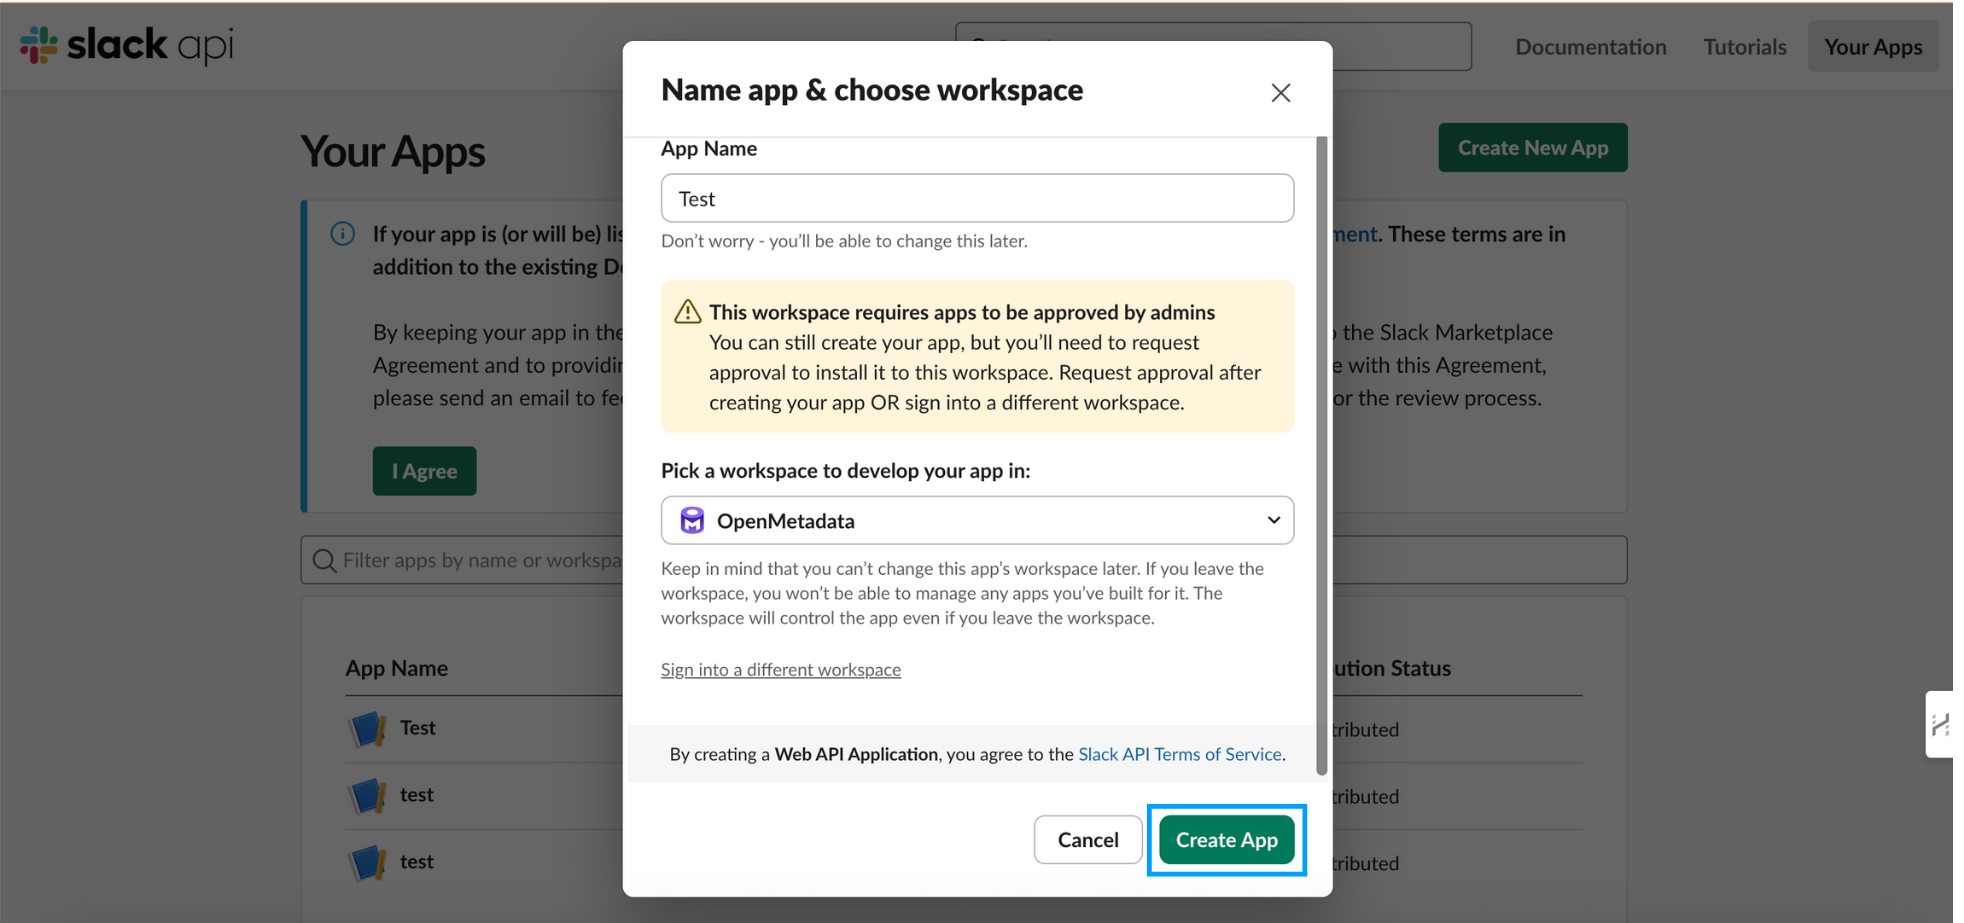
Configuration
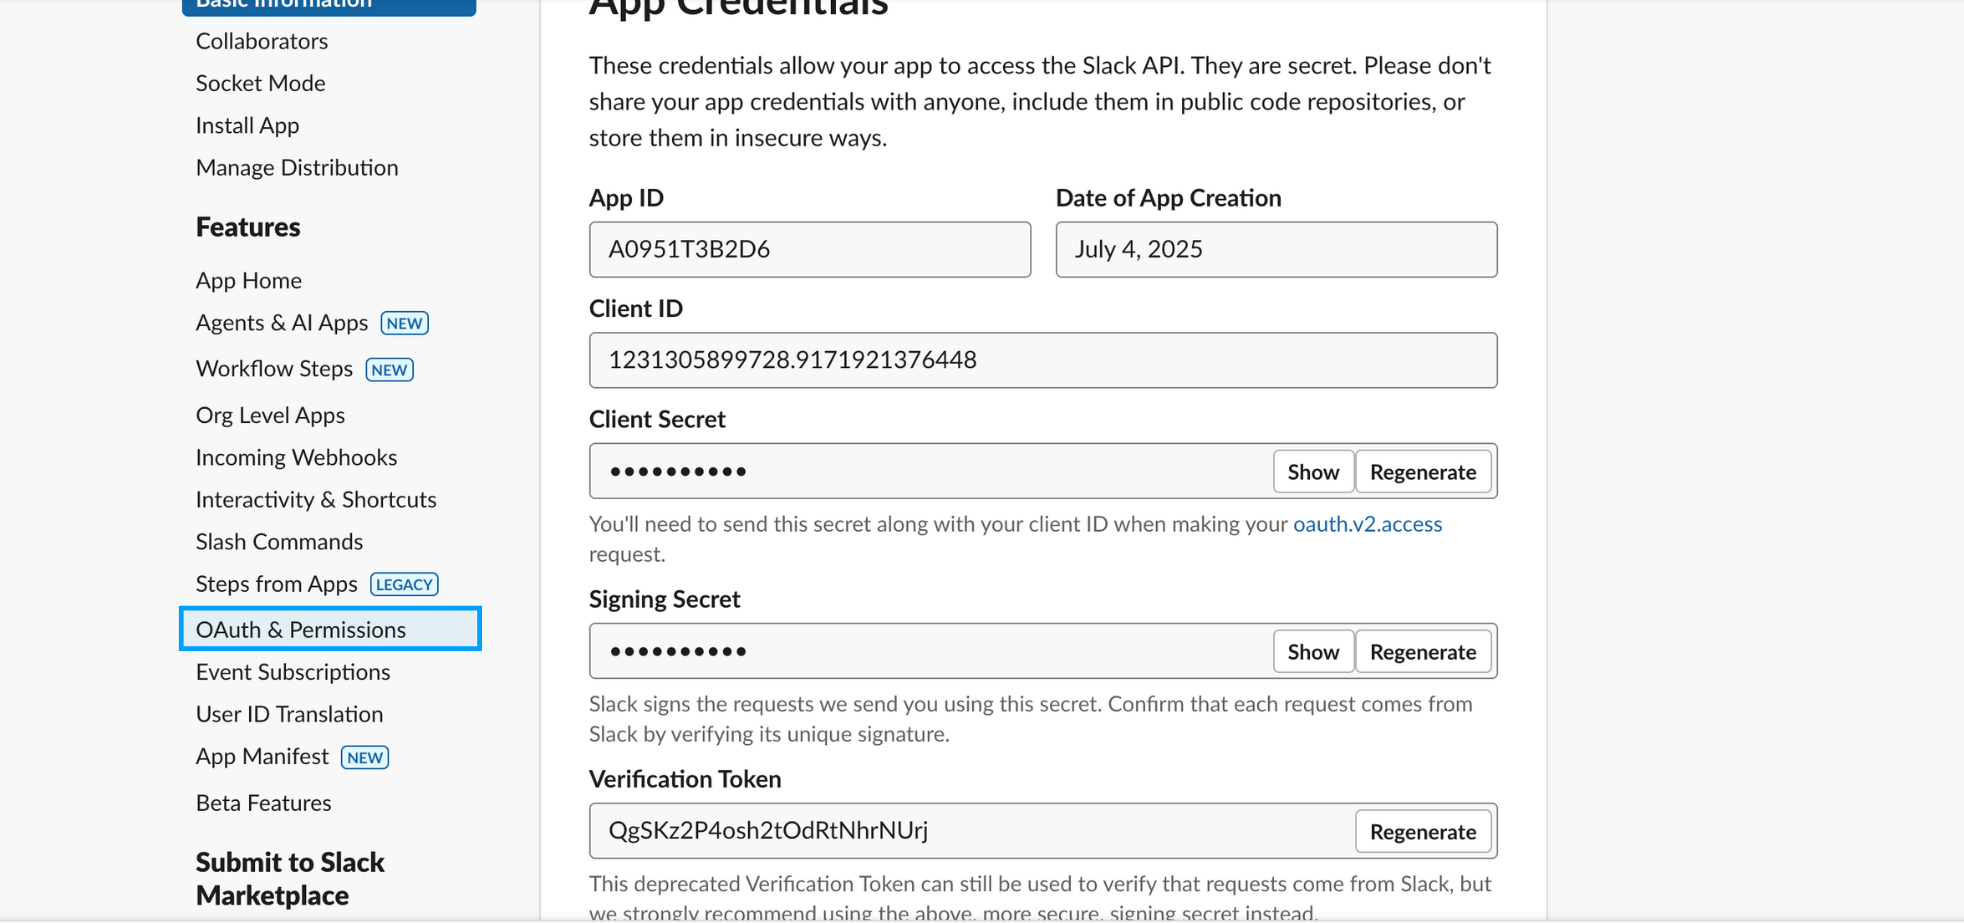
- After your app is created, you'll be redirected to the Basic Information page under Settings. Here, you'll find the following important credentials:
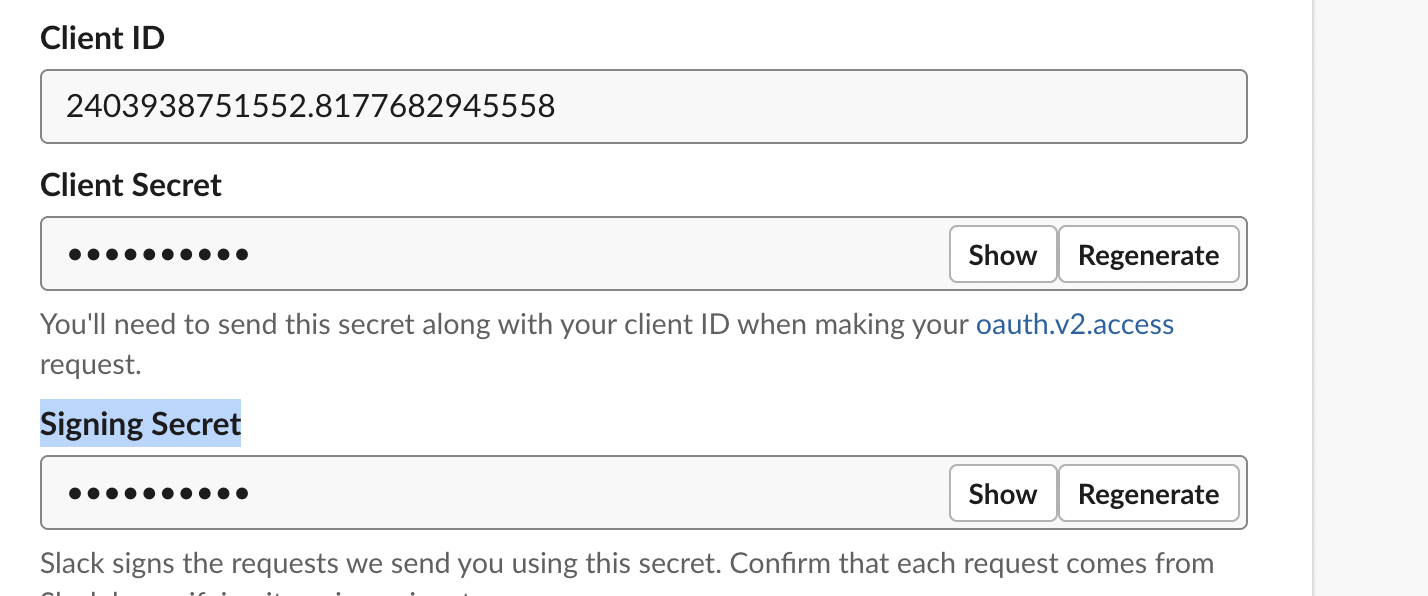
Client ID – Used to identify your app.
Client Secret – Used for authenticating requests made from your app.
Signing Secret – Used to verify that incoming requests (e.g., from Slack) are genuinely from Slack.
Click Show next to each secret if you need to view the values. You can also regenerate them if needed using the Regenerate button, and after that you can share it with Collate Team.
Make sure to store these securely, as you'll need them to configure OAuth and validate request signatures later.
Basic Information page
Configure OAuth & Permissions
- In your app’s dashboard, navigate to OAuth & Permissions.
Configuration
- Under Scopes, configure the following:
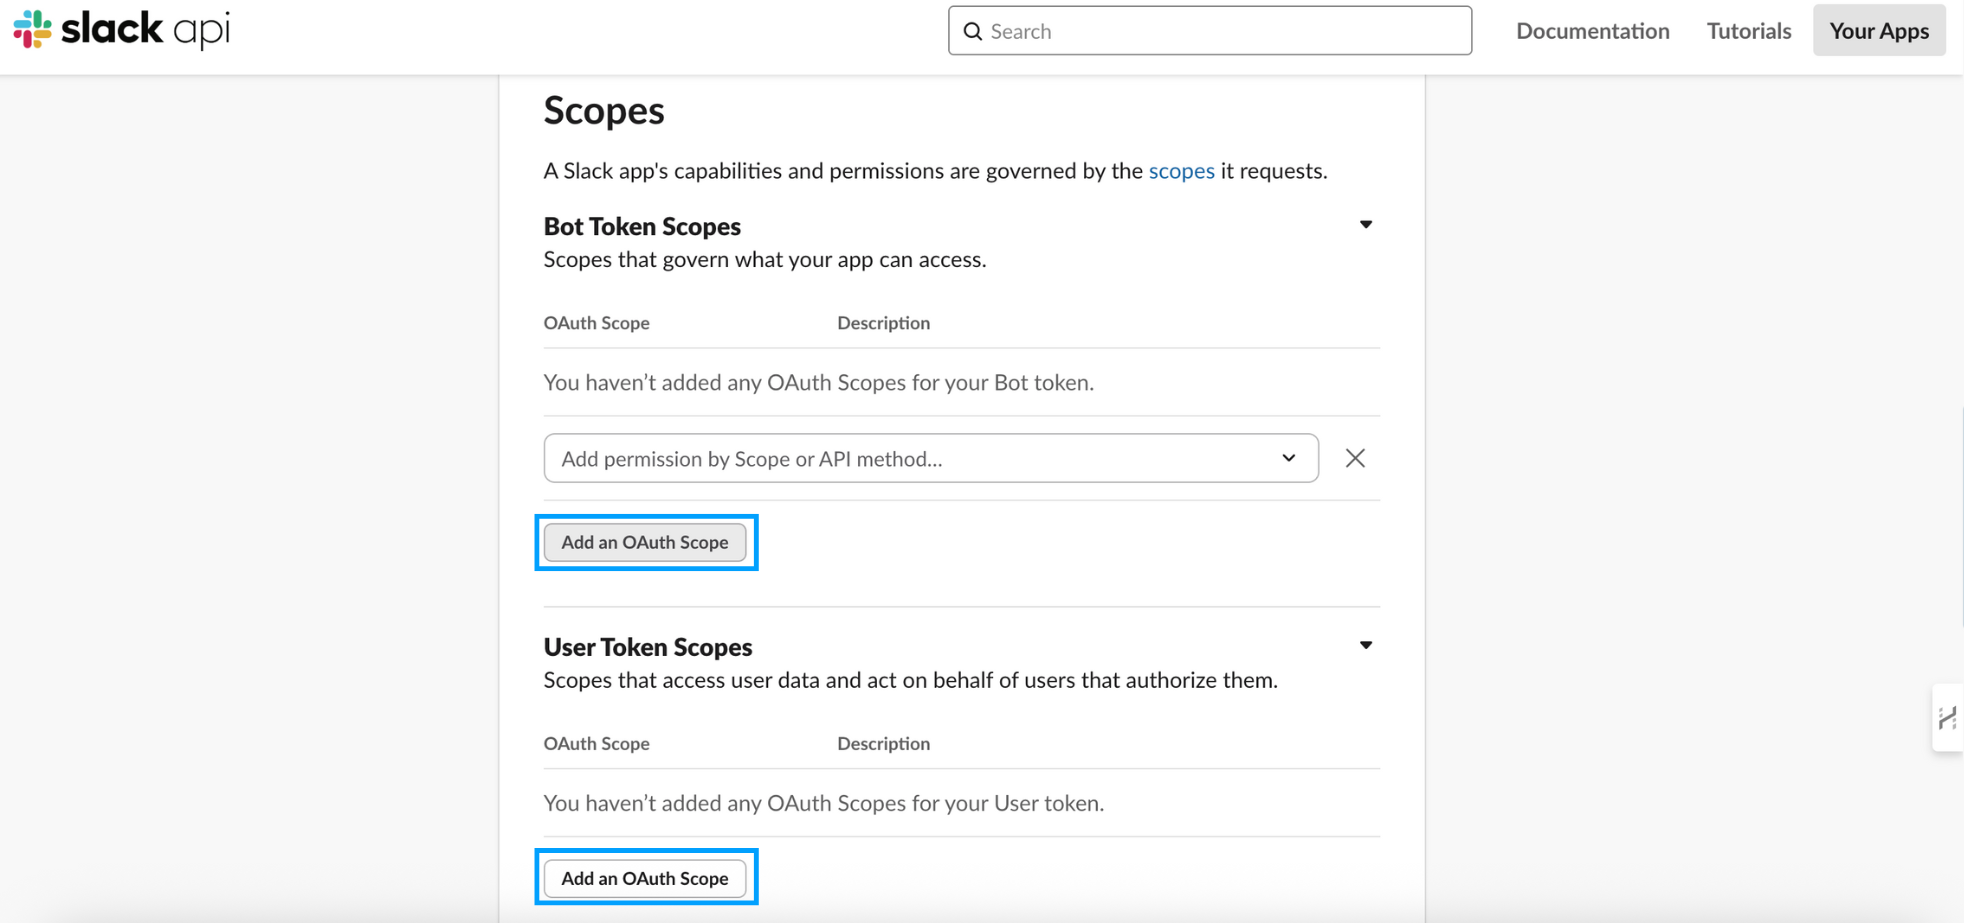
Configuration
For Bot Token Scopes:
Add these scopes:
chat:writechannels:readgroups:readim:readmpim:readusers:readcommandsapp_mentions:read
For User Token Scopes:
Add these scopes:
channels:historygroups:historyim:historympim:history
Only add the scopes you need. Ensure your Slack workspace allows user token generation (may require admin privileges).
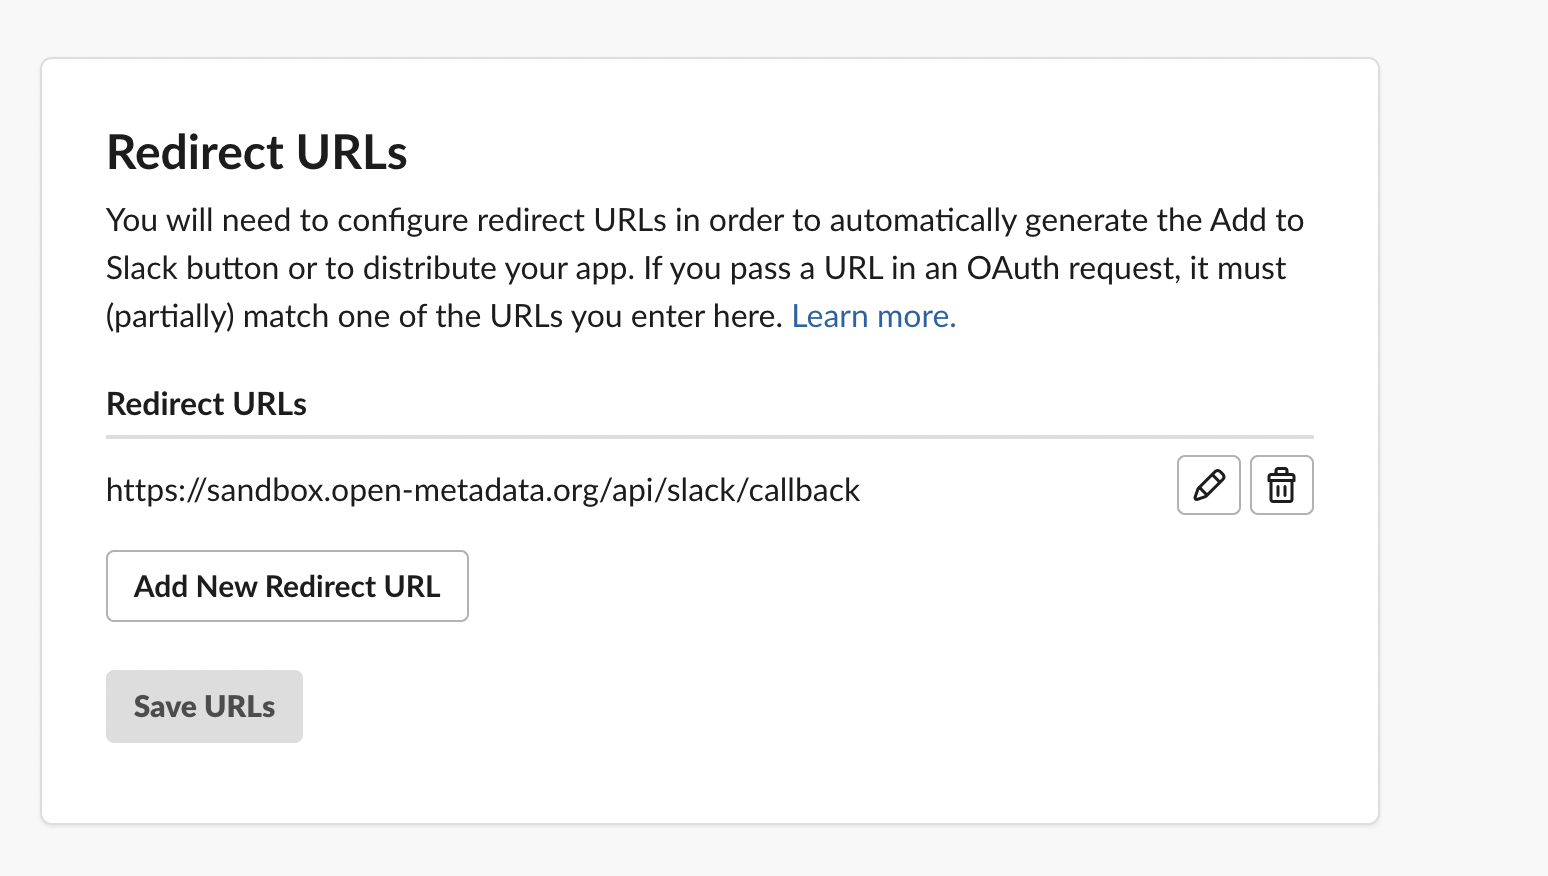
Configure Redirect URLs
Before installing the app to your workspace, configure the redirect URLs to ensure successful OAuth authentication:
- In the left-hand menu, go to OAuth & Permissions.
- Scroll down to the Redirect URLs section.
- Click Add New Redirect URL and enter the redirect URL (e.g., https://sandbox.open-metadata.org/api/slack/callback).
- Click Save URLs to apply the changes.
The redirect URL must exactly match the URL used in your OAuth request.
This ensures Slack can return the authorization code to your backend after the user grants permissions.
Configure Redirect URLs
Configure Event Subscriptions
After setting the necessary OAuth scopes, follow the steps below to configure Event Subscriptions:
In the left-hand menu under Features, click on Event Subscriptions.
Toggle the Enable Events switch to On.
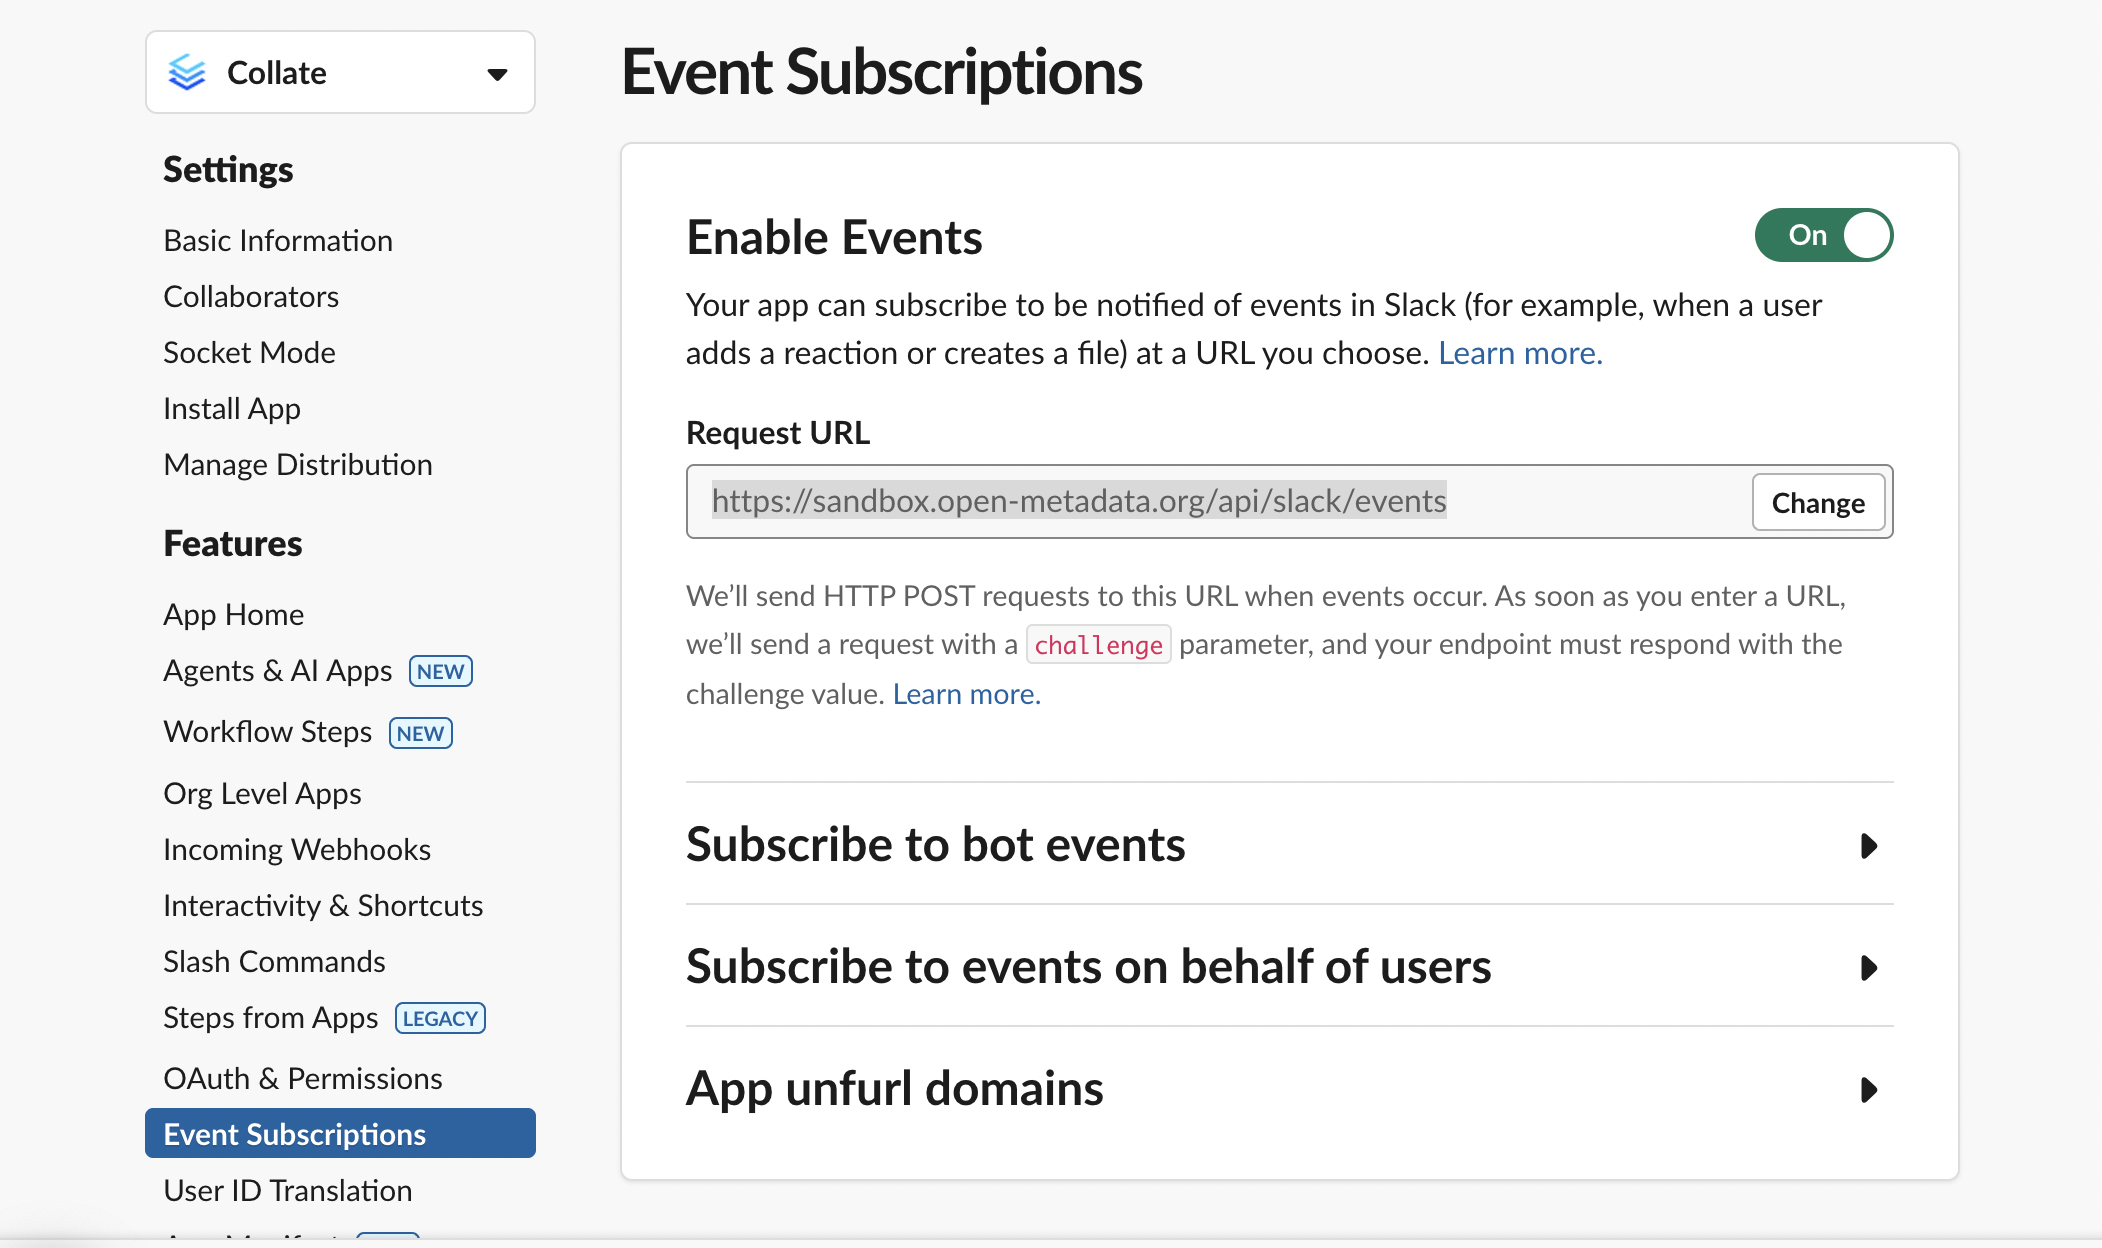
Enable Events
In the Request URL field, enter your app’s endpoint (e.g., https://sandbox.open-metadata.org/api/slack/events).
- Slack will send a verification request containing a challenge parameter.
- Ensure your endpoint responds with the challenge value to confirm validation.
Scroll down to the Subscribe to bot events section and click Add Bot User Event.
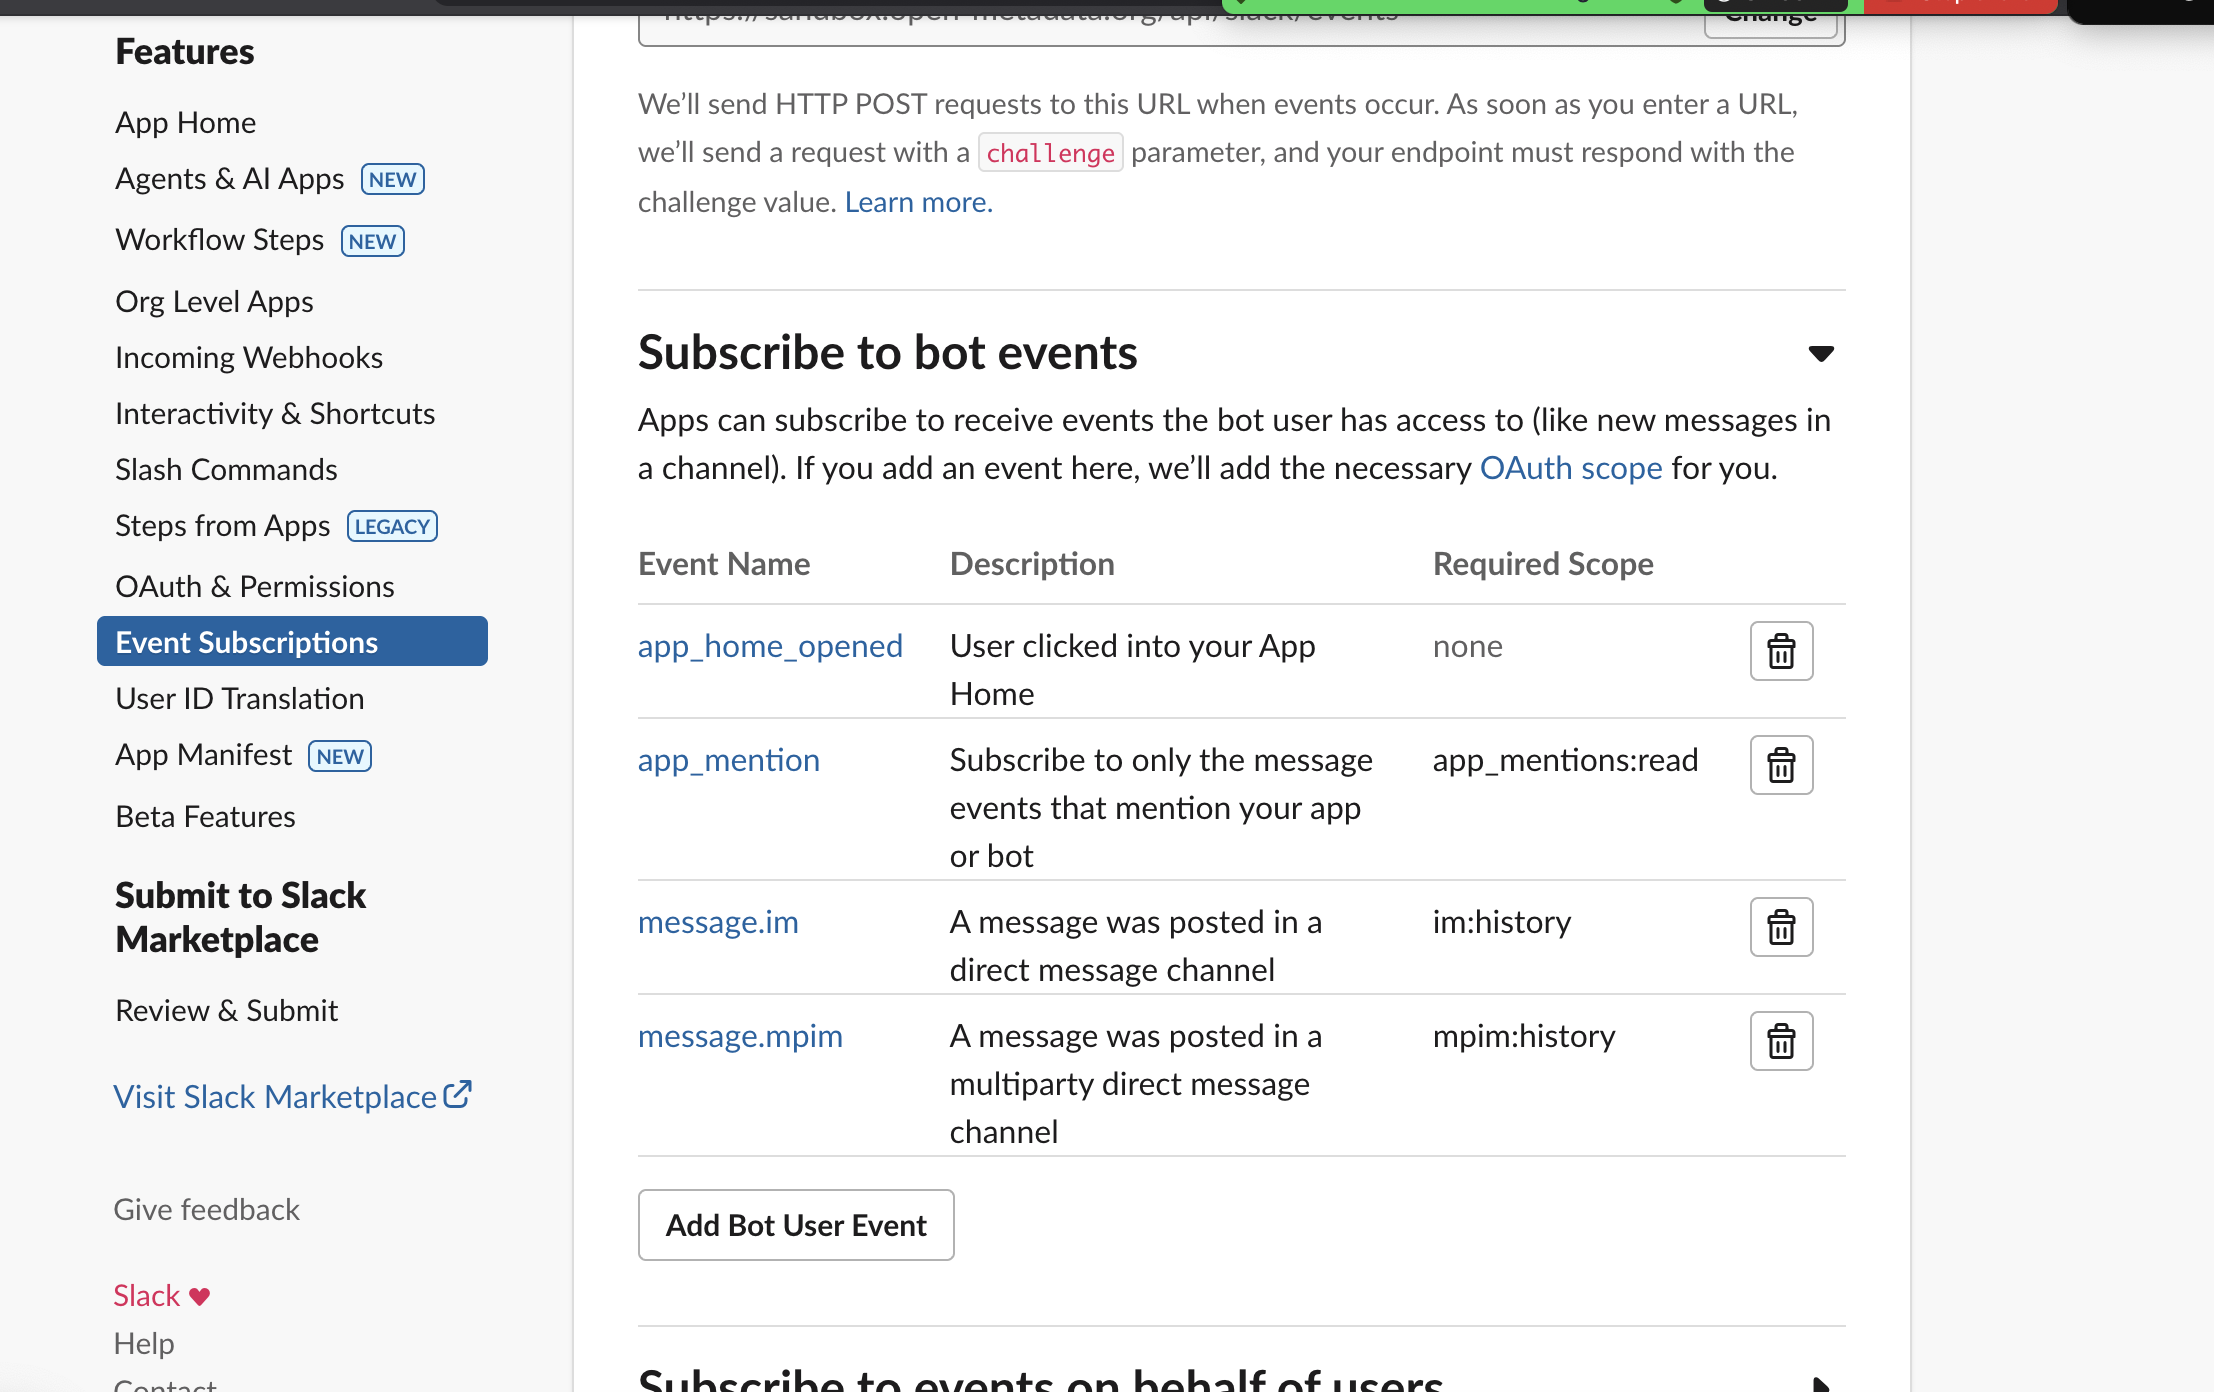
Subscribe to bot events
Add the following events (ensure corresponding scopes are already granted under OAuth permissions):
- app_home_opened – Triggered when a user clicks into your App Home (no additional scope needed).
- app_mention – Subscribes to messages that mention your app or bot (app_mentions:read scope required).
- message.im – Subscribes to messages in direct message channels (im:history scope required).
- message.mpim – Subscribes to messages in multi-party direct message channels (mpim:history scope required).
(Optional) Under Subscribe to events on behalf of users, click Add Workspace Event and select:
- message.im – Subscribes to messages posted in a direct message channel on behalf of users (im:history scope required).
Slack automatically adds the necessary scopes for any subscribed events if not already included.
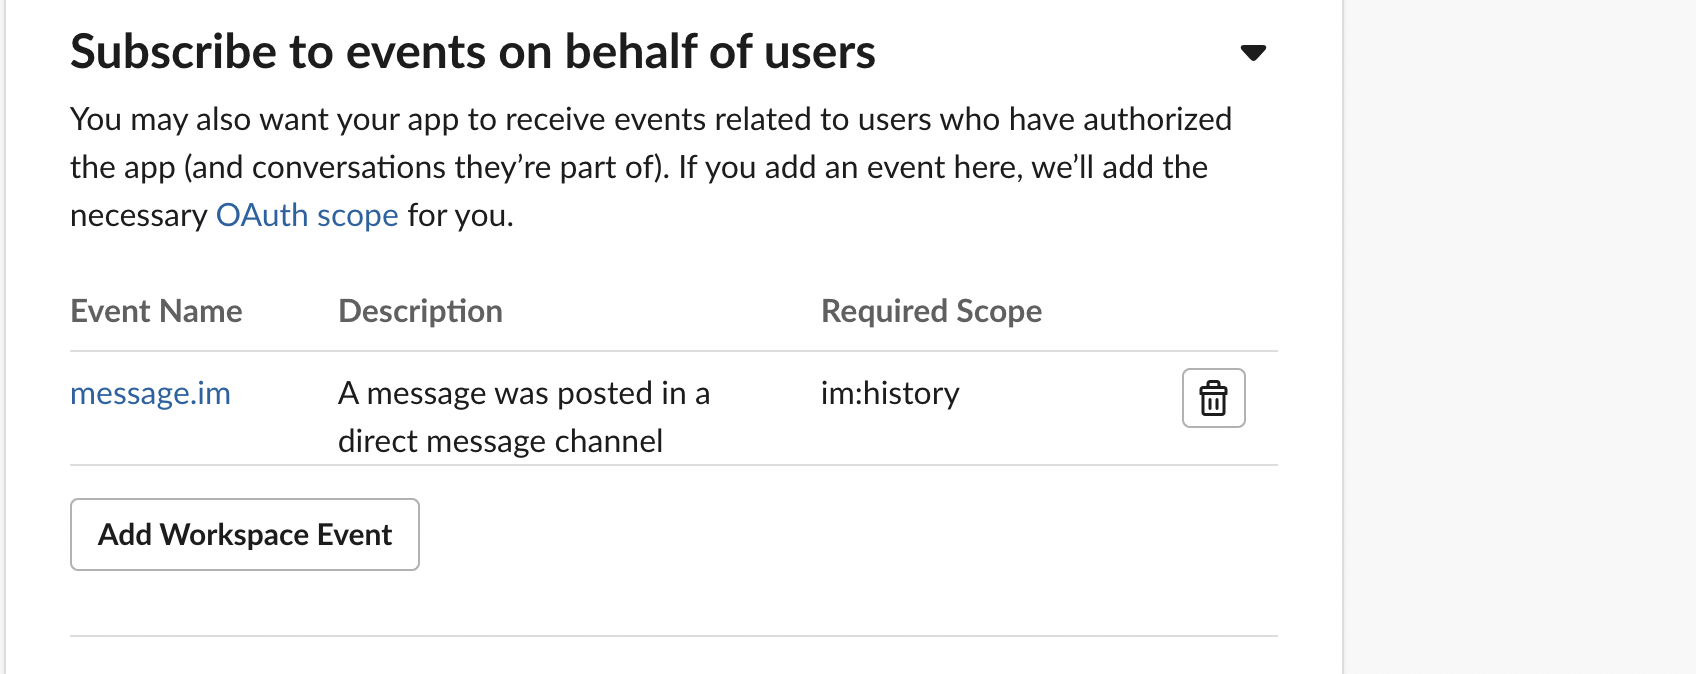
Subscribe to events on behalf of users
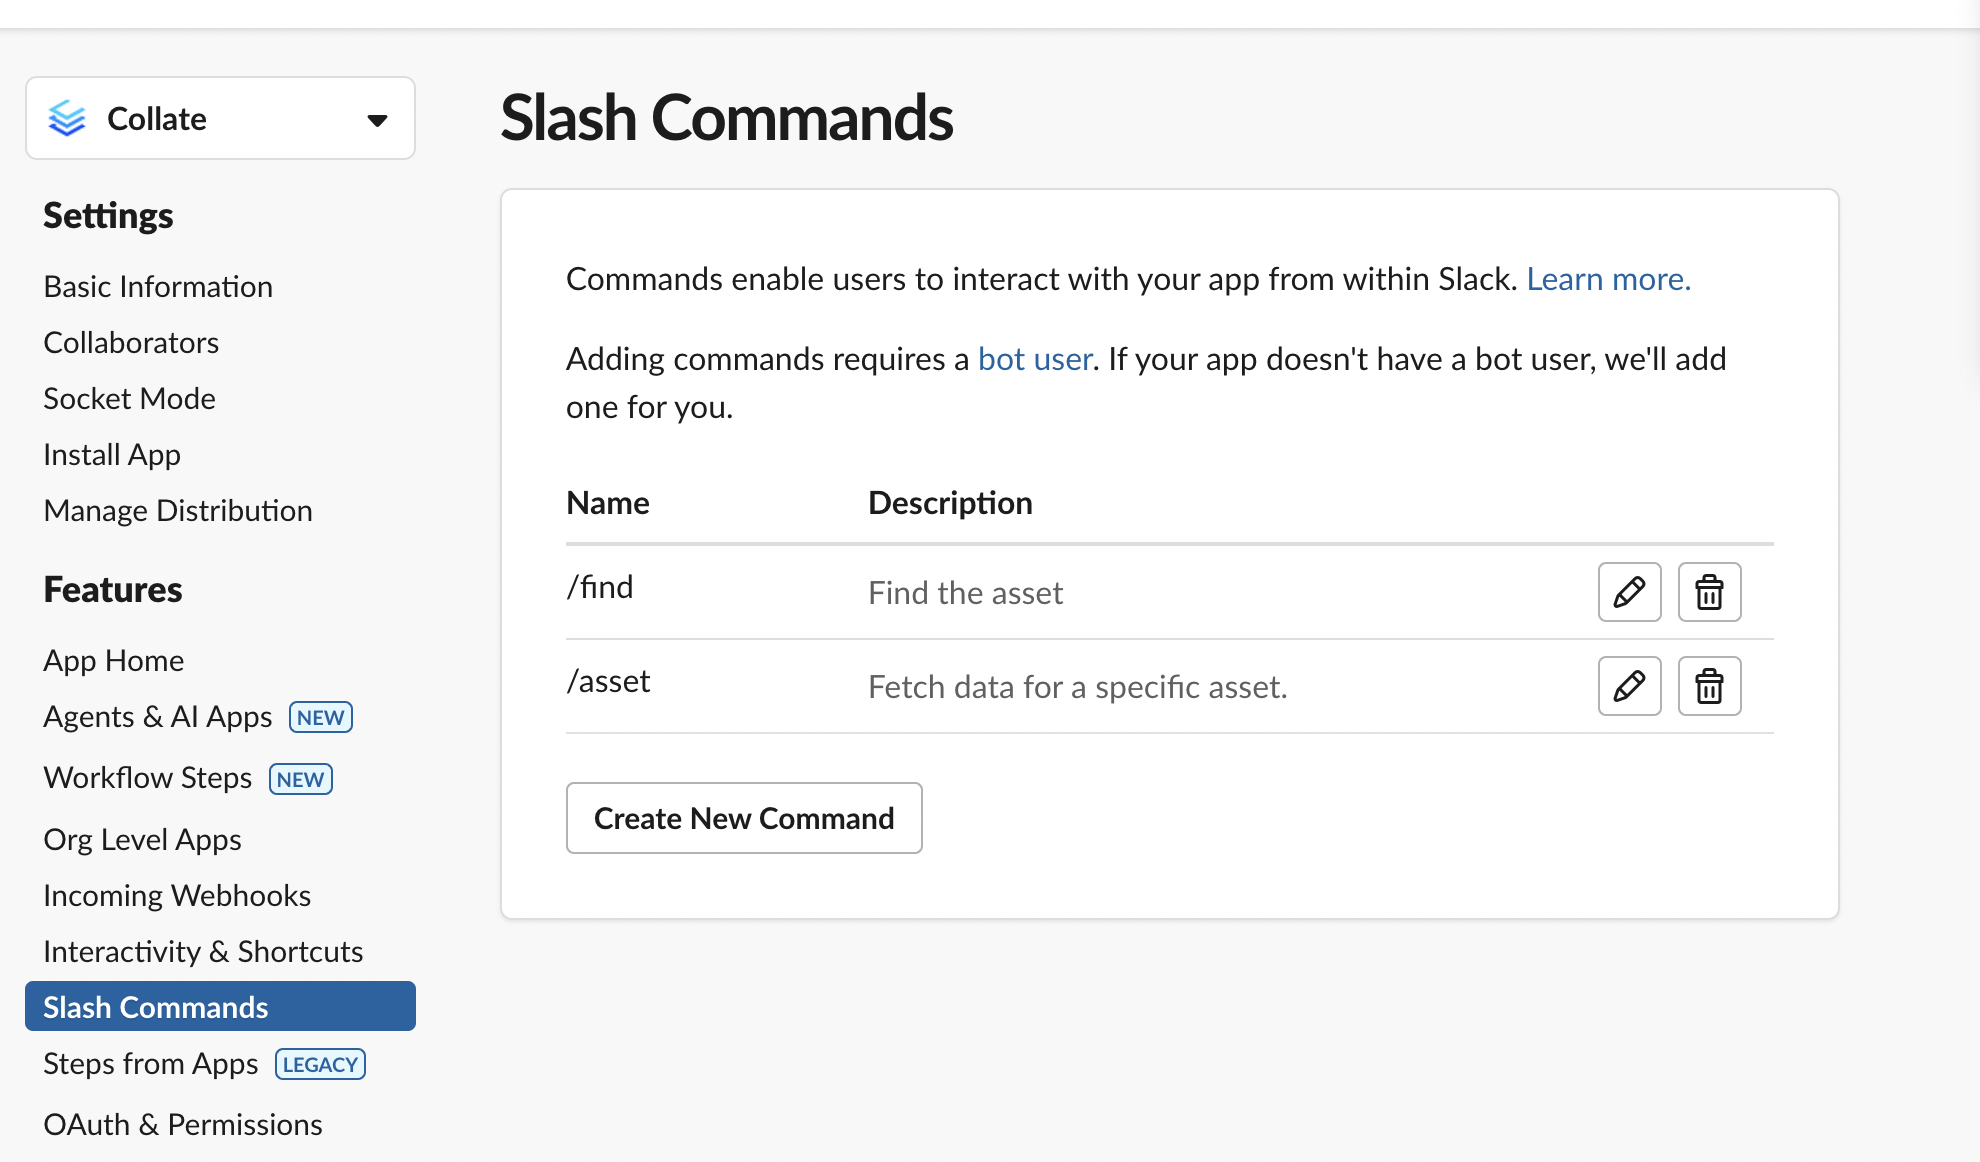
Configure Slash Commands
To enable users to interact with your app via custom commands in Slack:
- In the left-hand menu under Features, click on Slash Commands.
- Click Create New Command to define a new command, or edit an existing one.
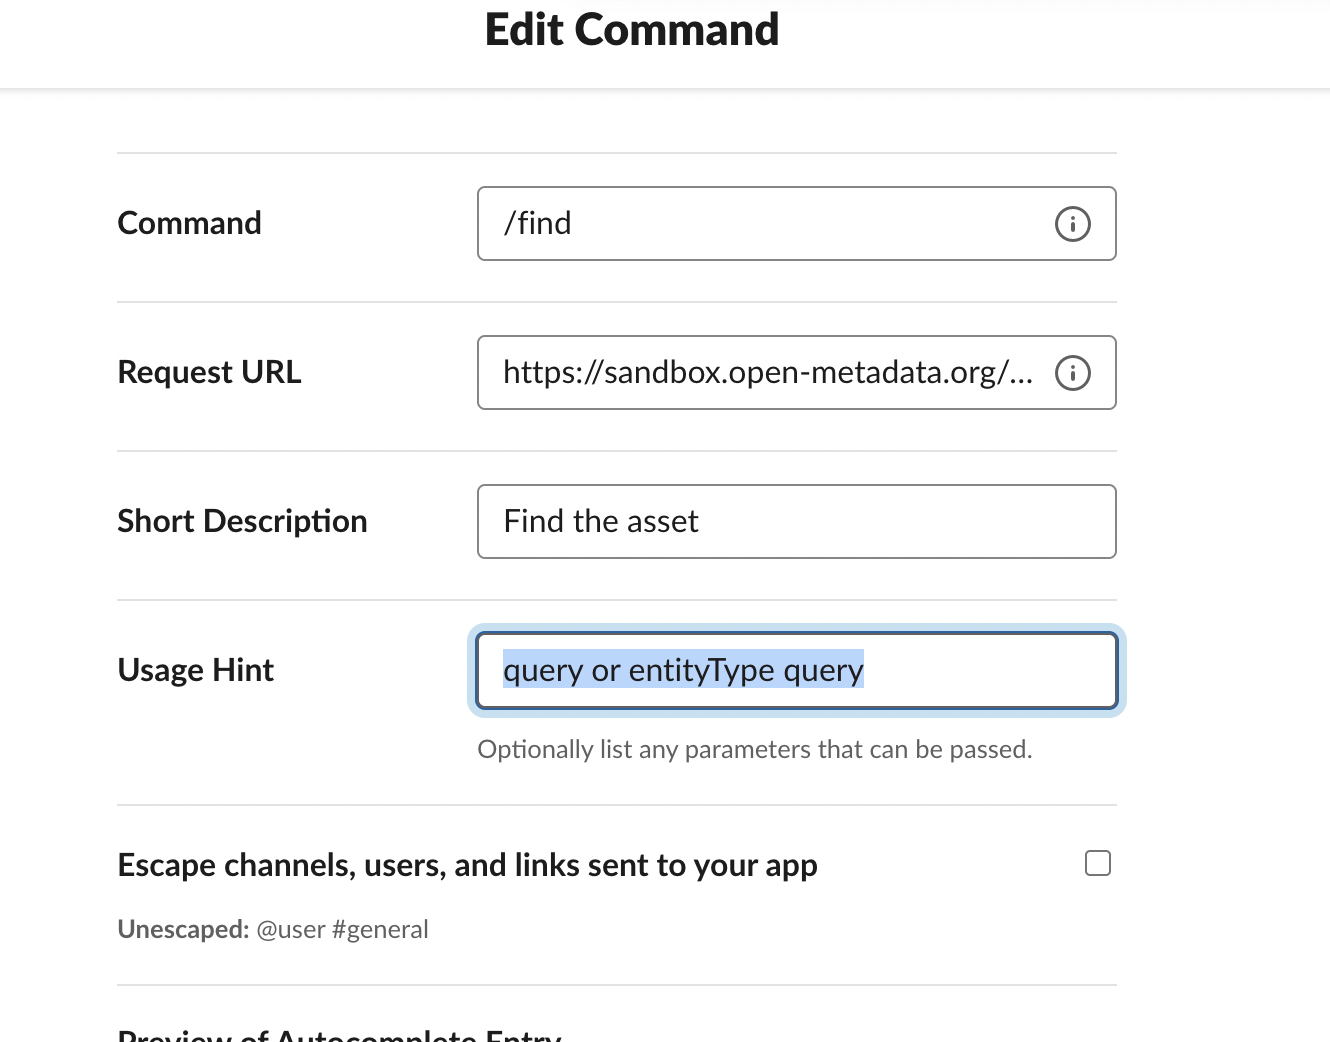
Create Edit New Command
Example Slash Commands
| Command | Description | Request URL | Usage Hint |
|---|---|---|---|
/find | Find the asset | https://sandbox.open-metadata.org/api/slack/command/find | query or entityType query |
/asset | Fetch data for a specific asset | https://sandbox.open-metadata.org/api/slack/command/asset | entityType fqn/id |
Slash Commands
For each command:
Command: Keyword users will type (e.g.,
/find).Request URL: The backend endpoint that processes the command.
Short Description: What the command does.
Usage Hint: Shows users how to pass parameters.
(Optional) Enable Escape channels, users, and links if you want Slack to escape mentions and links.
- Once created, the commands will appear in Slack's autocomplete suggestions when users start typing
/. - Authorize the permissions requested by the app.
- Once created, the commands will appear in Slack's autocomplete suggestions when users start typing
Install the App to Workspace
- Still in OAuth & Permissions, click Install to install App to your Workspace.

Configuration
- Authorize the permissions requested by the app.
After installation, you'll be redirected to the OAuth screen where your tokens will be displayed.
4. Copy the Tokens
- Bot User OAuth Token: Starts with
xoxb-... - User OAuth Token: Starts with
xoxp-...
Store these tokens securely and provide them in the Slack app configuration within Collate.
- Never expose your tokens publicly.
- Rotate tokens periodically.
- Use Slack's token rotation policy for better security.
For more information, refer to the Slack API documentation.