
Storage Services
This is the supported list of connectors for Storage Services:
ADLS
PROD

GCS

PROD

S3 Storage
PROD
Configuring the Ingestion
In any other connector, extracting metadata happens automatically. We have different ways to understand the information in the sources and send that to Collate. However, what happens with generic sources such as S3 buckets, or ADLS containers? In these systems we can have different types of information:- Unstructured data, such as images or videos,
- Structured data in single and independent files (which can also be ingested with the S3 Data Lake connector)
- Structured data in partitioned files, e.g.,
my_table/year=2022/...parquet,my_table/year=2023/...parquet, etc.
- We list the top-level containers (e.g., S3 buckets), and bring generic insights, such as size and number of objects.
- If there is an
openmetadata.jsonmanifest file present in the bucket root, we will ingest the informed paths as children of the top-level container. Let’s see how that works.
Collate Manifest
Our manifest file is defined as a JSON Schema, and can look like this:Global Manifest
You can also manage a single manifest file to centralize the ingestion process for any container, namedopenmetadata_storage_manifest.json.
You can also keep local manifests openmetadata.json in each container, but if possible, we will always try to pick up the global manifest during the ingestion.
Example
Let’s show an example on how the data process and metadata look like. We will work with S3, using a global manifest, and two buckets.S3 Data
In S3 we have:- We have a bucket
om-glue-testwhere ouropenmetadata_storage_manifest.jsonglobal manifest lives. - We have another bucket
collate-demo-storagewhere we want to ingest the metadata of 5 partitioned containers with different formats- The
cities_multiple_simplecontainer has a time partition (formatting just a date) and aStatepartition. - The
cities_multiplecontainer has aYearand aStatepartition. - The
citiescontainer is only partitioned byState. - The
transactions_separatorcontainer contains multiple CSV files separated by;. - The
transactionscontainer contains multiple CSV files separated by,.
- The
Global Manifest
Our global manifest looks like follows:- Where to find the data for each container we want to ingest via the
dataPath, - The
format, - Indication if the data has sub partitions or not (e.g.,
StateorYear), - The
containerName, so that the process knows in which S3 bucket to look for this data.
Source Config
To prepare the ingestion, we will:- Set the
sourceConfigto include only the containers we are interested in. - Set the
storageMetadataConfigSourcepointing to the global manifest stored in S3, specifying the container name asom-glue-test.
metadata CLI via metadata ingest -c <path to yaml>.
Checking the results
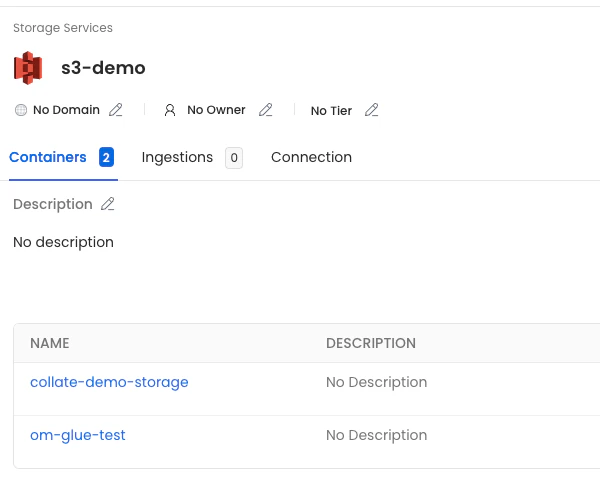
Once the ingestion process runs, we’ll see the following metadata: First, the service we calleds3-demo, which has the two buckets we included in the filter.
collate-demo-storage container, we’ll see all the children defined in the manifest.
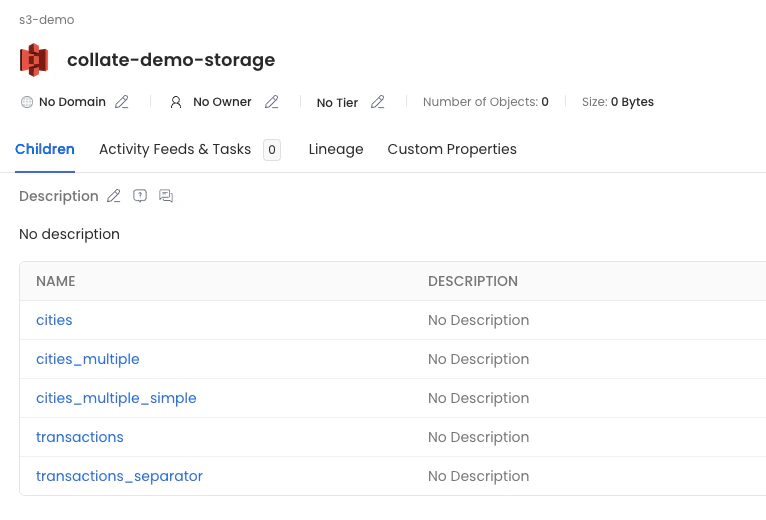
- cities: Will show the columns extracted from the sampled parquet files, since there is no partition columns specified.
- cities_multiple: Will have the parquet columns and the
YearandStatecolumns indicated in the partitions. - cities_multiple_simple: Will have the parquet columns and the
Statecolumn indicated in the partition. - transactions and transactions_separator: Will have the CSV columns.
Configure Metadata Agent and Schedule Ingestion
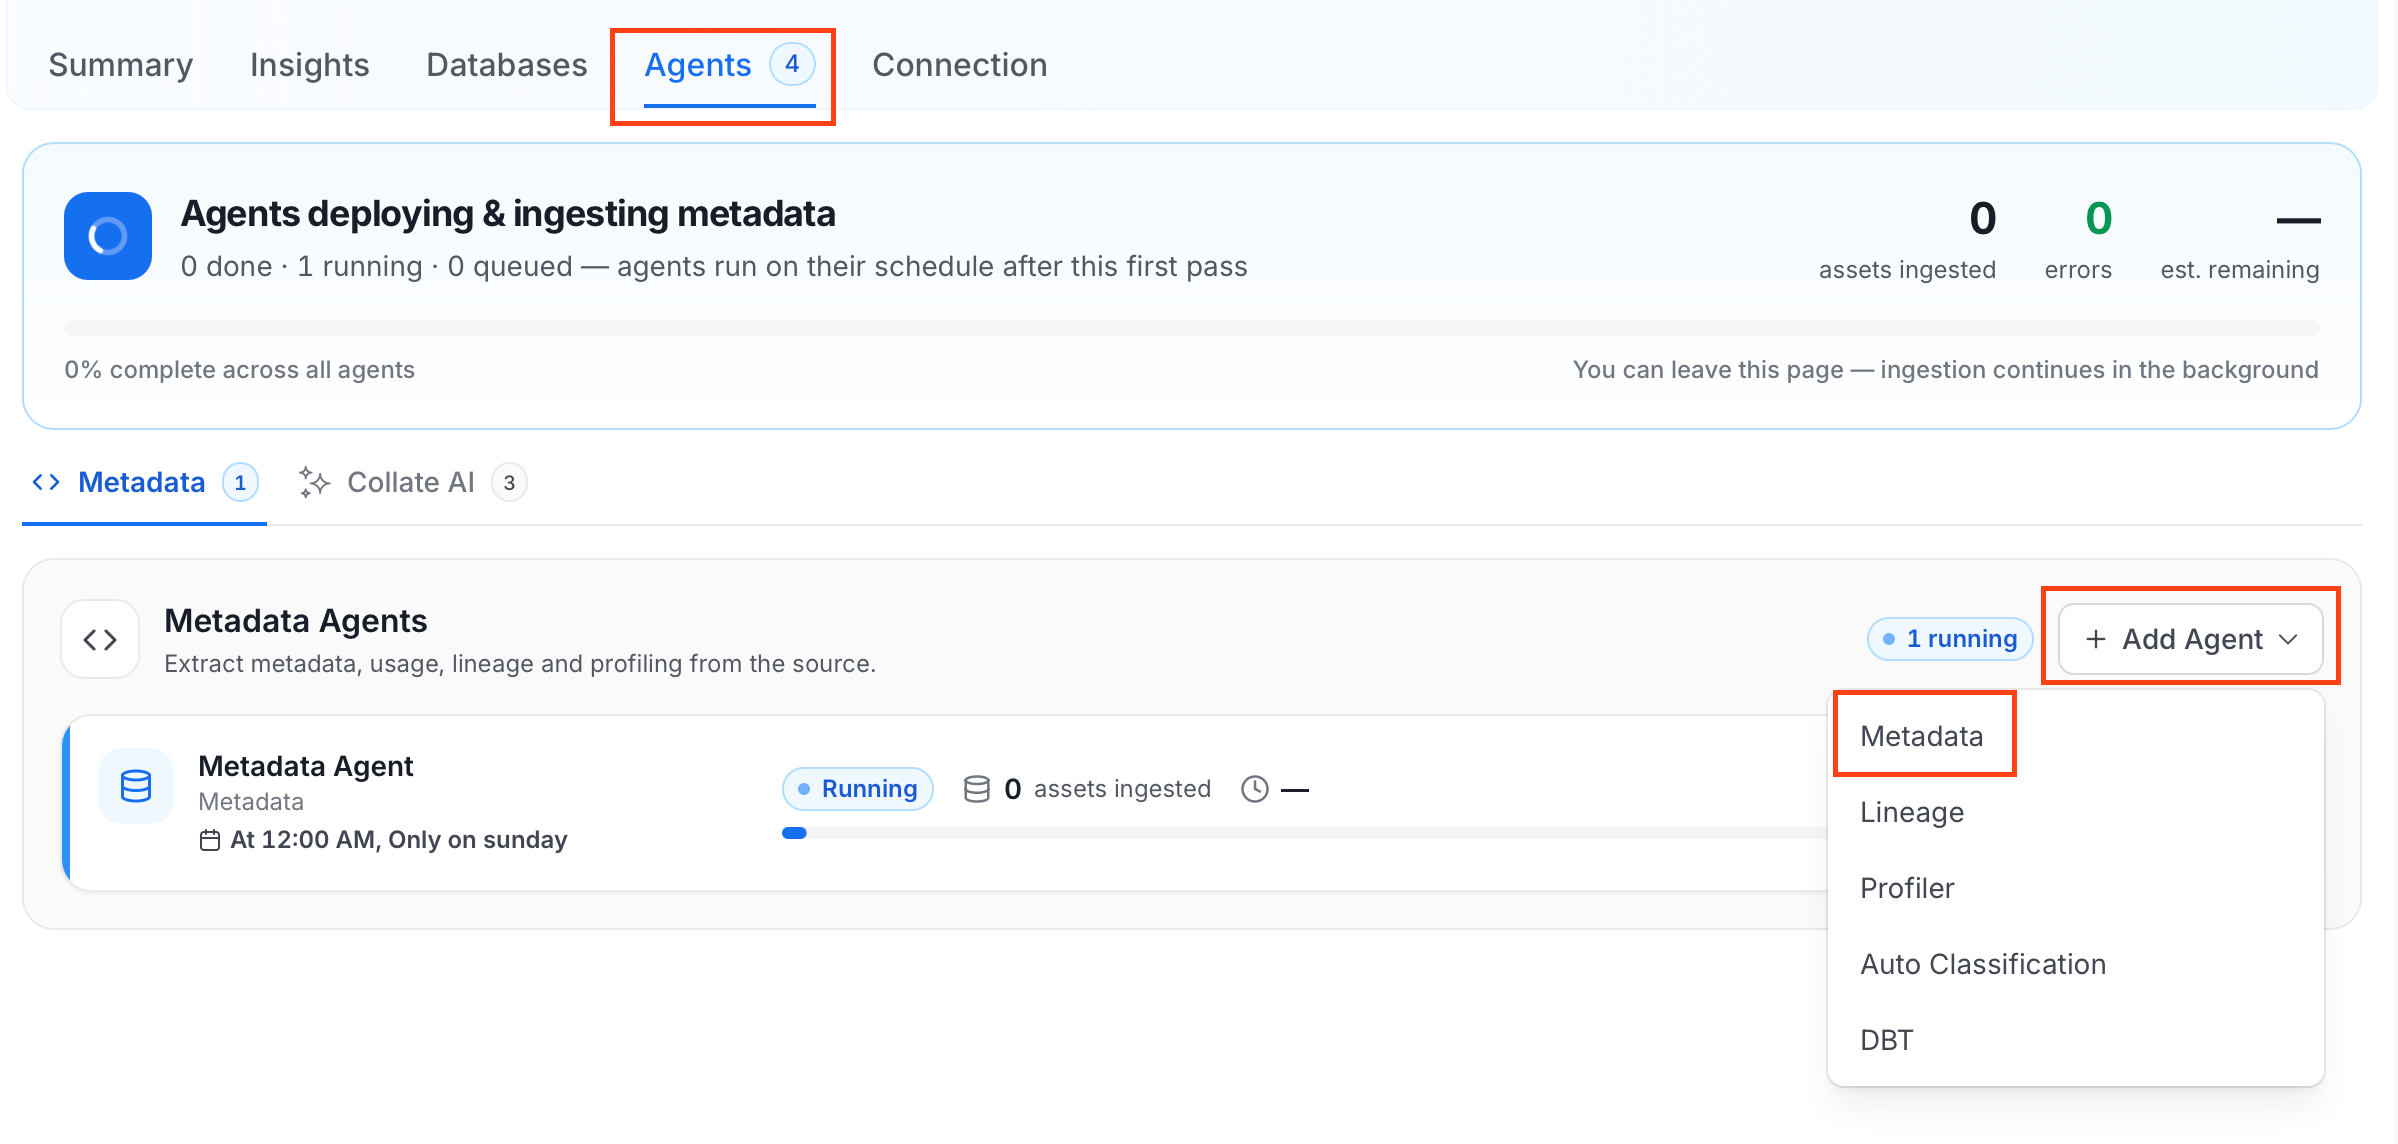
The Metadata Agent extracts containers, objects, and other structural metadata from your source and keeps your Collate catalog in sync. It powers discovery, lineage, and governance across your data assets. When you click Create & Deploy, Collate automatically deploys a Metadata Agent for this service and triggers the first ingestion run. View its status and run history from the Agents tab on the service detail page. To configure the additional Metadata Agent and schedule ingestion, follow these steps:- In the left navigation, click Connections and select your service.
- Click the Agents tab.
-
Click Add Agent and select Metadata from the dropdown.
-
On the Configure Ingestion page, do the following and click Next.
-
Name this Ingestion: Enter a unique, recognizable name for this ingestion pipeline.

- Filter Patterns: Apply include or exclude rules to scope which containers this agent ingests. These follow the same filter options described in Step 5.
-
Scope & Behaviour: Control how the agent handles metadata during ingestion. Toggle each option on or off based on your needs:
-
Name this Ingestion: Enter a unique, recognizable name for this ingestion pipeline.
-
On the Schedule Interval page, set when the agent runs:
- Schedule: Choose a preset interval (Hourly, Daily, Weekly, Monthly) or enter a custom cron expression.
- On-Demand: No automatic schedule; trigger the agent manually when needed.
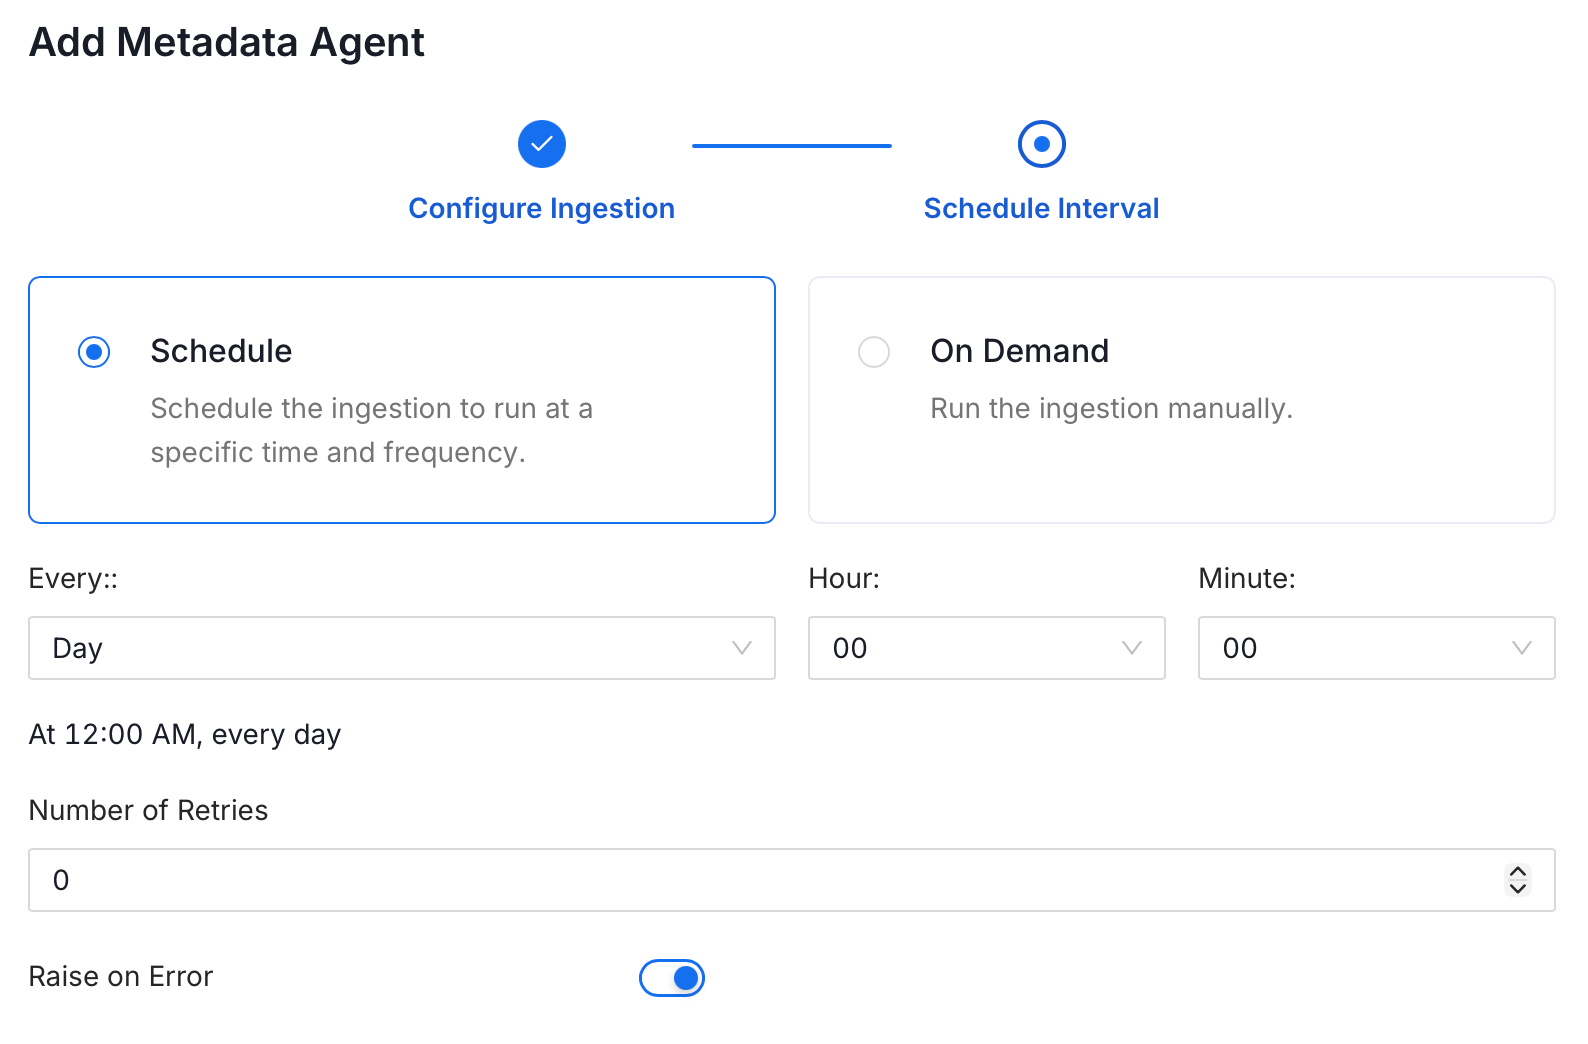
- Click Add to deploy the agent.