> ## Documentation Index
> Fetch the complete documentation index at: https://docs.getcollate.io/llms.txt
> Use this file to discover all available pages before exploring further.
# Alation Connector | Official Documentation
> Connect Alation to Collate seamlessly with our comprehensive connector guide. Learn setup, configuration, and metadata synchronization steps.
export const MetadataIngestionUi = ({connector, selectServicePath, addNewServicePath, serviceConnectionPath}) => {
return <>
To ingest metadata from your sources, you need to create a service connection.
The service connects your source system with Collate. Once you create
a service, you can use it to configure your ingestion workflows.
To create a service connection and ingest your metadata, follow the steps below:
-
On the left navigation bar, click Settings.
-
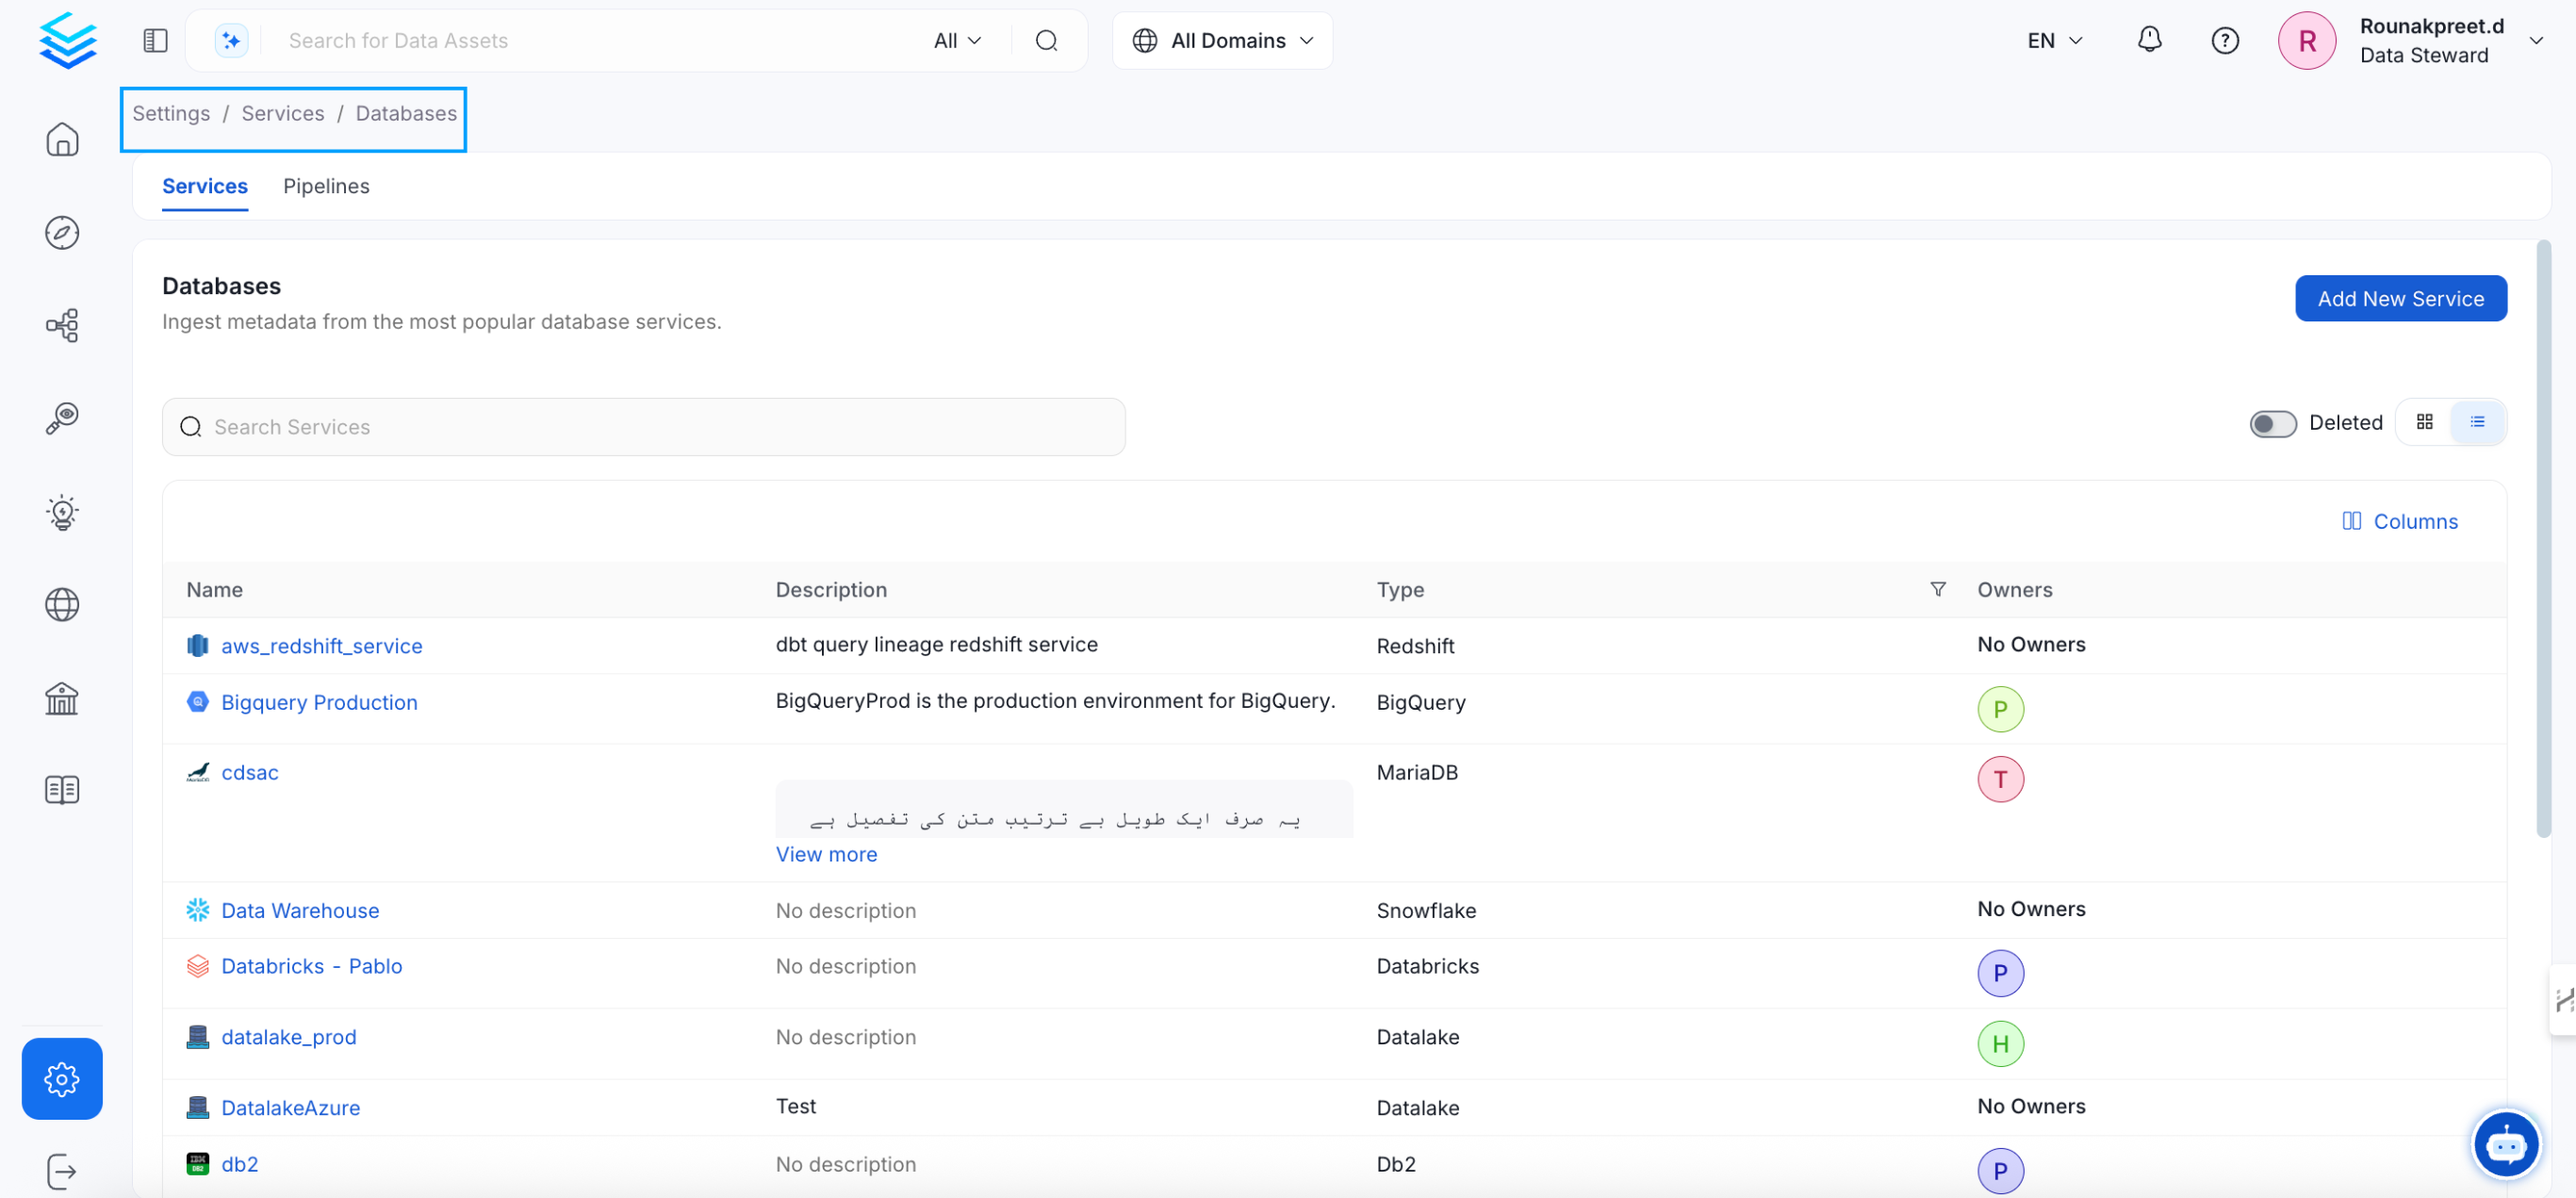
On the next page, click Services, and then select the service.
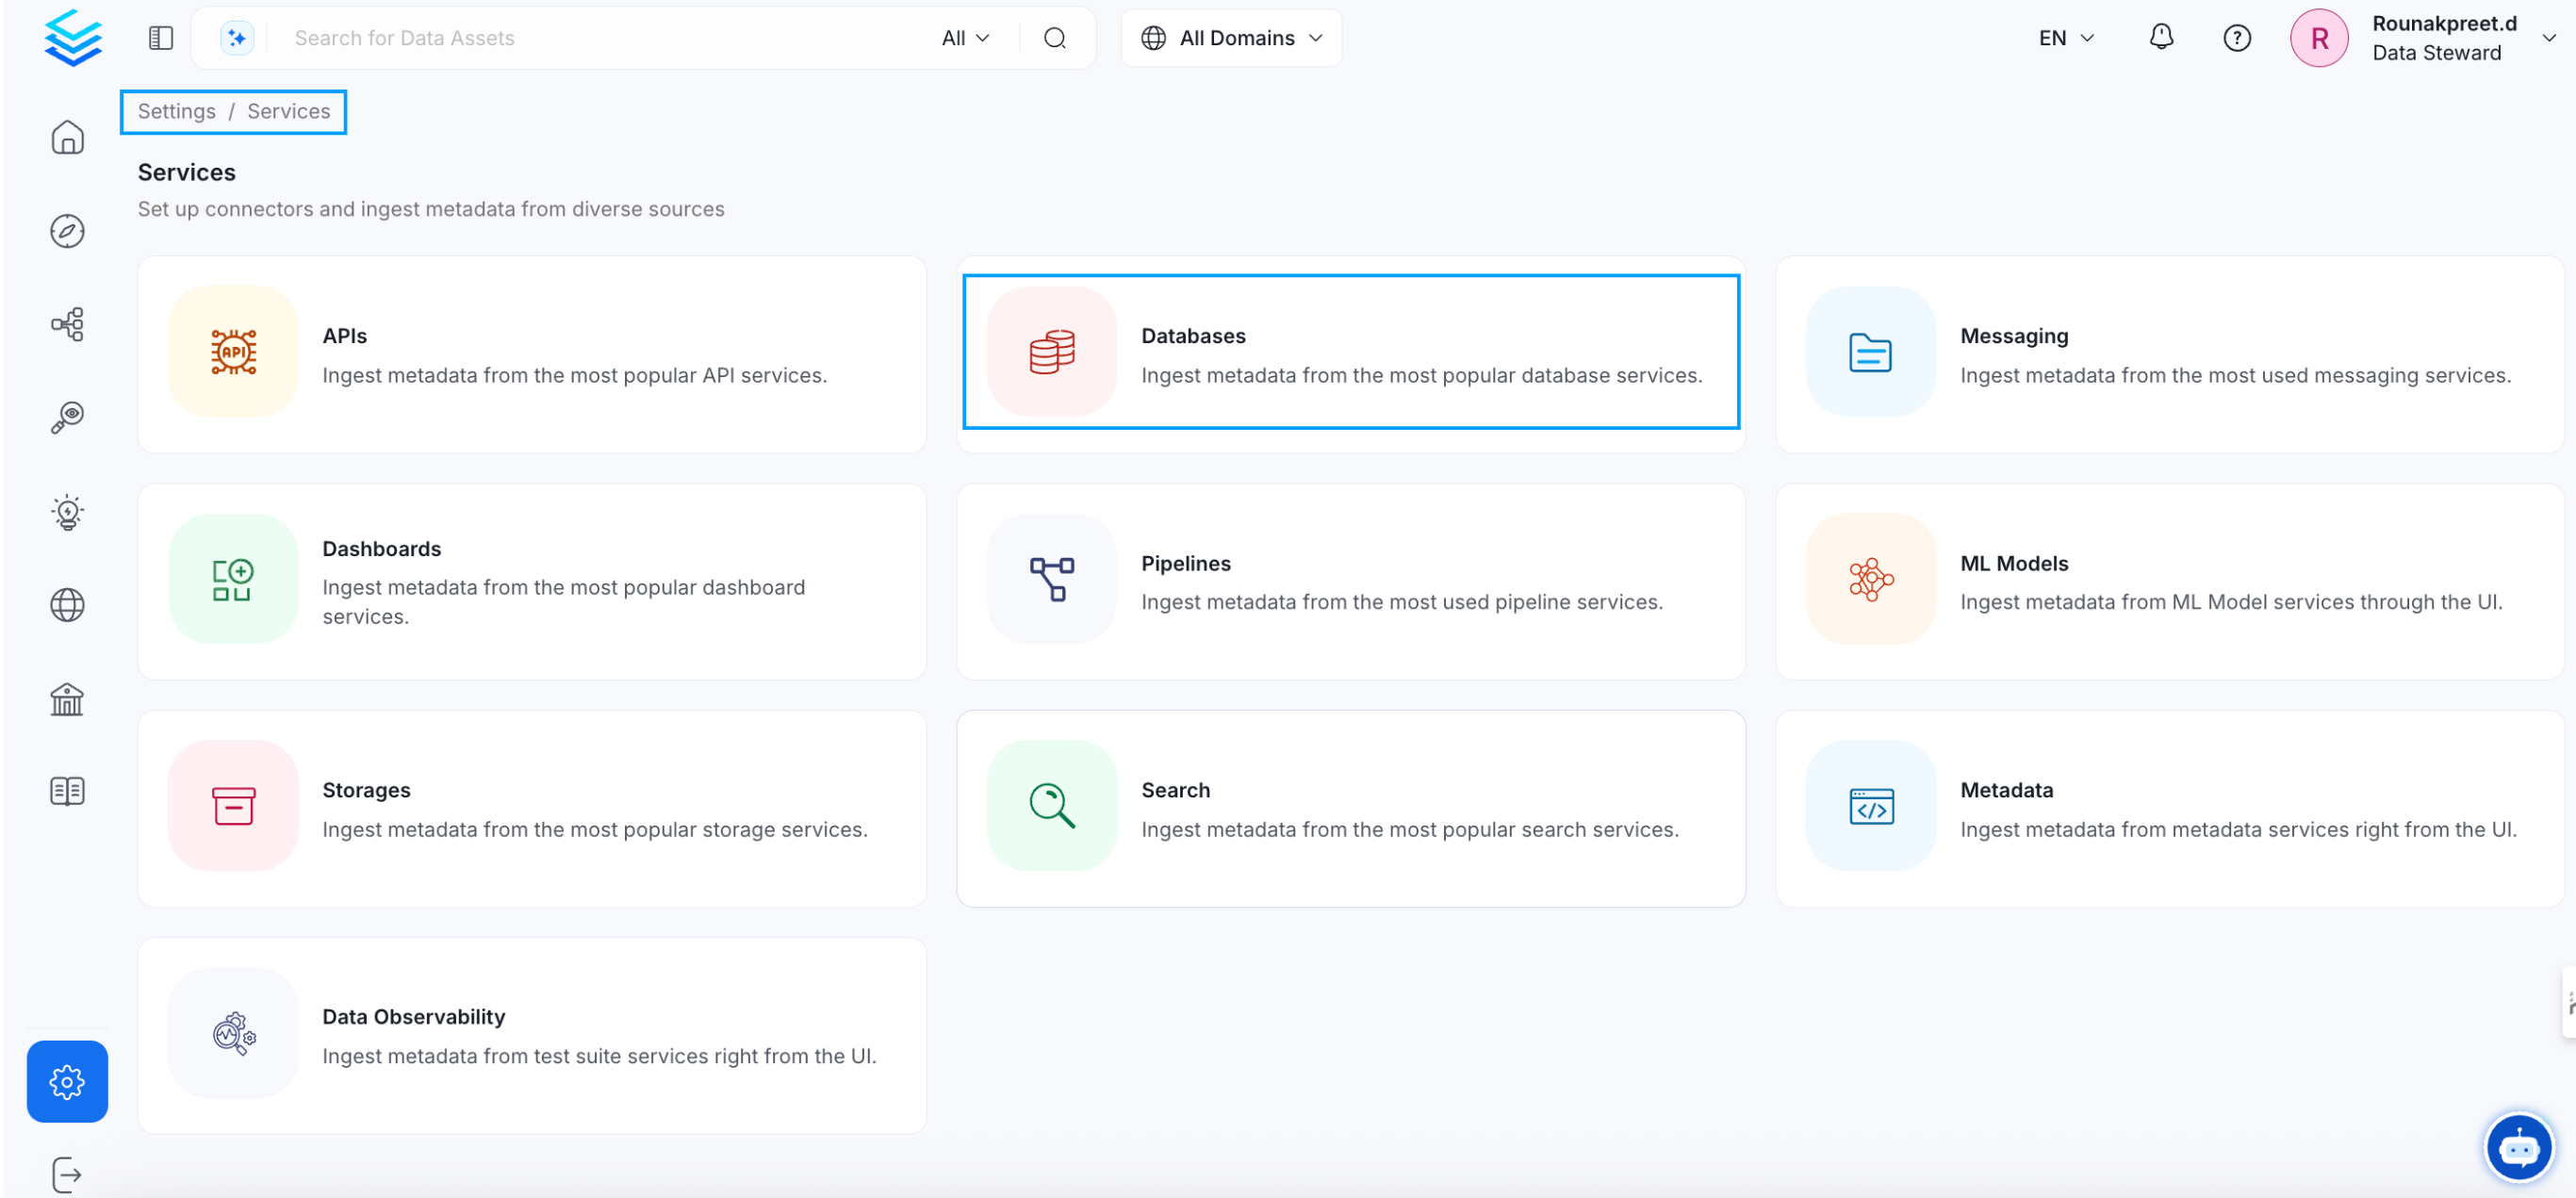
To add a new service connection, click Add New Service.
 Select {connector} as the service type and click Next.
{selectServicePath &&
Select {connector} as the service type and click Next.
{selectServicePath &&  }
Enter a unique, descriptive Service Name and Description.
}
Enter a unique, descriptive Service Name and Description.
- Service Name: Collate identifies services by their service name. Enter a name that distinguishes this deployment from other services, including other {connector} services you are ingesting metadata from.
The service name cannot be changed after it is set.
{addNewServicePath &&  }
Set up the connection settings required for {connector}.
}
Set up the connection settings required for {connector}.
Configure the following connection options to set up the service and start ingesting metadata from your sources. The right-hand panel displays help documentation for the selected connection type in the product UI
{serviceConnectionPath &&  }
;
};
export const ConnectorDetailsHeader = ({name, icon, stage, availableFeatures, unavailableFeatures = [], availableFeaturesCollate = []}) => {
const showSubHeading = availableFeatures?.length > 0 || unavailableFeatures?.length > 0 || availableFeaturesCollate?.length > 0;
const totalAvailableFeatures = [...availableFeatures || [], ...availableFeaturesCollate || []];
return
}
;
};
export const ConnectorDetailsHeader = ({name, icon, stage, availableFeatures, unavailableFeatures = [], availableFeaturesCollate = []}) => {
const showSubHeading = availableFeatures?.length > 0 || unavailableFeatures?.length > 0 || availableFeaturesCollate?.length > 0;
const totalAvailableFeatures = [...availableFeatures || [], ...availableFeaturesCollate || []];
return
{icon &&
}
{name}
{stage}
{showSubHeading &&
Feature List
{totalAvailableFeatures.map(feature =>
✓ {feature}
)}
{unavailableFeatures.map(feature =>
✕ {feature}
)}
}
;
};
In this section, we provide guides and references to use the Alation connector.
Configure and schedule Alation metadata workflow from the Collate UI:
* [Requirements](#requirements)
* [Data Mapping and Assumptions](#data-mapping-and-assumptions)
* [Metadata Ingestion](#metadata-ingestion)
* [Troubleshooting](/connectors/metadata/alation/troubleshooting)
## How to Run the Connector Externally
To run the Ingestion via the UI you'll need to use the OpenMetadata Ingestion Container, which comes shipped with
custom Airflow plugins to handle the workflow deployment.
If, instead, you want to manage your workflows externally on your preferred orchestrator, you can check
the following docs to run the Ingestion Framework **anywhere**.
Get more information about running the Ingestion Framework Externally
## Requirements
Follow the official documentation to generate an API Access Token from [here](https://developer.alation.com/dev/docs/authentication-into-alation-apis#create-an-api-access-token).
## Data Mapping and Assumptions
Following entities are supported and will be mapped to the OpenMetadata entities as shown below.
| Alation Entity | OpenMetadata Entity |
| :--------------------------- | :------------------------ |
| Data Source (OCF and Native) | Database Service |
| Data Source (OCF and Native) | Database |
| Schema | Schema |
| Table | Table |
| Columns | Columns |
| Custom Fields | Custom Properties |
| Tags | Tags |
| BI Servers | Dashboard Services |
| Dashboard DataSource | Dashboard DataModel |
| Folder | Dashboard |
| Report | Chart |
| Users/Groups | Users/Teams |
| Domains/Subdomains | Domains/Subdomains |
| Knowledge Articles | Knowledge Center Articles |
* Since Alation does not have a concept of a Service entity, the Data Sources (OCF and Native) will be mapped to Database Service and Database in OpenMetadata. Hence, for each Data Source in Alation, there will be one Database Service and one Database in OpenMetadata.
* Custom fields will have a 1:1 mapping for all the entities except for Columns since OpenMetadata does not support custom properties for columns.
* Alation has two fields for descriptions i.e. `descriptions` and `comments`. These fields will be combined under one field `description` in OpenMetadata for all the entities.
* Utilize the databaseFilterPattern (datasource in Alation), schemaFilterPattern, and tableFilterPattern to apply filters to Alation entities. Provide the `ids` of the datasource, schemas, and tables for the Alation entities in the respective fields.
## Metadata Ingestion
## Connection Options
**hostPort**: Host and port of the Alation instance.
```bash theme={null}
host and port (https://xxxx.alationcloud.com:443)
```
**authType**: Following authentication types are supported:
1. **Basic Authentication**:
We'll use the user credentials to generate the access token required to authenticate Alation APIs
* **username**: Username of the user.
* **password**: Password of the user.
2. **Access Token Authentication**:
The access token created using the steps mentioned [here](https://developer.alation.com/dev/docs/authentication-into-alation-apis#create-an-api-access-token) can directly be entered. We'll use that directly to authenticate the Alation APIs
* **accessToken**: Generated access token
#### For Alation backend database Connection:
Alation APIs do not provide some of the metadata. We extract this metadata directly from Alation's backend database by querying the tables.
Note that this is an optional configuration, and if it is not provided, primary metadata will still be ingested.
Below is the metadata fetched from the Alation database:
`1. User and Group Relationships`
Choose either postgres or mysql connection depending on the db:
1. Postgres Connection
* **username**: Specify the user to connect to Postgres. Make sure the user has select privileges on the tables of the Alation schema.
**password**: Password to connect to Postgres.
**hostPort**: Enter the fully qualified hostname and port number for your Postgres deployment in the Host and Port field.
* **database**: Initial Postgres database to connect to. Specify the name of the database associated with the Alation instance.
1. MySQL Connection
* **username**: Specify the user to connect to MySQL. Make sure the user has select privileges on the tables of the Alation schema.
**password**: Password to connect to MySQL.
**hostPort**: Enter the fully qualified hostname and port number for your MySQL deployment in the Host and Port field.
* **databaseSchema**: Initial MySQL database to connect to. Specify the name of the database schema associated with the Alation instance.
**projectName**: Project name can be anything, for example `Prod` or `Demo`. It will be used while creating the tokens.
**paginationLimit**: Pagination limit used for Alation APIs pagination. By default is set to 10.
**includeUndeployedDatasources**: Specifies if undeployed datasources should be included while ingesting. By default is set to `false`.
**includeHiddenDatasources**: Specifies if hidden datasources should be included while ingesting. By default is set to `false`.
**ingestUsersAndGroups**: Specifies if users and groups should be included while ingesting. By default is set to `true`.
**ingestKnowledgeArticles**: Specifies if knowledge articles should be included while ingesting. By default is set to `true`.
**ingestDatasources**: Specifies if databases, schemas and tables should be included while ingesting. By default is set to `true`.
**ingestDomains**: Specifies if domains and subdomains should be included while ingesting. By default is set to `true`.
**ingestDashboards**: Specifies if BI sources and dashboards should be included while ingesting. By default is set to `true`.
**alationTagClassificationName**: Specify the classification name under which the tags from Alation will be created in OpenMetadata. By default, it is set to `alationTags`.
**connectionArguments**: These are additional parameters for Alation. If not specified the ingestion will use the predefined pagination logic.
The following arguments are intended to be used in conjunction and are specifically for Alation DataSource APIs:
* skip: This parameter determines the count of records to bypass at the start of the dataset. When set to 0, as in this case, it means that no records will be bypassed. If set to 10, it will bypass the first 10 records.
* limit: This argument specifies the maximum number of records to return. Here, it's set to 10, meaning only the first 10 records will be returned.
To perform incremental ingestion, these arguments should be used together. For instance, if there are a total of 30 datasources in Alation, the ingestion can be configured to execute three times, with each execution ingesting 10 datasources.
* 1st execution: `{"skip": 0, "limit": 10}`
* 2nd execution: `{"skip": 10, "limit": 10}`
* 3rd execution: `{"skip": 20, "limit": 10}`
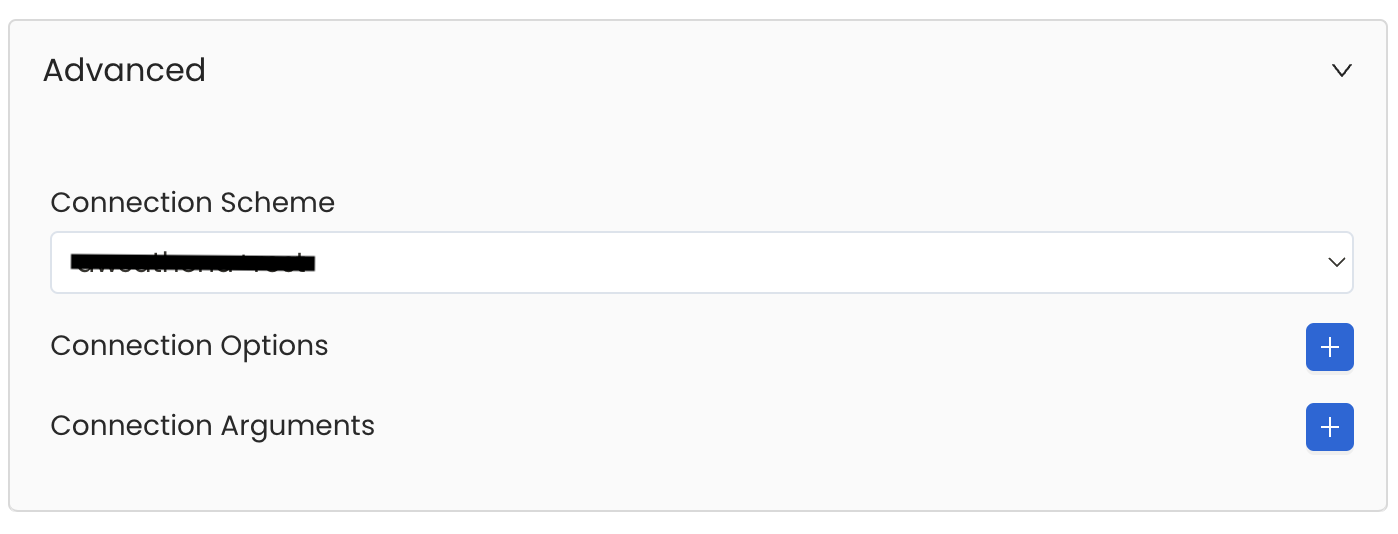
Database Services have an Advanced Configuration section, where you can pass extra arguments to the connector
and, if needed, change the connection Scheme.
This would only be required to handle advanced connectivity scenarios or customizations.
* **Connection Options (Optional)**: Enter the details for any additional connection options that can be sent to database during the connection. These details must be added as Key-Value pairs.
* **Connection Arguments (Optional)**: Enter the details for any additional connection arguments such as security or protocol configs that can be sent during the connection. These details must be added as Key-Value pairs.
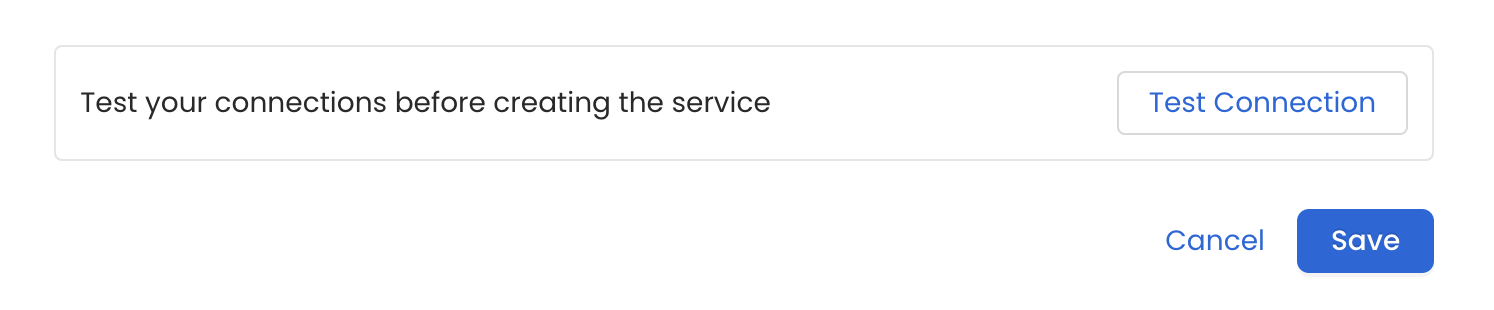
 Once the credentials have been added, click on *Test Connection* and *Save* the changes.
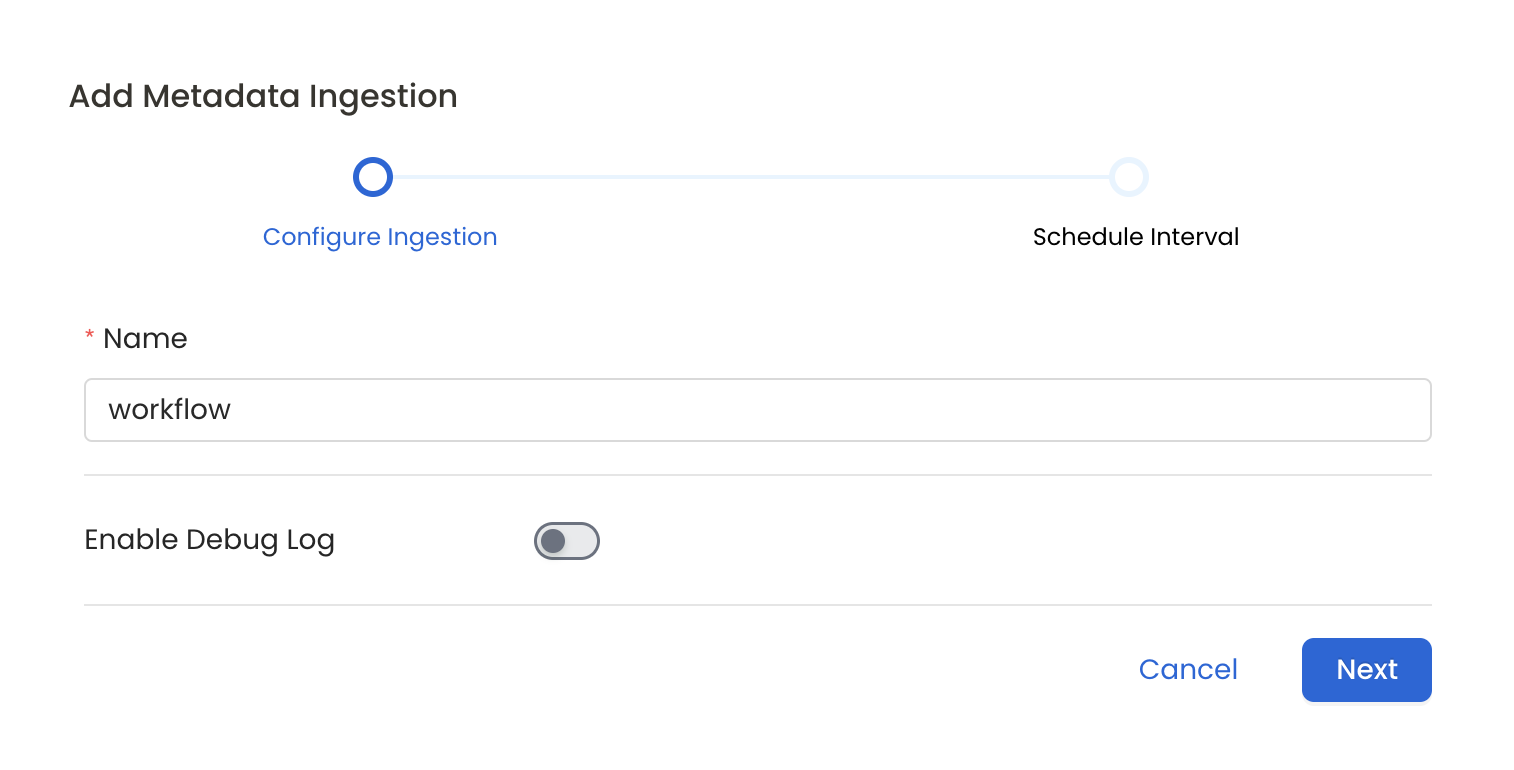
 In this step we will configure the metadata ingestion pipeline,
Please follow the instructions below
In this step we will configure the metadata ingestion pipeline,
Please follow the instructions below
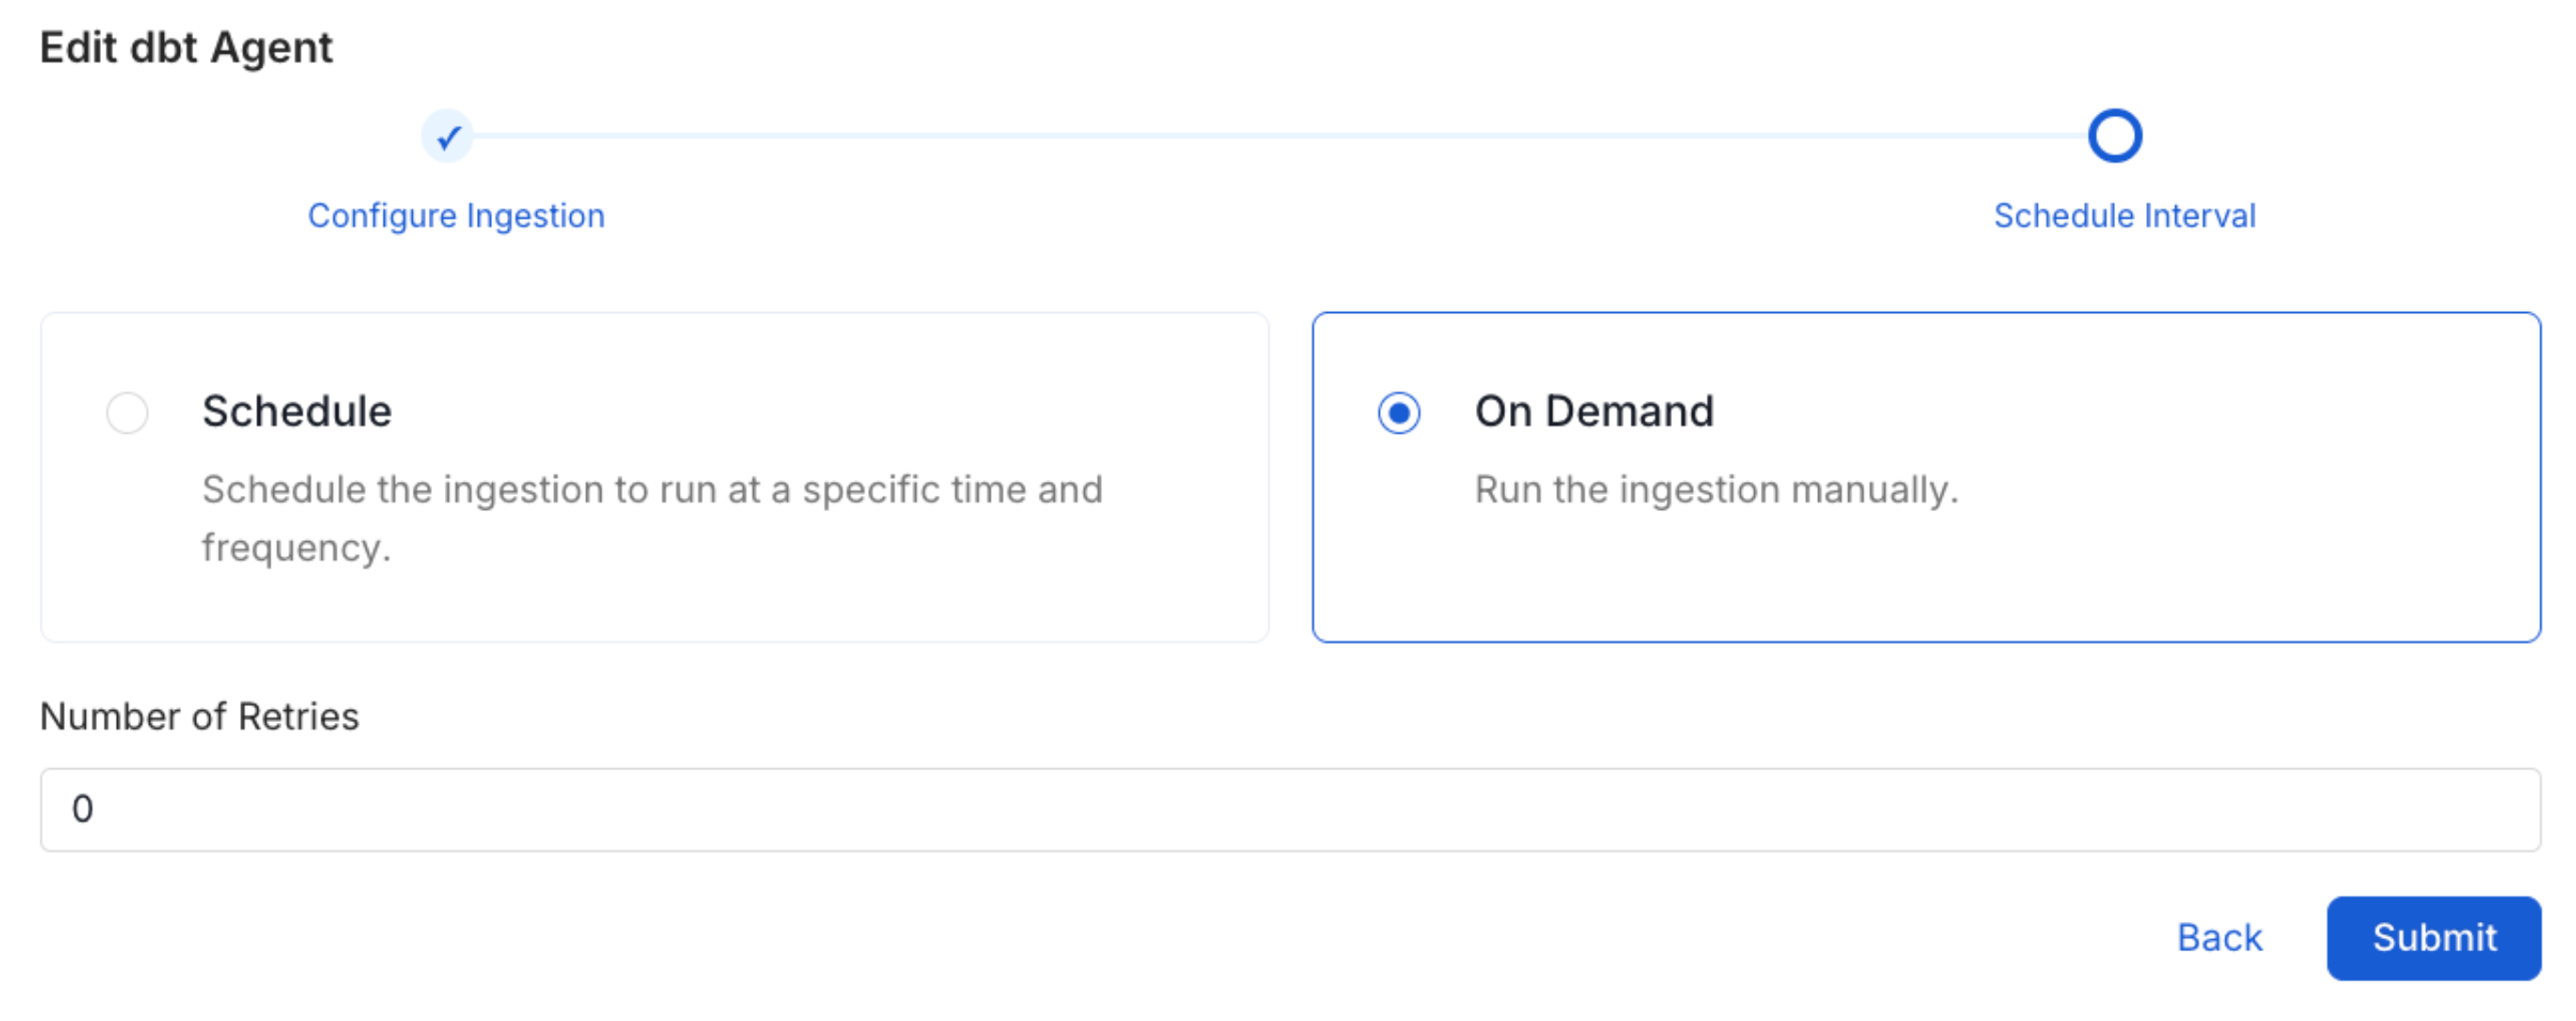
 Scheduling can be set up at an hourly, daily, weekly, or manual cadence. The
timezone is in UTC. Select a Start Date to schedule for ingestion. It is
optional to add an End Date.
Review your configuration settings. If they match what you intended,
click Deploy to create the service and schedule metadata ingestion.
If something doesn't look right, click the Back button to return to the
appropriate step and change the settings as needed.
After configuring the workflow, you can click on Deploy to create the
pipeline.
Scheduling can be set up at an hourly, daily, weekly, or manual cadence. The
timezone is in UTC. Select a Start Date to schedule for ingestion. It is
optional to add an End Date.
Review your configuration settings. If they match what you intended,
click Deploy to create the service and schedule metadata ingestion.
If something doesn't look right, click the Back button to return to the
appropriate step and change the settings as needed.
After configuring the workflow, you can click on Deploy to create the
pipeline.
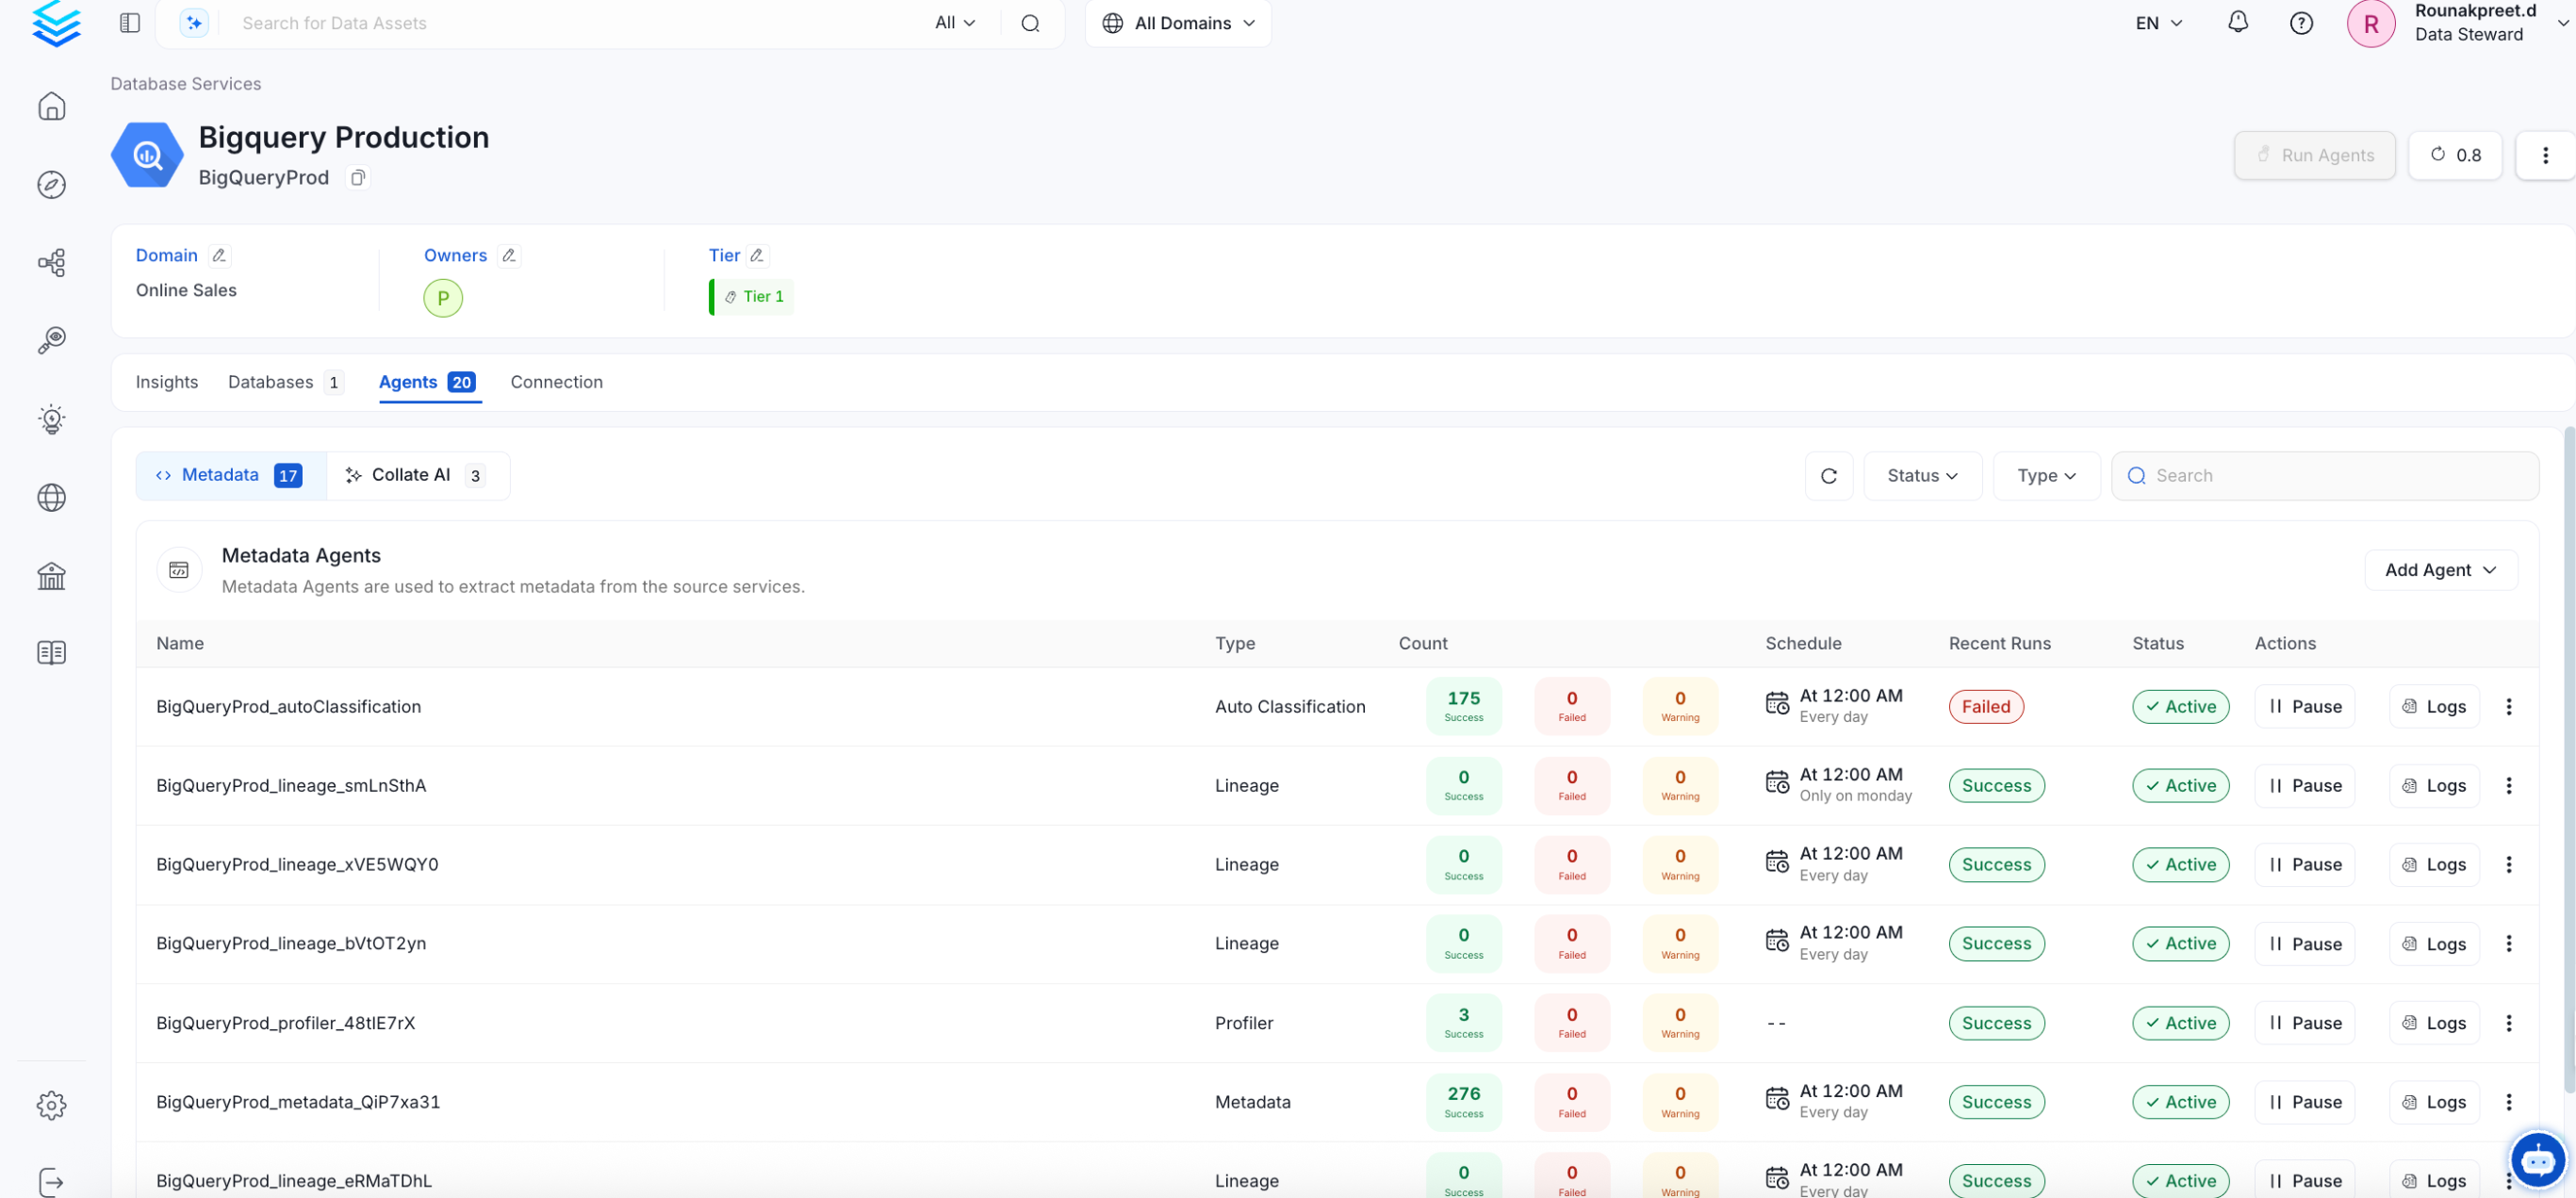
 Once the workflow has been successfully deployed, you can view the
Ingestion Pipeline running from the Service Page.
Once the workflow has been successfully deployed, you can view the
Ingestion Pipeline running from the Service Page.
 If [AutoPilot](/how-to-guides/admin-guide/applications/autopilot) is enabled, workflows like usage tracking, data lineage, and similar tasks will be handled automatically. Users don’t need to set up or manage them - AutoPilot takes care of everything in the system.
When using a **Hybrid Ingestion Runner**, any sensitive credential fields—such as passwords, API keys, or private keys—must reference secrets using the following format:
```
password: secret:/my/database/password
```
This applies **only to fields marked as secrets** in the connection form (these typically mask input and show a visibility toggle icon).
For a complete guide on managing secrets in hybrid setups, see the [Hybrid Ingestion Runner Secret Management Guide](https://docs.getcollate.io/getting-started/day-1/hybrid-saas/hybrid-ingestion-runner#3.-manage-secrets-securely).
## Troubleshooting
Learn more about how to troubleshoot common Alation connector issues and resolve configuration or ingestion errors.
If [AutoPilot](/how-to-guides/admin-guide/applications/autopilot) is enabled, workflows like usage tracking, data lineage, and similar tasks will be handled automatically. Users don’t need to set up or manage them - AutoPilot takes care of everything in the system.
When using a **Hybrid Ingestion Runner**, any sensitive credential fields—such as passwords, API keys, or private keys—must reference secrets using the following format:
```
password: secret:/my/database/password
```
This applies **only to fields marked as secrets** in the connection form (these typically mask input and show a visibility toggle icon).
For a complete guide on managing secrets in hybrid setups, see the [Hybrid Ingestion Runner Secret Management Guide](https://docs.getcollate.io/getting-started/day-1/hybrid-saas/hybrid-ingestion-runner#3.-manage-secrets-securely).
## Troubleshooting
Learn more about how to troubleshoot common Alation connector issues and resolve configuration or ingestion errors.