> ## Documentation Index
> Fetch the complete documentation index at: https://docs.getcollate.io/llms.txt
> Use this file to discover all available pages before exploring further.
# OAuth 2.0 Authentication for MCP Server
> Connect to Collate's MCP Server using OAuth 2.0 with your existing SSO provider. No Personal Access Tokens required.
# OAuth 2.0 Authentication for MCP Server
Collate's MCP Server supports **OAuth 2.0 authentication**, allowing you to connect AI assistants like Claude, Cursor, and VS Code directly using your existing Collate login. This is the same way you sign in to the Collate UI. No need to generate, copy, or rotate Personal Access Tokens.
## Why OAuth 2.0?
| | Personal Access Token (PAT) | OAuth 2.0 |
| -------------- | ---------------------------------------- | ------------------------------------- |
| **Setup** | Generate token, copy into config | Enter server URL, sign in via browser |
| **Security** | Token stored in plain text config files | No secrets stored locally |
| **Expiration** | Manual rotation when token expires | Tokens refresh automatically |
| **Access** | Must generate and manage tokens per user | Uses your existing Collate login |
**Note**: OAuth 2.0 is the **recommended** way to connect MCP clients. PAT-based authentication remains supported for backward compatibility and environments where browser-based login is not available.
## How It Works
Connecting via OAuth is simple:
1. **Add your Collate MCP Server URL** in your AI client, for example `https://your-collate-instance.com/mcp`.
2. **Sign in** when the browser window opens, using your usual Collate credentials.
3. **Start using the connection**: tokens are managed automatically in the background.
That's it. Your MCP client handles the rest, including refreshing your session when needed.
## How the Connection Works (Under the Hood)
Collate's MCP OAuth implementation uses **OAuth 2.0 Dynamic Client Registration** (RFC 7591), so MCP clients connect without any manual app setup:
1. The MCP client fetches Collate's OAuth discovery document at `/.well-known/oauth-authorization-server` to learn the authorization, token, and registration endpoints.
2. The client automatically registers itself by posting its metadata to the registration endpoint. Collate issues a `client_id` in response — no admin action is required.
3. The client initiates an **Authorization Code flow with PKCE** (SHA-256), opening your browser to sign in via your configured SSO provider or basic auth.
4. After you sign in, Collate redirects back to the client with an authorization code.
5. The client exchanges the code for an access token and a refresh token.
6. All subsequent MCP tool calls include the access token. When it expires, the client uses the refresh token to get a new one silently.
### Discovery Endpoints
| Endpoint | Purpose |
| --------------------------------------------- | -------------------------------------------------------------------------------------------------------------------------------------------------------------------------------------- |
| `GET /.well-known/oauth-authorization-server` | OAuth 2.0 authorization server metadata (RFC 8414) |
| `GET /.well-known/openid-configuration` | OAuth metadata compatibility alias — serves the same RFC 8414 metadata as above for clients that only check this OIDC-conventional path (not a true OpenID Connect discovery document) |
| `POST /mcp/register` | Dynamic client registration |
## Supported Authentication Methods
The MCP Server inherits the authentication method configured for your Collate instance. Whatever SSO provider your organization uses to sign in to Collate will also be used for MCP connections.
Sign in with your Google Workspace account.
Sign in with your Microsoft / Azure AD account.
Sign in with your Okta account.
Sign in with your Auth0 account.
Sign in with Amazon Cognito.
Sign in with any OIDC-compatible provider.
Sign in with your SAML identity provider.
Sign in with your LDAP / Active Directory credentials.
If your instance uses **basic authentication** (username and password), you'll see a login form for entering your Collate credentials directly.
## Changing Your Authentication Method
The MCP Server automatically uses the same authentication method configured for your Collate instance. To change how users authenticate:
1. Navigate to **Settings** in your Collate instance.
2. Go to the **SSO** configuration section.
3. Update the authentication provider, for example switching from basic auth to Google SSO.
Once updated, all MCP client connections will use the new authentication method with no changes needed on the client side.
For detailed instructions on configuring each SSO provider, see the [SSO Setup Guide](/ai-2-0/how-to-guides/sso).
## Token Lifetimes
OAuth tokens are handled entirely by your MCP client with no manual management needed.
| Token type | Lifetime | Notes |
| ---------------------- | ---------- | --------------------------------------------------------------------------------------- |
| **Access token** | 10 minutes | Short-lived to limit exposure. Automatically refreshed by the client |
| **Authorization code** | 10 minutes | Single-use. Expires if the login flow stalls |
| **Refresh token** | 30 days | Grants new access tokens without re-authentication. Expires after 30 days of inactivity |
Re-authentication is only required when the refresh token expires (30-day inactivity window). To **revoke access** for an MCP client, an administrator can manage active sessions from the Collate admin settings.
## Rate Limits
The MCP OAuth endpoints are rate-limited per IP address to prevent abuse:
| Endpoint | Limit |
| ------------------------------------- | ---------------------- |
| `/mcp/register` (client registration) | 10 requests per hour |
| `/mcp/token` (token requests) | 30 requests per minute |
These limits are per-server-instance. In clustered deployments, the effective limit is multiplied by the number of instances.
## Allowed Origins (CORS)
By default, the MCP Server allows CORS requests only from a small set of local development origins (`http://localhost:3000`, `http://localhost:8585`, `http://localhost:9090`) — it does not allow all origins. Administrators can update this allowlist from the MCP Server application settings:
1. Click the **Profile** icon and navigate to **Settings** > **Applications**.
2. Click the **MCP Server** application.
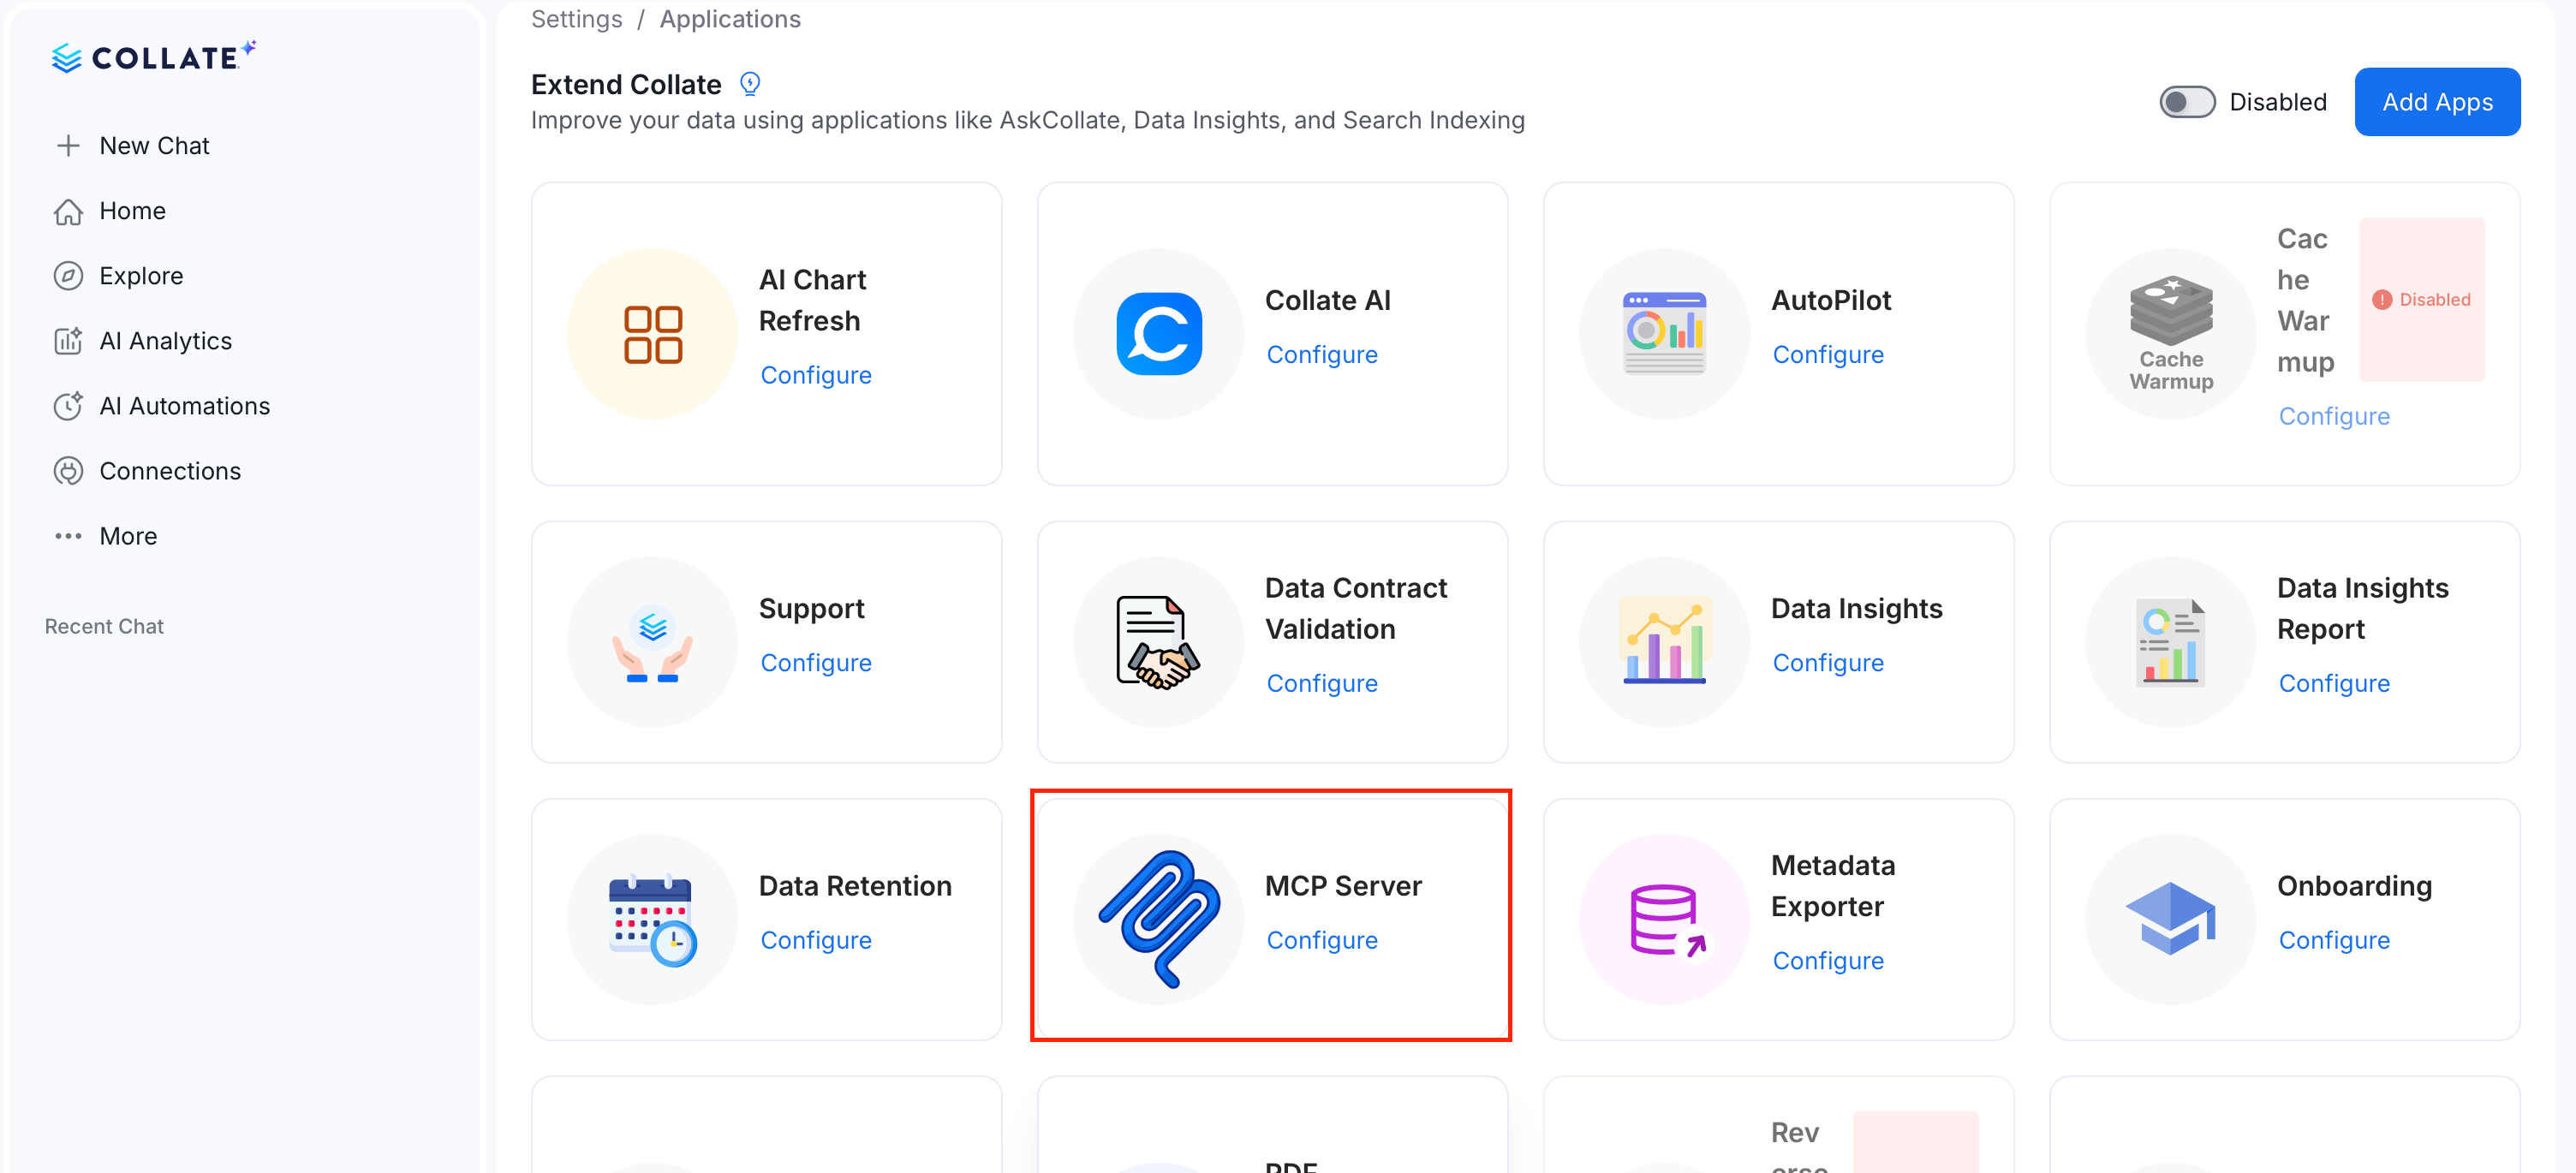 3. In the **Configuration** tab, add, edit, or remove entries under **Allowed Origins**.
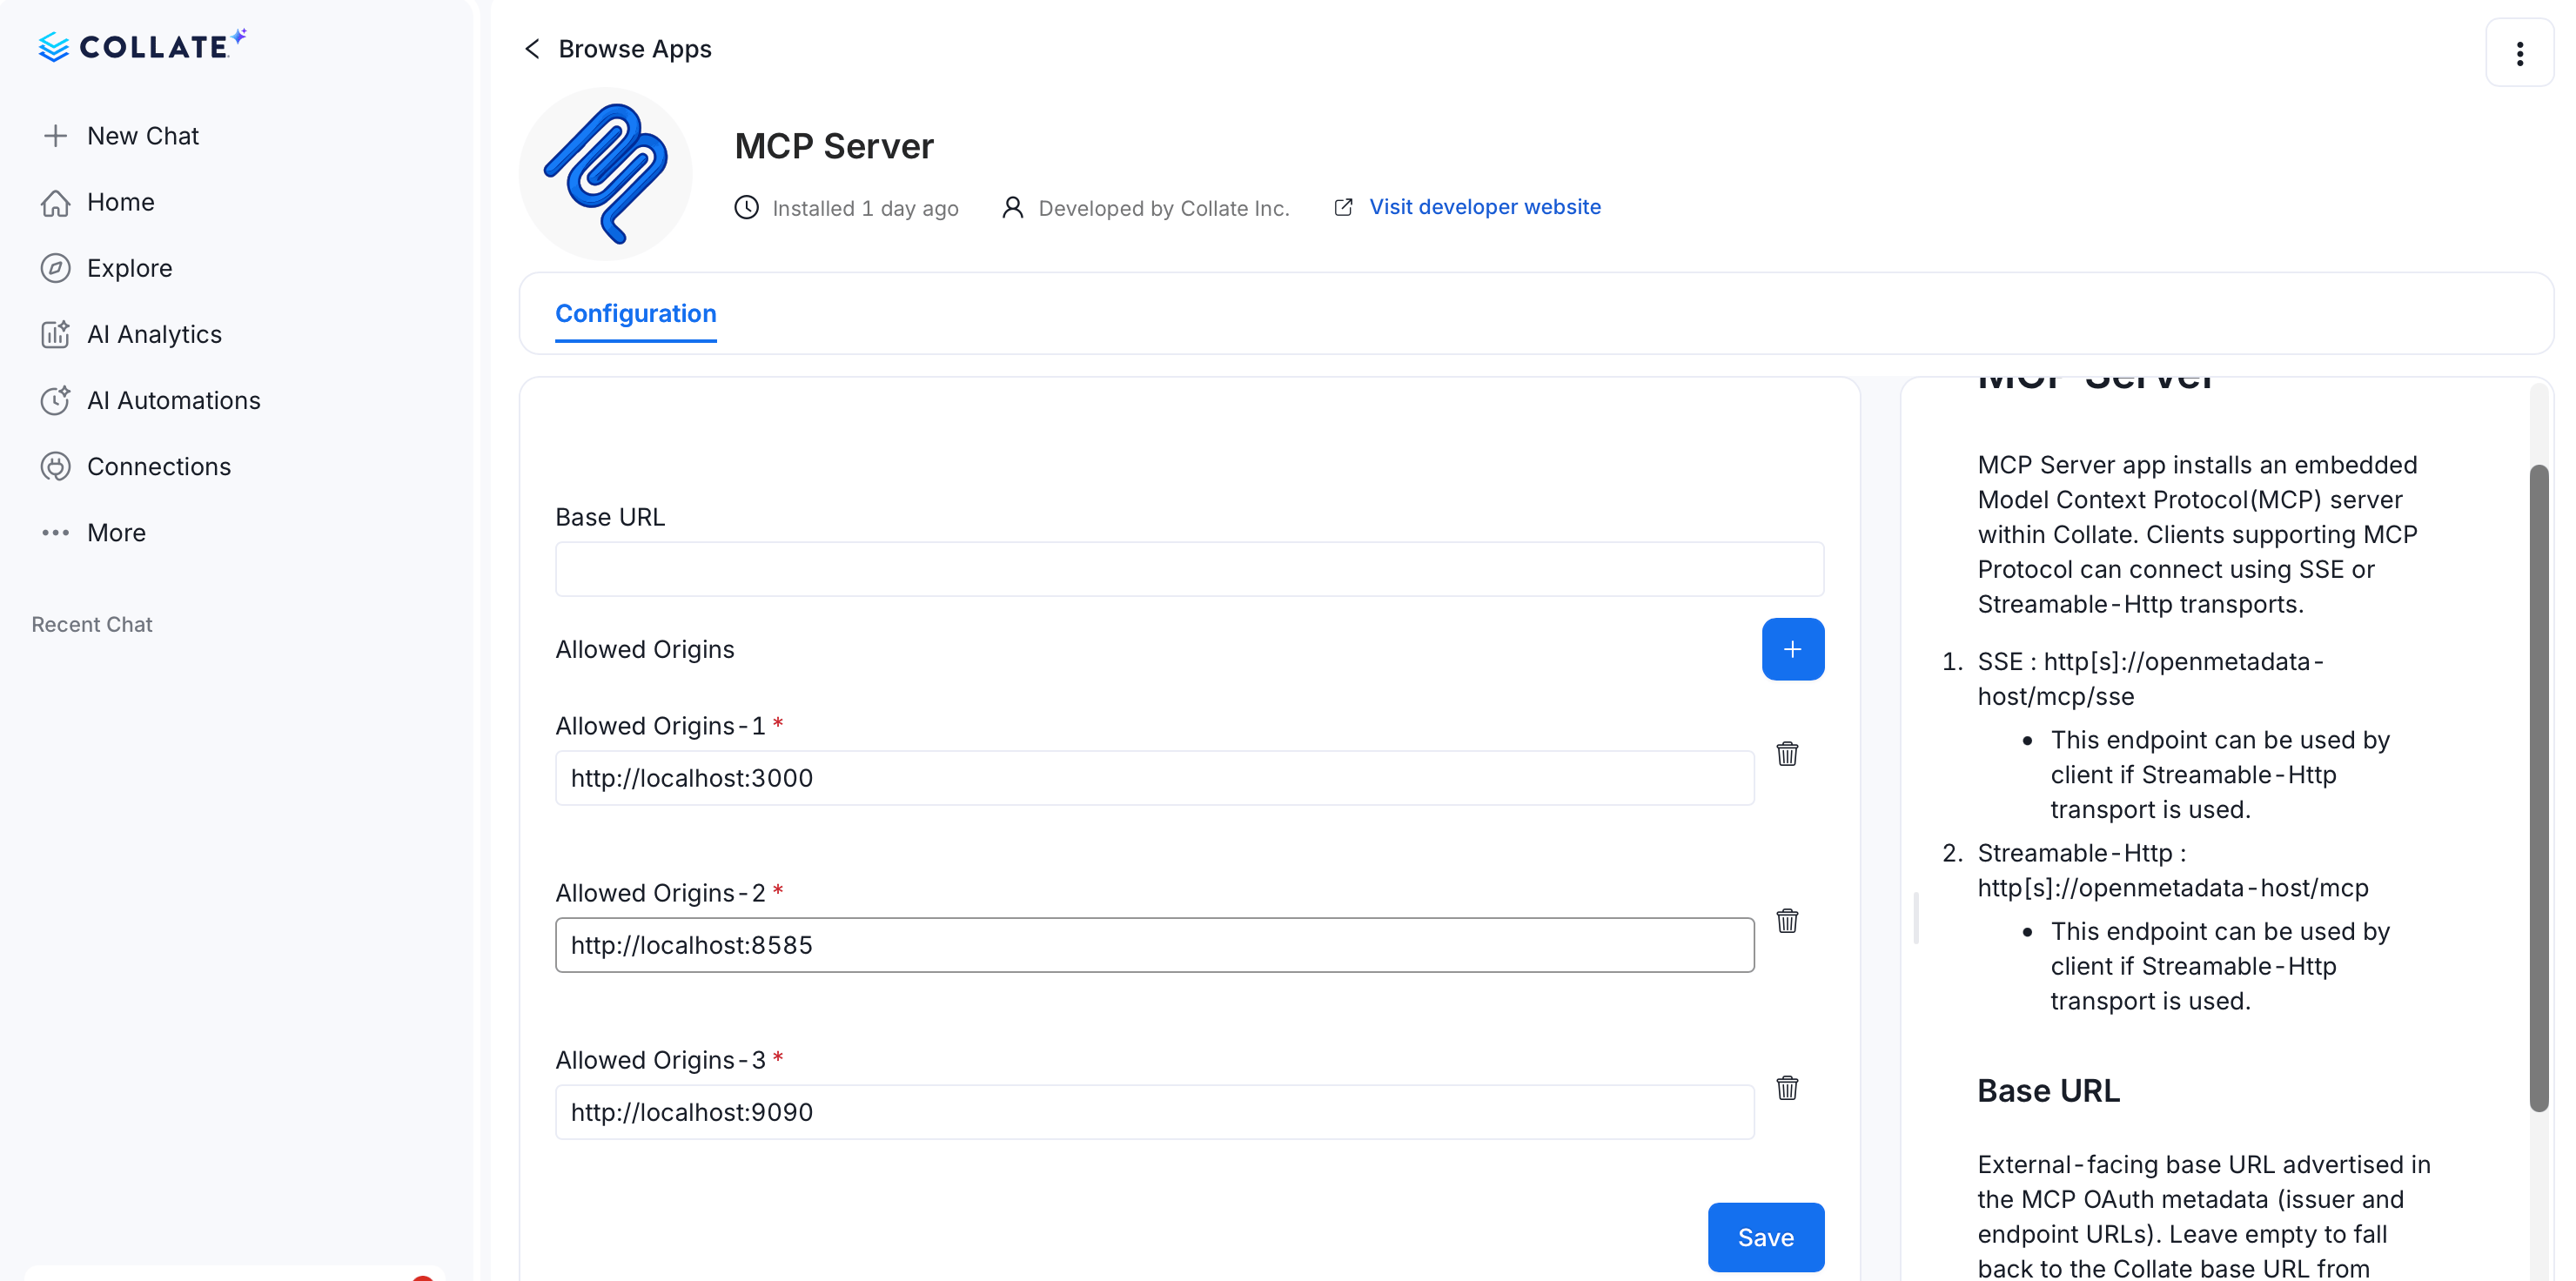 4. Click **Save**.
Only requests whose `Origin` header exactly matches an entry in the allowlist receive a valid `Access-Control-Allow-Origin` response header — there is no wildcard or prefix matching. This is relevant for browser-based MCP clients or custom integrations that call the MCP endpoint directly from a web page.
## Security
Collate's MCP OAuth implementation follows industry-standard security practices:
* **PKCE (Proof Key for Code Exchange)**: Protects the authorization flow against interception attacks, even on desktop and CLI clients.
* **Encrypted token storage**: All tokens are encrypted at rest in the Collate database.
* **Short-lived access tokens**: Access tokens expire quickly, limiting exposure if compromised.
* **Automatic token refresh**: Clients seamlessly refresh tokens without user interaction.
* **Rate limiting**: Built-in protection against brute-force attacks and abuse.
* **No secrets in config files**: Unlike PAT-based auth, OAuth doesn't require storing any secrets on your local machine.
## Supported MCP Clients
Set up OAuth authentication with your preferred MCP client:
Connect via Anthropic's AI assistant.
Connect via Cursor IDE.
Connect via Visual Studio Code.
Connect via Claude Code CLI.
Connect via Block's open-source AI agent.
4. Click **Save**.
Only requests whose `Origin` header exactly matches an entry in the allowlist receive a valid `Access-Control-Allow-Origin` response header — there is no wildcard or prefix matching. This is relevant for browser-based MCP clients or custom integrations that call the MCP endpoint directly from a web page.
## Security
Collate's MCP OAuth implementation follows industry-standard security practices:
* **PKCE (Proof Key for Code Exchange)**: Protects the authorization flow against interception attacks, even on desktop and CLI clients.
* **Encrypted token storage**: All tokens are encrypted at rest in the Collate database.
* **Short-lived access tokens**: Access tokens expire quickly, limiting exposure if compromised.
* **Automatic token refresh**: Clients seamlessly refresh tokens without user interaction.
* **Rate limiting**: Built-in protection against brute-force attacks and abuse.
* **No secrets in config files**: Unlike PAT-based auth, OAuth doesn't require storing any secrets on your local machine.
## Supported MCP Clients
Set up OAuth authentication with your preferred MCP client:
Connect via Anthropic's AI assistant.
Connect via Cursor IDE.
Connect via Visual Studio Code.
Connect via Claude Code CLI.
Connect via Block's open-source AI agent.