> ## Documentation Index
> Fetch the complete documentation index at: https://docs.getcollate.io/llms.txt
> Use this file to discover all available pages before exploring further.
# Create Quality Test Cases
> Create no-code data quality tests at the table, column, and dimension level directly from the Collate UI.
# No-Code Test Cases
Run data quality tests at the table, column, and dimension level across all supported database connectors. Tests range from business validations — confirming data meets real-world expectations — to technical checks like ensuring required columns are never null and identifier columns hold only unique values.
No YAML or JSON config files needed — set up everything from the UI by selecting a test level, filling in the details, and clicking Create.
## How to Create a Test
1. Navigate to the desired table and click the **Data Observability** tab.
2. Click **Add** and select **Test Case**.
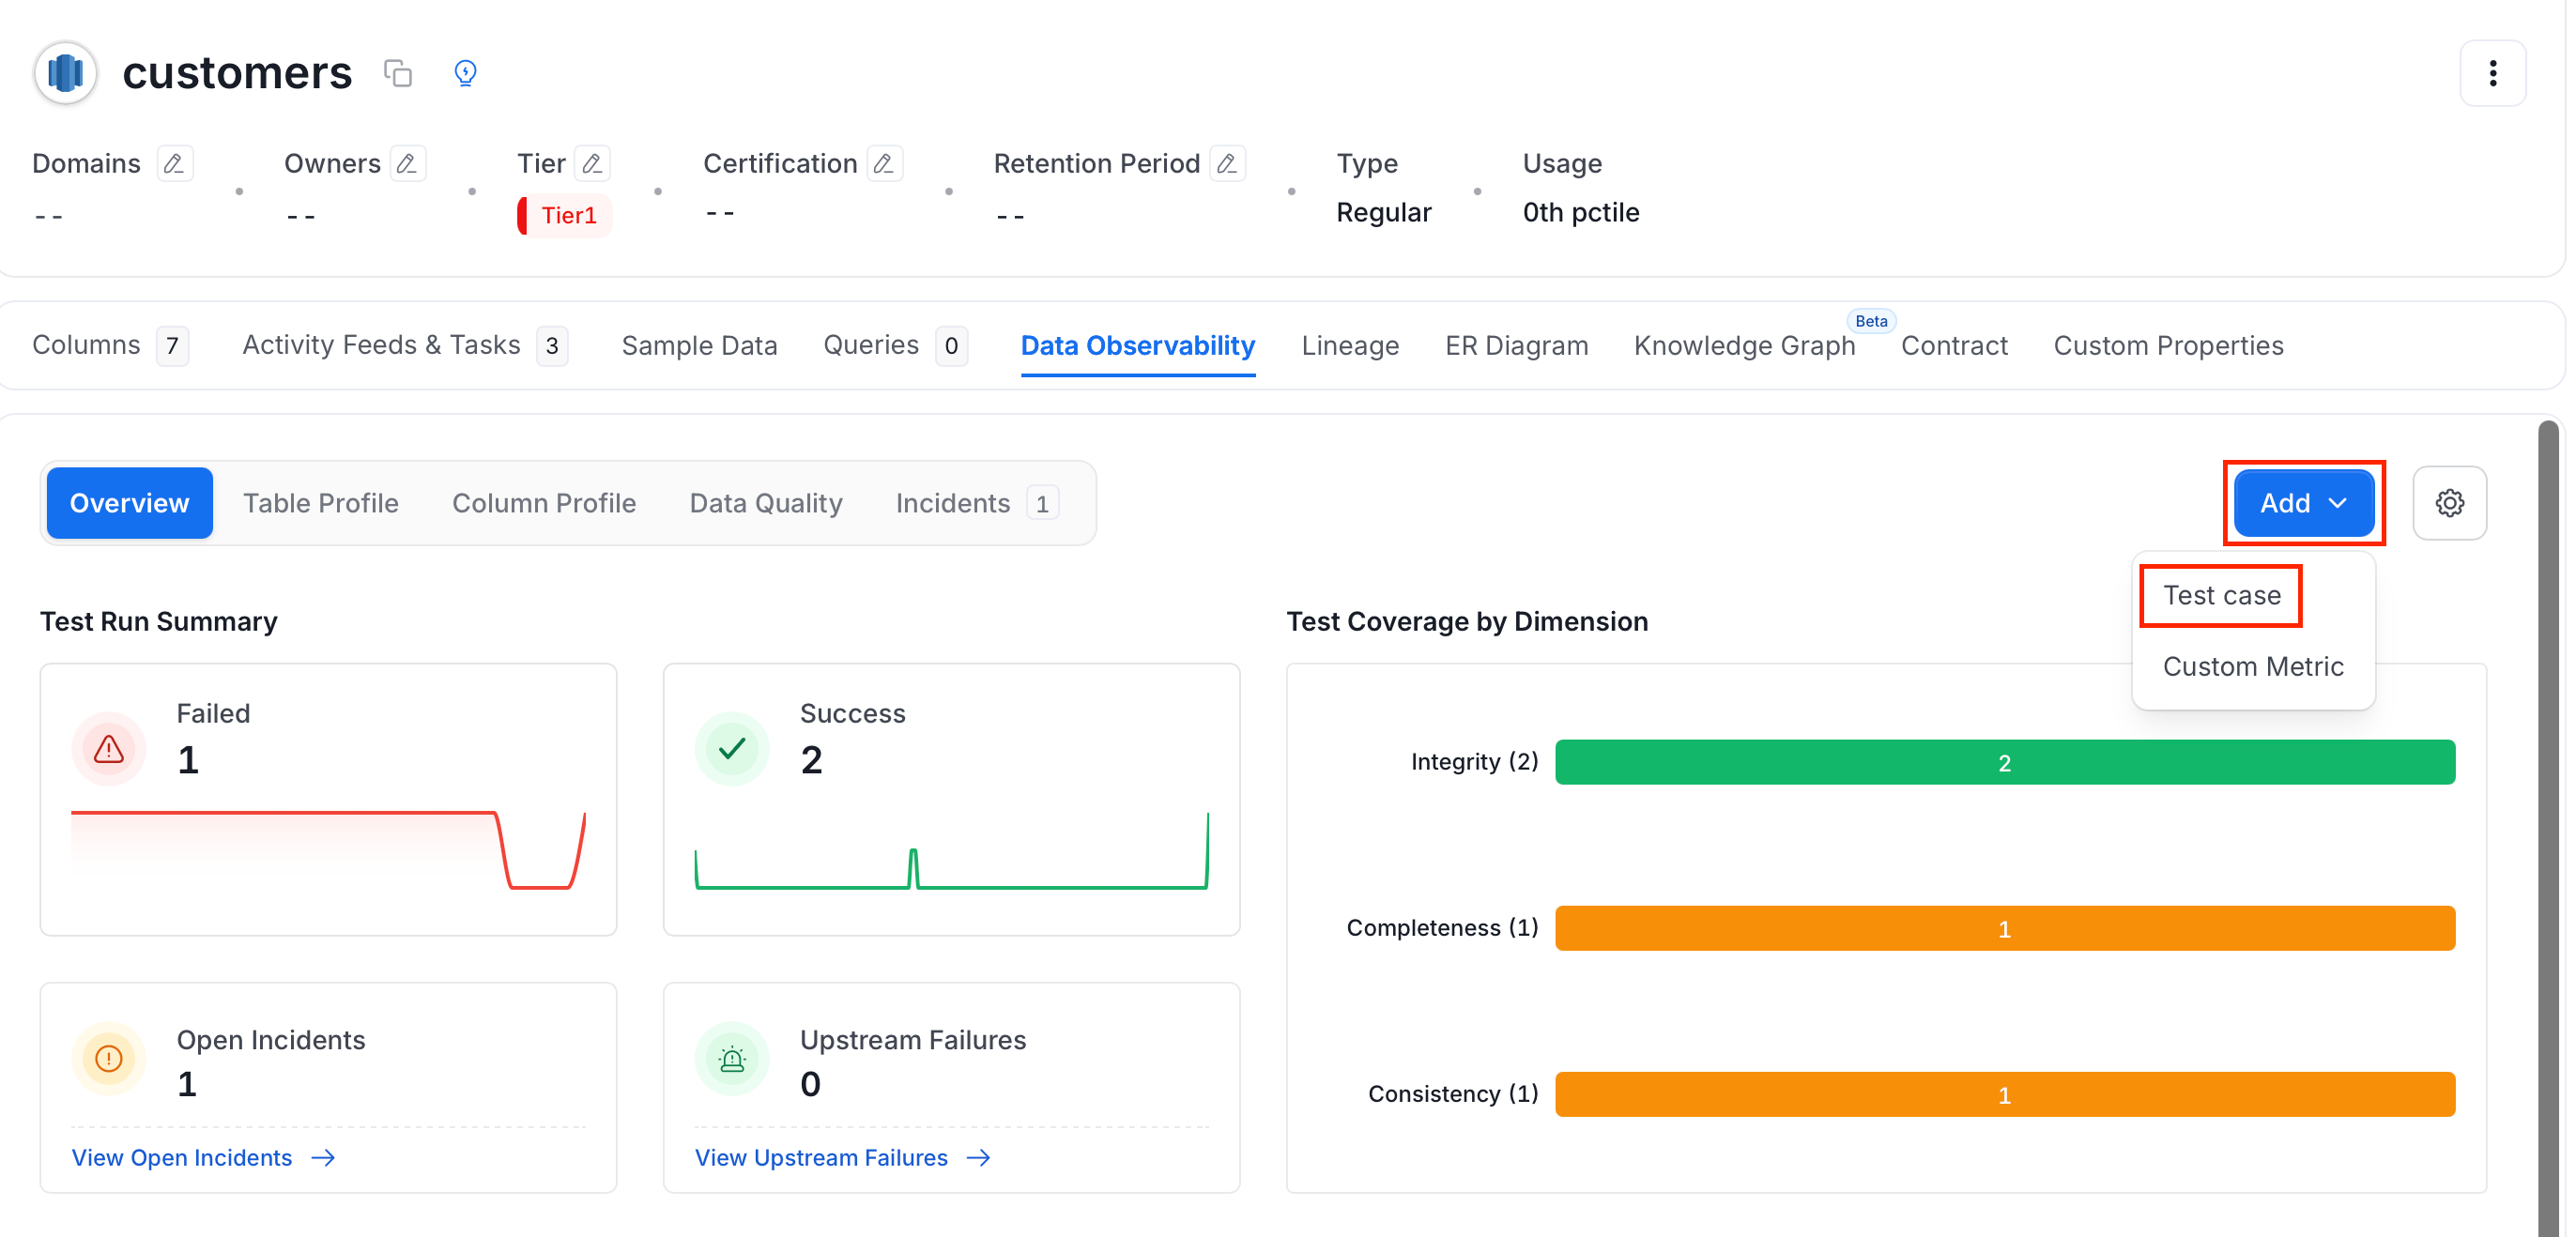 3. Select a test level and enter the test details. See the sections below for field details on each level:
* [Table Level](#table-level-test)
* [Column Level](#column-level-test)
* [Dimension Level](#dimension-level-test) (Beta)
3. Select a test level and enter the test details. See the sections below for field details on each level:
* [Table Level](#table-level-test)
* [Column Level](#column-level-test)
* [Dimension Level](#dimension-level-test) (Beta)
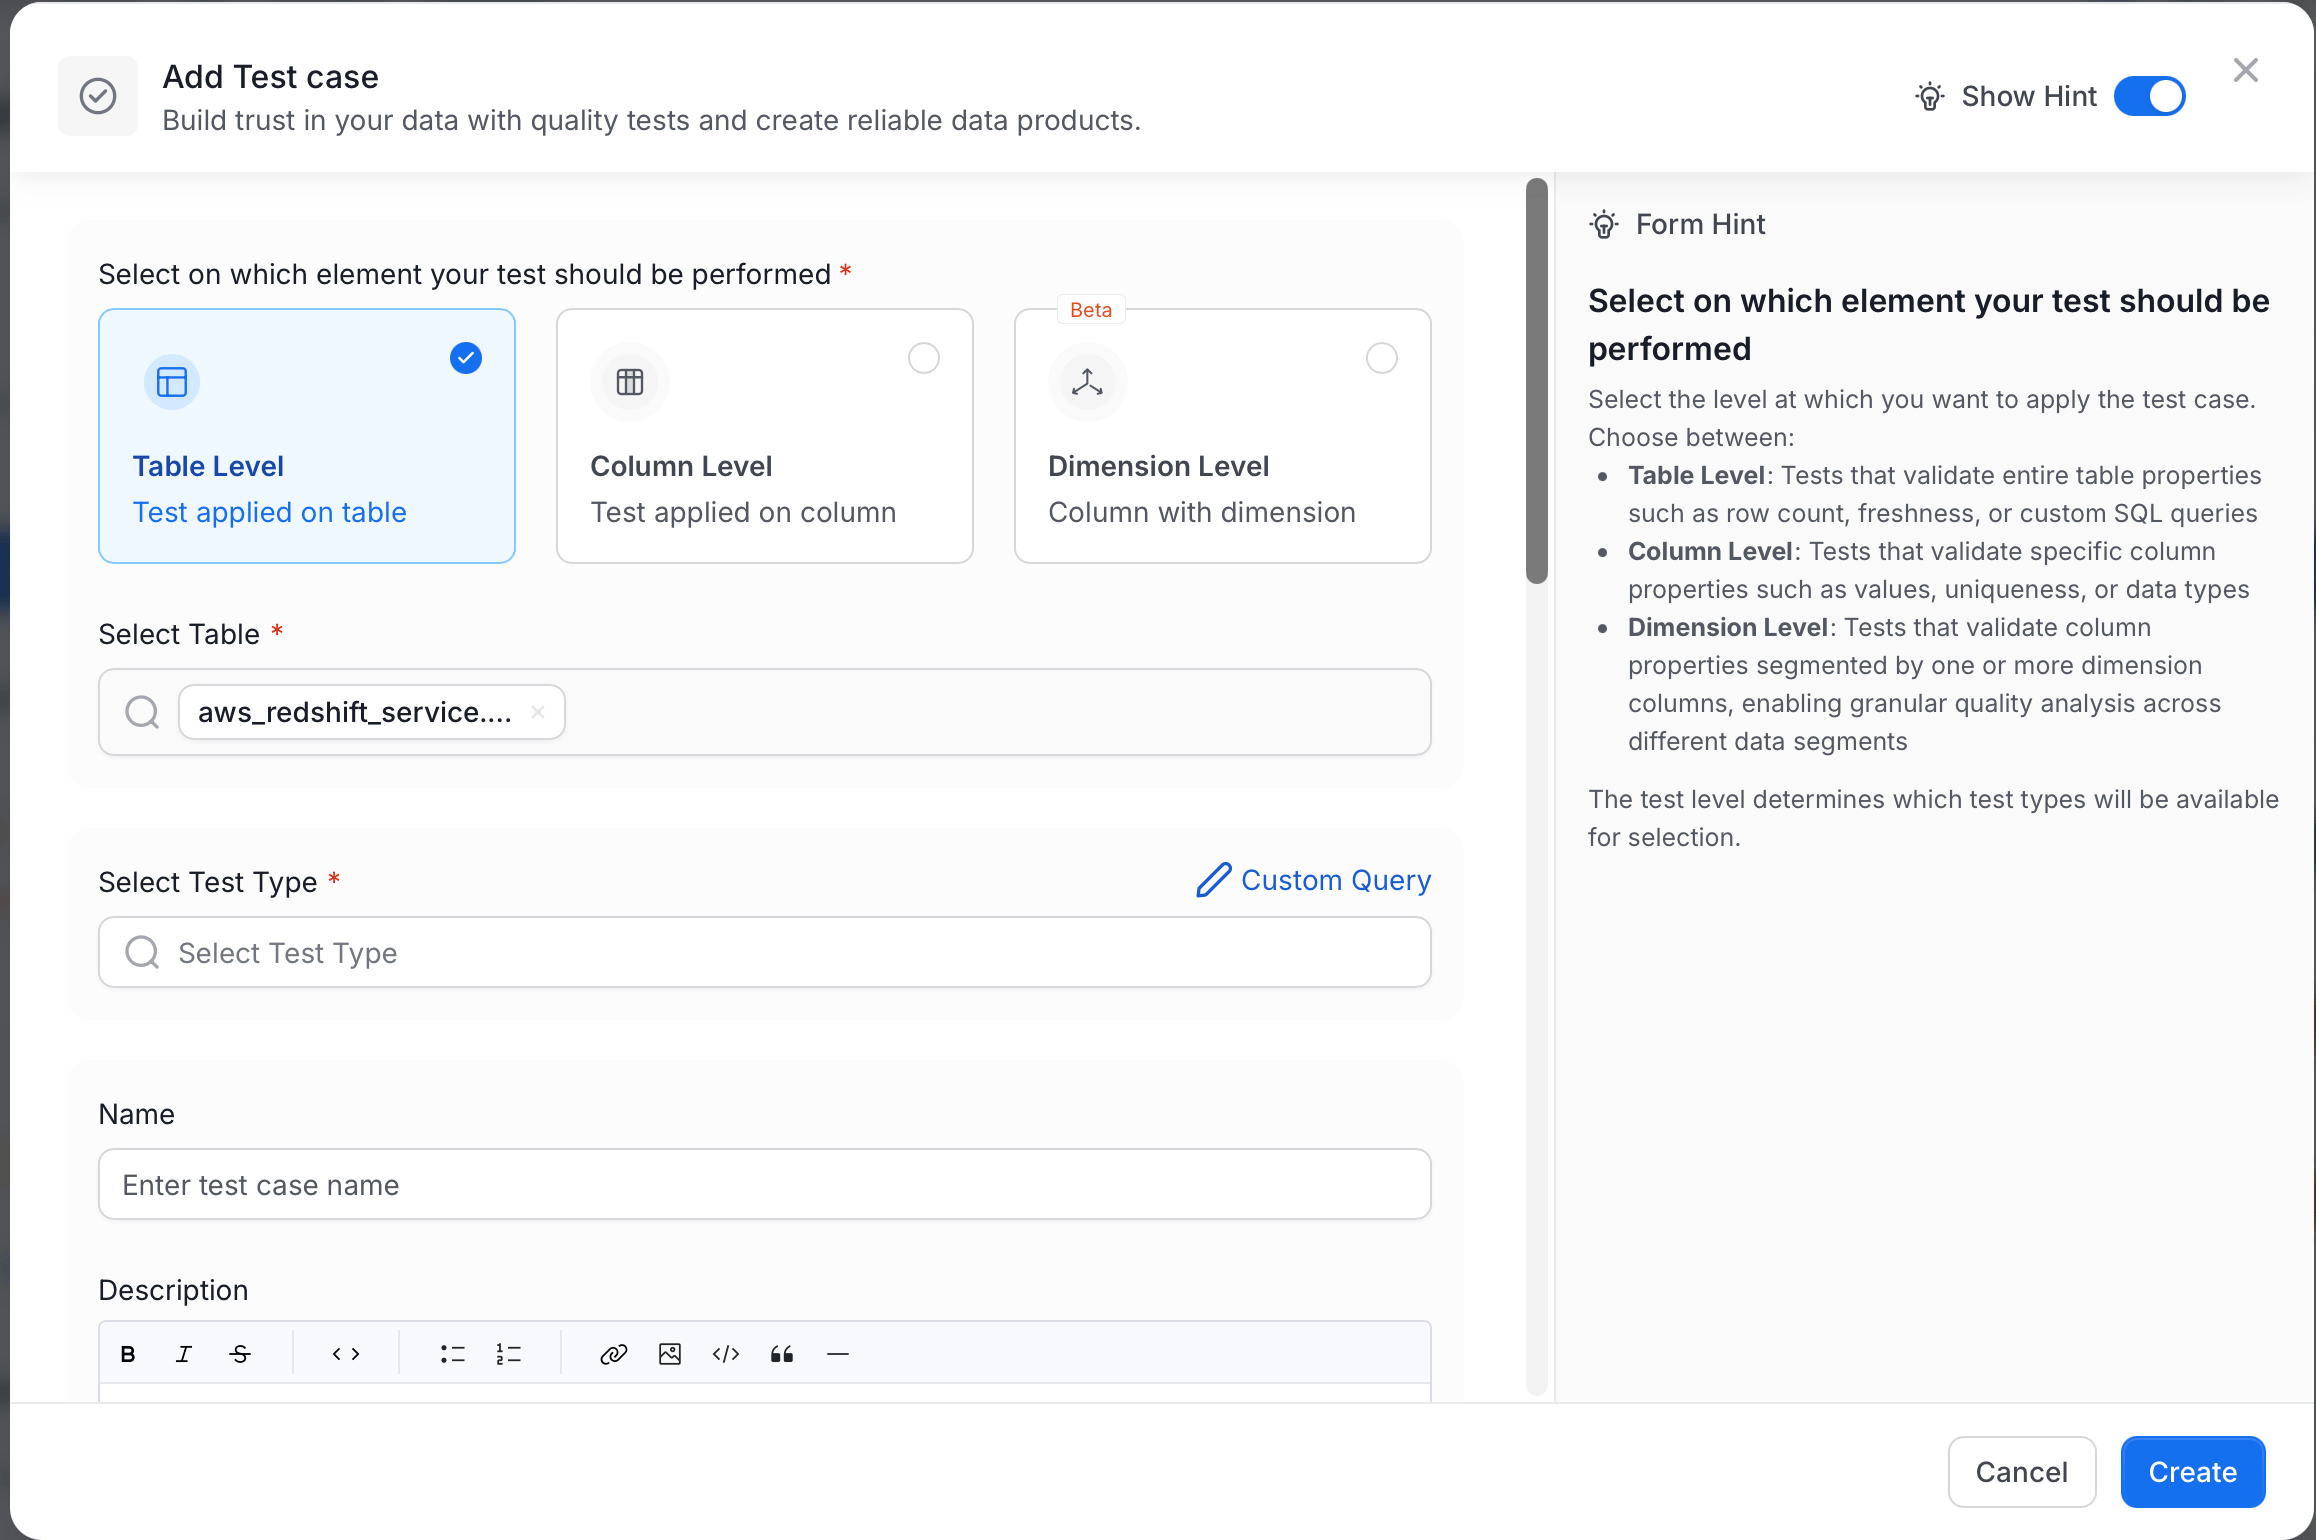 4. Click **Create** to save and deploy the test.
### Table Level Test
A **Table Level Test** validates properties of the entire table — row counts, column structure, freshness, or custom SQL logic.
To create a Table Level Test, enter the following details:
* **Table**: Select the table you want to test.
* **Test Type**: Choose the type of validation to run. Use the **Custom Query** shortcut on the right to write a SQL-based test directly.
* **Name**: Add a name that best defines your test case.
* **Description**: Describe what the test validates.
* **Tags**: Optionally tag the test for filtering and organization.
* **Glossary Terms**: Optionally link business glossary terms to add context.
Collate currently supports the following table level test types:
* **Table Column Count to be Between**: Define the Min. and Max.
* **Table Column Count to Equal**: Define a number.
* **Table Column Name to Exist**: Define a column name.
* **Table Column Names to Match Set**: Add comma-separated column names to match. You can also verify if the column names are in order.
* **Custom SQL Query**: Define a SQL expression. Select a strategy for Rows or Count, and define a threshold to determine if the test passes or fails.
* **Table Row Count to be Between**: Define the Min. and Max.
* **Table Row Count to Equal**: Define a number.
* **Table Row Inserted Count to be Between**: Define the Min. and Max. row count. Works with Timestamp, Date, and DateTime columns. Specify a range type (Hour, Day, Month, or Year) and an interval.
* **Compare 2 Tables for Differences**: Compare two tables to check for data integrity.
* **Table Data to Be Fresh**: Validate the freshness of a table's data.
4. Click **Create** to save and deploy the test.
### Table Level Test
A **Table Level Test** validates properties of the entire table — row counts, column structure, freshness, or custom SQL logic.
To create a Table Level Test, enter the following details:
* **Table**: Select the table you want to test.
* **Test Type**: Choose the type of validation to run. Use the **Custom Query** shortcut on the right to write a SQL-based test directly.
* **Name**: Add a name that best defines your test case.
* **Description**: Describe what the test validates.
* **Tags**: Optionally tag the test for filtering and organization.
* **Glossary Terms**: Optionally link business glossary terms to add context.
Collate currently supports the following table level test types:
* **Table Column Count to be Between**: Define the Min. and Max.
* **Table Column Count to Equal**: Define a number.
* **Table Column Name to Exist**: Define a column name.
* **Table Column Names to Match Set**: Add comma-separated column names to match. You can also verify if the column names are in order.
* **Custom SQL Query**: Define a SQL expression. Select a strategy for Rows or Count, and define a threshold to determine if the test passes or fails.
* **Table Row Count to be Between**: Define the Min. and Max.
* **Table Row Count to Equal**: Define a number.
* **Table Row Inserted Count to be Between**: Define the Min. and Max. row count. Works with Timestamp, Date, and DateTime columns. Specify a range type (Hour, Day, Month, or Year) and an interval.
* **Compare 2 Tables for Differences**: Compare two tables to check for data integrity.
* **Table Data to Be Fresh**: Validate the freshness of a table's data.
 ### Column Level Test
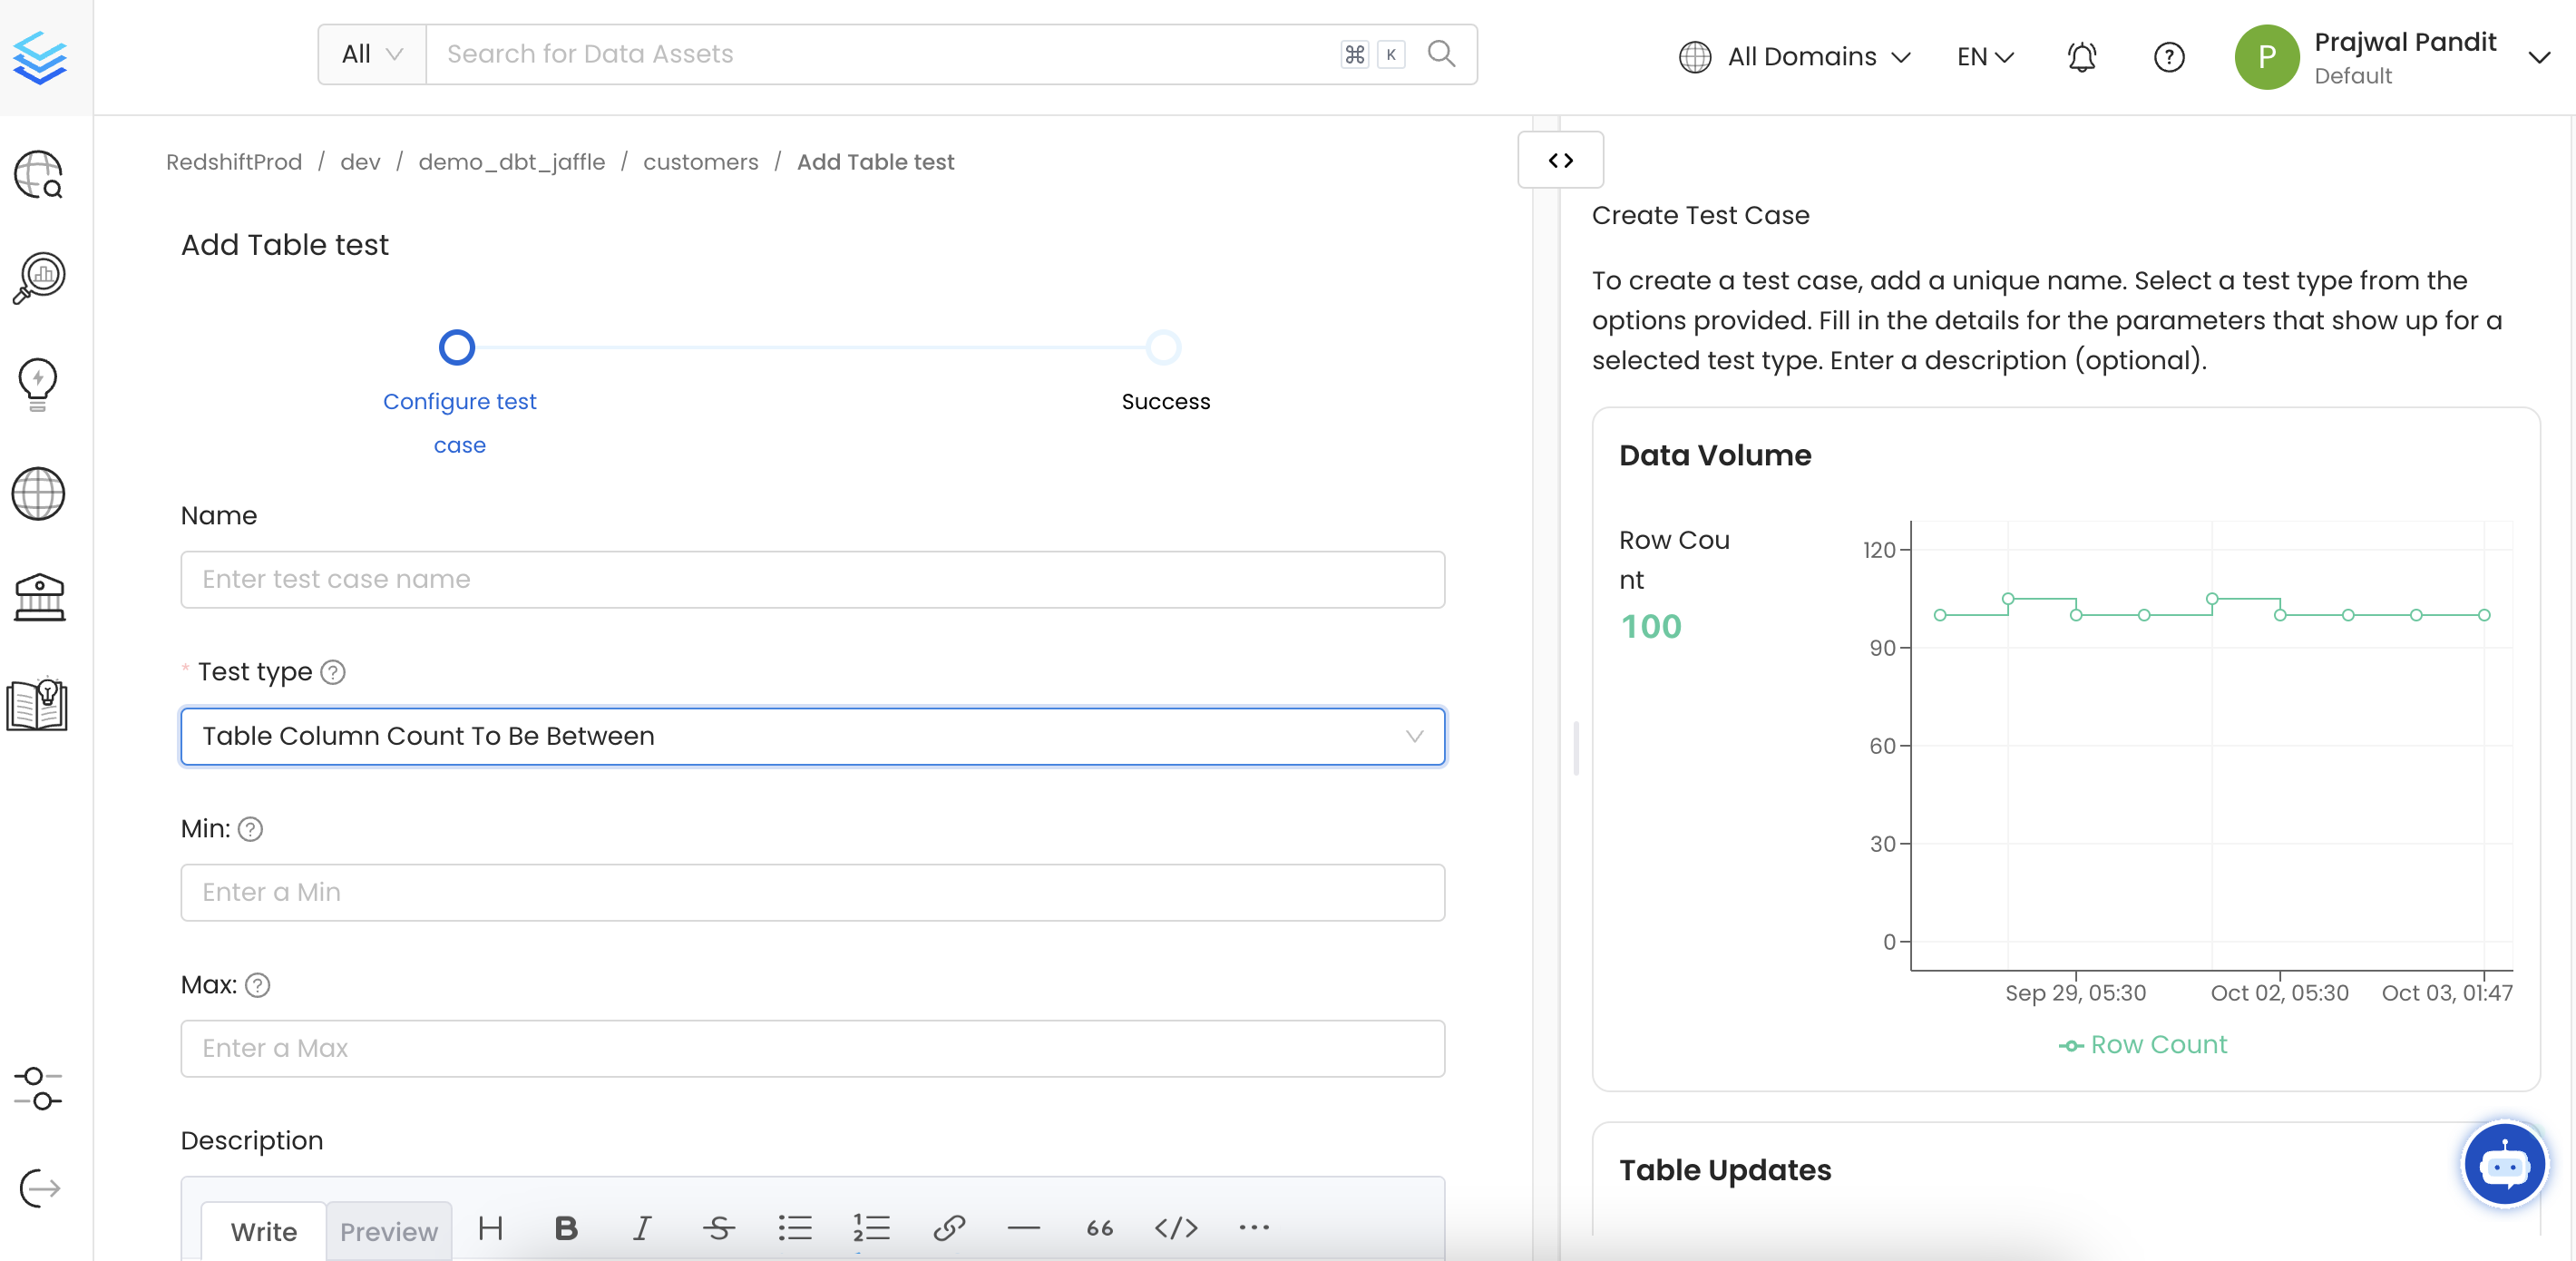
A **Column Level Test** validates specific column properties — null counts, value ranges, uniqueness, pattern matching, and more.
To create a Column Level Test, enter the following details:
* **Table**: Select the table that contains the column you want to test.
* **Column**: Select the column to test. A summary of the column's context appears on the right.
* **Test Type**: Choose the type of validation to run.
* **Name**: Add a name that best defines your test case.
* **Description**: Describe what the test validates.
* **Tags**: Optionally tag the test for filtering and organization.
* **Glossary Terms**: Optionally link business glossary terms to add context.
Collate currently supports the following column level test types:
* **Column Value Lengths to be Between**: Define the Min. and Max.
* **Column Value Max. to be Between**: Define the Min. and Max.
* **Column Value Mean to be Between**: Define the Min. and Max.
* **Column Value Median to be Between**: Define the Min. and Max.
* **Column Value Min. to be Between**: Define the Min. and Max.
* **Column Values Missing Count**: Define the number of missing values. Match all null and empty values as missing, and configure additional missing strings such as N/A.
* **Column Values Sum to be Between**: Define the Min. and Max.
* **Column Value Std Dev to be Between**: Define the Min. and Max.
* **Column Values to be Between**: Define the Min. and Max.
* **Column Values to be in Set**: Add an array of allowed values.
* **Column Values to be Not in Set**: Add an array of forbidden values.
* **Column Values to be Not Null**
* **Column Values to be Unique**
* **Column Values to Match Regex Pattern**: Define the regular expression that column entries should match.
* **Column Values to Not Match Regex**: Define the regular expression that column entries should not match.
### Column Level Test
A **Column Level Test** validates specific column properties — null counts, value ranges, uniqueness, pattern matching, and more.
To create a Column Level Test, enter the following details:
* **Table**: Select the table that contains the column you want to test.
* **Column**: Select the column to test. A summary of the column's context appears on the right.
* **Test Type**: Choose the type of validation to run.
* **Name**: Add a name that best defines your test case.
* **Description**: Describe what the test validates.
* **Tags**: Optionally tag the test for filtering and organization.
* **Glossary Terms**: Optionally link business glossary terms to add context.
Collate currently supports the following column level test types:
* **Column Value Lengths to be Between**: Define the Min. and Max.
* **Column Value Max. to be Between**: Define the Min. and Max.
* **Column Value Mean to be Between**: Define the Min. and Max.
* **Column Value Median to be Between**: Define the Min. and Max.
* **Column Value Min. to be Between**: Define the Min. and Max.
* **Column Values Missing Count**: Define the number of missing values. Match all null and empty values as missing, and configure additional missing strings such as N/A.
* **Column Values Sum to be Between**: Define the Min. and Max.
* **Column Value Std Dev to be Between**: Define the Min. and Max.
* **Column Values to be Between**: Define the Min. and Max.
* **Column Values to be in Set**: Add an array of allowed values.
* **Column Values to be Not in Set**: Add an array of forbidden values.
* **Column Values to be Not Null**
* **Column Values to be Unique**
* **Column Values to Match Regex Pattern**: Define the regular expression that column entries should match.
* **Column Values to Not Match Regex**: Define the regular expression that column entries should not match.
 ### Dimension Level Test
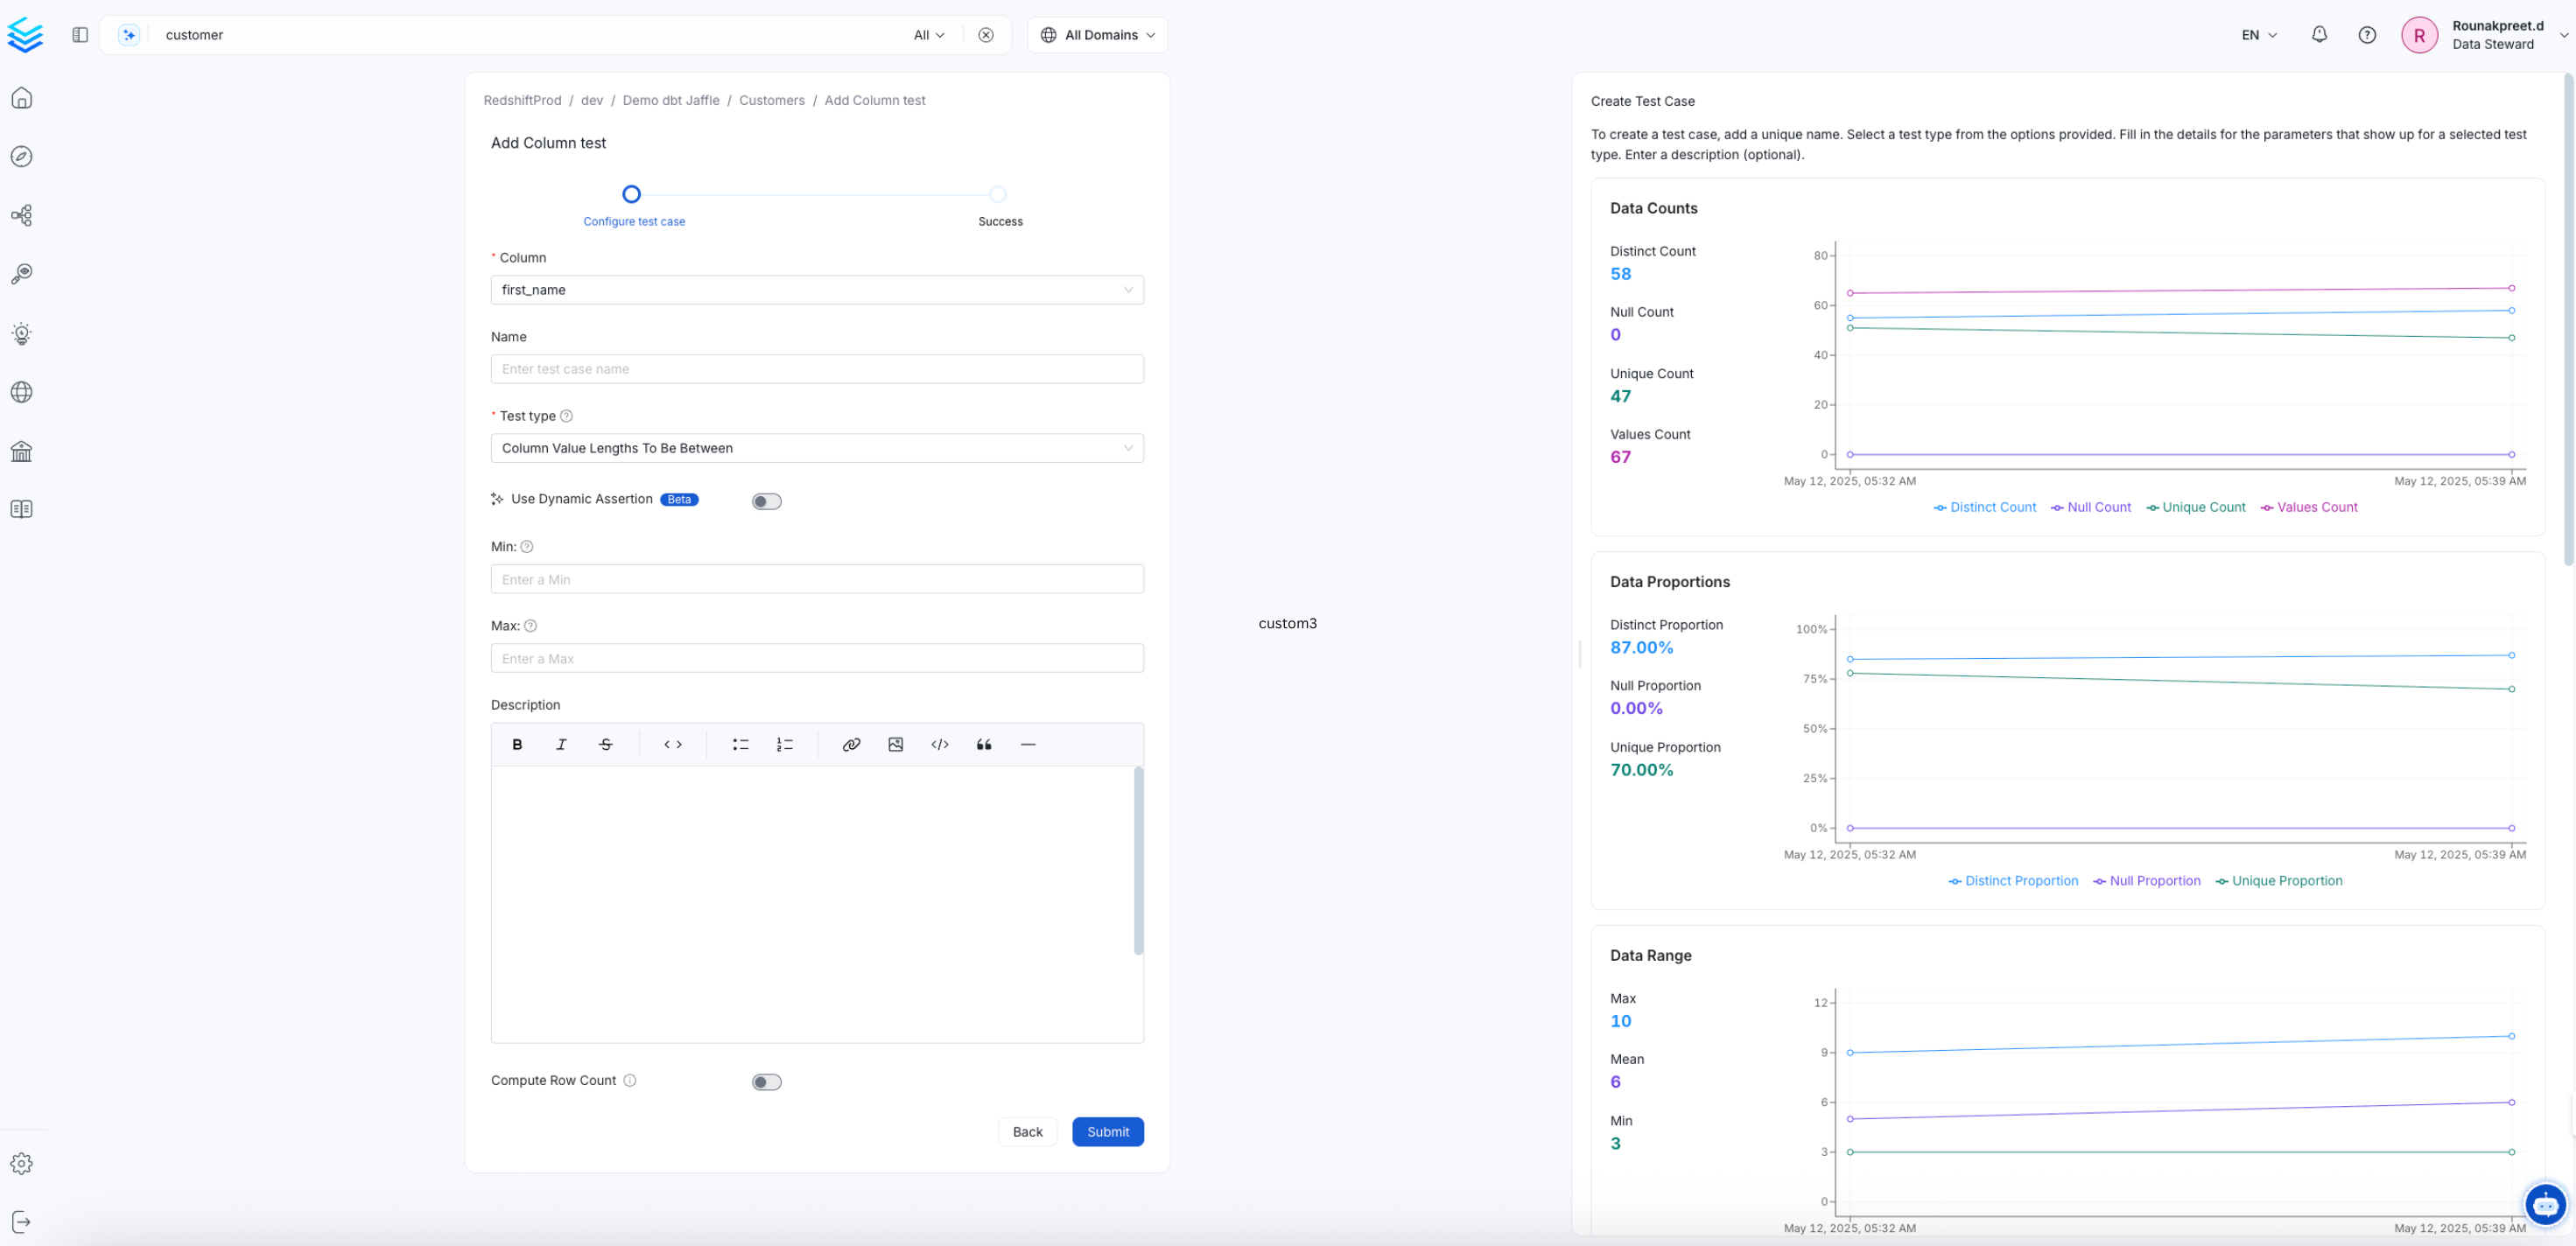
A **Dimension Level Test** is a column test segmented by one or more dimension columns. Instead of a single pass/fail result for the whole column, you get separate results for each unique combination of dimension values — so you can pinpoint exactly which segment of your data is failing.
To create a Dimension Level Test, enter the following details:
* **Table**: Select the table that contains the column you want to test.
* **Column**: Select the column to test.
* **Dimensions**: Select one or more columns to segment results by. Use low-cardinality columns such as `region`, `status`, or `product_category` for the most useful breakdown.
* **Top Dimensions**: Set how many top dimension combinations to display in the results (default: 5).
* **Test Type**: Choose from the same test types available for column-level tests.
* **Name**: Add a name that best defines your test case.
* **Description**: Describe the test case.
**Example**: If you test the `amount` column with `region` and `product_type` as dimensions, Collate returns separate results for each combination — North America / Electronics, Europe / Clothing, and so on — so you can immediately see which segment is causing a failure.
For concepts, best practices, and real-world examples, see [Dimensional Validation](/ai-2-0/how-to-guides/data-quality-observability/quality/dimensional-validation).
## View Test Results
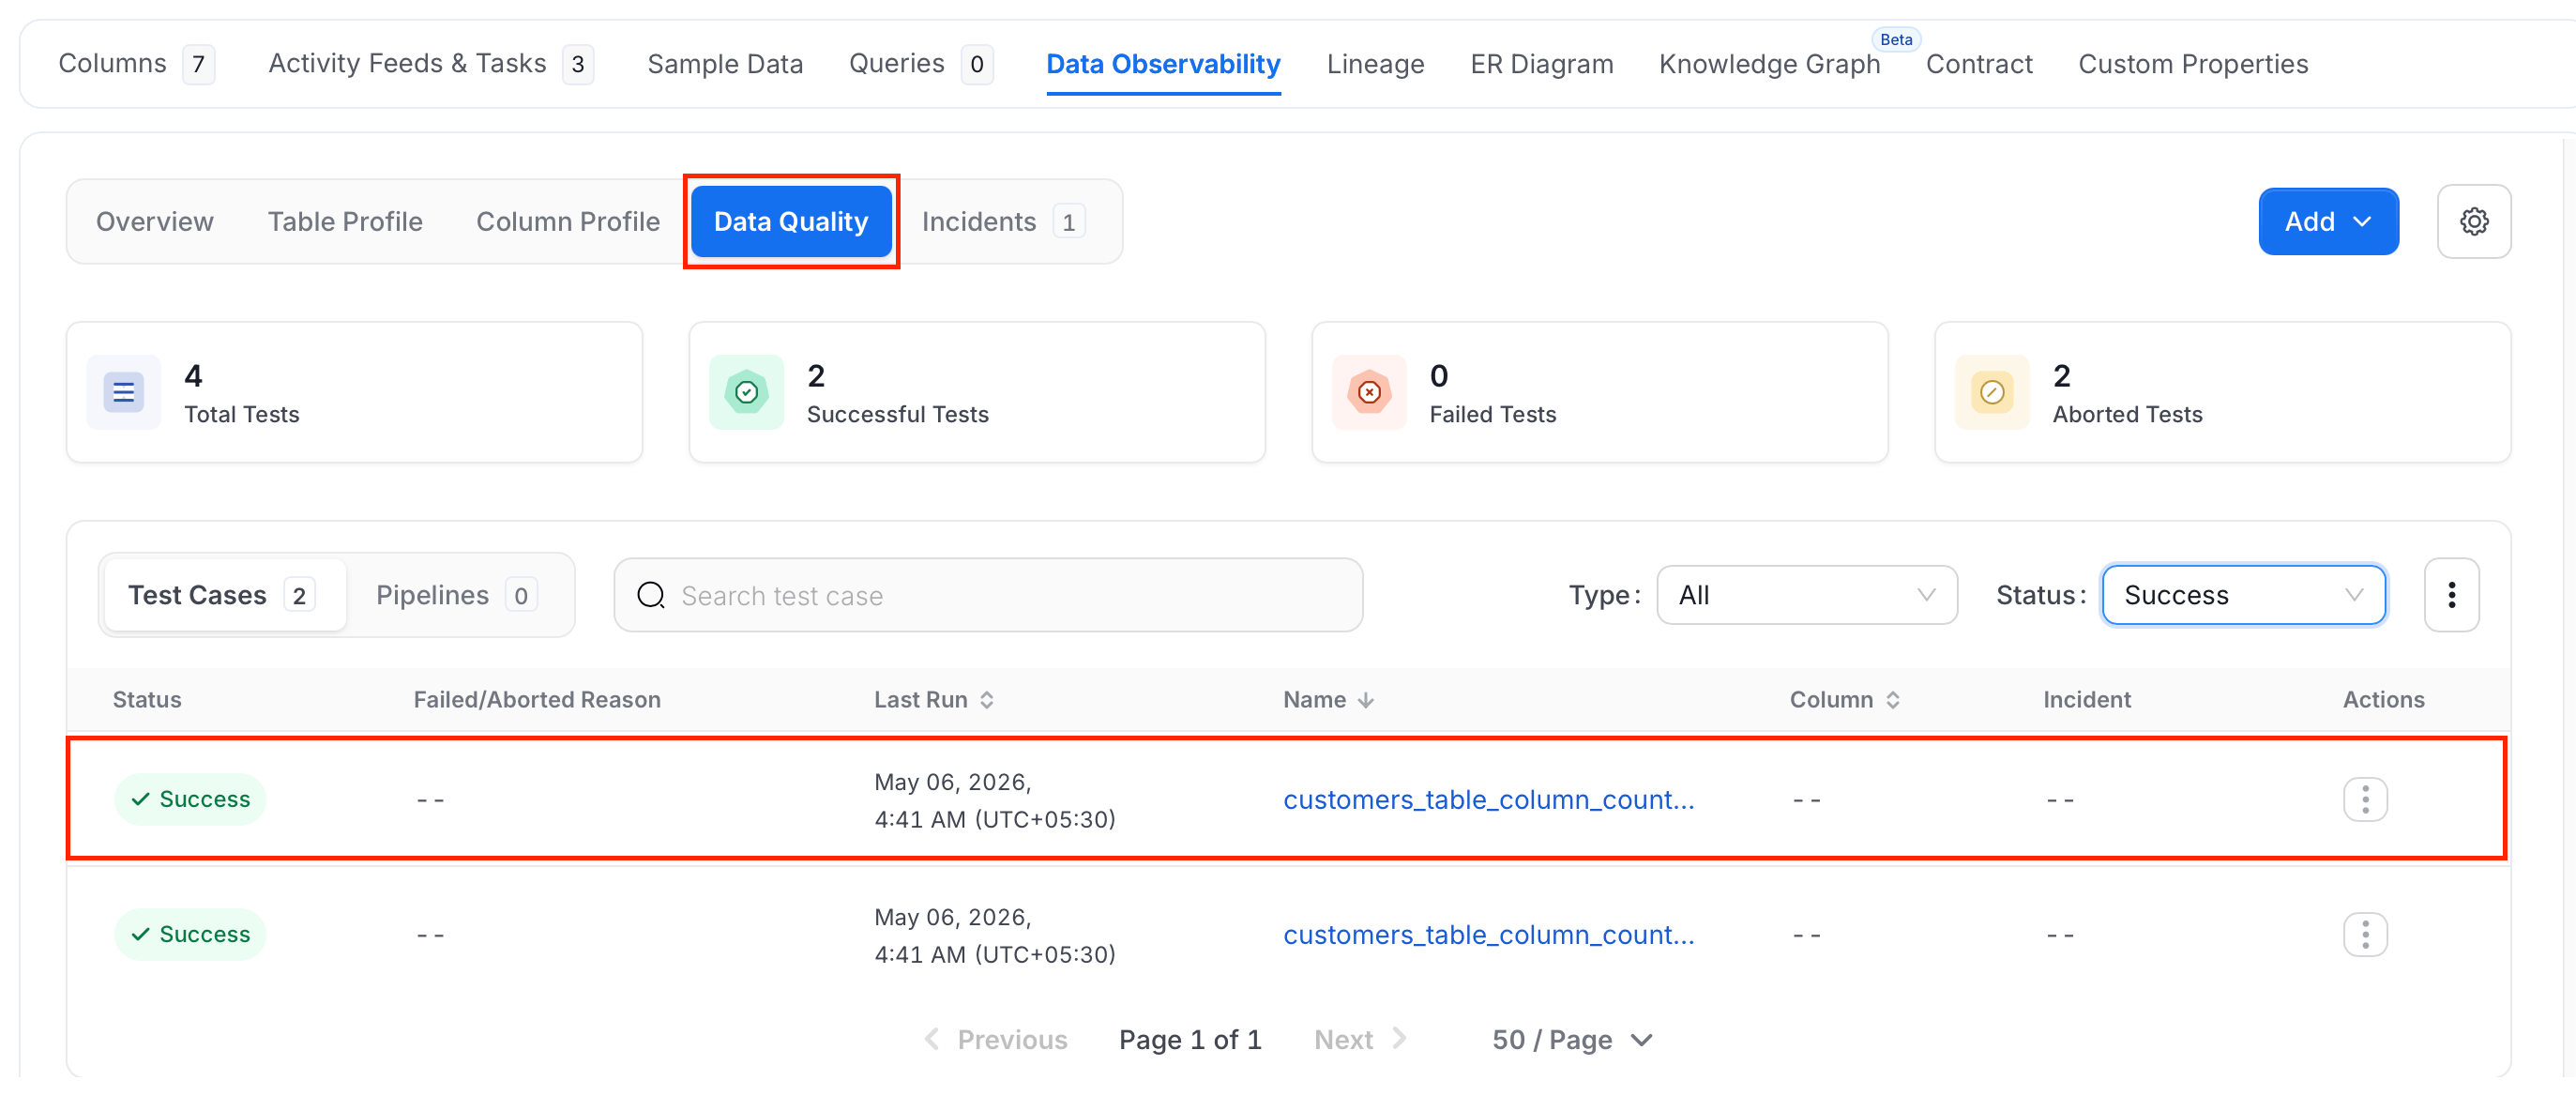
Once you create a test, it appears in the Data Quality tab. Edit the Display Name and Description for any test directly from there.
### Dimension Level Test
A **Dimension Level Test** is a column test segmented by one or more dimension columns. Instead of a single pass/fail result for the whole column, you get separate results for each unique combination of dimension values — so you can pinpoint exactly which segment of your data is failing.
To create a Dimension Level Test, enter the following details:
* **Table**: Select the table that contains the column you want to test.
* **Column**: Select the column to test.
* **Dimensions**: Select one or more columns to segment results by. Use low-cardinality columns such as `region`, `status`, or `product_category` for the most useful breakdown.
* **Top Dimensions**: Set how many top dimension combinations to display in the results (default: 5).
* **Test Type**: Choose from the same test types available for column-level tests.
* **Name**: Add a name that best defines your test case.
* **Description**: Describe the test case.
**Example**: If you test the `amount` column with `region` and `product_type` as dimensions, Collate returns separate results for each combination — North America / Electronics, Europe / Clothing, and so on — so you can immediately see which segment is causing a failure.
For concepts, best practices, and real-world examples, see [Dimensional Validation](/ai-2-0/how-to-guides/data-quality-observability/quality/dimensional-validation).
## View Test Results
Once you create a test, it appears in the Data Quality tab. Edit the Display Name and Description for any test directly from there.
 ## Set Up a Pipeline
Set up a pipeline to run tests at a regular interval. Follow the steps below:
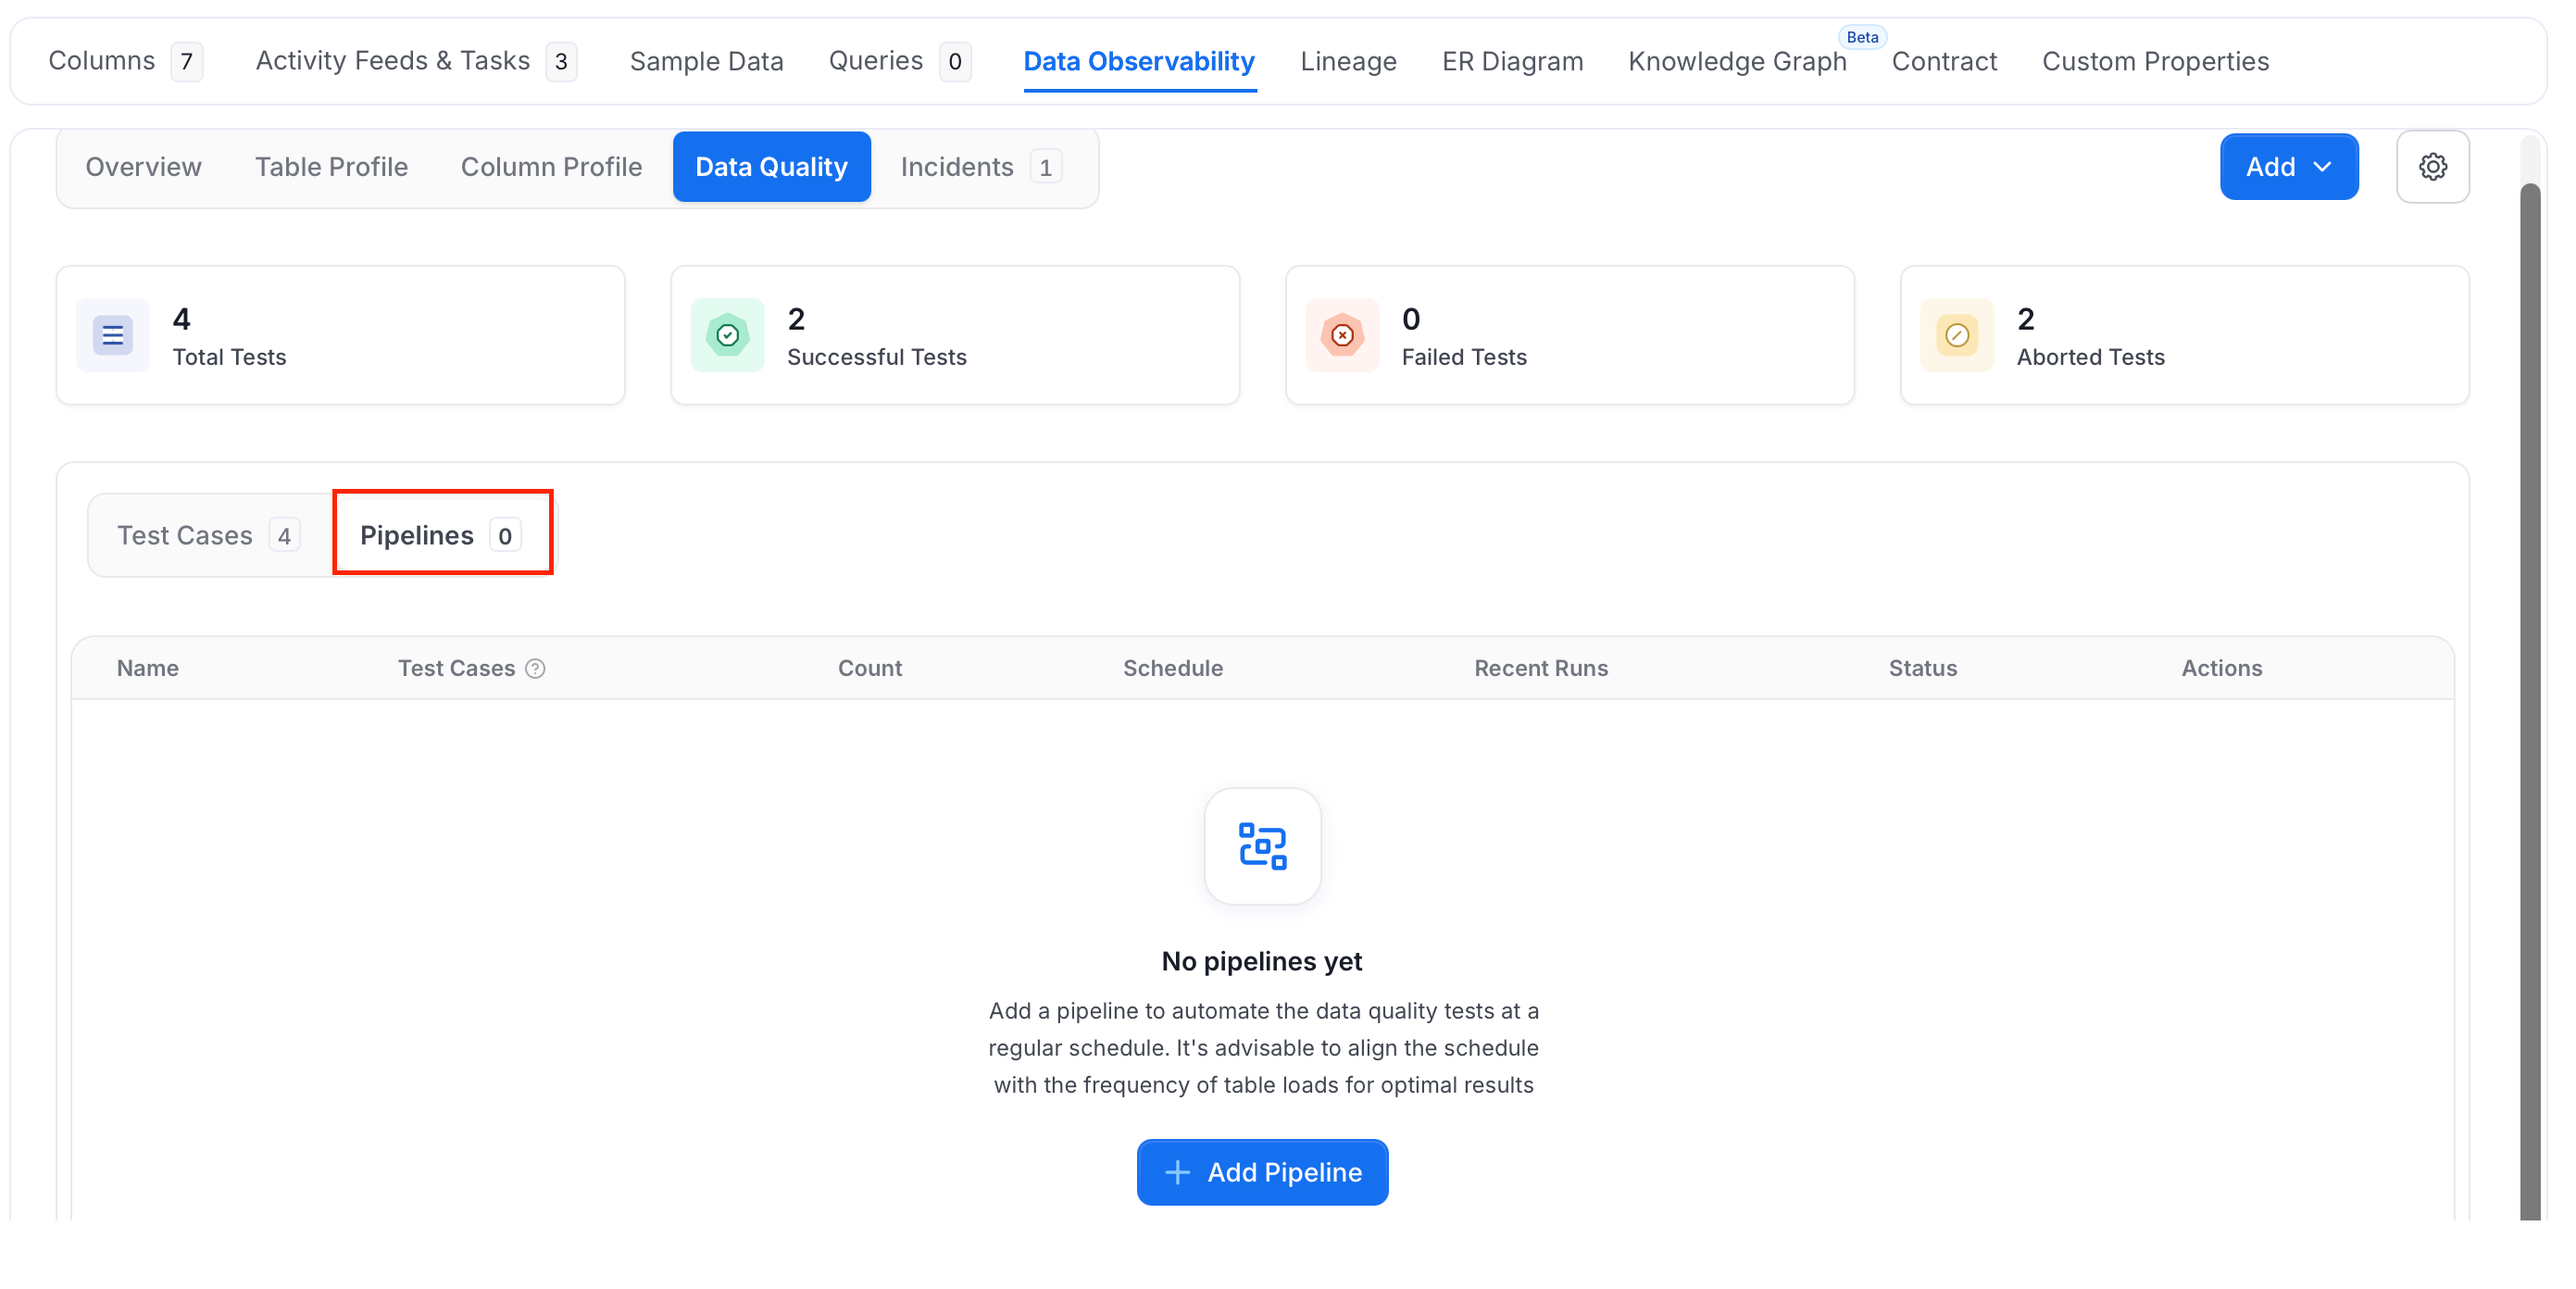
1. Click the **Pipeline** tab as shown in the below image.
## Set Up a Pipeline
Set up a pipeline to run tests at a regular interval. Follow the steps below:
1. Click the **Pipeline** tab as shown in the below image.
 2. Click **Add Pipeline**.
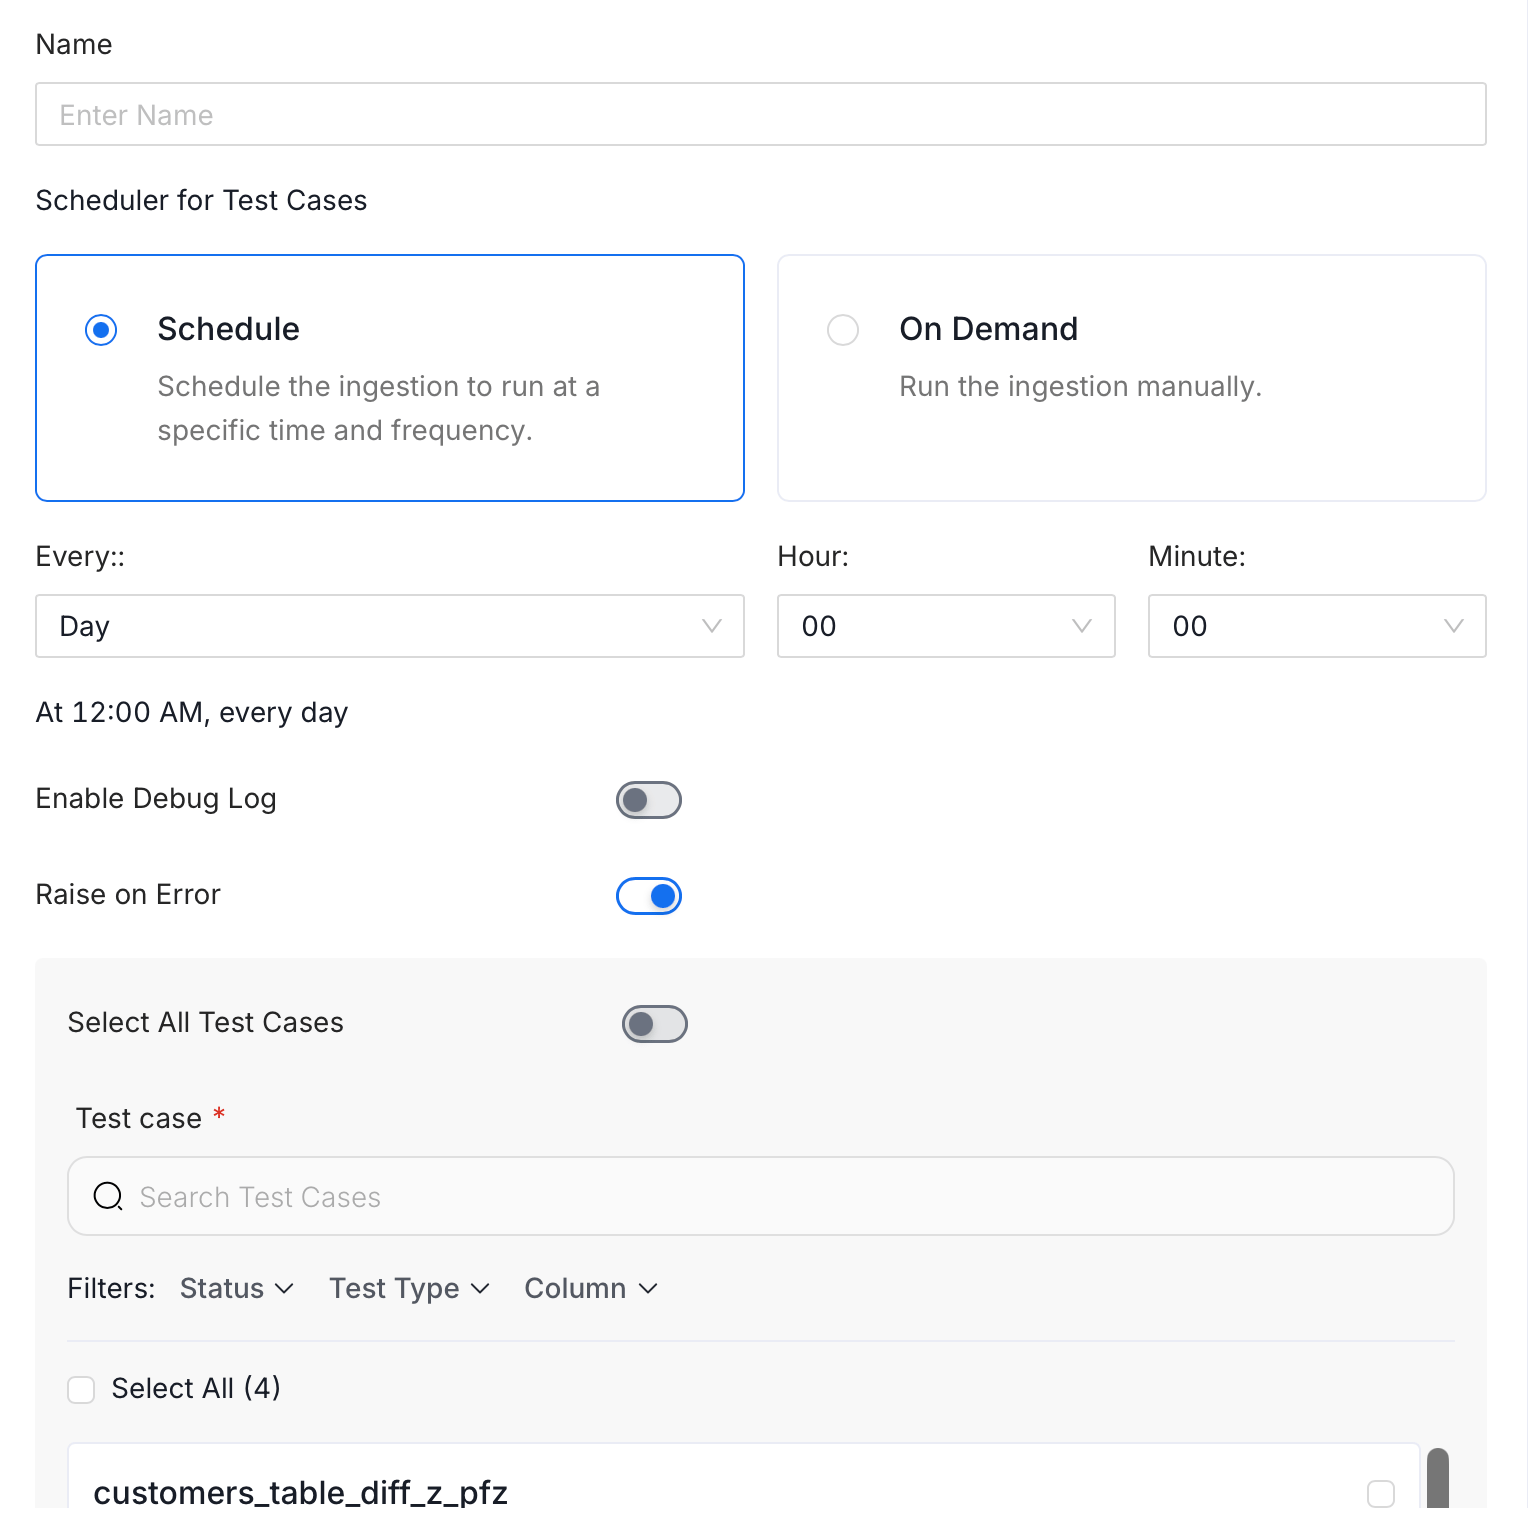
3. Enter the pipeline details:
* **Name**: Enter a name for the pipeline.
* **Scheduler for Test Cases**: Choose how it runs:
* **Schedule**: Runs automatically. Set the **Every**, **Hour**, and **Minute** fields to define the frequency — for example, every day at 12:00 AM.
* **On Demand**: Run the tests manually whenever needed.
* **Enable Debug Log**: Toggle on to capture detailed logs for troubleshooting.
* **Raise on Error**: Toggle on to stop the pipeline if a test throws an error.
* **Select All Test Cases**: Toggle on to include all tests, or search for specific ones in the **Test Case** field. Use the **Status**, **Test Type**, and **Column** filters to narrow the list.
2. Click **Add Pipeline**.
3. Enter the pipeline details:
* **Name**: Enter a name for the pipeline.
* **Scheduler for Test Cases**: Choose how it runs:
* **Schedule**: Runs automatically. Set the **Every**, **Hour**, and **Minute** fields to define the frequency — for example, every day at 12:00 AM.
* **On Demand**: Run the tests manually whenever needed.
* **Enable Debug Log**: Toggle on to capture detailed logs for troubleshooting.
* **Raise on Error**: Toggle on to stop the pipeline if a test throws an error.
* **Select All Test Cases**: Toggle on to include all tests, or search for specific ones in the **Test Case** field. Use the **Status**, **Test Type**, and **Column** filters to narrow the list.
 4. Click **Submit** to save and activate the pipeline.
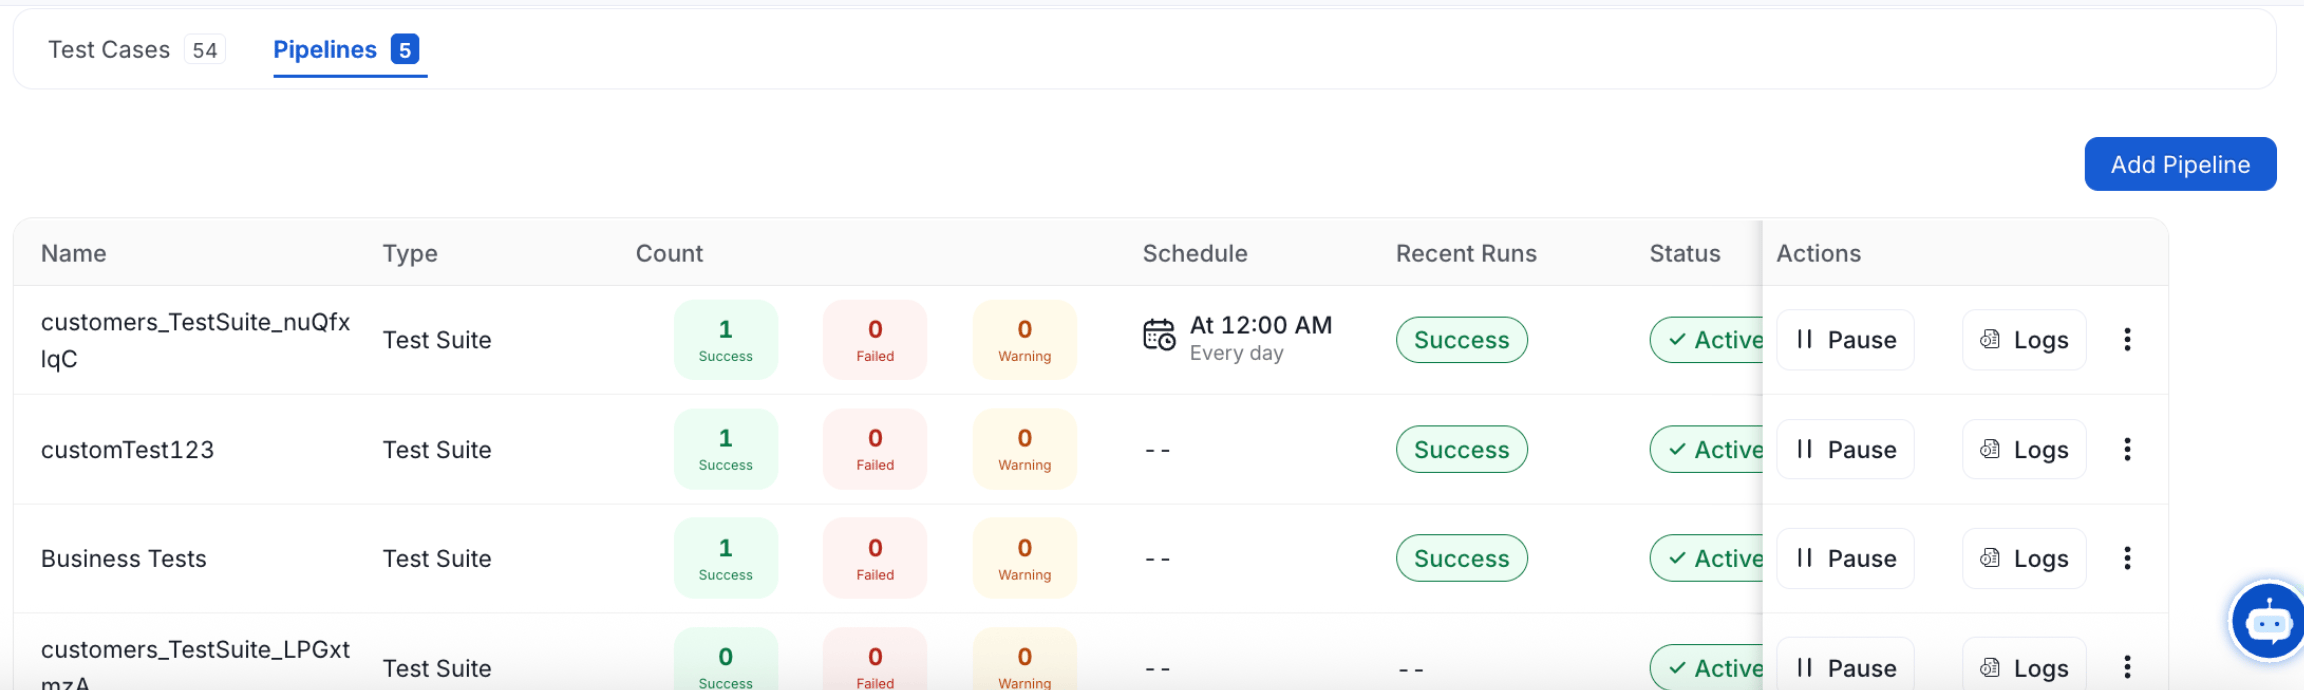
After the pipeline is scheduled, you can view and manage the pipeline in the **Pipelines** tab.
4. Click **Submit** to save and activate the pipeline.
After the pipeline is scheduled, you can view and manage the pipeline in the **Pipelines** tab.
 ## Handle Test Failures
If a test fails, you can edit the test status to **New**, **Acknowledged**, or **Resolved**.
To edit the status for a test, follow the steps below:
1. In the **Status** column, click the edit icon next to a failed test.
## Handle Test Failures
If a test fails, you can edit the test status to **New**, **Acknowledged**, or **Resolved**.
To edit the status for a test, follow the steps below:
1. In the **Status** column, click the edit icon next to a failed test.
 2. Select a test **Status**.
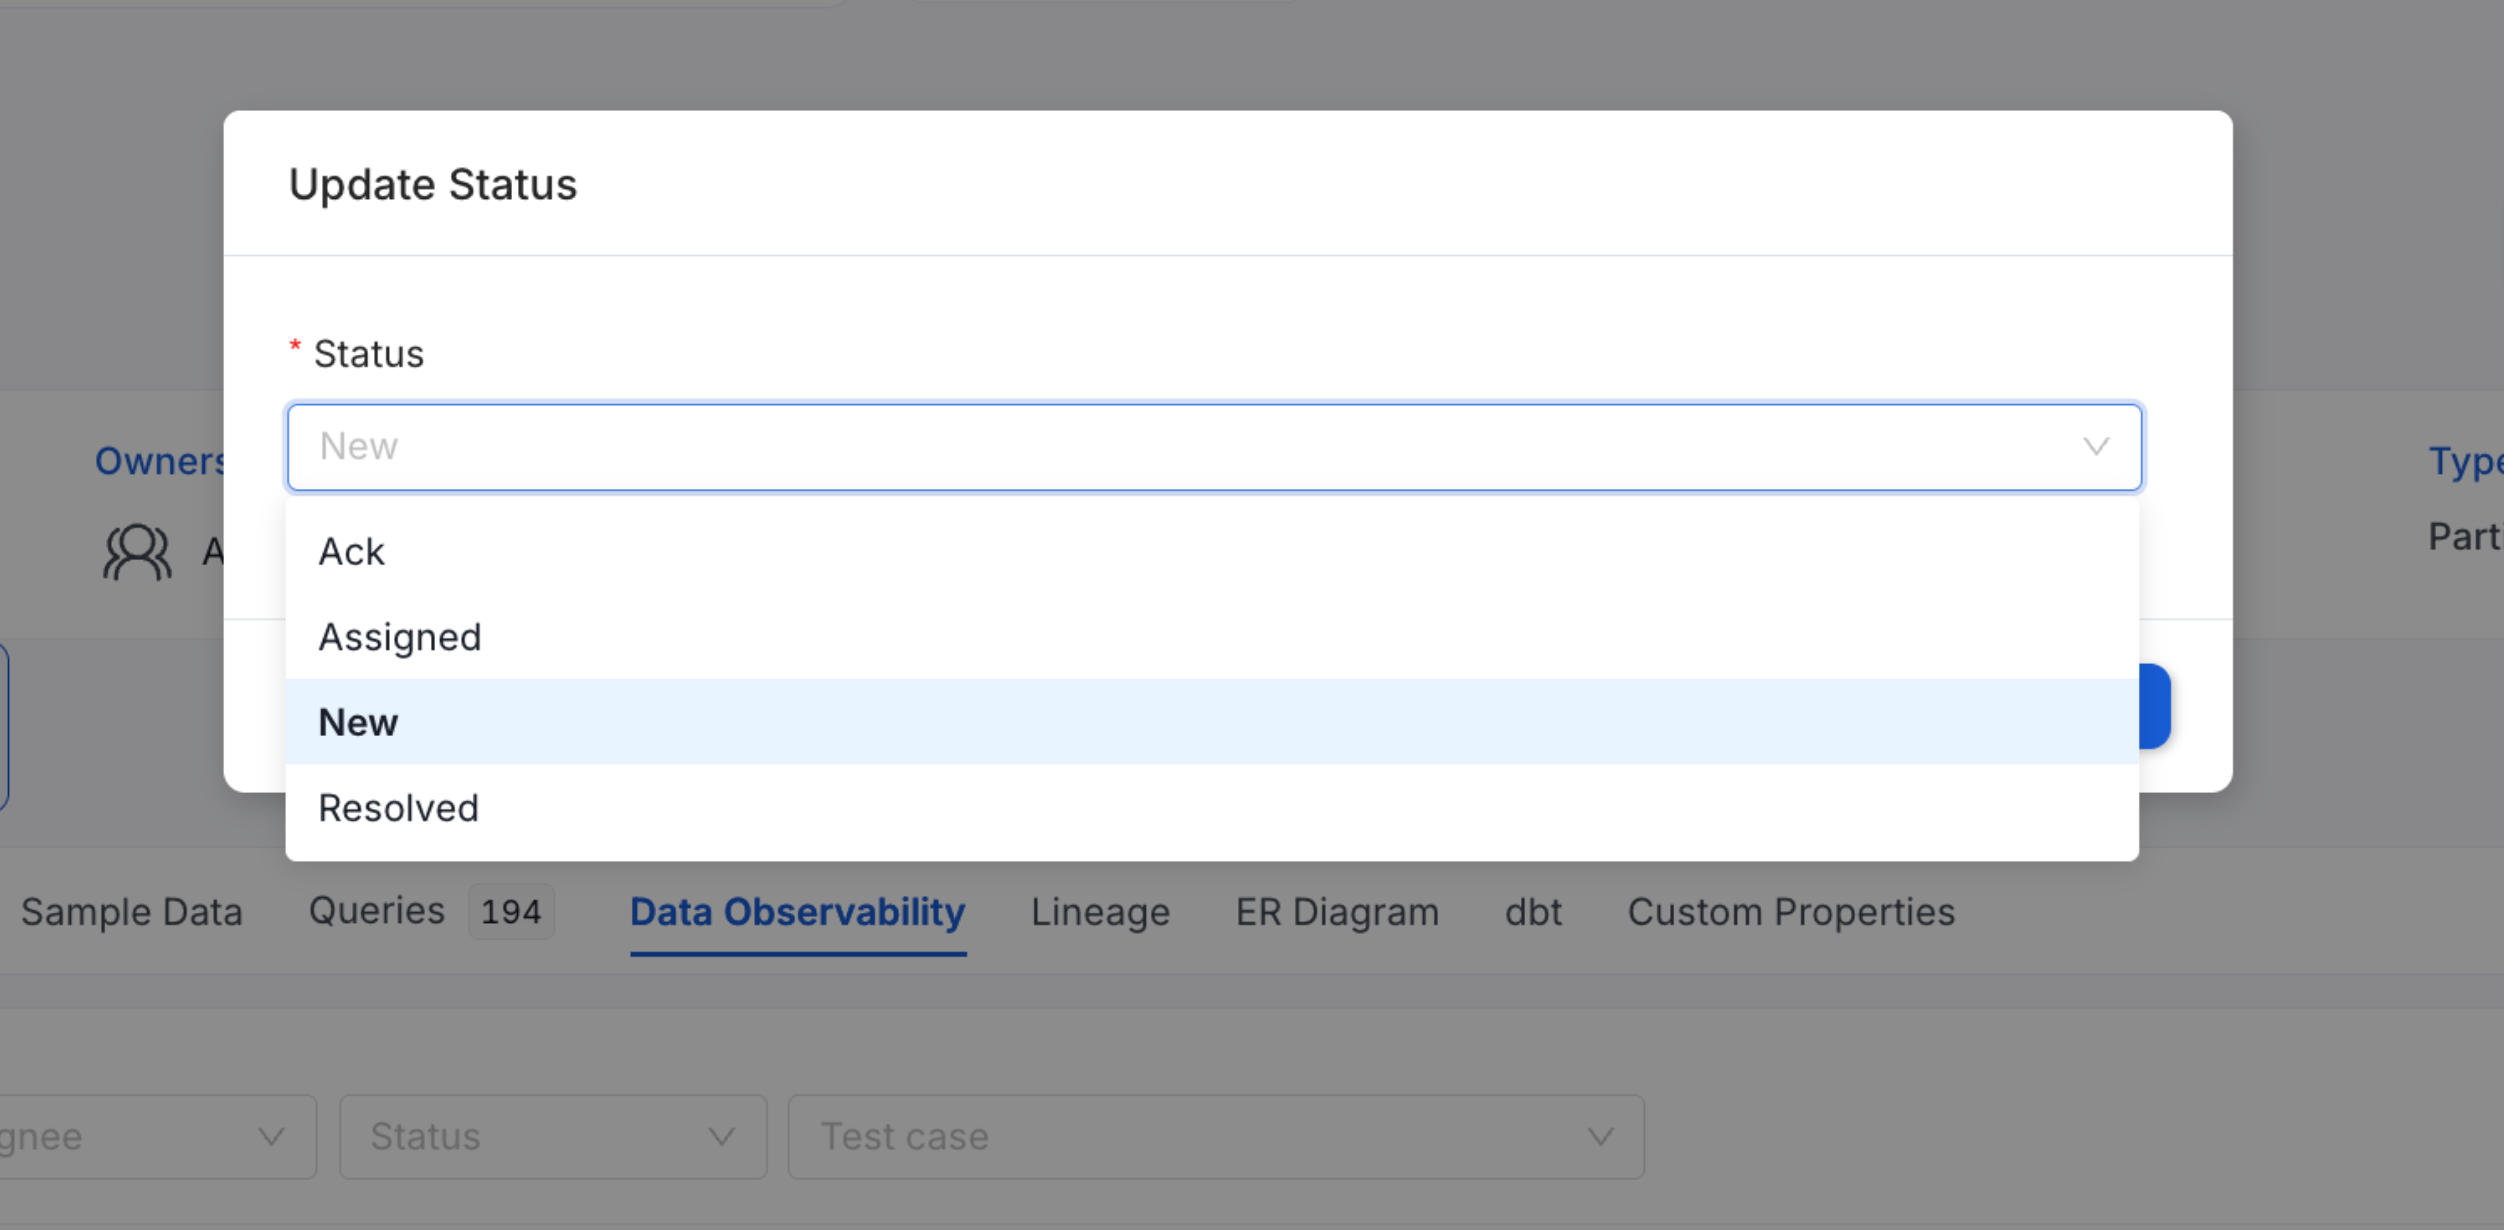 **Note**: If you are marking the test status as **Resolved**, you must specify the **Reason** for the failure and add a **Comment**. The reasons for failure can be Duplicates, False Positive, Missing Data, Other, or Out of Bounds.
3. Click **Submit** to update the status.
Set up [alerts](/ai-2-0/how-to-guides/data-quality-observability/alerts-notifications/data-observability-alerts) to be notified when a test fails.
Get notified when a data quality test fails.
**Note**: If you are marking the test status as **Resolved**, you must specify the **Reason** for the failure and add a **Comment**. The reasons for failure can be Duplicates, False Positive, Missing Data, Other, or Out of Bounds.
3. Click **Submit** to update the status.
Set up [alerts](/ai-2-0/how-to-guides/data-quality-observability/alerts-notifications/data-observability-alerts) to be notified when a test fails.
Get notified when a data quality test fails.