> ## Documentation Index
> Fetch the complete documentation index at: https://docs.getcollate.io/llms.txt
> Use this file to discover all available pages before exploring further.
# Import Data Assets
> Learn to bulk import databases, schemas, and tables in Collate using CSV files. Edit inline, validate changes, and import via UI or API.
# Import Data Assets
Importing a data asset is simple. Below are the steps to bulk import various data assets, such as Databases, Schemas, and Tables.
## How to Import a Database Service
To import a Database Service:
1. Click the **Profile** icon and navigate to **Settings** > **Services** > **Database**.
2. Select a database service you want to import. For example, we are importing the `Snowflake` service.
3. Click **Settings** and select **Import** to download the Database Service file.
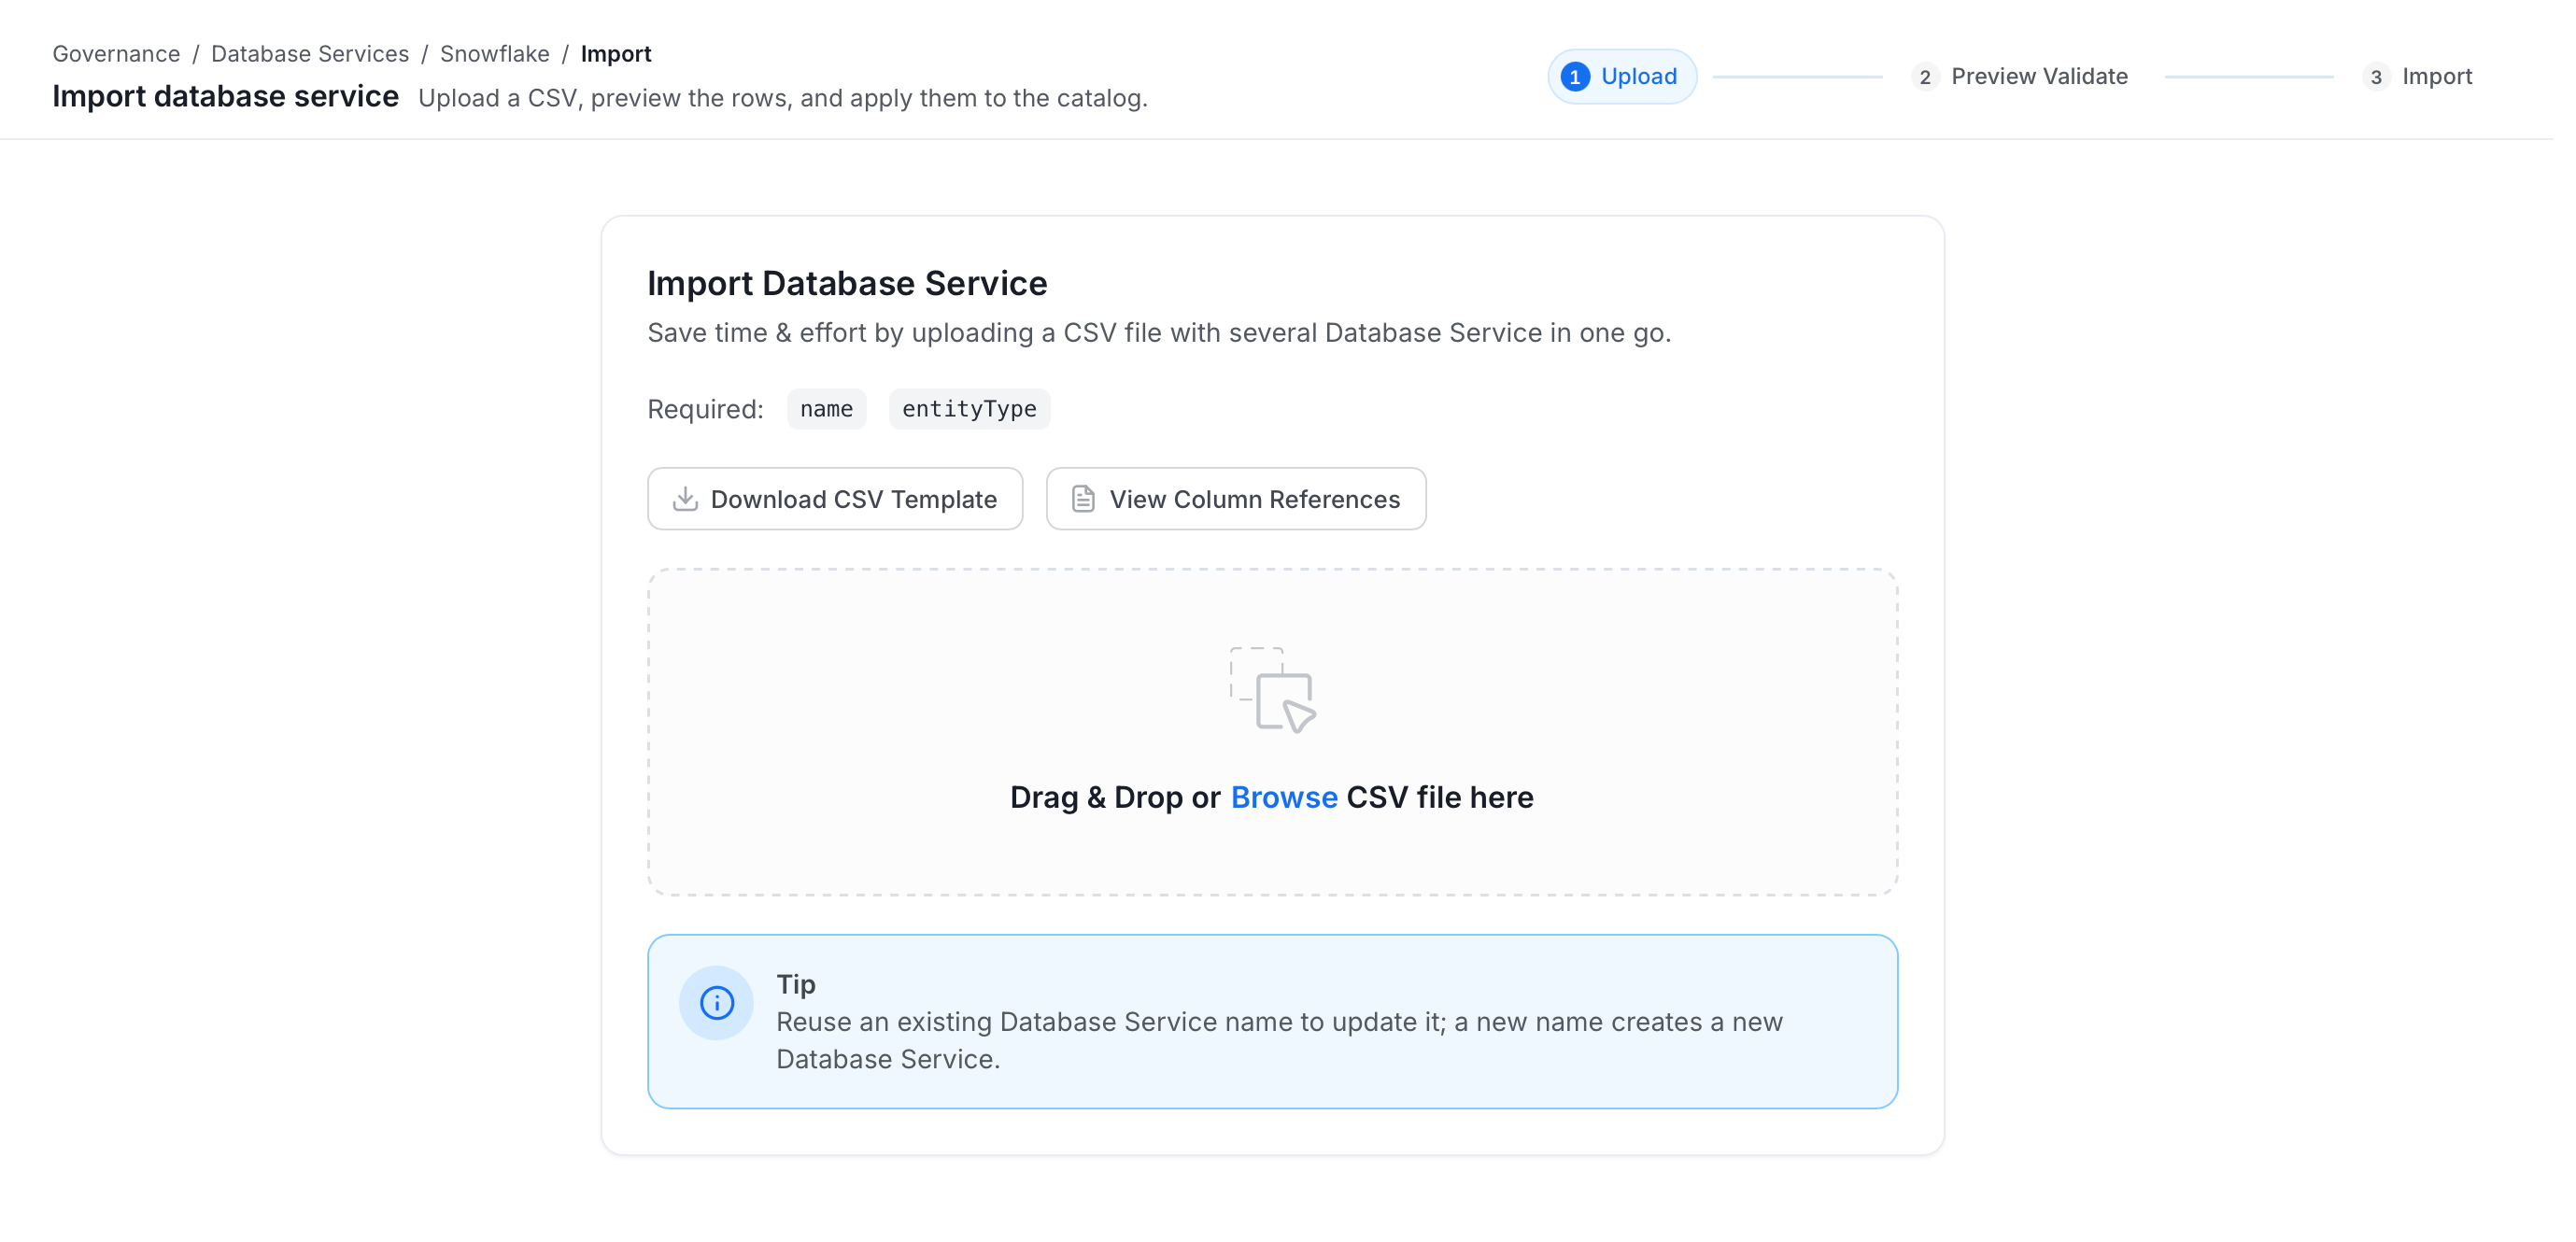
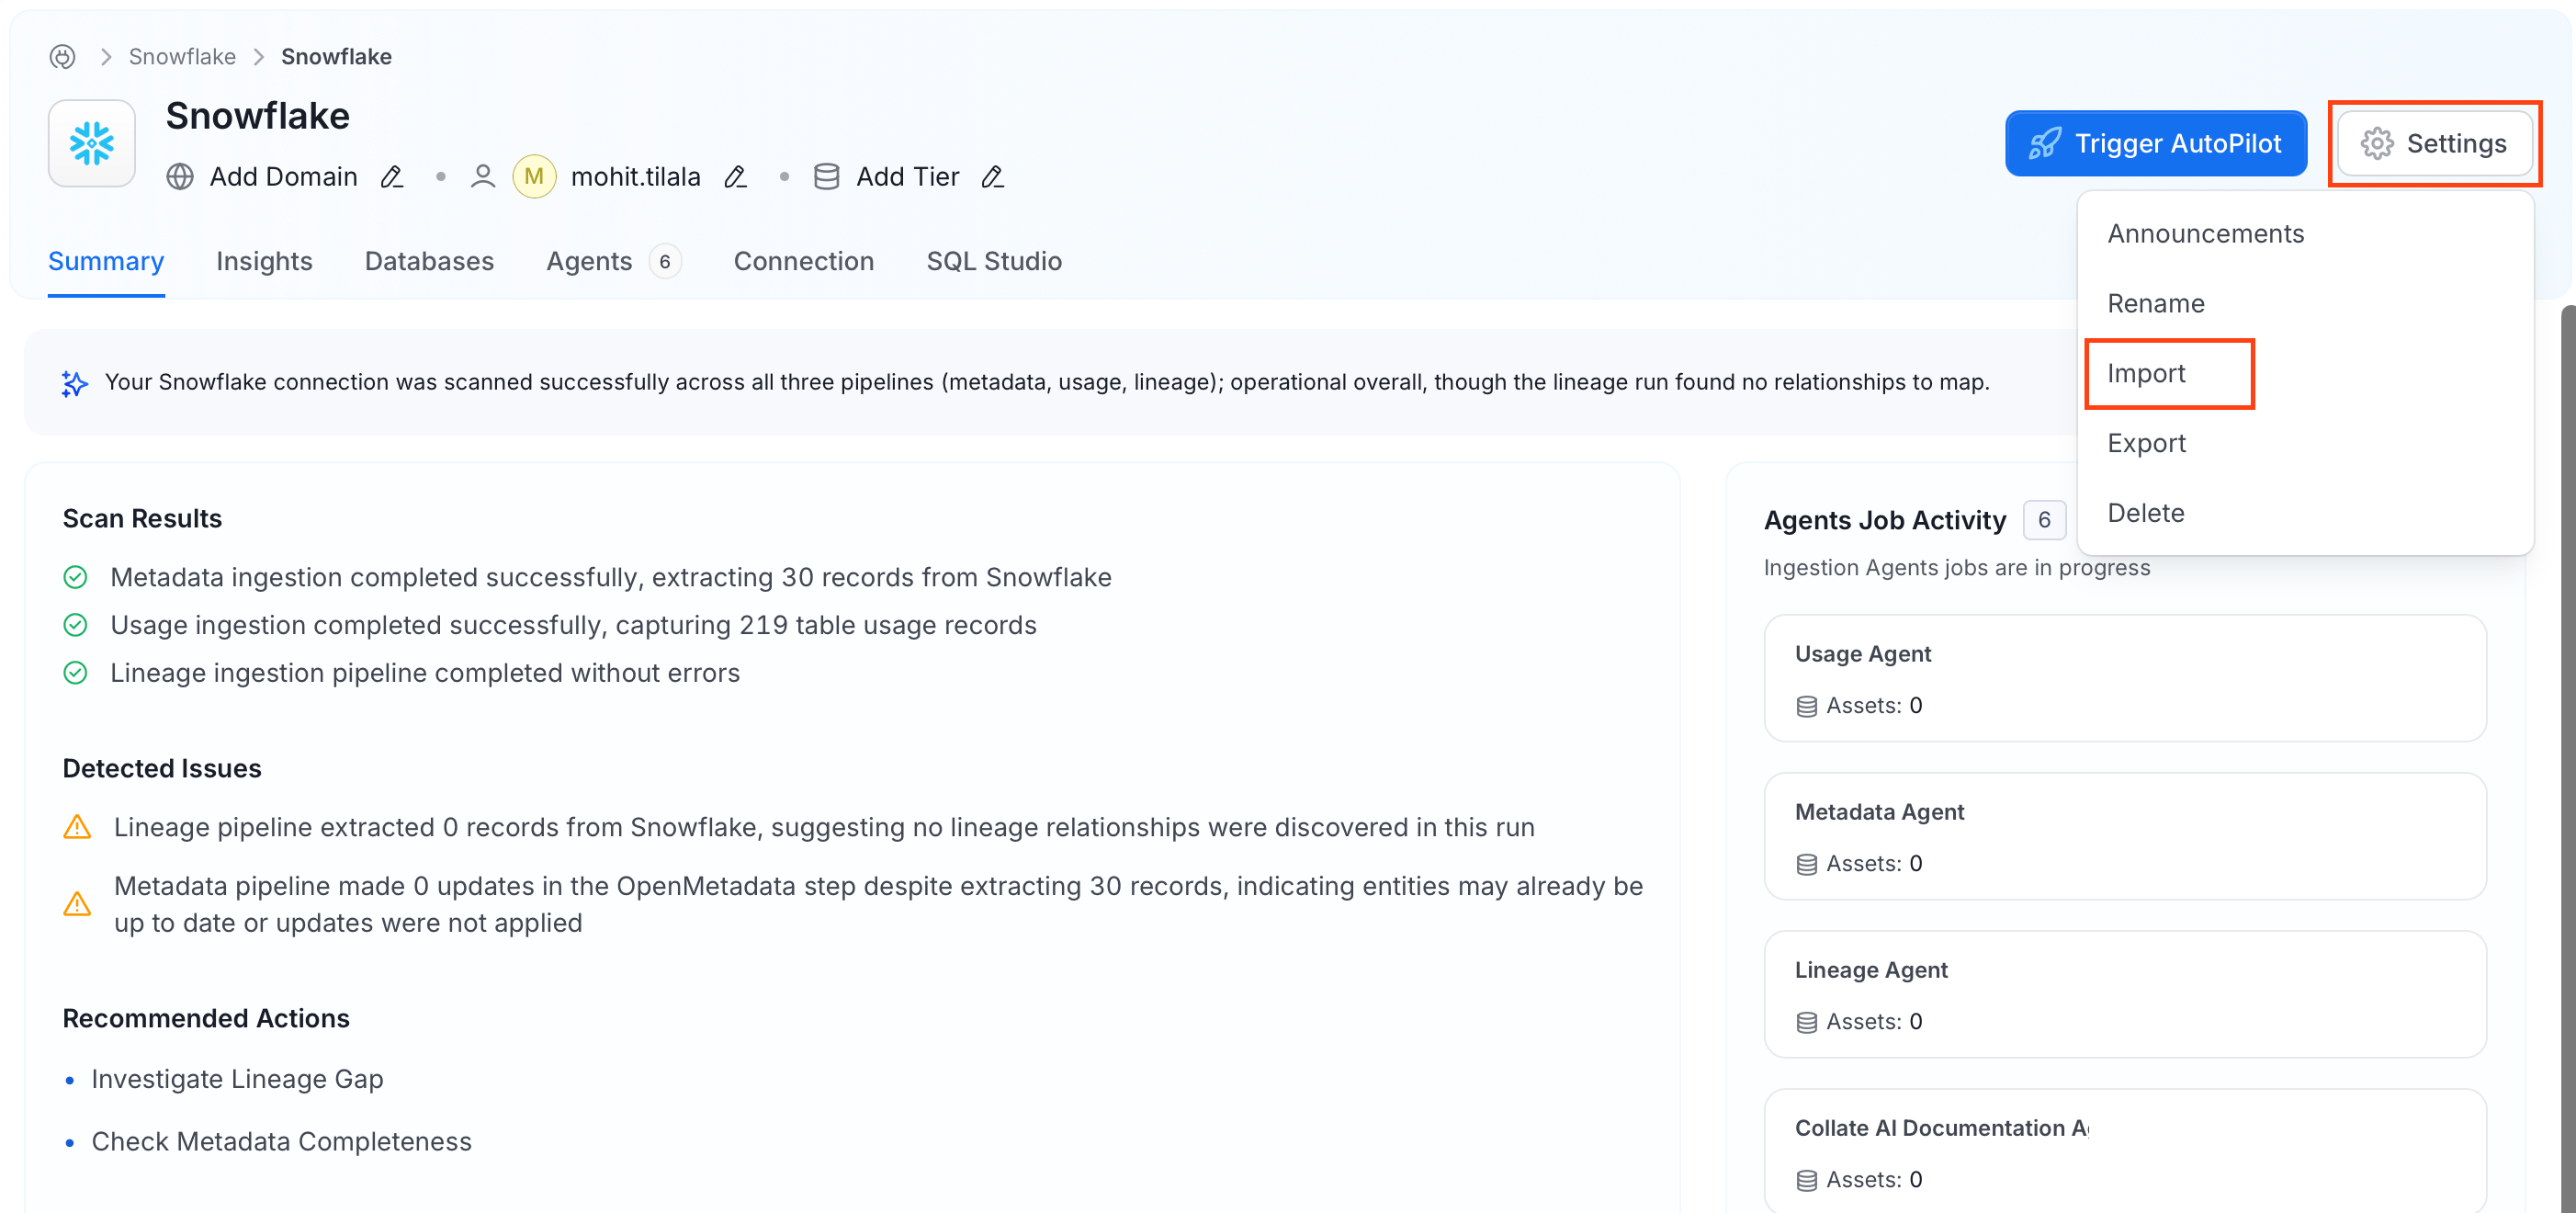 4. Upload/Drop the Database Service CSV file that you want to import.
Alternatively, you can `export` an existing Database Service CSV as a template, make the necessary edits, and then upload the updated file.
Once you have the template, you can fill in the following details:
* **name** (required): This field contains the name of the database.
* **fullyQualifiedName** (required): This field contains the fully qualified name of the database service.
* **displayName**: This field holds the display name of the database.
* **description**: This field contains a detailed description or information about the database.
* **owner**: This field specifies the owner of the database.
* **tags**: This field contains the tags associated with the database.
* **glossaryTerms**: This field holds the glossary terms linked to the database.
* **tiers**: This field defines the tiers associated with the database service.
* **domain**: This field contains the domain assigned to the data asset.
4. Upload/Drop the Database Service CSV file that you want to import.
Alternatively, you can `export` an existing Database Service CSV as a template, make the necessary edits, and then upload the updated file.
Once you have the template, you can fill in the following details:
* **name** (required): This field contains the name of the database.
* **fullyQualifiedName** (required): This field contains the fully qualified name of the database service.
* **displayName**: This field holds the display name of the database.
* **description**: This field contains a detailed description or information about the database.
* **owner**: This field specifies the owner of the database.
* **tags**: This field contains the tags associated with the database.
* **glossaryTerms**: This field holds the glossary terms linked to the database.
* **tiers**: This field defines the tiers associated with the database service.
* **domain**: This field contains the domain assigned to the data asset.
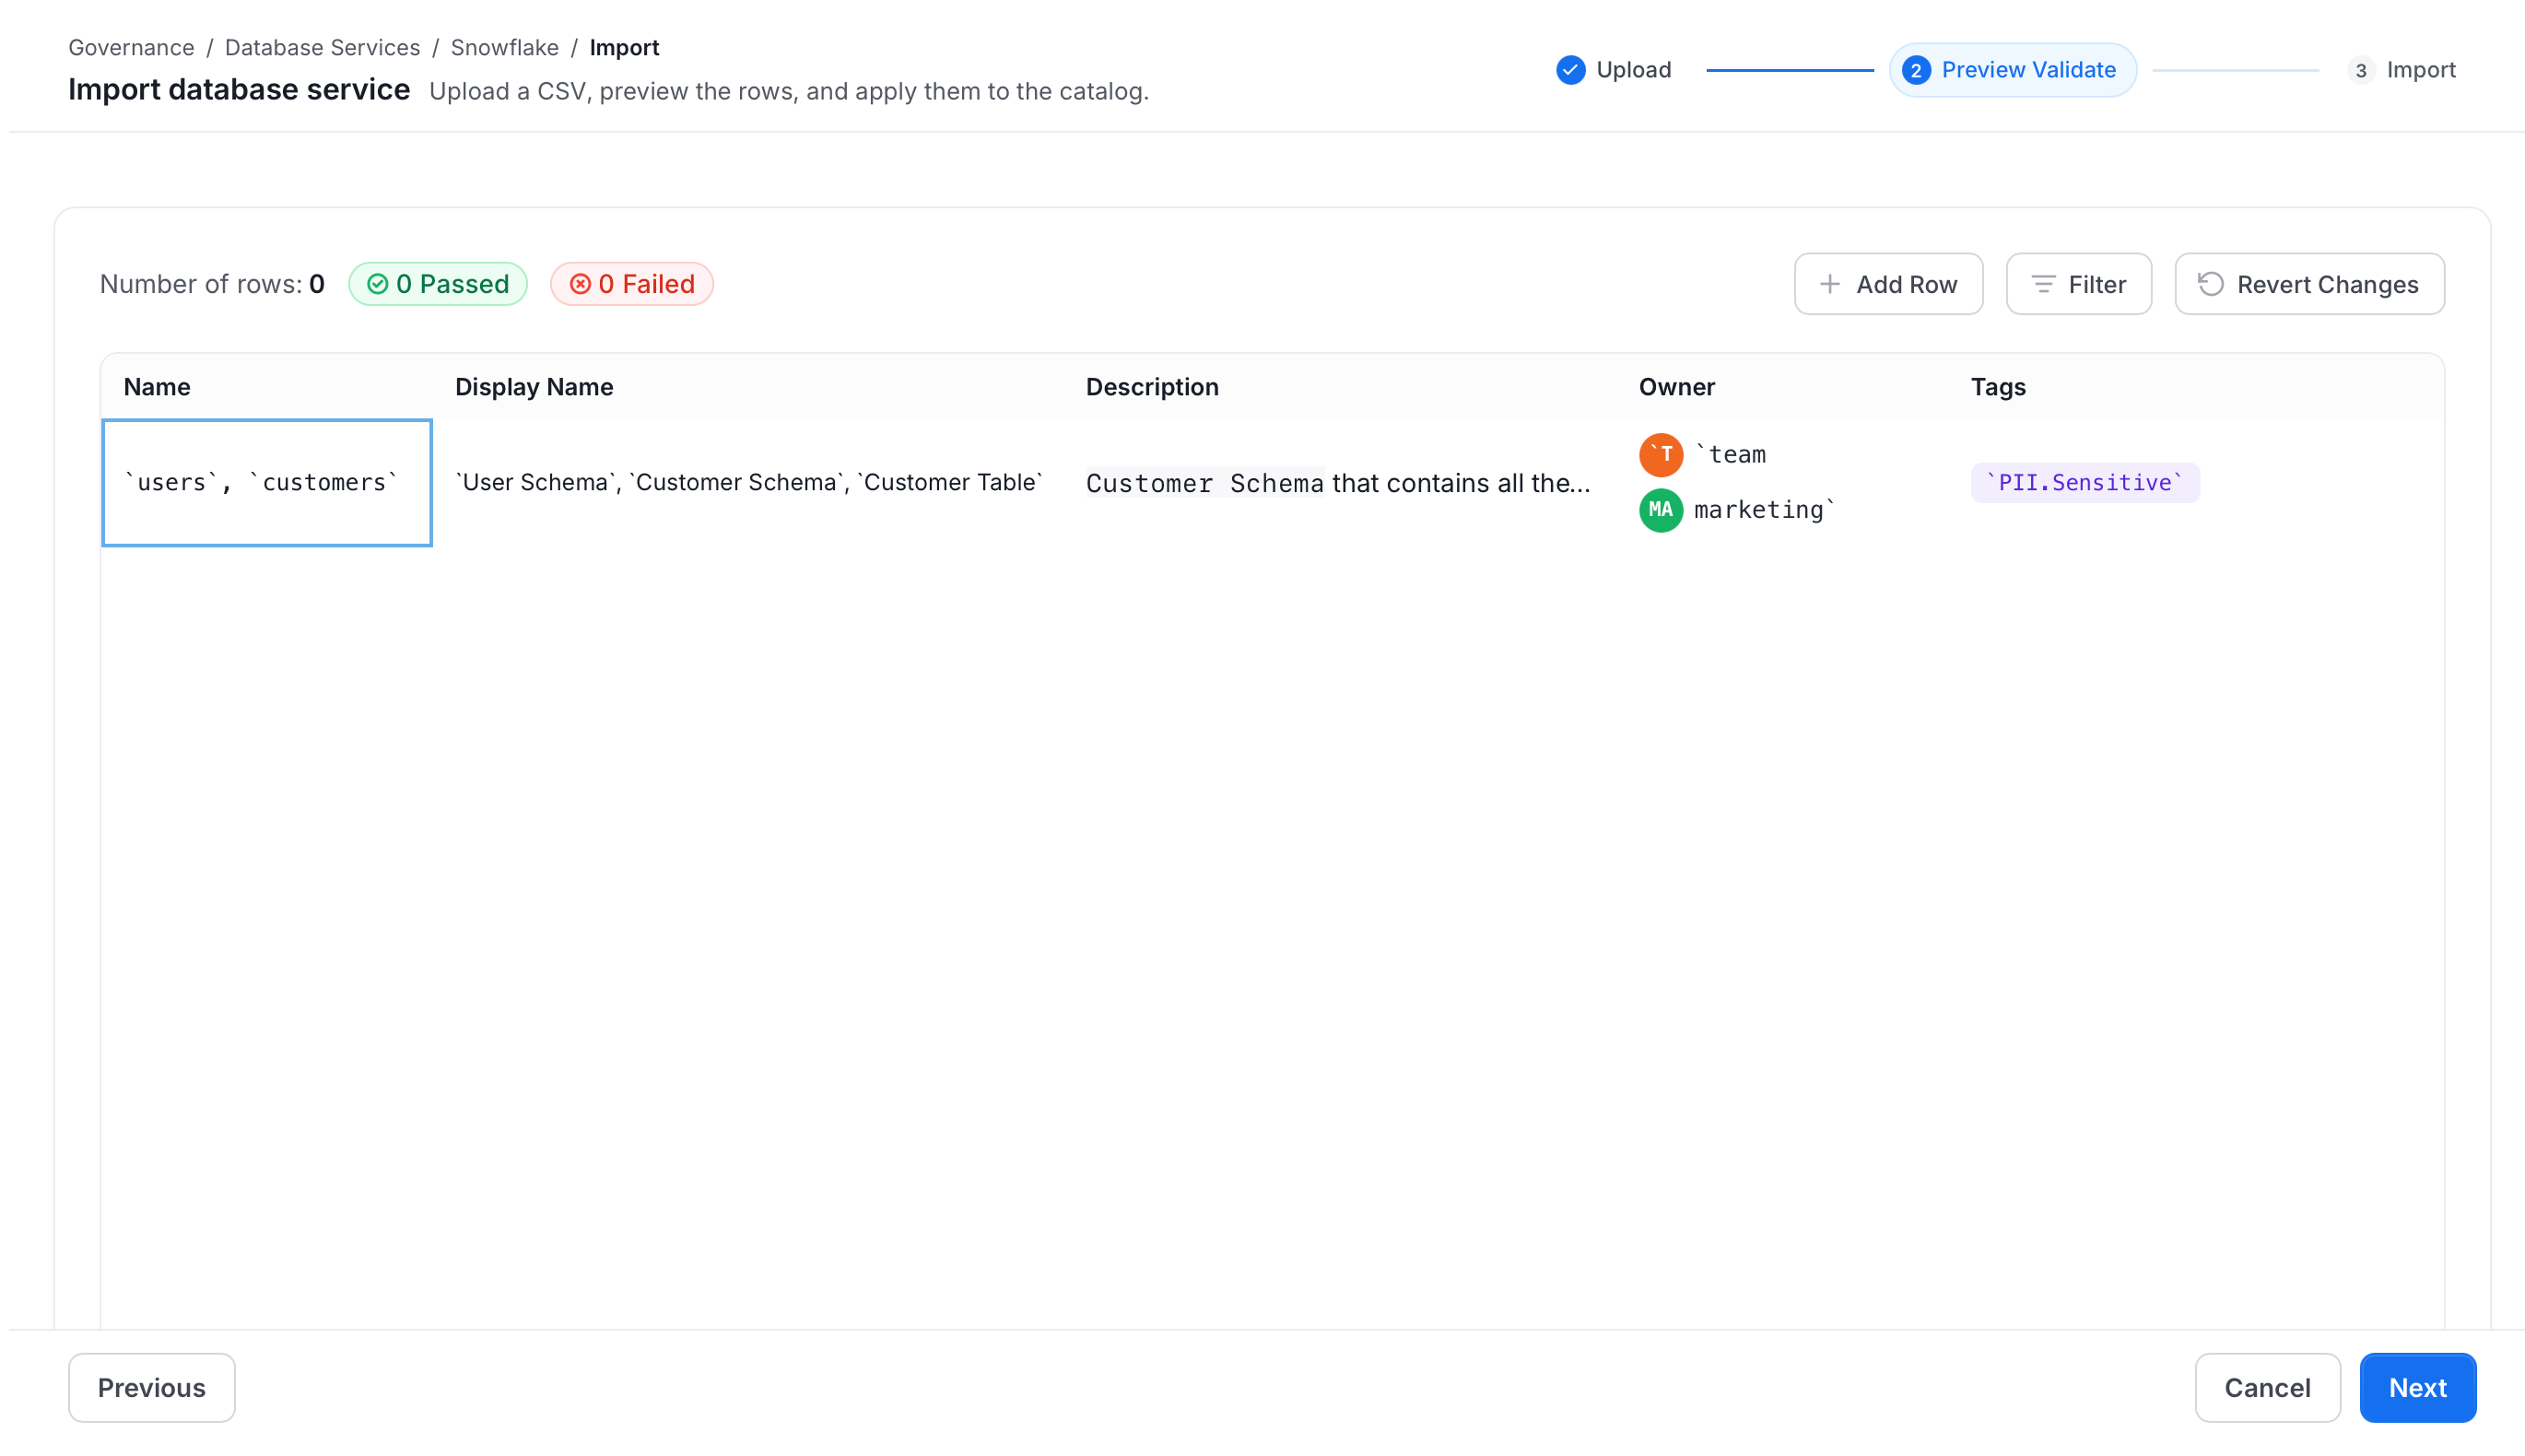
 5. Review the preview of your uploaded data. Make any additions or corrections directly in the table if needed. A **Passed** and **Failed** count is displayed above the table to help you quickly identify any rows with validation errors before proceeding.
Click **Next**.
5. Review the preview of your uploaded data. Make any additions or corrections directly in the table if needed. A **Passed** and **Failed** count is displayed above the table to help you quickly identify any rows with validation errors before proceeding.
Click **Next**.
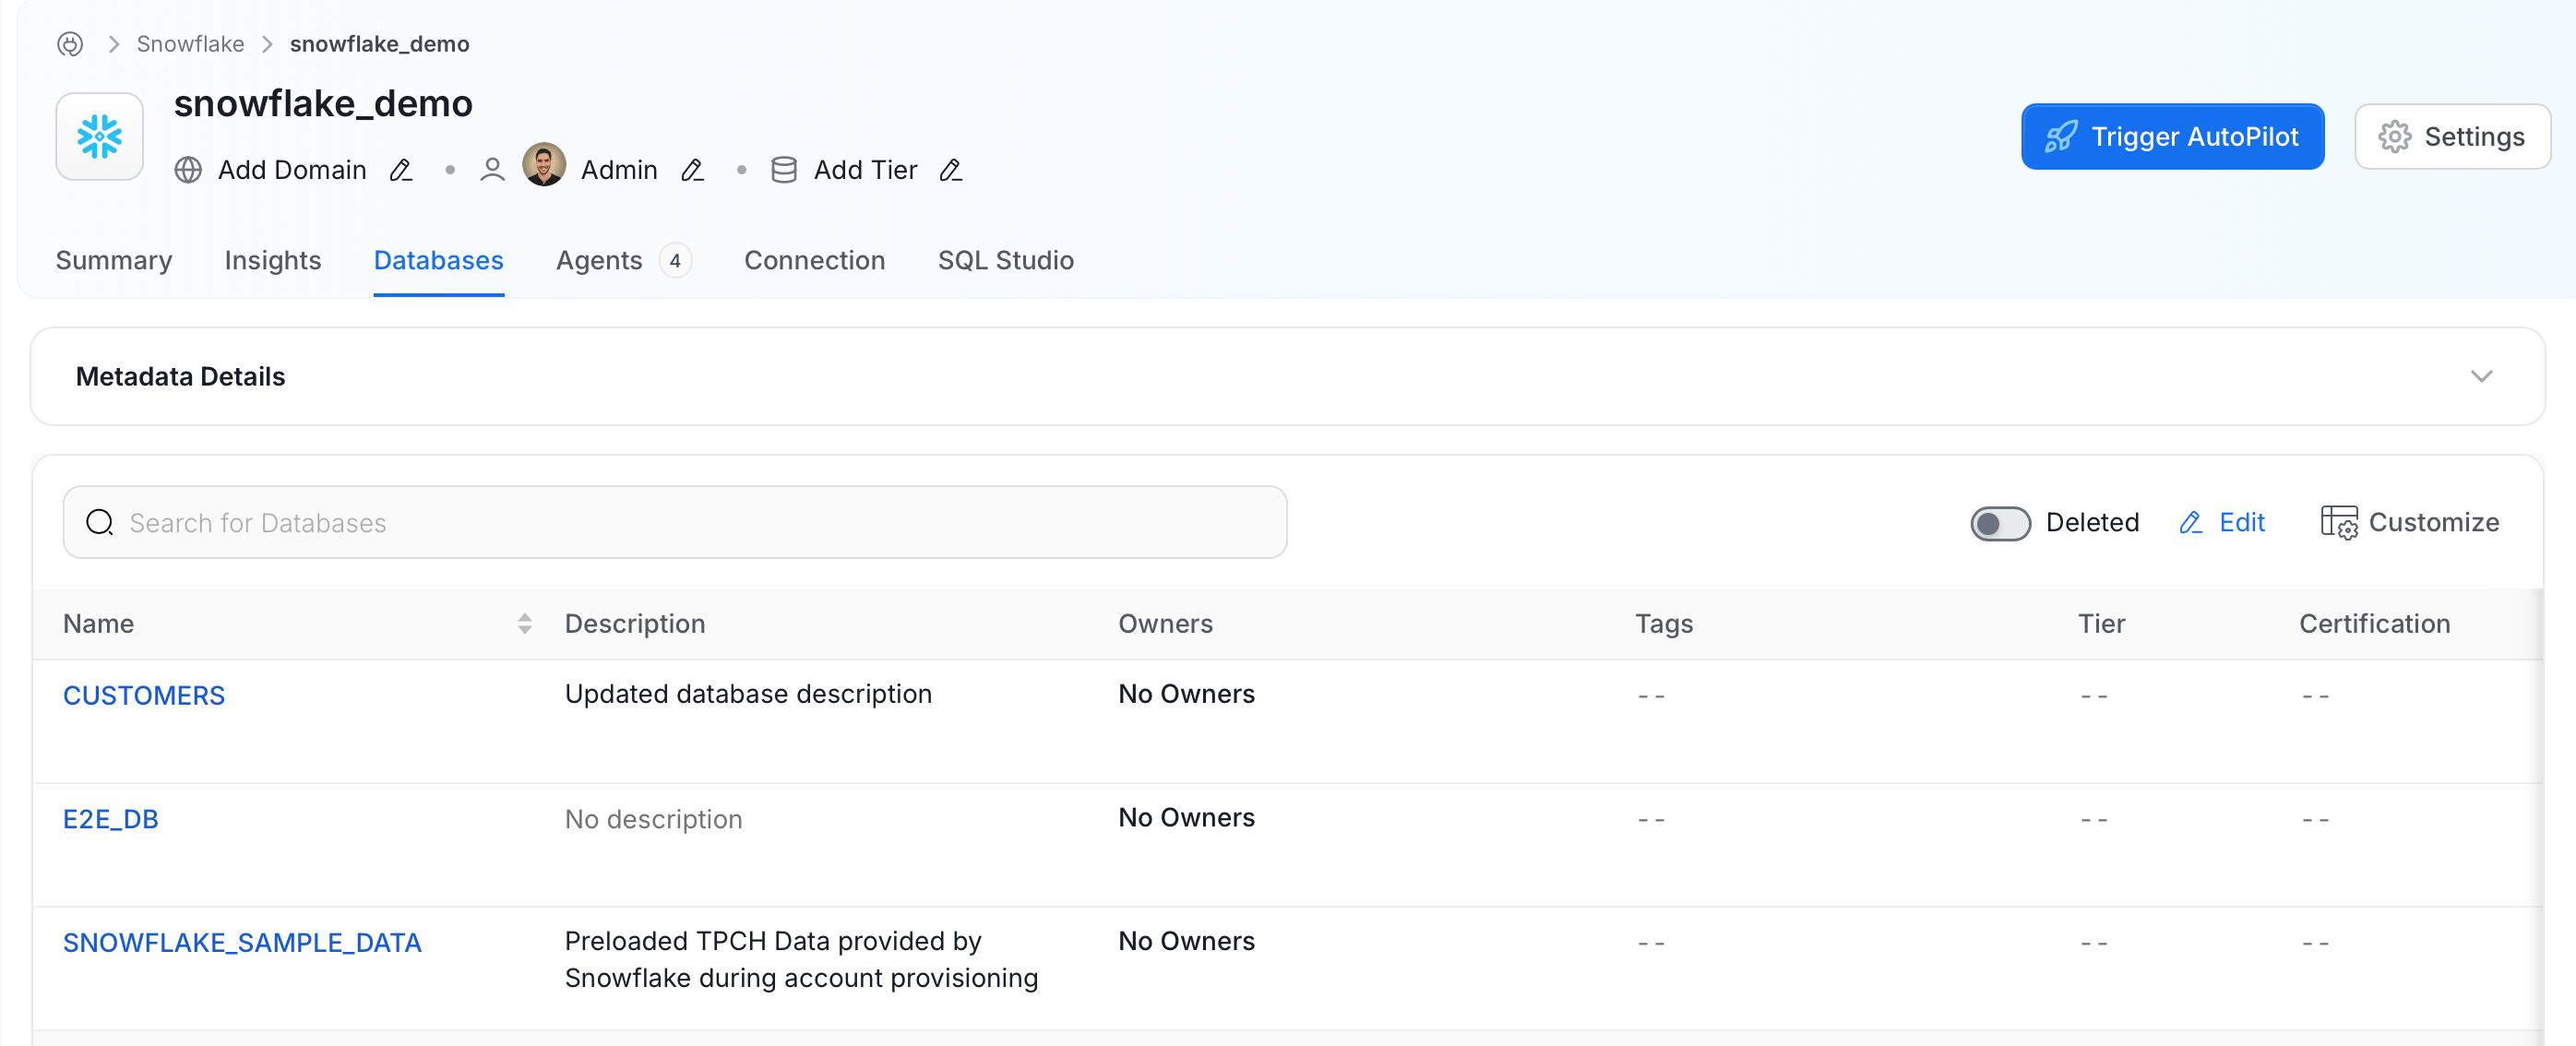
 6. After the database service is uploaded, you can view the changes in the database service.
**Tip**: You can also import the Database Service using the API with the following endpoint:
`/api/v1/services/databaseServices/name/{name}/import`
Make sure to replace `{name}` with the Fully Qualified Name (FQN) of the database service.
## How to Bulk Import a Database
To import a Database:
1. Click the **Profile** icon and select **Settings** > **Services** > **Database**.
2. Select a database service whose database you want to import.
3. Click the **Databases** tab and select the database you want to import.
6. After the database service is uploaded, you can view the changes in the database service.
**Tip**: You can also import the Database Service using the API with the following endpoint:
`/api/v1/services/databaseServices/name/{name}/import`
Make sure to replace `{name}` with the Fully Qualified Name (FQN) of the database service.
## How to Bulk Import a Database
To import a Database:
1. Click the **Profile** icon and select **Settings** > **Services** > **Database**.
2. Select a database service whose database you want to import.
3. Click the **Databases** tab and select the database you want to import.
 4. Click the **⋮** icon and select **Import** to upload the database CSV file.
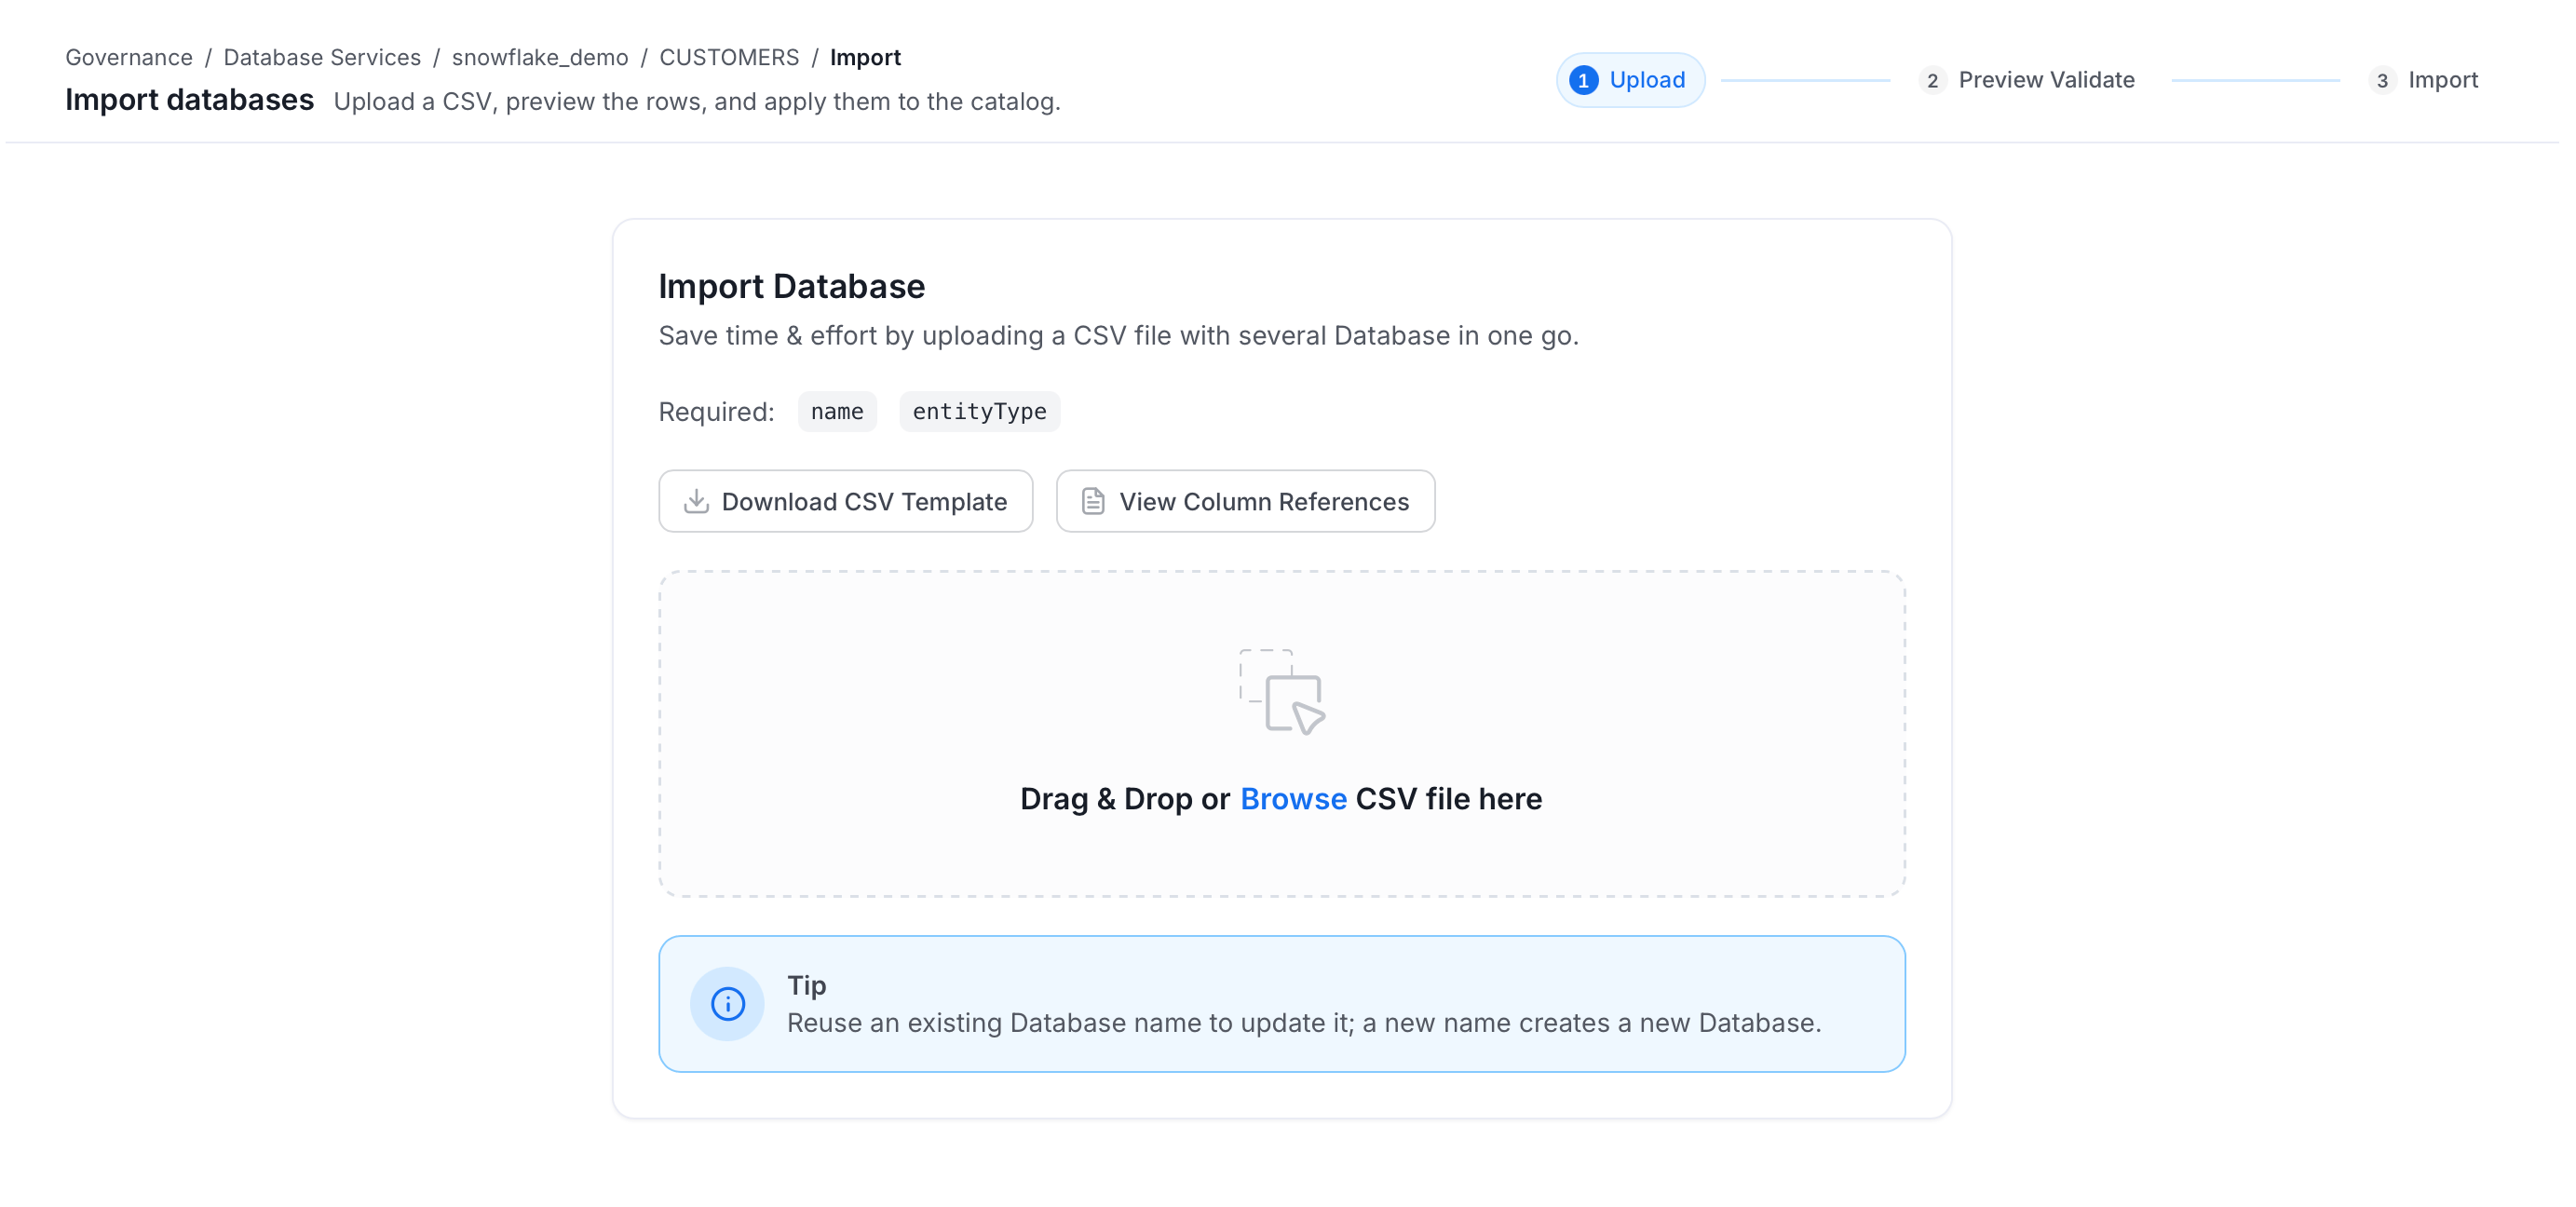
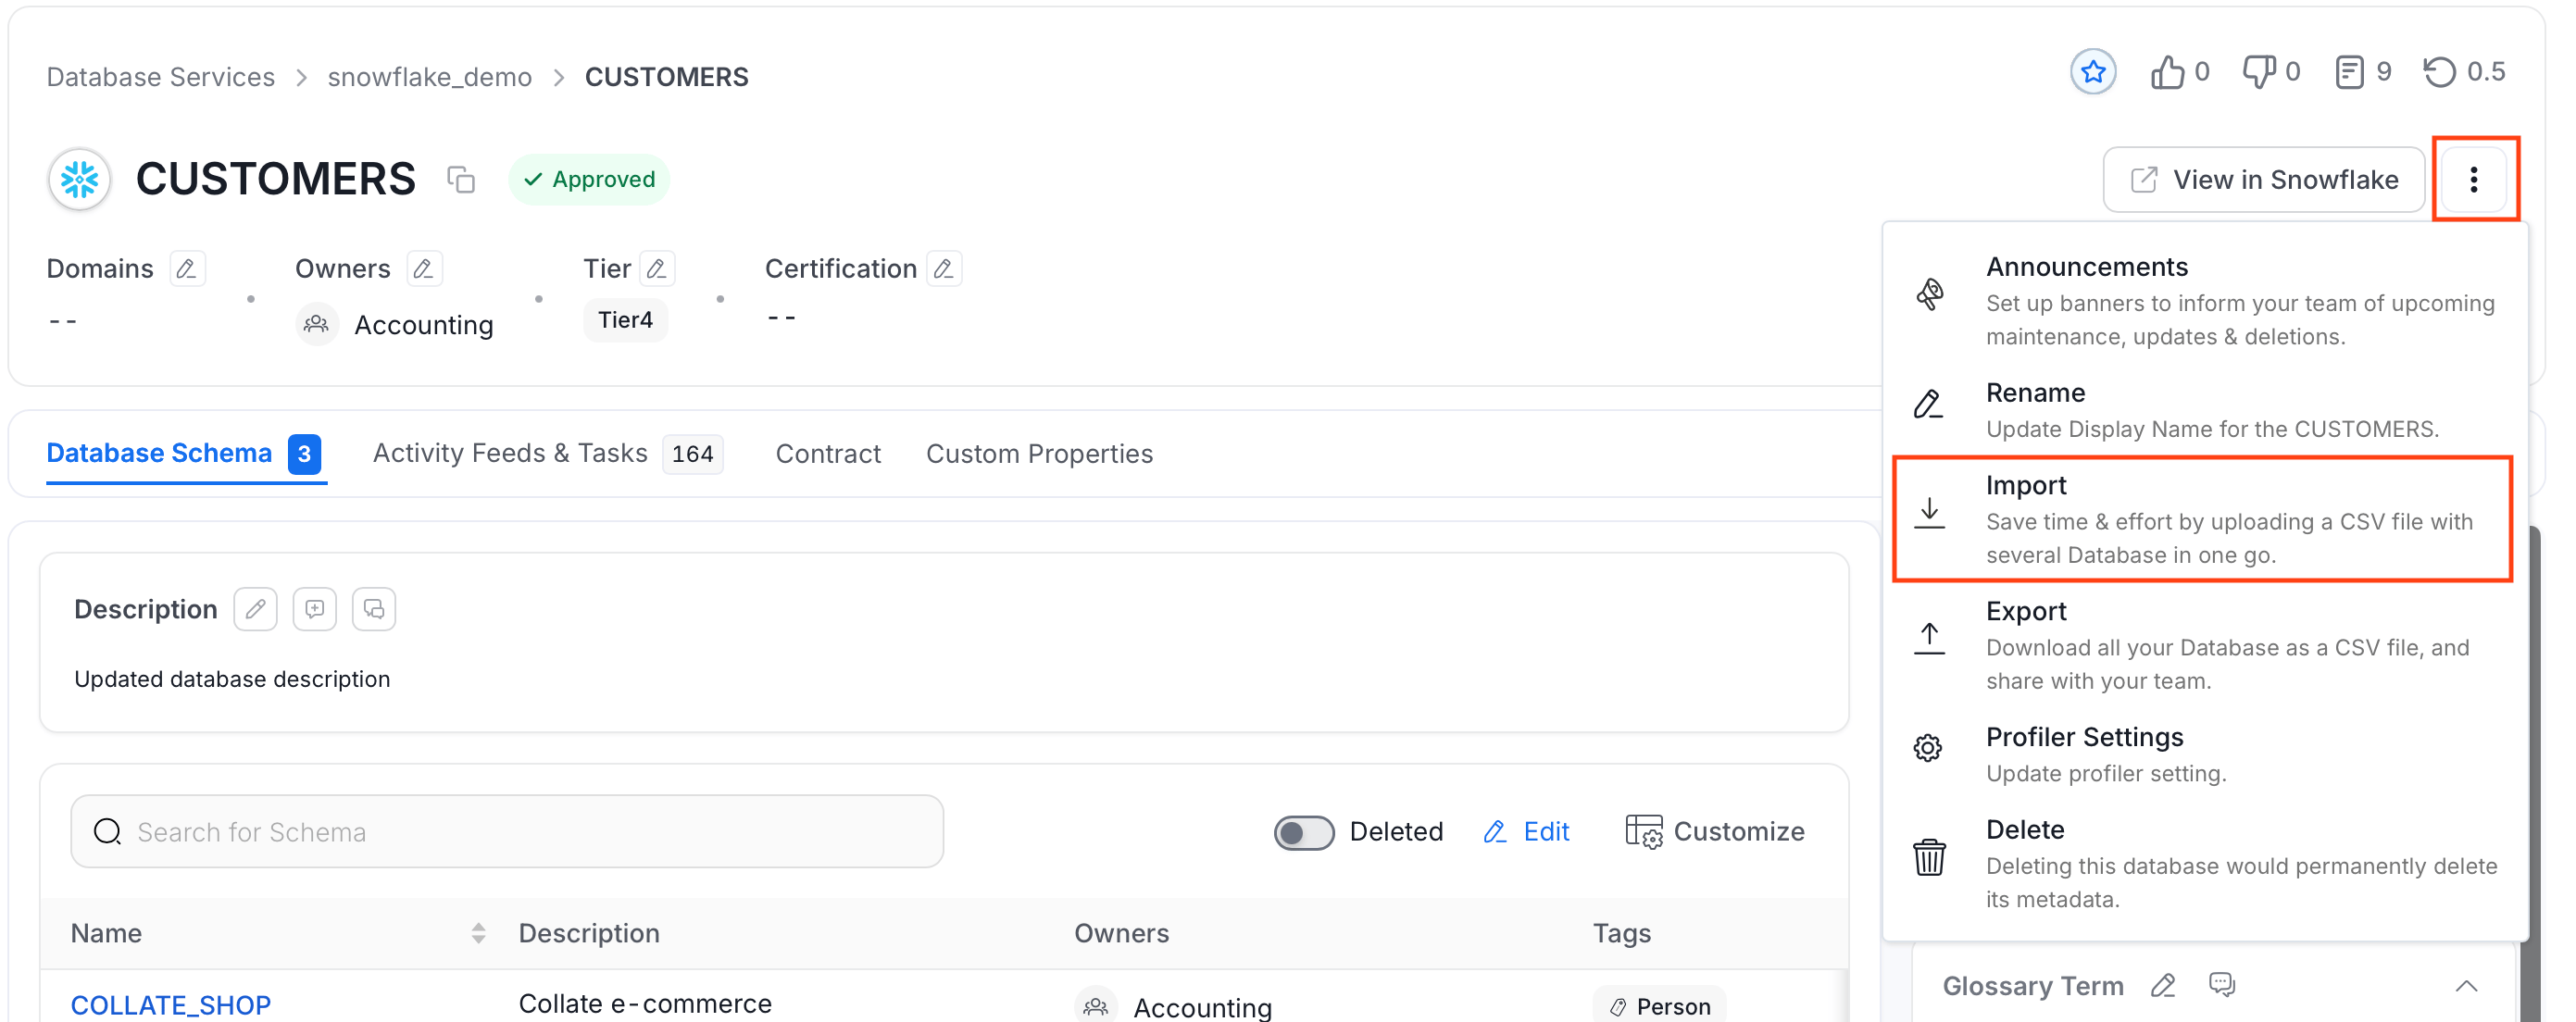 5. Upload/Drop the Database CSV file that you want to import. Alternatively,, you can `export` an existing Database CSV as a template, make the necessary edits, and then upload the updated file.
Once you have the template, you can fill in the following details:
* **name** (required): This field contains the name of the database.
* **fullyQualifiedName** (required): This field contains the fully qualified name of the database.
* **displayName**: This field holds the display name of the database.
* **description**: This field contains a detailed description or information about the database.
* **owner**: This field specifies the owner of the database.
* **tags**: This field contains the tags associated with the database.
* **glossaryTerms**: This field holds the glossary terms linked to the database.
* **tiers**: This field defines the tiers associated with the database.
* **sourceUrl**: This field contains the Source URL of the data asset. Example for the Snowflake database: `https://app.snowflake.com//#/data/databases/DEMO/`
* **retentionPeriod**: This field contains the retention period of the data asset. Period is expressed as a duration in ISO 8601 format in UTC. Example - `P23DT23H`.
* **domain**: This field contains the domain assigned to the data asset.
5. Upload/Drop the Database CSV file that you want to import. Alternatively,, you can `export` an existing Database CSV as a template, make the necessary edits, and then upload the updated file.
Once you have the template, you can fill in the following details:
* **name** (required): This field contains the name of the database.
* **fullyQualifiedName** (required): This field contains the fully qualified name of the database.
* **displayName**: This field holds the display name of the database.
* **description**: This field contains a detailed description or information about the database.
* **owner**: This field specifies the owner of the database.
* **tags**: This field contains the tags associated with the database.
* **glossaryTerms**: This field holds the glossary terms linked to the database.
* **tiers**: This field defines the tiers associated with the database.
* **sourceUrl**: This field contains the Source URL of the data asset. Example for the Snowflake database: `https://app.snowflake.com//#/data/databases/DEMO/`
* **retentionPeriod**: This field contains the retention period of the data asset. Period is expressed as a duration in ISO 8601 format in UTC. Example - `P23DT23H`.
* **domain**: This field contains the domain assigned to the data asset.
 6. Review the preview of your uploaded data. Make any additions or corrections directly in the table if needed. A **Passed** and **Failed** count is displayed above the table to help you quickly identify any rows with validation errors before proceeding.
Click **Next**.
7. After the database is uploaded, you can view the uploaded database in the **Databases** tab.
**Tip**: You can also import the Database using the API with the following endpoint:
`/api/v1/databases/name/{name}/import`
Make sure to replace `{name}` with the Fully Qualified Name (FQN) of the Database.
## How to Bulk Import a Database Schema
To import a Database Schema:
1. Navigate to the database whose schema you want to import.
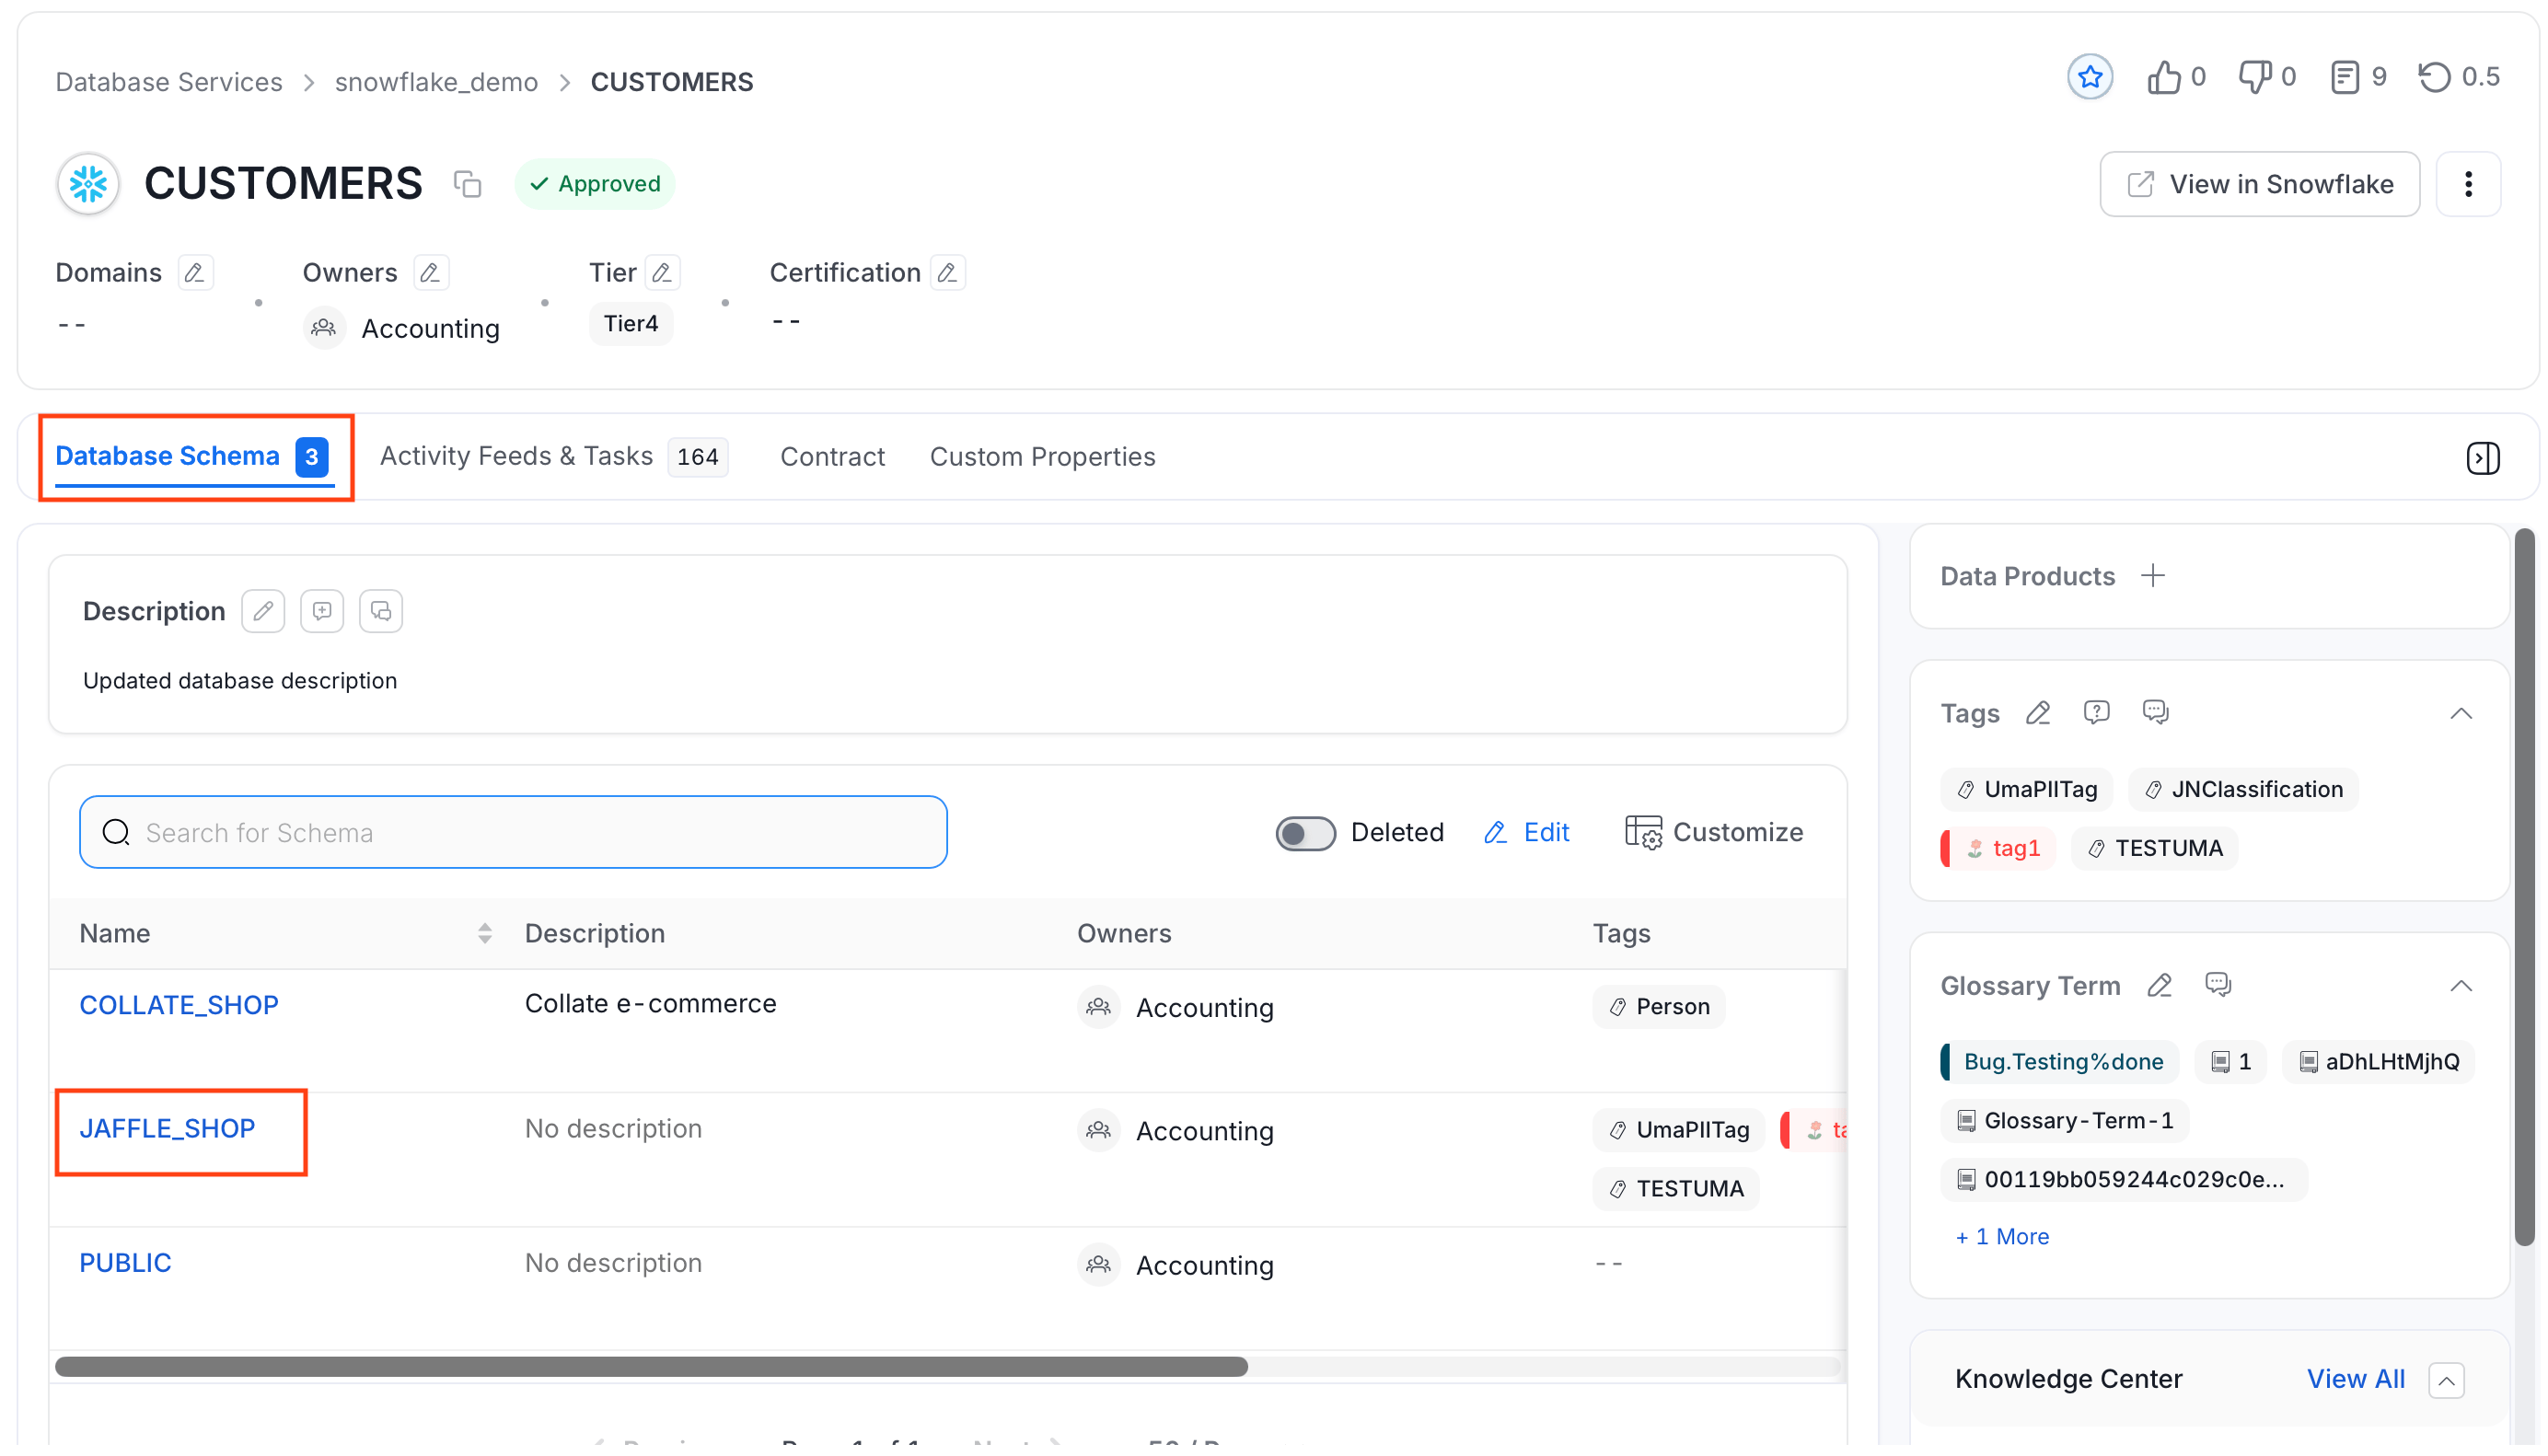
2. In the **Database Schema** tab, select the schema you want to import. For example, `JAFFLE_SHOP` in the following image.
6. Review the preview of your uploaded data. Make any additions or corrections directly in the table if needed. A **Passed** and **Failed** count is displayed above the table to help you quickly identify any rows with validation errors before proceeding.
Click **Next**.
7. After the database is uploaded, you can view the uploaded database in the **Databases** tab.
**Tip**: You can also import the Database using the API with the following endpoint:
`/api/v1/databases/name/{name}/import`
Make sure to replace `{name}` with the Fully Qualified Name (FQN) of the Database.
## How to Bulk Import a Database Schema
To import a Database Schema:
1. Navigate to the database whose schema you want to import.
2. In the **Database Schema** tab, select the schema you want to import. For example, `JAFFLE_SHOP` in the following image.
 3. Click the **⋮** icon and select **Import** to upload the database schema CSV file.
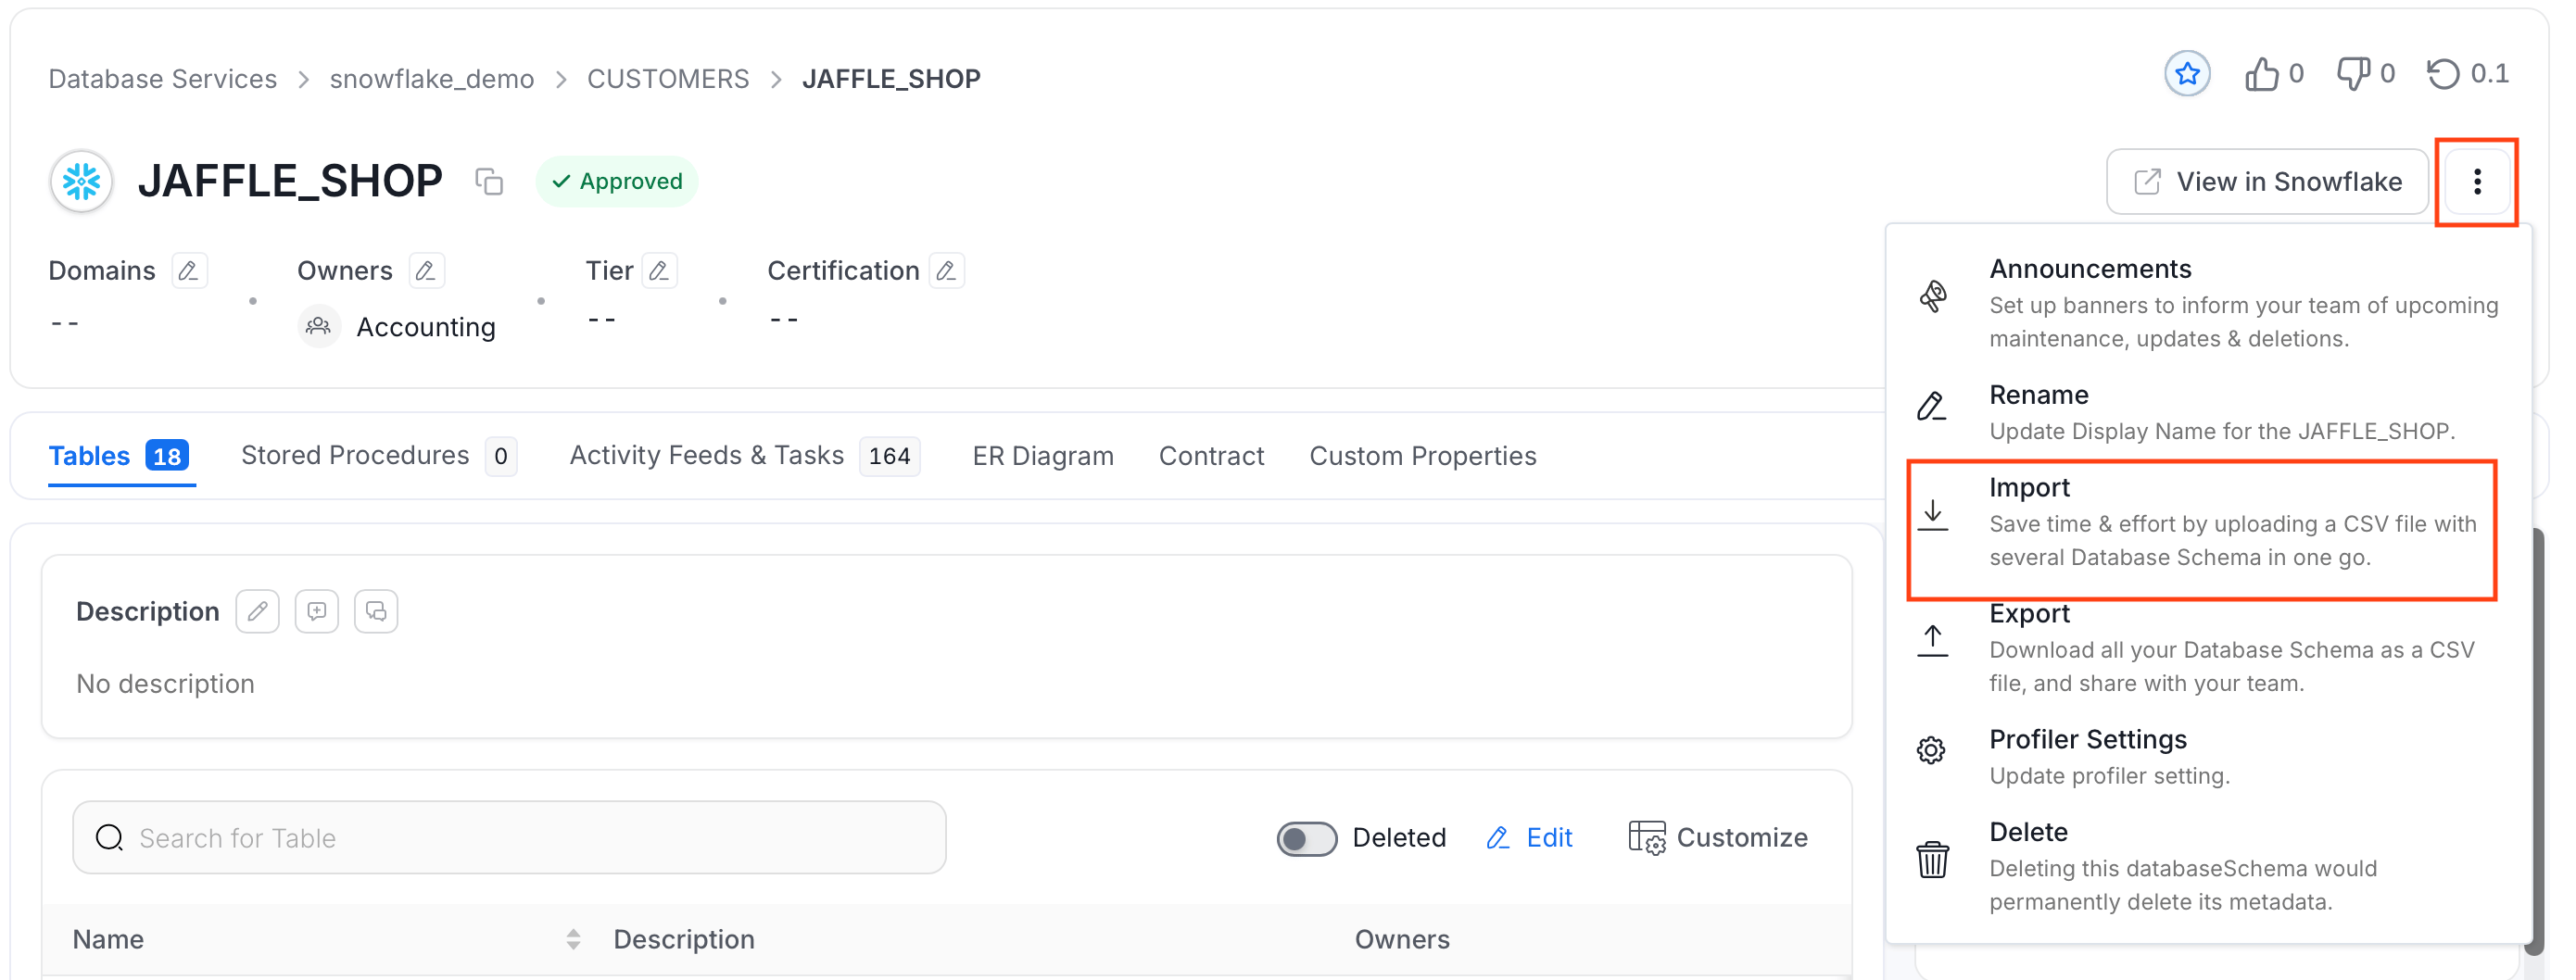 4. Upload/Drop the Database Schema CSV file that you want to import.
Alternatively, you can `export` an existing Database Schema CSV as a template, make the necessary edits, and then upload the updated file.
Once you have the template, you can fill in the following details:
* **name** (required): This field contains the name of the database schema.
* **fullyQualifiedName** (required): This field contains the fully qualified name of the database schema.
* **displayName**: This field holds the display name of the database schema.
* **description**: This field contains a detailed description or information about the database schema.
* **owner**: This field specifies the owner of the database schema.
* **tags**: This field contains the tags associated with the database schema.
* **glossaryTerms**: This field holds the glossary terms linked to the database schema.
* **tiers**: This field defines the tiers associated with the database schema.
* **sourceUrl**: This field contains the Source URL of the data asset. Example for the Snowflake database schema: `https://app.snowflake.com//#/data/databases/DEMO/schemas/JAFFLE_SHOP`
* **retentionPeriod**: This field contains the retention period of the data asset. Period is expressed as a duration in ISO 8601 format in UTC. Example - `P23DT23H`.
4. Upload/Drop the Database Schema CSV file that you want to import.
Alternatively, you can `export` an existing Database Schema CSV as a template, make the necessary edits, and then upload the updated file.
Once you have the template, you can fill in the following details:
* **name** (required): This field contains the name of the database schema.
* **fullyQualifiedName** (required): This field contains the fully qualified name of the database schema.
* **displayName**: This field holds the display name of the database schema.
* **description**: This field contains a detailed description or information about the database schema.
* **owner**: This field specifies the owner of the database schema.
* **tags**: This field contains the tags associated with the database schema.
* **glossaryTerms**: This field holds the glossary terms linked to the database schema.
* **tiers**: This field defines the tiers associated with the database schema.
* **sourceUrl**: This field contains the Source URL of the data asset. Example for the Snowflake database schema: `https://app.snowflake.com//#/data/databases/DEMO/schemas/JAFFLE_SHOP`
* **retentionPeriod**: This field contains the retention period of the data asset. Period is expressed as a duration in ISO 8601 format in UTC. Example - `P23DT23H`.
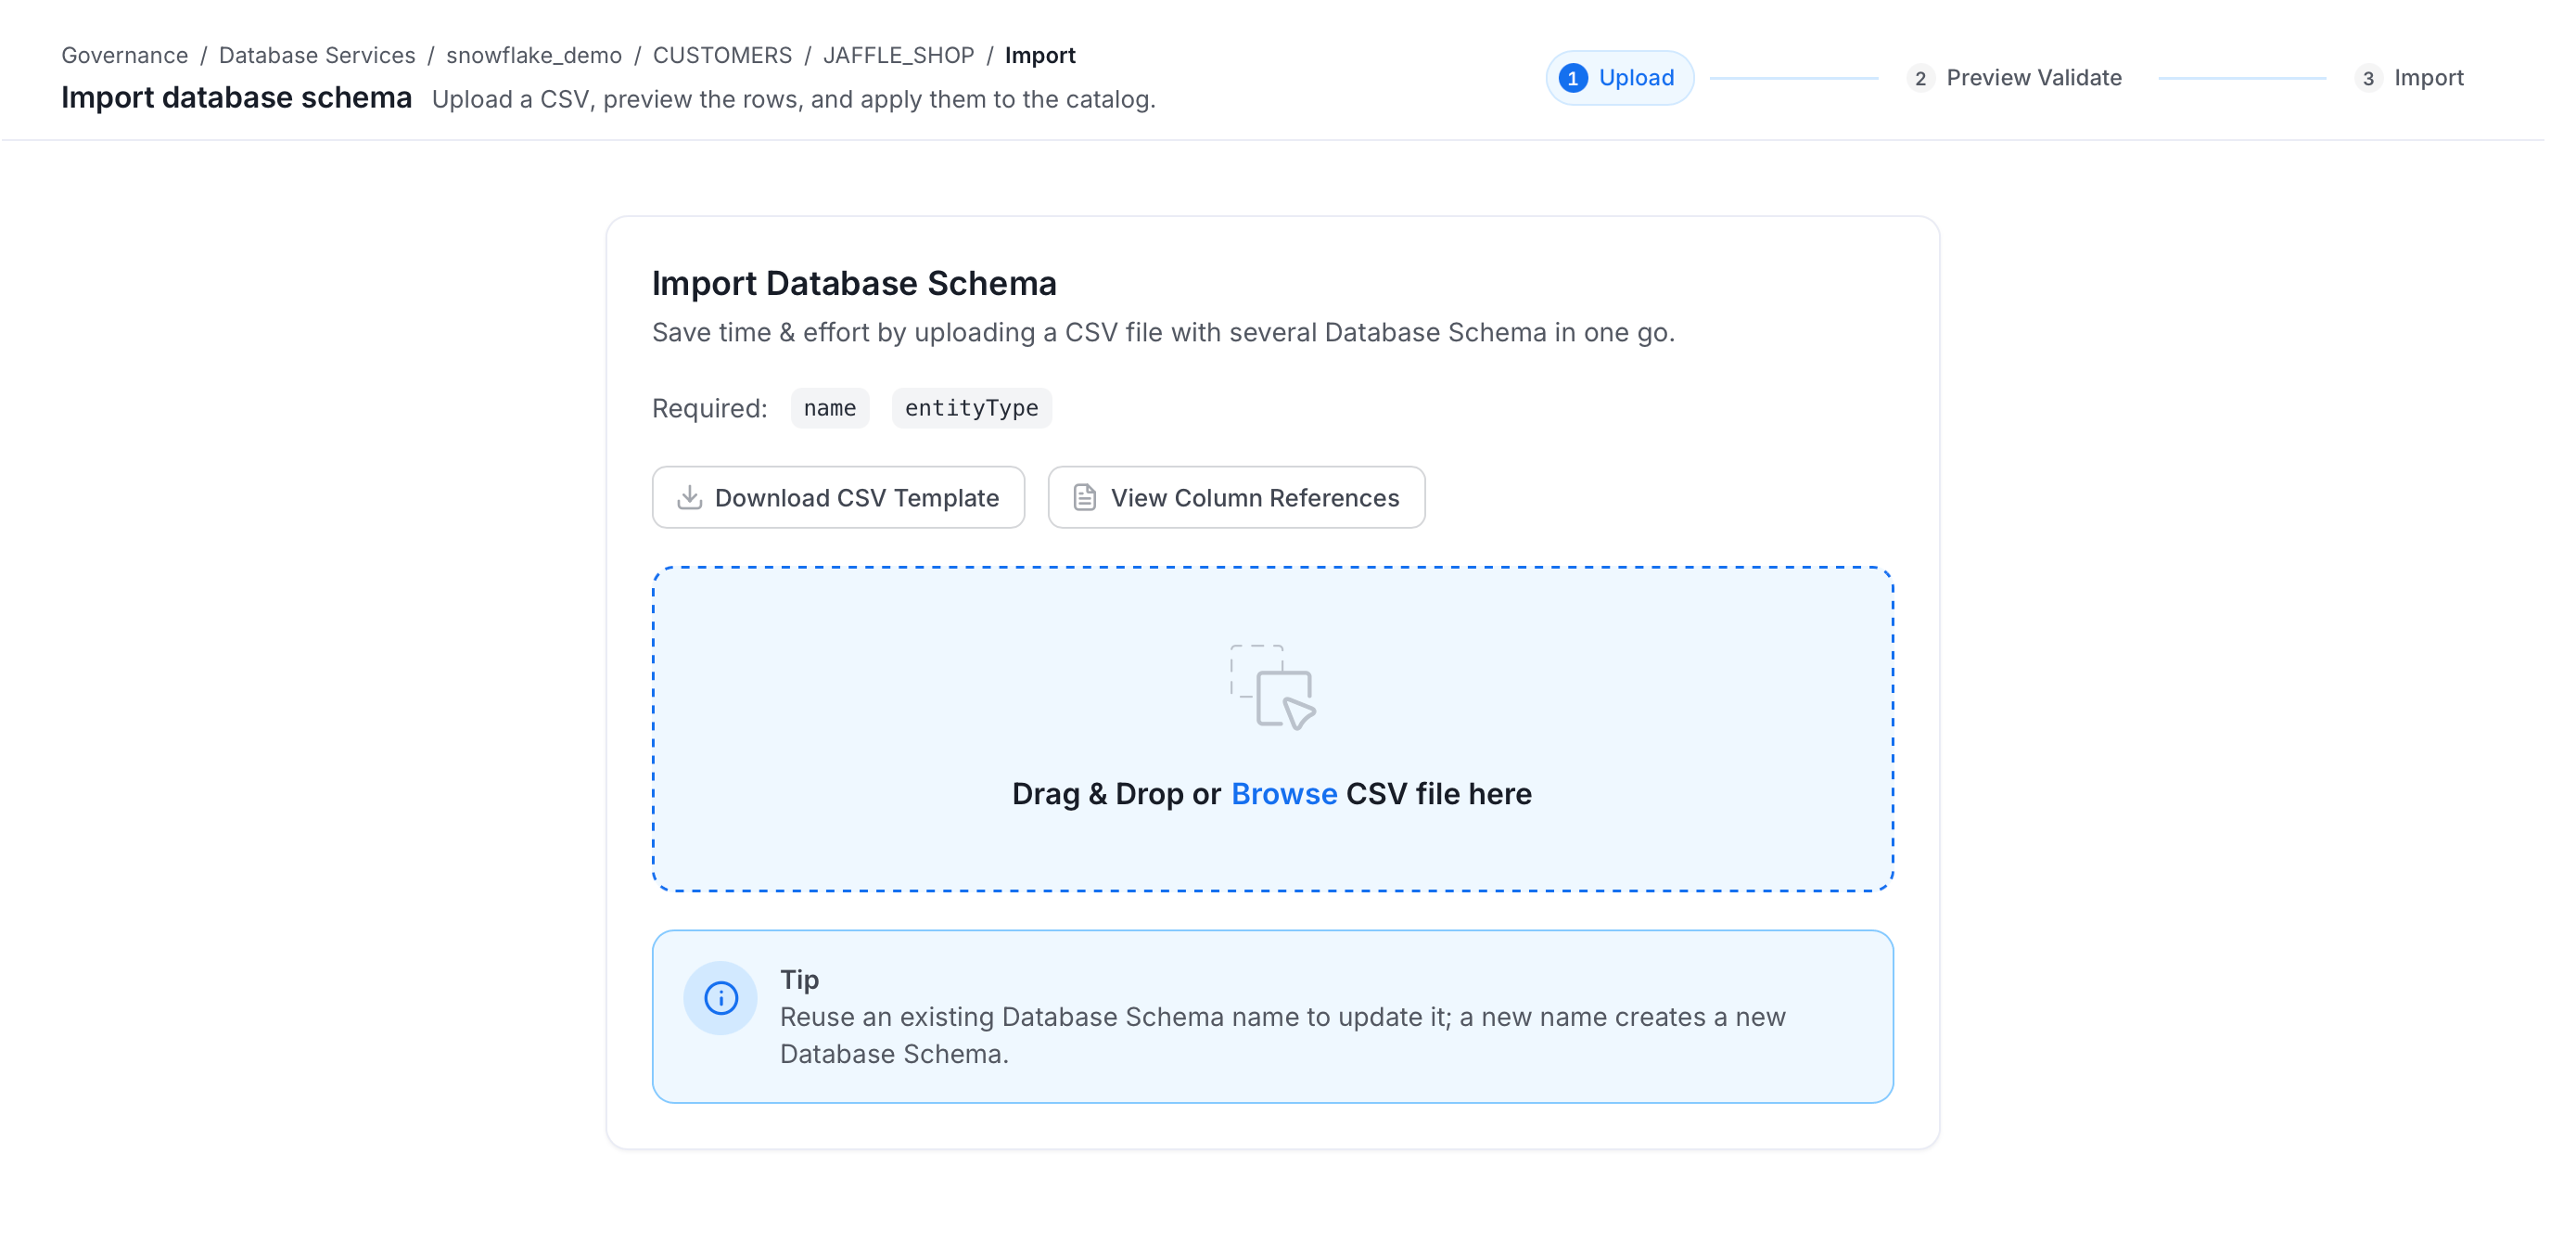 Click **Next Preview**.
5. Review the preview of your uploaded data. Make any additions or corrections directly in the table if needed. A **Passed** and **Failed** count is displayed above the table to help you quickly identify any rows with validation errors before proceeding.
Click **Next**.
Click **Next Preview**.
5. Review the preview of your uploaded data. Make any additions or corrections directly in the table if needed. A **Passed** and **Failed** count is displayed above the table to help you quickly identify any rows with validation errors before proceeding.
Click **Next**.
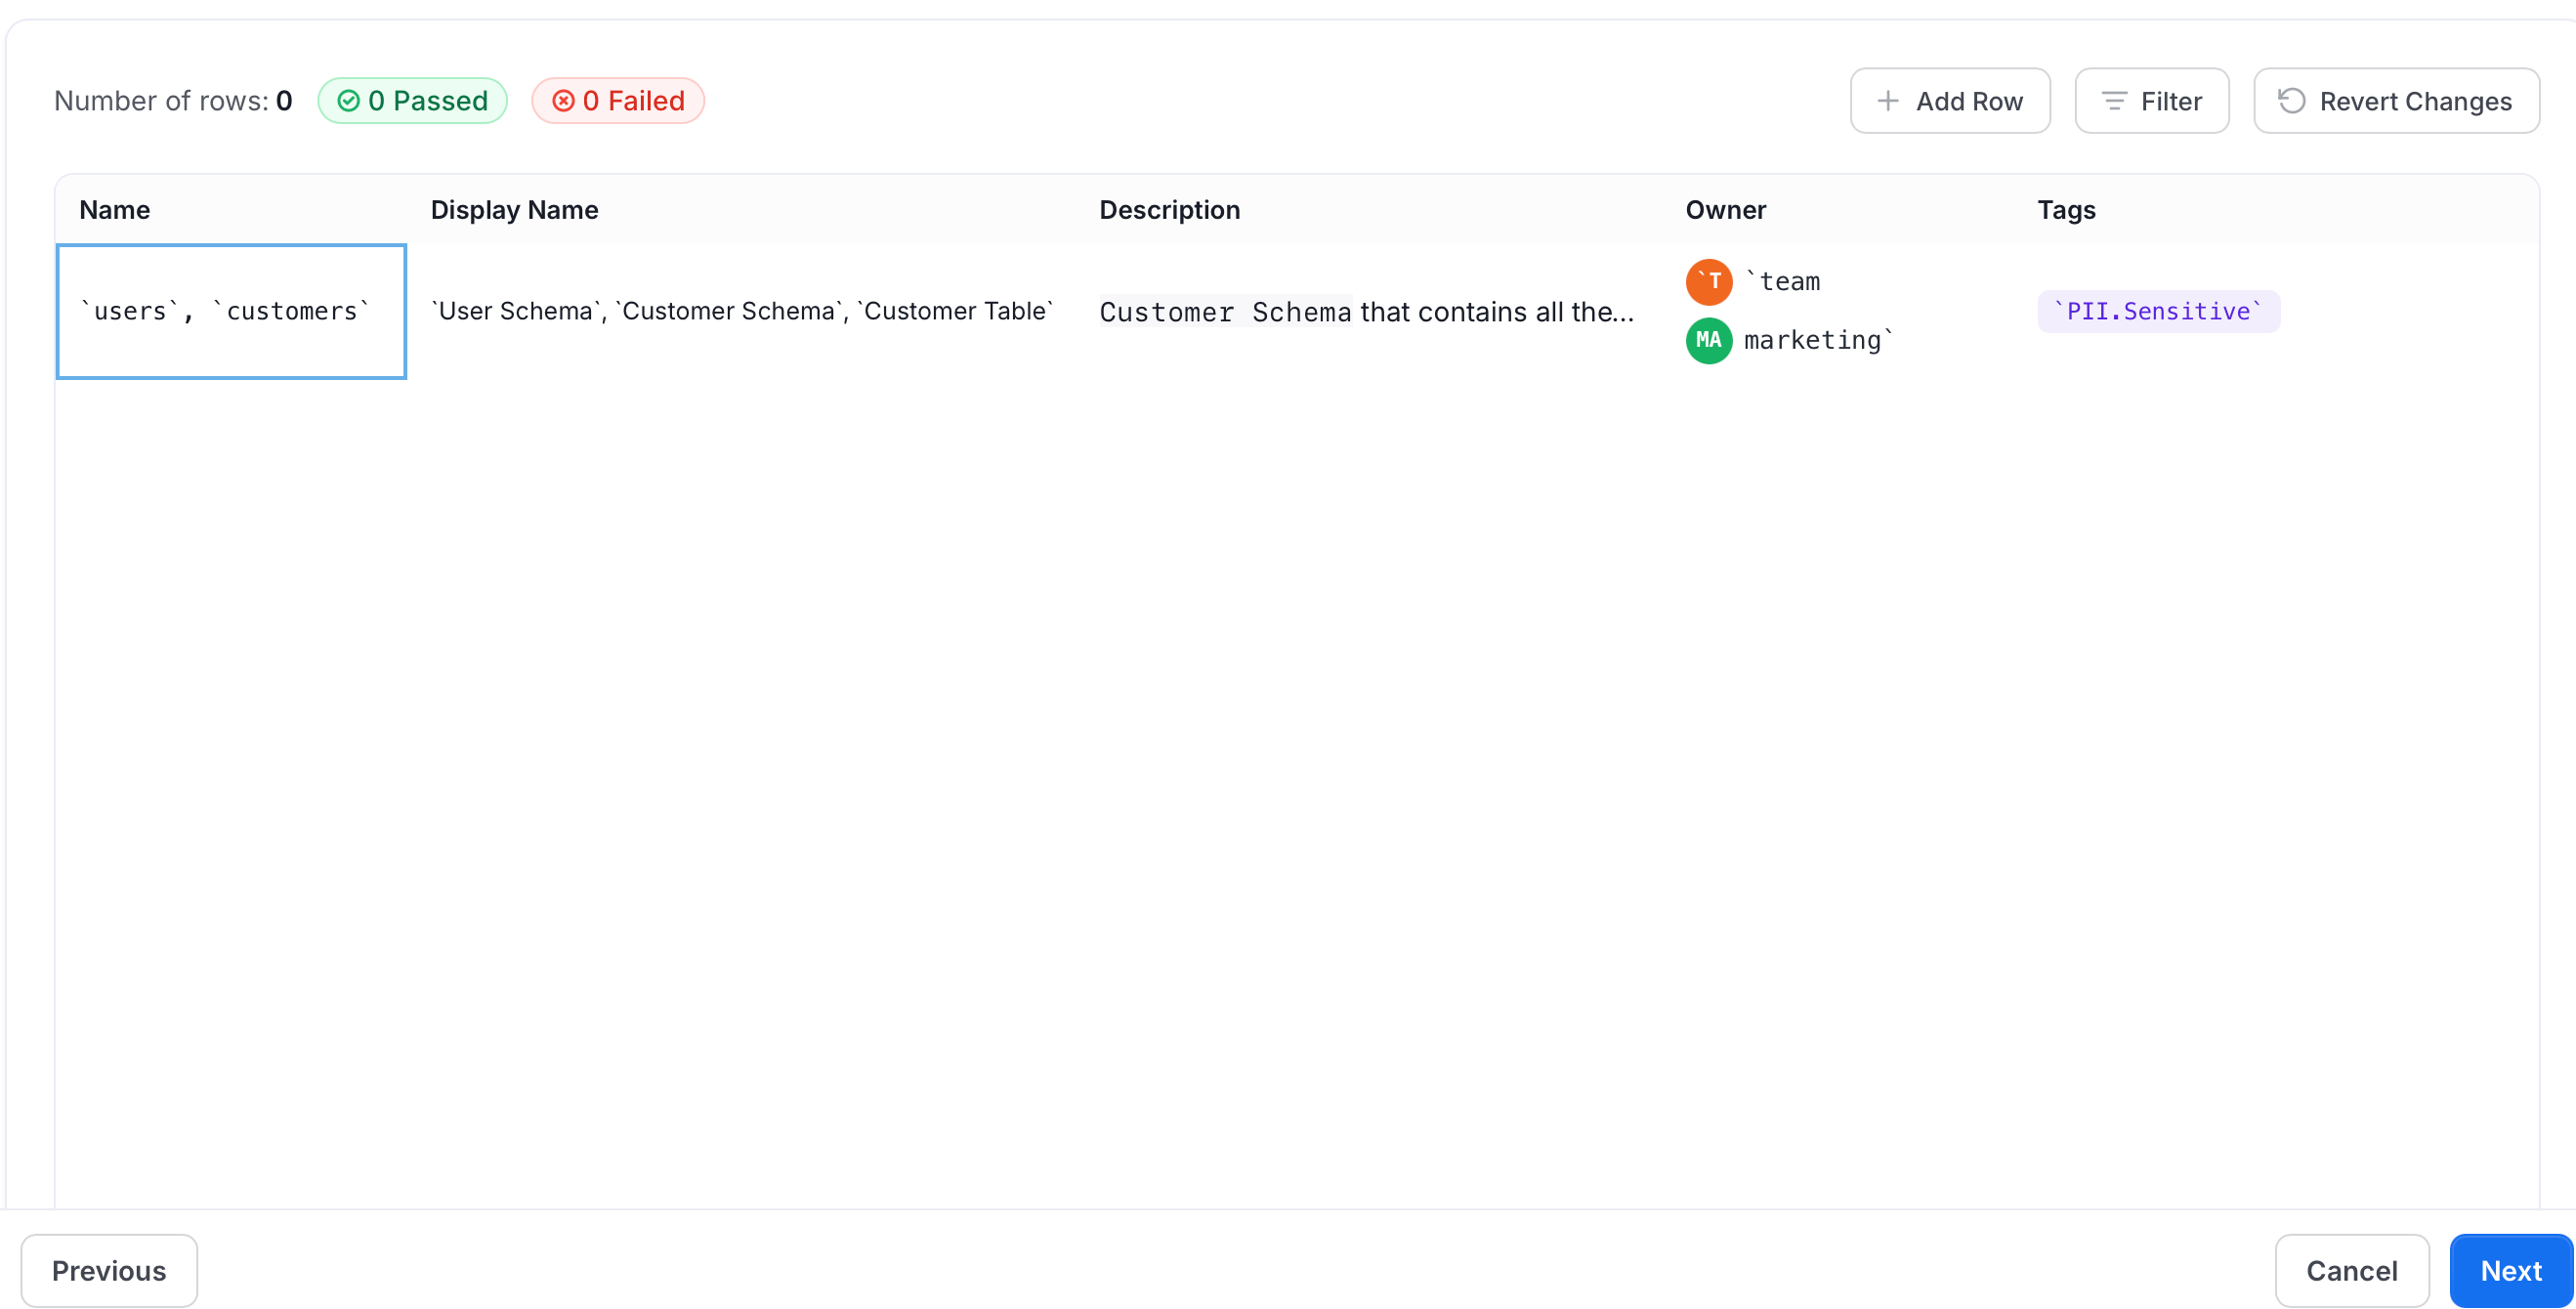 6. After successful import, you can view the uploaded database schemas listed under the **Database Schema** tab.
**Tip**: You can also import the Database Schema using the API with the following endpoint:
`/api/v1/databaseSchemas/name/{name}/import`
Make sure to replace `{name}` with the Fully Qualified Name (FQN) of the Database Schema.
## How to Bulk Import a Table
To import a Table:
1. Navigate to the database schema whose table you want to import.
2. In the **Tables** tab, select the table you want to import.
6. After successful import, you can view the uploaded database schemas listed under the **Database Schema** tab.
**Tip**: You can also import the Database Schema using the API with the following endpoint:
`/api/v1/databaseSchemas/name/{name}/import`
Make sure to replace `{name}` with the Fully Qualified Name (FQN) of the Database Schema.
## How to Bulk Import a Table
To import a Table:
1. Navigate to the database schema whose table you want to import.
2. In the **Tables** tab, select the table you want to import.
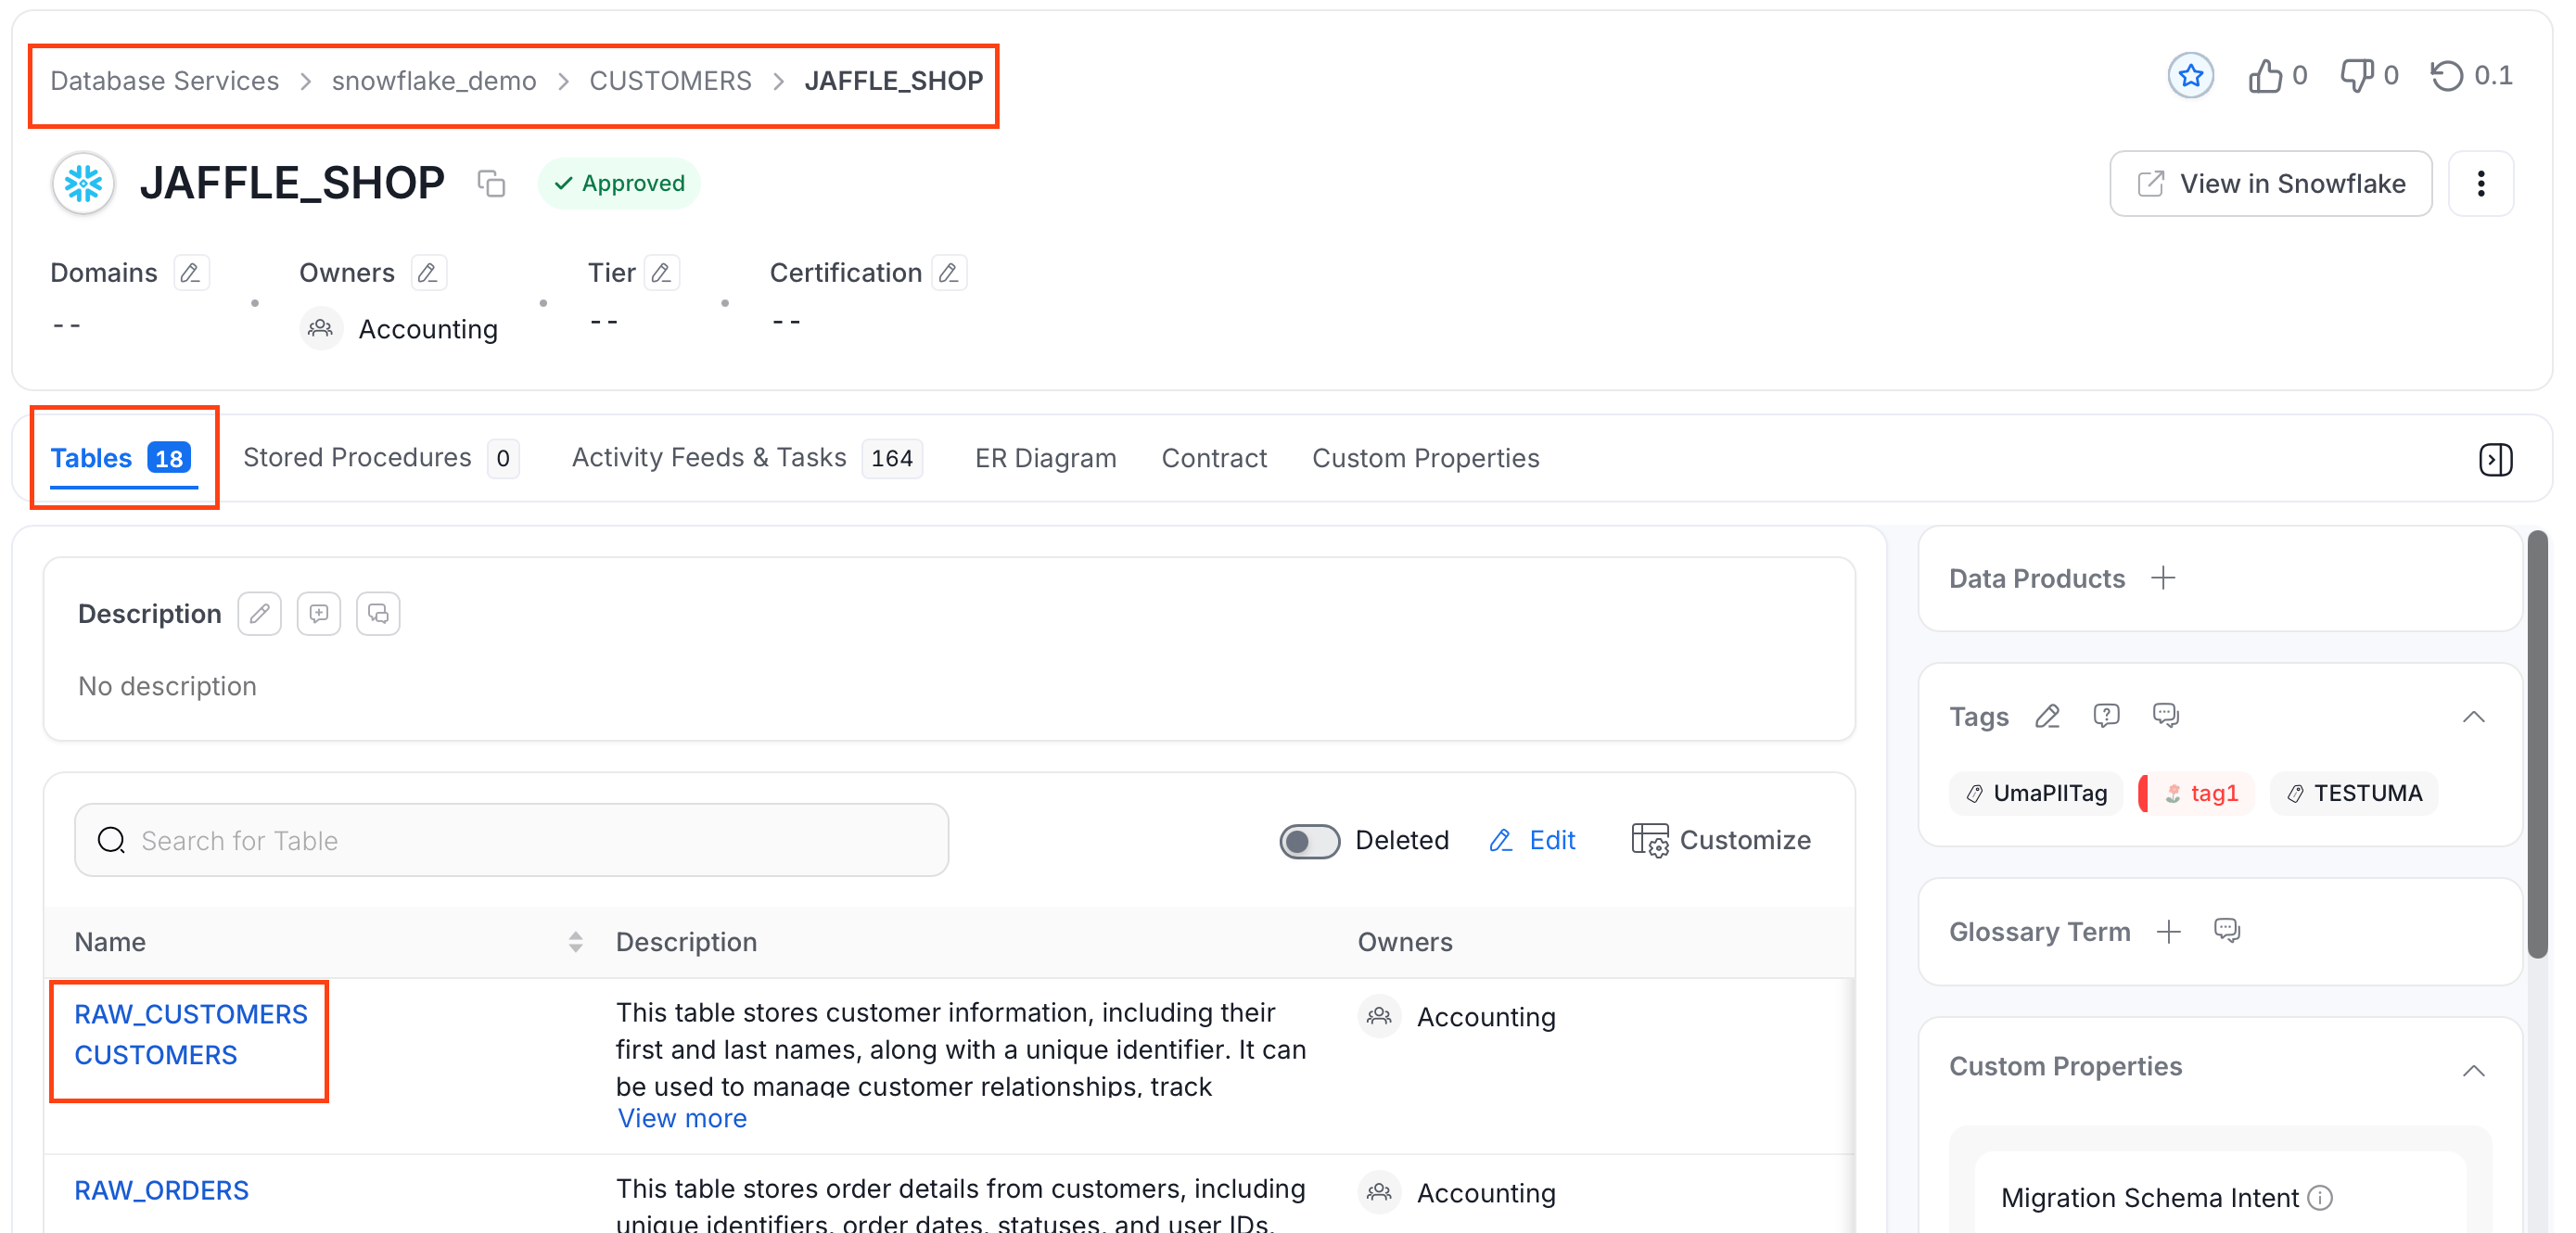 3. Click the **⋮** icon and select **Import** to upload the table CSV file.
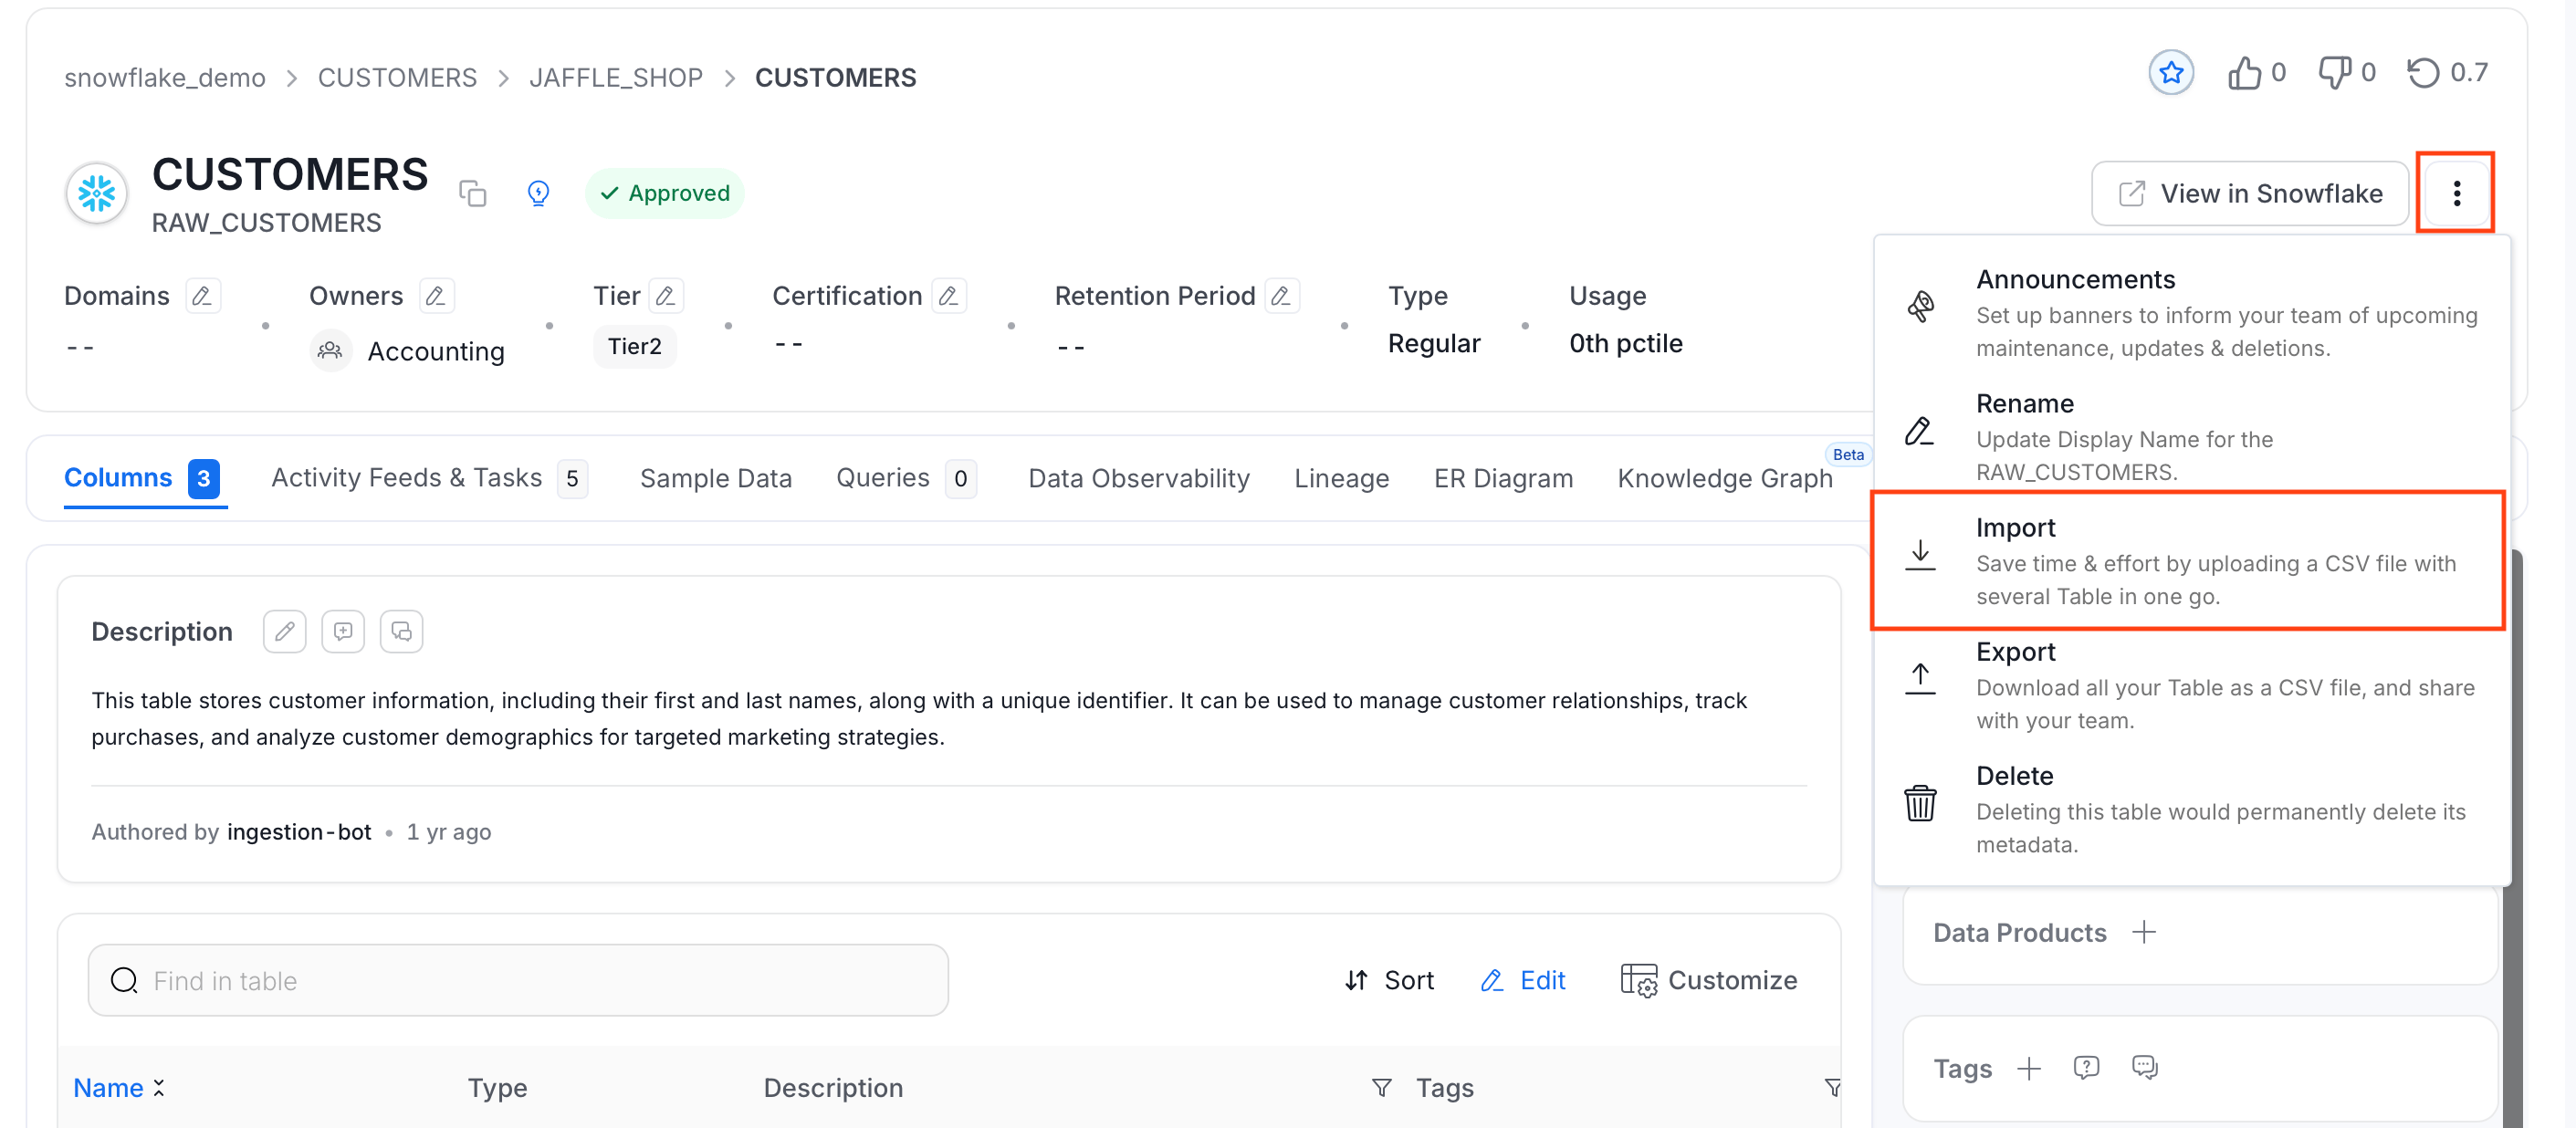 4. Upload/Drop the Table CSV file that you want to import.
Alternatively, you can `export` an existing table CSV as a template, make the necessary edits, and then upload the updated file.
Once you have the template, you can fill in the following details:
* **name**: This field contains the name of the table.
* **fullyQualifiedName** (required): This field contains the fully qualified name of the table.
* **displayName**: This field holds the display name of the table.
* **description**: This field contains a detailed description or information about the table.
* **owner**: This field specifies the owner of the table.
* **tags**: This field contains the tags associated with the table.
* **glossaryTerms**: This field holds the glossary terms linked to the table.
* **tiers**: This field defines the tiers associated with the table.
* **sourceUrl**: This field contains the Source URL of the data asset. Example for the Snowflake table: `https://app.snowflake.com//#/data/databases/DEMO/schemas/JAFFLE_SHOP/table/CUSTOMERS`
* **retentionPeriod**: This field contains the retention period of the data asset. Period is expressed as a duration in ISO 8601 format in UTC. Example - `P23DT23H`.
* **column.fullyQualifiedName** (required): This field holds the fully qualified name of the column.
* **column.displayName**: This field holds the display name of the column, if different from the technical name.
* **column.description**: This field holds a detailed description or information about the column's purpose or content.
* **column.dataTypeDisplay**: This field holds the data type for display purposes.
* **column.dataType**: This field holds the data type of the column (e.g., `VARCHAR`, `INT`, `BOOLEAN`).
* **column.arrayDataType**: If the column is an array, this field specifies the data type of the array elements.
* **column.dataLength**: This field holds the length or size of the data.
* **column.tags**: This field holds the tags associated with the column, which help categorize it.
* **column.glossaryTerms**: This field holds the glossary terms linked to the column to provide standardized definitions.
Click **Next Preview**.
4. Upload/Drop the Table CSV file that you want to import.
Alternatively, you can `export` an existing table CSV as a template, make the necessary edits, and then upload the updated file.
Once you have the template, you can fill in the following details:
* **name**: This field contains the name of the table.
* **fullyQualifiedName** (required): This field contains the fully qualified name of the table.
* **displayName**: This field holds the display name of the table.
* **description**: This field contains a detailed description or information about the table.
* **owner**: This field specifies the owner of the table.
* **tags**: This field contains the tags associated with the table.
* **glossaryTerms**: This field holds the glossary terms linked to the table.
* **tiers**: This field defines the tiers associated with the table.
* **sourceUrl**: This field contains the Source URL of the data asset. Example for the Snowflake table: `https://app.snowflake.com//#/data/databases/DEMO/schemas/JAFFLE_SHOP/table/CUSTOMERS`
* **retentionPeriod**: This field contains the retention period of the data asset. Period is expressed as a duration in ISO 8601 format in UTC. Example - `P23DT23H`.
* **column.fullyQualifiedName** (required): This field holds the fully qualified name of the column.
* **column.displayName**: This field holds the display name of the column, if different from the technical name.
* **column.description**: This field holds a detailed description or information about the column's purpose or content.
* **column.dataTypeDisplay**: This field holds the data type for display purposes.
* **column.dataType**: This field holds the data type of the column (e.g., `VARCHAR`, `INT`, `BOOLEAN`).
* **column.arrayDataType**: If the column is an array, this field specifies the data type of the array elements.
* **column.dataLength**: This field holds the length or size of the data.
* **column.tags**: This field holds the tags associated with the column, which help categorize it.
* **column.glossaryTerms**: This field holds the glossary terms linked to the column to provide standardized definitions.
Click **Next Preview**.
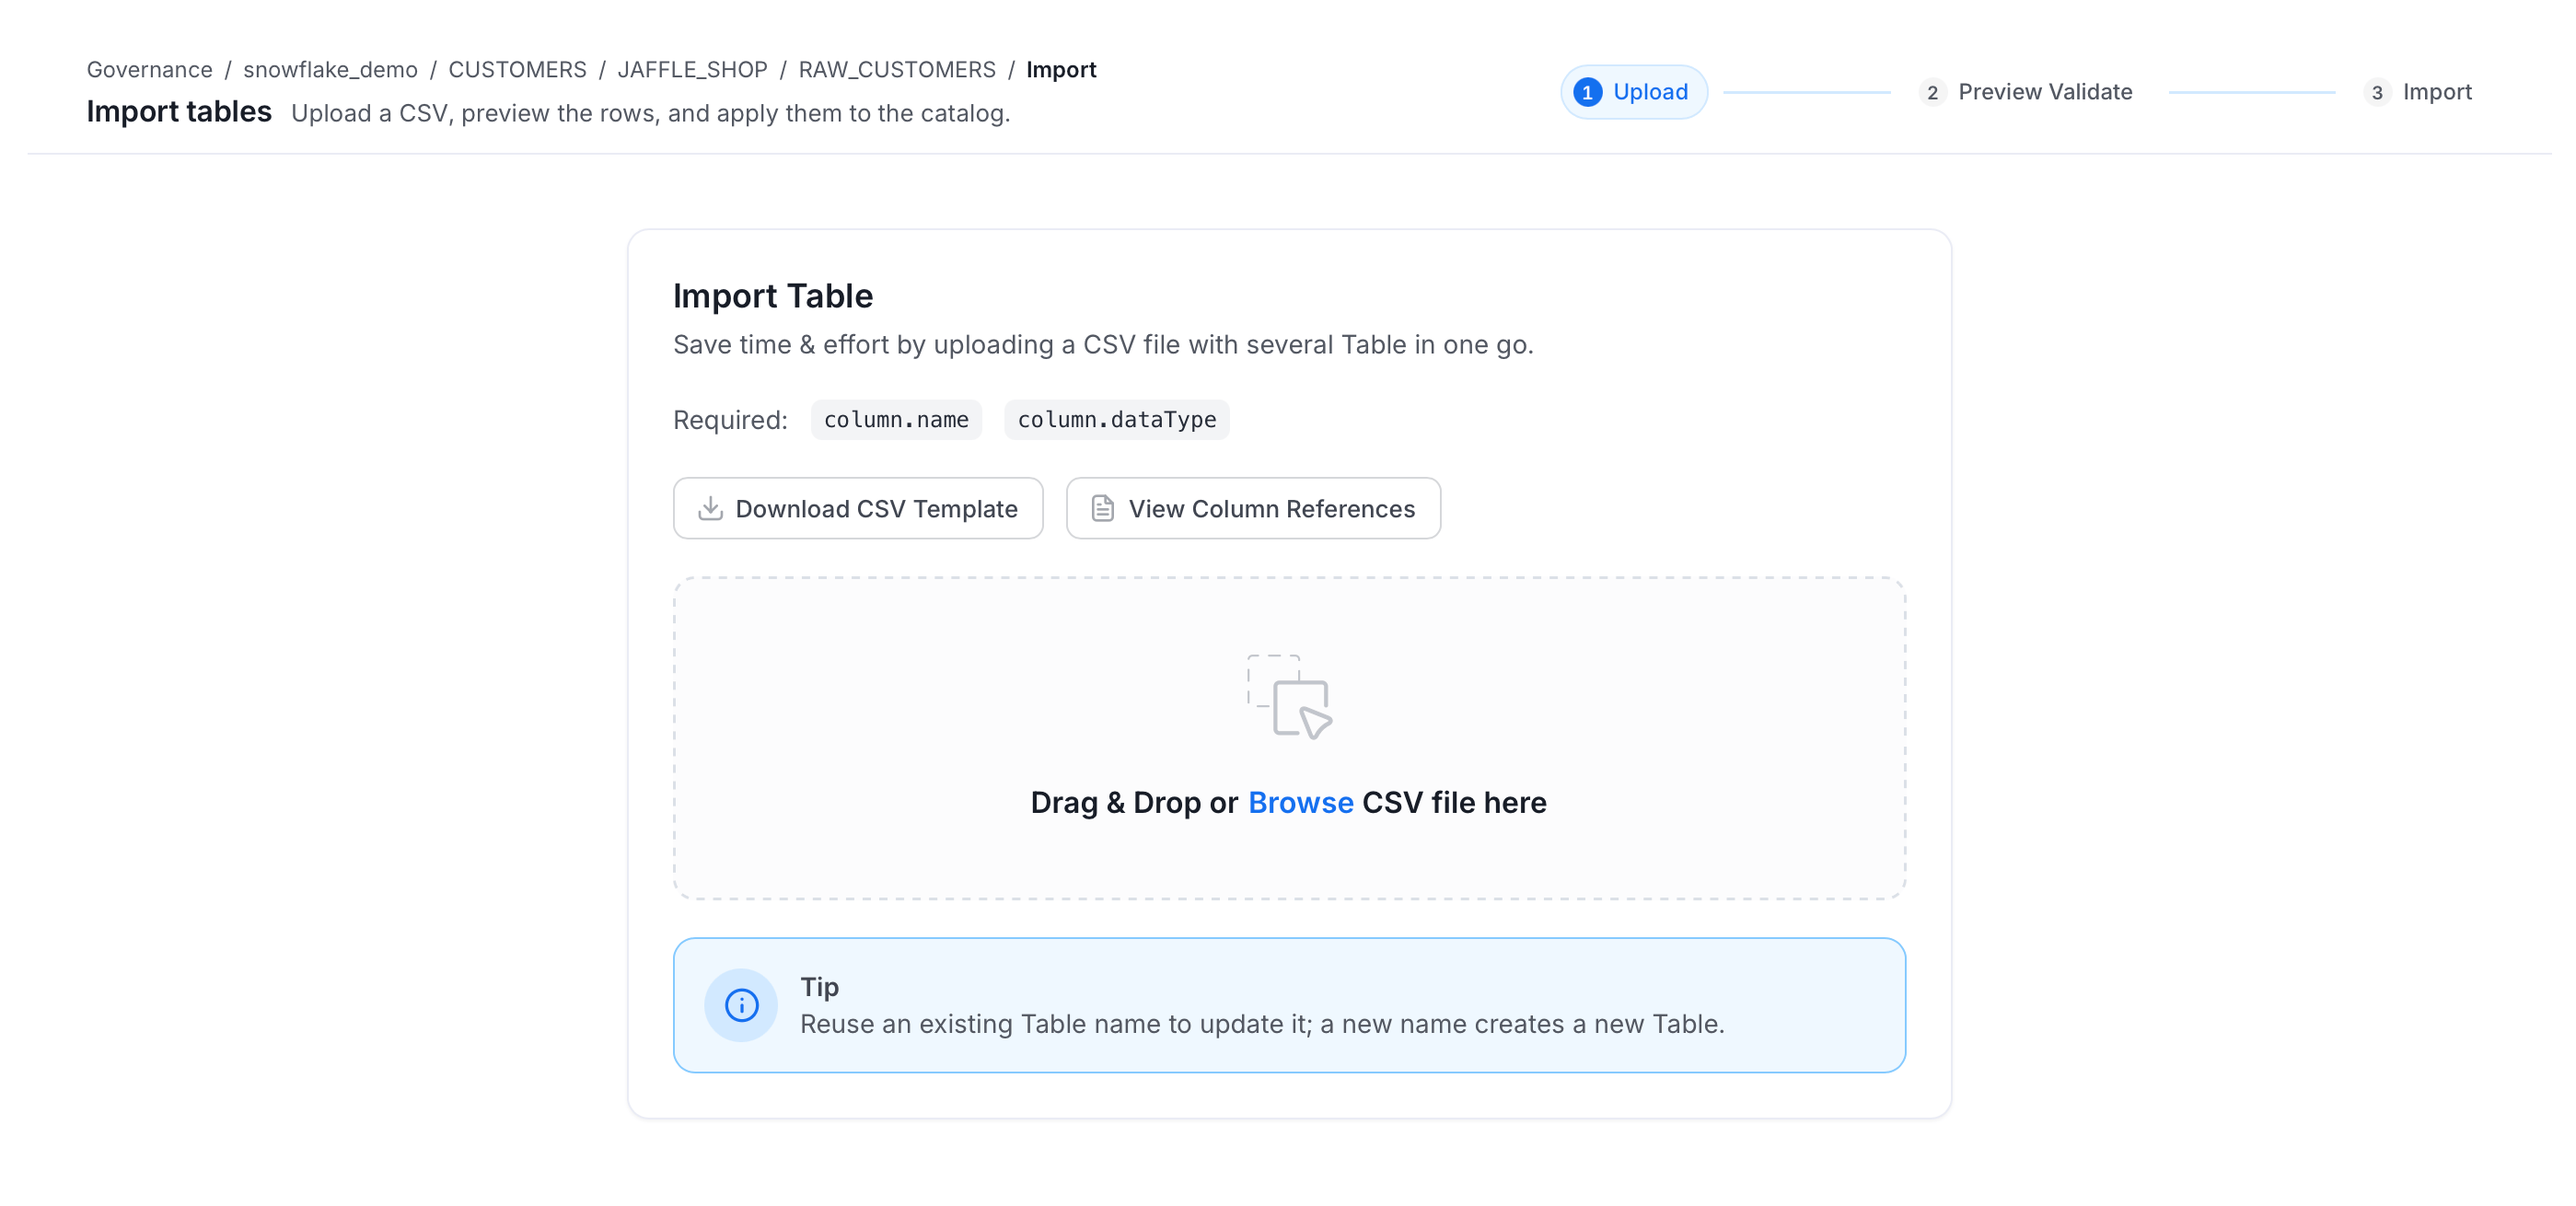 5. Review the preview of your uploaded data. Make any additions or corrections directly in the table if needed. A **Passed** and **Failed** count is displayed above the table to help you quickly identify any rows with validation errors before proceeding.
Click **Next**.
6. After successful import, you can view the uploaded database tables listed under the **Tables** tab.
**Tip**: You can also import the Tables using the API with the following endpoint:
`/api/v1/tables/name/{name}/import`
Make sure to replace `{name}` with the Fully Qualified Name (FQN) of the Table.
Quickly export data assets as a CSV file.
5. Review the preview of your uploaded data. Make any additions or corrections directly in the table if needed. A **Passed** and **Failed** count is displayed above the table to help you quickly identify any rows with validation errors before proceeding.
Click **Next**.
6. After successful import, you can view the uploaded database tables listed under the **Tables** tab.
**Tip**: You can also import the Tables using the API with the following endpoint:
`/api/v1/tables/name/{name}/import`
Make sure to replace `{name}` with the Fully Qualified Name (FQN) of the Table.
Quickly export data assets as a CSV file.