> ## Documentation Index
> Fetch the complete documentation index at: https://docs.getcollate.io/llms.txt
> Use this file to discover all available pages before exploring further.
# Collate SaaS Setup
> Connect a database service in Collate SaaS, allow IP access, test the connection, and run your first metadata extraction.
## Collate SaaS
Collate SaaS is the simplest way to connect a data source. Collate connects directly to your data source from its cloud — no local agent or additional infrastructure required.
**Tip**:
**When to use this**: Use Collate SaaS when your data source is accessible from the internet or you're able to allowlist an IP address in your data source's firewall settings.
### Setting Up a Database Service
To set up a database service, follow these steps:
1. Log in to the Collate platform.
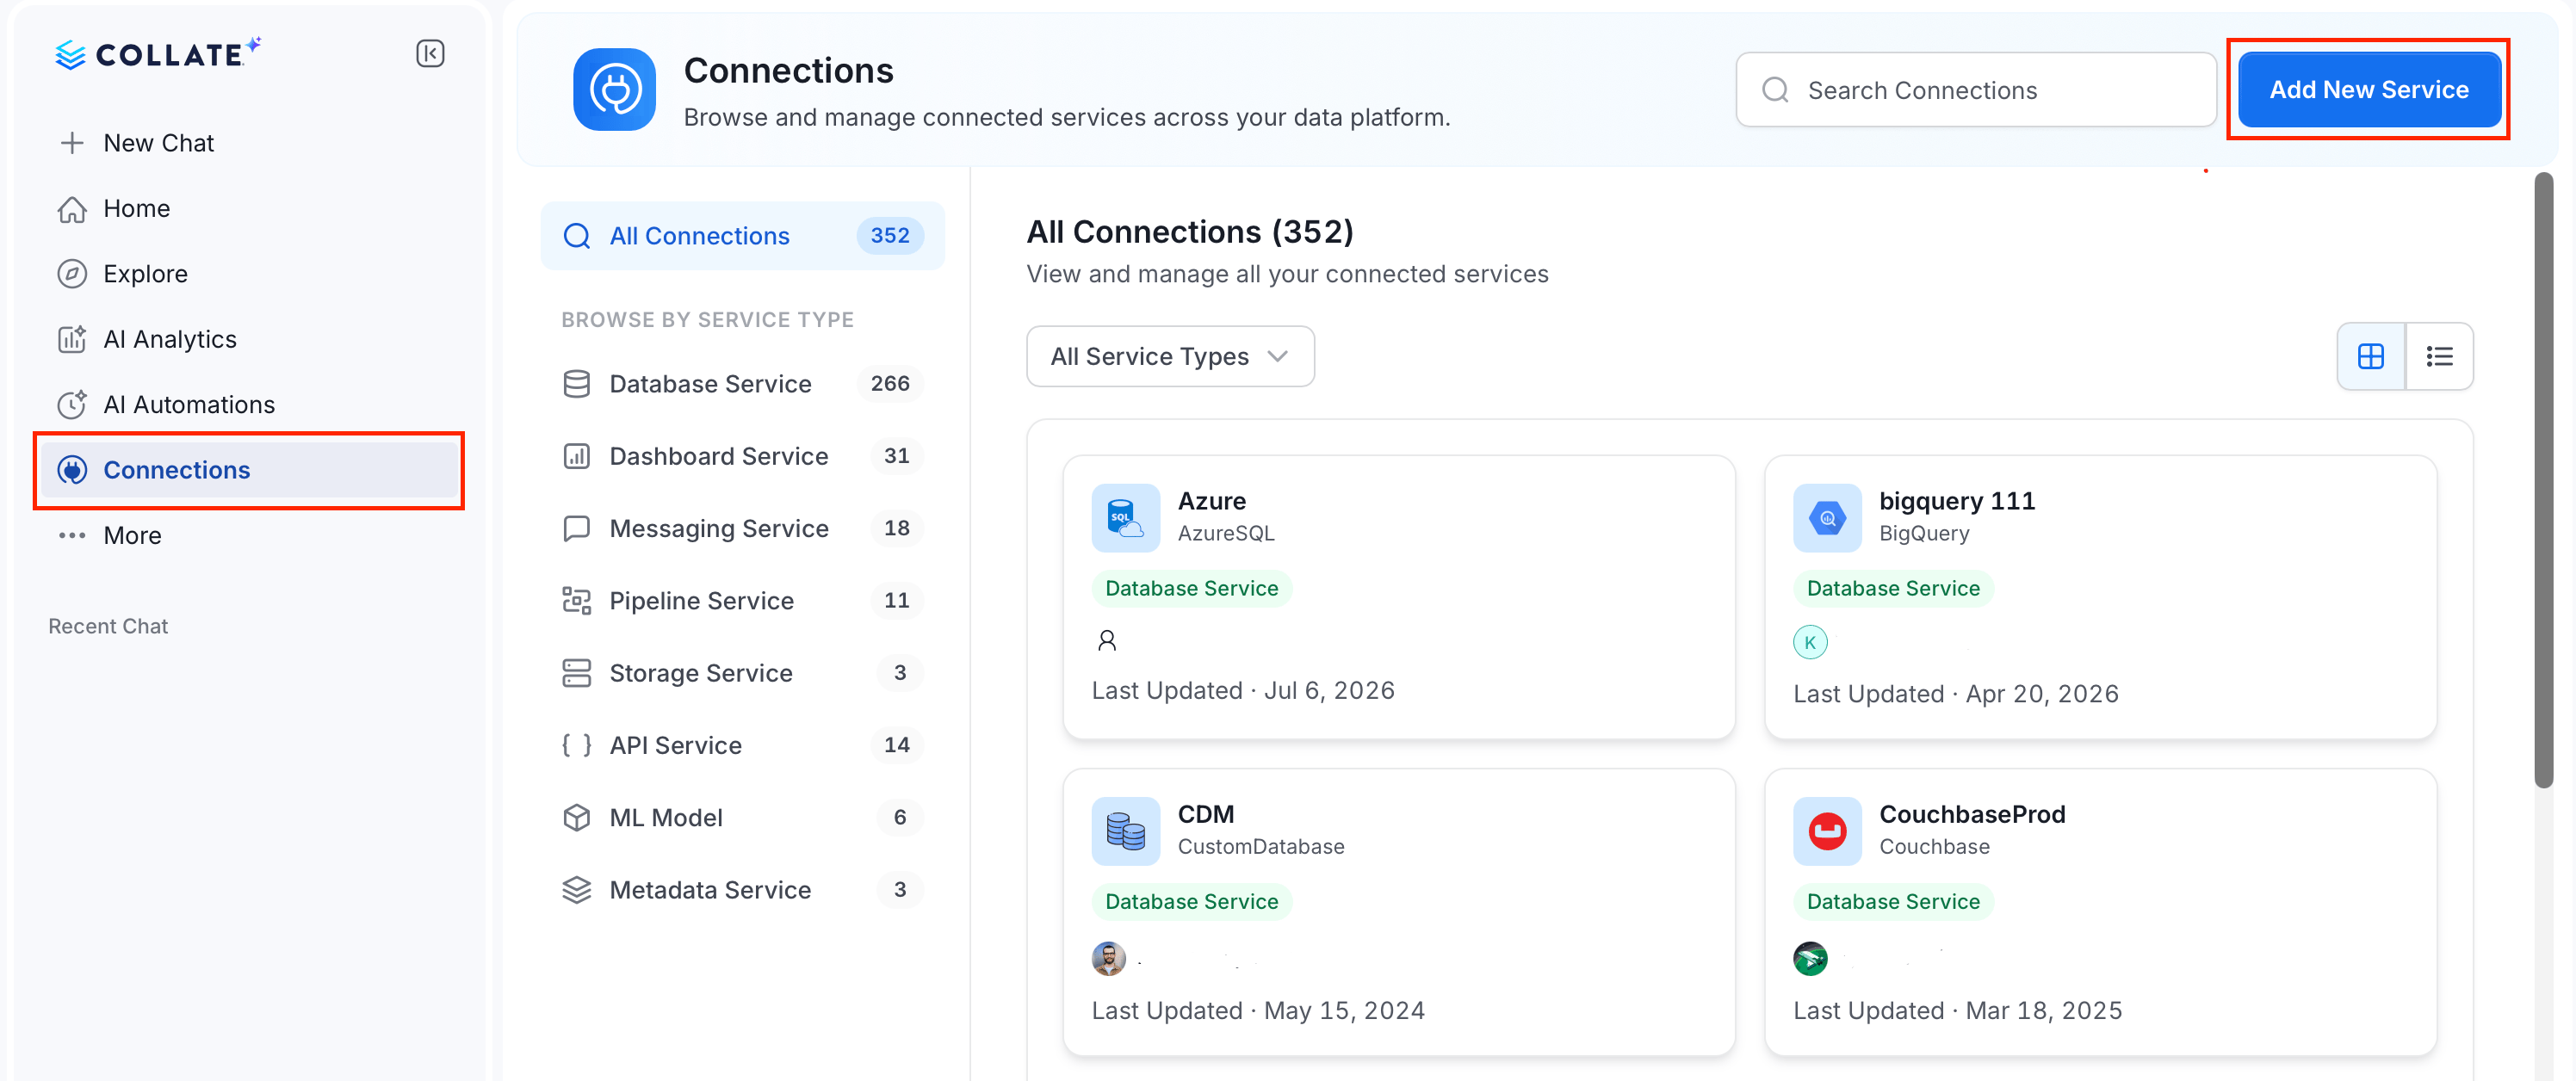
2. In the left navigation bar, select **Connections** and click **Add New Service**.
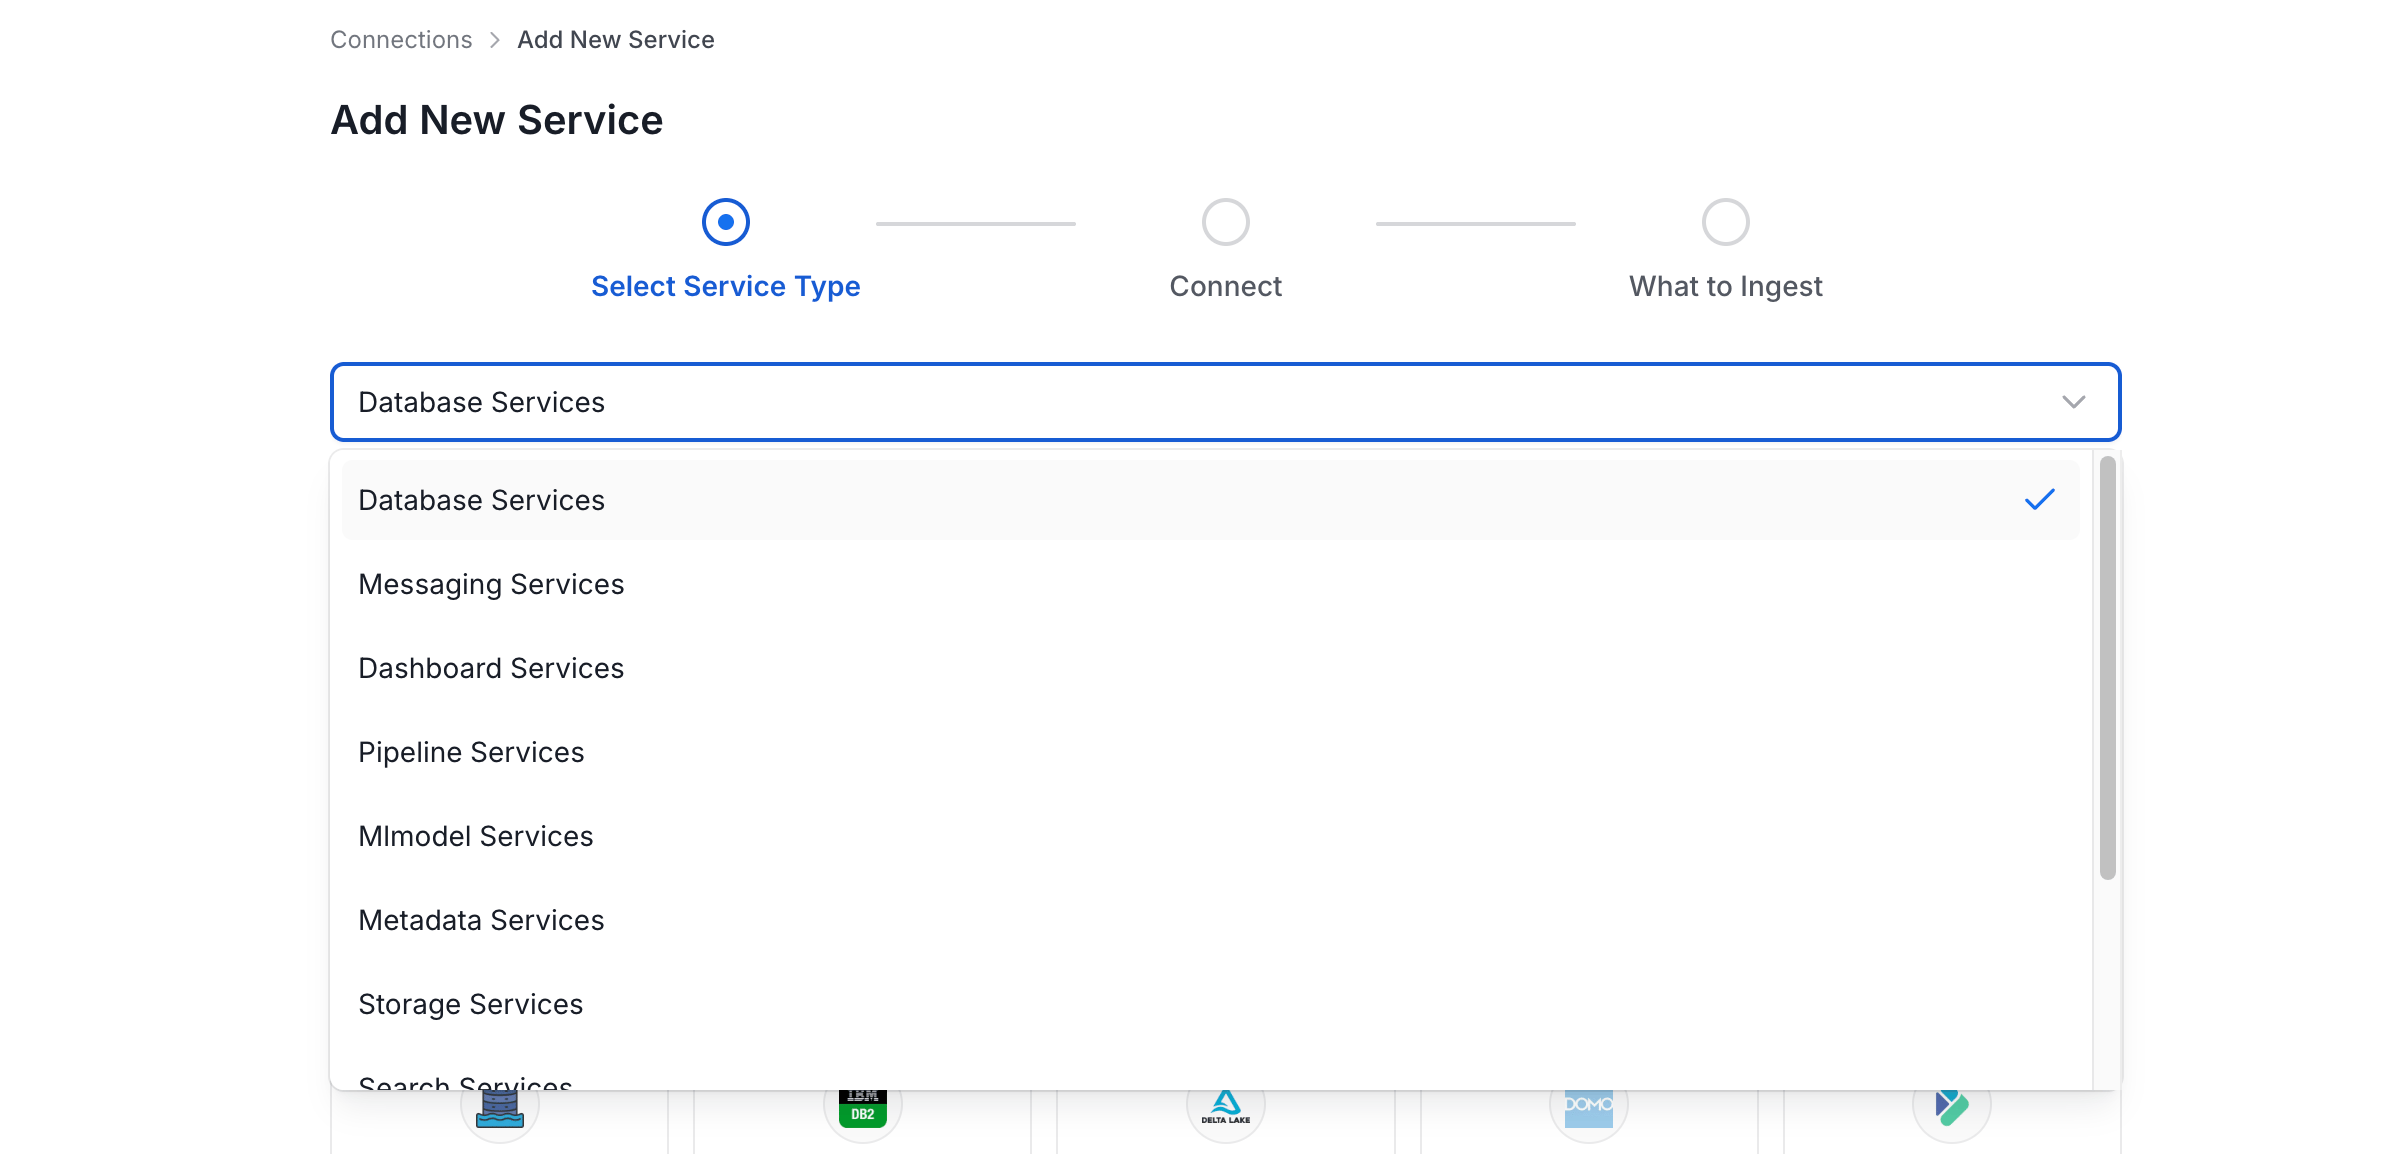
 3. On the **Add New Service** page, select the service type and click the connector you want to add.
 4. Enter a unique **Service Name**. Optionally, add a description.
5. In the **Ingestion Runner** drop-down, select **Collate SaaS Agent**.
4. Enter a unique **Service Name**. Optionally, add a description.
5. In the **Ingestion Runner** drop-down, select **Collate SaaS Agent**.
 6. Enter the **Connection Details**.
**Note**: The connection details vary based on the selected service type and connector.
For more information about configuring each connector, see [Connector](/ai-2-0/connectors).
7. In the Connection Details, you will see the IP Address unique to your cluster. Add this IP to your data source's allowlist so Collate can access your data source.
**Note**: This step applies to Collate SaaS only. If you're using the Hybrid Runner, no IP allowlist is needed — the runner connects from inside your own infrastructure.
6. Enter the **Connection Details**.
**Note**: The connection details vary based on the selected service type and connector.
For more information about configuring each connector, see [Connector](/ai-2-0/connectors).
7. In the Connection Details, you will see the IP Address unique to your cluster. Add this IP to your data source's allowlist so Collate can access your data source.
**Note**: This step applies to Collate SaaS only. If you're using the Hybrid Runner, no IP allowlist is needed — the runner connects from inside your own infrastructure.
 8. Click **Test Connection**. The test confirms the service is reachable and the credentials are valid.
After connection test is successful, click **Next: What to Ingest**.
9. Set the filter patterns to control which assets Collate ingests from your database service. Filter patterns use regular expressions applied to asset names.
10. Click **Create & Deploy**. Collate saves the service configuration and immediately begins pulling metadata from the source.
When you click **Create & Deploy** the services, Collate automatically deploys a Metadata Agent for this service and triggers the first ingestion run. You can view its status and run history from the **Agents** tab on the service detail page.
To manually configure the metadata agent and schedule the ingestion, see [Step 2 - Configure Metadata Agent and Schedule Ingestion](/ai-2-0/getting-started/lets-get-started/ingest-metadata).
8. Click **Test Connection**. The test confirms the service is reachable and the credentials are valid.
After connection test is successful, click **Next: What to Ingest**.
9. Set the filter patterns to control which assets Collate ingests from your database service. Filter patterns use regular expressions applied to asset names.
10. Click **Create & Deploy**. Collate saves the service configuration and immediately begins pulling metadata from the source.
When you click **Create & Deploy** the services, Collate automatically deploys a Metadata Agent for this service and triggers the first ingestion run. You can view its status and run history from the **Agents** tab on the service detail page.
To manually configure the metadata agent and schedule the ingestion, see [Step 2 - Configure Metadata Agent and Schedule Ingestion](/ai-2-0/getting-started/lets-get-started/ingest-metadata).