> ## Documentation Index
> Fetch the complete documentation index at: https://docs.getcollate.io/llms.txt
> Use this file to discover all available pages before exploring further.
# Getting Started
> Set up your environment and make your first API call in minutes
# Getting Started
Get up and running with the Collate API and the Python, Java, and Go SDKs. This guide walks you through authentication, SDK installation, and making your first API call.
### Prerequisites
* A Collate account (cloud or self-hosted instance)
* Your instance base URL (e.g., `https://your-company.getcollate.io/api`)
* Python 3.10 - 3.11, Java 21, or Go 1.24+
### Step 1: Get Your API Credentials
You need a JWT token to authenticate API requests. There are two ways to get one:
* **Bot Token** (recommended for automation)
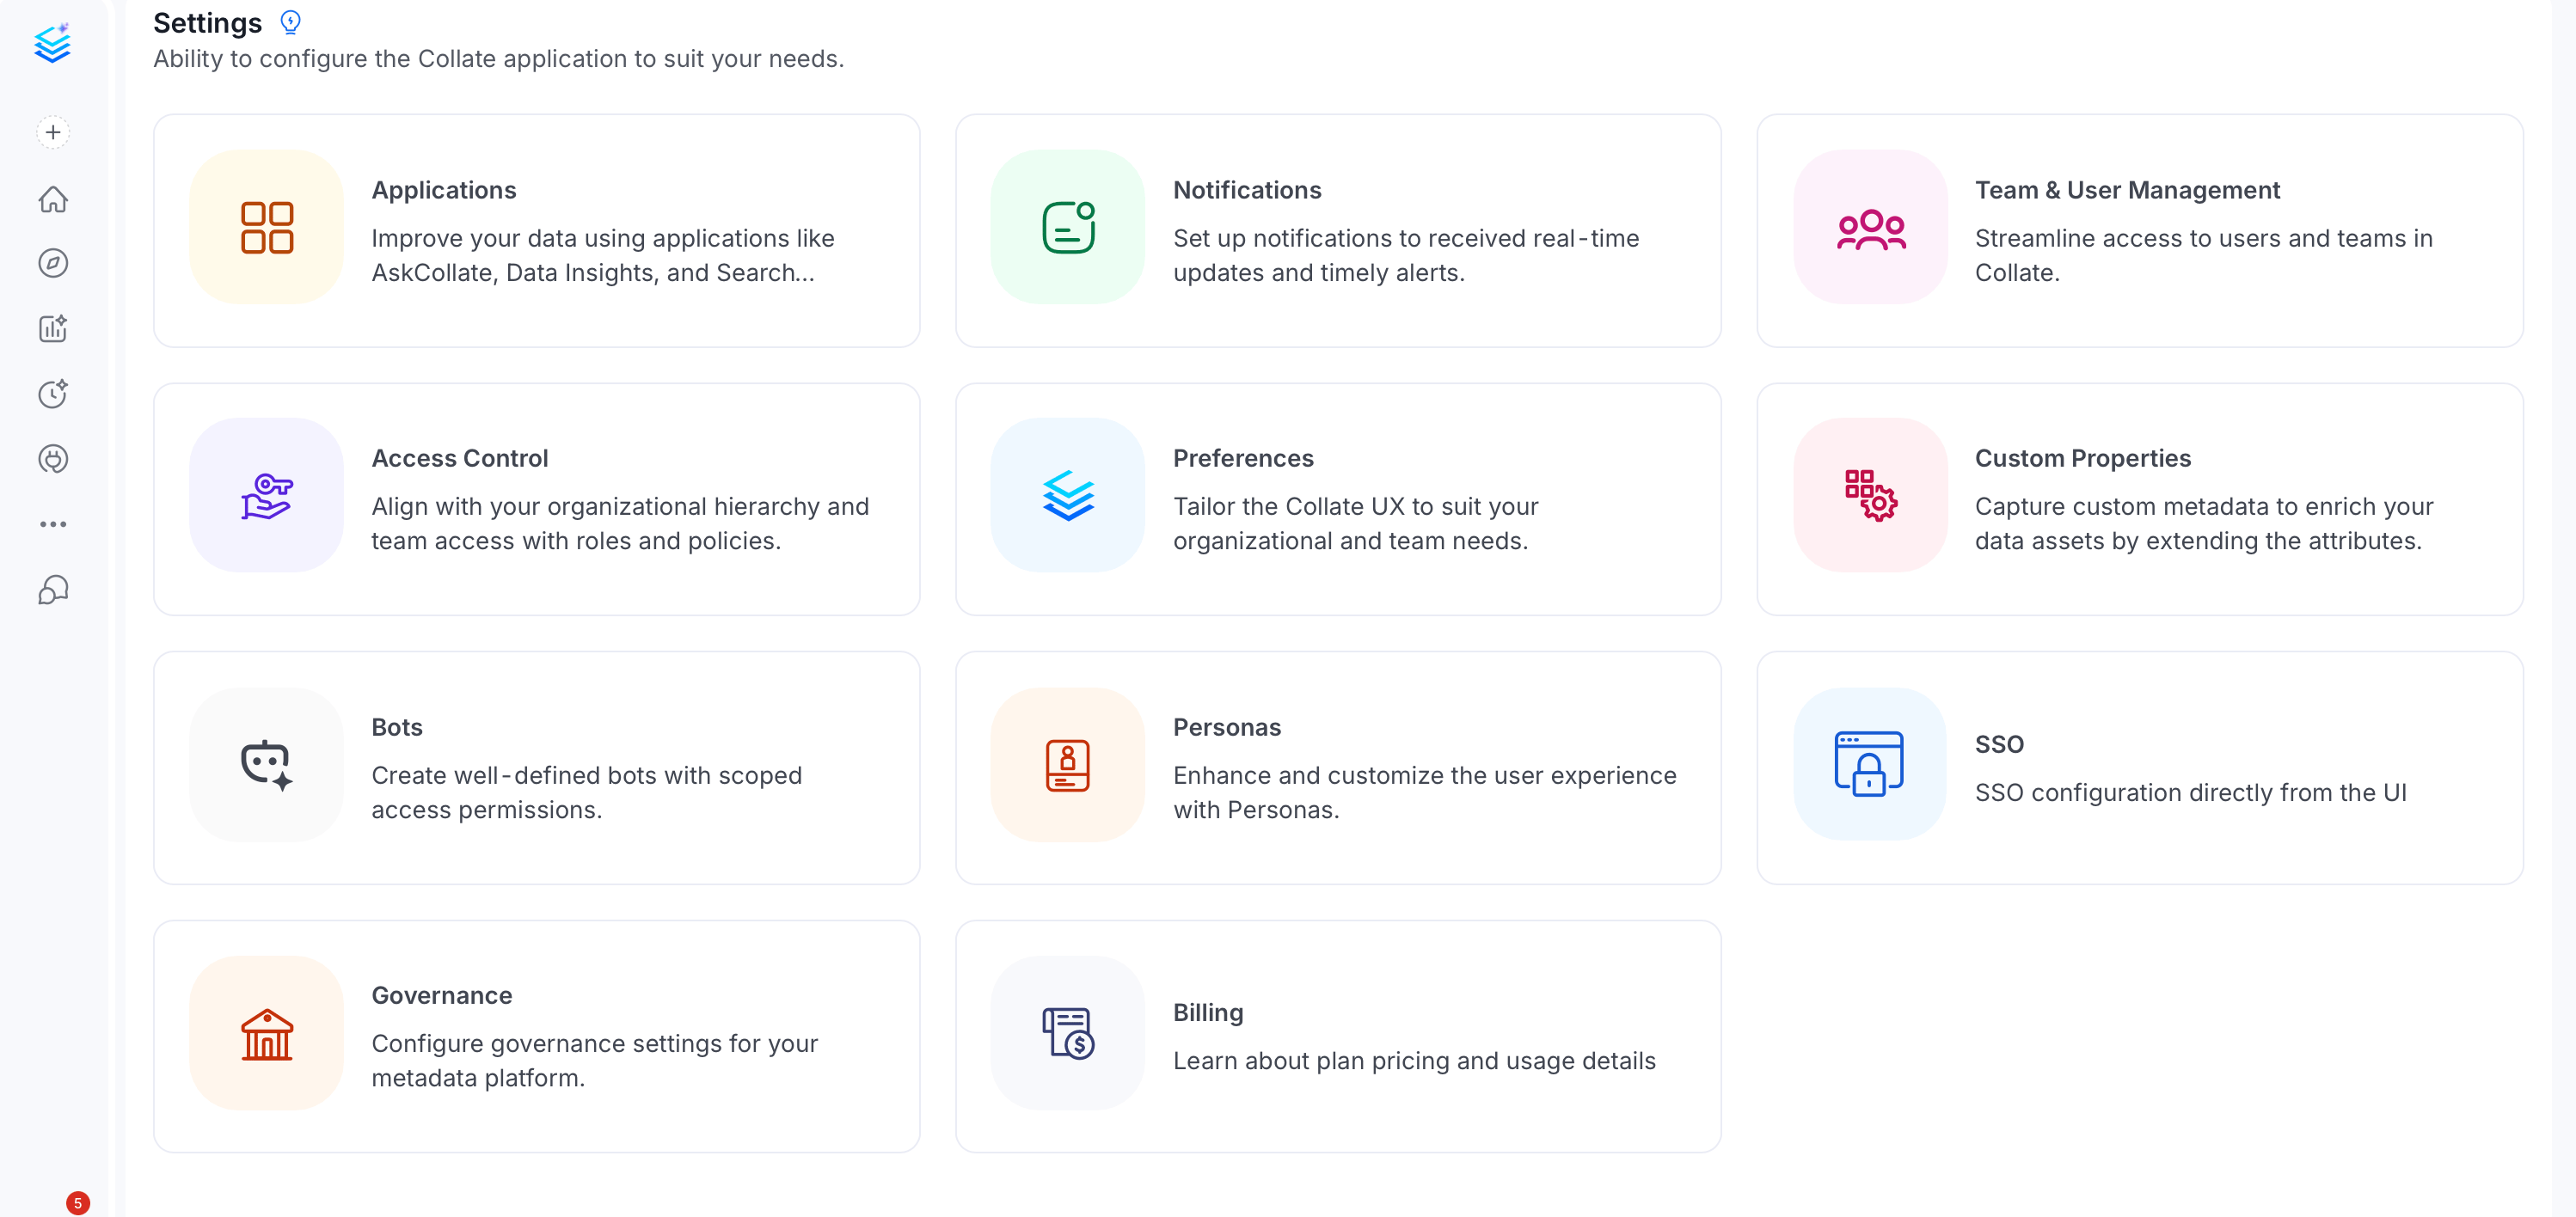
**Note**: The **Bots** tile under **Settings** is only visible to users with Admin privileges. If you don't see it, ask your organization's Collate Admin to generate a bot token for you or grant you Admin access.
1. Click the **Profile** icon and navigate to **Settings** > **Bots**.
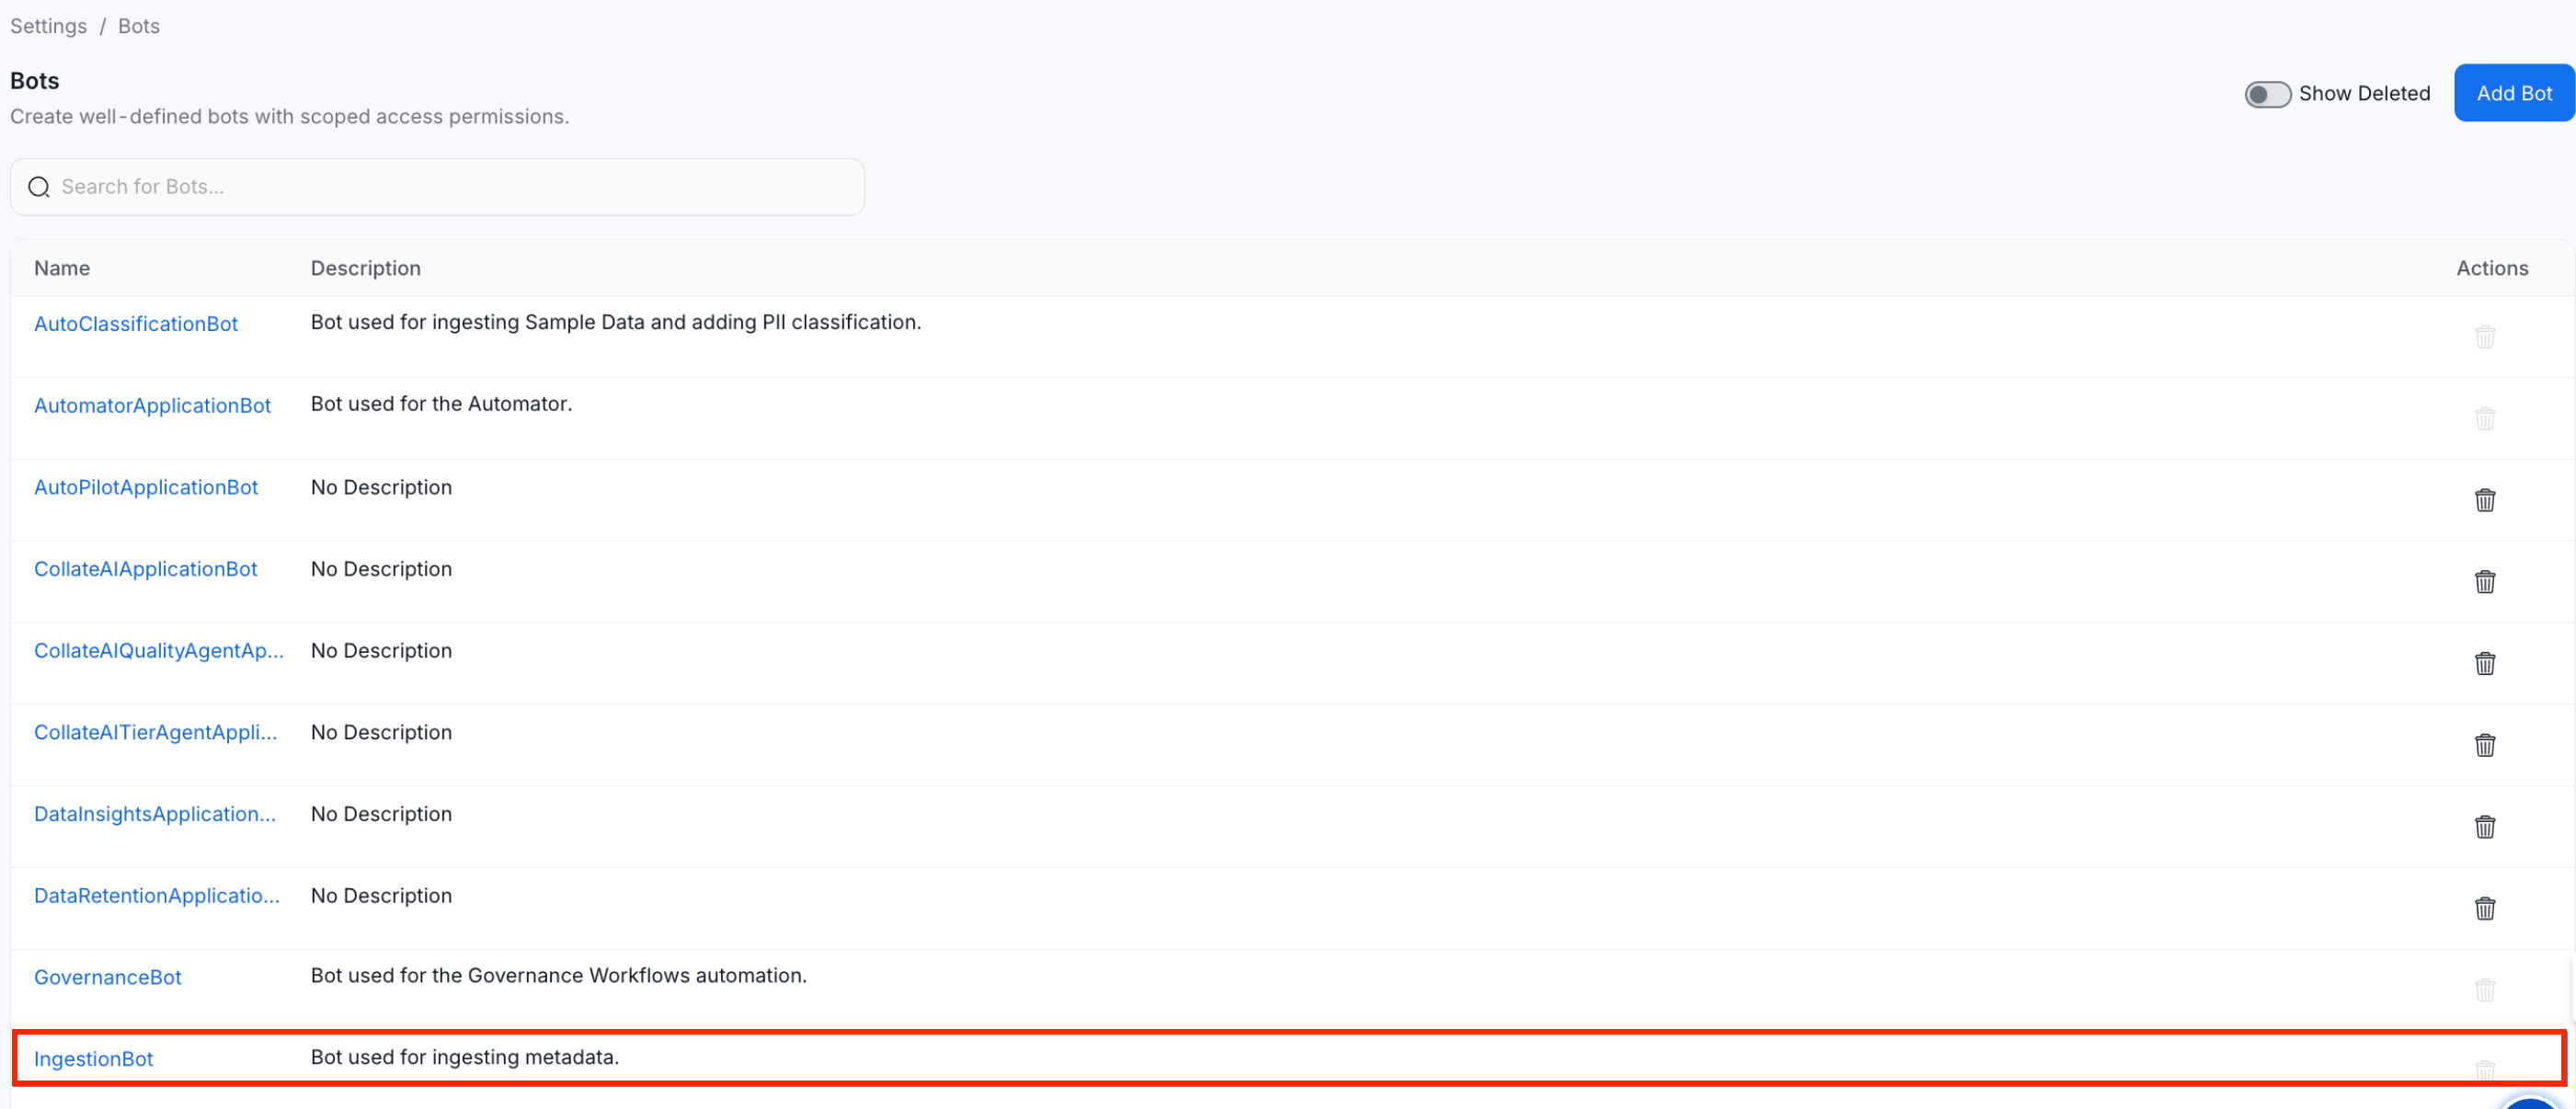
 2. Search and select **ingestion-bot**.
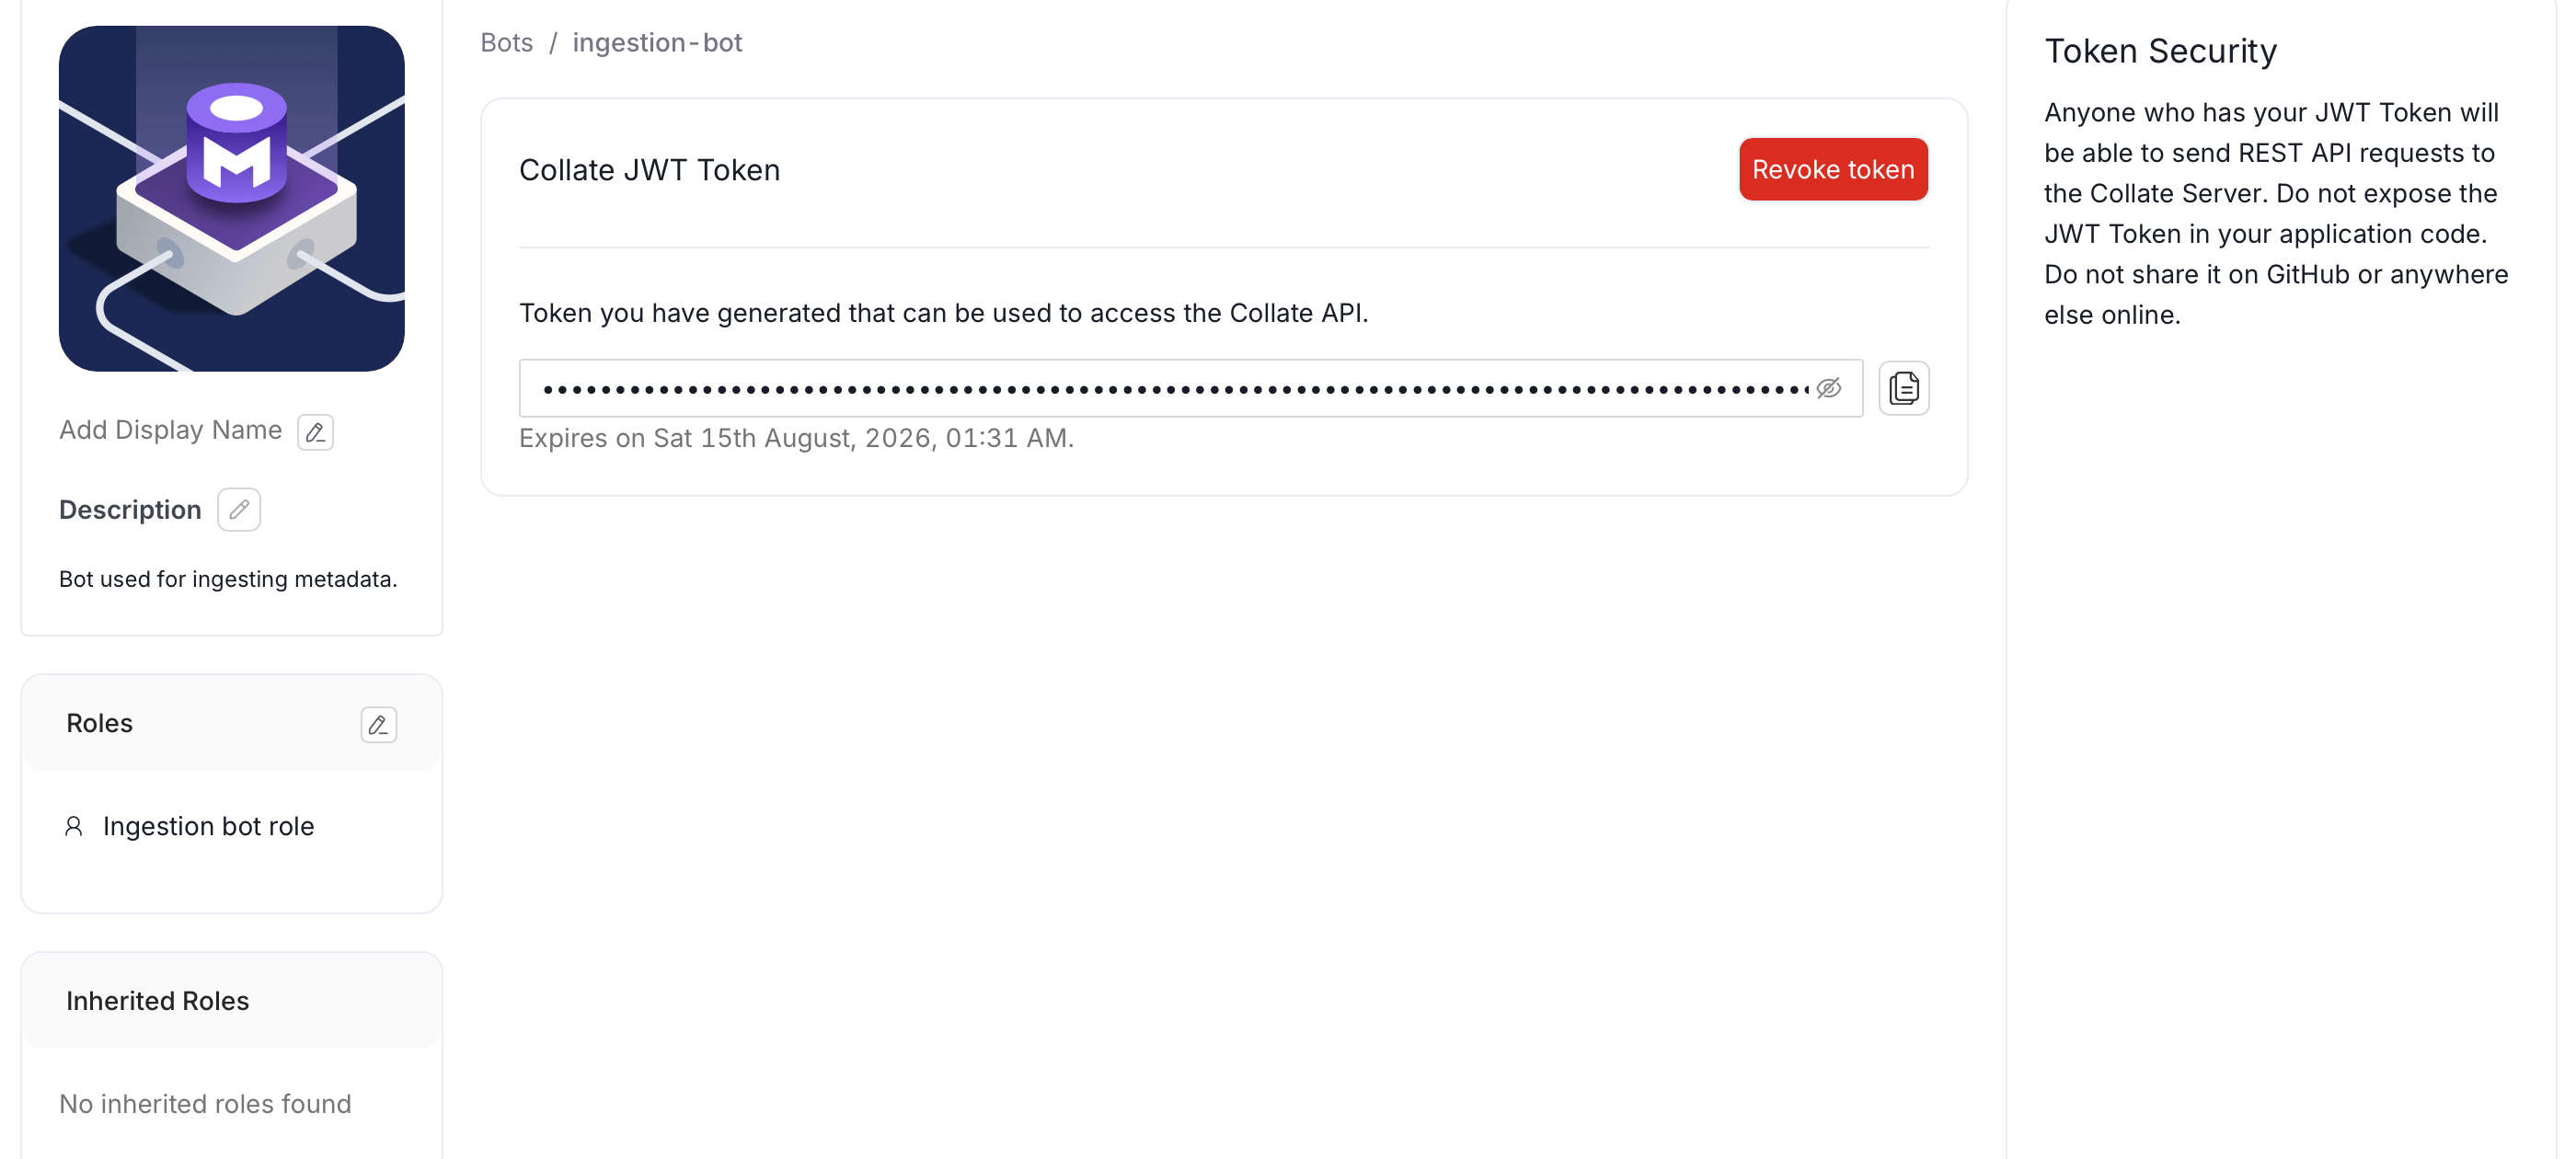
 3. Copy the Collate JWT token and save it for later use.
 * **Personal Access Token** (for development)
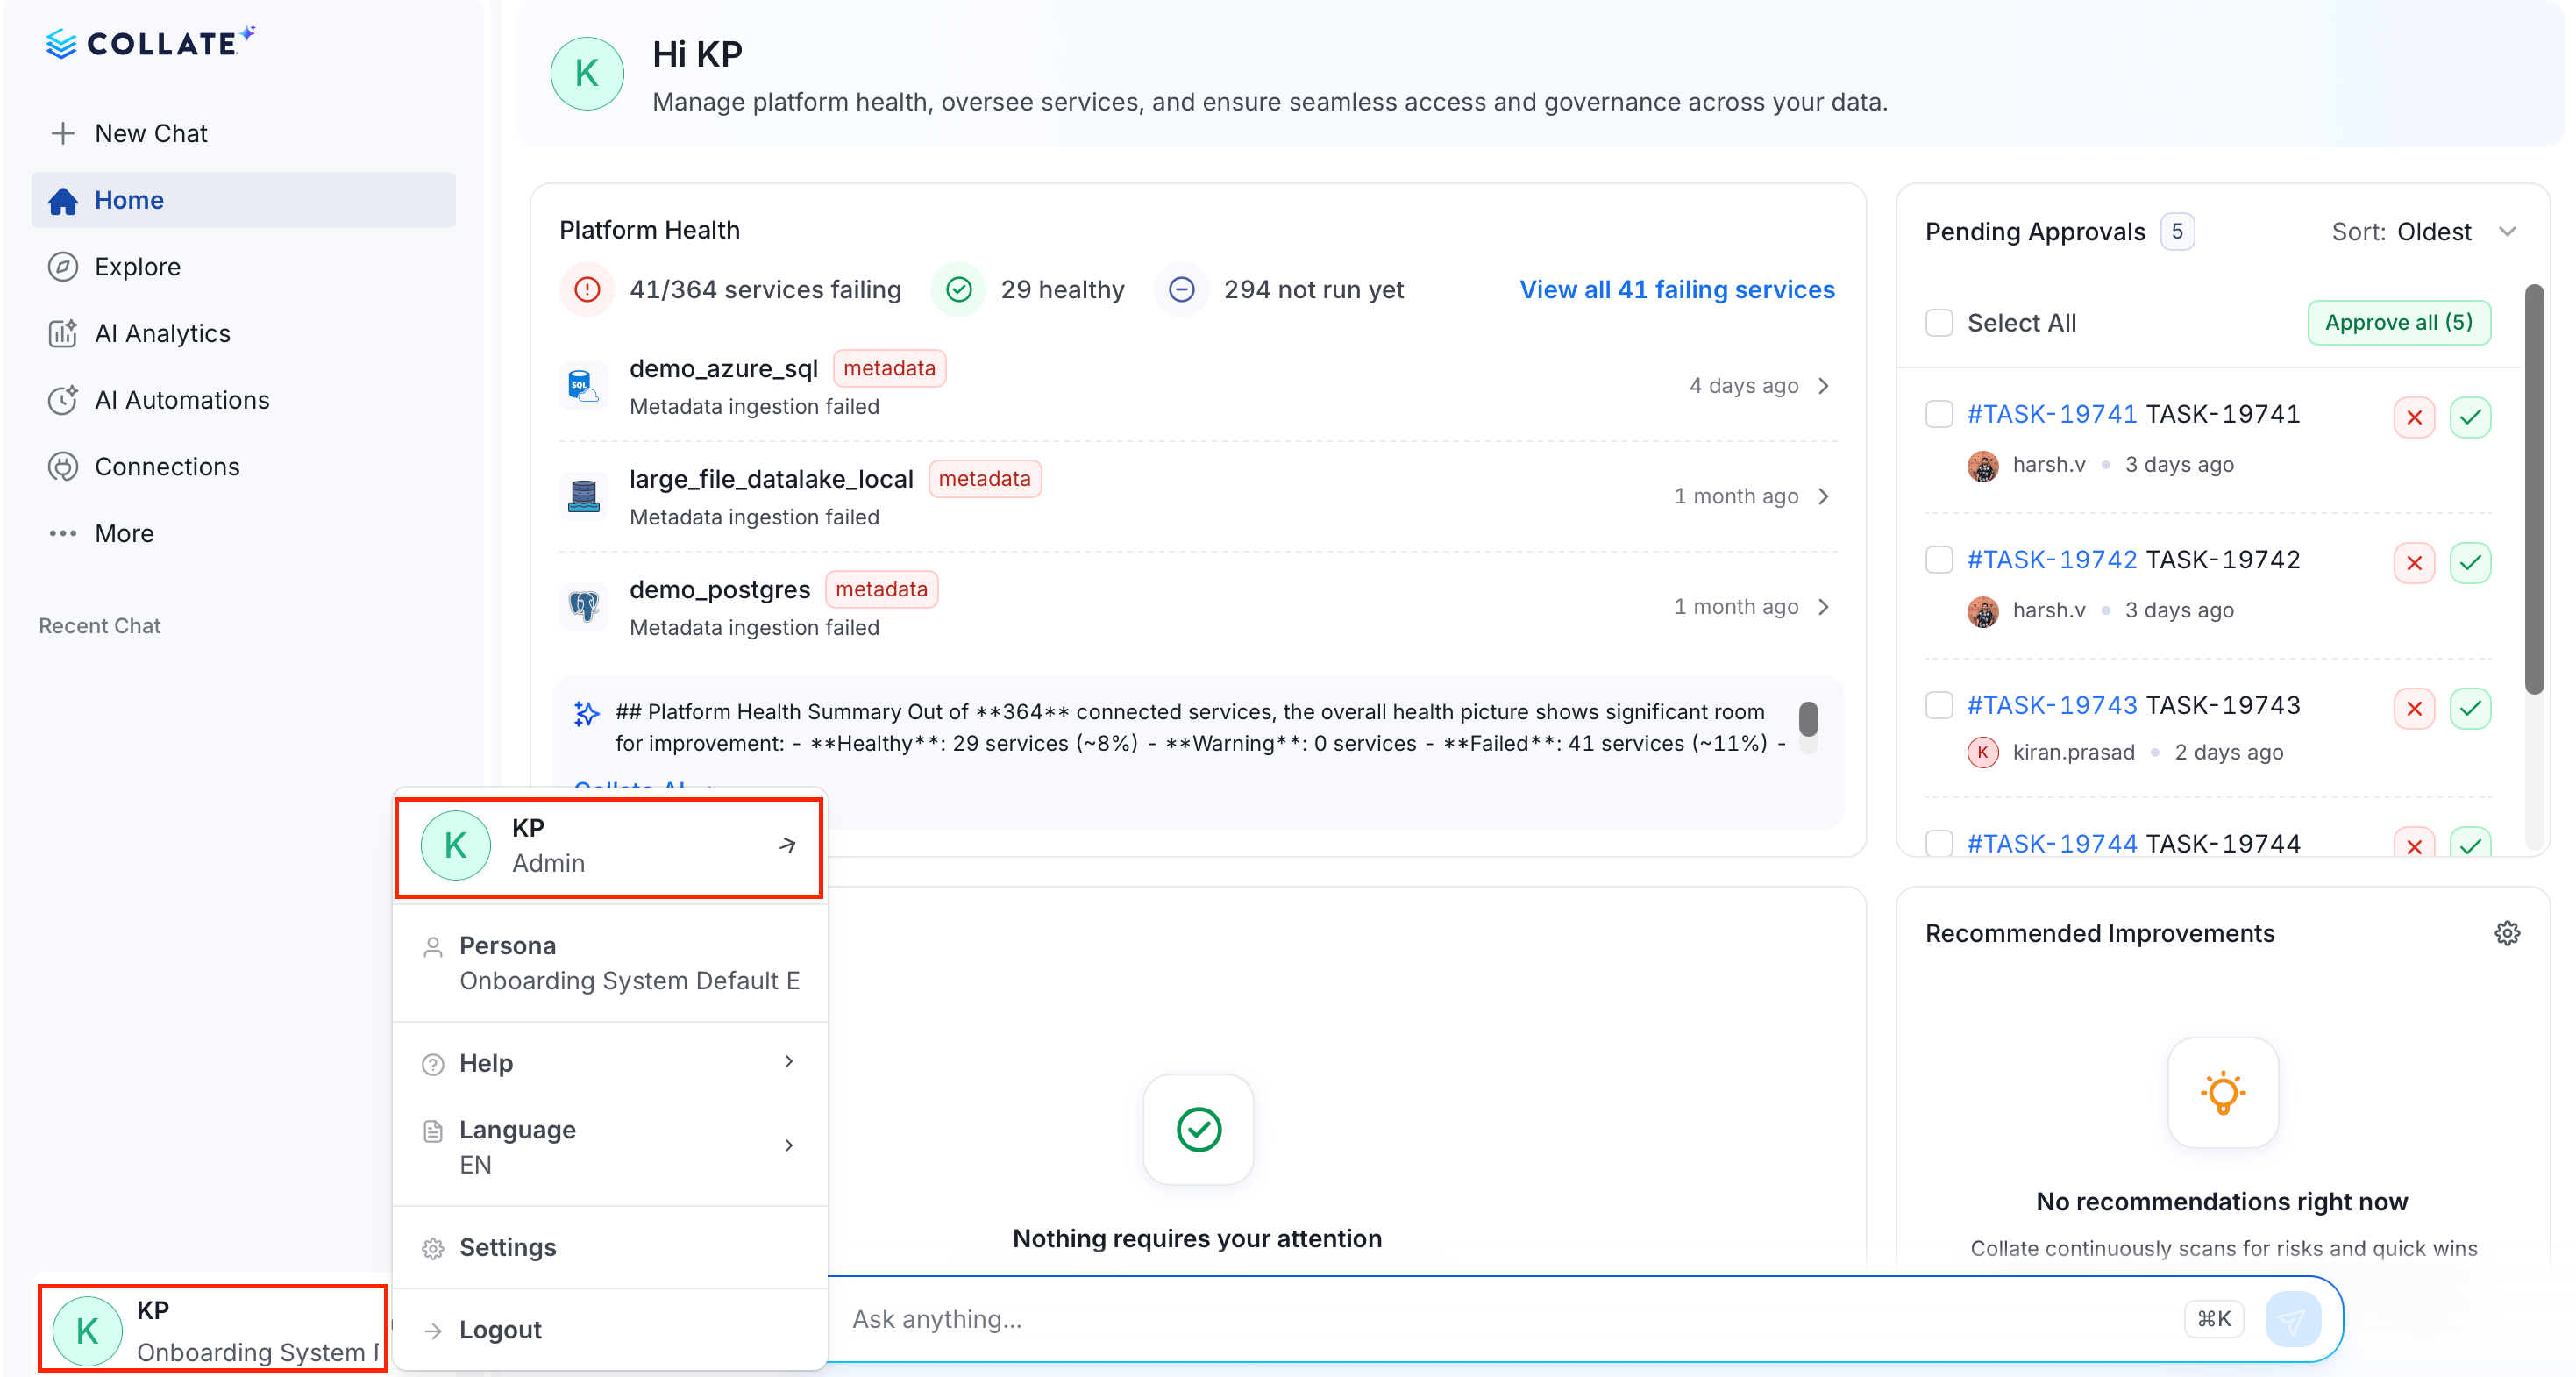
1. Click the **Profile** icon and select your user name.
* **Personal Access Token** (for development)
1. Click the **Profile** icon and select your user name.
 2. Click the **Access Token** tab.
3. Set the expiry time and click **Generate Token**.
2. Click the **Access Token** tab.
3. Set the expiry time and click **Generate Token**.
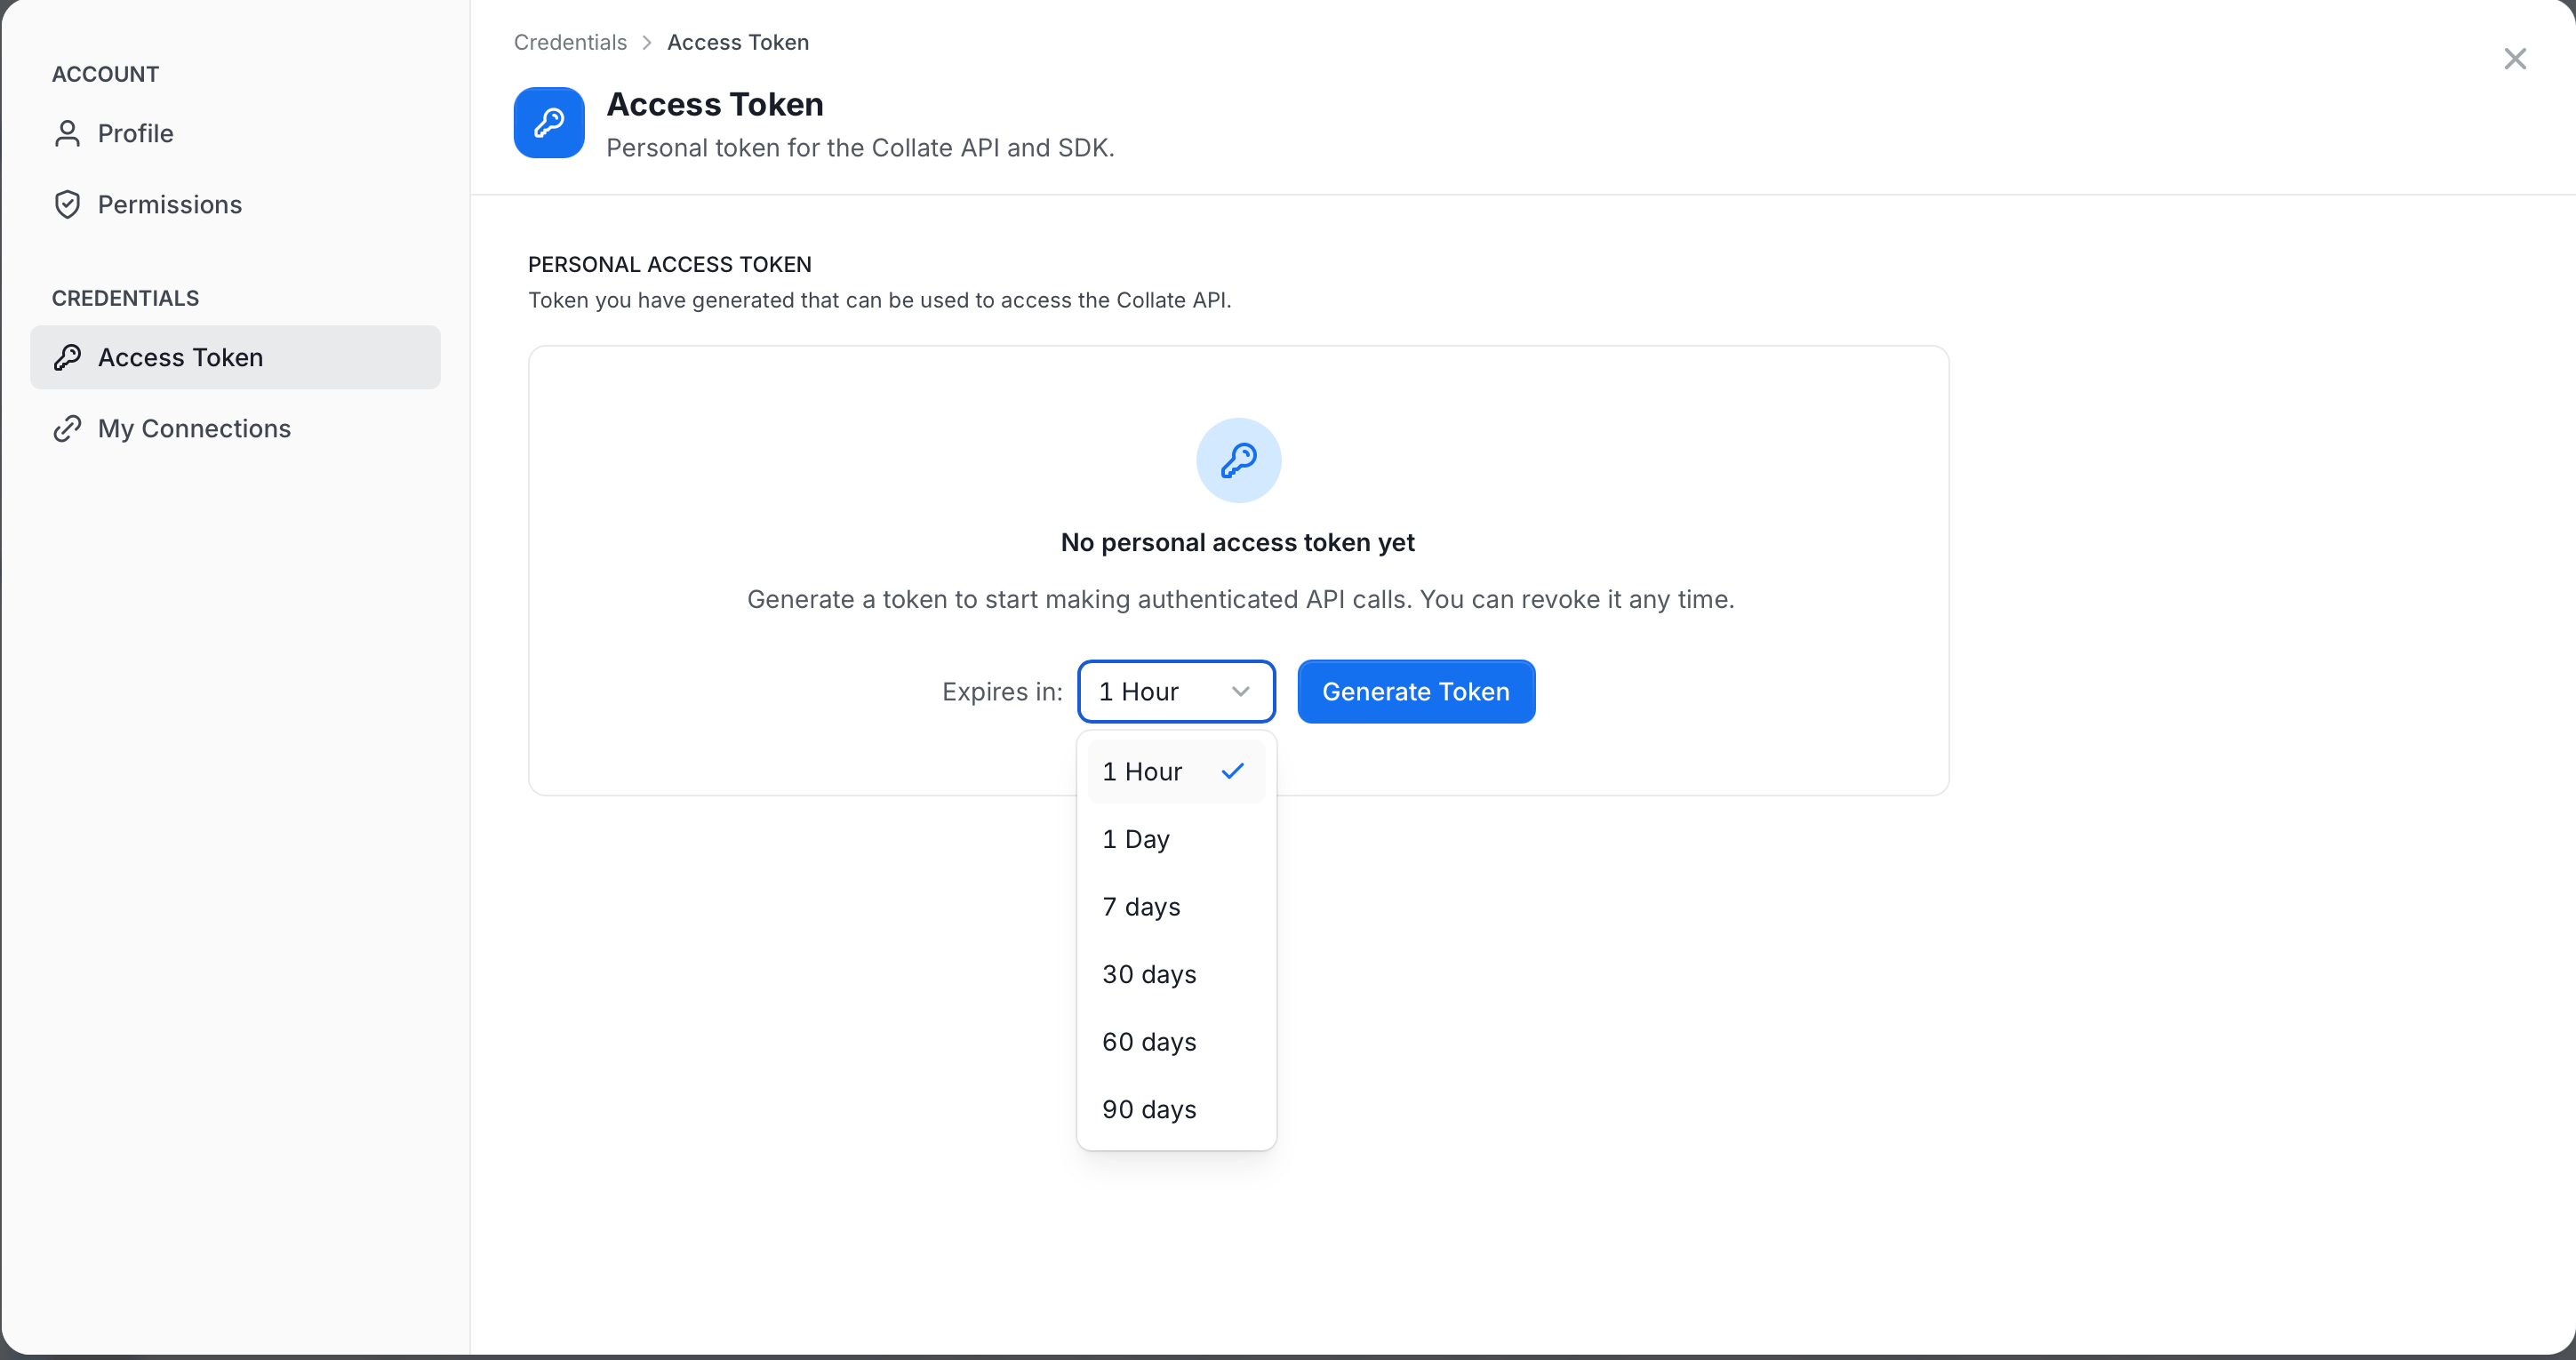 4. Copy and save it securely for later use.
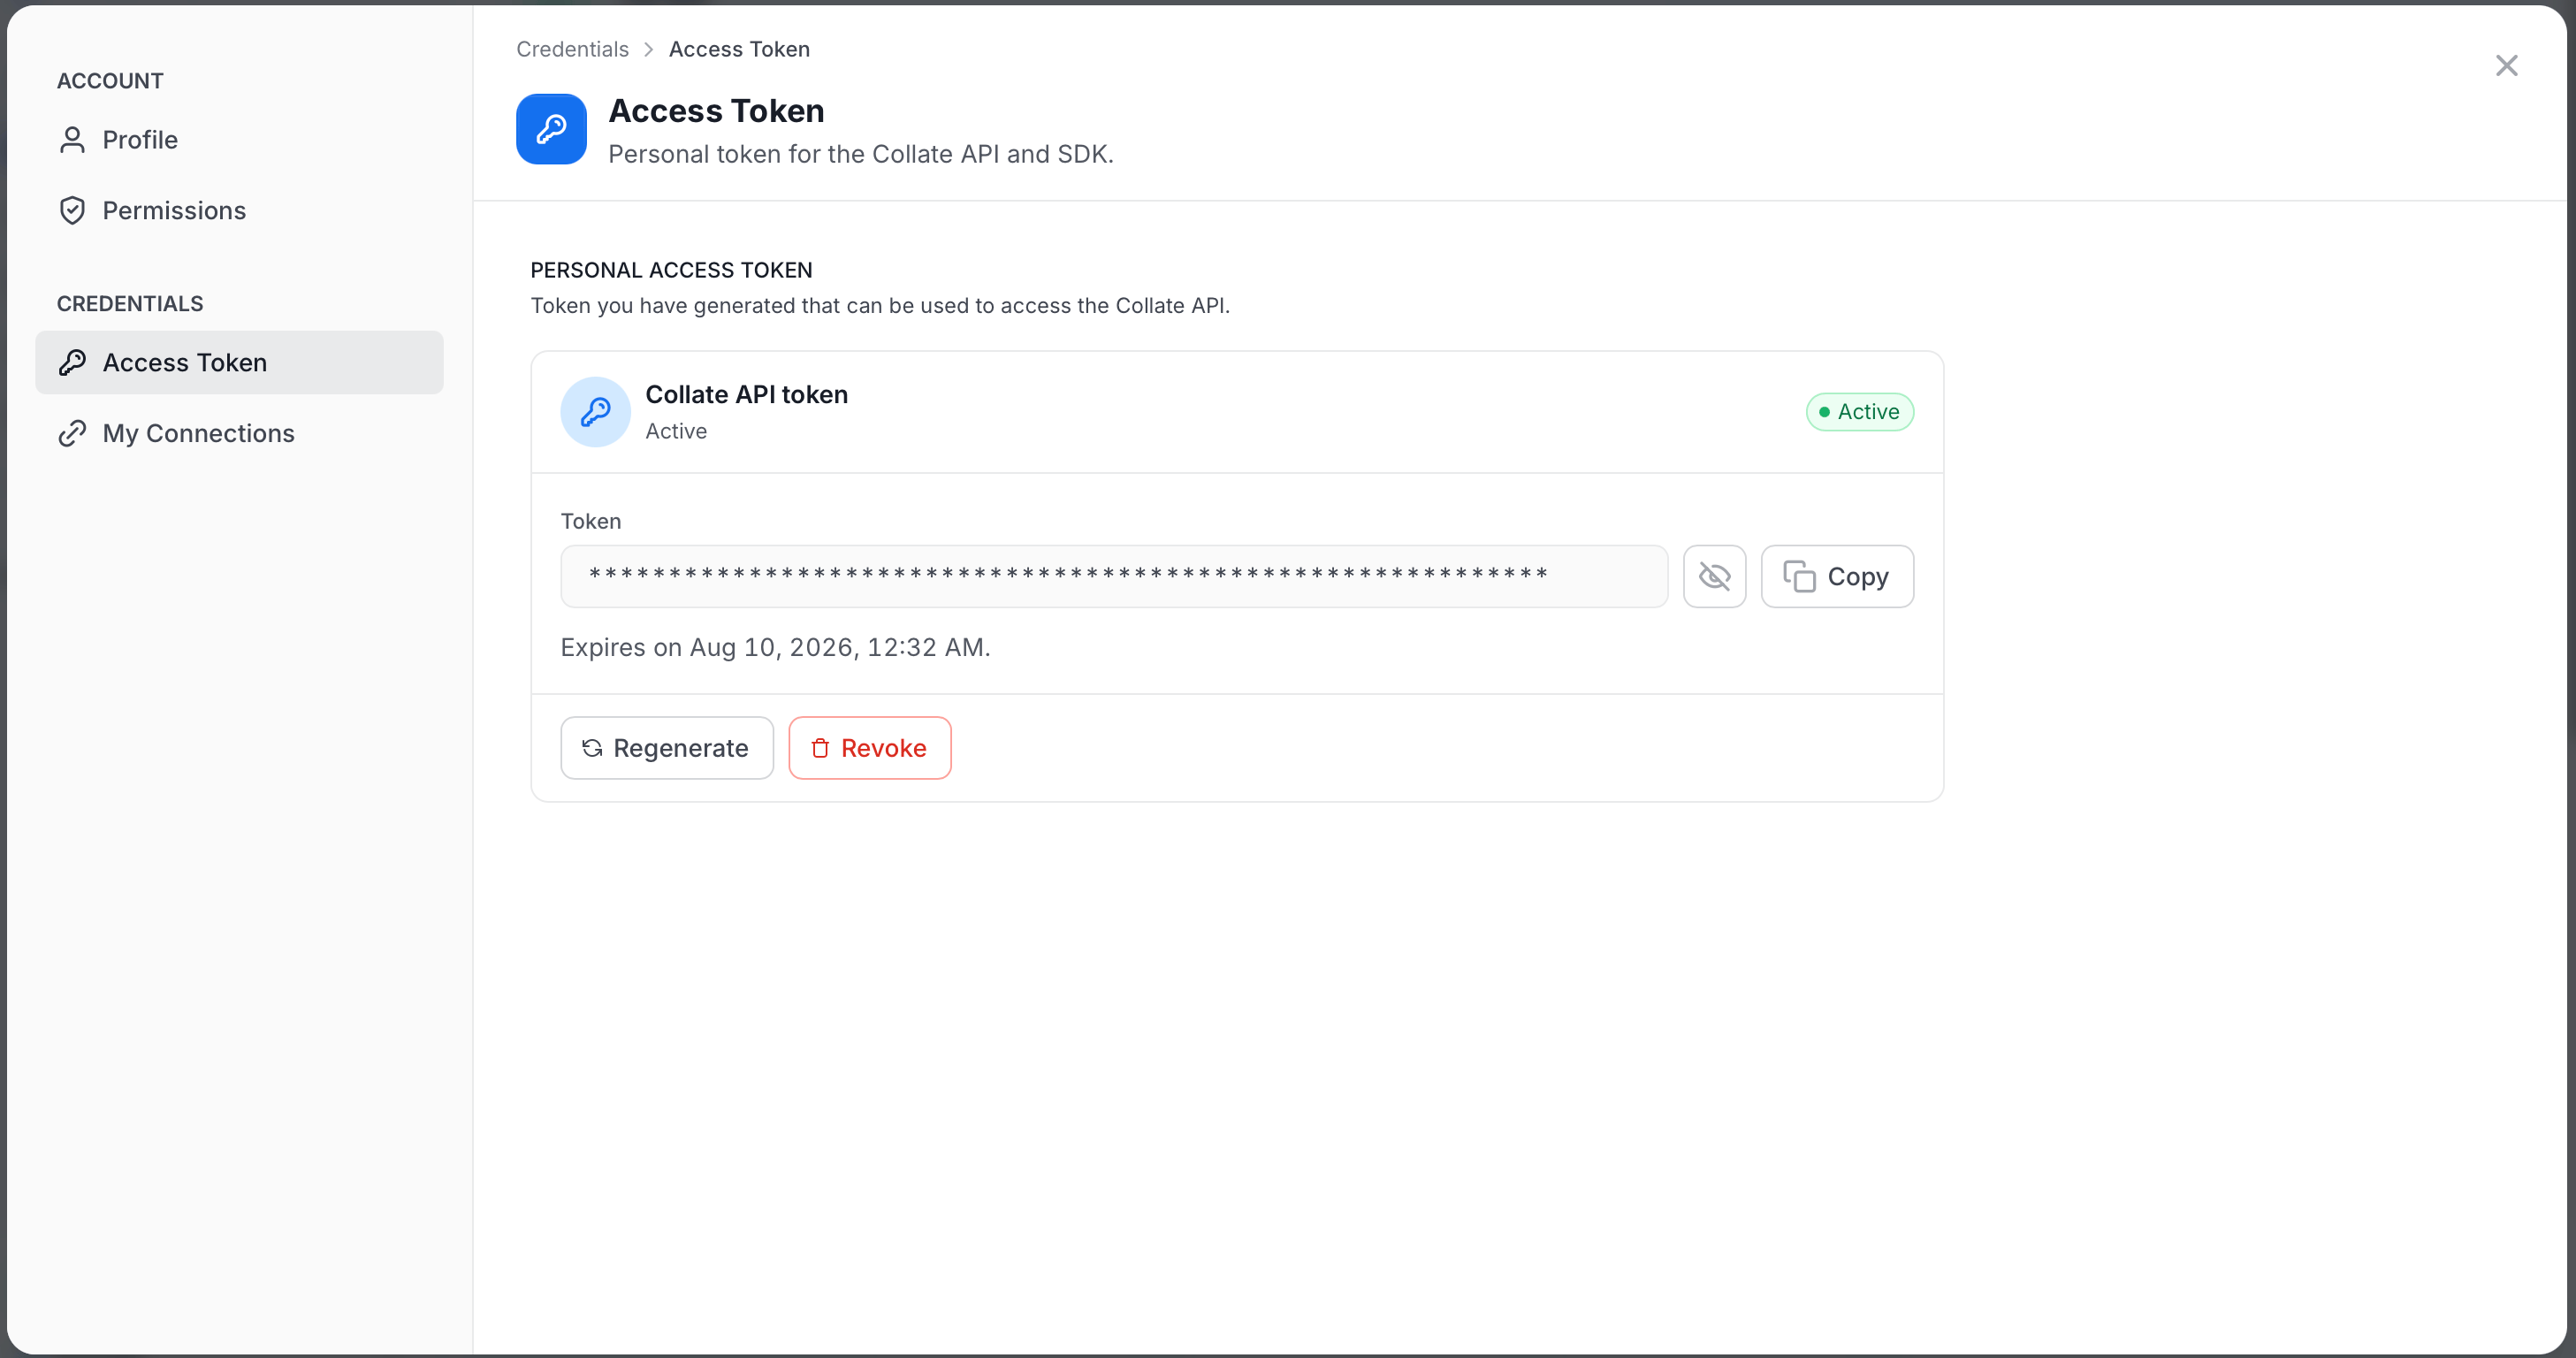 **Important**: Your JWT token carries full API privileges. Keep it secure — never share tokens in publicly accessible areas such as GitHub repositories or client-side code.
### Step 2: Install an SDK
Choose your preferred language and install the SDK:
```bash Python theme={null}
pip install "openmetadata-ingestion~=YOUR_SERVER_VERSION"
```
```xml Java (Maven) theme={null}
org.open-metadata
openmetadata-sdk
YOUR_SERVER_VERSION
```
```bash Go theme={null}
go get github.com/open-metadata/openmetadata-sdk/openmetadata-go-client@latest
```
Or skip SDK installation and use cURL to interact with the REST API directly.
### Step 3: Initialize Your Client
Set up the connection to your Collate instance:
```python Python theme={null}
from metadata.sdk import configure
configure(
host="https://your-company.getcollate.io/api",
jwt_token="your-jwt-token",
)
```
```java Java theme={null}
import org.openmetadata.sdk.client.OpenMetadata;
OpenMetadata.initialize(
"https://your-company.getcollate.io/api",
"your-jwt-token"
);
var client = OpenMetadata.client();
```
```go Go theme={null}
import "github.com/open-metadata/openmetadata-sdk/openmetadata-go-client/pkg/ometa"
client := ometa.NewClient(
"https://your-company.getcollate.io",
ometa.WithToken("your-jwt-token"),
)
```
```bash cURL theme={null}
# Set your token as an environment variable
export COLLATE_TOKEN="your-jwt-token"
export COLLATE_HOST="https://your-company.getcollate.io/api/v1"
```
### Step 4: Make Your First API Call
List the tables in your catalog to verify everything is working:
```python Python theme={null}
from metadata.sdk import Tables
tables = Tables.list_all()
for table in tables:
print(f"{table.fullyQualifiedName}: {table.description}")
```
```java Java theme={null}
import org.openmetadata.sdk.models.ListParams;
var tables = client.tables().list(new ListParams().setLimit(10));
for (var table : tables.getData()) {
System.out.println(table.getFullyQualifiedName());
}
```
```go Go theme={null}
ctx := context.Background()
for table, err := range client.Tables.List(ctx, &ometa.ListTablesParams{
Limit: ometa.Int32(10),
}) {
if err != nil {
log.Fatal(err)
}
fmt.Println(table.Name)
}
```
```bash cURL theme={null}
curl -X GET "$COLLATE_HOST/tables?limit=10" \
-H "Authorization: Bearer $COLLATE_TOKEN" \
-H "Content-Type: application/json"
```
You should see a JSON response like this:
```json Expected Response theme={null}
{
"data": [
{
"id": "af1c8e2-4b3a-4e5f-9c6d-7e8f9a0b1c2d",
"name": "customers",
"fullyQualifiedName": "mysql-prod.analytics.customers",
"description": "Core customer records",
"tableType": "Regular",
"columns": [ ... ],
"service": { "id": "...", "type": "databaseService" }
}
],
"paging": {
"total": 142,
"after": "eyJsaW1pdCI6MTAsIm9mZnNldCI6MTB9"
}
}
```
**Tip**: The `paging.after` cursor can be passed to the next request to paginate through results. See the [Pagination guide](/ai-2-0/developer-guide/api-reference/pagination) for details.
### Step 5: Create Resources with the Fluent API
The SDKs provide a fluent API for creating and managing resources. Here's how to create a table programmatically:
```python Python theme={null}
from metadata.sdk import Tables, configure
from metadata.generated.schema.api.data.createTable import CreateTableRequest
from metadata.generated.schema.entity.data.table import Column, DataType
## Initialize the SDK
configure(host="https://your-company.getcollate.io/api", jwt_token="your-jwt-token")
## Create and persist the table
table = Tables.create(CreateTableRequest(
name="customers",
databaseSchema="mysql-prod.analytics.public",
description="Customer master table",
columns=[
Column(name="id", dataType=DataType.BIGINT, description="Primary key"),
Column(name="name", dataType=DataType.VARCHAR, dataLength=255, description="Customer name"),
Column(name="email", dataType=DataType.VARCHAR, dataLength=255, description="Email address"),
],
))
print(f"Created: {table.fullyQualifiedName}")
```
```java Java theme={null}
import org.openmetadata.sdk.fluent.builders.TableBuilder;
import org.openmetadata.sdk.fluent.builders.ColumnBuilder;
import org.openmetadata.schema.entity.data.Table;
// Create and persist the table in one fluent chain
Table table = new TableBuilder(client)
.name("customers")
.description("Customer master table")
.schemaFQN("mysql-prod.analytics.public")
.addColumn("id", "BIGINT", "Primary key")
.column(ColumnBuilder.varchar("name", 255))
.column(ColumnBuilder.varchar("email", 255))
.tags("PII.Sensitive", "Tier.Tier1")
.create();
System.out.println("Created: " + table.getFullyQualifiedName());
```
```bash cURL theme={null}
curl -X POST "$COLLATE_HOST/tables" \
-H "Authorization: Bearer $COLLATE_TOKEN" \
-H "Content-Type: application/json" \
-d '{
"name": "new_table",
"databaseSchema": "mysql-prod.analytics",
"columns": [
{
"name": "id",
"dataType": "BIGINT",
"description": "Primary key"
},
{
"name": "name",
"dataType": "VARCHAR",
"dataLength": 255,
"description": "Customer name"
}
]
}'
```
The Java SDK exposes both builder-based and fluent helper APIs, the Python SDK uses typed request models and entity helpers, and the Go SDK provides typed services with automatic pagination. All SDKs provide strong typing and IDE-friendly workflows.
## Common Use Cases
Search and explore metadata across your entire catalog.
Create, update, and manage tables, dashboards, pipelines, and more.
Define test suites and monitor data quality metrics programmatically.
Manage domains, glossaries, classifications, and tags.
Provision users, teams, and manage organizational structure.
Create and validate data contracts for your assets.
## What's Next?
Deep dive into auth methods and token management.
Understand error codes and how to handle them.
Learn how to paginate through large result sets.
Understand PUT vs PATCH behavior and preserve/merge rules for bot-driven updates.
**Important**: Your JWT token carries full API privileges. Keep it secure — never share tokens in publicly accessible areas such as GitHub repositories or client-side code.
### Step 2: Install an SDK
Choose your preferred language and install the SDK:
```bash Python theme={null}
pip install "openmetadata-ingestion~=YOUR_SERVER_VERSION"
```
```xml Java (Maven) theme={null}
org.open-metadata
openmetadata-sdk
YOUR_SERVER_VERSION
```
```bash Go theme={null}
go get github.com/open-metadata/openmetadata-sdk/openmetadata-go-client@latest
```
Or skip SDK installation and use cURL to interact with the REST API directly.
### Step 3: Initialize Your Client
Set up the connection to your Collate instance:
```python Python theme={null}
from metadata.sdk import configure
configure(
host="https://your-company.getcollate.io/api",
jwt_token="your-jwt-token",
)
```
```java Java theme={null}
import org.openmetadata.sdk.client.OpenMetadata;
OpenMetadata.initialize(
"https://your-company.getcollate.io/api",
"your-jwt-token"
);
var client = OpenMetadata.client();
```
```go Go theme={null}
import "github.com/open-metadata/openmetadata-sdk/openmetadata-go-client/pkg/ometa"
client := ometa.NewClient(
"https://your-company.getcollate.io",
ometa.WithToken("your-jwt-token"),
)
```
```bash cURL theme={null}
# Set your token as an environment variable
export COLLATE_TOKEN="your-jwt-token"
export COLLATE_HOST="https://your-company.getcollate.io/api/v1"
```
### Step 4: Make Your First API Call
List the tables in your catalog to verify everything is working:
```python Python theme={null}
from metadata.sdk import Tables
tables = Tables.list_all()
for table in tables:
print(f"{table.fullyQualifiedName}: {table.description}")
```
```java Java theme={null}
import org.openmetadata.sdk.models.ListParams;
var tables = client.tables().list(new ListParams().setLimit(10));
for (var table : tables.getData()) {
System.out.println(table.getFullyQualifiedName());
}
```
```go Go theme={null}
ctx := context.Background()
for table, err := range client.Tables.List(ctx, &ometa.ListTablesParams{
Limit: ometa.Int32(10),
}) {
if err != nil {
log.Fatal(err)
}
fmt.Println(table.Name)
}
```
```bash cURL theme={null}
curl -X GET "$COLLATE_HOST/tables?limit=10" \
-H "Authorization: Bearer $COLLATE_TOKEN" \
-H "Content-Type: application/json"
```
You should see a JSON response like this:
```json Expected Response theme={null}
{
"data": [
{
"id": "af1c8e2-4b3a-4e5f-9c6d-7e8f9a0b1c2d",
"name": "customers",
"fullyQualifiedName": "mysql-prod.analytics.customers",
"description": "Core customer records",
"tableType": "Regular",
"columns": [ ... ],
"service": { "id": "...", "type": "databaseService" }
}
],
"paging": {
"total": 142,
"after": "eyJsaW1pdCI6MTAsIm9mZnNldCI6MTB9"
}
}
```
**Tip**: The `paging.after` cursor can be passed to the next request to paginate through results. See the [Pagination guide](/ai-2-0/developer-guide/api-reference/pagination) for details.
### Step 5: Create Resources with the Fluent API
The SDKs provide a fluent API for creating and managing resources. Here's how to create a table programmatically:
```python Python theme={null}
from metadata.sdk import Tables, configure
from metadata.generated.schema.api.data.createTable import CreateTableRequest
from metadata.generated.schema.entity.data.table import Column, DataType
## Initialize the SDK
configure(host="https://your-company.getcollate.io/api", jwt_token="your-jwt-token")
## Create and persist the table
table = Tables.create(CreateTableRequest(
name="customers",
databaseSchema="mysql-prod.analytics.public",
description="Customer master table",
columns=[
Column(name="id", dataType=DataType.BIGINT, description="Primary key"),
Column(name="name", dataType=DataType.VARCHAR, dataLength=255, description="Customer name"),
Column(name="email", dataType=DataType.VARCHAR, dataLength=255, description="Email address"),
],
))
print(f"Created: {table.fullyQualifiedName}")
```
```java Java theme={null}
import org.openmetadata.sdk.fluent.builders.TableBuilder;
import org.openmetadata.sdk.fluent.builders.ColumnBuilder;
import org.openmetadata.schema.entity.data.Table;
// Create and persist the table in one fluent chain
Table table = new TableBuilder(client)
.name("customers")
.description("Customer master table")
.schemaFQN("mysql-prod.analytics.public")
.addColumn("id", "BIGINT", "Primary key")
.column(ColumnBuilder.varchar("name", 255))
.column(ColumnBuilder.varchar("email", 255))
.tags("PII.Sensitive", "Tier.Tier1")
.create();
System.out.println("Created: " + table.getFullyQualifiedName());
```
```bash cURL theme={null}
curl -X POST "$COLLATE_HOST/tables" \
-H "Authorization: Bearer $COLLATE_TOKEN" \
-H "Content-Type: application/json" \
-d '{
"name": "new_table",
"databaseSchema": "mysql-prod.analytics",
"columns": [
{
"name": "id",
"dataType": "BIGINT",
"description": "Primary key"
},
{
"name": "name",
"dataType": "VARCHAR",
"dataLength": 255,
"description": "Customer name"
}
]
}'
```
The Java SDK exposes both builder-based and fluent helper APIs, the Python SDK uses typed request models and entity helpers, and the Go SDK provides typed services with automatic pagination. All SDKs provide strong typing and IDE-friendly workflows.
## Common Use Cases
Search and explore metadata across your entire catalog.
Create, update, and manage tables, dashboards, pipelines, and more.
Define test suites and monitor data quality metrics programmatically.
Manage domains, glossaries, classifications, and tags.
Provision users, teams, and manage organizational structure.
Create and validate data contracts for your assets.
## What's Next?
Deep dive into auth methods and token management.
Understand error codes and how to handle them.
Learn how to paginate through large result sets.
Understand PUT vs PATCH behavior and preserve/merge rules for bot-driven updates.