> ## Documentation Index
> Fetch the complete documentation index at: https://docs.getcollate.io/llms.txt
> Use this file to discover all available pages before exploring further.

# Apache Ranger Hybrid Runner

export const ConnectorDetailsHeader = ({name, icon, stage, availableFeatures, unavailableFeatures = [], availableFeaturesCollate = []}) => {
  const showSubHeading = availableFeatures?.length > 0 || unavailableFeatures?.length > 0 || availableFeaturesCollate?.length > 0;
  const totalAvailableFeatures = [...availableFeatures || [], ...availableFeaturesCollate || []];
  return <div className="container">
      <div className="Heading">
        <div className="flex items-center gap-3">
          {icon && <div className="IconContainer">
              <img src={icon} alt={name} noZoom className="ConnectorIcon" />
            </div>}
          <h1 className="ConnectorName">{name}</h1>
          <span className={`StageBadge ${stage === 'PROD' ? 'prod' : 'beta'}`}>
            {stage}
          </span>
        </div>
      </div>
      {showSubHeading && <div className="SubHeading">
          <div className="FeaturesHeading">Feature List</div>
          <div className="FeaturesList">
            {totalAvailableFeatures.map(feature => <div className="FeatureTag AvailableFeature" key={feature}>
                ✓ {feature}
              </div>)}
            {unavailableFeatures.map(feature => <div className="FeatureTag UnavailableFeature" key={feature}>
                ✕ {feature}
              </div>)}
          </div>
        </div>}
    </div>;
};

<ConnectorDetailsHeader icon="/public/images/connectors/ranger.webp" name="Ranger" stage="BETA" availableFeatures={["Reverse Metadata (Collate Only)"]} unavailableFeatures={[]} />

This section provides guides and references to use the Apache Ranger connector for reverse metadata ingestion.
Configure and schedule Apache Ranger reverse metadata workflows from the Collate UI:

* [Requirements](#requirements)
* [Reverse Metadata](#reverse-metadata)
* [Connection Details](#connection-details)

## Requirements

### Apache Ranger Setup

Apache Ranger 2.0 or greater is required. The user should have access to the Apache Ranger Admin API with appropriate privileges to manage policies and tags.

### Permissions

The user connecting to Apache Ranger should have the following permissions:

* Access to Apache Ranger Admin API endpoints
* Write access to policies and tag definitions
* Write access to tag management
* Read access to service definitions for verification

```bash theme={null}
# Create a service user in Apache Ranger with the following permissions:
# - Write access to tag management
# - Write access to policy management
# - Read access to service definitions
```

### Connection Details

<Tip>
  **Tip**: When using a **Hybrid Ingestion Runner**, any sensitive credential fields—such as passwords, API keys, or private keys—must reference secrets using the following format:

  ```
  password: secret:/my/database/password
  ```

  This applies **only to fields marked as secrets** in the connection form (these typically mask input and show a visibility toggle icon).

  For more information about managing secrets in hybrid setups, see the [Hybrid Ingestion Runner Secret Management Guide](/ai-2-0/getting-started/lets-get-started/ingest-your-data/hybrid-ingestion-runner#manage-secrets)
</Tip>

Collate supports Apache Ranger with Basic Authentication using username and password.

## Reverse Metadata

The Apache Ranger connector is designed specifically for **reverse metadata ingestion**. This means that Collate will sync metadata information (primarily tags) from your data sources back to Apache Ranger.

### How Reverse Metadata Works

1. **Configure Ranger as Sink Service**: Set up Apache Ranger as a sink service in your reverse metadata configuration
2. **Source Service Integration**: When you ingest metadata from source services like Snowflake, Trino, or other databases, Collate can sync this metadata back to Ranger
3. **Tag Synchronization**: Currently, Collate syncs tag information to Apache Ranger, allowing you to manage security policies based on discovered metadata
4. **Policy Management**: While Collate syncs tags to Ranger, the communication between Ranger and your specific data sources needs to be configured separately

### Important Considerations

* **Service Name Matching**: The service name configured in Apache Ranger must match exactly with the service name in Collate for reverse metadata synchronization to work properly
* **Tag Synchronization**: Currently, Collate only syncs tag information to Ranger.
* **Source-Ranger Communication**: You are responsible for configuring the communication between Apache Ranger and your actual data sources. Collate only handles the metadata synchronization to Ranger
* **Bidirectional Sync**: This is currently a one-way sync from Collate to Ranger

### Tag Synchronization Details

Understanding how tag synchronization works between Collate and Apache Ranger is crucial for proper implementation.

#### What Gets Created During Reverse Metadata Ingestion

During reverse metadata ingestion, Collate creates **only the mapping** between:

* **Ranger Resources**: The specific entity (database, schema, table, or column)
* **Tags**: The tag name and tag value

**Important:** Collate does **not** create or depend on tag policies during the reverse metadata workflow. The policy creation is **not mandatory** for the workflow to function. Policies can be created in Ranger after the reverse metadata workflow completes.

#### Policy Management

The actual application of tag-based policies—such as access control, data masking, or row-level filtering—is handled **entirely by Apache Ranger**. Collate's role is limited to:

1. Syncing tag metadata from Collate to actual data sources
2. Creating tag-to-resource mappings in Ranger
3. Keeping these mappings synchronized as tags change in Collate

#### Supported Tag Levels

Collate provides comprehensive tag support at multiple levels:

* **Database level**: Tags applied to entire databases
* **Schema level**: Tags applied to schemas
* **Table level**: Tags applied to tables
* **Column level**: Tags applied to individual columns

This multi-level support allows you to implement fine-grained governance policies based on your organization's requirements.

#### Tag Naming Convention

Collate uses a clear and consistent tag naming convention when syncing to Ranger. Tags are formatted as:

```
classification.tag
```

**Example:**

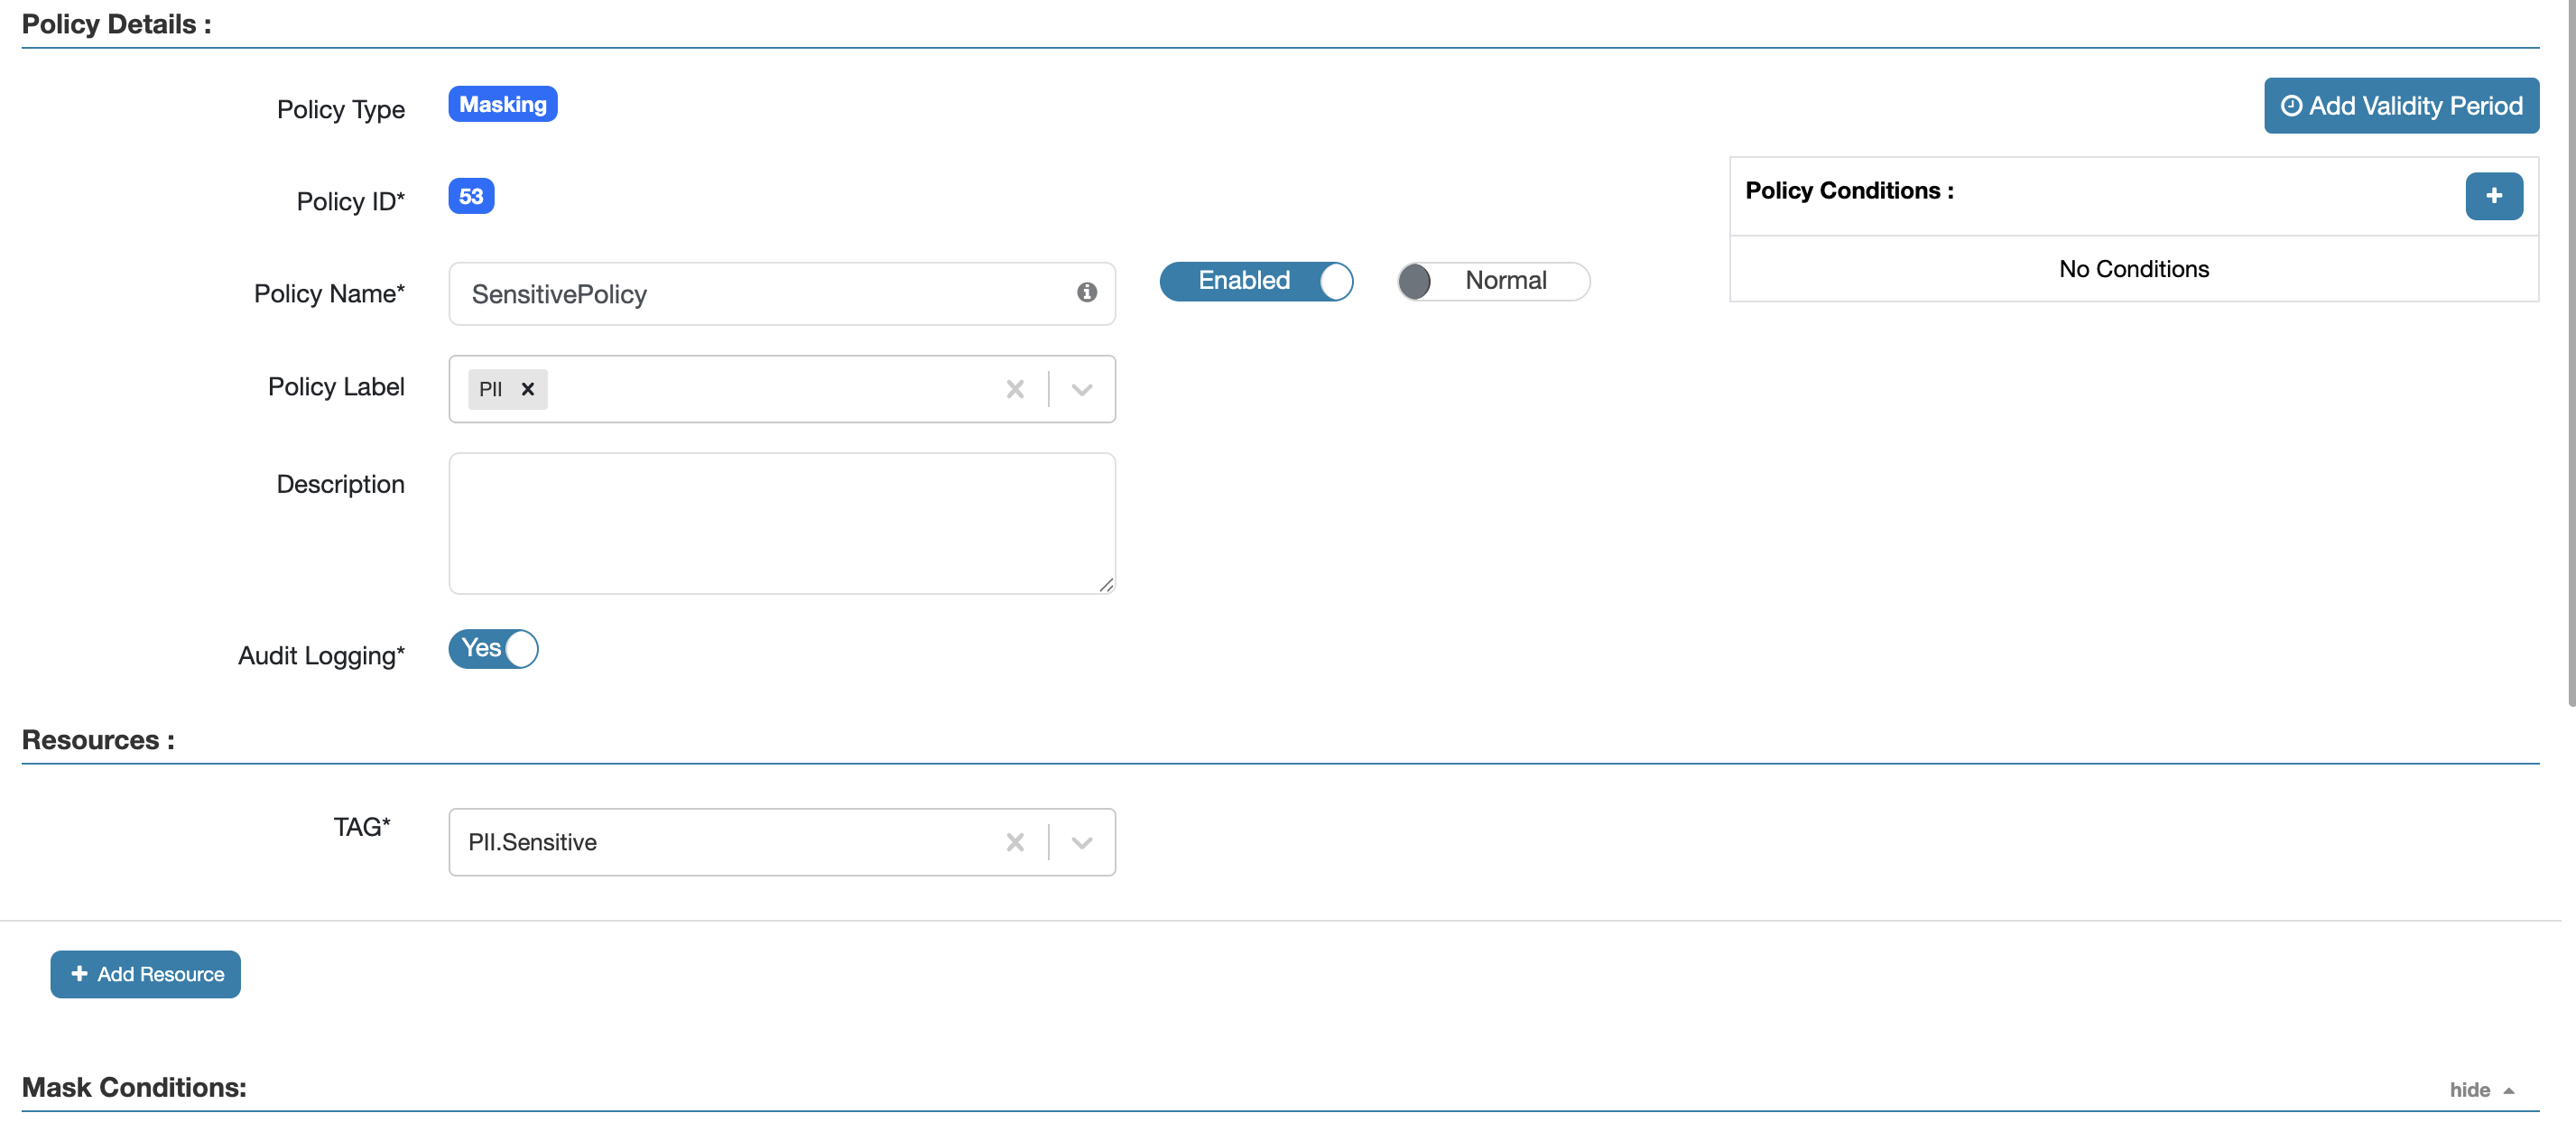
* A tag named `Sensitive` under the `PII` classification in Collate
* Will be synced to Ranger as: `PII.Sensitive`

This naming convention ensures clarity and prevents naming conflicts in Ranger.

<Frame caption="Example showing PII.Sensitive tag in Collate and Ranger">
  <img src="https://mintcdn.com/collatedocs/Wemdu4KIA6iHNFcL/public/images/connectors/ranger/tag-naming-example.png?fit=max&auto=format&n=Wemdu4KIA6iHNFcL&q=85&s=538e2723710bc67d9365df27d17239e0" alt="Tag Naming Convention Example" width="2854" height="1264" data-path="public/images/connectors/ranger/tag-naming-example.png" />
</Frame>

#### Complete Workflow Example

1. **In Collate**: You apply the tag `PII.Sensitive` to a column `customer_email` in table `users`
2. **Reverse Metadata Sync**: Collate creates a mapping in Ranger linking the resource `database.schema.users.customer_email` to tag `PII.Sensitive`
3. **In Apache Ranger**: You create a policy that applies masking to all resources tagged with `PII.Sensitive`
4. **Result**: The policy automatically applies to `customer_email` and any other resources tagged as `PII.Sensitive`

## Metadata Ingestion

To ingest metadata from Apache Ranger, you need to create a service connection. The service connects Apache Ranger with Collate. Once you create a service, Collate automatically starts ingesting metadata.

### Step 1: Add New Service

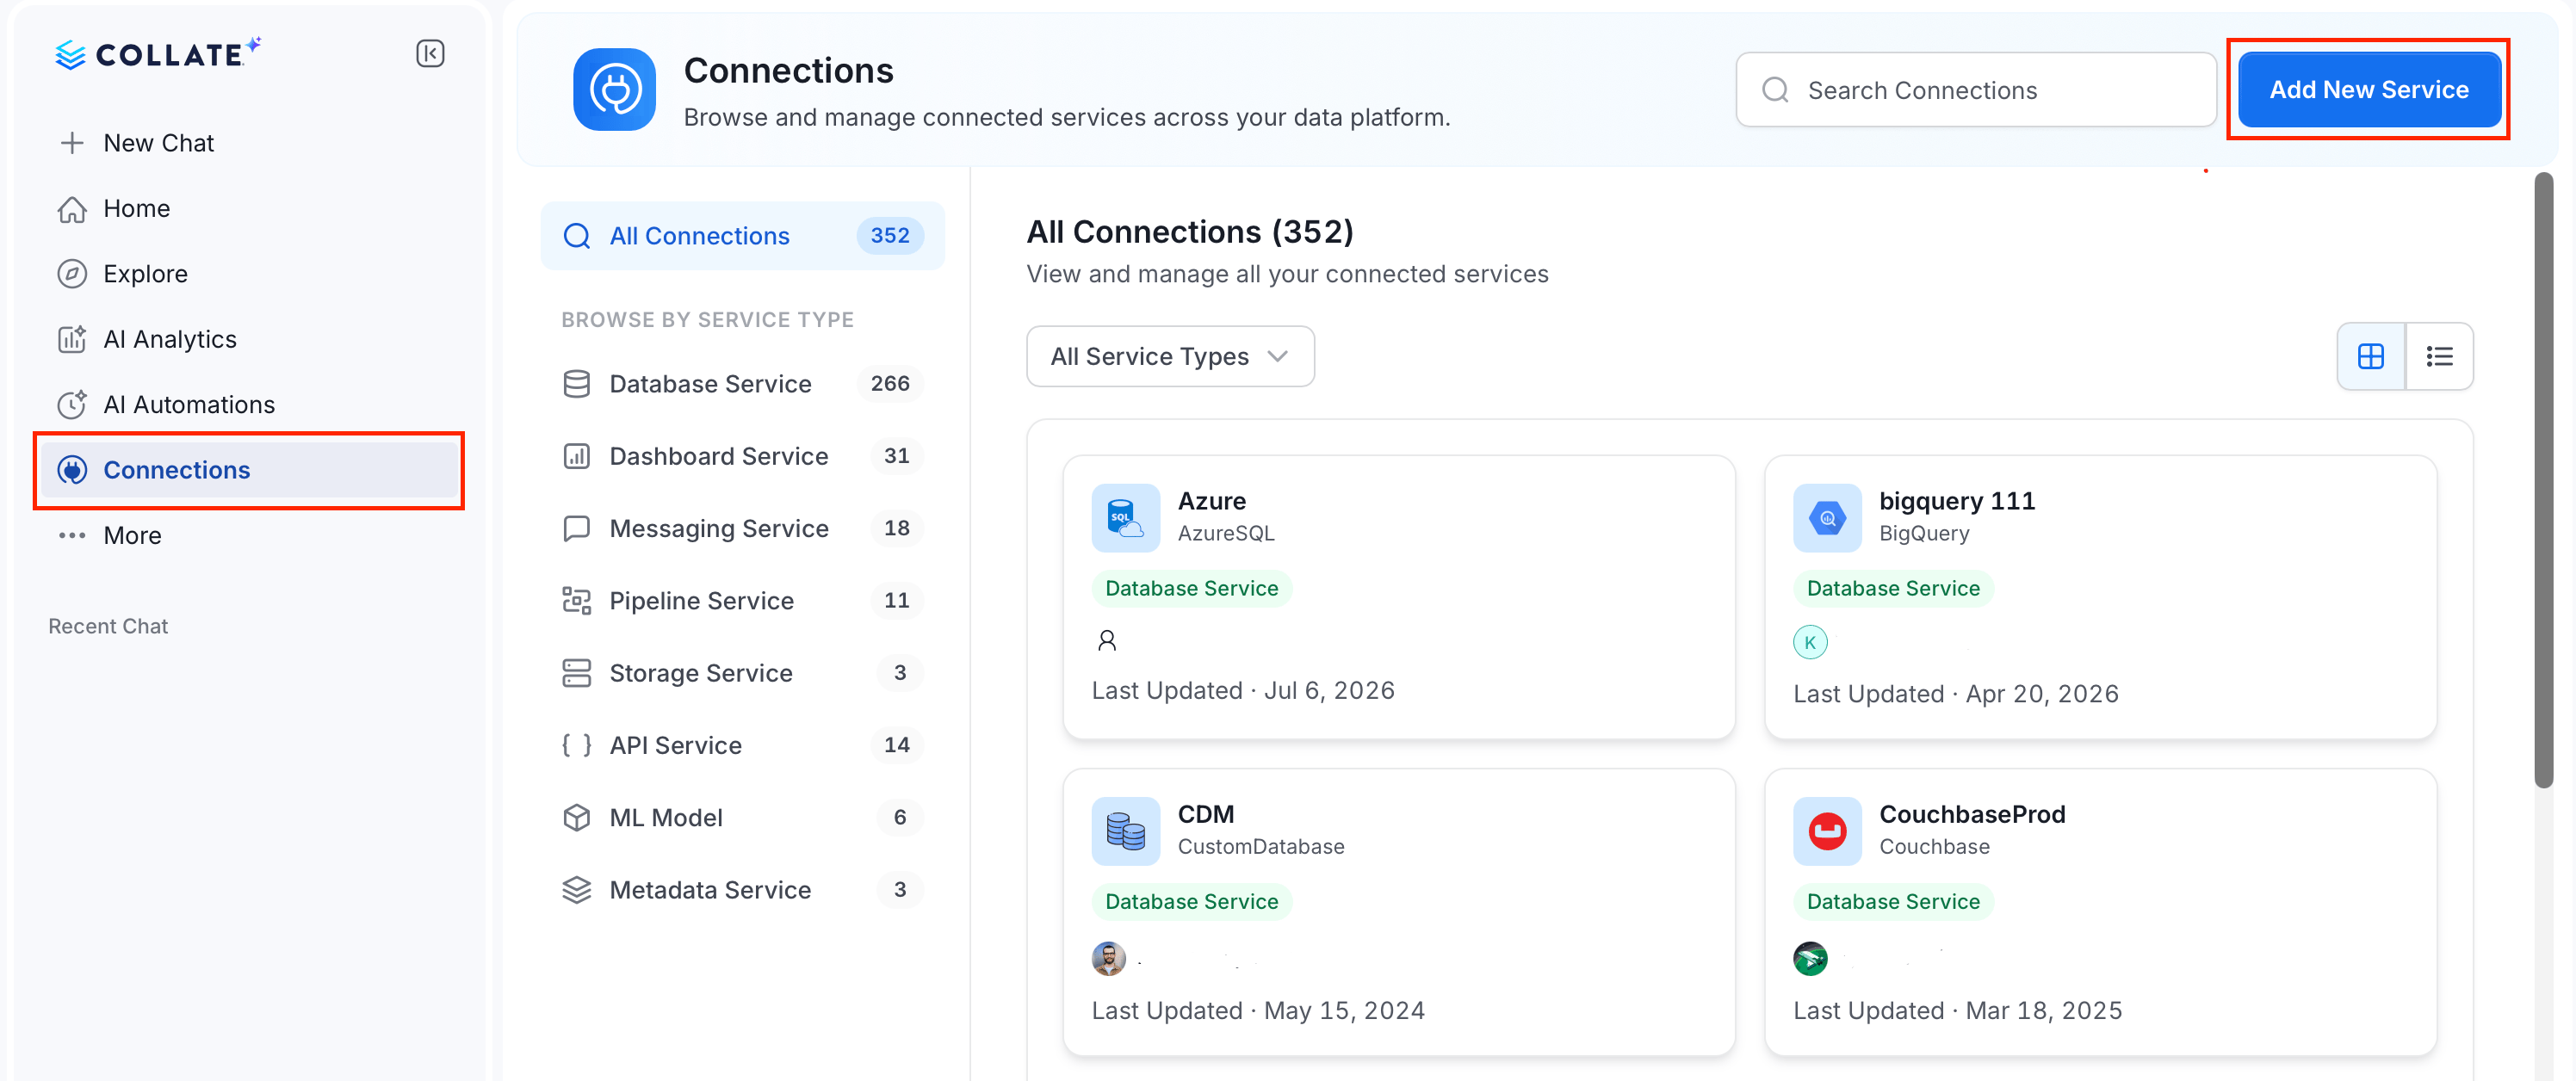
1. In the left navigation, click **Connections**.
2. On the **Connections** page, click **Add New Service**.
<img src="https://mintcdn.com/collatedocs/bv5oe4uRjuorTJO1/public/images/ai-2.0/connectors/metadata-ingestion/add-new-service.png?fit=max&auto=format&n=bv5oe4uRjuorTJO1&q=85&s=733cef1141ef13d318634aa9f407eb2b" alt="Add New Service" width="2992" height="1256" data-path="public/images/ai-2.0/connectors/metadata-ingestion/add-new-service.png" />

### Step 2: Select a Service and Connector

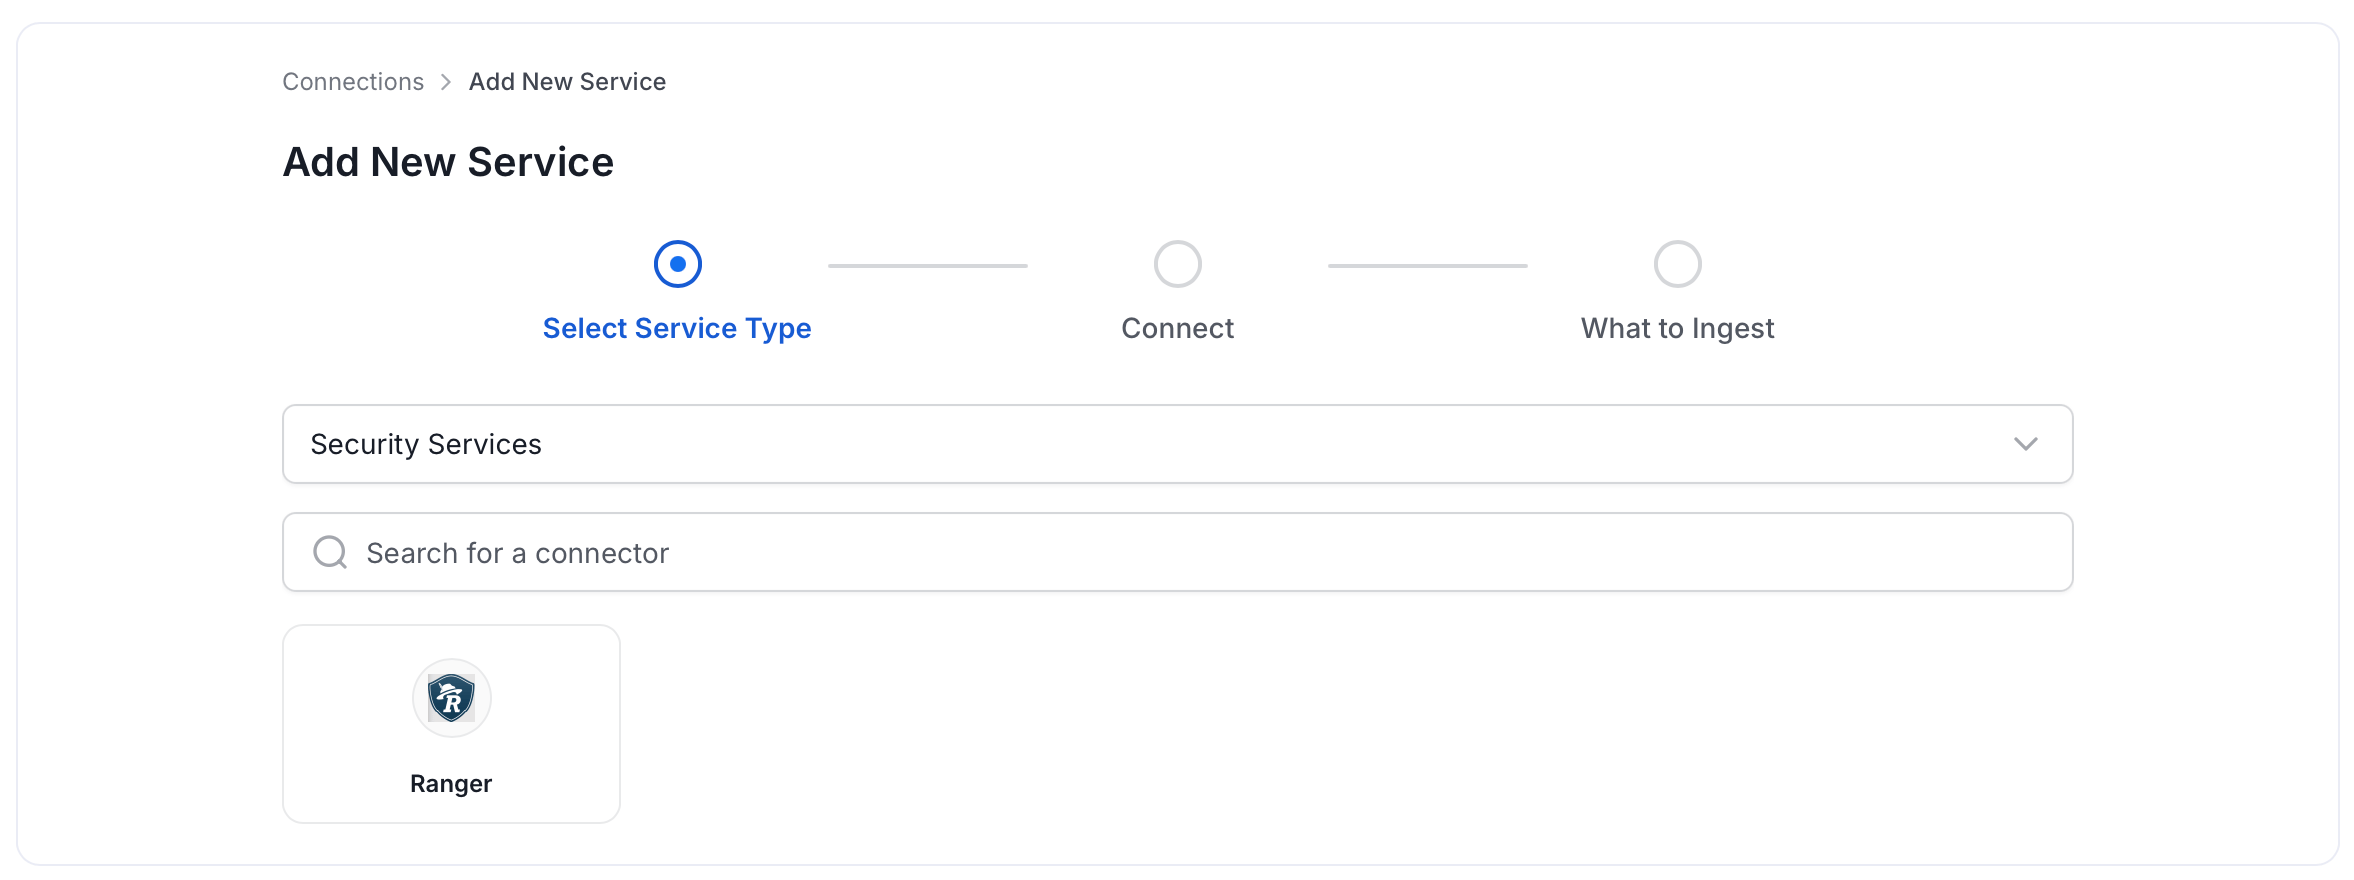
From the service type dropdown, select **Security Services**, then click the **Ranger** connector tile.
<img src="https://mintcdn.com/collatedocs/bv5oe4uRjuorTJO1/public/images/ai-2.0/connectors/metadata-ingestion/Security/select-service/ranger.png?fit=max&auto=format&n=bv5oe4uRjuorTJO1&q=85&s=8a400ec5cb22c5b431b204ec958db0b6" alt="Select Service" width="2354" height="880" data-path="public/images/ai-2.0/connectors/metadata-ingestion/Security/select-service/ranger.png" />

### Step 3: Add Service Name and Description

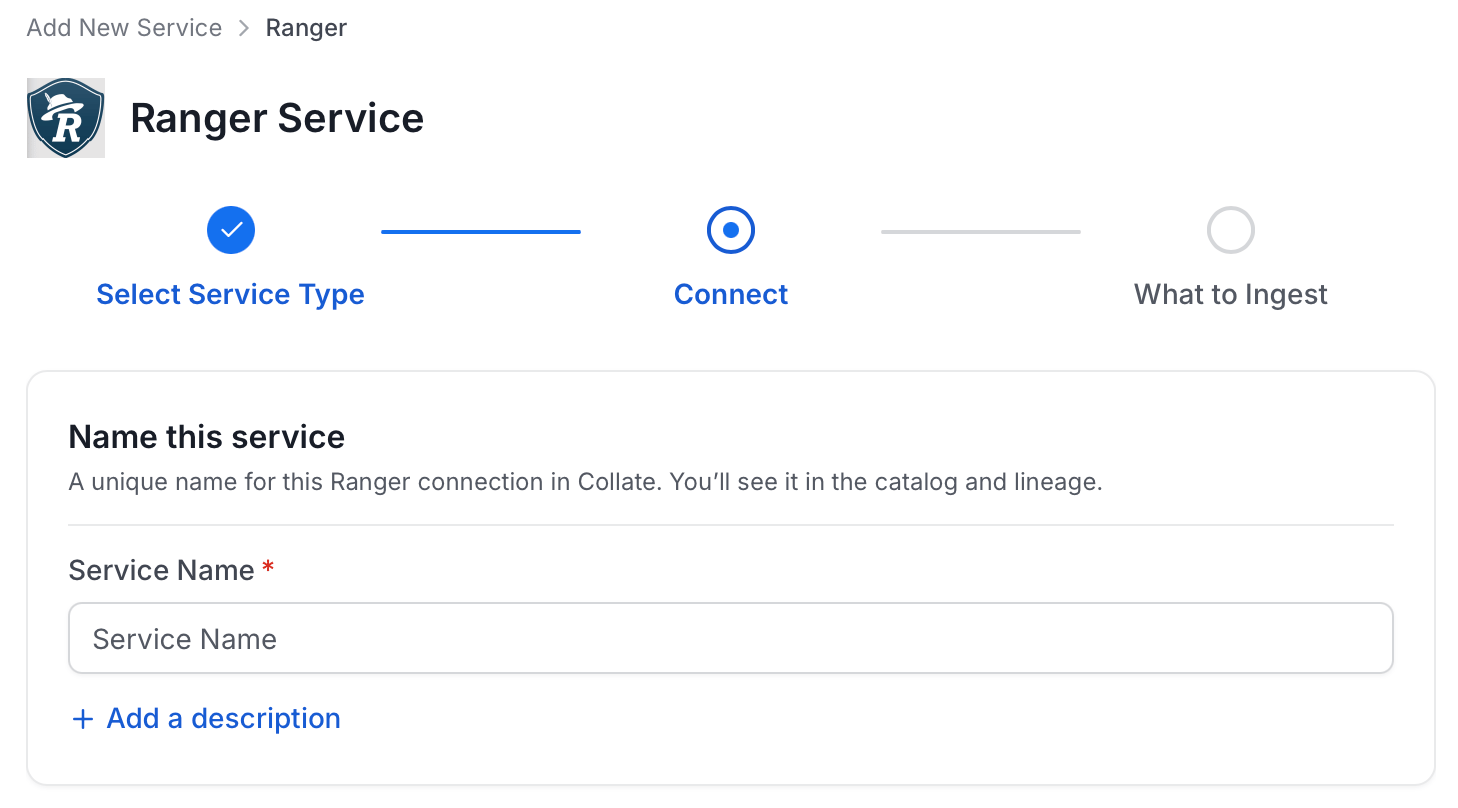
* Enter a unique, descriptive **Service Name**. Collate identifies services by their service name. Enter a name that distinguishes this deployment from other Ranger services you are ingesting metadata from.
* Optional: Enter a **Description** for the service.
<img src="https://mintcdn.com/collatedocs/bv5oe4uRjuorTJO1/public/images/ai-2.0/connectors/metadata-ingestion/Security/service-name/ranger.png?fit=max&auto=format&n=bv5oe4uRjuorTJO1&q=85&s=83c527560452c3f8e340037d1d0e690f" alt="Add New Service Name" width="1458" height="808" data-path="public/images/ai-2.0/connectors/metadata-ingestion/Security/service-name/ranger.png" />

<Note>
  **Note**: The service name cannot be changed after it is set.
</Note>

### Step 4: Configure Connection Options

Specify where ingestion runs, provide your source credentials, and verify the connection.

#### Select Ingestion Runner

Select an **Ingestion Runner**: the runner where the ingestion pipeline will execute.

<img src="https://mintcdn.com/collatedocs/bv5oe4uRjuorTJO1/public/images/ai-2.0/connectors/metadata-ingestion/select-ingestion-runner.png?fit=max&auto=format&n=bv5oe4uRjuorTJO1&q=85&s=1249f828648614445e8a976ea1933487" alt="Add Name and Select Ingestion Runner" width="1444" height="506" data-path="public/images/ai-2.0/connectors/metadata-ingestion/select-ingestion-runner.png" />

#### Enter Connection Details

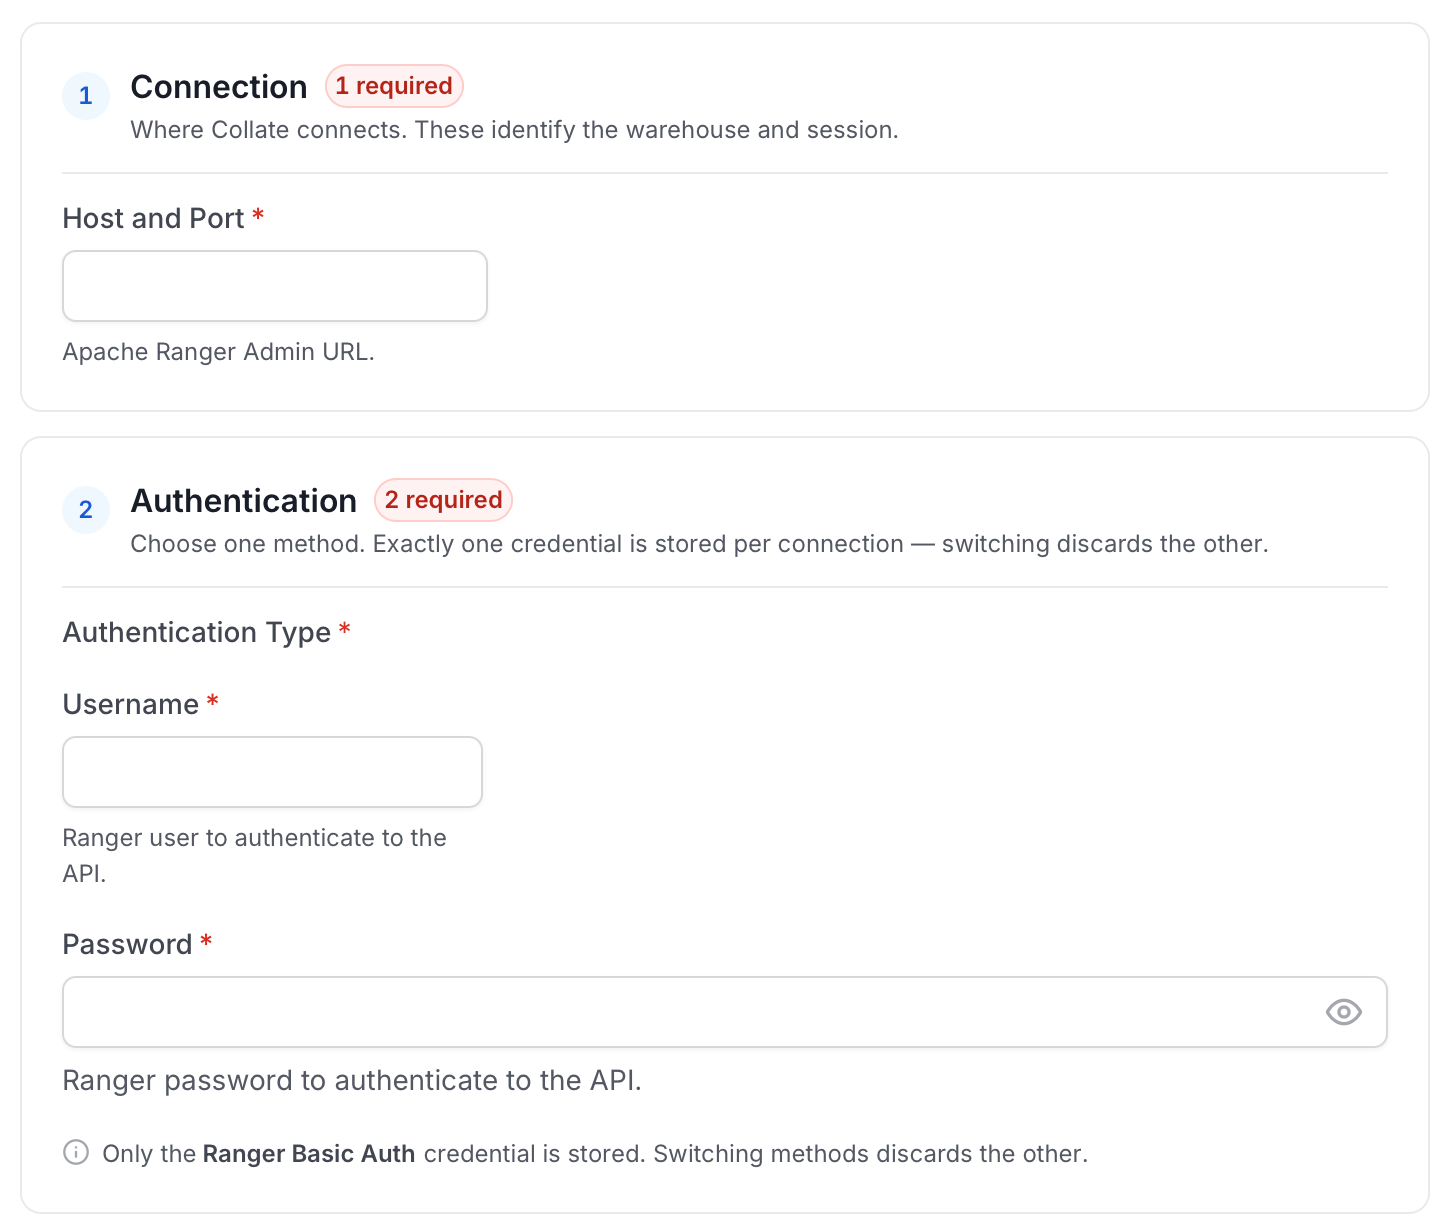
Enter the connection details for Apache Ranger. The right-hand panel in the UI displays inline help for each field.
<img src="https://mintcdn.com/collatedocs/bv5oe4uRjuorTJO1/public/images/ai-2.0/connectors/metadata-ingestion/Security/connection-details/ranger.png?fit=max&auto=format&n=bv5oe4uRjuorTJO1&q=85&s=d8b659e5bb9fd99d7e98453a14366ceb" alt="Configure Service Connection" width="1450" height="1232" data-path="public/images/ai-2.0/connectors/metadata-ingestion/Security/connection-details/ranger.png" />

* **Host and Port**: The URL of your Apache Ranger Admin instance (e.g., `http://ranger-host:6080`).
* **Username**: The username of the Ranger Admin user. The specified user should have access to the Apache Ranger Admin API with privileges to manage policies and tags.
* **Password**: The password for the Ranger Admin user.

<Tip>
  **Tip**: When using a **Hybrid Ingestion Runner**, any sensitive credential fields—such as passwords, API keys, or private keys—must reference secrets using the following format:

  ```
  password: secret:/my/database/password
  ```

  This applies **only to fields marked as secrets** in the connection form (these typically mask input and show a visibility toggle icon).

  For more information about managing secrets in hybrid setups, see the [Hybrid Ingestion Runner Secret Management Guide](/ai-2-0/getting-started/lets-get-started/ingest-your-data/hybrid-ingestion-runner#manage-secrets)
</Tip>

#### Test Connection

Once the credentials have been added, click on **Test Connection** and **Save** the changes.

<img src="https://mintcdn.com/collatedocs/bv5oe4uRjuorTJO1/public/images/ai-2.0/connectors/metadata-ingestion/test-connection.png?fit=max&auto=format&n=bv5oe4uRjuorTJO1&q=85&s=3365cff7bb9d82c85a2ff9ab559d6f11" alt="Test Connection" width="1446" height="188" data-path="public/images/ai-2.0/connectors/metadata-ingestion/test-connection.png" />

### Step 5: Configure Ingestion Options

In the **What to Ingest** step, use filter patterns to control which assets Collate ingests from Apache Ranger. Filter patterns use regular expressions applied to asset names.

#### How Filter Patterns Work

* **Include**: Add one or more comma-separated regular expressions. Collate ingests only assets whose names match at least one expression. Leave blank to include all assets.
* **Exclude**: Add one or more comma-separated regular expressions. Collate skips any asset whose name matches an expression. Leave blank to exclude nothing.

Rules match asset names using one of five expressions:

* **contains**: matches any name containing the value. For example, `sales` matches `my_sales_data` and `sales_2024`.
* **starts with**: matches names beginning with the value. For example, `prod_` matches `prod_db` and `prod_schema`.
* **ends with**: matches names ending with the value. For example, `_raw` matches `events_raw` and `logs_raw`.
* **is exactly**: matches the exact name only. For example, `analytics` matches only `analytics`.
* **matches regex**: matches names using a regular expression. For example, `^prod_.*_v\d+$` matches `prod_events_v1`.

When both Include and Exclude are set, Exclude takes priority.

<Tip>
  **Tip**: If [AutoPilot](/ai-2-0/admin-guide/applications/autopilot) is enabled, usage tracking, data lineage, and other downstream workflows start automatically after the first metadata ingestion completes.
</Tip>

### Step 6: Create & Deploy

Click **Create & Deploy** to deploy the agent and start the first metadata ingestion run. Collate saves the service configuration and immediately begins pulling metadata from the source.

To monitor ingestion progress or view the service you just added, go to **Connections** in the left navigation and select your service.

## Troubleshooting

<Columns cols={2}>
  <Card title="Ranger Troubleshooting" href="/ai-2-0/connectors/security/ranger/troubleshooting">
    Learn more about how to troubleshoot common Ranger connector issues and resolve configuration or ingestion errors.
  </Card>
</Columns>