{icon &&
 }
}
{name}
{stage}Feature List
{totalAvailableFeatures.map(feature =>
✓ {feature}
)}
{unavailableFeatures.map(feature =>
✕ {feature}
)}
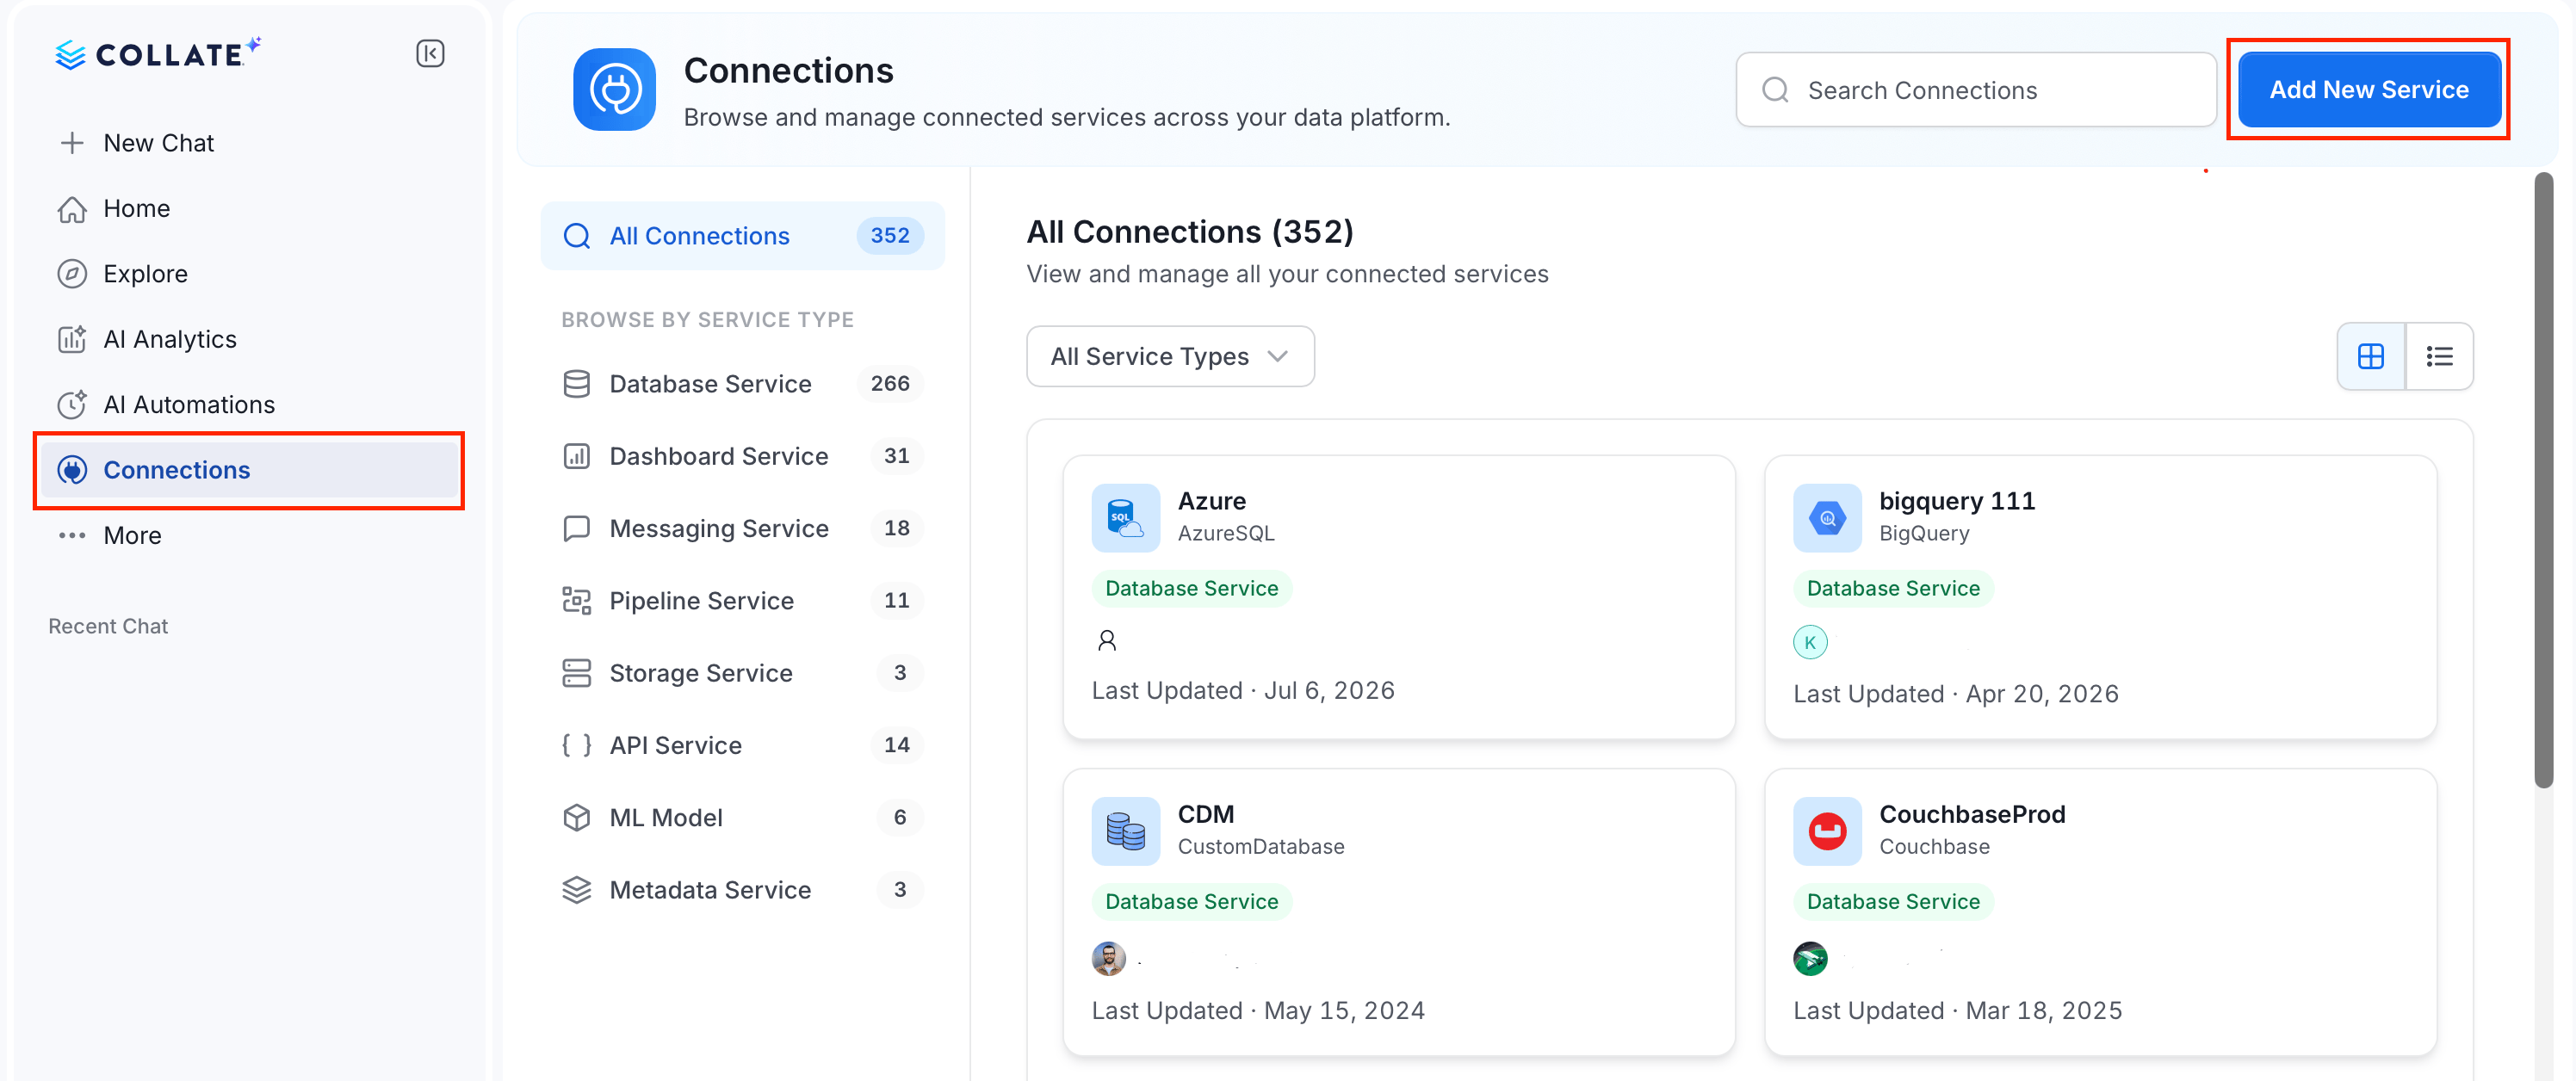 ### Step 2: Select a Service and Connector
From the service type dropdown, select **Mlmodel Services**, then click the **SageMaker** connector tile.
### Step 2: Select a Service and Connector
From the service type dropdown, select **Mlmodel Services**, then click the **SageMaker** connector tile.
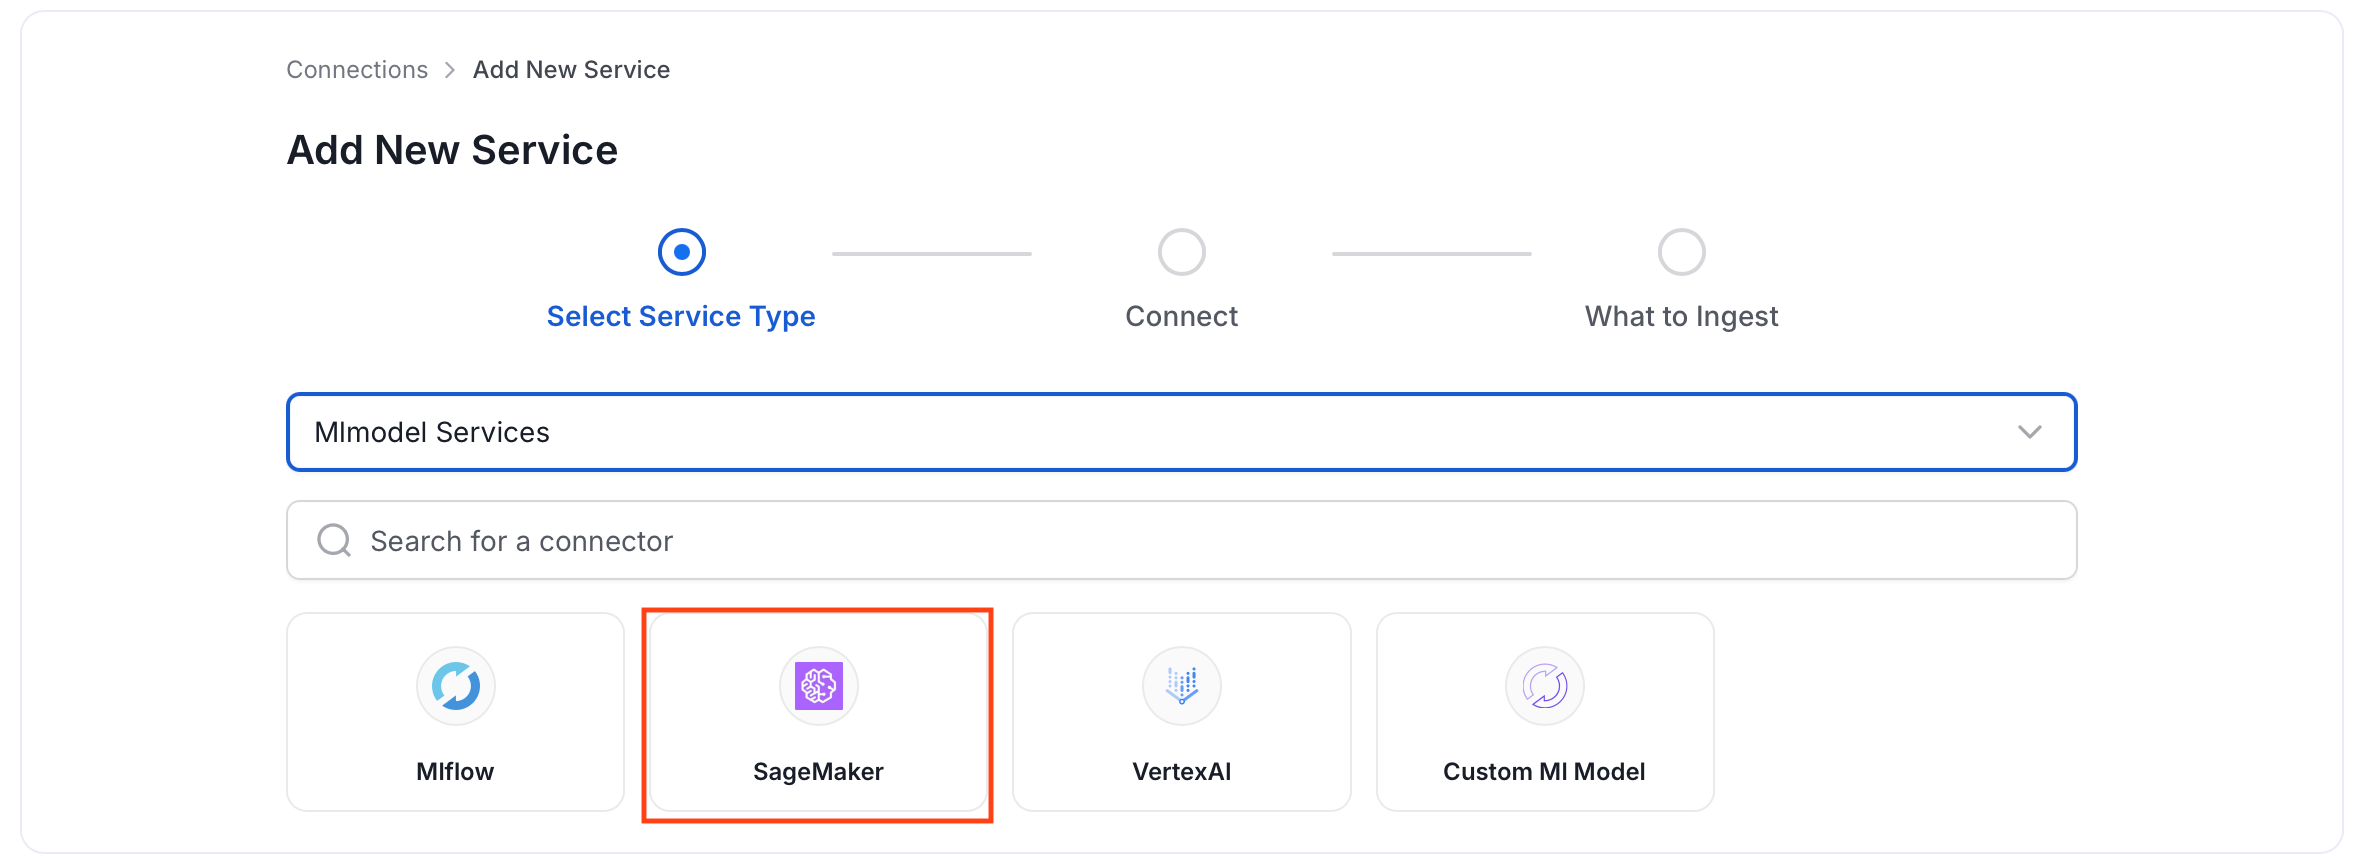 ### Step 3: Add Service Name and Description
* Enter a unique, descriptive **Service Name**. Collate identifies services by their service name. Enter a name that distinguishes this deployment from other SageMaker services you are ingesting metadata from.
* Optional: Enter a **Description** for the service.
### Step 3: Add Service Name and Description
* Enter a unique, descriptive **Service Name**. Collate identifies services by their service name. Enter a name that distinguishes this deployment from other SageMaker services you are ingesting metadata from.
* Optional: Enter a **Description** for the service.

 #### Enter Connection Details
Enter the connection details for SageMaker. The right-hand panel in the UI displays inline help for each field.
#### Enter Connection Details
Enter the connection details for SageMaker. The right-hand panel in the UI displays inline help for each field.
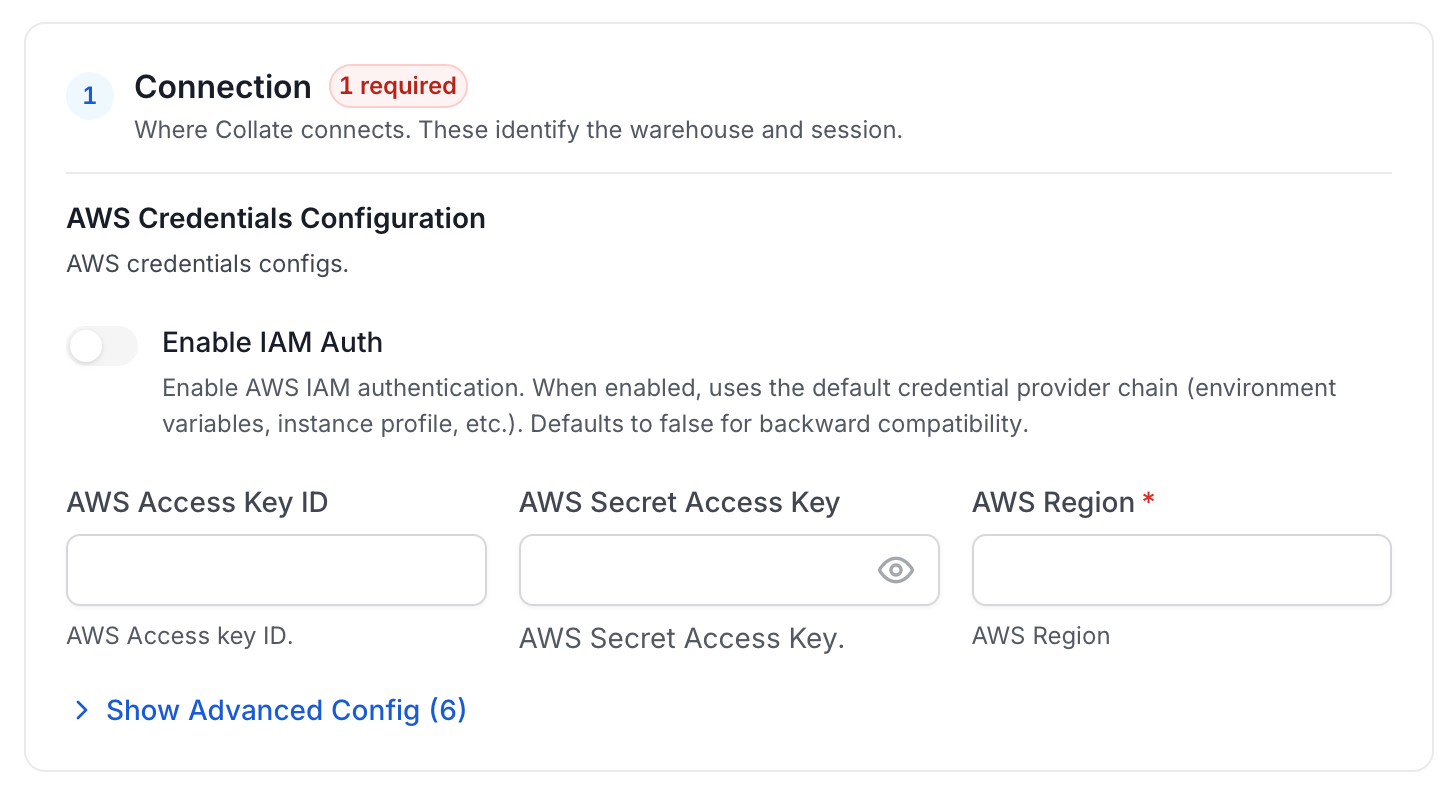 * **AWS Access Key ID and AWS Secret Access Key**: When you interact with AWS, you specify your AWS security credentials to verify who you are and whether you have
permission to access the resources that you are requesting. AWS uses the security credentials to authenticate and
authorize your requests ([docs](https://docs.aws.amazon.com/IAM/latest/UserGuide/security-creds.html)).
Access keys consist of two parts: An **access key ID** (for example, `AKIAIOSFODNN7EXAMPLE`), and a **secret access key** (for example, `wJalrXUtnFEMI/K7MDENG/bPxRfiCYEXAMPLEKEY`).
You must use both the access key ID and secret access key together to authenticate your requests.
You can find further information on [how to manage your access keys](https://docs.aws.amazon.com/IAM/latest/UserGuide/id_credentials_access-keys.html).
* **AWS Region**: Each AWS Region is a separate geographic area in which AWS clusters data centers ([docs](https://docs.aws.amazon.com/AmazonRDS/latest/UserGuide/Concepts.RegionsAndAvailabilityZones.html)).
As AWS can have instances in multiple regions, we need to know the region the service you want to reach belongs to.
Note that the AWS Region is the only required parameter when configuring a connection. When connecting to the
services programmatically, there are different ways in which we can extract and use the rest of AWS configurations.
You can find further information about [configuring your credentials](https://boto3.amazonaws.com/v1/documentation/api/latest/guide/credentials.html#configuring-credentials).
* **AWS Session Token (optional)**: If you are using temporary credentials to access your services, you will need to inform the AWS Access Key ID
and AWS Secrets Access Key. Also, these will include an AWS Session Token.
You can find more information on [Using temporary credentials with AWS resources](https://docs.aws.amazon.com/IAM/latest/UserGuide/id_credentials_temp_use-resources.html).
* **Endpoint URL (optional)**: To connect programmatically to an AWS service, you use an endpoint. An *endpoint* is the URL of the
entry point for an AWS web service. The AWS SDKs and the AWS Command Line Interface (AWS CLI) automatically uses the
default endpoint for each service in an AWS Region. But you can specify an alternate endpoint for your API requests.
Find more information on [AWS service endpoints](https://docs.aws.amazon.com/general/latest/gr/rande.html).
* **Profile Name**: A named profile is a collection of settings and credentials that you can apply to an AWS CLI command.
When you specify a profile to run a command, the settings and credentials are used to run that command.
Multiple named profiles can be stored in the config and credentials files.
You can inform this field if you'd like to use a profile other than `default`.
Find more information about [Named profiles for the AWS CLI](https://docs.aws.amazon.com/cli/latest/userguide/cli-configure-profiles.html).
* **Assume Role Arn**: Typically, you use `AssumeRole` within your account or for cross-account access. In this field you'll set the
`ARN` (Amazon Resource Name) of the policy of the other account.
A user who wants to access a role in a different account must also have permissions that are delegated from the account
administrator. The administrator must attach a policy that allows the user to call `AssumeRole` for the `ARN` of the role in the other account.
This is a required field if you'd like to `AssumeRole`.
Find more information on [AssumeRole](https://docs.aws.amazon.com/STS/latest/APIReference/API_AssumeRole.html).
* **AWS Access Key ID and AWS Secret Access Key**: When you interact with AWS, you specify your AWS security credentials to verify who you are and whether you have
permission to access the resources that you are requesting. AWS uses the security credentials to authenticate and
authorize your requests ([docs](https://docs.aws.amazon.com/IAM/latest/UserGuide/security-creds.html)).
Access keys consist of two parts: An **access key ID** (for example, `AKIAIOSFODNN7EXAMPLE`), and a **secret access key** (for example, `wJalrXUtnFEMI/K7MDENG/bPxRfiCYEXAMPLEKEY`).
You must use both the access key ID and secret access key together to authenticate your requests.
You can find further information on [how to manage your access keys](https://docs.aws.amazon.com/IAM/latest/UserGuide/id_credentials_access-keys.html).
* **AWS Region**: Each AWS Region is a separate geographic area in which AWS clusters data centers ([docs](https://docs.aws.amazon.com/AmazonRDS/latest/UserGuide/Concepts.RegionsAndAvailabilityZones.html)).
As AWS can have instances in multiple regions, we need to know the region the service you want to reach belongs to.
Note that the AWS Region is the only required parameter when configuring a connection. When connecting to the
services programmatically, there are different ways in which we can extract and use the rest of AWS configurations.
You can find further information about [configuring your credentials](https://boto3.amazonaws.com/v1/documentation/api/latest/guide/credentials.html#configuring-credentials).
* **AWS Session Token (optional)**: If you are using temporary credentials to access your services, you will need to inform the AWS Access Key ID
and AWS Secrets Access Key. Also, these will include an AWS Session Token.
You can find more information on [Using temporary credentials with AWS resources](https://docs.aws.amazon.com/IAM/latest/UserGuide/id_credentials_temp_use-resources.html).
* **Endpoint URL (optional)**: To connect programmatically to an AWS service, you use an endpoint. An *endpoint* is the URL of the
entry point for an AWS web service. The AWS SDKs and the AWS Command Line Interface (AWS CLI) automatically uses the
default endpoint for each service in an AWS Region. But you can specify an alternate endpoint for your API requests.
Find more information on [AWS service endpoints](https://docs.aws.amazon.com/general/latest/gr/rande.html).
* **Profile Name**: A named profile is a collection of settings and credentials that you can apply to an AWS CLI command.
When you specify a profile to run a command, the settings and credentials are used to run that command.
Multiple named profiles can be stored in the config and credentials files.
You can inform this field if you'd like to use a profile other than `default`.
Find more information about [Named profiles for the AWS CLI](https://docs.aws.amazon.com/cli/latest/userguide/cli-configure-profiles.html).
* **Assume Role Arn**: Typically, you use `AssumeRole` within your account or for cross-account access. In this field you'll set the
`ARN` (Amazon Resource Name) of the policy of the other account.
A user who wants to access a role in a different account must also have permissions that are delegated from the account
administrator. The administrator must attach a policy that allows the user to call `AssumeRole` for the `ARN` of the role in the other account.
This is a required field if you'd like to `AssumeRole`.
Find more information on [AssumeRole](https://docs.aws.amazon.com/STS/latest/APIReference/API_AssumeRole.html).
 ### Step 5: Configure Ingestion Options
In the **What to Ingest** step, use filter patterns to control which assets Collate ingests from your ML model service. Filter patterns use regular expressions applied to model names.
#### How Filter Patterns Work
* **Include**: Add one or more comma-separated regular expressions. Collate ingests only assets whose names match at least one expression. Leave blank to include all assets.
* **Exclude**: Add one or more comma-separated regular expressions. Collate skips any asset whose name matches an expression. Leave blank to exclude nothing.
Rules match asset names using one of five expressions:
* **contains**: matches any name containing the value. For example, `sales` matches `my_sales_data` and `sales_2024`.
* **starts with**: matches names beginning with the value. For example, `prod_` matches `prod_db` and `prod_schema`.
* **ends with**: matches names ending with the value. For example, `_raw` matches `events_raw` and `logs_raw`.
* **is exactly**: matches the exact name only. For example, `analytics` matches only `analytics`.
* **matches regex**: matches names using a regular expression. For example, `^prod_.*_v\d+$` matches `prod_events_v1`.
When both Include and Exclude are set, Exclude takes priority.
### Step 5: Configure Ingestion Options
In the **What to Ingest** step, use filter patterns to control which assets Collate ingests from your ML model service. Filter patterns use regular expressions applied to model names.
#### How Filter Patterns Work
* **Include**: Add one or more comma-separated regular expressions. Collate ingests only assets whose names match at least one expression. Leave blank to include all assets.
* **Exclude**: Add one or more comma-separated regular expressions. Collate skips any asset whose name matches an expression. Leave blank to exclude nothing.
Rules match asset names using one of five expressions:
* **contains**: matches any name containing the value. For example, `sales` matches `my_sales_data` and `sales_2024`.
* **starts with**: matches names beginning with the value. For example, `prod_` matches `prod_db` and `prod_schema`.
* **ends with**: matches names ending with the value. For example, `_raw` matches `events_raw` and `logs_raw`.
* **is exactly**: matches the exact name only. For example, `analytics` matches only `analytics`.
* **matches regex**: matches names using a regular expression. For example, `^prod_.*_v\d+$` matches `prod_events_v1`.
When both Include and Exclude are set, Exclude takes priority.
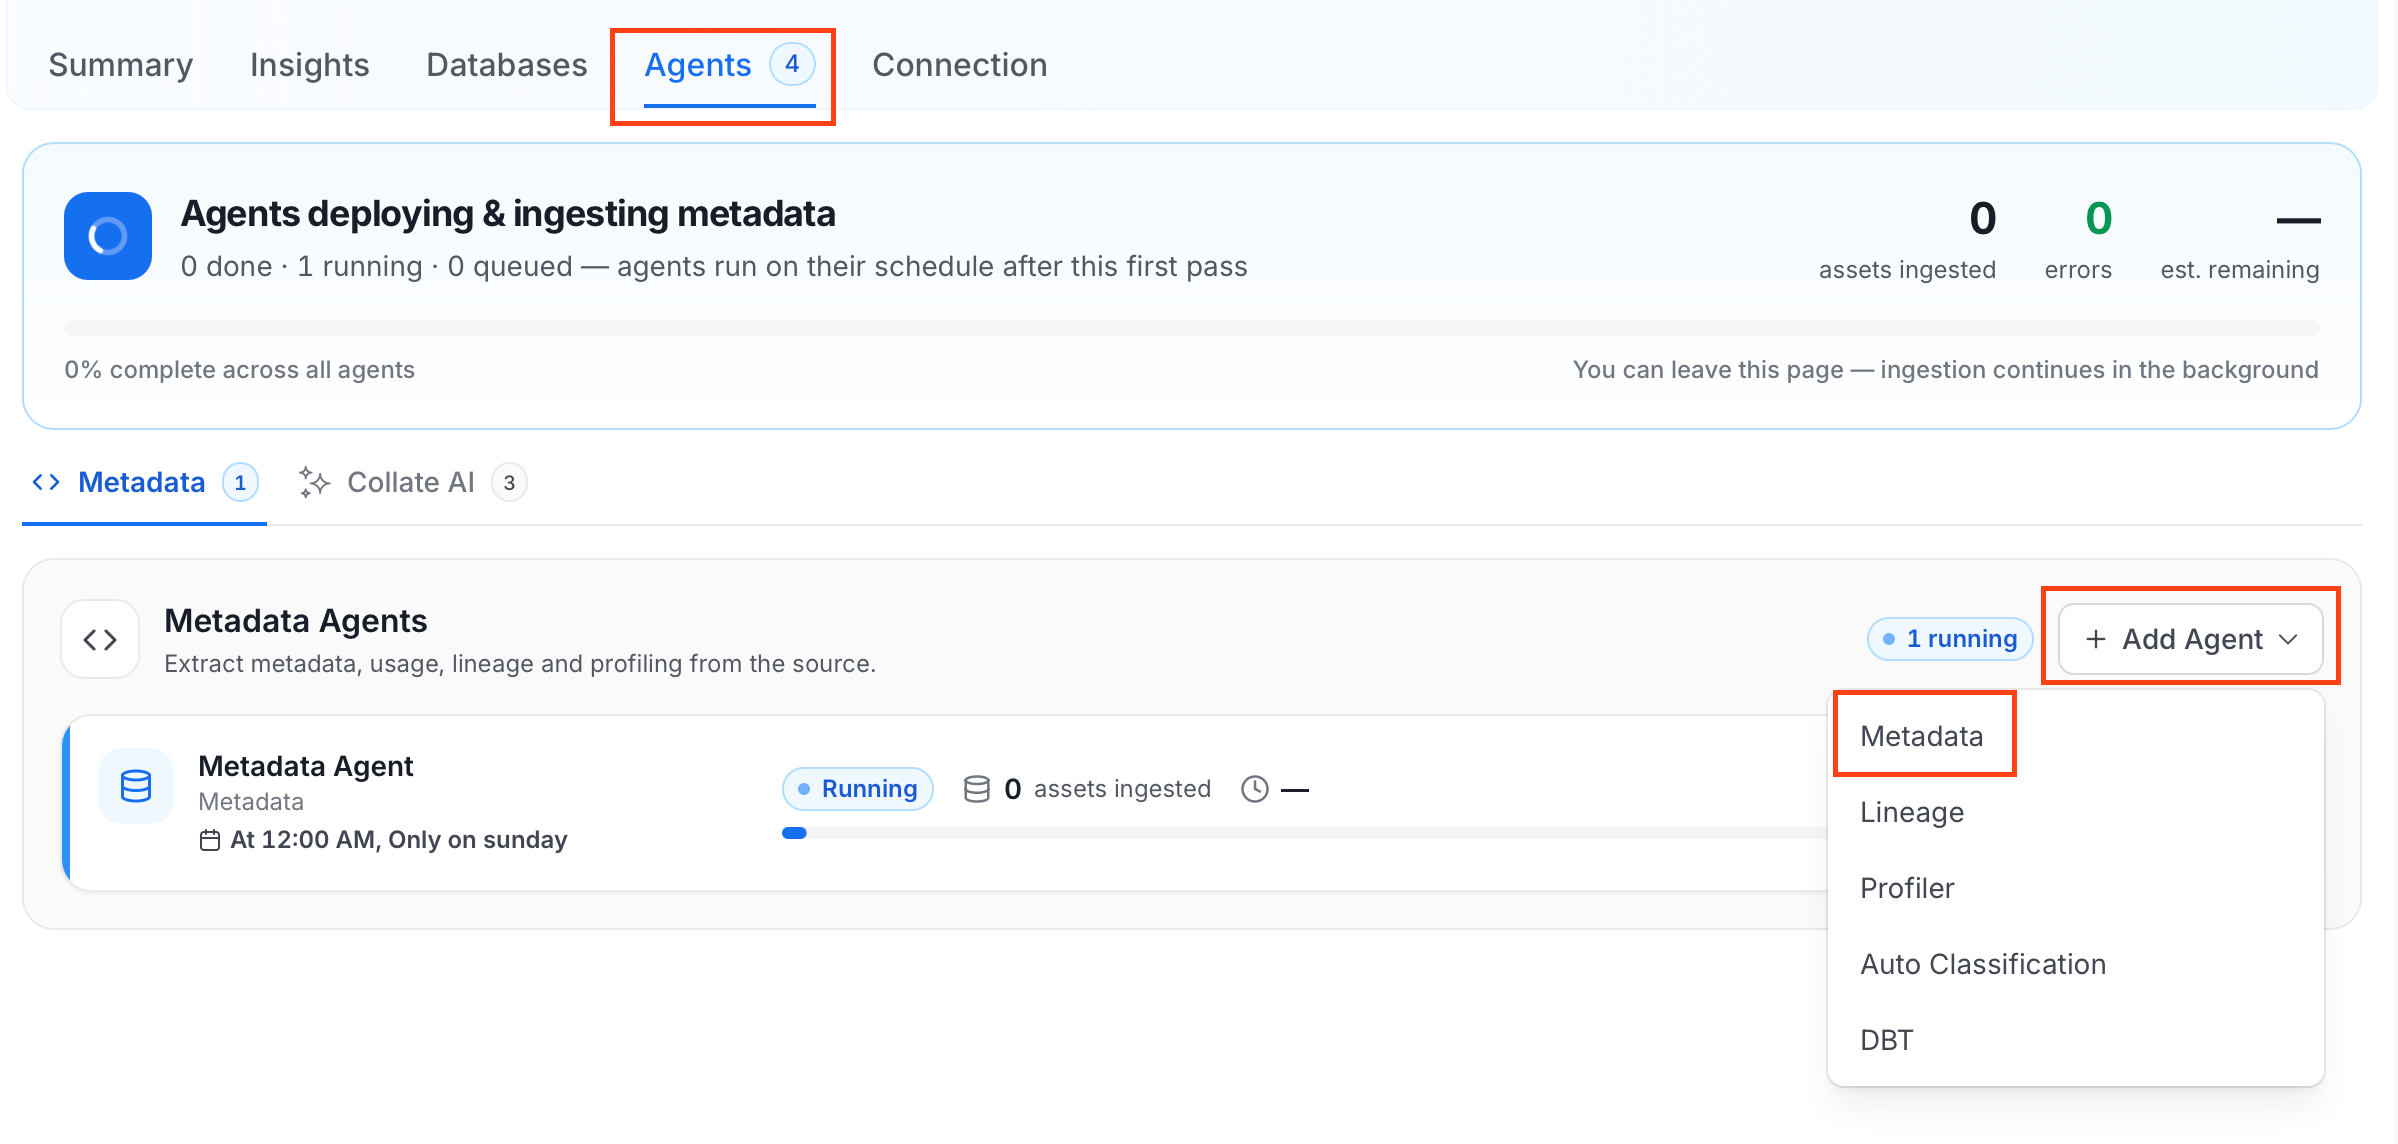 For some services, the dropdown is not available and clicking **Add Agent** takes you directly to the agent configuration page.
4. On the **Configure Ingestion** page, do the following and click **Next**.
* **Name this Ingestion**: Enter a unique recognizable name for this ingestion pipeline.
For some services, the dropdown is not available and clicking **Add Agent** takes you directly to the agent configuration page.
4. On the **Configure Ingestion** page, do the following and click **Next**.
* **Name this Ingestion**: Enter a unique recognizable name for this ingestion pipeline.
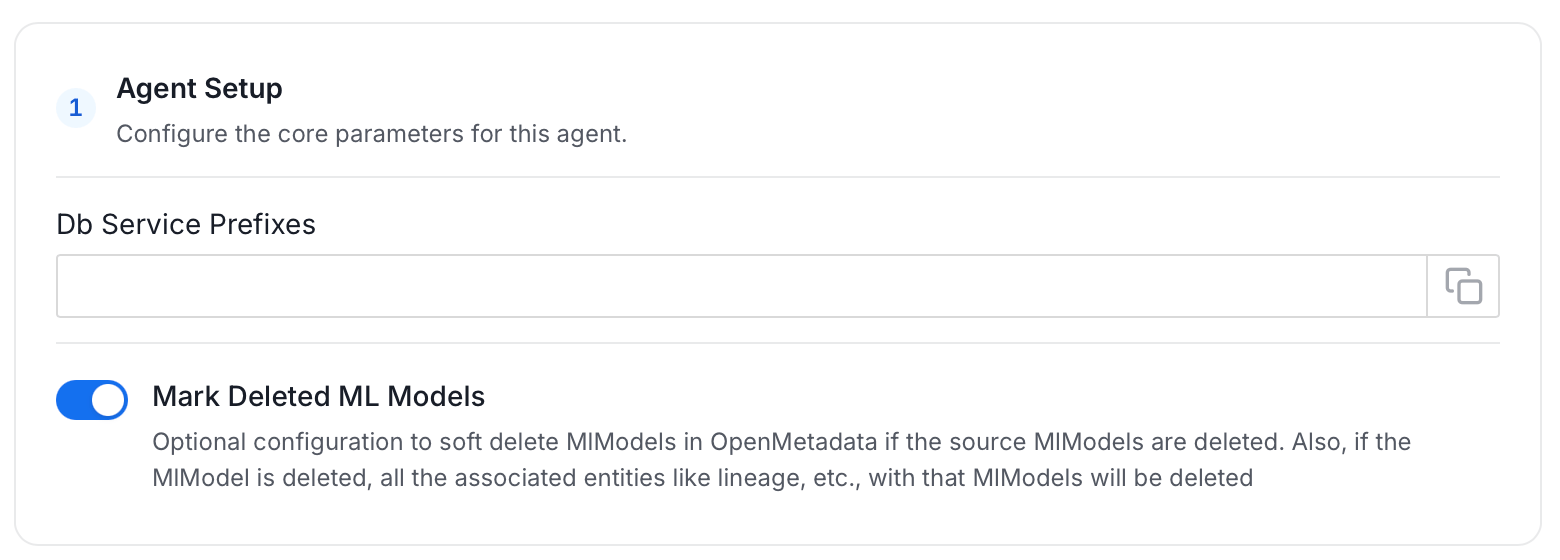
 * **Agent Setup**: Configure the core parameters for this agent. The following fields are available:
| Field | Default | Description |
| ---------------------- | ------- | -------------------------------------------------------------------------------------------------------------------------------------------------------------------------------------------------------------------------- |
| Db Service Prefixes | — | List of database service name prefixes used to resolve lineage between ML models and database assets. Accepted formats: `DBService`, `DBService.Database`, `DBService.Database.Schema`, `DBService.Database.Schema.Table`. |
| Mark Deleted ML Models | On | Soft-delete ML models in Collate when they are removed from the source. Associated entities like lineage are also deleted. |
* **Agent Setup**: Configure the core parameters for this agent. The following fields are available:
| Field | Default | Description |
| ---------------------- | ------- | -------------------------------------------------------------------------------------------------------------------------------------------------------------------------------------------------------------------------- |
| Db Service Prefixes | — | List of database service name prefixes used to resolve lineage between ML models and database assets. Accepted formats: `DBService`, `DBService.Database`, `DBService.Database.Schema`, `DBService.Database.Schema.Table`. |
| Mark Deleted ML Models | On | Soft-delete ML models in Collate when they are removed from the source. Associated entities like lineage are also deleted. |
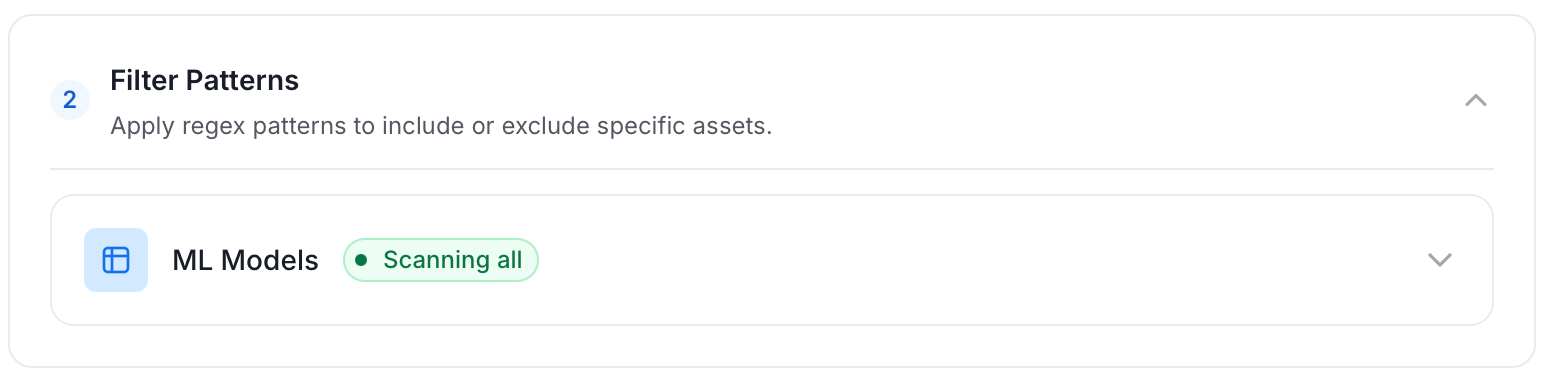
 * **Filter Patterns**: Apply include or exclude rules to scope which ML models this agent ingests. These follow the same filter options described in **Step 5**.
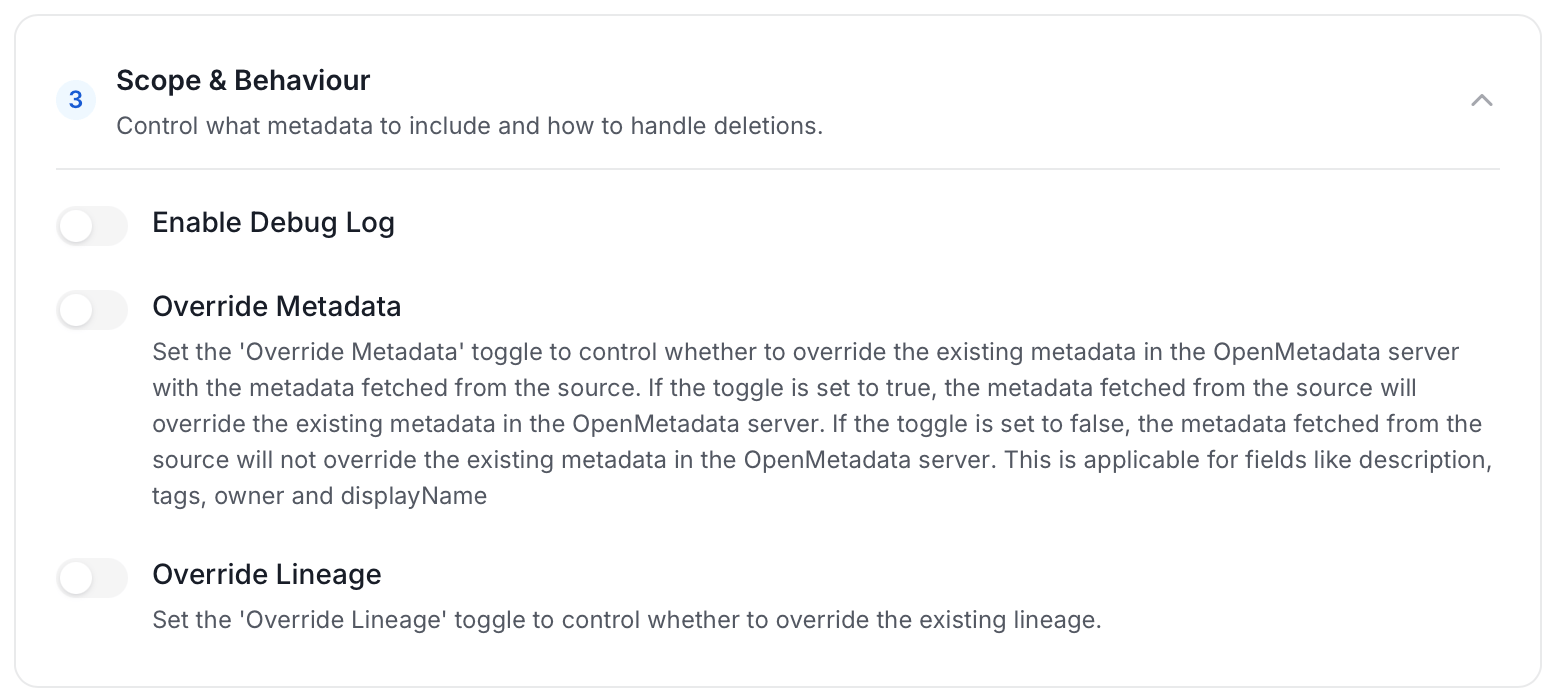
 * **Scope & Behaviour**: Control what metadata to include and how to handle deletions. Toggle each option on or off based on your needs:
| Toggle | Default | Description |
| ----------------- | ------- | ---------------------------------------------------------------------------------------------------------------------------------------------------------------------- |
| Enable Debug Log | Off | Sets the ingestion log level to DEBUG. Useful for troubleshooting. |
| Override Metadata | Off | When on, source values overwrite existing descriptions, tags, owners, and display names in Collate. When off, Collate only updates fields that have no existing value. |
| Override Lineage | Off | When on, existing lineage is replaced with newly extracted lineage on each run. |
* **Scope & Behaviour**: Control what metadata to include and how to handle deletions. Toggle each option on or off based on your needs:
| Toggle | Default | Description |
| ----------------- | ------- | ---------------------------------------------------------------------------------------------------------------------------------------------------------------------- |
| Enable Debug Log | Off | Sets the ingestion log level to DEBUG. Useful for troubleshooting. |
| Override Metadata | Off | When on, source values overwrite existing descriptions, tags, owners, and display names in Collate. When off, Collate only updates fields that have no existing value. |
| Override Lineage | Off | When on, existing lineage is replaced with newly extracted lineage on each run. |
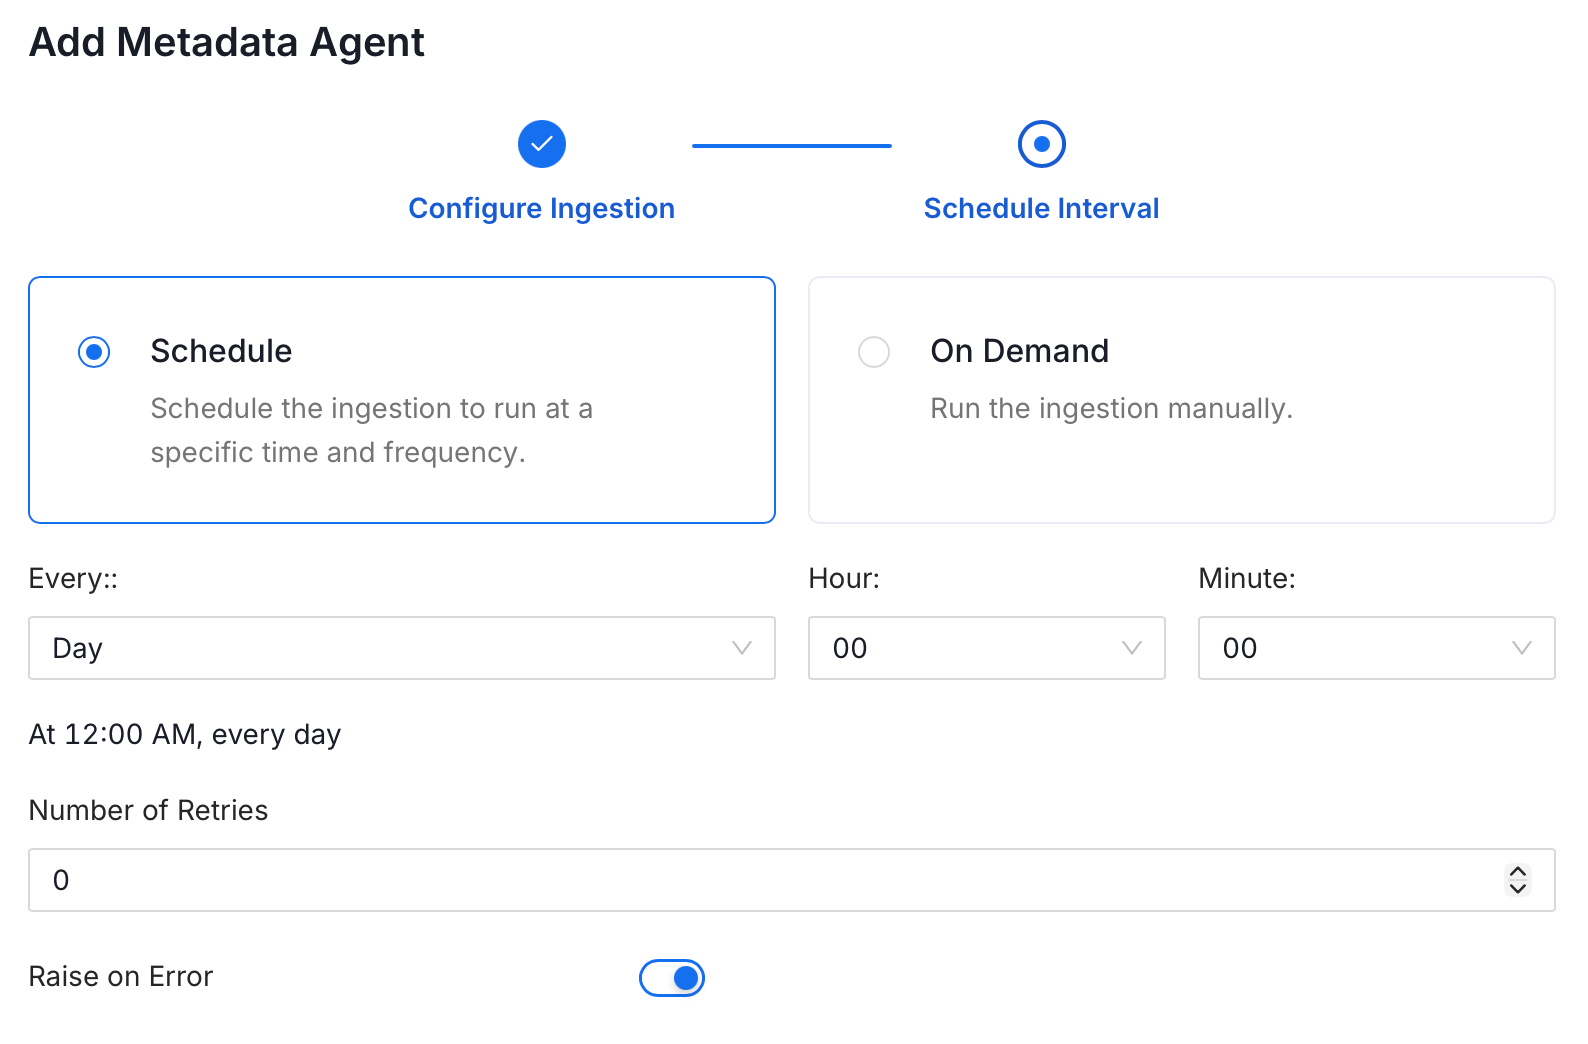
 5. On the **Schedule Interval** page, set when the agent runs:
* **Schedule**: Choose a preset interval (Hourly, Daily, Weekly, Monthly) or enter a custom cron expression.
* **On-Demand**: No automatic schedule; trigger the agent manually when needed.
5. On the **Schedule Interval** page, set when the agent runs:
* **Schedule**: Choose a preset interval (Hourly, Daily, Weekly, Monthly) or enter a custom cron expression.
* **On-Demand**: No automatic schedule; trigger the agent manually when needed.
 6. Click **Add** to deploy the agent.
## Troubleshooting
6. Click **Add** to deploy the agent.
## Troubleshooting