{icon &&
 }
}
{name}
{stage}Feature List
{totalAvailableFeatures.map(feature =>
✓ {feature}
)}
{unavailableFeatures.map(feature =>
✕ {feature}
)}
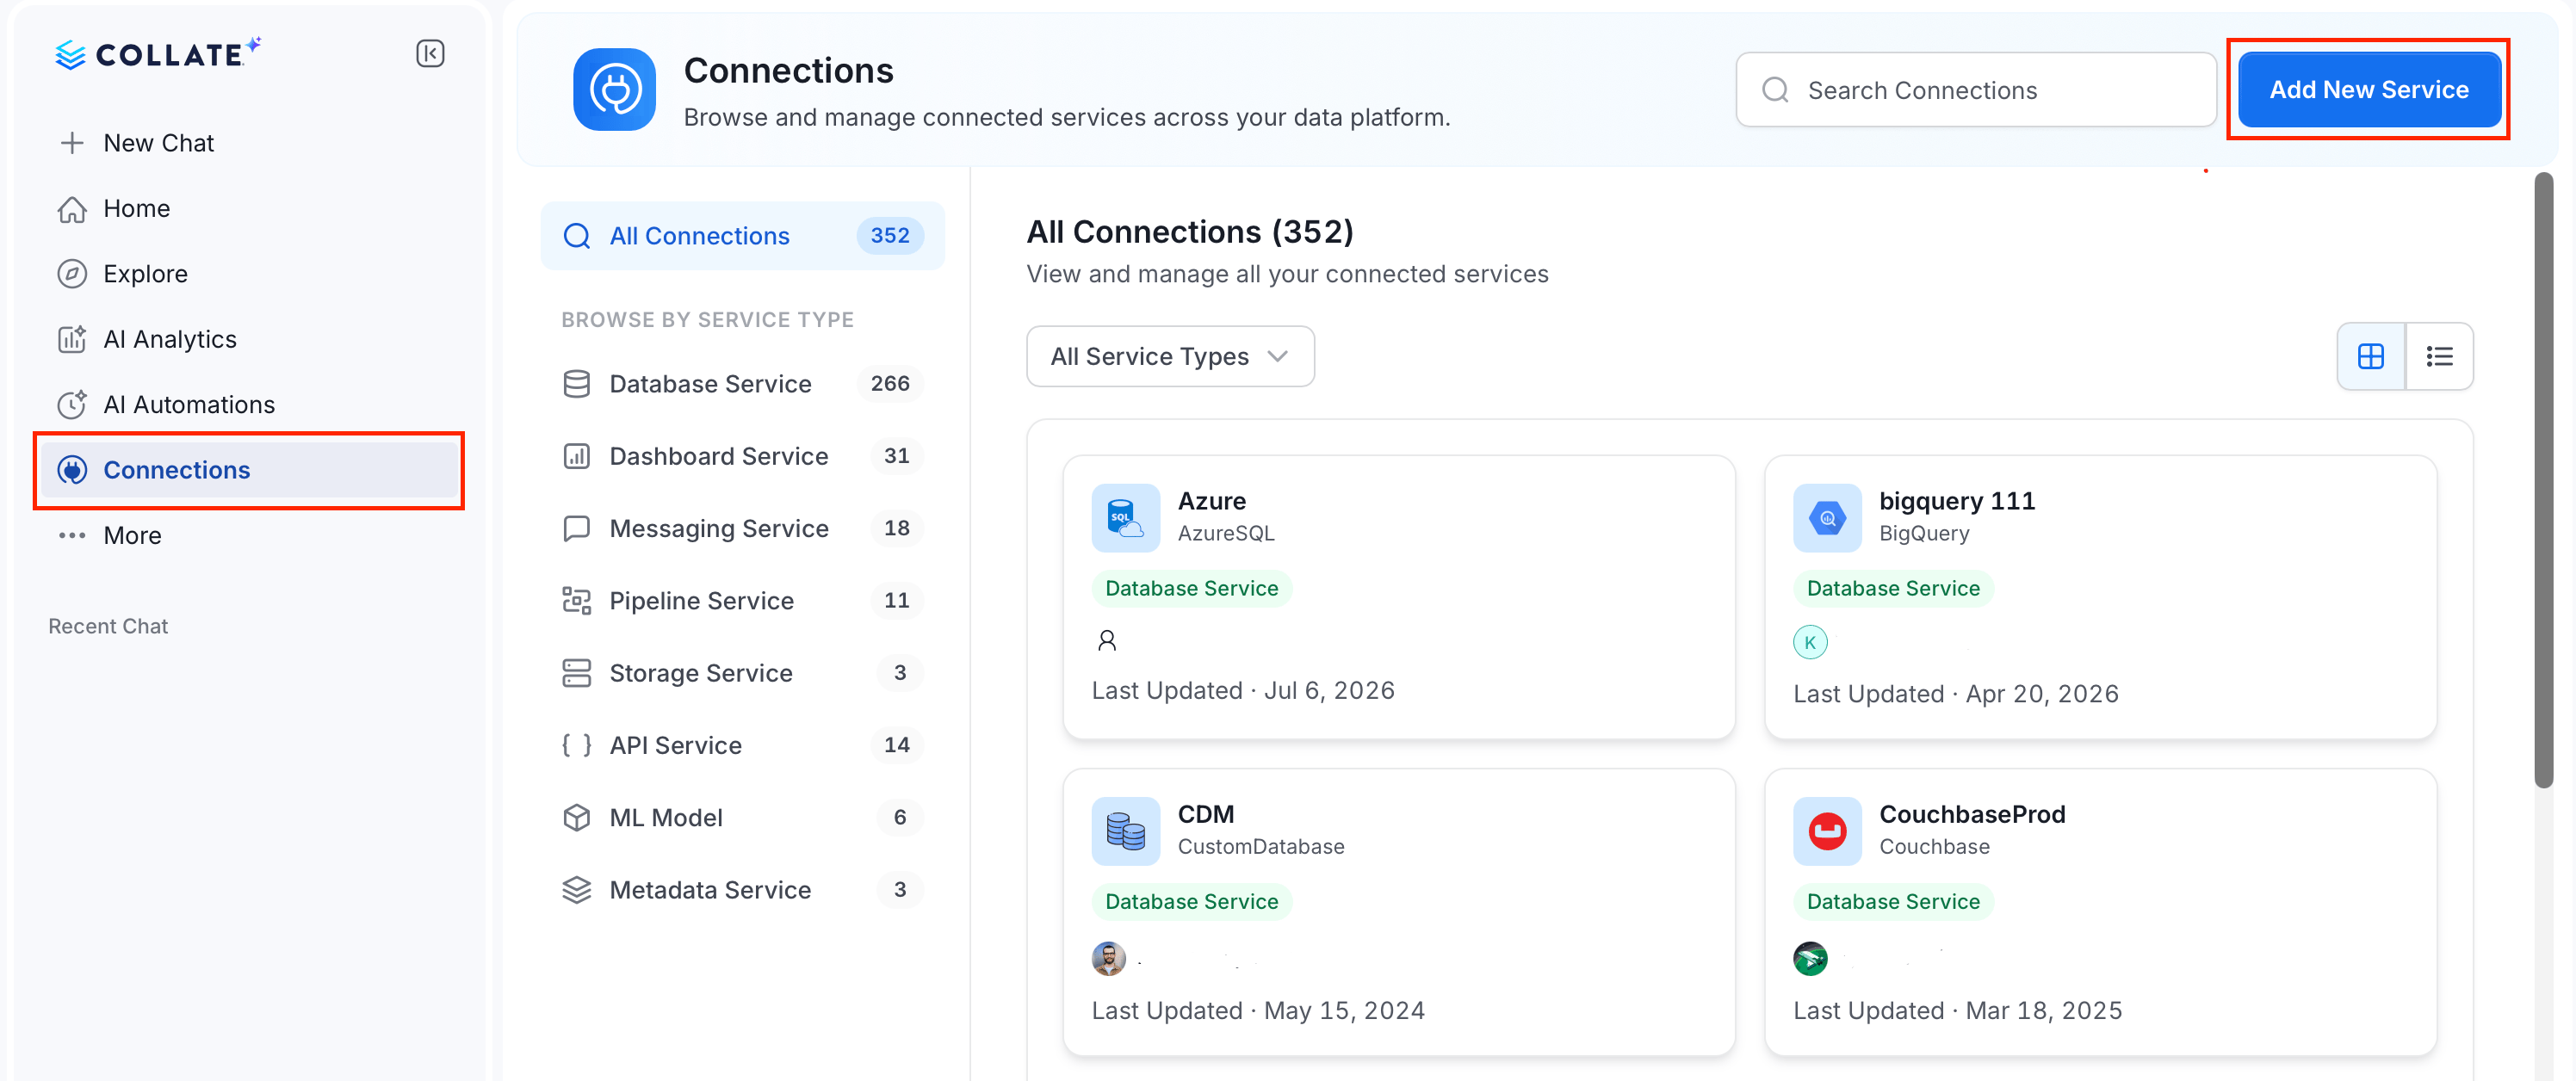 ### Step 2: Select a Service and Connector
From the service type dropdown, select **Metadata Services**, then click the **AlationSink** connector tile.
### Step 2: Select a Service and Connector
From the service type dropdown, select **Metadata Services**, then click the **AlationSink** connector tile.
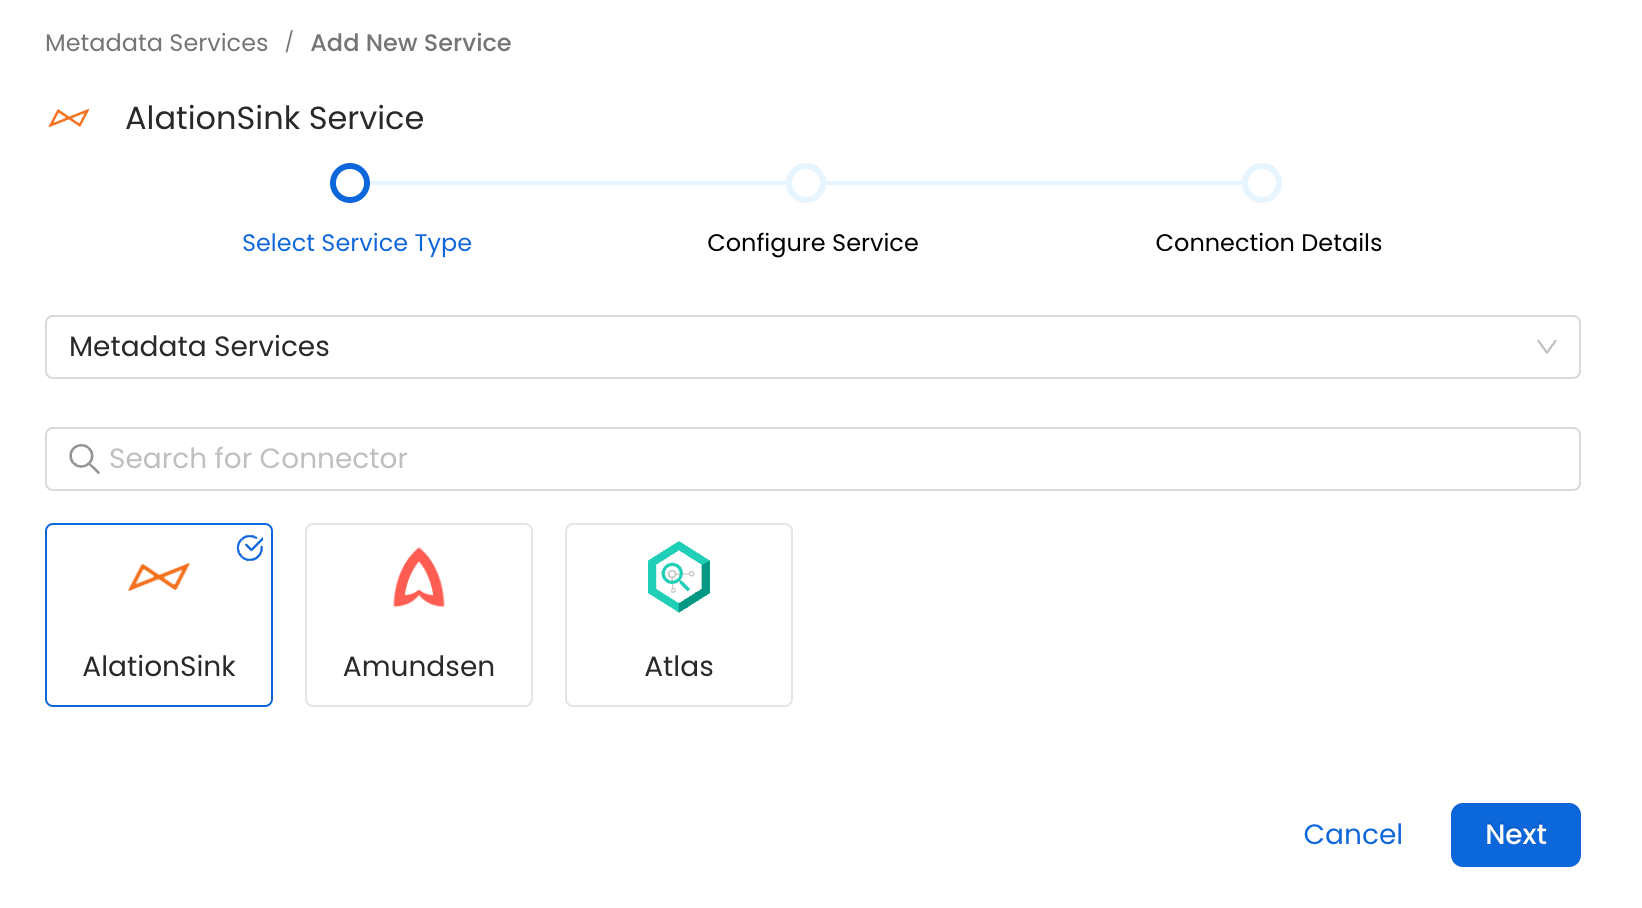 ### Step 3: Add Service Name and Description
* Enter a unique, descriptive **Service Name**. Collate identifies services by their service name. Enter a name that distinguishes this deployment from other AlationSink services you are ingesting metadata from.
* Optional: Enter a **Description** for the service.
### Step 3: Add Service Name and Description
* Enter a unique, descriptive **Service Name**. Collate identifies services by their service name. Enter a name that distinguishes this deployment from other AlationSink services you are ingesting metadata from.
* Optional: Enter a **Description** for the service.
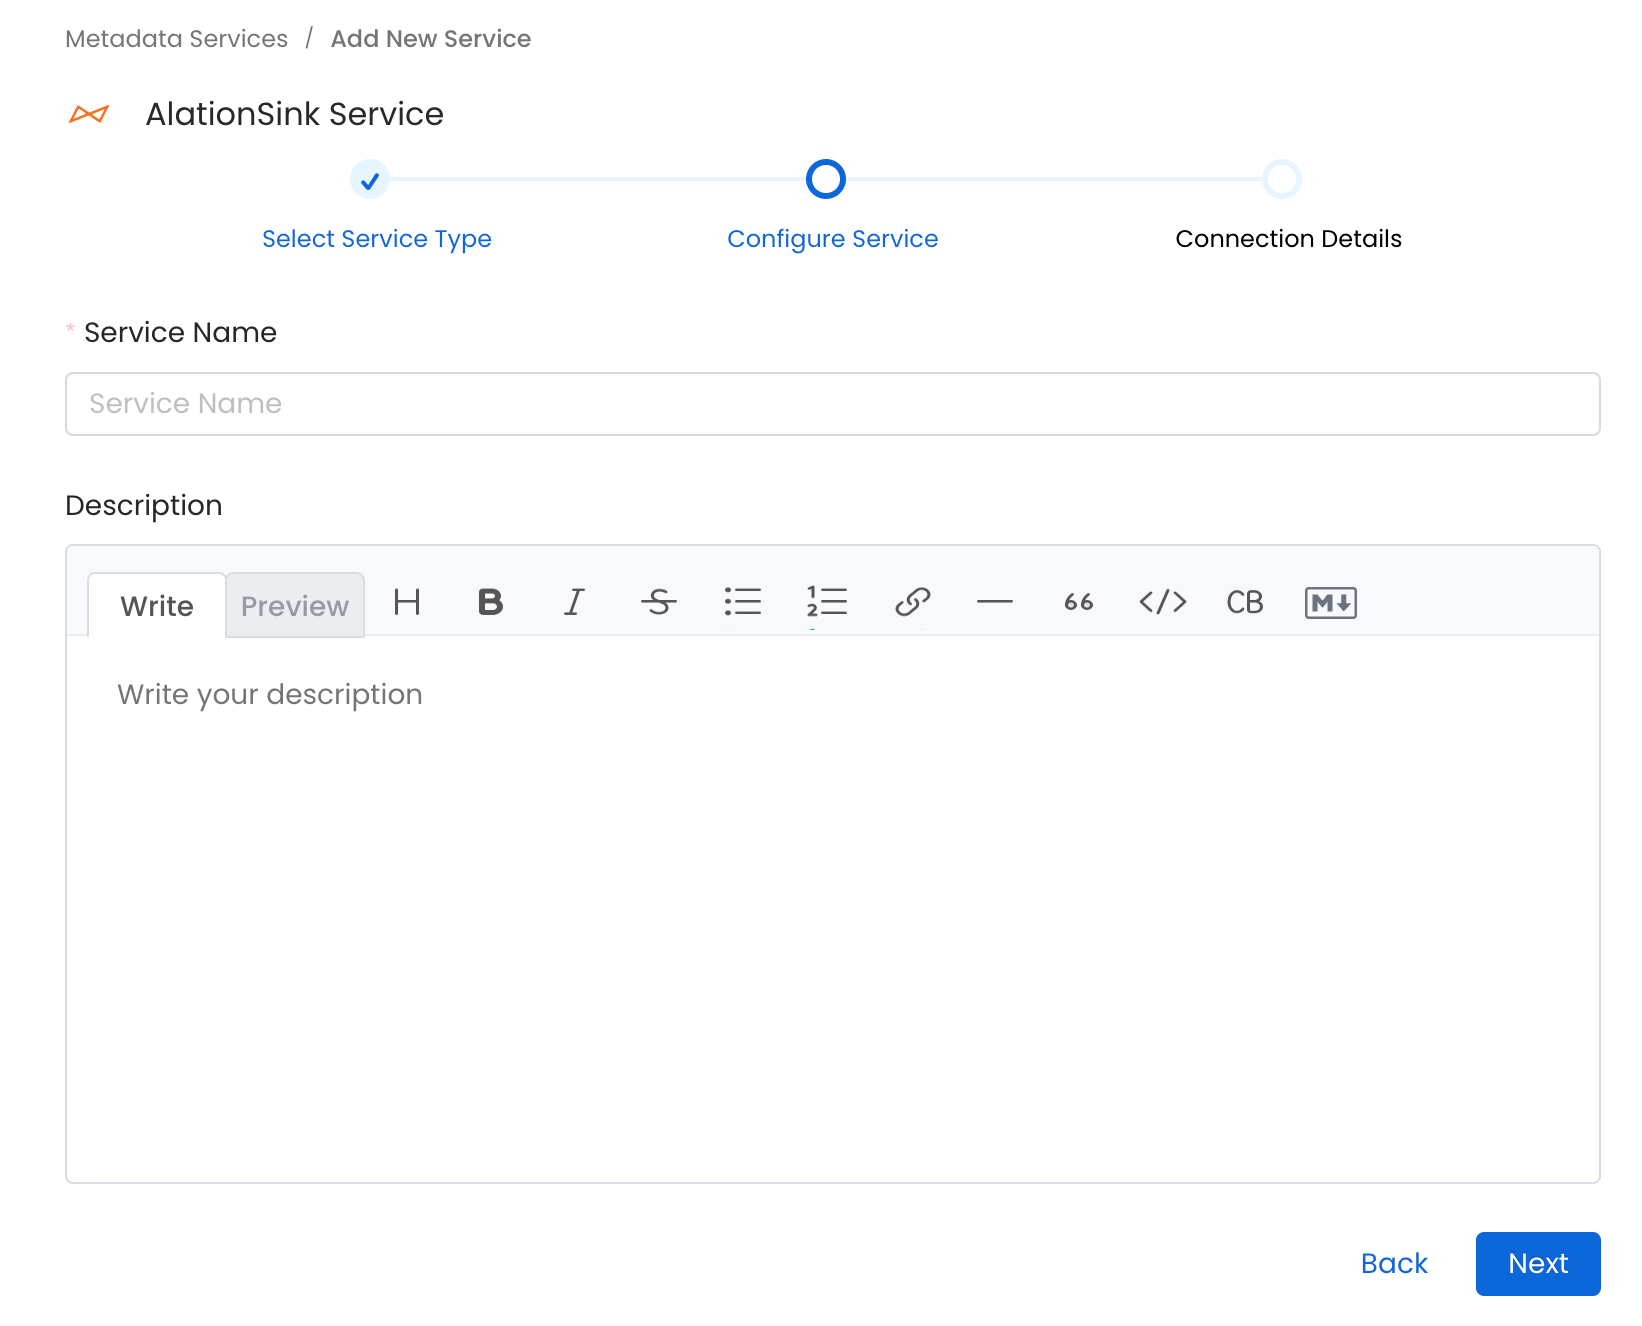
 #### Enter Connection Details
Enter the connection details for AlationSink. The right-hand panel in the UI displays inline help for each field.
#### Enter Connection Details
Enter the connection details for AlationSink. The right-hand panel in the UI displays inline help for each field.
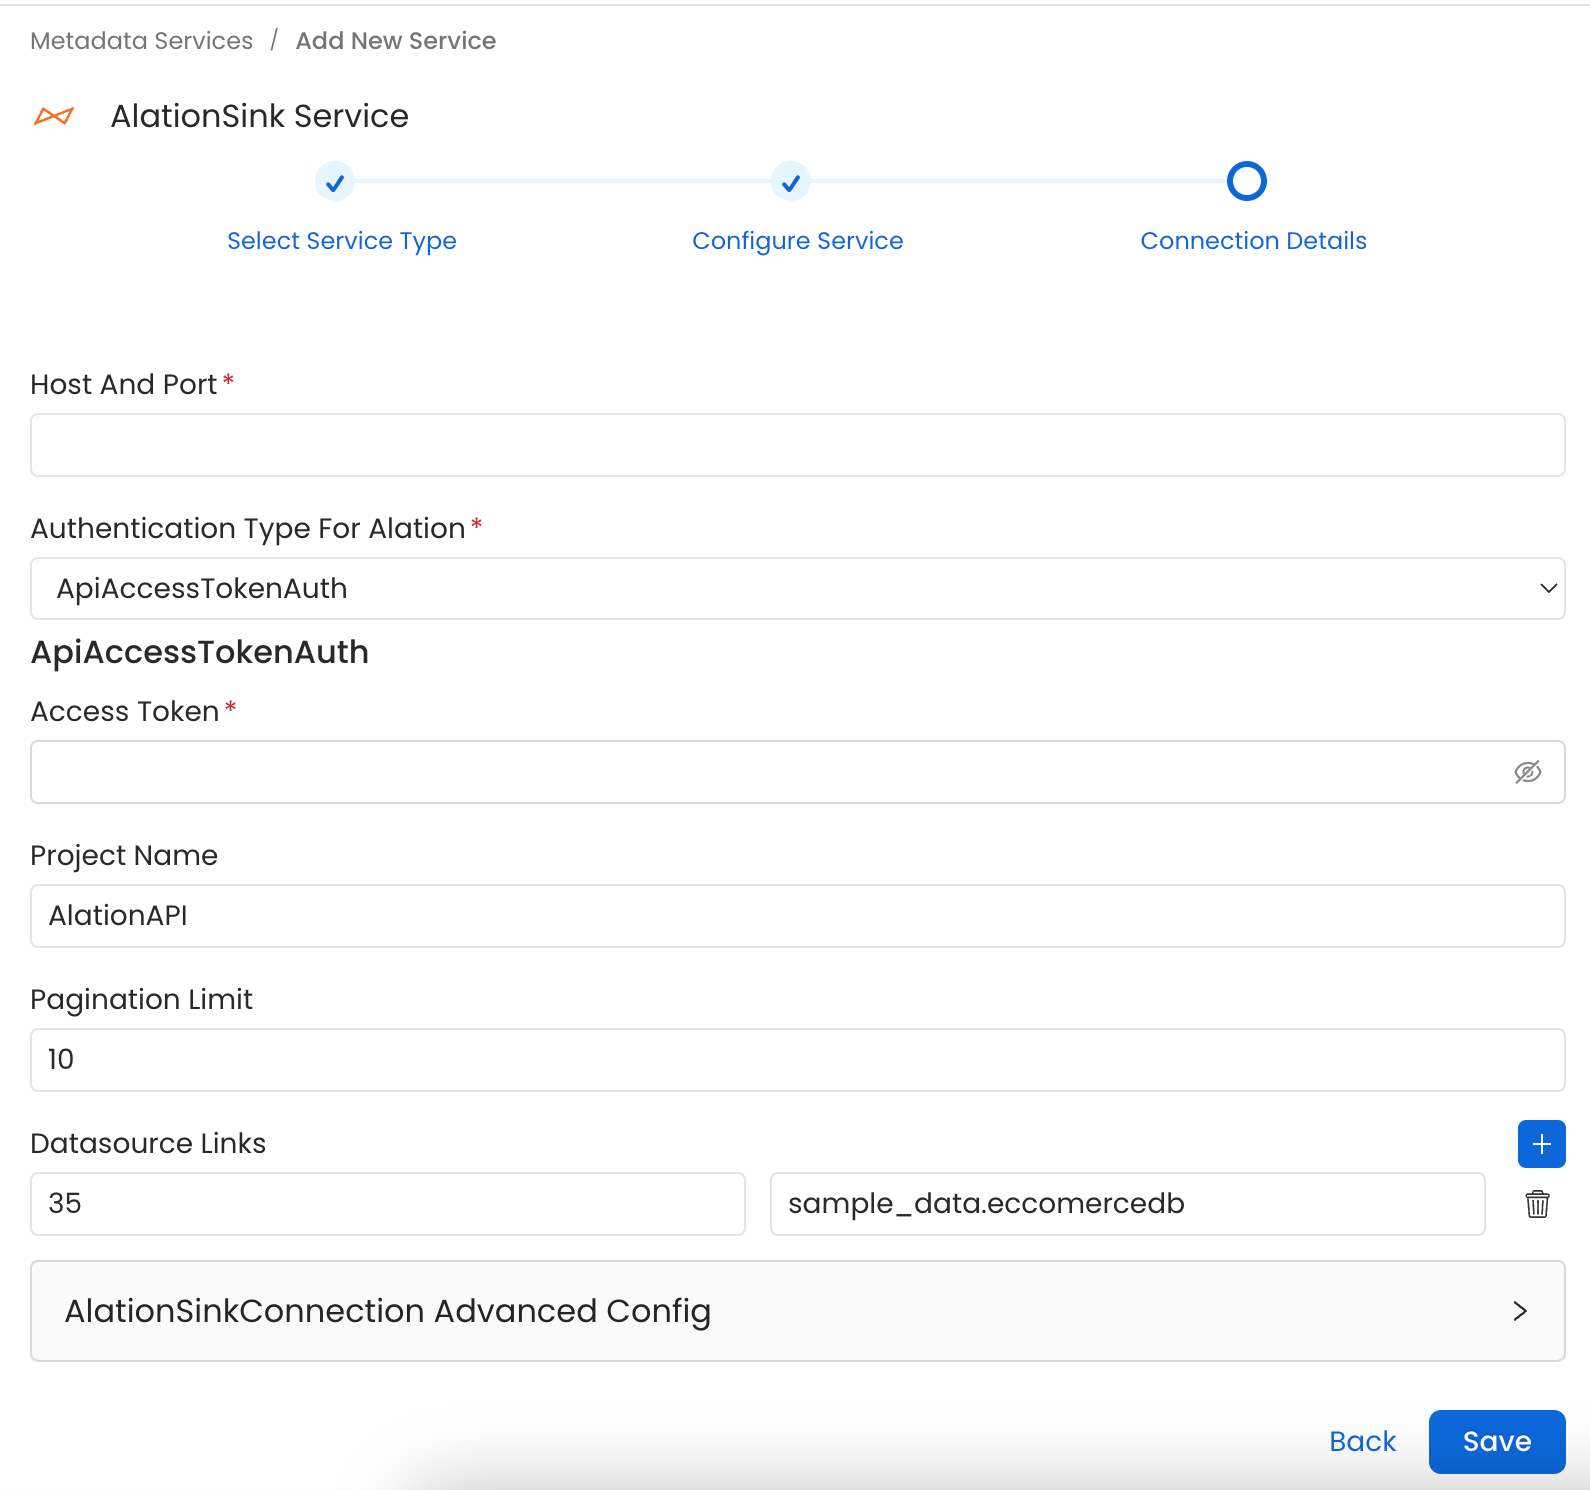 * **Host and Port**: Host and port of the Alation service.
* **Authentication Types**:
1. Basic Authentication
* Username: The name of the user whose credentials will be used to sign in.
* Password: The password of the user.
2. Access Token Authentication
The access token created using the [steps to create an access token](https://developer.alation.com/dev/docs/authentication-into-alation-apis#create-via-ui) can directly be entered. We'll use that directly to authenticate the Alation APIs
* accessToken: Generated access token
* **Project Name**: Project name used to create the refresh token. It can be anything.
* **Pagination Limit**: Pagination limit used for Alation APIs pagination
* **DataSource Links**: Add a custom mapping between Collate databases and Alation DataSources.
If this mapping is present, the connector will only look for the data source in Alation to create other entities inside it. It will not create the data source in Alation, so it needs to be created beforehand.
The mapping needs to be of the format `alation_datasource_id: openmetadata_database_fqn`
Here `alation_datasource_id` corresponds to the numerical ID of the data source in Alation.
And `openmetadata_database_fqn` corresponds to the fullyQualifiedName of the database in Collate.
Below is an example of the mapping:
```yaml theme={null}
datasourceLinks: {
"23": "sample_data.ecommerce_db",
"15": "mysql_prod.customers_db",
}
```
* **Host and Port**: Host and port of the Alation service.
* **Authentication Types**:
1. Basic Authentication
* Username: The name of the user whose credentials will be used to sign in.
* Password: The password of the user.
2. Access Token Authentication
The access token created using the [steps to create an access token](https://developer.alation.com/dev/docs/authentication-into-alation-apis#create-via-ui) can directly be entered. We'll use that directly to authenticate the Alation APIs
* accessToken: Generated access token
* **Project Name**: Project name used to create the refresh token. It can be anything.
* **Pagination Limit**: Pagination limit used for Alation APIs pagination
* **DataSource Links**: Add a custom mapping between Collate databases and Alation DataSources.
If this mapping is present, the connector will only look for the data source in Alation to create other entities inside it. It will not create the data source in Alation, so it needs to be created beforehand.
The mapping needs to be of the format `alation_datasource_id: openmetadata_database_fqn`
Here `alation_datasource_id` corresponds to the numerical ID of the data source in Alation.
And `openmetadata_database_fqn` corresponds to the fullyQualifiedName of the database in Collate.
Below is an example of the mapping:
```yaml theme={null}
datasourceLinks: {
"23": "sample_data.ecommerce_db",
"15": "mysql_prod.customers_db",
}
```
 ### Step 5: Configure Ingestion Options
In the **What to Ingest** step, configure the metadata ingestion pipeline settings, then click **Create & Deploy**.
Collate creates the service connection and automatically triggers the first metadata ingestion run. In AI 2.0, ingestion is managed by the Auto Pilot app — you do not need to schedule a separate pipeline.
After deployment, you can monitor the ingestion status by navigating to **Connections**, selecting your service, and viewing the ingestion pipeline.
### Step 5: Configure Ingestion Options
In the **What to Ingest** step, configure the metadata ingestion pipeline settings, then click **Create & Deploy**.
Collate creates the service connection and automatically triggers the first metadata ingestion run. In AI 2.0, ingestion is managed by the Auto Pilot app — you do not need to schedule a separate pipeline.
After deployment, you can monitor the ingestion status by navigating to **Connections**, selecting your service, and viewing the ingestion pipeline.
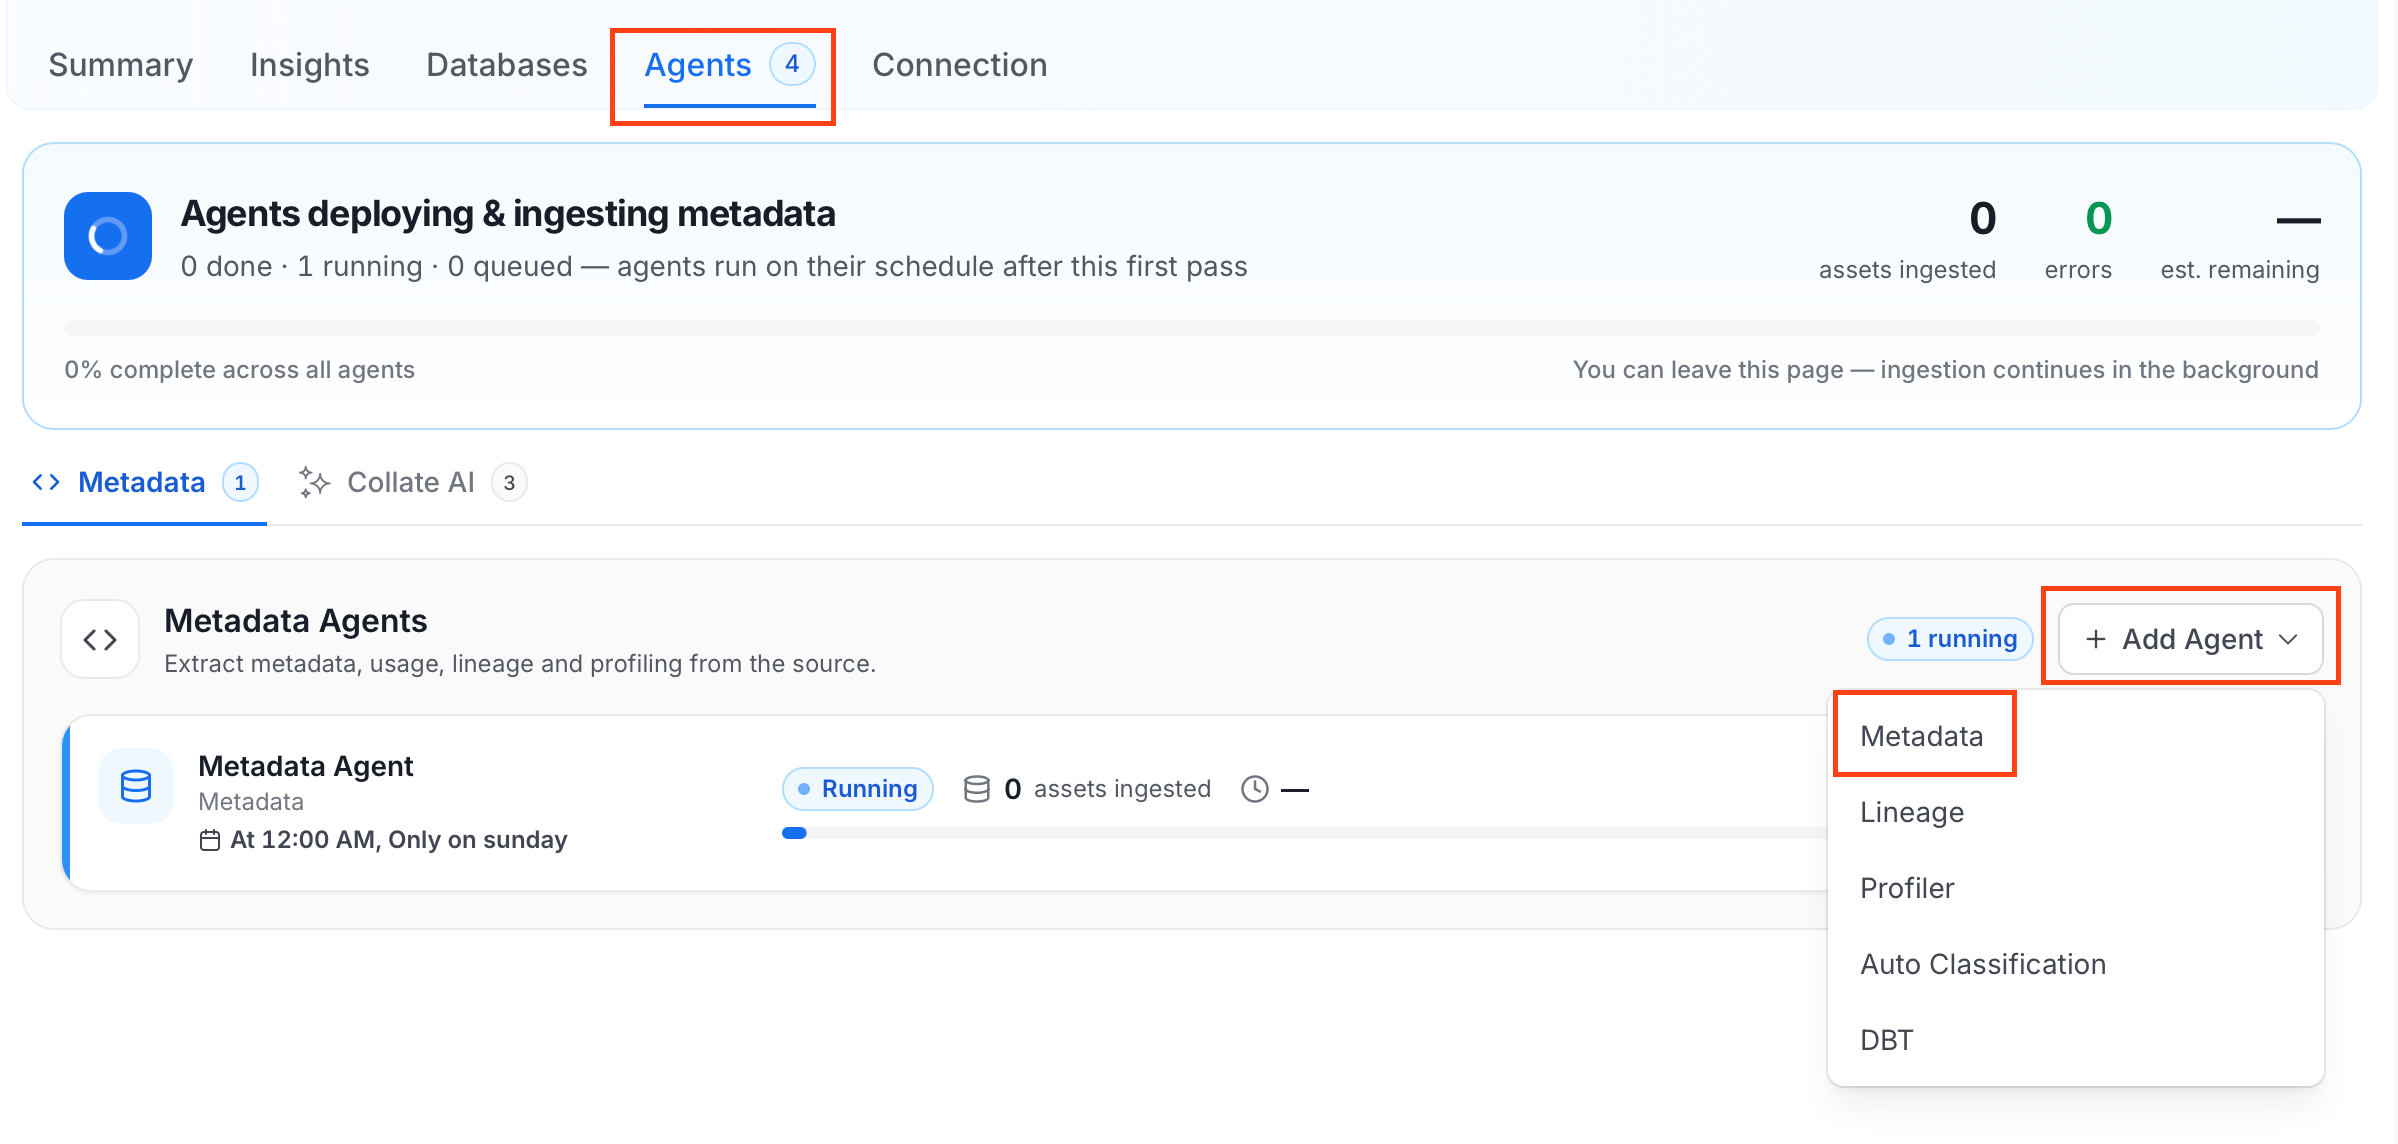 For some services, the dropdown is not available and clicking **Add Agent** takes you directly to the agent configuration page.
4. On the **Configure Ingestion** page, do the following and click **Next**.
* **Name this Ingestion**: Enter a unique recognizable name for this ingestion pipeline.
For some services, the dropdown is not available and clicking **Add Agent** takes you directly to the agent configuration page.
4. On the **Configure Ingestion** page, do the following and click **Next**.
* **Name this Ingestion**: Enter a unique recognizable name for this ingestion pipeline.
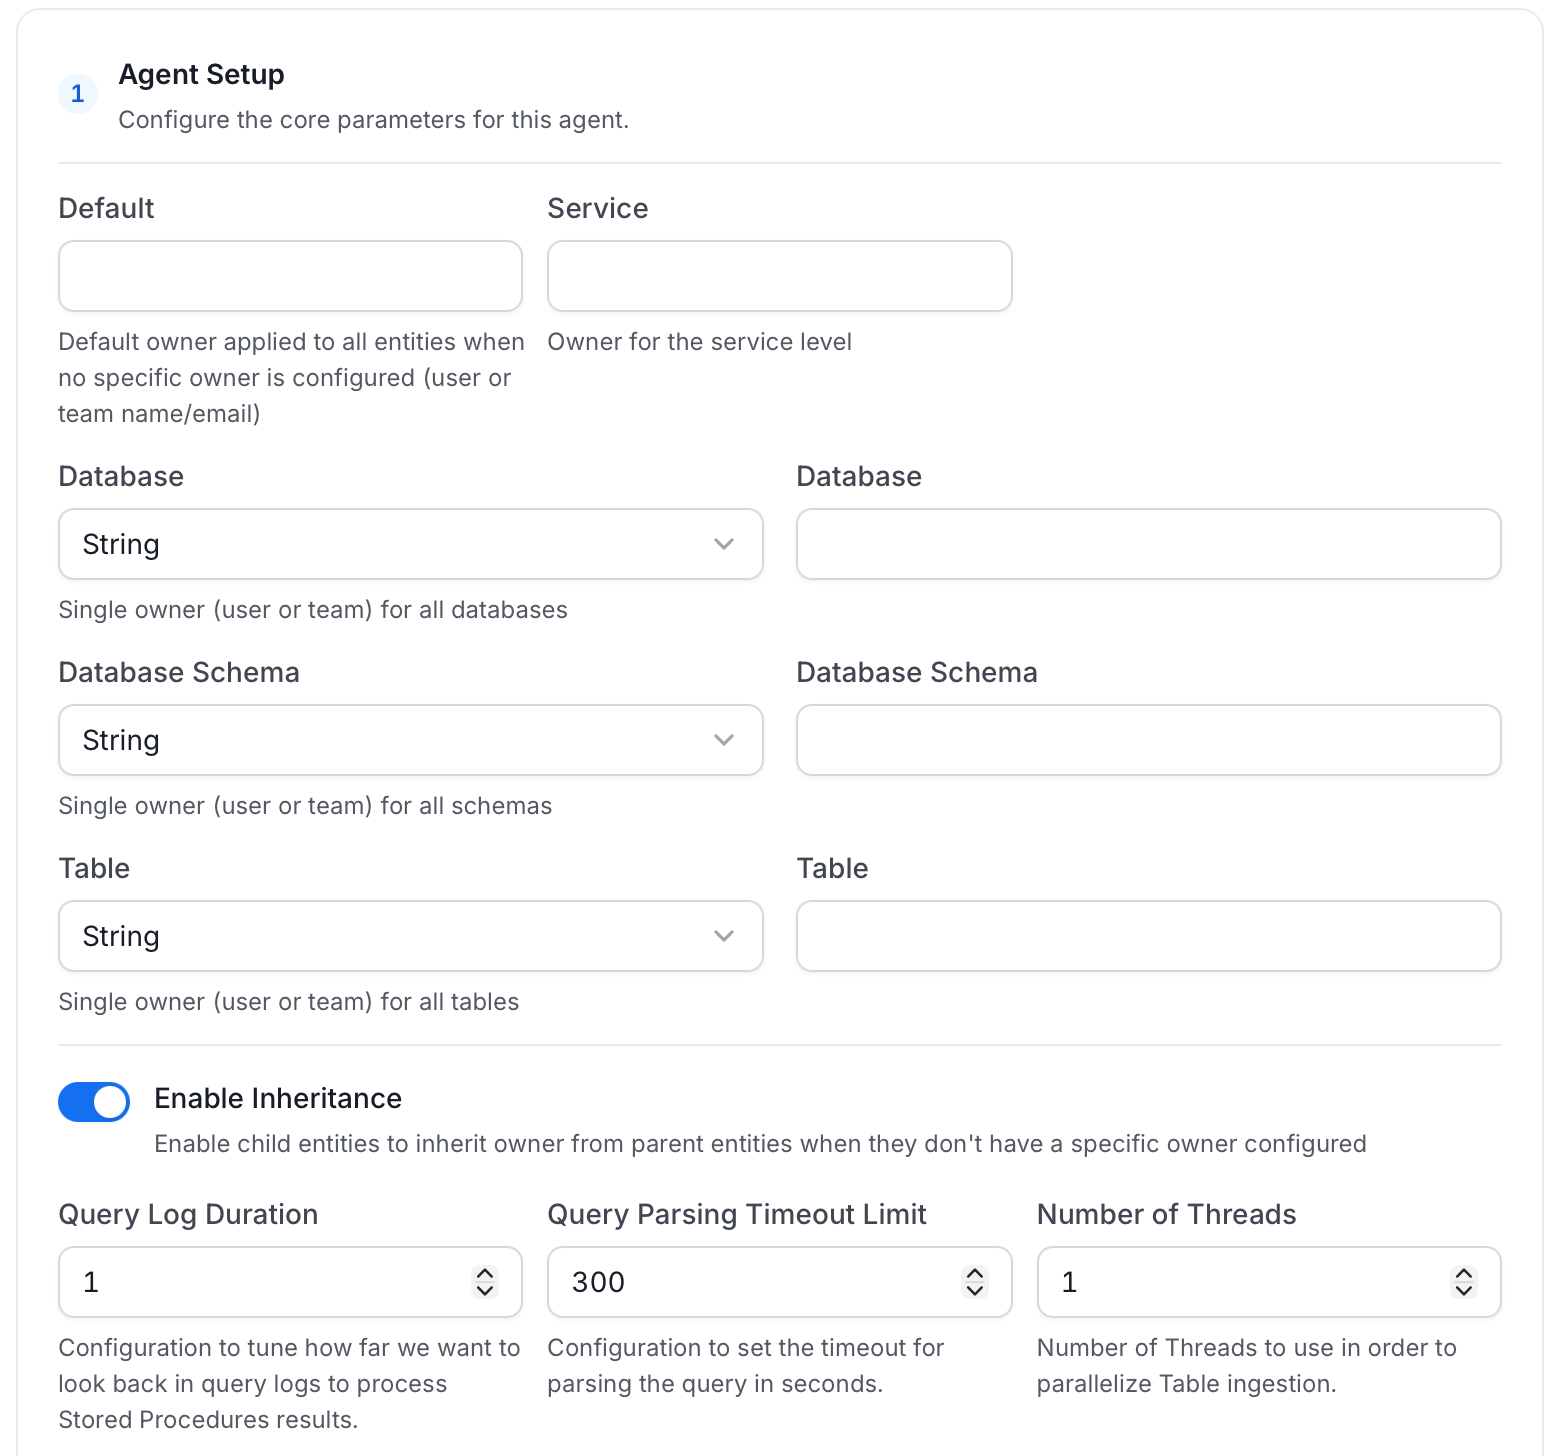
 * **Agent Setup**: Configure the core parameters for this agent. The following fields are available:
| Field | Default | Description |
| --------------------------- | ------- | ------------------------------------------------------------------------------------------------------------------------------------------------------------------------------------ |
| Default Owner | — | Default owner applied to all entities when no specific owner is configured. Accepts a user or team name/email. |
| Service Owner | — | Owner assigned to the service entity. |
| Database Owner | — | Owner assigned to all ingested databases. Accepts a single owner (user or team) for all databases. |
| Database Schema Owner | — | Owner assigned to all ingested schemas. Accepts a single owner (user or team) for all schemas. |
| Table Owner | — | Owner assigned to all ingested tables. Accepts a single owner (user or team) for all tables. |
| Enable Inheritance | On | Enable child entities to inherit owner from parent entities when they don't have a specific owner configured. |
| Query Log Duration | 1 | Number of days to look back in query logs when processing stored procedure results. |
| Query Parsing Timeout Limit | 300 | Timeout in seconds for parsing a single query. |
| Number of Threads | 1 | Number of threads to use for parallel table ingestion. |
| JSON Schema Sample Size | 10 | Number of rows to sample for inferring JSON schema. A larger sample size provides more accurate schema inference but increases query time. |
| Extract JSON Schema | Off | Extract JSON schema from JSON columns by sampling data. Requires SELECT permission on the tables. If disabled or SELECT fails, JSON columns are ingested without schema information. |
* **Agent Setup**: Configure the core parameters for this agent. The following fields are available:
| Field | Default | Description |
| --------------------------- | ------- | ------------------------------------------------------------------------------------------------------------------------------------------------------------------------------------ |
| Default Owner | — | Default owner applied to all entities when no specific owner is configured. Accepts a user or team name/email. |
| Service Owner | — | Owner assigned to the service entity. |
| Database Owner | — | Owner assigned to all ingested databases. Accepts a single owner (user or team) for all databases. |
| Database Schema Owner | — | Owner assigned to all ingested schemas. Accepts a single owner (user or team) for all schemas. |
| Table Owner | — | Owner assigned to all ingested tables. Accepts a single owner (user or team) for all tables. |
| Enable Inheritance | On | Enable child entities to inherit owner from parent entities when they don't have a specific owner configured. |
| Query Log Duration | 1 | Number of days to look back in query logs when processing stored procedure results. |
| Query Parsing Timeout Limit | 300 | Timeout in seconds for parsing a single query. |
| Number of Threads | 1 | Number of threads to use for parallel table ingestion. |
| JSON Schema Sample Size | 10 | Number of rows to sample for inferring JSON schema. A larger sample size provides more accurate schema inference but increases query time. |
| Extract JSON Schema | Off | Extract JSON schema from JSON columns by sampling data. Requires SELECT permission on the tables. If disabled or SELECT fails, JSON columns are ingested without schema information. |
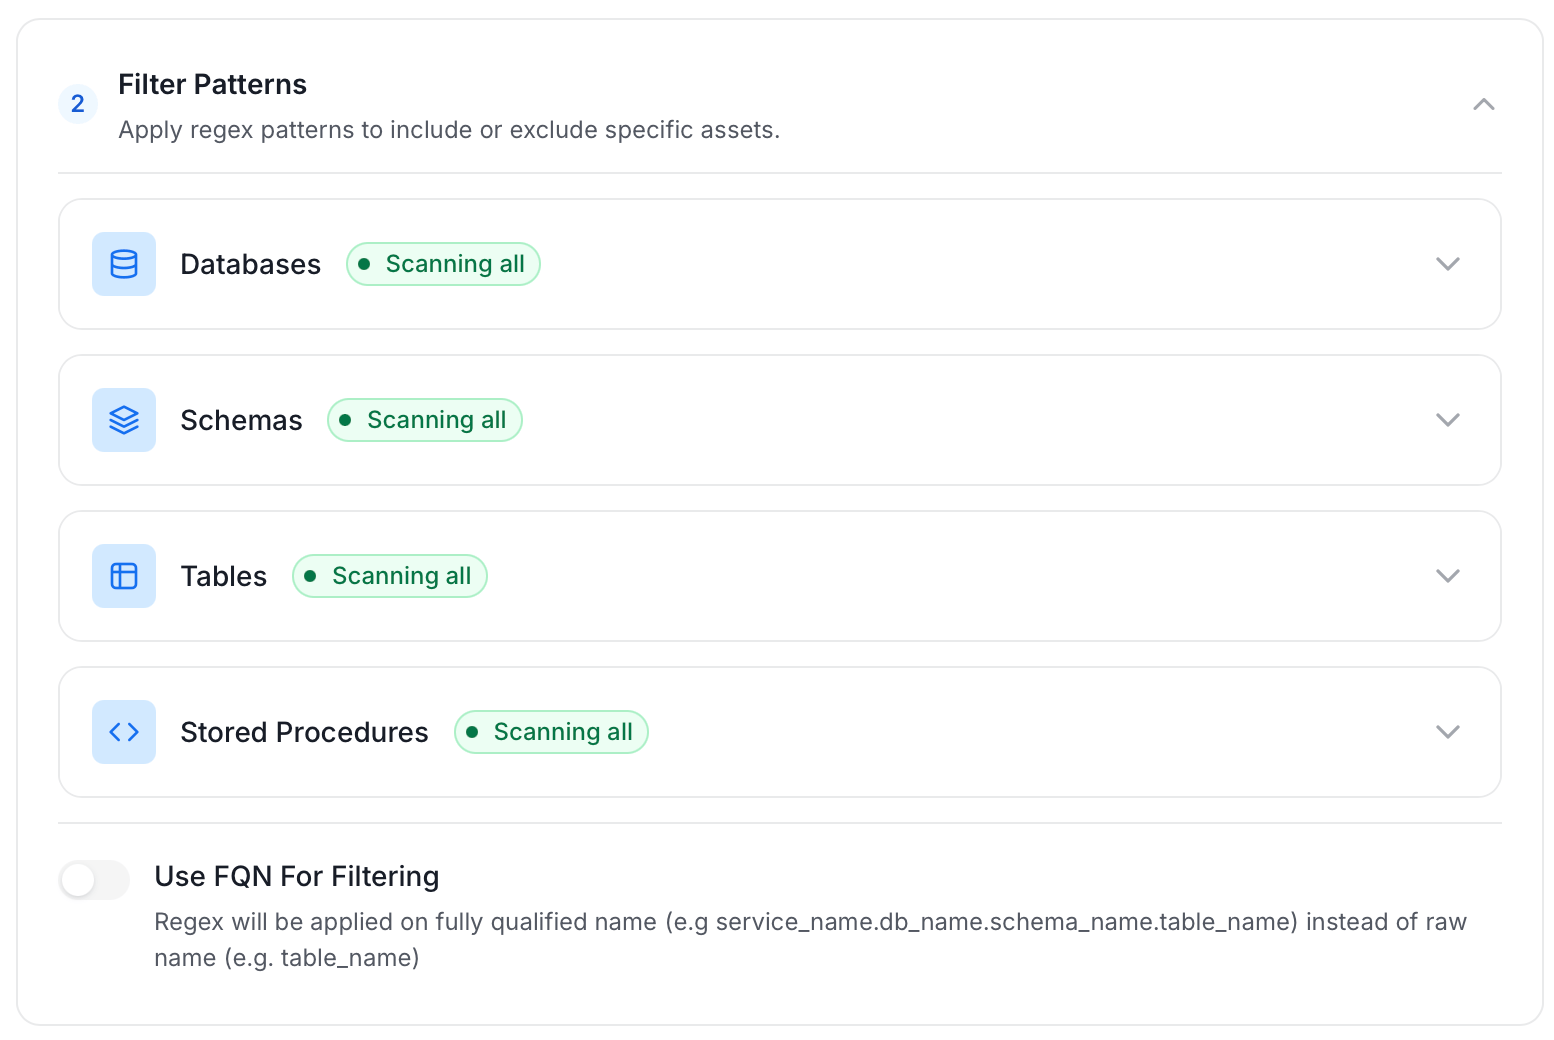
 * **Filter Patterns**: Apply include or exclude rules to scope which databases, schemas, tables, and stored procedures this agent ingests. These follow the same filter options described in **Step 5**.
 * **Scope & Behaviour**: Control what metadata to include and how to handle deletions. Toggle each option on or off based on your needs:
| Toggle | Default | Description |
| ------------------------------ | ------- | ---------------------------------------------------------------------------------------------------------------------------------------------------------------------- |
| Enable Debug Log | Off | Sets the ingestion log level to DEBUG. Useful for troubleshooting. |
| Mark Deleted Tables | On | Soft-delete tables in Collate when they are removed from the source. Applies only within the currently ingested schema. |
| Mark Deleted Stored Procedures | On | Soft-delete stored procedures in Collate when they are removed from the source. Associated entities like lineage are also deleted. |
| Mark Deleted Schemas | Off | Soft-delete schemas and all their child assets when removed from the source. |
| Mark Deleted Databases | Off | Soft-delete databases and all their child assets when removed from the source. |
| Include Tables | On | Ingest table metadata from the source. Turn off to skip tables entirely. |
| Include Tags | On | Ingest tags from the source. |
| Include Custom Properties | Off | Ingest connector-specific custom properties onto entities. |
| Include Owners | Off | Assign owners to ingested entities when the source owner's email matches a user in Collate. Does not overwrite an existing owner. |
| Include Stored Procedures | On | Ingest stored procedure metadata. |
| Include DDL Statements | Off | Ingest DDL statements alongside table metadata. |
| Override Metadata | Off | When on, source values overwrite existing descriptions, tags, owners, and display names in Collate. When off, Collate only updates fields that have no existing value. |
* **Scope & Behaviour**: Control what metadata to include and how to handle deletions. Toggle each option on or off based on your needs:
| Toggle | Default | Description |
| ------------------------------ | ------- | ---------------------------------------------------------------------------------------------------------------------------------------------------------------------- |
| Enable Debug Log | Off | Sets the ingestion log level to DEBUG. Useful for troubleshooting. |
| Mark Deleted Tables | On | Soft-delete tables in Collate when they are removed from the source. Applies only within the currently ingested schema. |
| Mark Deleted Stored Procedures | On | Soft-delete stored procedures in Collate when they are removed from the source. Associated entities like lineage are also deleted. |
| Mark Deleted Schemas | Off | Soft-delete schemas and all their child assets when removed from the source. |
| Mark Deleted Databases | Off | Soft-delete databases and all their child assets when removed from the source. |
| Include Tables | On | Ingest table metadata from the source. Turn off to skip tables entirely. |
| Include Tags | On | Ingest tags from the source. |
| Include Custom Properties | Off | Ingest connector-specific custom properties onto entities. |
| Include Owners | Off | Assign owners to ingested entities when the source owner's email matches a user in Collate. Does not overwrite an existing owner. |
| Include Stored Procedures | On | Ingest stored procedure metadata. |
| Include DDL Statements | Off | Ingest DDL statements alongside table metadata. |
| Override Metadata | Off | When on, source values overwrite existing descriptions, tags, owners, and display names in Collate. When off, Collate only updates fields that have no existing value. |
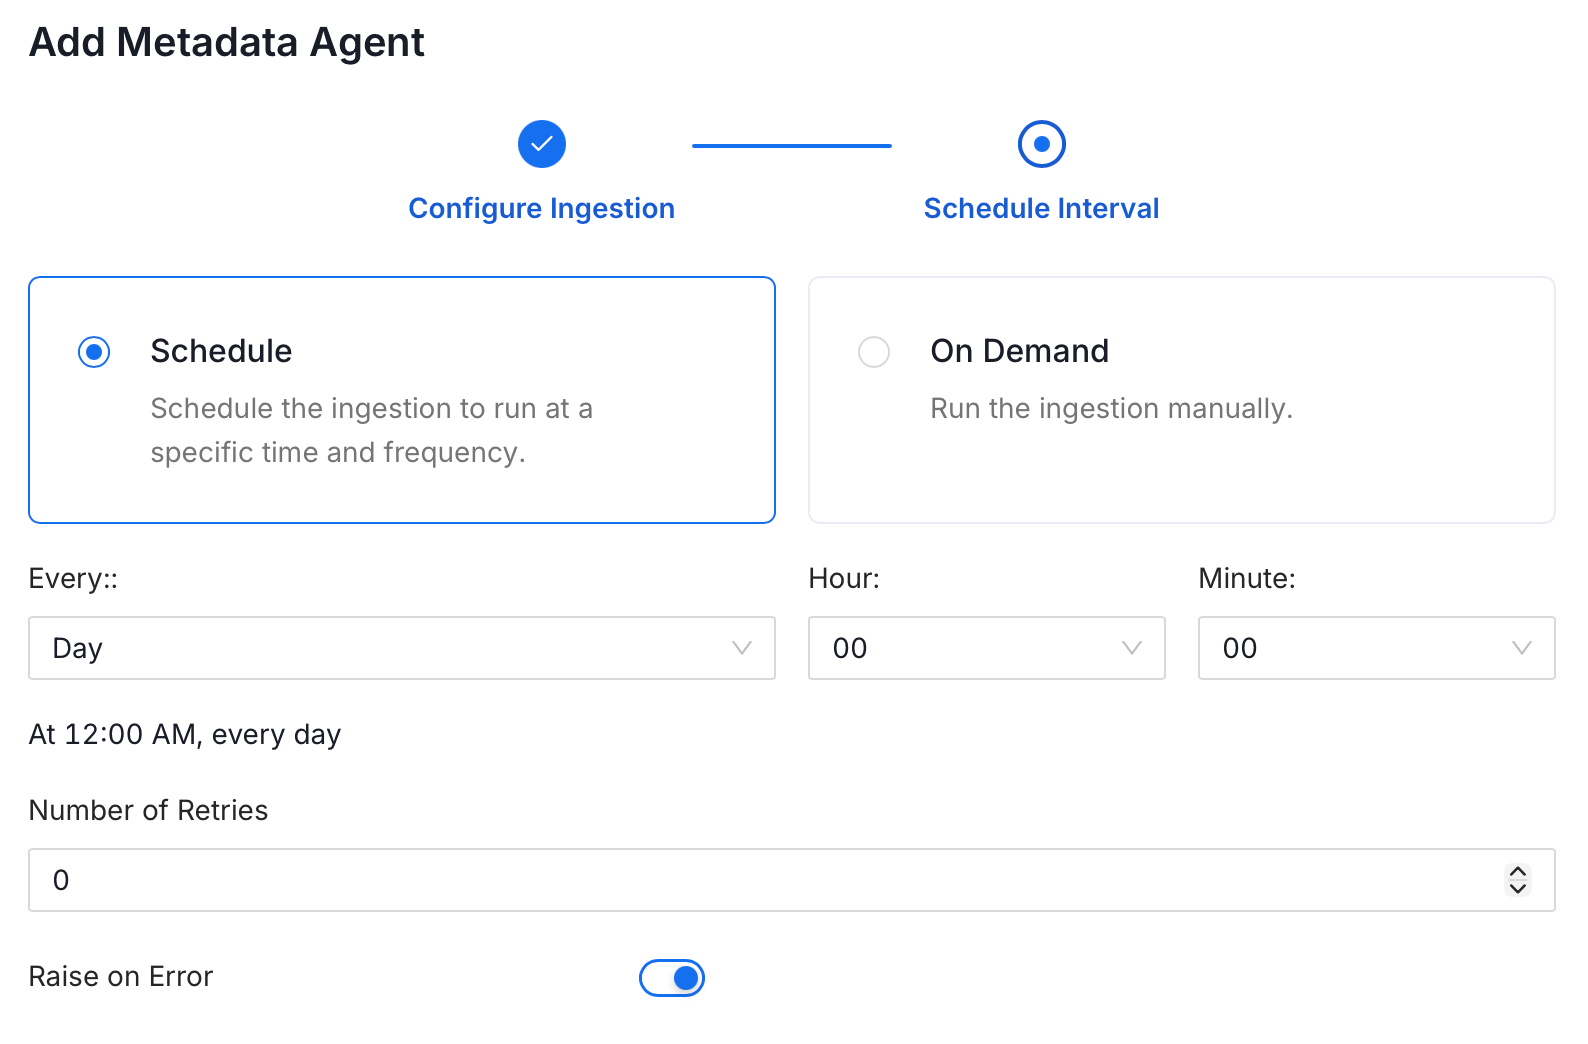
 5. On the **Schedule Interval** page, set when the agent runs:
* **Schedule**: Choose a preset interval (Hourly, Daily, Weekly, Monthly) or enter a custom cron expression.
* **On-Demand**: No automatic schedule; trigger the agent manually when needed.
5. On the **Schedule Interval** page, set when the agent runs:
* **Schedule**: Choose a preset interval (Hourly, Daily, Weekly, Monthly) or enter a custom cron expression.
* **On-Demand**: No automatic schedule; trigger the agent manually when needed.
 6. Click **Add** to deploy the agent.
## Troubleshooting
6. Click **Add** to deploy the agent.
## Troubleshooting